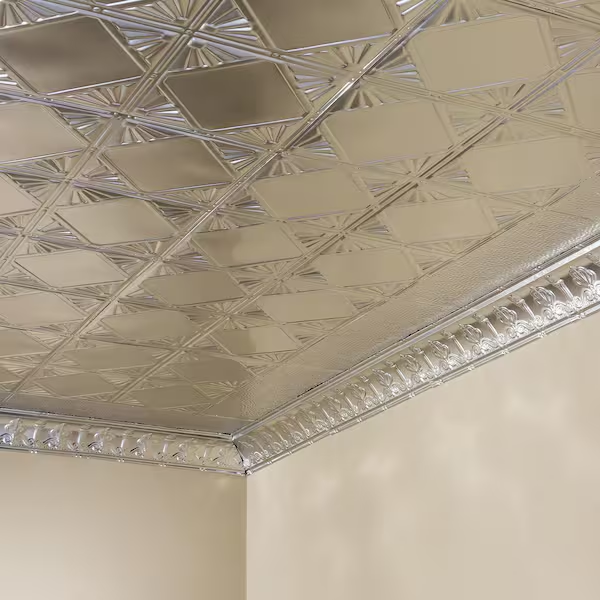
In the world of interior design, few elements offer the combination of elegance and practicality quite like nail up tin ceiling tiles. These versatile tiles have been making a comeback, bringing a touch of vintage charm to modern spaces. Whether you’re renovating a historic home or looking to add a unique feature to a contemporary setting, nail up tin ceiling tiles offer a distinctive solution. This article will explore the benefits, installation process, and design ideas for incorporating these stylish tiles into your home.
Why Choose Nail Up Tin Ceiling Tiles?
Nail up tin ceiling tiles are a popular choice for many reasons. Their historical significance, combined with modern adaptability, makes them a compelling option for a variety of design styles. Here’s why you might consider them for your next project:
Historical Charm: Tin ceiling tiles date back to the 19th century when they were used to mimic expensive plaster ceilings. Today, they offer a nostalgic appeal while remaining relevant in contemporary design.
Durability: Made from metal, these tiles are highly durable and resistant to wear and tear. They can withstand the test of time, making them a long-lasting investment.
Easy Installation: Unlike traditional plaster ceilings, nail up tin ceiling tiles are relatively easy to install. This makes them a popular choice for DIY enthusiasts.
Versatility:Tin ceiling tiles come in various designs and finishes, allowing them to complement a wide range of interior styles, from rustic farmhouse to sleek modern.
Low Maintenance: These tiles are easy to clean and maintain, requiring only occasional dusting to keep them looking their best.
When it comes to incorporating nail up tin ceiling tiles into your home, the possibilities are nearly endless. Here are a few design ideas to inspire your project:
Vintage Elegance: For a classic look, choose ornate tin tiles with intricate patterns. Pair them with vintage-inspired furnishings and fixtures to create a cohesive, timeless space.
Modern Minimalism: Opt for sleek, minimalist tin tiles with a smooth finish. This choice works well in contemporary settings where clean lines and simplicity are key.
Industrial Chic: Embrace the raw beauty of tin by leaving tiles in their natural metal finish. This design is perfect for lofts or urban spaces that celebrate an industrial aesthetic.
Bold Patterns: For a more dramatic effect, choose tiles with bold, geometric patterns. These can serve as a focal point in a room, adding visual interest and texture.
Color and Finish: Tin ceiling tiles are available in a variety of finishes, from polished and shiny to matte and aged. Choose a finish that complements your existing decor or adds a pop of contrast.
How to Install Nail Up Tin Ceiling Tiles
Installing nail up tin ceiling tiles is a manageable DIY project if you have some basic tools and a bit of patience. Here’s a step-by-step guide to help you get started:
Preparation: Begin by preparing your ceiling. Ensure it is clean, dry, and free of any old paint or debris. Measure the area to determine how many tiles you’ll need.
Plan Your Layout: Decide on the layout of your tiles. It’s helpful to draw a grid on your ceiling to guide the installation process.
Cutting Tiles: If necessary, cut tiles to fit the edges and corners of your ceiling. Use tin snips or a metal cutter for clean, precise cuts.
Apply Adhesive: Apply a strong adhesive to the back of each tile. Be sure to follow the manufacturer’s instructions for best results.
Nail Tiles: Position the tile on the ceiling and secure it with nails or screws. Make sure to place nails at regular intervals to ensure a secure hold.
Fill Gaps and Finish: Once all tiles are installed, fill any gaps or seams with a suitable filler. Paint or seal the tiles if desired to achieve your preferred finish.
Maintaining Tips
Maintaining nail up tin ceiling tiles is relatively straightforward. Regular dusting with a soft cloth or duster will keep them looking clean. For more stubborn stains, a mild soap solution and a soft brush can be used. Avoid abrasive cleaners that could damage the finish.
Conclusion
Nail up tin ceiling tile are a fantastic way to add character and sophistication to any room. Their rich history, combined with their modern adaptability, makes them a valuable choice for both renovation projects and new constructions. With a variety of designs, finishes, and installation options, these tiles offer endless possibilities for creating a space that is uniquely yours. Whether you’re drawn to their vintage charm or their contemporary appeal, nail up tin ceiling tiles are sure to elevate the style and ambiance of your home.
When it comes to selecting the right ceiling tiles for your home or business, Moisture Resistant Drop Ceiling Tiles stand out as a highly functional and versatile option. Designed to combat issues related to humidity and water damage, these tiles offer a range of benefits that make them suitable for various environments. In this comprehensive guide, we’ll delve into the advantages, installation, and maintenance of moisture-resistant drop ceiling tiles, helping you make an informed decision for your next project.
What Are Moisture Resistant Drop Ceiling Tiles?
Moisture Resistant Drop Ceiling Tiles are specially designed tiles used in suspended ceiling systems that are engineered to withstand high humidity and resist water damage. These tiles are commonly used in areas prone to moisture such as bathrooms, kitchens, basements, and commercial spaces like restaurants and laundromats.
Key Features
Water Resistance: As the name suggests, moisture-resistant tiles are designed to repel water and prevent damage from high humidity levels.
Durability: These tiles are made from materials that are resistant to warping, sagging, or disintegration when exposed to moisture.
Ease of Installation: Like standard drop ceiling tiles, moisture-resistant tiles are designed to be easily installed and removed, making them convenient for maintenance and upgrades.
Variety of Styles: Available in various designs, colors, and textures, moisture-resistant tiles can complement a range of interior aesthetics while providing practical benefits.
One of the primary advantages of Moisture Resistant Drop Ceiling Tiles is their enhanced durability. Unlike standard ceiling tiles that may deteriorate or become discolored when exposed to moisture, moisture-resistant tiles are built to maintain their integrity and appearance even in challenging conditions. This durability reduces the need for frequent replacements and repairs, saving time and money in the long run.
2. Improved Indoor Air Quality
Many moisture-resistant tiles come with built-in antimicrobial properties that help to reduce the growth of mold and mildew. By preventing these harmful substances from proliferating, moisture-resistant tiles contribute to better indoor air quality, which is particularly important for maintaining a healthy living or working environment.
3. Cost-Effective Solution
Although moisture-resistant tiles may have a slightly higher upfront cost compared to standard tiles, their long-term benefits often outweigh the initial investment. By reducing the likelihood of damage and the need for replacements, these tiles can be a cost-effective solution in the long run.
4. Easy Maintenance
Maintaining Moisture Resistant Drop Ceiling Tiles is relatively simple. They are often washable and can be easily cleaned with mild detergents. Additionally, their resistance to staining and discoloration helps to keep your ceiling looking fresh and new with minimal effort.
5. Versatility
These tiles are available in a variety of designs, allowing you to choose a style that fits your space. Whether you’re looking for a modern, sleek appearance or a more traditional look, moisture-resistant tiles can be found in various textures and finishes to match your aesthetic preferences.
Applications of Moisture Resistant Drop Ceiling Tiles
1. Residential Use
In residential settings, Moisture Resistant Drop Ceiling Tiles are ideal for areas such as bathrooms, laundry rooms, and basements where moisture levels are typically higher. Their ability to withstand humidity helps to prevent issues like mold growth and ceiling damage.
2. Commercial Use
For commercial spaces like restaurants, kitchens, and public restrooms, moisture-resistant tiles provide a practical solution for managing high moisture levels. They help maintain a clean and professional appearance while ensuring durability and ease of maintenance.
3. Industrial Settings
In industrial environments, where exposure to moisture and chemicals can be common, moisture-resistant ceiling tiles offer a reliable option. They can withstand harsh conditions and contribute to a safer and more organized workspace.
Installation of Moisture Resistant Drop Ceiling Tiles
1. Preparation
Before installing moisture-resistant tiles, ensure that the ceiling grid system is properly installed and level. The grid system should be checked for any damage or misalignment to ensure a smooth and accurate tile installation.
2. Measuring and Cutting
Measure the tiles to fit the dimensions of the ceiling grid. If necessary, cut the tiles to fit around fixtures and other obstructions. Use a utility knife or tile cutter for clean and precise cuts.
3. Placing the Tiles
Place the moisture-resistant tiles into the ceiling grid, starting from one corner and working your way across the ceiling. Ensure that each tile is properly aligned and sits flush with the surrounding tiles. Press the tiles gently into place to secure them.
4. Finishing Touches
After installing the tiles, check for any gaps or inconsistencies. Adjust or replace any tiles as needed to ensure a uniform and professional appearance. Clean the tiles to remove any dust or debris from the installation process.
Maintenance Tips for Moisture Resistant Drop Ceiling Tile
1. Regular Cleaning
Clean the tiles regularly using a damp cloth and mild detergent. Avoid using abrasive cleaners or excessive water, as this can damage the tiles. For stubborn stains, use a specialized cleaner recommended by the tile manufacturer.
2. Inspect for Damage
Periodically inspect the tiles for any signs of damage or wear. Replace any tiles that are cracked, warped, or showing signs of mold growth to maintain the integrity of the ceiling system.
3. Monitor Humidity Levels
Keep an eye on the humidity levels in areas where moisture-resistant tiles are installed. While these tiles are designed to resist moisture, excessive humidity or leaks can still pose a risk. Address any sources of moisture promptly to prevent potential damage.
4. Address Leaks Promptly
If you notice any leaks or water damage, address them immediately. Repair any sources of leaks and replace any damaged tiles to prevent further issues.
Conclusion
Moisture Resistant Drop Ceiling Tiles offer a practical and stylish solution for managing moisture and maintaining a clean, durable ceiling. Their benefits include enhanced durability, improved indoor air quality, cost-effectiveness, easy maintenance, and versatility. By understanding their advantages and following proper installation and maintenance practices, you can ensure that your ceiling system remains functional and attractive for years to come.
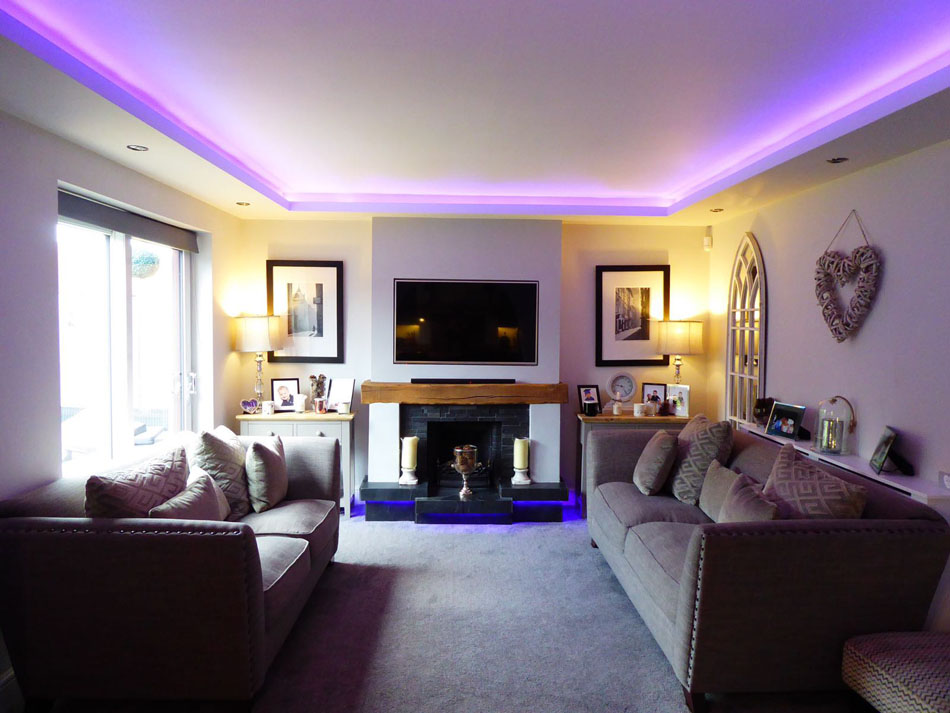
Drop ceilings, also known as suspended ceilings, have become a popular choice in both residential and commercial spaces for their versatility and ease of installation. When it comes to illuminating these spaces, choosing the right lighting is crucial. LED lights have emerged as a top choice due to their energy efficiency, longevity, and the quality of light they produce. In this article, we’ll explore everything you need to know about selecting and installing LED for drop ceiling, ensuring that your space is both well-lit and energy-efficient.
Why Choose LED for Drop Ceiling?
LED lights have transformed the lighting industry, offering numerous benefits over traditional lighting options. When considering LED for drop ceiling, it’s important to understand the advantages they bring to the table.
1. Energy Efficiency
One of the primary reasons for choosing LED lights is their unparalleled energy efficiency. LEDs consume significantly less power than traditional incandescent or fluorescent lights, which can result in substantial energy savings, especially in commercial settings where lighting is a major part of the energy expenditure.
2. Longevity
LED lights boast an impressive lifespan, often lasting up to 50,000 hours or more. This means less frequent replacements, reducing maintenance costs and the hassle of constantly changing bulbs in hard-to-reach drop ceilings.
LEDs offer superior light quality, providing bright, consistent illumination without the flicker associated with older fluorescent tubes. They also come in a range of color temperatures, allowing you to choose the type of light that best suits your space—whether it’s a warm, inviting glow for a home or a cool, bright light for an office.
4. Eco-Friendly
LED lights are free from harmful chemicals like mercury, which is commonly found in fluorescent bulbs. They are also fully recyclable, making them a more environmentally friendly option.
5. Versatility
LED lights are available in a variety of shapes and sizes, making them a versatile choice for drop ceilings. Whether you need slim panels, troffers, or recessed lights, there’s an LED solution that will fit seamlessly into your ceiling design.
Understanding the Types of LED Lights for Drop Ceilings
When it comes to choosing LED for drop ceiling, you’ll encounter several different types of lights. Each has its own unique features and benefits, making it important to choose the right type for your specific needs.
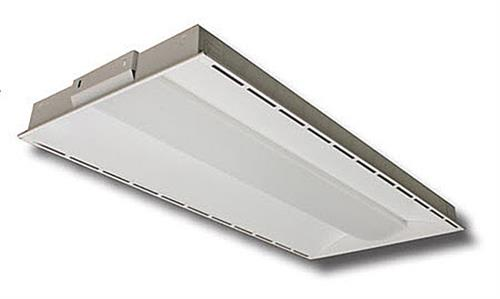
1. LED Troffers
LED troffers are one of the most common types of lighting used in drop ceilings. These rectangular or square fixtures are designed to fit into the grid of a suspended ceiling and provide widespread, even illumination.
Advantages: They are highly efficient and can provide a significant amount of light, making them ideal for offices, schools, and commercial spaces.
Disadvantages: The installation process can be complex, often requiring professional assistance.
2. LED Panels
LED panels are slim, lightweight, and easy to install. They offer a modern aesthetic and are often used in residential settings or modern commercial spaces.
Advantages: Their sleek design allows for a flush fit within the drop ceiling, and they provide even light distribution.
Disadvantages: They can be more expensive than other LED options.
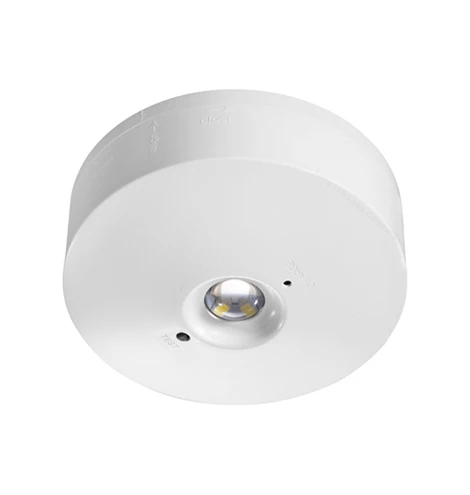
3. LED Recessed Lights
Recessed lights, also known as downlights, are installed directly into the ceiling, providing focused light that can be directed to specific areas.
Advantages: They are ideal for task lighting or highlighting specific areas of a room.
Disadvantages: They provide less overall illumination compared to troffers or panels and may require more fixtures to light a space effectively.
4. LED Strip Lights
LED strip lights are flexible, allowing them to be installed in a variety of configurations. They are often used for accent lighting or to highlight architectural features.
Advantages: They are highly customizable and can be used to create unique lighting effects.
Disadvantages: They are not typically used as the primary source of light and are better suited for supplementary lighting.
How to Choose the Right LED for Drop Ceiling
Selecting the right LED for your drop ceiling involves considering several factors, including the size of your space, the amount of light you need, and the desired aesthetic.
1. Determine the Purpose of the Lighting
The first step in choosing LED for drop ceiling is to determine the purpose of the lighting. Are you looking to illuminate a large office space, provide task lighting in a kitchen, or create ambient lighting in a living room? The purpose of the lighting will guide your choice of fixtures and the amount of light you need.
2. Calculate the Lumens Needed
Lumens measure the amount of light emitted by a bulb. To ensure your space is well-lit, calculate the total lumens needed based on the size of your room and the type of activities that will take place there.
General Lighting: For general lighting in a living room or bedroom, aim for around 10-20 lumens per square foot.
Task Lighting: In areas where tasks like reading or cooking are performed, you’ll need brighter lighting, around 50-70 lumens per square foot.
Accent Lighting: Accent lighting can be lower, around 5-10 lumens per square foot, as it is often used to highlight specific areas rather than provide overall illumination.
3. Consider the Color Temperature
LED lights are available in various color temperatures, measured in Kelvins (K). The color temperature you choose will affect the mood and functionality of the space.
Warm White (2700K-3000K): Ideal for living rooms, bedrooms, and dining areas where a cozy, inviting atmosphere is desired.
Cool White (3500K-4100K): Suitable for kitchens, bathrooms, and offices where a bright, clean light is needed.
Daylight (5000K-6500K): Best for spaces that require very bright, natural light, such as garages, workshops, or basements.
4. Check Compatibility with Your Ceiling Grid
Before purchasing LED lights, ensure they are compatible with your ceiling grid. Measure the dimensions of your ceiling tiles and compare them with the size of the LED fixtures you plan to install.
5. Energy Efficiency Ratings
Look for LED lights that have high energy efficiency ratings. Products with ENERGY STAR certification are tested for efficiency and performance, ensuring that you get the most out of your investment.
6. Installation Considerations
Consider whether you’ll be installing the lights yourself or hiring a professional. Some LED fixtures, like recessed lights, may require more complex installation processes that are best handled by an electrician.
How to Install LED for Drop Ceiling
Installing LED lights in a drop ceiling is a straightforward process if you have the right tools and knowledge. Below is a general guide to help you through the installation process.
1. Gather Your Tools and Materials
Before you begin, gather all the necessary tools and materials:
LED lights (troffers, panels, or recessed lights)
Ladder
Measuring tape
Screwdriver
Wire connectors
Wire stripper
Voltage tester
2. Turn Off the Power
Safety first! Turn off the power to the area where you’ll be working at the circuit breaker to prevent any electrical accidents.
3. Remove the Existing Tiles
If you’re replacing old lighting fixtures, start by carefully removing the ceiling tiles where the new LED lights will be installed.
4. Install the LED Fixtures
Troffers and Panels: Fit the LED fixture into the ceiling grid where the tile was removed. Secure it in place according to the manufacturer’s instructions.
Recessed Lights: Cut holes in the ceiling tiles for the recessed lights using a hole saw. Insert the lights into the holes and secure them in place with clips.
5. Connect the Wiring
Using wire connectors, connect the wires from the LED fixture to the corresponding wires in the ceiling. Use a voltage tester to ensure the connections are secure and that there is no power running through the wires before connecting them.
6. Replace the Tiles
Once the fixtures are installed and wired, replace the surrounding ceiling tiles. Ensure everything is aligned and secure.
7. Turn the Power Back On
After the installation is complete, turn the power back on and test the lights to ensure they are functioning properly.
Benefits of LED for Drop Ceiling in Different Settings
1. Commercial Spaces
In commercial spaces like offices and retail stores, LED troffers and panels provide bright, even lighting that enhances productivity and displays products effectively. The energy savings and reduced maintenance costs make LEDs a smart investment for businesses.
2. Residential Spaces
For residential settings, LED panels or recessed lights offer a sleek, modern look. They are perfect for kitchens, living rooms, and bathrooms, providing a clean, bright light that can be customized to suit the ambiance of the room.
3. Industrial Settings
In industrial settings such as warehouses or workshops, LED lights provide the bright, durable lighting needed to perform tasks safely and efficiently. Their long lifespan and energy efficiency are especially beneficial in environments where lights are on for extended periods.
Conclusion
Choosing the right LED for drop ceiling is crucial for creating a well-lit, energy-efficient space. Whether you’re outfitting a commercial office, a cozy living room, or a bustling kitchen, LED lights offer versatility, durability, and exceptional light quality. By considering factors like the purpose of the lighting, the amount of lumens needed, color temperature, and installation requirements, you can ensure that your LED lighting solution meets your needs and enhances the overall look and feel of your space.
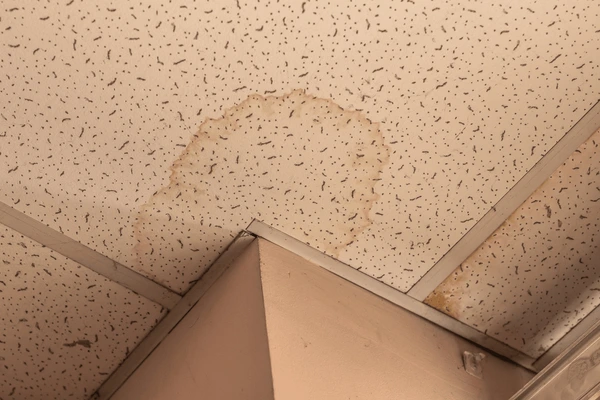
Water damage is a common problem that can affect any part of your home, but ceiling tiles are particularly vulnerable. Whether caused by a leaking roof, burst pipe, or excessive humidity, water damage can lead to unsightly stains, warping, and even mold growth on your ceiling tiles. Fortunately, repairing ceiling tiles with water damage is a manageable task that can restore the appearance and integrity of your ceiling. In this comprehensive guide, we’ll walk you through the steps on how to repair ceiling tiles with water damage, offering practical tips and insights to help you get the job done right.
Understanding Water Damage in Ceiling Tiles
Before diving into the repair process, it’s essential to understand the nature of water damage and its impact on ceiling tiles. Water can cause various types of damage depending on the material of your ceiling tiles, the extent of the water exposure, and how quickly the issue is addressed.
Common Types of Ceiling Tiles
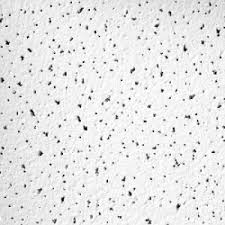
Acoustic Tiles: Often found in commercial buildings, these tiles are designed to reduce noise. They are usually made from porous materials that can absorb water, leading to stains and mold.
Drywall Ceiling Tiles: Common in residential homes, these tiles are prone to warping, sagging, and staining when exposed to water.
Metal Ceiling Tiles: Less susceptible to water damage, but they can rust if exposed to moisture over time.
Mineral Fiber Ceiling Tiles: Made from a mix of mineral fibers, these tiles can absorb water and become discolored or warped.
Signs of Water Damage
Stains: Yellow or brown stains are often the first visible sign of water damage.
Warping: Ceiling tiles may bulge, warp, or sag due to water absorption.
Cracks: Excessive moisture can cause tiles to crack or break apart.
Mold Growth: In areas with high humidity, mold can develop on damp ceiling tiles, posing health risks.
Repairing ceiling tiles with water damage involves several steps, from assessing the damage to replacing or restoring the affected tiles. Follow these instructions to ensure a successful repair.
1. Assess the Damage
Before you start any repairs, assess the extent of the damage:
Determine the Source: Identify where the water is coming from. It could be a leaky roof, plumbing issue, or condensation problem. Address the source of the water to prevent future damage.
Evaluate the Damage: Check how many tiles are affected and whether they are stained, warped, or cracked. If mold is present, take extra precautions, as mold can spread and cause health issues.
2. Remove the Damaged Tiles
If the damage is severe, you may need to remove and replace the damaged tiles:
Cut Around the Damaged Area: Use a utility knife to cut around the damaged tile if it’s a drywall or mineral fiber tile. For acoustic or metal tiles, you may be able to simply lift the tile out of the grid system.
Carefully Remove the Tile: Gently remove the tile to avoid damaging the surrounding tiles or ceiling structure. If the tile is wet, handle it with care as it may be fragile.
3. Dry and Clean the Area
Once the damaged tiles are removed, it’s crucial to dry and clean the area to prevent further issues:
Dry the Ceiling: Use fans or a dehumidifier to thoroughly dry the area where the tiles were removed. This step is vital to prevent mold growth.
Clean the Surrounding Area: Wipe down the ceiling structure with a damp cloth to remove any dust, debris, or mold spores. If mold is present, use a mixture of water and mild detergent or a specialized mold cleaner to disinfect the area.
4. Repair or Replace the Ceiling Tiles
Depending on the extent of the damage, you can either repair the existing tiles or replace them entirely.
Repairing Stained or Warped Tiles
If the tiles are only slightly stained or warped, you may be able to salvage them:
Stain Removal: For minor stains, apply a stain-blocking primer to the affected area before repainting. This will prevent the stain from bleeding through the new paint. Use a paintbrush or roller to apply a fresh coat of paint that matches the original color.
Flatten Warped Tiles: If the tiles are slightly warped, try to flatten them by placing a heavy object on top of the tile while it’s drying. Alternatively, dampen the back of the tile and gently press it flat before allowing it to dry completely.
Replacing the Tiles
For tiles that are beyond repair, replacement is the best option:
Measure and Cut New Tiles: Measure the size of the existing tiles and cut the new tiles to match. Ensure that the new tiles are the same material and thickness as the originals.
Install the New Tiles: For grid systems, simply drop the new tiles into place. For drywall or glued tiles, apply adhesive to the back of the tile and press it firmly onto the ceiling.
5. Prevent Future Water Damage
After repairing the ceiling tiles, take steps to prevent future water damage:
Fix Leaks: Ensure that any leaks in the roof or plumbing are repaired promptly to avoid further damage.
Improve Ventilation: In areas prone to high humidity, such as bathrooms or kitchens, improve ventilation by installing exhaust fans or using a dehumidifier.
Regular Inspections: Periodically inspect your ceiling for signs of water damage, especially after heavy rain or if you notice any leaks.
6. Repaint and Finish
Once the repairs are complete, finish the ceiling to restore its original appearance:
Repaint the Ceiling: Apply a fresh coat of paint to the entire ceiling for a uniform look. Use a paint that is resistant to moisture and stains to extend the life of your ceiling.
Reapply Texture: If your ceiling has a textured finish, use a texture spray or brush to reapply the texture to the repaired area.
How To Repair Ceiling Tiles With Water Damage: Additional Tips
1. Safety First
When dealing with water-damaged ceiling tiles, always prioritize safety:
Wear Protective Gear: Wear gloves, safety goggles, and a dust mask to protect yourself from mold spores and debris.
Turn Off Power: If the water damage is near electrical fixtures, turn off the power to the area to prevent electrical hazards.
2. Choose the Right Materials
Selecting the right materials for repair is crucial:
Stain-Resistant Paint: Use stain-resistant paint to help prevent future stains from appearing.
3. Consider Professional Help
If the water damage is extensive or if you’re dealing with mold, it may be wise to hire a professional. A contractor can provide expert advice and ensure that the repairs are done correctly.
Conclusion
Water damage to ceiling tiles can be a frustrating issue, but with the right approach, it can be effectively repaired. By following these steps on how to repair ceiling tiles with water damage, you can restore your ceiling’s appearance and prevent future problems. Whether you’re dealing with minor stains or extensive damage, taking prompt action and using the right materials will ensure a successful repair.
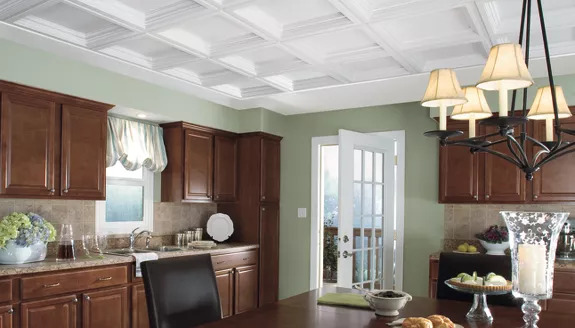
How To Install A Tongue And Groove Ceiling? A tongue and groove ceiling adds a touch of elegance and charm to any room. Its classic, clean lines and seamless appearance can enhance the aesthetic of your home, whether you’re renovating a single room or undertaking a whole-house makeover. This guide will walk you through the process of installing a tongue and groove ceiling, providing you with practical tips and detailed instructions to achieve a professional-looking result.
What Is a Tongue and Groove Ceiling?
A tongue and groove ceiling features wooden planks that interlock through a “tongue” (a protruding edge) and “groove” (a recessed edge). This design creates a snug fit between the planks, ensuring a seamless and attractive finish. Tongue and groove ceilings are known for their durability and classic appearance, making them a popular choice for both modern and traditional interiors.
Easy Installation: With the right tools and materials, tongue and groove ceilings can be installed relatively easily by DIY enthusiasts.
Versatility: Available in various wood types, finishes, and sizes, they can suit a range of interior design styles.
Tools and Materials Needed
Before starting your project, gather the following tools and materials:
Tools
Tape measure
Pencil
Saw (circular or miter saw)
Hammer or nail gun
Level
Drill
Stud finder
Pry bar
Safety glasses and gloves
Materials
Tongue and groove ceiling planks (wood or engineered)
Wood filler (if needed)
Finishing nails or screws
Ceiling adhesive (optional, depending on the method)
Paint or stain (if finishing the ceiling yourself)
Preparing for Installation
1. Measure the Ceiling
Start by measuring the dimensions of the ceiling where you plan to install the tongue and groove planks. Determine the total square footage and calculate how many planks you will need. Most manufacturers provide coverage information for their planks, which will help you estimate the quantity required.
2. Select Your Planks
Choose planks that match your desired aesthetic. Tongue and groove ceiling planks come in various types of wood, finishes, and sizes. Ensure that the planks you select are suitable for your climate and intended use.
3. Prepare the Ceiling
Before installation, prepare the ceiling surface:
Remove Old Fixtures: Take down any existing ceiling fixtures, such as lights or fans.
Inspect for Damage: Check the ceiling for any signs of damage, such as leaks or mold. Address any issues before proceeding.
Clean the Surface: Ensure that the ceiling is clean and free of dust or debris.
How To Install A Tongue And Groove Ceiling: Step-by-Step Instructions
1. Locate and Mark the Joists
Use a stud finder to locate the ceiling joists. Mark their positions along the perimeter of the ceiling with a pencil. This will help you secure the planks properly.
2. Install a Batten or Furring Strips
For a more secure installation, attach battens or furring strips perpendicular to the joists. This provides a solid base for the planks and helps ensure they are evenly spaced.
Measure and Cut: Measure the length of the ceiling and cut the battens or furring strips to fit.
Attach the Strips: Use finishing nails or screws to secure the battens to the joists, spacing them according to the width of the planks.
3. Start the Installation
Begin installing the tongue and groove planks:
Position the First Plank: Place the first plank along one edge of the ceiling, aligning it with the battens or joists.
Secure the Plank: Use a nail gun or hammer to attach the plank to the ceiling. If using nails, drive them through the tongue at an angle to hide the nail heads. Alternatively, you can use screws for added security.
Continue Installing: Slide the next plank into the groove of the previous plank. Ensure that the planks are tightly fitted and level as you work your way across the ceiling.
4. Cutting and Fitting
Measure and Cut Planks: Measure and cut planks as needed to fit around obstacles such as light fixtures or vents. Use a saw to make precise cuts.
Fit Around Obstacles: For areas around fixtures or vents, cut the planks to fit snugly. Use a jigsaw or coping saw for detailed cuts.
5. Finish the Installation
Fill Gaps and Nails: Use wood filler to cover any gaps or nail holes. Smooth the filler with a putty knife and allow it to dry completely.
Sand the Surface: Lightly sand the surface to ensure a smooth finish. Be sure to wear a dust mask while sanding.
Apply Finish: Paint or stain the ceiling as desired. Follow the manufacturer’s instructions for application and drying times.
Tips for a Professional Finish
1. Ensure Proper Ventilation
During the installation and finishing process, ensure that the room is well-ventilated. This helps with drying and prevents the buildup of fumes from adhesives or finishes.
2. Check for Level
Regularly check that the planks are level and evenly spaced. Use a level and adjust as needed to maintain a uniform appearance.
3. Allow for Expansion
Wood can expand and contract with changes in temperature and humidity. Allow for slight gaps between the planks and the wall to accommodate these changes without affecting the overall appearance.
4. Consider Professional Help
If you’re unsure about any aspect of the installation or if the project seems too complex, consider hiring a professional. A contractor can ensure that the installation is done correctly and provide advice on finishing techniques.
Maintenance and Care
Once your tongue and groove ceiling is installed, follow these maintenance tips to keep it looking its best:
Regular Cleaning: Dust the ceiling regularly with a soft cloth or duster. Avoid using harsh chemicals or abrasive cleaners.
Inspect for Damage: Periodically check for signs of damage or wear. Address any issues promptly to prevent further problems.
Touch-Up Finishes: Reapply paint or stain as needed to maintain the ceiling’s appearance and protect the wood.
Conclusion
Installing a tongue and groove ceiling can dramatically enhance the look and feel of your space. By following these steps and tips, you can achieve a beautiful and professional finish. Whether you’re a DIY enthusiast or considering professional installation, understanding the process and preparation will help you create a stunning ceiling that adds value and charm to your home.
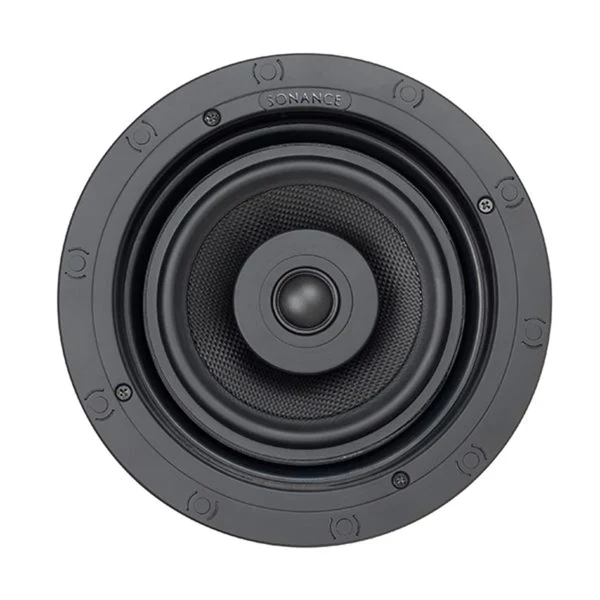
Ceiling speakers offer a sleek and unobtrusive way to enjoy high-quality sound throughout your home. Whether you’re planning a new audio installation or upgrading your current system, determining the right number of ceiling speakers is crucial for achieving optimal sound quality. This guide will help you understand how many ceiling speakers you need, factors to consider, and how to create the best audio experience for your space.
Understanding the Basics of Ceiling Speakers
Ceiling speakers are designed to provide ambient sound and background music without taking up valuable floor space. They are typically installed flush with the ceiling and can blend seamlessly into the room’s decor. To get the most out of your ceiling speaker system, it’s important to consider several factors, including the room size, speaker placement, and audio needs.
Before determining how many ceiling speakers you need, it’s helpful to understand the different types available:
Full-Range Speakers: These speakers cover the entire audio spectrum, from bass to treble, providing a well-rounded sound experience.
In-Ceiling Subwoofers: Designed to handle low frequencies, subwoofers can complement full-range speakers for enhanced bass response.
Directional Speakers: These speakers can be angled to direct sound towards specific areas, which is useful for customizing audio coverage.
Factors to Consider for Ceiling Speaker Placement
1. Room Size and Shape
The size and shape of the room significantly impact how many ceiling speakers you need. Larger rooms typically require more speakers to ensure even sound distribution. Conversely, smaller rooms may need fewer speakers. Consider the following guidelines:
Small Rooms (up to 150 sq. ft.): One or two ceiling speakers should suffice for even sound coverage.
Medium Rooms (150 to 300 sq. ft.): Two to four speakers can help achieve a balanced sound experience.
Large Rooms (300 sq. ft. and above): Four or more speakers may be necessary to cover the entire space effectively.
2. Ceiling Height
The height of the ceiling can also affect speaker placement and quantity. Higher ceilings may require additional speakers or the use of directional speakers to ensure sound reaches all areas of the room. For standard ceilings (8 to 10 feet), a typical speaker arrangement will work. For higher ceilings, consider adding more speakers or adjusting placement to optimize sound distribution.
3. Speaker Purpose
Consider the purpose of the ceiling speakers in each room. Are they intended for background music, movie soundtracks, or high-fidelity audio? The more demanding the audio needs, the more speakers you may require. For background music, fewer speakers may be sufficient, while for immersive audio experiences, you might need more.
4. Room Acoustics
Room acoustics play a vital role in determining the number of ceiling speakers needed. Rooms with hard surfaces and minimal furnishings can cause sound to reflect and bounce, potentially creating audio hotspots and dead zones. In contrast, rooms with carpets, curtains, and soft furnishings absorb sound, which may require additional speakers to compensate for sound absorption.
Calculating the Number of Ceiling Speakers
1. General Guidelines
Here are some general guidelines to help determine how many ceiling speakers you might need based on room size:
Small Room (up to 150 sq. ft.): 1 to 2 speakers
Medium Room (150 to 300 sq. ft.): 2 to 4 speakers
Large Room (300 sq. ft. and above): 4 or more speakers
2. Speaker Spacing
For even sound distribution, speakers should be spaced evenly across the ceiling. A common rule of thumb is to place speakers about 6 to 8 feet apart, depending on the room size and speaker type. Ensure that speakers are positioned away from walls and corners to minimize sound reflections and improve audio clarity.
3. Speaker Wattage and Coverage
Consider the wattage and coverage area of each speaker. Higher wattage speakers can cover larger areas and provide more powerful sound. Ensure that the total wattage of your ceiling speaker system aligns with your audio needs and room size.
Installation Tips for Ceiling Speakers
1. Plan Your Layout
Before installing ceiling speakers, plan the layout to ensure optimal placement and coverage. Use a floor plan or grid to map out speaker locations and test the sound coverage before final installation.
2. Use a Speaker Placement Calculator
Several online tools and calculators can help determine the ideal number and placement of ceiling speakers based on room dimensions and acoustic properties. These tools can provide a more precise recommendation tailored to your space.
3. Consider Professional Installation
For complex installations or large-scale audio systems, consider hiring a professional installer. Experienced installers can assess your space, recommend the best setup, and ensure that speakers are installed correctly for optimal performance.
Common Mistakes to Avoid
1. Overcrowding the Ceiling
Adding too many ceiling speakers can lead to an overwhelming sound experience and potential audio interference. Stick to recommended guidelines and avoid overcrowding the ceiling with speakers.
2. Ignoring Room Acoustics
Neglecting room acoustics can result in uneven sound coverage and audio issues. Pay attention to the acoustic properties of your room and adjust speaker placement accordingly.
3. Underestimating Speaker Power
Choosing speakers with insufficient power for your room size can lead to inadequate sound quality. Ensure that your speakers have the necessary wattage and coverage to meet your audio needs.
How Many Ceiling Speakers Do I Need for Different Scenarios?
1. Home Theater Setup
For a home theater setup, consider using a combination of ceiling speakers and traditional floor or wall-mounted speakers. A typical home theater might include 4 to 6 ceiling speakers to create an immersive audio experience.
2. Whole-House Audio System
In a whole-house audio system, the number of ceiling speaker will vary based on the number of rooms and the desired audio coverage. Plan for 2 to 4 speakers per room, depending on size and acoustic requirements.
3. Office or Conference Rooms
In office or conference rooms, ceiling speaker should provide clear and even sound for presentations and meetings. Typically, 2 to 4 speakers are sufficient for these spaces, but larger rooms may require more.
Conclusion
Determining how many ceiling speaker you need involves considering various factors, including room size, ceiling height, speaker purpose, and room acoustics. By following general guidelines and using tools to calculate speaker placement, you can achieve an optimal audio experience tailored to your space. Whether you’re setting up a home theater, a whole-house audio system, or simply enhancing your living space, proper planning and installation will ensure that your ceiling speakers deliver high-quality sound and enhance your overall listening experience.
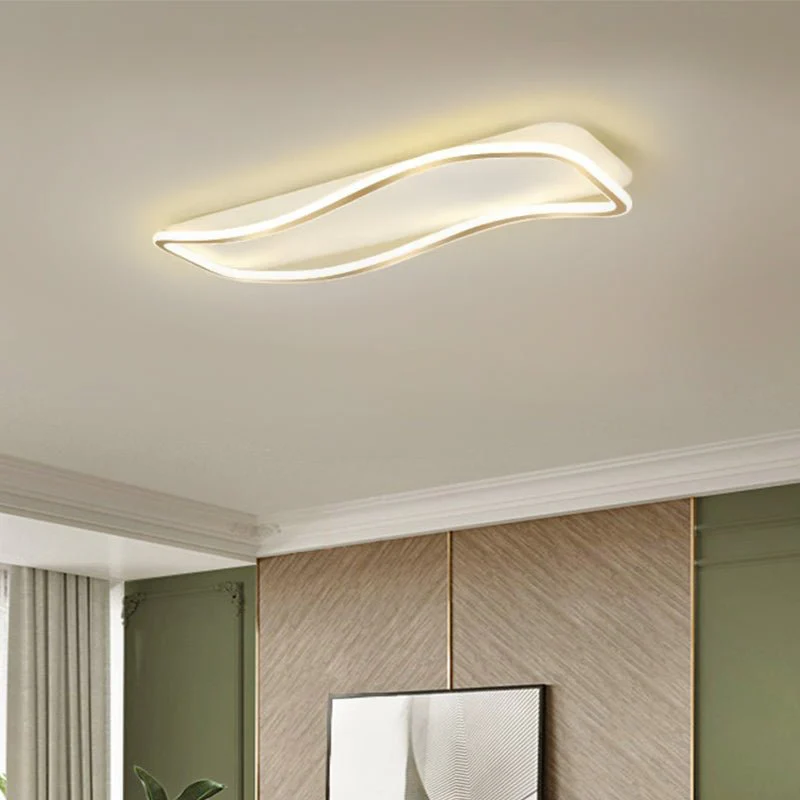
Lighting can transform a space, providing both function and ambiance. Among the various lighting options available, the flush mount rectangular ceiling light stands out for its sleek design and versatility. This comprehensive guide explores the benefits, features, and considerations of flush mount rectangular ceiling lights, helping you make an informed decision for your home or office.
What Is a Flush Mount Rectangular Ceiling Light?
A flush mount rectangular ceiling light is a type of light fixture that is mounted directly against the ceiling, with no gap between the fixture and the ceiling surface. It is characterized by its rectangular shape, which makes it an ideal choice for modern and contemporary spaces. Unlike pendant lights or chandeliers, flush mount lights offer a streamlined appearance that integrates seamlessly with the ceiling.
Benefits of Flush Mount Rectangular Ceiling Lights
1. Space-Saving Design
One of the key advantages of flush mount rectangular ceiling lights is their space-saving design. These fixtures are ideal for rooms with low ceilings or limited vertical space. By mounting directly against the ceiling, they do not protrude or obstruct movement, making them perfect for areas where headroom is a concern.
2. Modern Aesthetic
Flush mount rectangular ceiling lights are known for their sleek, modern aesthetic. Their clean lines and minimalistic design contribute to a contemporary look that complements various interior styles. Whether you have a minimalist, industrial, or transitional decor, these lights can enhance the overall design of your space.
3. Even Lighting Distribution
These fixtures provide even and consistent lighting across the entire room. Their rectangular shape allows for the distribution of light in a broad, uniform manner, reducing shadows and ensuring that every corner of the room is well-lit. This makes them ideal for workspaces, kitchens, and living areas where balanced lighting is essential.
4. Easy Installation and Maintenance
Flush mount rectangular ceiling lights are relatively easy to install compared to other types of lighting fixtures. Since they do not require hanging hardware or complex installations, they can be mounted quickly and efficiently. Additionally, their design often allows for straightforward maintenance, as cleaning and bulb replacement can be done with minimal effort.
Choosing the Right Flush Mount Rectangular Ceiling Light
Selecting the perfect flush mount rectangular ceiling light involves considering several factors to ensure it meets your needs and complements your space. Here’s what to keep in mind:
1. Size and Proportion
The size of the flush mount rectangular ceiling light should be proportional to the dimensions of the room. Larger fixtures work well in spacious areas, while smaller ones are better suited for compact spaces. Measure your room and choose a light fixture that fits well within the space without overwhelming it.
2. Style and Design
Flush mount rectangular ceiling lights come in various styles, from minimalist designs to more decorative options. Consider the overall style of your room and choose a fixture that enhances the aesthetic. For a modern look, opt for sleek, geometric designs. If you prefer something more decorative, look for fixtures with intricate details or unique finishes.
3. Lighting Type
The type of lighting you need will influence your choice of flush mount rectangular ceiling light. Different lighting options include:
LED Lights: Energy-efficient and long-lasting, LED lights offer bright illumination and low power consumption. They are a popular choice for flush mount fixtures due to their longevity and efficiency.
Fluorescent Lights: These lights provide a bright, even light and are often used in commercial settings. They are less energy-efficient than LEDs but can be a cost-effective option.
Incandescent Lights: Traditional and warm, incandescent lights offer a softer glow. However, they are less energy-efficient and have a shorter lifespan compared to LEDs.
4. Material and Finish
Flush mount rectangular ceiling lights are available in a variety of materials and finishes. Common materials include:
Metal: Durable and modern, metal fixtures can be finished in various colors such as chrome, brushed nickel, or matte black.
Glass: Glass fixtures can offer a sleek, elegant look. Frosted or clear glass options can alter the diffusion of light and contribute to different lighting effects.
Acrylic: Lightweight and versatile, acrylic fixtures are often used for contemporary designs and offer a range of colors and styles.
5. Installation and Maintenance
Consider the installation requirements and ease of maintenance when choosing a fixture. Some flush mount rectangular ceiling lights may require professional installation, while others can be installed by homeowners. Additionally, choose a fixture that allows for easy access to bulbs and components for routine maintenance.
Popular Applications of Flush Mount Rectangular Ceiling Lights
Flush mount rectangular ceiling lights are versatile and can be used in various settings. Here are some popular applications:
1. Living Rooms
In living rooms, flush mount rectangular ceiling lights provide a clean and modern look while ensuring ample illumination. They can be used as the main light source or in combination with other lighting elements, such as floor lamps or table lamps, to create a balanced lighting scheme.
2. Kitchens
Kitchens benefit from the even and bright illumination provided by flush mount rectangular ceiling lights. They help ensure that countertops and work areas are well-lit, making it easier to prepare meals and perform other tasks.
3. Offices
In office settings, flush mount rectangular ceiling lights are ideal for providing consistent lighting that reduces eye strain and enhances productivity. Their unobtrusive design ensures they do not distract from the workspace.
4. Hallways and Entryways
Flush mount rectangular ceiling lights are also a great choice for hallways and entryways. Their slim profile and even lighting distribution help make these spaces feel welcoming and well-lit.
Maintenance Tips for Flush Mount Rectangular Ceiling Lights
To ensure your flush mount rectangular ceiling light remains in excellent condition, follow these maintenance tips:
1. Regular Cleaning
Dust and dirt can accumulate on the fixture over time, affecting its appearance and light output. Regularly clean the fixture with a soft cloth and a gentle cleaner to remove dust and smudges. For glass or acrylic components, use a glass cleaner or a solution suitable for the material.
2. Check for Loose Parts
Periodically check for any loose screws or fittings and tighten them as needed. Loose parts can affect the stability of the fixture and may lead to more significant issues if not addressed promptly.
3. Replace Bulbs Promptly
Replace any burned-out bulbs as soon as possible to ensure consistent lighting. Follow the manufacturer’s recommendations for bulb types and wattages to avoid damaging the fixture.
4. Inspect Electrical Components
If you notice any issues with the electrical components, such as flickering lights or unusual sounds, consult a professional electrician. Electrical issues can pose safety risks and should be addressed by a qualified technician.
Conclusion
Flush mount rectangular ceiling lights offer a stylish and functional lighting solution for a variety of spaces. Their space-saving design, modern aesthetic, and even lighting distribution make them a popular choice for contemporary interiors. By considering factors such as size, style, lighting type, and material, you can select the perfect fixture to enhance your space. With proper maintenance, your flush mount rectangular ceiling light will continue to provide reliable and attractive illumination for years to come.
As the popularity of outdoor living spaces continues to rise, so does the demand for products that make these spaces comfortable year-round. One such product that has gained significant attention is the electric outdoor ceiling heater. Whether you’re looking to extend the use of your patio into the cooler months or create a warm and inviting atmosphere for evening gatherings, electric outdoor ceiling heaters offer an efficient and stylish solution. In this guide, we’ll explore everything you need to know about these heaters, from their benefits and types to installation tips and maintenance.
Why Choose Electric Outdoor Ceiling Heaters?
Outdoor spaces, like patios, decks, and pergolas, have become extensions of our living areas, offering a place to relax, entertain, and enjoy the fresh air. However, cooler weather can limit the usability of these spaces. Electric outdoor ceiling heaters are designed to solve this problem by providing consistent, targeted warmth that allows you to enjoy your outdoor area even when temperatures drop.
Benefits of Electric Outdoor Ceiling Heaters
Efficient Heating: Electric outdoor ceiling heaters are designed to provide direct heat to a specific area, making them more efficient than traditional heaters. They work by emitting infrared rays that warm objects and people in their path, rather than just heating the air.
Space-Saving Design: Mounted on the ceiling, these heaters take up no floor space, making them ideal for smaller patios or areas where floor space is at a premium. This also means they’re less likely to be knocked over or tampered with, adding to their safety.
Stylish and Discreet: Modern electric outdoor ceiling heaters come in a variety of sleek designs that blend seamlessly into your outdoor decor. Some are even designed to look like light fixtures, providing both warmth and illumination.
Ease of Use: Most electric heaters are equipped with user-friendly controls, such as remote controls or wall switches, making them easy to operate. Some models also come with programmable timers or thermostats for added convenience.
Environmentally Friendly: Unlike gas heaters, which require fuel and emit carbon dioxide, electric outdoor ceiling heaters are powered by electricity and produce no emissions. This makes them a more environmentally friendly option for heating your outdoor space.
Electric outdoor ceiling heaters are versatile and can be used in various outdoor settings, including:
Patios and Decks: These are the most common areas where ceiling heaters are installed. They provide warmth to seating areas, allowing you to use your patio or deck well into the fall or even winter months.
Pergolas and Gazebos: Ceiling heaters are ideal for these structures, as they can be mounted overhead to distribute heat evenly across the space.
Outdoor Dining Areas: Whether it’s a covered outdoor kitchen or an al fresco dining area, ceiling heaters can make these spaces comfortable for dining even on chilly evenings.
Commercial Spaces: Restaurants, cafes, and other businesses with outdoor seating areas often use electric ceiling heaters to keep their customers warm and comfortable.
Types of Electric Outdoor Ceiling Heaters
Electric outdoor ceiling heaters come in several types, each with its unique features and benefits. Understanding the differences between these types can help you choose the best heater for your needs.
1. Infrared Heaters
Infrared heaters are the most common type of electric outdoor ceiling heater. They work by emitting infrared radiation, which directly heats objects and people rather than the surrounding air. This makes them highly efficient and effective, particularly in open or breezy areas.
Pros:
Immediate Heat: Infrared heaters provide almost instant warmth, making them ideal for outdoor spaces where quick heating is needed.
Energy-Efficient: Since they heat objects directly, they use less energy compared to other heating methods.
No Noise: These heaters operate silently, making them perfect for quiet, relaxing environments.
Cons:
Directional Heating: Infrared heaters provide focused heat, so they may not be as effective in heating larger areas evenly.
2. Halogen Heaters
Halogen heaters use halogen bulbs to produce heat. Like infrared heaters, they provide direct, focused warmth, making them efficient for outdoor use. They are often favored for their ability to produce a bright, warming glow, adding both light and heat to outdoor areas.
Pros:
Bright Light: The halogen bulbs provide both heat and light, enhancing the ambiance of outdoor spaces.
Fast Heating: Halogen heaters warm up quickly, providing instant comfort.
Cons:
Shorter Lifespan: Halogen bulbs have a shorter lifespan compared to other heating elements, requiring more frequent replacement.
3. Quartz Heaters
Quartz heaters are similar to infrared heaters but use quartz tubes to generate heat. They are known for their durability and efficiency, making them a popular choice for both residential and commercial settings.
Pros:
Durable: Quartz heaters are long-lasting and require minimal maintenance.
Efficient Heating: They offer efficient, targeted warmth with low energy consumption.
Cons:
Higher Initial Cost: Quartz heaters can be more expensive upfront compared to other types of electric heaters.
4. Ceramic Heaters
Ceramic heaters use ceramic elements to generate and radiate heat. They are less common in ceiling-mounted designs but are still available for outdoor use. Ceramic heaters are known for their steady, consistent warmth.
Pros:
Consistent Heat: Ceramic heaters provide a steady heat output, maintaining a comfortable temperature.
Safe to Use: These heaters typically have safety features such as overheat protection.
Cons:
Slower Heating: They may take longer to heat up compared to infrared or halogen heaters.
Installation Tips for Electric Outdoor Ceiling Heaters
Installing an electric outdoor ceiling heater is a straightforward process, but there are several factors to consider to ensure optimal performance and safety.
1. Location
The placement of your heater is crucial. Ideally, it should be installed where it can provide the most warmth to seating or dining areas. Consider the height of your ceiling as well; heaters should be mounted at a height that ensures efficient heat distribution without being too close to occupants.
2. Mounting Options
Electric outdoor ceiling heaters typically come with brackets or chains for mounting. Ensure that your ceiling can support the weight of the heater and that it’s securely fastened to prevent accidents. If you’re installing the heater in a commercial setting, you may need to comply with specific safety regulations.
3. Electrical Requirements
Before installation, check the electrical requirements of your heater. Most electric outdoor ceiling heaters will require a dedicated circuit to operate safely. If you’re not familiar with electrical work, it’s advisable to hire a professional electrician to handle the installation.
4. Weather Protection
Although electric outdoor ceiling heaters are designed for outdoor use, it’s essential to ensure they’re protected from direct exposure to rain or snow. Installing them under a covered area, such as a patio roof or pergola, will help prolong their lifespan.
5. Safety Considerations
Always follow the manufacturer’s guidelines for installation and use. Make sure the heater is installed at a safe distance from combustible materials and that it’s equipped with any necessary safety features, such as automatic shut-off or overheating protection.
Maintenance and Care for Electric Outdoor Ceiling Heaters
Maintaining your electric outdoor ceiling heater is essential to ensure its longevity and efficiency. Here are some tips to keep your heater in top condition:
1. Regular Cleaning
Dust and debris can accumulate on the heater’s surface and heating elements, reducing its efficiency. Regularly clean the heater with a soft cloth and a mild detergent to remove any buildup. Make sure the heater is turned off and cool before cleaning.
2. Inspecting Connections
Periodically check the electrical connections and mounting hardware to ensure everything is secure. Loose connections can lead to poor performance or pose a safety hazard.
3. Replacing Bulbs or Elements
If your heater uses halogen bulbs or quartz elements, they will eventually need to be replaced. Keep an eye on the performance of your heater, and replace any bulbs or elements that are no longer working efficiently.
4. Storing the Heater
If you plan to store your heater during the warmer months, make sure it’s cleaned and properly stored in a dry, protected area. Covering the heater with a weather-resistant cover can also help protect it from dust and moisture when not in use.
Conclusion: Enjoy Year-Round Comfort with Electric Outdoor Ceiling Heaters
Electric outdoor ceiling heaters are an excellent investment for anyone looking to maximize the use of their outdoor space throughout the year. With a variety of options available, from infrared to quartz heaters, there’s a solution to suit every need and preference. By carefully selecting the right heater, installing it correctly, and maintaining it properly, you can create a warm, inviting outdoor environment that you can enjoy regardless of the season.
Whether you’re hosting a dinner party on a cool autumn evening or simply relaxing on your patio with a book, electric outdoor ceiling heaters provide the comfort and warmth you need to make the most of your outdoor living space.
Designing a room with a sloping ceiling can be a challenge, especially when it comes to choosing and installing curtains. Sloped ceilings, often found in attics, lofts, or homes with unique architectural designs, add character and charm to a space but also require thoughtful planning when it comes to window treatments. This article will guide you through the process of selecting and installing curtains for sloping ceilings, offering creative solutions to enhance your space while maintaining functionality and style.
Why Sloping Ceilings Pose a Challenge for Curtains
Sloping ceilings add a distinctive element to a room, but they can complicate the installation of standard window treatments. The angled lines and varying ceiling heights can make it difficult to hang curtains in a way that looks natural and stylish. Here are some of the common challenges you might face:
Uneven Heights: Sloping ceilings often mean that one side of the window is higher than the other, requiring a custom approach to curtain rods and drapery lengths.
Limited Space: In some rooms, the ceiling slope might leave very little space above the window for traditional curtain rods.
Aesthetic Balance: Finding a balance between functionality and aesthetics can be tricky when dealing with unconventional angles.
Despite these challenges, there are several creative solutions that can help you achieve a polished look with curtains for sloping ceilings.
Choosing the Right Curtains for Sloping Ceilings
When selecting curtains for a sloping ceiling, it’s essential to consider both form and function. The right curtains will not only enhance the room’s decor but also provide practical benefits such as light control and privacy. Here are some factors to keep in mind:
1. Fabric Selection
The type of fabric you choose will significantly impact the overall look and feel of your space. Heavier fabrics like velvet or brocade can add warmth and opulence, ideal for formal rooms or areas where you want to block out light completely. Lighter fabrics like linen or cotton can create a more airy, casual feel, perfect for spaces where you want to maximize natural light.
2. Curtain Length
In rooms with sloping ceilings, curtain length becomes a critical consideration. Floor-length curtains can elongate the appearance of the walls, making the room feel taller and more spacious. However, if the slope is severe, you may need to opt for custom-cut curtains that taper to match the ceiling’s angle.
3. Pattern and Color
The right pattern and color can draw attention to the architectural features of your room or help them blend in. Vertical stripes, for example, can emphasize height, making the slope less noticeable. On the other hand, a bold pattern can turn the curtains into a focal point, diverting attention from the ceiling’s angle.
Creative Solutions for Hanging Curtains on Sloping Ceilings
1. Custom Curtain Rods
One of the most effective ways to hang curtains on a sloping ceiling is by using custom curtain rods. These rods can be specially designed to follow the angle of your ceiling, allowing the curtains to hang naturally without bunching or gapping. Custom rods can be made from various materials, including metal, wood, or even PVC, depending on your budget and the room’s decor.
2. Flexible Curtain Tracks
Flexible curtain tracks are another excellent solution for sloping ceilings. These tracks can be bent or curved to match the slope of your ceiling, ensuring a smooth, even hang for your curtains. Flexible tracks are particularly useful in tight spaces where traditional rods may not fit or in rooms with multiple angles and slopes.
3. Ceiling-Mounted Curtains
In some cases, it may be best to mount the curtains directly to the ceiling. This approach works well in rooms with very steep slopes or where the window is positioned close to the ceiling. Ceiling-mounted curtains can be installed using ceiling brackets or tracks, creating a clean, modern look that emphasizes the room’s architecture.
4. Layered Curtains
Layering curtains can add depth and dimension to a room with a sloping ceiling. Consider combining sheer curtains with heavier drapes to create a versatile window treatment that can be adjusted for light control and privacy. Layering also allows you to play with different textures and colors, adding interest to the space.
5. Tiebacks and Holdbacks
Tiebacks and holdbacks can be particularly useful in rooms with sloping ceilings, allowing you to gather the curtains to one side or adjust them to follow the angle of the slope. Decorative tiebacks can also add a touch of elegance and help keep the curtains in place, especially in rooms with irregular window shapes.
6. Velcro and Clips
For a less permanent solution, consider using Velcro or curtain clips to secure the curtains in place along the slope. This method is ideal for renters or anyone looking for a temporary solution, as it allows you to adjust the curtains easily without making permanent changes to the room.
DIY Curtain Solutions for Sloping Ceilings
If you’re a DIY enthusiast, there are several creative ways to make your own curtains for a sloping ceiling. Here are some ideas to get you started:
1. DIY Sloped Curtain Panels
Create custom curtain panels that match the slope of your ceiling by measuring the angle and cutting the fabric accordingly. Hem the edges for a clean finish, and use grommets or curtain rings to hang the panels from a sloped rod or track.
2. No-Sew Curtains
If you’re not handy with a sewing machine, you can still create custom curtains using no-sew techniques. Fabric glue or iron-on hemming tape can be used to create seams and hems without sewing. Simply cut the fabric to the desired length, fold and glue the edges, and attach curtain rings or clips for hanging.
3. Repurpose Existing Curtains
If you have existing curtains that you love, consider repurposing them for your sloping ceiling. You may need to trim them to fit the angle or add additional fabric to cover any gaps. With a little creativity, you can give old curtains new life in a unique space.
Enhancing Your Space with Accessories
Curtains are just one part of the equation when it comes to decorating a room with a sloping ceiling. Consider these additional accessories to complete the look:
1. Window Valances
Valances can be an excellent addition to curtains in a room with a sloping ceiling. They add a decorative touch and can help hide any hardware or imperfections in the curtain installation. Choose a valance that complements your curtains in terms of color, pattern, and style.
2. Blinds or Shades
For added privacy and light control, consider pairing your curtains with blinds or shades. Roman shades, for example, can be custom-fitted to your window and can be a great way to add texture and warmth to the room.
3. Decorative Hardware
Don’t overlook the importance of decorative hardware when hanging curtains on a sloping ceiling. Finials, brackets, and curtain rods come in a wide variety of styles and finishes, allowing you to match them to your overall decor theme. Decorative hardware can also serve as a focal point, drawing attention to the curtains and the unique angles of the room.
Conclusion: Making the Most of Curtains for Sloping Ceilings
Curtains for sloping ceilings may require a bit more creativity and effort, but the results are well worth it. By carefully selecting the right fabrics, styles, and installation methods, you can turn a challenging architectural feature into an opportunity for stunning design. Whether you opt for custom curtain rods, flexible tracks, or DIY solutions, the key is to embrace the unique characteristics of your space and use them to your advantage.
With the right approach, your sloping ceiling can become a beautiful and functional part of your home’s decor. So, don’t let the angles intimidate you—get creative and start designing curtains that enhance both the beauty and functionality of your space.
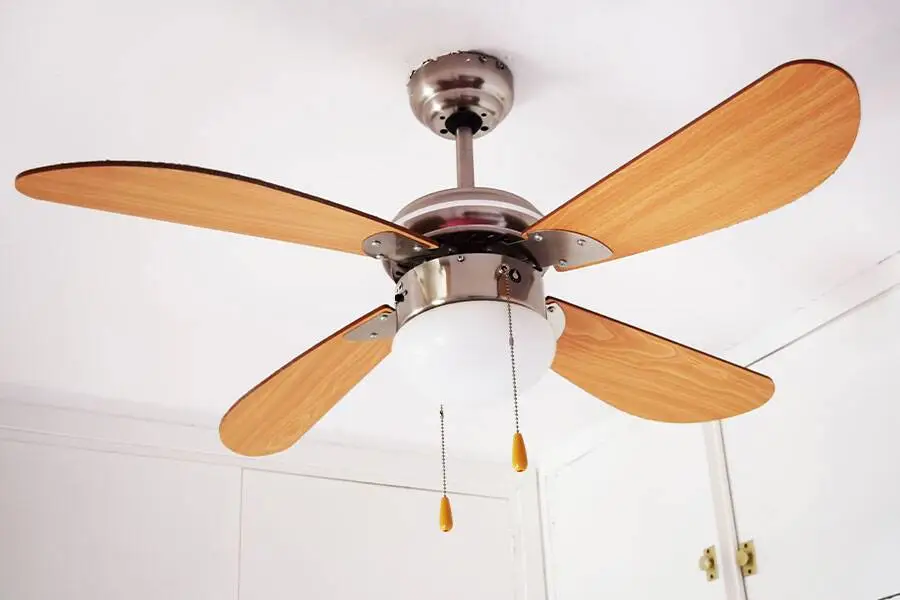
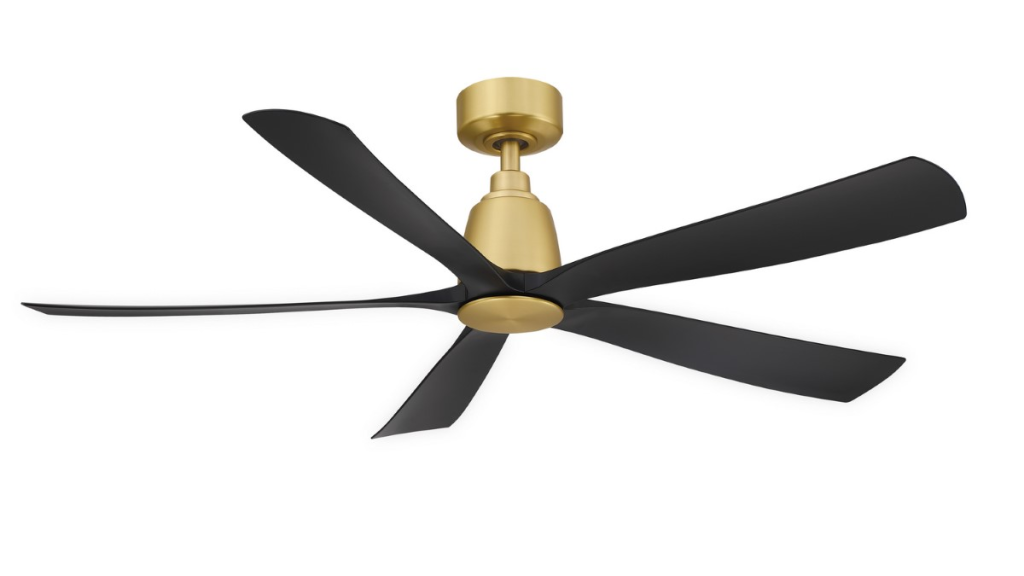
Ceiling fans are an essential part of home comfort, providing both cooling and air circulation with efficiency and style. Craftmade, known for its high-quality ceiling fans, offers a range of fans equipped with remote controls for added convenience. However, to fully enjoy this feature, it’s crucial to understand how to program the remote correctly. In this comprehensive guide, we’ll walk you through the process of Craftmade ceiling fan remote programming, ensuring that you can operate your fan with ease and precision.
Understanding the Importance of Remote Programming
Remote controls add a layer of convenience to ceiling fan operation by allowing users to adjust the fan speed, control the light (if applicable), and even reverse the fan direction—all from the comfort of your seat. However, this convenience is only possible if the remote is properly programmed to the fan. Without correct programming, the remote may not communicate with the fan, rendering it useless or partially functional.
Proper Craftmade ceiling fan remote programming is essential for several reasons:
Efficient Operation: Ensure that all fan and light settings respond accurately to the remote control inputs.
Personalized Settings: Tailor the fan’s operation to your preferences, such as setting specific speeds, light dimming levels, and more.
Troubleshooting Issues: Correct programming can resolve common issues like the remote not responding or the fan operating inconsistently.
Multiple Fans: If you have more than one ceiling fan, programming allows you to control each fan independently, even if they are in close proximity.
Step-by-Step Guide to Craftmade Ceiling Fan Remote Programming
Programming your Craftmade ceiling fan remote is a straightforward process, but it requires careful attention to detail. Follow these steps to ensure successful programming:
Step 1: Gather the Necessary Materials
Before you begin, make sure you have the following items:
A small screwdriver (if needed to access the remote’s battery compartment)
Step 2: Power Off the Fan
For safety and to prevent any interference during programming, turn off the power to your ceiling fan at the circuit breaker or by using the wall switch. Wait a few moments to ensure the fan has completely powered down.
Step 3: Install or Replace Remote Batteries
Open the battery compartment on your remote control using a small screwdriver if necessary. Insert fresh batteries, ensuring they are placed in the correct orientation as indicated inside the compartment. A low battery can cause the remote to malfunction or fail to program correctly.
Step 4: Locate the Programming Buttons
Most Craftmade ceiling fan remotes have a set of buttons specifically for programming. These buttons may be hidden under the battery cover or located on the back of the remote. Familiarize yourself with these buttons before proceeding.
Step 5: Set the Dip Switches
Craftmade remotes often feature dip switches, small toggles inside the remote that help pair the remote with the fan. The positions of these switches must match between the remote and the fan’s receiver (located inside the fan’s canopy). Set the dip switches on the remote to your desired positions, making sure they align with those on the fan’s receiver.
Step 6: Power On the Fan
After setting the dip switches, restore power to the ceiling fan by turning on the circuit breaker or wall switch. The fan and remote should now be ready for programming.
Step 7: Initiate the Programming Sequence
Press the programming button on the remote control. Depending on the model, this button may need to be held down for several seconds until the remote’s indicator light begins to flash. This signals that the remote is in programming mode.
Step 8: Sync the Remote with the Fan
With the remote in programming mode, press the “ON” button or the button corresponding to fan speed. The fan should respond by turning on or changing speeds, indicating that the programming was successful. If your fan includes a light, test the light function as well to ensure everything is synced.
Step 9: Test the Remote
Once programming is complete, test all the remote’s functions—speed control, light control, and reverse direction (if applicable). Ensure that each function works smoothly and as expected.
Step 10: Troubleshoot if Necessary
If the fan does not respond to the remote, repeat the steps above, paying close attention to the dip switch settings and ensuring that the batteries are fresh. If issues persist, consult the fan’s user manual or contact Craftmade customer support for further assistance.
Common Issues and Troubleshooting Tips
Even with careful programming, you may encounter some common issues. Here’s how to address them:
1. Remote Not Responding
If your remote isn’t working, first check the batteries. Weak or dead batteries are the most common cause of a non-responsive remote. If the batteries are fine, try reprogramming the remote from the beginning.
2. Fan Only Operates at Certain Speeds
If the fan doesn’t respond to all speed settings, this could be due to incorrect dip switch settings. Recheck the switches on both the remote and the fan receiver to ensure they match.
3. Light Function Not Working
If the fan’s light isn’t responding to the remote, make sure the light bulb is installed correctly and is functional. Also, check that the remote is set to control the light by verifying the programming settings.
4. Interference from Other Devices
If you have multiple ceiling fans or other remote-controlled devices nearby, they may interfere with each other. To resolve this, try changing the dip switch settings on one or more devices to create unique codes for each remote.
Enhancing Your Experience with Craftmade Ceiling Fan Remote Programming
Programming your Craftmade ceiling fan remote is just the beginning. There are several ways to enhance your experience and make the most of your ceiling fan’s capabilities:
1. Advanced Remote Features
Some Craftmade remotes offer advanced features such as timers, dimming controls, and temperature sensors. If your remote includes these features, take the time to program and customize them according to your preferences.
2. Smart Home Integration
For tech-savvy homeowners, integrating your ceiling fan with a smart home system can provide additional convenience. Check if your Craftmade fan is compatible with smart home hubs like Alexa or Google Home, and consider programming your remote to work with these systems for voice-controlled operation.
3. Regular Maintenance
To ensure your ceiling fan operates smoothly, regular maintenance is essential. This includes cleaning the fan blades, checking for loose screws, and periodically reprogramming the remote to maintain optimal performance.
Conclusion: Mastering Craftmade Ceiling Fan Remote Programming
Craftmade ceiling fan remote programming is a straightforward process that enhances the convenience and functionality of your ceiling fan. By following the steps outlined in this guide, you can easily program your remote to ensure reliable operation and enjoy the full range of features your fan has to offer. Whether you’re a first-time user or a seasoned pro, proper programming can make all the difference in your home comfort and satisfaction.
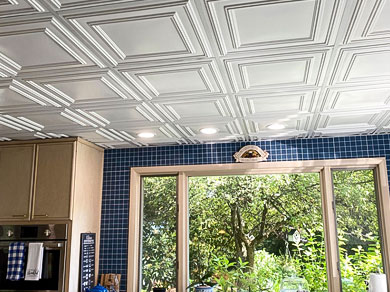
Drop ceilings, also known as suspended ceilings, are a popular choice for both residential and commercial spaces. They offer an easy and cost-effective way to cover up unsightly pipes, wiring, or damaged ceilings while adding a polished look to any room. When it comes to selecting materials for a drop ceiling, one of the most common choices is the 2×2 ceiling tile. If you’re on a budget, finding cheap drop ceiling tiles 2×2 that don’t compromise on quality or aesthetics is crucial. This article will guide you through everything you need to know about selecting affordable 2×2 drop ceiling tiles, including types, materials, benefits, and where to find the best deals.
Understanding Cheap Drop Ceiling Tiles 2X2
What Are Drop Ceiling Tiles?
Drop ceiling tiles, often referred to as suspended ceiling tiles, are panels that are laid into a grid system. This grid is suspended from the structural ceiling, creating a gap between the ceiling tiles and the actual ceiling. This setup is particularly useful in basements, commercial buildings, and rooms where access to plumbing, electrical wiring, or ductwork is needed.
Why Choose 2X2 Tiles?
2×2 tiles refer to tiles that are 2 feet by 2 feet in size. This size is one of the most popular and commonly used for drop ceilings, as it strikes a good balance between coverage and ease of handling. These tiles are easy to install, replace, and maintain, making them a practical choice for both DIY enthusiasts and professional installers.
Advantages of Cheap Drop Ceiling Tiles 2X2
When selecting cheap drop ceiling tiles 2×2, it’s important to consider the advantages that come with choosing this specific size and style.
One of the most significant advantages of 2×2 drop ceiling tiles is their affordability. These tiles are widely available, and their standard size often means they are produced in bulk, reducing the cost. For budget-conscious homeowners or business owners, choosing cheap drop ceiling tiles 2×2 allows for a cost-effective solution without sacrificing functionality or appearance.
2. Easy Installation
Another benefit of 2×2 ceiling tiles is their ease of installation. Their manageable size allows for quicker and less complicated installation, whether you’re doing it yourself or hiring a professional. This can lead to reduced labor costs, further enhancing the affordability of your project.
3. Variety of Styles
Despite being on the cheaper side, 2×2 ceiling tiles come in a wide range of styles, colors, and materials. Whether you’re looking for a simple, clean look or something more decorative, there’s likely a 2×2 tile that fits your aesthetic. This variety allows you to achieve the look you want at a price you can afford.
4. Sound Absorption
Many 2×2 ceiling tiles offer sound-absorbing qualities, which can be particularly beneficial in noisy environments. Whether it’s a busy office or a bustling home, these tiles can help dampen sound, creating a more peaceful and comfortable space.
5. Accessibility
Drop ceilings provide easy access to the space above, making them ideal for rooms where you might need to access wiring, plumbing, or ductwork. The 2×2 tiles are particularly convenient because they can be easily removed and replaced without disturbing the rest of the ceiling.
Materials Used in Cheap Drop Ceiling Tiles 2X2
When shopping for cheap drop ceiling tiles 2×2, it’s essential to understand the different materials available. Each material offers its own set of benefits and can affect the overall look, durability, and functionality of your ceiling.
1. Mineral Fiber
Mineral fiber is one of the most common materials used in drop ceiling tiles. These tiles are made from a combination of natural and synthetic fibers and are known for their acoustic properties. They are lightweight, affordable, and come in a variety of finishes, making them a popular choice for budget-friendly ceiling installations.
2. PVC (Polyvinyl Chloride)
PVC ceiling tiles are another cost-effective option. These tiles are lightweight, durable, and resistant to moisture and mold, making them an excellent choice for basements or bathrooms. PVC tiles can also be designed to mimic the look of tin or other more expensive materials, providing a high-end look at a fraction of the cost.
3. Gypsum
Gypsum ceiling tiles are made from a mineral-based material and are known for their fire-resistant properties. While they can be slightly more expensive than other options, they offer a solid, durable finish that can be painted or textured to match your décor. Gypsum tiles are an excellent choice for areas where safety is a concern.
4. Tin
Tin ceiling tiles offer a more decorative option for drop ceilings. Although tin tiles tend to be more expensive, there are cheaper faux-tin alternatives that provide the same aesthetic at a lower cost. These tiles add a vintage or industrial look to a room, making them a popular choice for homeowners looking to make a statement.
5. Styrofoam
Styrofoam ceiling tiles are an ultra-cheap option that can be easily installed and painted. While not as durable as other materials, they can be a good choice for temporary installations or for areas where aesthetics are more important than long-term durability.
Where to Find Cheap Drop Ceiling Tiles 2X2
Finding affordable drop ceiling tiles can be as simple as knowing where to look. Here are some tips for sourcing cheap drop ceiling tiles 2×2 without sacrificing quality.
1. Home Improvement Stores
Large home improvement stores often carry a wide selection of ceiling tiles in various styles and materials. These stores frequently offer sales and discounts, particularly on bulk purchases, making it easier to stay within budget.
2. Online Retailers
Shopping online can open up a wider range of options for cheap drop ceiling tiles 2×2. Websites like Amazon, eBay, and specialized retailers often offer competitive prices and a larger selection than brick-and-mortar stores. Additionally, online shopping allows you to easily compare prices and read reviews before making a purchase.
3. Discount Building Supply Stores
Discount building supply stores are another excellent source for affordable ceiling tiles. These stores often sell overstock, discontinued items, or returned goods at a fraction of the retail price. While the selection may be more limited, you can find significant deals if you’re flexible with your choices.
4. Wholesale Suppliers
If you’re working on a large project or multiple rooms, purchasing ceiling tiles from a wholesale supplier can save you money. Many wholesalers offer bulk pricing that can reduce the per-tile cost, making it more affordable to cover a larger area.
5. Local Classifieds and Reuse Centers
Don’t overlook local classifieds, such as Craigslist, or reuse centers when searching for cheap drop ceiling tiles 2×2. You may find used or surplus materials at a steep discount, particularly if someone is renovating and has leftover tiles they no longer need.
Installation Tips for Cheap Drop Ceiling Tiles 2X2
Installing drop ceiling tiles is a relatively straightforward process, but there are a few tips to ensure a smooth installation.
1. Prepare the Grid System
Before installing the tiles, ensure that your grid system is properly installed and level. Any misalignment can cause the tiles to fit improperly or look uneven.
2. Measure and Cut Tiles as Needed
While 2×2 tiles are designed to fit standard grid systems, you may need to cut tiles to fit around edges or obstacles. Use a sharp utility knife or a specialized ceiling tile cutter to achieve clean, precise cuts.
3. Install Tiles Carefully
When placing tiles into the grid, do so gently to avoid damaging them. If a tile doesn’t fit easily, double-check the grid alignment or trim the tile slightly rather than forcing it into place.
4. Consider Lighting and Fixtures
If your ceiling will include recessed lighting or other fixtures, ensure that your tiles are compatible or can be easily modified to accommodate these elements. Some tiles are pre-cut for standard fixtures, which can save time during installation.
Maintenance and Care for Cheap Drop Ceiling Tiles 2X2
Once your ceiling tiles are installed, proper maintenance will help them last longer and maintain their appearance.
1. Regular Cleaning
Dust and dirt can accumulate on ceiling tiles, particularly in high-traffic areas. Regularly dusting or lightly vacuuming your tiles can keep them looking fresh. For deeper cleaning, use a damp cloth and mild detergent, but be sure to check that the tiles are water-resistant before doing so.
2. Replace Damaged Tiles
If a tile becomes damaged, replacing it is usually simple. Keep a few extra tiles on hand for quick replacements, ensuring that your ceiling always looks its best.
3. Inspect for Moisture Damage
In areas prone to moisture, regularly inspect your tiles for signs of water damage, such as staining or warping. If you notice any issues, address the source of the moisture and replace the affected tiles to prevent further damage.
Conclusion
Cheap drop ceiling tiles 2×2 offer an affordable, versatile, and stylish solution for covering up old ceilings or finishing a room. Whether you’re renovating a basement, updating a commercial space, or simply looking for a quick and easy ceiling solution, 2×2 tiles provide the perfect combination of practicality and aesthetic appeal. By understanding the different materials, knowing where to find the best deals, and following proper installation and maintenance tips, you can achieve a professional-looking ceiling without exceeding your budget.
In any commercial or residential building, safety is a top priority, and one crucial component of ensuring safety is the proper installation of emergency lighting systems. Among the various types of emergency lights, ceiling mounted emergency lights stand out for their effectiveness and efficiency. These lights are designed to provide illumination during power outages, guiding occupants to safety and ensuring compliance with safety regulations. This comprehensive guide will explore the importance, features, installation, and maintenance of ceiling mounted emergency lights, helping you make informed decisions about your emergency lighting needs.
Understanding Ceiling Mounted Emergency Lights
Emergency lights are essential fixtures in buildings, serving as a vital component of a building’s safety infrastructure. When power fails, these lights automatically activate, providing necessary illumination in darkened spaces to help occupants find exits and navigate safely.
What Are Ceiling Mounted Emergency Lights?
Ceiling mounted emergency lights are lighting fixtures installed directly onto the ceiling, designed to provide emergency illumination when normal lighting systems fail. Unlike wall-mounted emergency lights, ceiling-mounted variants offer a more centralized and widespread coverage, making them ideal for large areas like hallways, stairwells, and open spaces.
How Do They Work?
Ceiling mounted emergency lights are equipped with backup batteries that automatically kick in during a power outage. These batteries are constantly charged while the main power is on, ensuring that the lights are always ready to operate in an emergency. Many modern ceiling mounted emergency lights also come with LED technology, which provides brighter light and greater energy efficiency compared to traditional incandescent bulbs.
Why Choose Ceiling Mounted Emergency Lights?
There are several reasons why ceiling mounted emergency lights are preferred in various settings. Understanding their benefits can help you decide if they are the right choice for your building.
1. Enhanced Coverage and Visibility
One of the key advantages of ceiling mounted emergency lights is their ability to cover a large area. Because they are installed on the ceiling, they provide a broad, unobstructed light pattern that enhances visibility across the entire space. This makes them particularly useful in large rooms, corridors, and other areas where maximum light coverage is needed.
2. Aesthetic Integration
Ceiling mounted emergency lights can be seamlessly integrated into the design of a building, providing safety without compromising aesthetics. These lights are available in various styles and finishes, allowing them to blend into the ceiling and maintain the overall appearance of the space.
3. Compliance with Safety Regulations
Installing ceiling mounted emergency lights is often required by building codes and safety regulations, especially in commercial and public buildings. These lights ensure compliance with regulations by providing reliable emergency illumination that meets the required standards.
4. Reduced Obstruction
Unlike wall-mounted lights, which can protrude into a space and potentially obstruct movement, ceiling mounted emergency lights are out of the way, reducing the risk of accidental damage or interference with other building systems. This makes them ideal for high-traffic areas where safety and efficiency are paramount.
Key Features of Ceiling Mounted Emergency Lights
When selecting ceiling mounted emergency lights, there are several features to consider to ensure they meet your specific needs.
1. LED Technology
Many modern ceiling mounted emergency lights use LED bulbs, which offer several benefits over traditional lighting options. LEDs are energy-efficient, long-lasting, and provide bright, consistent illumination. They also generate less heat, which can be advantageous in maintaining the safety of the fixture and surrounding materials.
2. Battery Backup
The battery backup system is a critical component of any emergency light. High-quality ceiling mounted emergency lights feature robust, rechargeable batteries that can provide hours of illumination during a power outage. It’s essential to choose lights with reliable battery systems to ensure they perform when needed.
Some ceiling mounted emergency lights come with self-testing features that regularly check the functionality of the light and battery. This feature simplifies maintenance by automatically alerting you to any issues, ensuring that the lights are always operational.
4. Durability and Weather Resistance
In some settings, particularly outdoor or industrial environments, ceiling mounted emergency lights need to withstand harsh conditions. Look for models that are weather-resistant and constructed from durable materials like aluminum or polycarbonate to ensure longevity and reliability.
5. Ease of Installation
The installation process for ceiling mounted emergency lights should be straightforward, with clear instructions and necessary mounting hardware included. Some models are designed for easy retrofitting into existing systems, which can save time and reduce installation costs.
Installation and Maintenance of Ceiling Mounted Emergency Lights
Proper installation and regular maintenance are crucial for ensuring that your ceiling mounted emergency lights function correctly in an emergency. Here’s what you need to know:
Installation Guidelines
Determine the Placement:
Ceiling mounted emergency lights should be strategically placed to provide maximum coverage in key areas such as exits, stairwells, hallways, and large rooms. Consider the layout of the building and the most likely paths occupants will take during an evacuation.
Follow Electrical Codes:
Ensure that the installation complies with local electrical codes and regulations. This may include specific requirements for wiring, mounting, and the connection to the building’s power system.
Test the System:
After installation, test the emergency lights to ensure they are working correctly. This includes checking the battery backup, light output, and automatic switch-over function.
Maintenance Tips
Regular Testing:
Regularly test your ceiling mounted emergency lights to ensure they are operational. Many lights with self-testing features will automatically perform these checks, but manual testing should also be conducted periodically.
Battery Replacement:
The batteries in emergency lights have a limited lifespan and will need to be replaced periodically. Follow the manufacturer’s recommendations for battery replacement intervals, and keep spare batteries on hand to avoid downtime.
Keep Clean:
Dust and debris can accumulate on the light fixtures, potentially affecting their performance. Regularly clean the lights to ensure maximum brightness and efficiency.
Professional Inspection:
Consider having a professional inspect your emergency lighting system annually. This can help identify any issues that may not be apparent during routine testing and maintenance.
Choosing the Right Ceiling Mounted Emergency Light for Your Needs
Selecting the appropriate ceiling mounted emergency light depends on several factors, including the specific requirements of your building, the environment where the lights will be installed, and your budget.
Consider the Environment
Indoor vs. Outdoor:
Choose lights designed for the environment in which they will be installed. Indoor lights may not need the same level of weather resistance as outdoor models, but they should still be durable and reliable.
Harsh Conditions:
In environments like factories or warehouses, opt for lights that are resistant to dust, moisture, and impact. These lights are often labeled as industrial-grade or heavy-duty.
Determine the Coverage Area
Large Spaces:
For large spaces, choose lights with a wide beam angle and high lumen output to ensure adequate illumination across the entire area.
Smaller Spaces:
In smaller rooms or corridors, lower lumen output may be sufficient, and you might prioritize lights that are more compact or aesthetically pleasing.
Budget Considerations
Initial Cost vs. Long-Term Savings:
While LED emergency lights may have a higher upfront cost compared to incandescent models, they offer long-term savings through reduced energy consumption and longer lifespans.
Maintenance Costs:
Consider the maintenance requirements and costs associated with different models. Lights with self-testing features or longer-lasting batteries may reduce ongoing expenses.
Conclusion
Ceiling mounted emergency lights are an essential component of any building’s safety system, providing critical illumination during power outages and ensuring that occupants can evacuate safely. By understanding the benefits, features, and installation considerations for these lights, you can make an informed decision that enhances the safety and compliance of your building. Whether for a commercial, residential, or industrial setting, investing in high-quality ceiling mounted emergency lights is a step towards a safer environment for everyone.
Ceiling fans are an essential addition to homes, particularly in regions like San Diego, where warm temperatures and sunny weather are a regular occurrence. A well-chosen ceiling fan not only provides much-needed air circulation but also enhances the aesthetic appeal of any room. In this comprehensive guide, we’ll delve into everything you need to know about Ceiling Fans in San Diego, including the best types for your home, energy efficiency tips, and the benefits of installing one in your living space.
Why Ceiling Fans are a Must-Have in San Diego
The San Diego Climate
San Diego is known for its mild, Mediterranean climate with warm summers and cool winters. However, even with the city’s generally comfortable weather, there are times when indoor spaces can become stuffy and uncomfortable, particularly during the hotter months. Installing a ceiling fan is an excellent way to maintain a cool and comfortable environment without relying solely on air conditioning, which can be both expensive and energy-intensive.
Ceiling fans are an energy-efficient way to improve air circulation and maintain a comfortable temperature in your home. By using a ceiling fan, you can reduce your reliance on air conditioning, which can significantly lower your energy bills. In fact, ceiling fans can make a room feel up to 8 degrees cooler, allowing you to raise the thermostat setting by about 4 degrees without sacrificing comfort.
Versatile Design Options
Ceiling Fans in San Diego come in a wide variety of designs, finishes, and sizes, making it easy to find one that complements your home’s decor. Whether you prefer a modern, sleek look or a more traditional style, there’s a ceiling fan to suit every taste and room setting. Many fans also come with integrated lighting, which adds an extra layer of functionality to your living space.
Choosing the Right Ceiling Fan for Your San Diego Home
Size Matters
One of the most important factors to consider when choosing a ceiling fan is the size of the room. A fan that is too small won’t circulate air effectively, while a fan that is too large may overpower the space. Here’s a quick guide to help you choose the right size:
For rooms up to 75 square feet, a 29- to 36-inch fan is recommended.
For rooms between 76 and 144 square feet, a 36- to 42-inch fan works well.
For rooms between 144 and 225 square feet, a 44- to 50-inch fan is ideal.
For larger rooms, 225 square feet or more, consider a 50- to 54-inch fan.
Style and Finish
The style of your ceiling fan should complement the existing decor of your home. In San Diego, where indoor-outdoor living is common, you may want to choose fans that can be used both inside and outside. Coastal-inspired designs with weather-resistant finishes are popular choices for outdoor areas like patios or sunrooms. Indoors, you might prefer a fan with a sleek, modern design or a fan with more traditional, decorative elements.
Energy Efficiency Features
When shopping for Ceiling Fans in San Diego, it’s crucial to consider energy efficiency. Look for fans with the ENERGY STAR label, as they are typically 60% more efficient than standard fans. Additionally, many ceiling fans come with reversible motors, allowing you to change the direction of the blades depending on the season. In the summer, the blades should rotate counterclockwise to create a cooling breeze. In the winter, switch to a clockwise rotation to push warm air down from the ceiling, reducing heating costs.
Motor Quality and Noise Level
The motor is the heart of the ceiling fan, and its quality can greatly impact the fan’s performance and noise level. Look for fans with high-quality motors that are known for quiet operation. DC motors are particularly efficient and quiet, making them an excellent choice for bedrooms or other quiet areas in your home. A good quality motor will also ensure that your fan lasts longer and operates smoothly without unnecessary wobbling or noise.
Installation Tips for Ceiling Fans in San Diego
Professional vs. DIY Installation
While some homeowners in San Diego may opt to install their ceiling fans themselves, it’s often recommended to hire a professional electrician, especially if the installation involves complex wiring or if you’re installing the fan in a high ceiling or difficult-to-reach area. Professional installation ensures that your fan is securely mounted and properly wired, reducing the risk of accidents or electrical issues.
Placement for Maximum Efficiency
The placement of your ceiling fan is crucial for maximizing its cooling effect. For optimal performance, install the fan in the center of the room, about 7-9 feet above the floor and at least 18 inches away from the walls. If you have a particularly large room, you might need more than one fan to ensure adequate air circulation.
Ceiling Height Considerations
San Diego homes often feature a variety of ceiling heights, from standard 8-foot ceilings to vaulted or cathedral ceilings. When selecting a ceiling fan, it’s important to choose the right mount to ensure proper clearance. For low ceilings, a flush mount or hugger fan is ideal. For higher ceilings, you’ll need a downrod to lower the fan to the appropriate height. Some ceiling fans come with adjustable downrods to accommodate different ceiling heights.
Popular Ceiling Fan Brands in San Diego
Hunter
Hunter is a well-known brand that offers a wide range of ceiling fans in various styles and finishes. Known for their reliability and durability, Hunter fans are a popular choice among San Diego homeowners. They offer energy-efficient models with quiet motors, making them suitable for any room in the house.
Casablanca
Casablanca fans are renowned for their high-quality construction and elegant designs. They offer a range of styles, from contemporary to traditional, ensuring that you can find the perfect fan to match your decor. Casablanca fans are also known for their powerful motors and efficient air circulation.
Minka-Aire
Minka-Aire is a favorite among those looking for modern, stylish ceiling fans in San Diego. Their fans often feature sleek designs, innovative technology, and integrated LED lighting. Minka-Aire fans are perfect for homeowners who want a ceiling fan that doubles as a statement piece.
Emerson
Emerson fans are known for their energy efficiency and innovative features. They offer a variety of styles, including indoor and outdoor models, making them a versatile option for San Diego homes. Emerson fans also come with advanced motor technology, ensuring quiet operation and long-lasting performance.
Benefits of Installing Ceiling Fans in San Diego
Improved Air Circulation
Ceiling fans play a crucial role in improving air circulation within your home. By keeping the air moving, they help to maintain a consistent temperature, reducing the need for air conditioning during the warmer months. In San Diego, where the weather is generally mild, a ceiling fan can often eliminate the need for air conditioning altogether, particularly in the cooler evening hours.
Energy Savings
One of the most significant benefits of installing a ceiling fan is the potential for energy savings. By using a ceiling fan in conjunction with your HVAC system, you can raise your thermostat setting by about 4 degrees without compromising comfort. This can result in significant savings on your energy bills, especially during the hot summer months when cooling costs are at their highest.
Aesthetic Appeal
Beyond their functional benefits, ceiling fans can also enhance the aesthetic appeal of your home. With a wide range of styles, finishes, and designs available, you can find a fan that complements your decor and adds a touch of elegance to any room. Whether you prefer a modern, minimalist look or a more traditional, ornate design, there’s a ceiling fan that will meet your needs.
Versatility and Functionality
Ceiling fans are incredibly versatile, offering both cooling and lighting options in a single fixture. Many modern ceiling fans come with integrated LED lighting, which is energy-efficient and long-lasting. This dual functionality makes ceiling fans a practical choice for any room in your home, from the living room to the bedroom to outdoor patios.
Maintenance Tips for Ceiling Fans in San Diego
Regular Cleaning
To ensure your ceiling fan continues to operate efficiently, regular cleaning is essential. Dust and dirt can accumulate on the blades, leading to reduced airflow and increased noise. Use a soft cloth or a microfiber duster to clean the blades regularly. For a deeper clean, you can use a mild soap and water solution to wipe down the blades and motor housing.
Blade Balancing
If your ceiling fan starts to wobble or make noise, it may be due to unbalanced blades. Blade balancing kits are available and can help you correct this issue. Follow the instructions provided with the kit to ensure your fan operates smoothly and quietly.
Seasonal Maintenance
As the seasons change, it’s a good idea to check the direction of your ceiling fan’s rotation. In the summer, the fan should rotate counterclockwise to create a cooling breeze. In the winter, switch to a clockwise rotation to help circulate warm air throughout the room. This simple adjustment can help improve comfort and reduce energy costs year-round.
Conclusion
Installing a Ceiling Fan in San Diego is a smart investment that can enhance both the comfort and style of your home. With the wide variety of designs, sizes, and features available, you can easily find a fan that meets your needs and complements your decor. Whether you’re looking to improve air circulation, save on energy costs, or add a stylish element to your living space, a ceiling fan is the perfect solution. Remember to consider factors like room size, motor quality, and energy efficiency when making your selection to ensure you get the best fan for your home.
When it comes to selecting the perfect ceiling fan for your home, a combination of style and functionality is essential. The Brass and Black Ceiling Fan has become a popular choice for homeowners who want to add a touch of sophistication to their space while ensuring optimal air circulation. This stylish fan not only enhances the aesthetic appeal of any room but also serves as a practical solution for keeping your home cool and comfortable. In this article, we’ll explore the many features, benefits, and design options of the brass and black ceiling fan, helping you understand why it could be the ideal addition to your living space.
Why Choose a Brass and Black Ceiling Fan?
The Aesthetic Appeal of Brass and Black
The Brass and Black Ceiling Fan is a striking combination of classic and modern design elements. The rich, warm tone of brass, paired with the sleek, bold look of black, creates a fan that can complement a wide variety of interior styles. Whether your home features a traditional, industrial, or contemporary design, this fan can seamlessly integrate into the space, adding a touch of luxury and refinement.
Versatility in Interior Design
One of the key reasons why the brass and black ceiling fan is so popular is its versatility. This fan can be used in various settings, from a modern loft to a classic living room, making it a flexible option for homeowners with diverse tastes. The brass finish brings a timeless elegance, while the black accents add a contemporary edge, ensuring that the fan remains stylish and relevant regardless of changing trends.
Durability and Longevity
Brass is known for its durability and resistance to corrosion, making it an excellent material for ceiling fans. The black components, often made from high-quality metals or durable plastics, further enhance the fan’s longevity. By choosing a brass and black ceiling fan, you’re investing in a product that will not only look great for years to come but will also withstand the test of time.
Features of a Brass and Black Ceiling Fan
High-Quality Materials
The Brass and Black Ceiling Fan is typically constructed from high-quality materials that ensure both durability and performance. The brass components are often solid and polished, offering resistance to tarnishing and corrosion. Meanwhile, the black elements, which may include the blades or motor housing, are usually made from sturdy materials that can withstand daily use without losing their finish.
One of the primary functions of any ceiling fan is to promote air circulation within a room. The brass and black ceiling fan is designed with aerodynamics in mind, featuring blades that are carefully angled to maximize airflow. Whether you need a gentle breeze during the summer or improved air circulation in the winter, this fan can adjust to meet your needs while adding style to your space.
Energy Efficiency
Modern ceiling fans, including those with a brass and black design, are built with energy efficiency in mind. Many models come equipped with energy-saving features, such as reversible motors that allow you to change the direction of the fan’s rotation based on the season. This not only helps maintain a comfortable temperature in your home but also reduces energy consumption, leading to lower utility bills.
Quiet Operation
Another significant feature of the Brass and Black Ceiling Fan is its quiet operation. Advanced motor technology and well-balanced blades ensure that the fan runs smoothly without creating excessive noise. This makes it an excellent choice for bedrooms, home offices, or any other space where a peaceful environment is essential.
Lighting Integration
Many brass and black ceiling fans come with integrated lighting, offering both illumination and cooling in one stylish package. These lights are often adjustable, allowing you to customize the brightness to suit your mood or activity. With various lighting options available, including LED and dimmable bulbs, you can create the perfect ambiance in any room.
Brass and Black Ceiling Fan: A Perfect Fit for Any Room
Living Room Elegance
The living room is often the centerpiece of a home, and a Brass and Black Ceiling Fan can serve as a stunning focal point. Its elegant design can tie together various elements of the room, such as brass light fixtures, black furniture, or other metallic accents. Additionally, the fan provides a comfortable breeze, making your living space more inviting for both family and guests.
Bedroom Comfort
In the bedroom, a brass and black ceiling fan can add a touch of luxury while ensuring a restful night’s sleep. Its quiet operation won’t disturb your slumber, and the gentle airflow can help maintain a comfortable temperature throughout the night. With the option to dim the integrated lights, you can create a relaxing environment that’s perfect for winding down after a long day.
Dining Room Sophistication
For the dining room, the Brass and Black Ceiling Fan offers a sophisticated touch that can elevate the overall dining experience. Whether you’re hosting a formal dinner or enjoying a casual meal, this fan’s stylish appearance and functional lighting will enhance the ambiance. The fan’s adjustable speed settings also ensure that you and your guests remain comfortable, regardless of the season.
Office Efficiency
If you have a home office, a brass and black ceiling fan can help create a productive and comfortable workspace. The fan’s sleek design complements modern office furniture, while its quiet operation allows you to focus on your tasks without distraction. Additionally, the integrated lighting can provide the perfect level of illumination for working, reading, or video conferencing.
Outdoor Spaces
Many homeowners are now choosing to extend their living spaces outdoors, and a Brass and Black Ceiling Fan can be a perfect addition to patios, verandas, or screened-in porches. Designed to withstand the elements, these fans can keep your outdoor area cool and comfortable while adding a touch of elegance to your exterior decor.
Choosing the Right Brass and Black Ceiling Fan
Consider the Size of Your Room
When selecting a brass and black ceiling fans, it’s essential to choose the right size to ensure optimal performance. The size of the fan should be proportionate to the size of the room; a fan that is too small won’t circulate air effectively, while one that is too large may overpower the space. Most manufacturers provide guidelines on the recommended room size for each fan model, helping you make the right choice.
Evaluate the Mounting Options
Ceiling fans come with various mounting options, including flush mounts, downrods, and angled mounts. The right mounting option for your Brass and Black Ceiling Fan depends on the height of your ceiling and the layout of the room. For rooms with low ceilings, a flush mount may be the best option, while a downrod is suitable for higher ceilings.
Check the Control Options
Modern brass and black ceiling fans offer several control options, including pull chains, wall controls, and remote controls. Consider which option best suits your lifestyle and room layout. For example, a remote control can provide convenient operation from anywhere in the room, while a wall control may be preferable for a more permanent solution.
Lighting Preferences
If you’re choosing a fan with integrated lighting, consider your lighting needs. Do you prefer a warm, soft glow or bright, task-oriented lighting? Many brass and black ceiling fans offer customizable lighting options, so you can select the perfect brightness and color temperature for your space.
Maintaining Your Brass and Black Ceiling Fan
Regular Cleaning
To keep your brass and black ceiling fans looking its best, regular cleaning is essential. Dust the blades and motor housing frequently to prevent the buildup of dirt and grime. Use a soft cloth or a microfiber duster to avoid scratching the finish. For the brass components, you may want to use a brass cleaner to maintain their shine.
Inspecting the Blades and Motor
Periodically inspect the fan blades and motor to ensure they are in good condition. Look for signs of wear or damage, and make sure the blades are balanced to prevent wobbling. If you notice any issues, address them promptly to avoid further damage and ensure the fan operates smoothly.
Lubrication and Maintenance
Some ceiling fans may require occasional lubrication to keep the motor running efficiently. Check the manufacturer’s guidelines for maintenance recommendations specific to your Brass and Black Ceiling Fan model. Proper care will extend the life of your fan and ensure it continues to perform well.
Conclusion
A Brass and Black Ceiling Fan is more than just a functional appliance; it’s a statement piece that can enhance the beauty and comfort of any room. With its timeless design, durability, and energy efficiency, this fan offers a perfect blend of style and practicality. Whether you’re updating your living room, bedroom, or outdoor space, the brass and black ceiling fan is a versatile option that will complement a variety of interior designs while providing the cooling power you need.
When it comes to creating a comfortable and aesthetically pleasing environment in commercial and residential spaces, ceiling tiles play a crucial role. Among the various options available on the market, the Armstrong 922A Ceiling Tile stands out as a popular choice for its excellent acoustic properties, durability, and attractive design. Whether you’re renovating an office space, a school, or a retail store, the Armstrong 922A ceiling tile offers a blend of functionality and visual appeal that can enhance any space. In this article, we’ll explore everything you need to know about the Armstrong 922A ceiling tile, including its features, benefits, and installation process.
What is the Armstrong 922A Ceiling Tile?
The Armstrong 922A Ceiling Tile is a high-quality acoustic ceiling tile designed to provide superior sound absorption, making it ideal for environments where noise control is essential. These tiles are part of Armstrong’s extensive range of ceiling solutions, known for their durability, ease of installation, and aesthetic versatility. The 922A model is particularly favored for its fine-textured surface, which contributes to a clean, modern look while enhancing the acoustics of the space.
Key Features of Armstrong 922A Ceiling Tile
Acoustic Performance: The Armstrong 922A ceiling tile is engineered to offer excellent sound absorption, with a Noise Reduction Coefficient (NRC) of up to 0.55. This makes it an ideal choice for offices, classrooms, and other spaces where reducing ambient noise is important.
Durability: Made from high-quality mineral fiber, the 922A tile is designed to withstand wear and tear over time, making it a long-lasting solution for commercial and residential installations.
Aesthetic Appeal: The fine-textured surface of the Armstrong 922A ceiling tile provides a smooth, elegant finish that can complement a wide range of interior designs. Its clean, white color ensures it blends seamlessly into any ceiling grid, enhancing the overall look of the space.
Ease of Installation: The tiles are lightweight and easy to handle, making the installation process straightforward. They fit into standard 15/16-inch ceiling grids, which are commonly used in most commercial and residential buildings.
Sustainability: Armstrong ceiling tiles are made with sustainability in mind. The 922A tiles contain a high percentage of recycled content, contributing to LEED credits for environmentally responsible building practices.
Choosing the Armstrong 922A ceiling tile comes with numerous benefits, making it a preferred option for many architects, builders, and facility managers. Here are some of the key advantages:
1. Superior Acoustic Control
One of the primary reasons for selecting the Armstrong 922A ceiling tile is its ability to control sound within a room. The tile’s acoustic properties help to absorb sound, reducing echo and minimizing noise levels. This makes it particularly beneficial in environments where clear communication is essential, such as offices, educational institutions, and healthcare facilities.
2. Enhanced Aesthetics
The Armstrong 922A ceiling tile offers a fine-textured, non-directional surface that provides a uniform and modern look. This design versatility allows it to be used in a variety of settings, from corporate offices to retail spaces. The clean, white finish of the tiles contributes to a bright and open atmosphere, which can enhance the perception of space and improve the overall ambiance of the room.
3. Durability and Low Maintenance
Durability is another significant advantage of the Armstrong 922A ceiling tile. Made from robust mineral fiber, these tiles are resistant to sagging and warping, even in high-humidity environments. Their durability reduces the need for frequent replacements, making them a cost-effective option in the long run. Additionally, the tiles are easy to clean, requiring only periodic dusting or vacuuming to maintain their appearance.
4. Sustainability and Environmental Responsibility
With growing concerns about environmental impact, the Armstrong 922A ceiling tile offers a sustainable choice for building projects. These tiles contain recycled materials and are fully recyclable at the end of their lifecycle, reducing their environmental footprint. Using Armstrong tiles can contribute to LEED certification, supporting green building initiatives and helping to achieve sustainability goals.
5. Ease of Installation and Replacement
The Armstrong 922A ceiling tile is designed for easy installation, fitting seamlessly into standard ceiling grids. This ease of installation not only saves time during the initial setup but also simplifies future maintenance tasks. If a tile becomes damaged or needs to be replaced, it can be easily removed and swapped out without disrupting the entire ceiling system.
Installation Guide for Armstrong 922A Ceiling Tile
Installing Armstrong 922A ceiling tiles is a relatively straightforward process that can be completed by professionals or experienced DIYers. Below is a step-by-step guide to help you through the installation process:
1. Preparation
Before starting the installation, ensure that you have all the necessary tools and materials, including the ceiling tiles, a ladder, a tape measure, a utility knife, and the ceiling grid system. Make sure the area is clean and free of debris, and that the ceiling grid is securely installed and level.
2. Measure and Cut the Tiles
Measure the dimensions of the ceiling grid and the room to determine the number of tiles needed. If necessary, cut the tiles to fit around edges, corners, or light fixtures. Use a utility knife to make precise cuts, ensuring that the tiles fit snugly within the grid.
3. Install the Tiles
Starting from one corner of the room, begin placing the Armstrong 922A ceiling tiles into the grid. Lift each tile into place and gently lower it into the grid framework. Make sure each tile is properly aligned and sits flush within the grid. Continue this process until all tiles are installed.
4. Finishing Touches
Once all the tiles are in place, step back and inspect the ceiling to ensure that all tiles are level and properly aligned. Make any necessary adjustments, and ensure that all tiles are securely fitted within the grid system.
5. Post-Installation Care
After installation, clean the tiles to remove any dust or debris that may have accumulated during the process. Regular maintenance includes dusting or vacuuming the tiles to keep them looking clean and fresh.
Applications and Use Cases for Armstrong 922A Ceiling Tile
The Armstrong 922A ceiling tile is a versatile solution suitable for a wide range of applications. Here are some common use cases where these tiles excel:
1. Commercial Offices
In office environments, controlling noise levels is crucial to maintaining productivity and a pleasant working atmosphere. The Armstrong 922A ceiling tile provides the acoustic control needed in open-plan offices, conference rooms, and private offices, while also contributing to a professional and polished appearance.
2. Educational Facilities
Classrooms, lecture halls, and libraries can benefit greatly from the sound-absorbing properties of the Armstrong 922A ceiling tiles. By reducing ambient noise, these tiles help create a more conducive learning environment, where students and teachers can focus on their tasks without distractions.
3. Healthcare Settings
Hospitals and clinics require environments that are both quiet and hygienic. The Armstrong 922A ceiling tile meets these needs by offering excellent sound absorption and easy-to-clean surfaces. This helps maintain a calm and sterile environment, essential for patient care and recovery.
4. Retail Spaces
In retail settings, the right ceiling solution can enhance the shopping experience by improving acoustics and contributing to the store’s overall aesthetic. The Armstrong 922A ceiling tiles provides a clean, bright appearance that can make retail spaces feel more welcoming and spacious, while also minimizing noise from bustling crowds.
5. Residential Areas
While primarily used in commercial settings, the Armstrong 922A ceiling tiles can also be an excellent choice for residential spaces, particularly in basements or home offices. These tiles offer the same benefits of noise reduction and aesthetic appeal, making them a great option for creating a comfortable and functional living space.
Conclusion
The Armstrong 922A ceiling tiles is a versatile, durable, and aesthetically pleasing option for both commercial and residential spaces. Its superior acoustic properties, ease of installation, and sustainability make it a top choice for anyone looking to improve the functionality and appearance of their ceiling. Whether you’re designing a new office, renovating a school, or updating a retail space, the Armstrong 922A ceiling tiles provides the performance and visual appeal needed to create a comfortable, efficient environment.
In the quest for energy efficiency and modern aesthetics, many homeowners and businesses are turning to LED lighting solutions. Among these, 2×4 LED lights for drop ceilings stand out as a popular choice due to their ability to deliver bright, even illumination while fitting seamlessly into existing ceiling grids. Whether you’re renovating a commercial office space, upgrading your home’s basement, or simply looking to reduce energy costs, 2×4 LED lights offer numerous benefits. This article explores everything you need to know about 2×4 LED lights for drop ceilings, from their advantages and installation process to selecting the right model for your needs.
What Are 2×4 LED Lights for Drop Ceilings?
2×4 LED lights are flat, rectangular light fixtures specifically designed to fit within the grid of a drop ceiling. They replace traditional fluorescent tube fixtures, offering improved energy efficiency, longer lifespan, and a sleek, modern appearance. These lights measure 2 feet by 4 feet, making them ideal for large areas that require ample illumination, such as offices, classrooms, retail spaces, and even residential basements.
Why Choose 2×4 LED Lights for Drop Ceilings?
Opting for 2×4 LED lights for your drop ceiling comes with several advantages, including:
Energy Efficiency: LED lights consume significantly less power compared to traditional fluorescent or incandescent lighting, helping you save on energy bills.
Longer Lifespan: LEDs have a longer operational life, often lasting up to 50,000 hours or more, reducing the frequency of replacements.
Improved Light Quality: LEDs provide bright, consistent light with better color rendering, which enhances the visual appeal and functionality of any space.
Environmental Benefits: LED lights are eco-friendly, containing no harmful substances like mercury, and they generate less heat, contributing to a lower carbon footprint.
Modern Aesthetics: With their sleek design and variety of color temperatures, 2×4 LED lights can enhance the overall look and feel of any room.
Installing 2×4 LED Lights for Drop Ceilings: A Step-by-Step Guide
Installing 2×4 LED lights in a drop ceiling is a straightforward process, but it’s essential to follow the correct steps to ensure proper installation and optimal performance. Here’s a step-by-step guide:
1. Preparation and Safety Measures
Before starting the installation, gather all necessary tools and materials, including a ladder, screwdriver, wire cutters, and wire connectors. Ensure that the power to the area where you’ll be working is turned off to prevent any electrical hazards.
2. Remove the Existing Fixture
If you’re replacing old fluorescent lights, carefully remove the existing fixtures from the ceiling grid. Disconnect the wiring, and safely dispose of or recycle the old lights according to local regulations.
3. Prepare the Wiring
Inspect the wiring in the ceiling to ensure it is in good condition and compatible with your new LED lights. Most 2×4 LED lights are designed to work with standard 120V or 277V wiring. If you’re not confident in handling electrical work, it’s best to hire a licensed electrician for this step.
4. Install the LED Light Fixture
Place the new 2×4 LED light fixture into the ceiling grid, ensuring it fits securely. Most fixtures are lightweight and easy to handle. Once in place, connect the wiring according to the manufacturer’s instructions. Typically, this involves connecting the black wire to the hot wire, the white wire to the neutral wire, and the green or bare wire to the ground.
5. Secure and Test the Installation
After the wiring is connected, secure the fixture in place with screws or clips as needed. Once the fixture is securely installed, restore power to the area and test the light to ensure it’s working correctly. If the light doesn’t turn on, double-check the wiring connections.
6. Final Adjustments
Finally, adjust the light fixture as necessary to ensure it’s level and evenly positioned within the ceiling grid. If the fixture includes a diffuser or lens, attach it according to the manufacturer’s instructions to complete the installation.
Selecting the Right 2×4 LED Lights for Drop Ceilings
When choosing 2×4 LED lights for your drop ceiling, several factors should be considered to ensure you select the right fixtures for your needs. Here are some key aspects to keep in mind:
1. Brightness and Lumens
The brightness of an LED light is measured in lumens, with higher lumen ratings indicating brighter light output. Consider the size and purpose of the room when selecting the brightness level. For example, a large office or classroom might require lights with 4,000 to 5,000 lumens, while a smaller room could suffice with lower lumen output.
2. Color Temperature
LED lights are available in various color temperatures, typically ranging from warm white (around 3000K) to cool white (up to 5000K or higher). Warm white lights create a cozy atmosphere, making them ideal for residential spaces, while cool white lights are more suitable for work environments where bright, focused light is needed.
3. Dimmability
If you want the flexibility to adjust the brightness of your lighting, choose dimmable 2×4 LED lights. These fixtures can be paired with compatible dimmer switches to create a customizable lighting environment that suits different activities and times of day.
4. Energy Efficiency and Certifications
Look for energy-efficient LED lights with certifications such as ENERGY STAR, which indicate that the product meets strict energy efficiency guidelines. These lights not only reduce energy consumption but also often come with longer warranties, providing better value over time.
5. Design and Aesthetics
Consider the design of the LED fixture, especially if aesthetics are important for your space. Some 2×4 LED lights come with sleek, modern designs, including edge-lit or back-lit panels that provide a more even light distribution. Additionally, consider the type of diffuser or lens used, as this can impact the appearance of the light.
6. Price and Warranty
While price is always a factor, it’s essential to balance cost with quality. Investing in higher-quality LED lights might have a higher upfront cost, but they often offer better performance, durability, and longer warranties, making them a more economical choice in the long run.
Benefits of Upgrading to 2×4 LED Lights for Drop Ceilings
Switching to 2×4 LED lights offers numerous benefits beyond just energy savings. Here’s why upgrading to LED lighting can be a smart move:
1. Reduced Maintenance Costs
LED lights require less maintenance than traditional lighting solutions. Their longer lifespan means fewer replacements, and they’re less prone to issues like flickering or buzzing, which are common with older fluorescent lights.
2. Enhanced Lighting Quality
LED lights provide consistent, high-quality light that can improve visibility and comfort in any space. This is particularly important in work environments where proper lighting can enhance productivity and reduce eye strain.
3. Environmental Impact
LED lights are more environmentally friendly, using less energy and producing less heat. They also contain no hazardous materials, like mercury, found in fluorescent lights, making them safer and easier to dispose of.
4. Increased Property Value
Upgrading to LED lighting can increase the value of your property by modernizing its appearance and improving energy efficiency. This can be an attractive feature for potential buyers or tenants, especially in commercial spaces.
5. Versatility in Applications
2×4 LED lights are versatile and can be used in various settings, from commercial offices and retail spaces to residential basements and garages. Their ability to fit seamlessly into drop ceilings makes them a practical choice for many different applications.
Common Myths About 2×4 LED Lights for Drop Ceilings
Despite their many benefits, there are still some misconceptions about LED lighting that may cause hesitation when considering an upgrade. Let’s debunk some common myths:
1. Myth: LED Lights Are Too Expensive
While the initial cost of LED lights can be higher than traditional lighting, the long-term savings on energy bills and reduced maintenance costs make them more cost-effective over time. Additionally, prices for LED technology have decreased significantly in recent years, making them more accessible.
2. Myth: LEDs Don’t Provide Enough Light
LED lights are available in a wide range of brightness levels, and many models provide as much or even more light than traditional fixtures. By selecting the right lumen output, you can achieve the desired level of brightness for any space.
3. Myth: LED Lights Have Poor Color Quality
Modern LED lights offer excellent color rendering, with many options for color temperature. Whether you prefer warm, soft lighting or bright, cool lighting, LEDs can deliver high-quality light that meets your needs.
4. Myth: LEDs Are Difficult to Install
Installing 2×4 LED lights in a drop ceiling is generally straightforward, especially when replacing existing fixtures. Many LED panels are designed to fit directly into standard ceiling grids, and their lightweight construction makes installation easier.
Conclusion
2×4 LED lights for drop ceilings are an excellent choice for anyone looking to enhance their space with energy-efficient, long-lasting, and aesthetically pleasing lighting. Whether you’re updating an office, classroom, or residential area, these LED fixtures offer numerous benefits, from reduced energy consumption to improved light quality. By understanding the installation process, selecting the right fixtures, and debunking common myths, you can make an informed decision that will brighten your space for years to come.
Water damaged ceiling tiles are a common issue in both residential and commercial properties. Whether caused by a leaky roof, plumbing issues, or condensation, water damage not only affects the aesthetic appeal of your ceilings but can also indicate more severe underlying problems. In this comprehensive guide, we’ll explore the causes of water damage in ceiling tiles, how to address and repair the issue, and essential tips for preventing future damage.
Understanding the Causes of Water Damaged Ceiling Tiles
Before diving into solutions and prevention strategies, it’s crucial to understand the common causes of water damaged ceiling tiles. Identifying the root cause is the first step in effectively addressing and preventing further damage.
1. Roof Leaks
One of the most common causes of water damaged ceiling tiles is a leaking roof. Whether due to aging materials, storm damage, or poor installation, a compromised roof can allow water to seep into your home or office. Over time, this water accumulates in the ceiling, eventually leading to noticeable damage in the form of stains, discoloration, and sagging tiles.
2. Plumbing Leaks
Plumbing issues, such as leaking pipes or faulty plumbing fixtures, can also lead to water damaged ceiling tiles. Water from leaking pipes often finds its way into ceilings, especially if the pipes are located directly above them. This can result in localized damage, typically appearing as brown or yellow stains on the ceiling tiles.
3. Condensation
In some cases, condensation from HVAC systems or high humidity levels can cause water damage. When warm, moist air comes into contact with cold surfaces, condensation forms and can eventually lead to water accumulation. This is especially common in areas with poor ventilation, where moisture cannot escape, leading to the deterioration of ceiling tiles over time.
4. Poor Insulation
Insufficient insulation can also contribute to water damage in ceiling tiles. Poor insulation allows warm air to escape, causing condensation on the underside of the roof or in the attic. This moisture can then drip onto ceiling tiles, leading to gradual water damage.
Over time, roofing materials can degrade, especially in areas with harsh weather conditions. Shingles can crack, and waterproof membranes can lose their effectiveness, allowing water to penetrate into the structure of the building. As the water seeps through, it can accumulate and cause damage to the ceiling tiles below.
Signs of Water Damaged Ceiling Tiles
Recognizing the signs of water damaged ceiling tiles early on can prevent more extensive damage and costly repairs. Here are some common indicators that your ceiling tiles have been compromised by water:
1. Discoloration
One of the first signs of water damage is discoloration. Affected ceiling tiles often develop brown, yellow, or dark stains, typically in irregular shapes. These stains are caused by water soaking into the material and can be a clear indication of a leak above the ceiling.
2. Sagging or Warping
When ceiling tiles absorb water, they can become heavy and start to sag or warp. This is particularly noticeable in drop ceilings, where the tiles are not securely fixed in place. Sagging tiles are not only unsightly but can also pose a safety risk if they fall out of the ceiling grid.
3. Peeling Paint or Wallpaper
In some cases, water damage can cause paint or wallpaper on the ceiling to peel or bubble. This is often a sign that water has been seeping into the ceiling for some time, causing the adhesive holding the paint or wallpaper to fail.
4. Mold and Mildew Growth
Mold and mildew thrive in damp environments, making water damaged ceiling tiles a prime breeding ground. If you notice black, green, or white spots on your ceiling tiles, it could be a sign of mold growth. Mold not only damages the tiles further but also poses health risks, particularly for those with respiratory conditions or allergies.
5. Musty Odors
A musty smell in the room can also indicate water damage. This odor is often caused by mold or mildew growing in the damp environment created by water damage. If you detect a persistent musty smell, it’s essential to investigate the cause and address any underlying water damage.
How to Address Water Damaged Ceiling Tiles
Once you’ve identified water damaged ceiling tiles, it’s important to address the issue promptly to prevent further damage. Here’s a step-by-step guide to repairing or replacing your water damaged ceiling tiles:
1. Identify and Fix the Source of the Water
Before you begin repairing the ceiling tiles, it’s crucial to identify and fix the source of the water. Whether it’s a leaky roof, plumbing issue, or condensation problem, addressing the root cause will prevent future damage. If you’re unsure where the water is coming from, consider hiring a professional to conduct a thorough inspection.
2. Assess the Extent of the Damage
Next, assess the extent of the damage to determine whether the tiles can be repaired or if they need to be replaced. If the damage is minor, such as small stains or slight discoloration, cleaning and repainting the tiles may be sufficient. However, if the tiles are sagging, warped, or moldy, it’s best to replace them entirely.
3. Remove Damaged Tiles
If replacement is necessary, carefully remove the damaged tiles. For drop ceilings, this involves lifting the tiles out of the grid. For fixed ceilings, you may need to cut out the damaged section using a utility knife or drywall saw. Be sure to wear protective gear, such as gloves and a mask, to avoid contact with mold or other contaminants.
4. Clean and Disinfect the Area
After removing the damaged tiles, clean and disinfect the area to remove any mold, mildew, or bacteria. Use a mixture of water and bleach or a commercial mold remover to thoroughly clean the affected area. Allow the area to dry completely before proceeding with repairs.
5. Install New Ceiling Tiles
Once the area is clean and dry, install new ceiling tiles. For drop ceilings, simply place the new tiles into the grid. For fixed ceilings, you may need to cut the new tiles to size and secure them in place with adhesive or screws. Be sure to match the new tiles as closely as possible to the existing ones to maintain a uniform appearance.
6. Paint or Finish the Ceiling
If the new tiles do not match the existing ceiling color, consider painting the entire ceiling for a consistent look. Use a stain-blocking primer to cover any remaining stains before applying the paint. This will ensure that the water stains do not bleed through the new paint.
Preventing Future Water Damage in Ceiling Tiles
Preventing water damage to your ceiling tiles is essential for maintaining the integrity and appearance of your home or office. Here are some tips to help you avoid future issues:
1. Regular Roof Inspections
Regular roof inspections are key to preventing water damage. Inspect your roof at least twice a year, or after major storms, to check for signs of damage, such as missing shingles, cracks, or loose flashing. Address any issues promptly to prevent water from seeping into your ceiling.
2. Maintain Plumbing Systems
Proper maintenance of your plumbing systems can also help prevent water damage. Check for leaks in pipes, faucets, and fixtures regularly, and repair any issues immediately. If you have plumbing running through your ceiling, consider insulating the pipes to prevent condensation.
3. Improve Ventilation
Improving ventilation in your home or office can help reduce the risk of condensation-related water damage. Ensure that bathrooms, kitchens, and attics are well-ventilated to allow moisture to escape. Installing exhaust fans or dehumidifiers in high-humidity areas can also help reduce condensation.
4. Upgrade Insulation
Upgrading your insulation can prevent condensation and water damage. Proper insulation helps regulate temperature and reduces the likelihood of moisture buildup. Consider adding insulation to your attic, walls, and ceilings to protect against water damage.
5. Monitor Humidity Levels
High humidity levels can contribute to condensation and water damage. Monitor the humidity levels in your home or office, and use a dehumidifier if necessary to keep levels within a safe range. Aim for a relative humidity level between 30% and 50% to prevent moisture-related issues.
6. Address Water Damage Promptly
If you notice any signs of water damage, such as discoloration or musty odors, address the issue promptly. Delaying repairs can lead to more extensive damage, including mold growth and structural issues. Take immediate action to fix the source of the water and repair or replace damaged ceiling tiles.
When to Call a Professional for Water Damaged Ceiling Tiles
While minor water damage can often be addressed with DIY repairs, more severe cases may require professional intervention. Here are some scenarios where you should consider calling a professional:
1. Extensive Water Damage
If the water damage is extensive, affecting multiple tiles or large areas of the ceiling, it’s best to call a professional. They can assess the damage, identify the source, and recommend the most effective repair solutions.
2. Mold Growth
Mold growth is a serious issue that requires professional remediation. If you notice mold on your ceiling tiles, contact a mold remediation specialist to safely remove the mold and prevent it from spreading.
3. Structural Damage
If the water damage has compromised the structural integrity of your ceiling, such as causing sagging or weakening the support beams, a professional contractor should be called. They can repair the structural damage and ensure the ceiling is safe and secure.
4. Reoccurring Issues
If you’ve addressed water damage before but the issue keeps reoccurring, it’s time to bring in a professional. They can conduct a thorough inspection to identify the underlying cause and provide long-term solutions to prevent future damage.
Conclusion
Water damaged ceiling tiles are not only an eyesore but can also be indicative of more significant problems within your home or office. By understanding the causes of water damage, recognizing the signs early, and taking prompt action, you can effectively address and prevent further damage. Regular maintenance, proper ventilation, and timely repairs are essential in keeping your ceiling tiles in good condition and your property safe from water-related issues.
A Vaulted Ceiling with Faux Beams is one of the most impactful ways to elevate the aesthetic of your home. By combining the spacious feel of a vaulted ceiling with the rustic charm of faux beams, you can create a visually stunning space that exudes warmth and character. This combination not only adds architectural interest but also offers a range of design possibilities that can transform an ordinary room into an extraordinary one. In this article, we’ll explore everything you need to know about incorporating faux beams into your vaulted ceiling, including the benefits, design tips, installation process, and cost considerations.
What Is a Vaulted Ceiling?
Before diving into the specifics of adding faux beams, it’s important to understand what a vaulted ceiling is. A vaulted ceiling is a type of ceiling that extends upwards, following the roofline of a structure to create a higher, more open space. Unlike flat ceilings, vaulted ceilings are angled or arched, making a room feel larger and more expansive. These ceilings are often seen in living rooms, great rooms, and even master bedrooms, where they can dramatically change the look and feel of the space.
Vaulted ceilings come in various styles, each with its own unique appeal:
Cathedral Ceilings: These follow the roof’s pitch and typically form a symmetrical peak in the center of the room, mimicking the architecture of cathedrals.
Shed Ceilings: These have a single slope and are often used in modern or contemporary designs.
Barrel Vault Ceilings: These feature a continuous arch, resembling a barrel cut in half, adding a classical element to any space.
Each of these styles can be enhanced with faux beams to create a more dramatic and stylish effect.
What Are Faux Beams?
Faux beams are decorative elements that mimic the look of real wooden beams but are made from lightweight materials such as polyurethane, PVC, or medium-density fiberboard (MDF). Unlike real wood beams, faux beams are much easier to install and maintain, making them a popular choice for homeowners looking to add rustic charm without the hassle and cost of real wood.
Benefits of Faux Beams
There are several advantages to choosing faux beams over real wood beams:
Cost-Effective: Faux beams are significantly cheaper than real wood, making them an affordable option for most homeowners.
Lightweight: Due to their lightweight nature, faux beams are easier to install and do not require structural reinforcement, unlike real wood beams.
Durability: Faux beams are resistant to moisture, pests, and warping, making them a long-lasting option that requires minimal maintenance.
Versatility: Available in a wide range of styles, finishes, and sizes, faux beams can be customized to suit any design aesthetic, from rustic to modern.
Eco-Friendly: Because they do not require the use of natural wood, faux beams are a more sustainable choice, helping to reduce deforestation.
The Allure of a Vaulted Ceiling with Faux Beams
When combined, a Vaulted Ceiling with Faux Beams creates a space that is both grand and inviting. The height and openness of the vaulted ceiling draw the eye upwards, while the faux beams add texture and depth, anchoring the design and providing a sense of warmth. Whether you’re aiming for a rustic farmhouse look or a more contemporary style, faux beams can be tailored to complement the overall aesthetic of your space.
Design Possibilities
The design possibilities with faux beams are nearly endless. Here are a few ideas to consider:
Rustic Charm: Use dark, distressed faux beams to create a rustic, cabin-like atmosphere. Pair these beams with natural materials like stone or brick for a cohesive look.
Modern Elegance: For a more modern take, choose sleek, smooth faux beams in a light color, such as white or grey. These beams can be paired with a minimalist décor to create a clean, sophisticated space.
Farmhouse Style: Achieve a classic farmhouse look by combining medium-toned wood-like faux beams with shiplap walls and vintage-inspired fixtures.
Coastal Vibes: Light-colored faux beams, such as those with a whitewashed or driftwood finish, can enhance a coastal-themed room, especially when paired with light, airy fabrics and coastal accessories.
Enhancing Your Space with Lighting
Incorporating lighting into your faux beams can further elevate the design. Recessed lighting, pendant lights, or even chandeliers can be installed between or within the beams to highlight the architectural features and create a warm, inviting ambiance. This is especially effective in large rooms where additional lighting is needed to brighten the space.
How to Install Faux Beams on a Vaulted Ceiling
Installing faux beams on a vaulted ceiling may seem daunting, but with the right tools and preparation, it can be a manageable DIY project. Here’s a step-by-step guide:
1. Planning and Measuring
Begin by measuring the dimensions of your ceiling and planning the placement of the beams. Decide on the number of beams you want and the spacing between them. It’s crucial to measure accurately to ensure a balanced and symmetrical installation.
2. Choosing the Beams
Select faux beams that complement your design vision. Consider the style, finish, and size of the beams. Most manufacturers offer beams that can be cut to size, so be sure to choose a beam length that fits your ceiling dimensions.
3. Preparing the Ceiling
Before installing the beams, ensure that the ceiling is clean and free of any debris. If your ceiling has existing fixtures or vents, plan around them or consider relocating them to avoid interference.
4. Mounting the Beams
Use a stud finder to locate the ceiling joists, as these will provide the necessary support for the beams. Mark the joist locations and pre-drill holes into the faux beams for mounting. Depending on the weight of the beams, you may need additional support, such as cleats or brackets, which can be installed on the joists.
5. Securing the Beams
Lift the beams into place and secure them to the joists using screws or nails. Be sure to check that each beam is level before securing it fully. If you’re installing multiple beams, ensure that they are evenly spaced for a uniform look.
6. Finishing Touches
After the beams are installed, caulk any gaps between the beams and the ceiling to create a seamless appearance. Touch up any areas with paint or stain as needed. If you’ve chosen to add lighting, install the fixtures at this stage and connect them to your electrical system.
Cost Considerations
The cost of installing a Vaulted Ceiling with Faux Beams can vary depending on several factors, including the size of the room, the type of faux beams used, and whether you hire a professional installer or tackle the project yourself.
1. Material Costs
Faux beams can range in price from $5 to $20 per linear foot, depending on the quality, size, and finish. For a medium-sized room with several beams, the material costs can add up, but they will still be more affordable than real wood beams.
2. Installation Costs
If you choose to hire a professional, installation costs can vary widely based on your location and the complexity of the project. On average, professional installation can range from $500 to $2,000 or more. However, by opting for a DIY installation, you can save on labor costs.
3. Additional Costs
Other costs to consider include any additional materials needed for the installation, such as brackets, screws, and caulk, as well as any lighting fixtures you plan to incorporate into the design.
Conclusion: Is a Vaulted Ceiling with Faux Beams Right for You?
A Vaulted Ceiling with Faux Beams can dramatically transform the look and feel of your home. Whether you’re aiming for a cozy rustic retreat or a sleek modern sanctuary, the addition of faux beams can elevate your space and add architectural interest. With a range of styles, finishes, and sizes available, faux beams offer a versatile and cost-effective way to achieve the look of real wood beams without the associated challenges.
By considering the factors outlined in this guide, including the benefits, design possibilities, installation process, and costs, you can make an informed decision that enhances the beauty and functionality of your home. Whether you choose to hire a professional or take on the project yourself, the result will be a stunning space that reflects your personal style and meets your design goals.
Retractable ceiling beds are an innovative solution for maximizing space in modern homes. With the ability to lower from the ceiling and retract back up when not in use, these beds offer a practical and stylish way to make the most of limited living areas. However, one of the most common questions potential buyers have is about the Retractable Ceiling Bed Price. In this comprehensive guide, we will delve into the factors that influence the cost of retractable ceiling beds, discuss the benefits of investing in one, and provide insights on how to choose the best option for your needs.
What is a Retractable Ceiling Bed?
Before exploring the pricing details, it’s essential to understand what a retractable ceiling bed is. Essentially, this is a bed that is mounted on a ceiling track system, allowing it to be lowered or raised with ease. When lowered, it functions like a regular bed, but when not in use, it can be retracted to free up floor space. This feature is particularly beneficial in small apartments, studio spaces, or multi-functional rooms where maximizing space is a priority.
Types of Retractable Ceiling Beds
There are several types of retractable ceiling beds, each with its own pricing structure:
Manual Retractable Ceiling Beds: These are operated by hand, using a crank or pulley system to raise and lower the bed. They tend to be more affordable but require physical effort.
Motorized Retractable Ceiling Beds: These beds come with an electric motor that allows for easy raising and lowering with the push of a button. They are more expensive due to the added convenience and technology.
Custom Retractable Ceiling Beds: For those looking for a specific design or size, custom beds can be made to order. These are usually the most expensive option, as they are tailored to individual preferences and room specifications.
When considering the Retractable Ceiling Bed Price, several factors come into play. Understanding these elements can help you make an informed decision that aligns with your budget and needs.
1. Size of the Bed
The size of the bed is one of the most significant factors affecting the price. Twin or single-sized beds are typically less expensive, while queen or king-sized beds will cost more due to the additional materials and engineering required to support the larger structure.
2. Material and Build Quality
The materials used in constructing the bed and its frame can significantly influence the price. High-quality materials like solid wood, stainless steel, and reinforced aluminum tend to increase the cost but offer better durability and longevity. Beds made from cheaper materials like particleboard or lightweight metals may be more affordable but could lack the durability of higher-end options.
3. Motorization and Technology
As mentioned earlier, motorized retractable ceiling beds come at a higher price due to the inclusion of an electric motor and remote control system. Additionally, some advanced models may include features like programmable height settings, integrated lighting, and safety sensors, all of which can drive up the price.
4. Installation Costs
Installation is another critical factor to consider. While some retractable ceiling beds are designed for DIY installation, others may require professional assistance, especially if they involve complex ceiling mounts or electrical components. The cost of professional installation can vary based on the complexity of the setup and the rates in your area.
5. Brand and Manufacturer
The brand and reputation of the manufacturer can also affect the Retractable Ceiling Bed Price. Well-known brands with a history of quality and reliability may charge a premium, while lesser-known or generic brands might offer more budget-friendly options.
6. Additional Features
Retractable ceiling beds can come with a range of additional features that impact the overall price. These can include built-in storage compartments, custom finishes, integrated lighting, or even smart home compatibility. Each added feature increases the price but also enhances the functionality and aesthetic appeal of the bed.
Average Cost of Retractable Ceiling Beds
Given the various factors that influence the Retractable Ceiling Bed Price, the cost can vary widely. However, here’s a general breakdown of what you might expect:
Custom Retractable Ceiling Beds: $10,000 and up, depending on the design and features
These prices are approximate and can vary based on the specific product, brand, and installation requirements.
Benefits of Investing in a Retractable Ceiling Bed
While the cost of a retractable ceiling bed can be significant, the benefits often justify the investment, particularly for those with limited space or a desire for a multi-functional living area.
1. Space-Saving Solution
The most obvious benefit of a retractable ceiling bed is the ability to save space. By retracting the bed when it’s not in use, you can free up valuable floor space for other activities. This is especially useful in small apartments, studio lofts, or homes where every square foot counts.
2. Multi-Functional Living Spaces
Retractable ceiling beds allow you to transform a single room into a multi-functional space. For example, a home office can double as a guest room, or a living room can convert into a bedroom at night. This flexibility enhances the usability of your home without requiring additional square footage.
3. Aesthetic Appeal
Modern retractable ceiling beds are designed with aesthetics in mind. They often feature sleek, minimalist designs that blend seamlessly with contemporary interiors. When retracted, they can leave the room looking clean and uncluttered, contributing to a more open and airy feel.
4. Convenience and Ease of Use
Motorized retractable ceiling beds offer unparalleled convenience. With just the push of a button, you can lower or raise the bed, making it easy to transition between day and night modes. This is particularly beneficial for those with physical limitations or for anyone who appreciates the ease of automation in their home.
5. Long-Term Value
Although the initial cost of a retractable ceiling bed can be high, it’s important to consider the long-term value. These beds are typically built to last, with durable materials and quality craftsmanship that ensure years of use. Additionally, the space-saving benefits can enhance the overall value of your home, making it a worthwhile investment.
Things to Consider Before Buying a Retractable Ceiling Bed
Before committing to a retractable ceiling bed, there are several important considerations to keep in mind:
1. Room Measurements
Accurate measurements of your room are crucial to ensuring that the bed will fit properly when both lowered and retracted. Consider the ceiling height, the width of the room, and any potential obstructions, such as ceiling fans or light fixtures.
2. Weight Capacity
Check the weight capacity of the bed and its ceiling mount to ensure it can safely support the intended users. This is especially important for larger beds, such as queen or king sizes, and for those who plan to use the bed regularly.
3. Installation Requirements
Determine whether the bed requires professional installation or if it’s something you can handle on your own. Complex setups may involve electrical work or the reinforcement of ceiling structures, which can add to the overall cost.
4. Aesthetic Considerations
Consider how the bed will look in your space when both retracted and lowered. Some beds are designed to blend in with the ceiling when retracted, while others may be more visible. Choose a style and finish that complements your existing decor.
5. Budget
Finally, establish a budget that takes into account the cost of the bed, installation, and any additional features you may want. Remember that while it’s tempting to go for the cheapest option, investing in a quality product can save you money and hassle in the long run.
Conclusion: Is a Retractable Ceiling Bed Worth the Investment?
Investing in a retractable ceiling bed is a decision that comes down to your specific needs, space constraints, and budget. While the Retractable Ceiling Bed Price can be high, the benefits of space-saving, convenience, and aesthetic appeal often outweigh the initial cost. By carefully considering the factors outlined in this guide, you can make an informed decision that enhances your living space and meets your lifestyle requirements.
Whether you opt for a manual, motorized, or custom retractable ceiling bed, the key is to choose a solution that fits your space and budget while delivering the functionality and style you desire. With the right retractable ceiling bed, you can transform your home into a versatile and elegant living space that maximizes both form and function.
Pendant lighting is a popular choice for homeowners looking to add a touch of elegance and functionality to their living spaces. When it comes to homes with high ceilings, pendant lighting not only enhances the visual appeal but also provides practical illumination that bridges the gap between floor and ceiling. In this article, we will explore the various aspects of Pendant Lighting For High Ceilings, offering insights on how to select, install, and optimize this lighting style to elevate your home’s aesthetic.
The Importance of Pendant Lighting For High Ceilings
Homes with high ceilings present a unique opportunity to make a bold design statement. However, they also come with certain challenges, particularly in lighting. Standard light fixtures might not suffice, leaving parts of the room in shadows or failing to create the desired ambiance. This is where Pendant Lighting For High Ceilings comes into play.
1. Enhancing Room Proportions
One of the main advantages of pendant lighting in high-ceilinged rooms is its ability to enhance the proportions of the space. High ceilings can sometimes make a room feel cold or cavernous. Pendant lights, especially those with adjustable cords or chains, allow you to bring the light source closer to eye level, creating a more intimate and balanced environment. The vertical space is utilized effectively, drawing the eye upward and accentuating the room’s height.
Pendant lighting is available in a wide range of styles, materials, and finishes, making it a versatile choice for any interior design. Whether your home is modern, rustic, industrial, or traditional, there is a pendant light design that can complement your decor. For high ceilings, larger or multi-light pendants can create a focal point, while clusters of smaller pendants can be arranged to cover a larger area, adding both style and substance to the room.
3. Focused Lighting
Unlike other types of lighting, pendant lights provide focused illumination, making them ideal for specific areas within a room. For example, in a kitchen with high ceilings, pendant lights can be hung over an island or dining area to provide direct light for cooking or eating. In living rooms, they can highlight a seating area or art piece, creating zones of activity or relaxation.
4. Energy Efficiency
Modern pendant lights often come equipped with energy-efficient LED bulbs, which not only save on electricity bills but also have a longer lifespan compared to traditional bulbs. This is particularly beneficial for high ceilings, where changing a bulb can be a challenging task. LED pendants offer bright, consistent lighting without the frequent need for replacement.
Selecting the Right Pendant Lighting For High Ceilings
Choosing the right pendant lighting for high ceilings involves considering several factors, including the height of the ceiling, the size of the room, and the overall design aesthetic. Here are some tips to help you make the best choice.
1. Ceiling Height and Pendant Length
The height of your ceiling will significantly influence the type of pendant light you choose. For very high ceilings, you’ll want a pendant light with an adjustable cord or chain that can be customized to hang at the desired height. The general rule of thumb is to hang the pendant so that the bottom of the light is about 7 feet (84 inches) above the floor, but this can vary depending on the room’s purpose and the furniture layout.
For example, in a dining room with a high ceiling, the pendant should be hung 30-36 inches above the table surface. This ensures sufficient lighting for dining while maintaining an unobstructed view across the table. In other areas like a foyer or living room, you may want the pendant to hang lower or higher depending on the space’s function.
2. Size and Scale
The size of the pendant light should be proportional to the room and the area it will illuminate. A large, open space with high ceilings can accommodate a larger pendant or multiple pendants, while smaller rooms might benefit from a single, moderately sized fixture.
When choosing the size, consider the diameter and height of the fixture. For instance, in a grand foyer with a high ceiling, a large, dramatic pendant can serve as a stunning centerpiece. On the other hand, in a kitchen with high ceilings, a series of smaller pendants spaced evenly across the island may be more appropriate.
3. Design and Material
Pendant lights come in various materials, including glass, metal, wood, and fabric, each bringing a different feel to the space. Glass pendants offer a sleek, modern look and can be clear, frosted, or colored. Metal pendants are often used in industrial or contemporary designs, while wood or fabric pendants lend warmth and texture to a room.
Consider the existing decor and color scheme when selecting a pendant light. A metal pendant with a matte finish might suit a modern, minimalist space, while a wood pendant with a warm hue could enhance a rustic or bohemian interior.
4. Light Output and Bulb Type
The type of bulb and its brightness are critical factors in the effectiveness of pendant lighting. LED bulbs are recommended for their energy efficiency and long life. Ensure that the light output (measured in lumens) is sufficient for the room’s size and purpose.
For ambient lighting in a large room, you may need pendants with higher lumen outputs or multiple fixtures. In contrast, for task lighting over a kitchen island or desk, focused light with a lower lumen output might be sufficient.
Installing Pendant Lighting For High Ceilings
Installation is a critical step in achieving the perfect lighting setup for high ceilings. While some homeowners may choose to hire a professional, others might opt for a DIY approach. Here’s a general guide to installing pendant lighting for high ceilings.
1. Planning the Layout
Before installing pendant lights, plan the layout carefully. Determine where the lights will hang, considering the room’s focal points and the areas that require the most illumination. Use a measuring tape to ensure even spacing between multiple pendants and check the height at which each pendant will hang.
2. Wiring and Safety Considerations
Safety is paramount when working with electrical fixtures. Turn off the power at the circuit breaker before beginning any installation work. Ensure that the wiring is compatible with the new fixture and that the ceiling can support the weight of the pendant. If the pendant is particularly heavy or large, you may need to install additional support, such as a brace or a junction box.
3. Adjusting the Pendant Height
For high ceilings, adjusting the pendant height is crucial to achieving the desired look and functionality. Most pendant lights come with adjustable cords or chains that can be shortened or lengthened as needed. Test the height before finalizing the installation by temporarily hanging the pendant and observing how it looks from different angles.
4. Mounting the Fixture
Once you’ve determined the height, mount the fixture to the ceiling. Attach the pendant light’s canopy to the junction box using screws, ensuring that it is secure. Connect the wires according to the manufacturer’s instructions, typically matching the black (live), white (neutral), and green or copper (ground) wires. Once connected, carefully tuck the wires into the junction box and secure the canopy.
5. Testing the Lighting
After installation, turn the power back on and test the pendant light. Check that the light is functioning correctly and that the height and alignment are as planned. If the fixture wobbles or appears uneven, adjust the mounting hardware or the cord length as necessary.
Optimizing Pendant Lighting For High Ceilings
Once installed, there are several ways to optimize pendant lighting to enhance your space further.
1. Layering Light Sources
For a well-lit room with high ceilings, consider layering your lighting sources. Combine pendant lighting with other fixtures, such as recessed lights, wall sconces, or floor lamps, to create a balanced and dynamic lighting scheme. This approach ensures that the room is well-lit from multiple angles, reducing shadows and highlighting architectural features.
2. Using Dimmers
Installing dimmers for your pendant lights allows you to adjust the brightness according to your needs and mood. Dimmers are especially useful in living rooms, dining rooms, and bedrooms, where you might want to change the light intensity throughout the day. A dimmer can also extend the life of your bulbs by reducing the overall energy consumption.
3. Highlighting Architectural Features
Pendant lighting can be used strategically to highlight architectural features in a room with high ceilings. For example, hanging pendants at varying heights can draw attention to a vaulted ceiling or a tall fireplace. In a hallway or foyer, pendants can emphasize the length of the space, creating a dramatic entryway.
4. Color and Temperature Control
Some modern pendant lights come with options for color temperature control, allowing you to switch between warm and cool lighting. This feature can be particularly useful in multifunctional spaces, where you might prefer warmer tones for relaxation and cooler tones for tasks or activities.
Conclusion
Pendant Lighting For High Ceilings offers a perfect blend of style and functionality, making it an excellent choice for modern homes. By carefully selecting and installing pendant lights, you can transform a high-ceilinged room into a well-lit, aesthetically pleasing space. Whether you’re looking to make a bold statement with a large, dramatic fixture or create a cozy atmosphere with a cluster of smaller pendants, the possibilities are endless. Remember to consider factors such as ceiling height, pendant size, and lighting needs when making your selection, and don’t be afraid to experiment with different layouts and designs to find what works best for your space.