Understanding the Cost to Insulate a Ceiling for Your Home Comfort: Unveiling the Numbers

If you’re considering enhancing the energy efficiency and comfort of your home, understanding the “Cost To Insulate A Ceiling” is a crucial step. Learn about the factors influencing expenses and make informed decisions to optimize your living space.

Cost To Insulate A Ceiling

Introduction

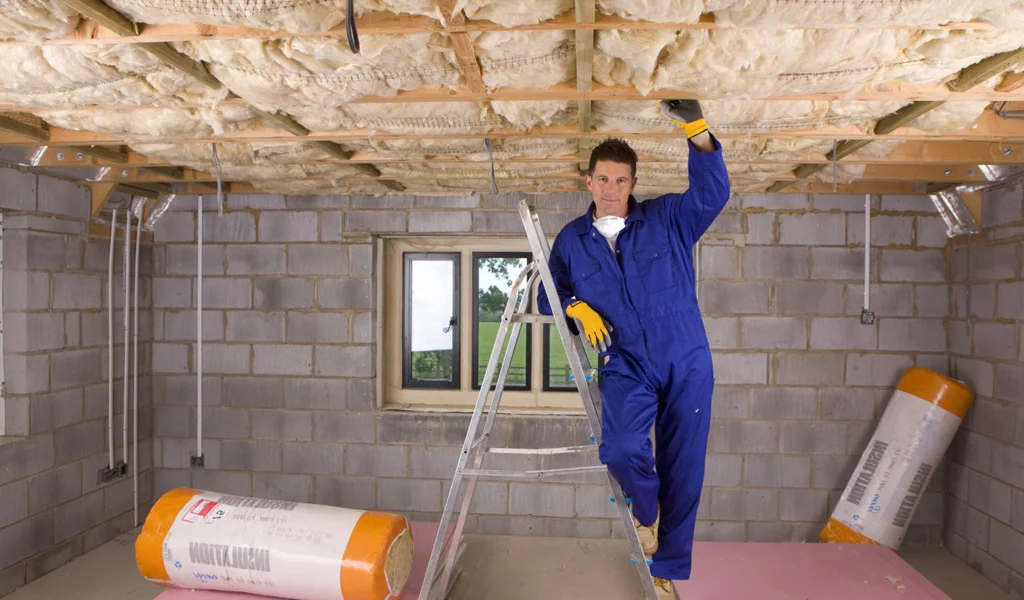
Insulating your ceiling is a strategic investment that pays dividends in energy savings, comfort, and sustainability. Whether you’re motivated by reducing utility bills or creating a more temperate indoor environment, knowing the “Cost To Insulate A Ceiling” empowers you to make sound decisions for your home. In this comprehensive guide, we’ll explore the factors influencing insulation costs, types of insulation materials, and the potential long-term benefits of this investment.

Deciphering Expenses: Factors Affecting the Cost To Insulate A Ceiling

Understanding the various elements that contribute to the overall cost of insulating a ceiling is essential. Each home is unique, and several factors influence the expenses associated with this improvement.

  1. Ceiling Size and Layout: The size and layout of your ceiling directly impact the amount of insulation material required. Larger ceilings or intricate architectural designs may increase the overall cost.
  2. Insulation Material Choice: The type of insulation material you choose significantly affects costs. Common options include fiberglass, cellulose, foam board, and spray foam, each with its own price point.
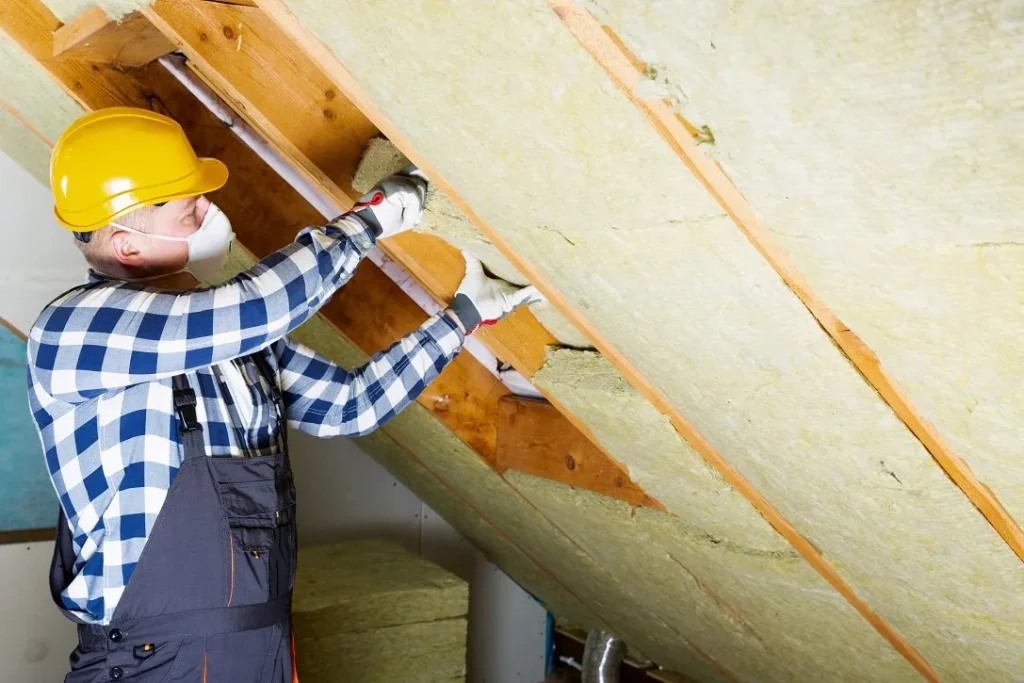
  3. Labor Costs: Professional installation ensures optimal performance. Labor costs can vary based on the complexity of the job and local labor rates.
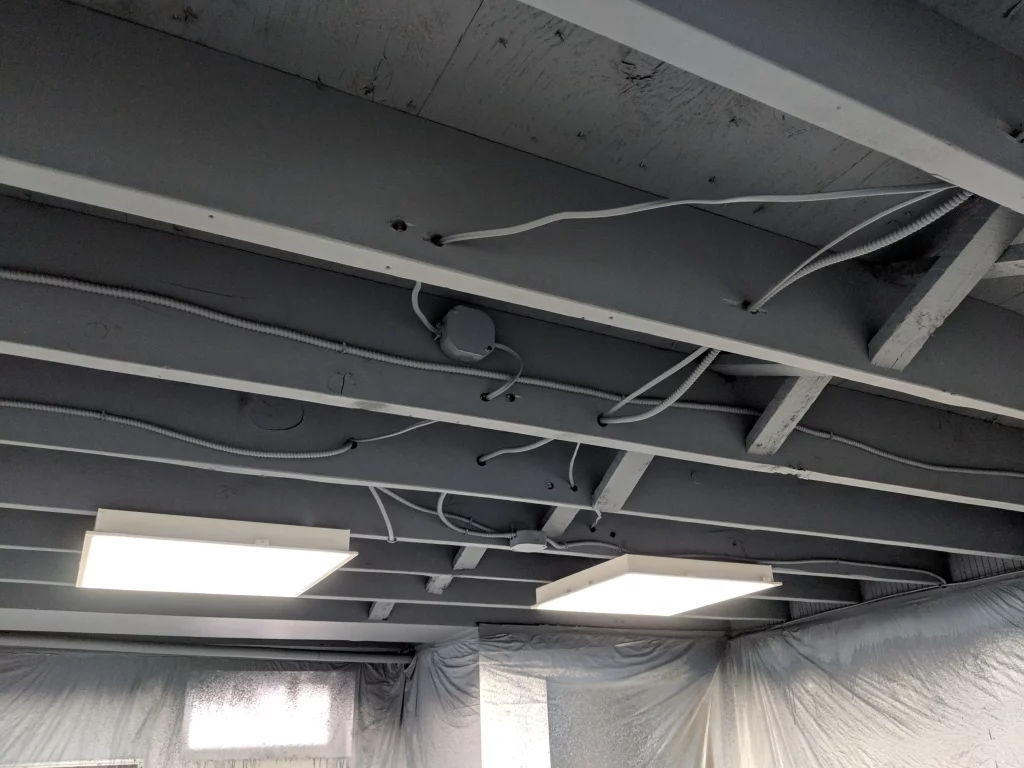
  4. Accessibility of the Ceiling: Easy access to the ceiling facilitates installation, potentially reducing labor costs. In contrast, hard-to-reach or obstructed areas may require more effort, impacting overall expenses.
  5. Local Climate Considerations: The climate in your region influences the recommended insulation levels. Colder climates may necessitate thicker insulation, affecting costs.

Unveiling the Numbers: Average Cost To Insulate A Ceiling

While the cost to insulate a ceiling can vary widely based on individual circumstances, providing a general overview can offer valuable insights. The following estimates are intended to provide a rough idea of potential expenses:

  1. Fiberglass Insulation: On average, fiberglass insulation costs between $1.00 and $1.50 per square foot, including materials and labor. This cost-effective option is popular for its thermal resistance and fire resistance.
  2. Cellulose Insulation: Cellulose insulation typically falls in the range of $1.00 to $1.50 per square foot. Made from recycled paper, cellulose is an eco-friendly choice known for its effective insulation properties.
  3. Foam Board Insulation: Foam board insulation can range from $1.50 to $3.00 per square foot. While more expensive, it offers high R-values and is suitable for various applications.
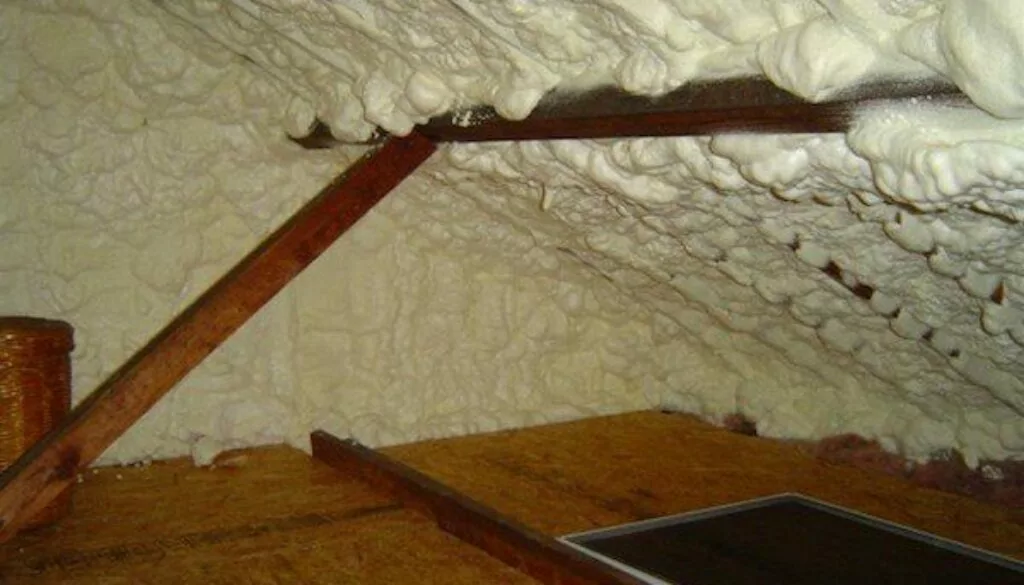
  4. Spray Foam Insulation: Spray foam insulation tends to be pricier, averaging between $1.50 and $3.50 per square foot. However, it provides superior air sealing and thermal resistance.

Maximizing Returns: Long-Term Benefits of Ceiling Insulation

Investing in ceiling insulation goes beyond upfront costs, offering long-term benefits that contribute to the overall value of your home.

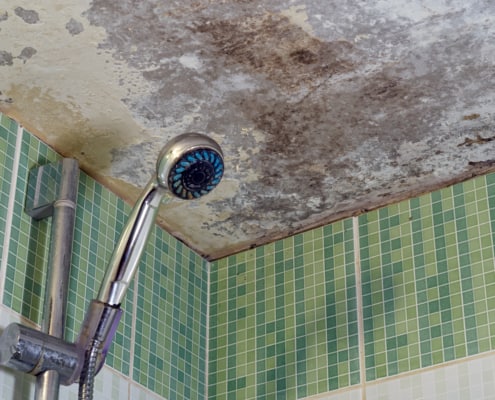
  1. Energy Savings: Properly insulated ceilings reduce heat transfer, resulting in lower energy consumption for heating and cooling. This translates to ongoing savings on utility bills.
  2. Enhanced Comfort: Insulation creates a more stable indoor temperature, reducing drafts and temperature fluctuations. This contributes to a more comfortable living environment year-round.
  3. Environmental Impact: Energy-efficient homes contribute to environmental sustainability by reducing greenhouse gas emissions. Choosing eco-friendly insulation materials further enhances the positive impact.
  4. Increased Home Value: Well-insulated homes are attractive to potential buyers. The added energy efficiency and comfort provided by ceiling insulation can increase the resale value of your property.

Making Informed Decisions: Tips for Cost-Effective Ceiling Insulation

To maximize cost-effectiveness when insulating your ceiling, consider the following tips:

  1. Energy Audits: Conduct an energy audit to identify specific areas for improvement, guiding your insulation decisions and potentially reducing unnecessary expenses.
  2. DIY Considerations: While professional installation is recommended, homeowners with experience may explore certain DIY insulation projects, such as installing batts in accessible areas.
  3. Material Comparison: Research and compare insulation materials based on their R-values, durability, and long-term benefits. Choosing the right material for your needs ensures a wise investment.
  4. Government Incentives: Investigate available government incentives or tax credits for energy-efficient home improvements. These can help offset the initial cost of ceiling insulation.

Read too: Discover the Allure of Hunter Douglas Wood Ceiling Designs: Enhancing Spaces with Elegance

Conclusion

Investing in ceiling insulation is a strategic decision that pays off in increased comfort, energy savings, and environmental sustainability. By understanding the factors influencing the “Cost To Insulate A Ceiling,” you empower yourself to make informed choices for your home. Whether you prioritize cost-effectiveness, eco-friendliness, or long-term benefits, ceiling insulation is a valuable investment in the overall well-being of your living space.

Understanding Ceiling Collapse Lawsuit Settlements and Your Rights: Navigating the Legal Terrain

Are you familiar with the complexities of a “Ceiling Collapse Lawsuit Settlement”? This in-depth guide provides insights into the legal aspects surrounding ceiling collapses, potential settlements, and crucial information for those navigating such challenging situations.

Ceiling Collapse Lawsuit Settlement

The Peril: Ceiling Collapse Lawsuit Settlement

Unraveling the Legal Implications

Causes of Ceiling Collapses:

Understanding the causes of ceiling collapses is vital in any legal context. From structural defects to water damage, the root cause plays a significant role in determining liability and potential settlement outcomes.

Responsibilities of Property Owners:

Property owners have a duty to maintain a safe environment. Failure to address structural issues promptly may result in legal consequences, making it essential for affected individuals to explore their legal options.

Ceiling Collapse Lawsuit Settlement: A Closer Look

Legal Procedures and Considerations

Filing a Lawsuit:

If you’ve experienced a ceiling collapse, filing a lawsuit may be necessary to seek compensation. Understanding the steps involved, including gathering evidence and filing the complaint, is crucial for a successful case.

Liability Determination:

Identifying the responsible party is a critical aspect of ceiling collapse lawsuits. It may involve assessing the role of contractors, architects, or property owners in the construction and maintenance of the affected structure.

Navigating the Settlement Process

Negotiation and Mediation:

Many ceiling collapse lawsuits end in settlement before reaching trial. Negotiation and mediation sessions allow parties to discuss terms, potentially reaching a resolution that avoids the time and expenses associated with a court trial.

Factors Influencing Settlements:

Various factors impact the outcome of a ceiling collapse lawsuit settlement. These may include the severity of injuries, property damage, insurance coverage, and the strength of the evidence presented.

Your Rights and Responsibilities: Ceiling Collapse Lawsuit Settlement

Seeking Legal Counsel:

Importance of Legal Representation:

Engaging a skilled attorney specializing in premises liability and personal injury is crucial. They can guide you through the legal process, ensuring your rights are protected and advocating for fair compensation.

Statute of Limitations:

Understanding the statute of limitations is vital. Failing to file a lawsuit within the specified timeframe may jeopardize your ability to seek compensation. Consult with an attorney to ensure compliance with these deadlines.

Read too: Discover the Allure of Hunter Douglas Wood Ceiling Designs: Enhancing Spaces with Elegance

Conclusion

In conclusion, the aftermath of a ceiling collapse can be physically, emotionally, and financially overwhelming. Knowing your rights and understanding the legal nuances surrounding a “Ceiling Collapse Lawsuit Settlement” empowers you to make informed decisions.

Whether you are negotiating a settlement or pursuing legal action, seeking professional legal advice is paramount. A skilled attorney can navigate the complexities of your case, advocate for your rights, and work towards a resolution that provides the compensation you deserve.

Remember, in the face of a ceiling collapse, you don’t have to navigate the legal landscape alone. Arm yourself with knowledge, seek legal counsel, and take the necessary steps to protect your rights and secure a fair settlement.

Why You Might Hear Water Dripping in Your Ceiling and What to Do About It? Unveiling the Mystery

Have you ever wondered, “Hear Water Dripping in Ceiling?” This comprehensive guide explores the potential causes behind this unsettling sound, the risks it poses, and actionable steps to address the issue promptly.

Hear Water Dripping In Ceiling

The Concern: Hear Water Dripping in Ceiling

Understanding the Source of the Sound

Plumbing Issues:

One common reason you might hear water dripping in your ceiling is plumbing problems. Leaks in pipes can occur in hidden spaces, and the sound of water dripping may be the first indication of a potential issue.

Roof Leaks:

Another culprit could be roof leaks. Rainwater infiltrating through a damaged roof can find its way into your home, causing water damage and creating the distinct sound of dripping water.

Risks Associated with Water Dripping in Ceiling

Structural Damage:

Ignoring the sound of water dripping can lead to severe structural damage. Persistent leaks weaken the ceiling, potentially causing it to sag or collapse.

Mold and Mildew:

Accumulated moisture from a leak can create an ideal environment for mold and mildew growth. This not only compromises indoor air quality but also poses health risks.

Investigating and Identifying the Issue

Visual Inspection:

Stains and Discoloration:

Inspect your ceiling for any visible stains or discoloration, as these could indicate water damage. Discolored patches often point to the source of the leak.

Sagging:

A sagging ceiling is a clear sign of water damage. If you notice any irregularities in your ceiling’s appearance, it’s crucial to investigate further.

Hear Water Dripping in Ceiling? Take Action!

Seeking Professional Help:

Plumber Inspection:

If plumbing issues are suspected, consult with a licensed plumber. They can conduct a thorough inspection to identify and address any leaks in the plumbing system.

Roof Inspection:

For potential roof leaks, hire a professional roofing contractor to inspect your roof. Prompt repairs can prevent further water damage to your home.

Read too: Discover the Allure of Hunter Douglas Wood Ceiling Designs: Enhancing Spaces with Elegance

DIY Tips for Temporary Solutions

Temporary Leak Mitigation:

Buckets or Towels:

Place buckets under the dripping water to catch it and use towels to absorb excess moisture. This provides a temporary solution until professional help arrives.

Ceiling Fan or Dehumidifier:

Using a ceiling fan or dehumidifier can help reduce moisture in the affected area, preventing the growth of mold and mildew.

Conclusion

In conclusion, hearing water dripping in your ceiling is not just an auditory inconvenience – it’s a warning sign of potential water damage that demands immediate attention. Whether the culprit is plumbing issues or a leaky roof, swift action is crucial to prevent further harm to your home’s structure and your health.

Remember, identifying and addressing the root cause of the issue is paramount. If you hear water dripping in your ceiling, don’t ignore it. Take proactive steps to investigate, seek professional assistance, and implement necessary repairs. By doing so, you can safeguard your home from extensive damage and ensure a safe living environment for you and your family.

Do Popcorn Ceiling Have Asbestos and What You Need to Know? Unraveling the Mystery

Do Popcorn Ceiling Have Asbestos? Popcorn ceilings, once a popular design choice, now raise concerns about asbestos exposure. If you’re wondering, “Do Popcorn Ceilings Have Asbestos,” this comprehensive guide is your go-to source for information on the potential risks, identification, and steps to address the issue.

Do Popcorn Ceiling Have Asbestos

Understanding the Concern: Do Popcorn Ceilings Have Asbestos?

What is Asbestos, and Why the Concern?

Asbestos is a mineral fiber known for its durability and resistance to heat and fire. In the past, it was commonly used in construction materials, including popcorn ceiling textures. However, due to its link to serious health issues such as lung cancer and mesothelioma, asbestos has been heavily regulated, leading to concerns about its presence in older homes.

Identifying Asbestos in Popcorn Ceilings

The Age Factor:

One clue to whether your popcorn ceiling contains asbestos is its age. Popcorn ceilings installed before the 1980s are more likely to contain asbestos, as it was widely used in construction during that period.

Professional Inspection:

To definitively determine the presence of asbestos, it’s advisable to seek professional inspection services. Certified inspectors can take samples and conduct tests to assess the risk accurately.

Risks and Health Concerns: Do Popcorn Ceiling Have Asbestos

The Dangers of Asbestos Exposure:

Inhaling asbestos fibers poses significant health risks. The microscopic fibers can become trapped in the lungs, leading to respiratory issues and, in severe cases, life-threatening diseases. Understanding these risks emphasizes the importance of addressing the question, “Do Popcorn Ceilings Have Asbestos?”

Safe Handling and Removal

Hiring Professionals:

If asbestos is confirmed, it’s crucial to hire licensed professionals for the removal process. Attempting to remove asbestos-containing materials without proper training and equipment can release dangerous fibers into the air.

Encapsulation:

In some cases, encapsulation may be a viable option. This involves sealing the popcorn ceiling with a protective coating to prevent the release of asbestos fibers. However, this method is not always recommended, and professional advice should be sought.

Read too: Discover the Allure of Hunter Douglas Wood Ceiling Designs: Enhancing Spaces with Elegance

DIY Testing and Precautionary Measures

DIY Asbestos Testing Kits:

For those curious about the presence of asbestos, DIY testing kits are available. These kits allow homeowners to collect samples and send them to a lab for analysis. However, it’s essential to exercise caution and follow safety guidelines during the sampling process.

Precautionary Measures:

If you suspect the presence of asbestos but haven’t confirmed it, take precautionary measures such as avoiding any activities that could disturb the ceiling material. This includes drilling, sanding, or scraping, as these actions could release asbestos fibers into the air.

Conclusion

In conclusion, the question “Do Popcorn Ceilings Have Asbestos” is a valid concern for homeowners, especially in older properties. Asbestos, if present, poses serious health risks, making it crucial to address the issue promptly and responsibly. Whether through professional inspection, safe removal, or encapsulation, taking the necessary steps ensures a safe living environment for you and your family.

Remember, when it comes to asbestos, it’s better to be safe than sorry. If in doubt, seek professional advice and assistance to mitigate any potential risks associated with popcorn ceilings in your home.

A Step-by-Step Guide to Installing Ceiling Fan with Red Wire: Mastering Your Ceiling Fan

Are you gearing up to upgrade your living space with a ceiling fan? Delve into the intricacies of “Installing Ceiling Fan Red Wire” and unlock the secrets to a seamless installation process. This comprehensive guide provides valuable insights, tips, and step-by-step instructions, ensuring you navigate the installation with confidence.

Installing Ceiling Fan Red Wire

Introduction: The Significance of the Red Wire in Ceiling Fan Installation

Installing a ceiling fan can be a rewarding home improvement project, but the presence of a red wire might raise questions. In this guide, we demystify the role of the red wire and walk you through the process of “Installing Ceiling Fan Red Wire.” Whether you’re a seasoned DIY enthusiast or a novice, this guide equips you with the knowledge to successfully install a ceiling fan with confidence.

Understanding the Red Wire in Ceiling Fan Installation

The Red Wire in Electrical Wiring

Before diving into the installation process, it’s crucial to understand the role of the red wire in electrical wiring. In a typical electrical setup, the red wire is often associated with secondary live wires, three-way switches, or specific functions in a circuit. Understanding its purpose lays the foundation for a safe and efficient ceiling fan installation.

Key Steps in Installing Ceiling Fan with Red Wire

*1. Turn Off Power: Safety first! Begin by turning off the power to the circuit where you’ll be working. Use a circuit tester to ensure that the power is indeed off before proceeding.

*2. Identify Ceiling Fan Wires: Unbox your ceiling fan and identify the wires. The red wire is typically used for specific functions, such as connecting to a separate light switch or operating the fan’s motor.

*3. Match Wires: Match the red wire from the ceiling fan with the corresponding wire in your electrical box. Consult the manufacturer’s instructions to ensure proper alignment.

*4. Secure Connections: Use wire nuts to secure the connections. Ensure a tight and secure fit for all wires, including the red wire, to prevent loose connections that can lead to electrical issues.

*5. Assemble and Mount Fan: Follow the manufacturer’s instructions to assemble your ceiling fan. Once assembled, carefully mount the fan to the ceiling bracket, securing it in place.

*6. Test the Installation: After completing the installation, turn the power back on and test the ceiling fan’s functions. Confirm that the red wire operates as intended, whether controlling the fan speed or activating a separate light switch.

Common Questions and Troubleshooting Tips

*1. What if There’s No Red Wire? If your ceiling doesn’t have a red wire, don’t panic. Some fans operate without a red wire, and the functions associated with it may be controlled differently.

*2. The Fan Isn’t Working: If the fan isn’t working after installation, double-check the connections, ensuring all wires, including the red wire, are properly secured. Consult troubleshooting tips in the fan’s manual.

Read too: Discover the Allure of Hunter Douglas Wood Ceiling Designs: Enhancing Spaces with Elegance

Conclusion: Enjoying the Fruits of Your Ceiling Fan Installation

In conclusion, “Installing Ceiling Fan Red Wire” need not be a daunting task. By understanding the role of the red wire, following key steps, and addressing common questions, you can successfully install a ceiling fan and enhance your home’s comfort. Enjoy the cool breeze and improved aesthetics as you bask in the satisfaction of a DIY well-done.

Understanding and Addressing Ceiling Leaking Through Light Fixture Woes: Navigating the Drips

Uncover the mysteries behind “Ceiling Leaking Through Light Fixture” as we guide you through the causes, potential damages, and effective solutions. Explore the signs, preventive measures, and step-by-step remediation to safeguard your home from this common issue.

Ceiling Leaking Through Light Fixture

Introduction: Decoding the Dilemma

A leaking ceiling through a light fixture can turn a seemingly ordinary day into a homeowner’s nightmare. In this comprehensive guide, we delve into the intricacies of “Ceiling Leaking Through Light Fixture,” shedding light on the reasons behind this occurrence and empowering you with the knowledge to tackle it head-on.

Identifying the Culprits – Ceiling Leaking Through Light Fixture

Understanding Roof and Ceiling Leaks

  1. Roof Leaks: Damaged or aging roofs can allow water to penetrate, leading to leaks that manifest through light fixtures. Learn how to differentiate roof leaks from other sources.
  2. Plumbing Issues: Faulty plumbing in upper floors can result in water leaks that travel down to light fixtures on lower levels. Recognizing the signs can aid in early detection.

Read too: Discover the Allure of Hunter Douglas Wood Ceiling Designs: Enhancing Spaces with Elegance

Signs of Ceiling Leaking Through Light Fixture

  1. Water Stains: Noticeable water stains around the light fixture or on the ceiling are key indicators of a leak.
  2. Dripping Water: If you observe water dripping directly from the light fixture, it’s a clear sign of an active leak.
  3. Bulb or Fixture Damage: Damage to bulbs or fixtures, such as rust or discoloration, may be a result of continuous exposure to water.

Potential Damages Caused by Ceiling Leaking

  1. Electrical Hazards: Water and electricity don’t mix. Discover the potential electrical hazards associated with leaks and the importance of addressing them promptly.
  2. Mold Growth: Persistent moisture can create an ideal environment for mold growth, posing health risks and requiring thorough remediation.

Addressing Ceiling Leaking Through Light Fixture: A Step-by-Step Guide

*1. Safety First: Turn Off Power

Before attempting any repairs, prioritize safety by turning off the power to the affected light fixture and surrounding electrical components.

*2. Assessing the Source of the Leak

Identify the source of the leak, whether it’s a roof issue, plumbing problem, or other structural concerns. This step is crucial for effective and lasting solutions.

*3. Temporary Containment Measures

Implement temporary containment measures to prevent further damage while awaiting professional assistance or before tackling repairs yourself.

*4. Roof Repairs and Plumbing Fixes

Engage professionals to address roof leaks or plumbing issues promptly. Ensure proper repairs to prevent recurring leaks.

*5. Ceiling and Electrical Repairs

Once the source is resolved, proceed with ceiling repairs, including addressing water damage and ensuring the electrical components are safe for use.

Preventive Measures to Avoid Future Leaks

  1. Regular Roof Inspections: Schedule routine roof inspections to identify and address potential issues before they escalate.
  2. Plumbing Maintenance: Stay proactive with plumbing maintenance to prevent leaks and water damage.
  3. Prompt Repairs: Address any signs of water damage immediately to avoid exacerbating the issue.

Conclusion: Empowered to Tackle Ceiling Leaks Through Light Fixtures

In conclusion, understanding and addressing “Ceiling Leaking Through Light Fixture” requires a combination of vigilance, prompt action, and, at times, professional assistance. Armed with the insights from this guide, you can navigate this homeowner’s dilemma with confidence, protecting your home from potential damages and ensuring a safe living environment.

Should I Insulate My Basement Ceiling for a Cozier Home Environment? Decoding Comfort

Are you contemplating home improvements and wondering, “Should I Insulate Basement Ceiling?” Uncover the reasons, benefits, and considerations in this comprehensive guide. Learn how insulating your basement ceiling can transform your living space, providing comfort and energy efficiency.

Should I Insulate Basement Ceiling

Introduction: The Quest for a Cozier Basement – Should I Insulate Basement Ceiling?

As homeowners seek ways to enhance comfort and energy efficiency, insulating the basement ceiling emerges as a viable solution. In this guide, we delve into the question of “Should I Insulate Basement Ceiling?” exploring the factors that influence the decision and the potential advantages that come with this home improvement endeavor.

Weighing the Pros and Cons

Advantages of Insulating Basement Ceiling

  1. Temperature Regulation: Insulating the basement ceiling helps in maintaining a consistent temperature throughout the home. This can contribute to a more comfortable living environment, especially in extreme weather conditions.
  2. Energy Efficiency: A well-insulated basement ceiling can lead to energy savings by preventing heat loss. This is particularly relevant in homes with HVAC systems, as the insulation reduces the workload on heating and cooling appliances.
  3. Noise Reduction: Insulation acts as a sound barrier, reducing the transmission of noise between floors. This is beneficial for creating a quieter and more peaceful living space.

Considerations Before Insulating Basement Ceiling

  1. Existing Insulation: Assess the current insulation in your basement walls. If the walls are already adequately insulated, insulating the ceiling might provide diminishing returns. It’s essential to strike a balance to avoid over-insulation.
  2. Moisture Control: Basements are prone to moisture issues. Ensure that your basement is adequately waterproofed before considering insulation. Moisture can compromise insulation effectiveness and lead to mold growth.

Factors Influencing the Decision

Climate Considerations

The decision to insulate your basement ceiling can be influenced by the climate in your region. In colder climates, insulation is crucial for retaining heat, while in warmer climates, it may be less of a priority.

Intended Use of Basement Space

Consider how you plan to use your basement. If it’s primarily a storage area, insulation might be less critical. However, if you intend to use the space as a living area, office, or recreational space, insulation becomes more important for comfort.

Installation Options and Materials for Insulating Basement Ceiling

Types of Insulation Materials

  1. Fiberglass Batts: Easy to install, fiberglass batts are a popular choice. They come in rolls and are placed between joists.
  2. Spray Foam Insulation: Provides excellent coverage, filling gaps and crevices. It’s effective in both insulation and moisture control.
  3. Rigid Foam Insulation: Ideal for areas with limited space, rigid foam boards are durable and moisture-resistant.

Read too: Discover the Allure of Hunter Douglas Wood Ceiling Designs: Enhancing Spaces with Elegance

Conclusion: Making an Informed Decision on Insulating Basement Ceiling

In conclusion, the decision of “Should I Insulate Basement Ceiling” depends on various factors unique to your home and needs. By weighing the advantages, considering climate and usage, and exploring insulation options, you can make an informed decision that enhances the comfort, energy efficiency, and overall livability of your home.

Painting an Unfinished Basement Ceiling to Elevate Your Space: Transformative Charm

Embark on a home improvement journey with “Painting an Unfinished Basement Ceiling” and unlock the secrets to turning a neglected space into a visually appealing and functional area. Discover the transformative power of paint and reimagine your unfinished basement with this comprehensive guide.

Painting An Unfinished Basement Ceiling

Introduction: The Power of Paint – Revitalizing Your Unfinished Basement Ceiling

Often overlooked, the basement holds untapped potential. In this guide, we delve into the world of “Painting an Unfinished Basement Ceiling,” exploring the reasons, benefits, and step-by-step process to breathe new life into your home’s lower level. Whether it’s a playroom, home office, or entertainment space, painting the ceiling can elevate the entire ambiance.

Step-by-Step Guide to Painting an Unfinished Basement Ceiling

*1. Preparation is Key: Cleaning and Inspection

Before picking up a paintbrush, ensure the ceiling is clean and free of dust or debris. Inspect for any signs of water damage, leaks, or structural issues that may need addressing before painting.

*2. Selecting the Right Paint for the Job

Choose a high-quality paint suitable for basement conditions. Consider factors like moisture resistance, mold resistance, and durability to ensure a long-lasting and visually appealing finish.

*3. Gather the Necessary Tools and Equipment

Prepare for the task by gathering essential tools, including a quality paintbrush, roller, painter’s tape, drop cloths, and any additional equipment required for your specific ceiling type.

*4. Applying Primer for Adhesion

Apply a primer to enhance paint adhesion and promote an even finish. This step is particularly crucial for unfinished basement ceilings, as it creates a solid foundation for the paint to adhere to.

*5. Choosing the Right Paint Technique

Explore various paint techniques, such as spraying, rolling, or brushing, to find the one that suits your ceiling’s texture and your desired aesthetic. Consider using a sprayer for efficiency on larger surfaces.

*6. Picking the Perfect Color Palette

Selecting the right color can significantly impact the atmosphere of your basement. Opt for lighter shades to create an open and inviting space, or go bold with contrasting colors for a more dramatic look.

*7. Executing the Painting Process

Follow a systematic approach to painting your unfinished basement ceiling. Start from one corner and work your way across the room, ensuring even coverage and addressing any drips or imperfections as you go.

*8. Drying and Curing Time

Allow sufficient drying and curing time between coats as per the paint manufacturer’s recommendations. This ensures a durable and professional-looking finish.

Benefits of Painting an Unfinished Basement Ceiling

  1. Enhanced Aesthetics: Painting transforms the raw, industrial look of an unfinished ceiling into a polished and cohesive space.
  2. Light Reflection: Light-colored paint can improve light reflection, making the basement feel brighter and more welcoming.
  3. Concealing Imperfections: Paint helps conceal minor imperfections and inconsistencies in the ceiling, providing a cleaner appearance.

Maintaining Your Painted Basement Ceiling

  1. Regular Cleaning: Keep your painted ceiling looking fresh by incorporating regular cleaning routines to remove dust or cobwebs.
  2. Addressing Issues Promptly: Promptly address any water leaks or damage to prevent paint deterioration. Regular inspections ensure early detection and swift action.

Read too: Discover the Allure of Hunter Douglas Wood Ceiling Designs: Enhancing Spaces with Elegance

Conclusion: Unleashing the Full Potential of Your Basement

In conclusion, “Painting an Unfinished Basement Ceiling” is a transformative project that can revitalize your home’s lower level. By following this guide, you can turn a neglected space into a vibrant and functional area that complements your overall home design. Unleash your creativity, pick up that paintbrush, and witness the remarkable difference it makes.

Is Bathroom Ceiling Mold Dangerous to Your Health and Home? Unveiling the Threat

Discover the hidden dangers lurking above with the question, “Is Bathroom Ceiling Mold Dangerous?” This comprehensive guide not only addresses the potential health risks but also provides insights into prevention and effective remediation. Dive into the world of bathroom mold to safeguard your well-being and home integrity.

Is Bathroom Ceiling Mold Dangerous

Introduction: Demystifying the Menace – Is Bathroom Ceiling Mold Dangerous?

The presence of mold in any part of your home raises concerns, but when it infiltrates the bathroom ceiling, the stakes may be higher. In this guide, we explore the question, “Is Bathroom Ceiling Mold Dangerous?” unraveling the potential health hazards and structural risks associated with this pervasive issue.

Assessing the Risks – Is Bathroom Ceiling Mold Dangerous?

Understanding the Types of Mold

Not all molds are created equal. This section delves into the various types of mold that can manifest on bathroom ceilings, with a focus on those potentially harmful to health and home structures.

Health Implications of Bathroom Ceiling Mold

  1. Respiratory Issues: Certain molds release spores that can trigger or exacerbate respiratory conditions, including allergies, asthma, or other respiratory infections.
  2. Skin Irritations: Prolonged exposure to mold can cause skin irritations, such as rashes or itchiness, especially for individuals with sensitive skin.
  3. Allergic Reactions: Mold exposure can lead to allergic reactions, including sneezing, watery eyes, and nasal congestion.

Structural Risks of Bathroom Ceiling Mold

  1. Surface Degradation: Mold can cause deterioration of the ceiling surface, compromising its integrity and aesthetic appeal.
  2. Weakening of Structures: Prolonged mold growth may weaken the structural components of the ceiling, posing a risk of collapse or damage.

Prevention and Remediation Strategies for Bathroom Ceiling Mold

  1. Proper Ventilation: Ensure adequate ventilation in the bathroom by using exhaust fans, opening windows, or installing ventilation systems to reduce humidity levels.
  2. Regular Cleaning: Adopt a routine cleaning schedule to prevent mold growth. Focus on areas prone to moisture, such as ceilings, walls, and corners.
  3. Prompt Repairs: Address water leaks or damage promptly. Repair any plumbing issues, roof leaks, or structural damage contributing to moisture accumulation.
  4. Use Mold-Resistant Materials: Consider using mold-resistant paint or materials for bathroom ceilings to create an inhospitable environment for mold growth.
  5. Professional Remediation: If mold infestation is extensive, seek professional mold remediation services to ensure thorough and safe removal.

Recognizing and Dealing With Bathroom Ceiling Mold

  1. Identification: Learn how to identify signs of mold on your bathroom ceiling, including discoloration, musty odors, or visible mold growth.
  2. DIY Remediation: For minor mold issues, explore DIY remediation methods using safe cleaning agents and protective gear.
  3. When to Consult Professionals: Understand the indicators that necessitate professional intervention, such as extensive mold growth, recurring issues, or health concerns.

Conclusion: Safeguarding Your Home and Health from Bathroom Ceiling Mold

In conclusion, the question, “Is Bathroom Ceiling Mold Dangerous?” highlights the importance of proactive measures to protect both your health and the structural integrity of your home. By understanding the risks, implementing preventative strategies, and addressing mold issues promptly, you can create a healthier and safer living environment.

Understanding and Addressing Cracks in Ceiling and Walls: Unveiling the Intricacies

Discover the reasons behind and effective solutions for “Cracks in Ceiling and Walls.” Enhance your knowledge for a structurally sound and visually pleasing home.

Cracks In Ceiling And Walls

The Mystery of Cracks in Ceiling and Walls

Introduction: “Cracks in Ceiling and Walls” can be unsettling for homeowners, raising concerns about structural integrity and aesthetics. In this comprehensive guide, we will delve into the various factors contributing to these cracks and explore practical solutions to address the issue.

Read too: Is Bathroom Ceiling Mold Dangerous to Your Health and Home? Unveiling the Threat

Understanding the Causes: Cracks in Ceiling and Walls

1. Settlement Cracks:

  • Definition: These are common and typically occur within the first few years after construction as the building settles into the ground.
  • Solution: Minor settlement cracks may be cosmetic, but larger ones may require professional inspection and repairs.

2. Foundation Issues:

  • Signs: Cracks appearing near windows and doors can indicate foundation problems.
  • Solution: Consult with a structural engineer to assess foundation health. Repairs may involve foundation underpinning or stabilization.

3. Temperature and Humidity Fluctuations:

  • Impact: Extreme temperature changes or high humidity levels can cause materials to expand and contract, leading to cracks.
  • Solution: Maintain consistent indoor climate control to minimize temperature and humidity variations.

4. Poor Construction Practices:

  • Signs: Inadequate materials or improper construction techniques can result in structural weaknesses.
  • Solution: Consult with a contractor to identify subpar construction elements and implement necessary repairs.

The Role of Water Damage: Cracks in Ceiling and Walls

1. Roof Leaks:

  • Indicators: Water stains on ceilings and walls, coupled with cracks, suggest potential roof leaks.
  • Solution: Address roof leaks promptly, repair any damage, and ensure proper drainage.

2. Plumbing Issues:

  • Signs: Water seepage from pipes can weaken walls and ceilings.
  • Solution: Fix plumbing leaks and repair any resulting structural damage.

3. Exterior Water Intrusion:

  • Impact: Poorly sealed windows or damaged siding can allow water to penetrate walls.
  • Solution: Seal any gaps, repair damaged exteriors, and consider waterproofing measures.

Dealing with Cracks in Ceiling and Walls

Professional Inspection:

Structural Engineer Assessment:

  • Importance: A certified structural engineer can determine the severity and root cause of cracks.
  • Solution: Follow the engineer’s recommendations for repairs and maintenance.

DIY Repairs: Cracks in Ceiling and Walls

Minor Crack Filling:

  • Tools: Use spackle or joint compound for minor cosmetic cracks.
  • Precaution: Monitor cracks for any signs of progression or structural issues.

Preventive Measures:

Regular Maintenance:

  • Routine Checks: Conduct regular inspections to identify and address potential issues before they escalate.
  • Maintenance Tasks: Keep gutters clean, fix roof issues promptly, and address any water-related concerns.

Conclusion

In conclusion, understanding and addressing “Cracks in Ceiling and Walls” are vital for maintaining a structurally sound and visually appealing home. By identifying the root causes and implementing effective solutions, homeowners can ensure the longevity of their property and prevent further damage. Whether it’s through professional inspections, DIY repairs, or preventive measures, taking a proactive approach to crack management is key. Remember, a well-maintained home not only provides a comfortable living space but also preserves its value over time.

Are All Popcorn Ceilings Asbestos? Understanding the Risks and Facts

Curious about the potential dangers of popcorn ceilings? Let’s explore the question, “Are All Popcorn Ceilings Asbestos?” to shed light on the facts, risks, and what you need to know for a safe and informed home environment.

Are All Popcorn Ceilings Asbestos

Demystifying the Concern: Are All Popcorn Ceilings Asbestos?

Popcorn ceilings, also known as acoustic or textured ceilings, were prevalent in mid-century homes for their decorative appeal and noise reduction properties. Many of these ceilings contained asbestos, a naturally occurring mineral known for its heat resistance and durability.

1. Not All Popcorn Ceilings Contain Asbestos:

Contrary to common belief, not every popcorn ceiling contains asbestos. The use of asbestos in popcorn ceilings was prevalent until the late 1970s when its health risks became widely known.

2. Age of the Property Matters:

Homes built before the 1980s are more likely to have popcorn ceilings. However, this is not a definitive rule, and testing is the only way to confirm the presence of asbestos.

3. DIY Testing and Professional Inspection:

DIY testing kits are available, but for accurate results, hiring a certified asbestos inspector is recommended. They can provide a comprehensive analysis of your ceiling’s composition.

Risks Associated: Are All Popcorn Ceilings Asbestos?

1. Health Concerns:

Asbestos fibers, when disturbed, can become airborne. Inhaling these fibers may lead to severe respiratory issues, including lung cancer and mesothelioma.

2. Renovation and Disturbance Risks:

Renovations or activities that disturb popcorn ceilings, such as drilling or scraping, can release asbestos fibers. Proper precautions are essential to prevent exposure during such activities.

3. Legal and Selling Implications:

Homes containing asbestos may face legal implications, affecting property values and making it challenging to sell. Disclosure laws regarding asbestos vary by location.

How to Determine if Your Popcorn Ceiling Contains Asbestos

1. Home Testing Kits:

DIY testing kits are available at home improvement stores. Follow the instructions carefully and send samples to a certified laboratory for analysis.

2. Professional Asbestos Inspection:

Hiring a certified asbestos inspector ensures accurate results. They use specialized equipment and methods to identify asbestos presence in your popcorn ceiling.

3. Local Regulations:

Check local regulations regarding asbestos testing and abatement. Some areas may have specific requirements and guidelines for dealing with asbestos-containing materials.

Read too: Is Bathroom Ceiling Mold Dangerous to Your Health and Home? Unveiling the Threat

Dealing with Asbestos in Popcorn Ceilings

1. Asbestos Removal:

If your popcorn ceiling contains asbestos and you decide to remove it, hire a licensed asbestos abatement professional. DIY removal is strongly discouraged due to the associated health risks.

2. Encapsulation:

Encapsulation involves covering the popcorn ceiling with a sealant to prevent asbestos fibers from becoming airborne. This method is a less invasive alternative to removal.

3. Professional Consultation:

Consult with asbestos professionals for guidance on the best course of action based on your specific situation.

Conclusion

In conclusion, the question “Are All Popcorn Ceilings Asbestos?” highlights a significant concern for homeowners, especially those with older properties. Understanding the risks associated with asbestos and taking proactive steps for testing and, if necessary, abatement is crucial for creating a safe living environment. Whether you’re considering renovations or simply want peace of mind, being informed about the composition of your popcorn ceiling is a responsible and necessary step in homeownership.

Factors Influencing the Cost to Paint a Ceiling and Budget-Friendly Tips: Unveiling the Secrets

Curious about the Cost to Paint a Ceiling and how to make the process more affordable? This comprehensive guide will provide you with valuable insights into the factors influencing ceiling painting costs and practical tips to manage your budget effectively.

Cost To Paint A Ceiling

Understanding the Cost to Paint a Ceiling

Factors Influencing: Cost to Paint a Ceiling

1. Ceiling Size and Height:

The larger the ceiling area, the more paint and labor are required. Additionally, higher ceilings may necessitate specialized equipment, impacting overall costs.

2. Surface Condition:

A ceiling with extensive damage, stains, or imperfections may require additional preparation, such as patching and priming, leading to increased costs.

3. Type of Paint:

The type and quality of paint chosen significantly affect costs. High-quality paints may be more expensive but often provide better coverage and durability.

4. Ceiling Texture:

Textured ceilings, such as popcorn or stucco, can be more challenging to paint than smooth surfaces. The complexity of the texture may influence labor costs.

5. Professional Labor:

Hiring professional painters adds to the overall cost. However, their expertise ensures a high-quality finish and can save you time and effort.

Budget-Friendly Tips: Cost to Paint a Ceiling

1. DIY Preparation:

Save on labor costs by preparing the ceiling yourself. Clean the surface, patch any holes or cracks, and apply primer before the painters arrive.

2. Optimize Paint Selection:

While high-quality paint is essential for a lasting finish, you can find mid-range options that balance quality and cost. Consult with professionals for recommendations.

3. Bundle Services:

If you have multiple painting projects, consider bundling them to negotiate a better rate with the painting contractor.

4. Compare Quotes:

Obtain quotes from multiple painting contractors to compare prices and services. Be wary of significantly low prices, as they may indicate a compromise in quality.

Read too: Is Bathroom Ceiling Mold Dangerous to Your Health and Home? Unveiling the Threat

Cost Breakdown and Estimates

To give you a clearer picture, let’s break down the potential costs associated with painting a ceiling:

1. Paint and Materials:

  • Primer: $20 – $50 per gallon
  • Paint: $25 – $70 per gallon
  • Brushes, rollers, and other materials: $50 – $100

2. Professional Labor:

  • Labor costs per hour: $25 – $70
  • Average labor hours for ceiling painting: 4 – 8 hours

3. Total Estimated Cost:

  • Small room: $200 – $500
  • Medium room: $400 – $800
  • Large room: $800 – $1,500

Practical Considerations for Cost-Efficient Ceiling Painting

1. Regular Maintenance:

Conduct regular inspections and touch-ups to address minor issues before they escalate, reducing the need for extensive and costly repairs.

2. DIY Touch-Ups:

Learn basic painting skills to handle minor touch-ups and small areas, saving money on professional services.

3. Plan Ahead:

If you’re aware of upcoming painting projects, plan and budget for them in advance to avoid financial strain.

Conclusion

Understanding the Cost to Paint a Ceiling is essential for homeowners looking to enhance their living spaces. By considering the factors influencing costs and implementing budget-friendly tips, you can achieve a beautifully painted ceiling without breaking the bank. Whether you decide to tackle the project yourself or hire professionals, informed decision-making ensures a satisfying outcome. Remember, a freshly painted ceiling not only adds aesthetic appeal but also contributes to the overall maintenance and value of your home.

Exploring the Wonders of Spray Foam on Attic Ceiling for Energy Efficiency: Unveiling the Benefits

The use of spray foam on attic ceilings has become a game-changer in the realm of home insulation. Homeowners seeking energy-efficient solutions are turning to this innovative method to enhance insulation and reduce energy costs. In this comprehensive guide, we’ll delve into the world of “Spray Foam on Attic Ceiling,” exploring its benefits, installation process, and why it’s gaining popularity among savvy homeowners.

Spray Foam On Attic Ceiling

Understanding Spray Foam on Attic Ceiling

What is Spray Foam Insulation? Spray foam insulation is a cutting-edge material renowned for its exceptional thermal resistance properties. When applied to the attic ceiling, it creates a seamless barrier that prevents heat loss or gain, resulting in a more comfortable and energy-efficient home.

Advantages of Using Spray Foam on Attic Ceilings

1. Improved Energy Efficiency:

The primary advantage lies in its ability to seal every nook and cranny, leaving no room for air leaks. This tight seal significantly reduces the workload on your heating and cooling systems, leading to lower energy bills.

2. Enhanced Comfort:

Spray foam provides consistent insulation, ensuring a more comfortable living space year-round. Say goodbye to cold spots in winter and sweltering areas in summer – enjoy a balanced indoor temperature.

3. Moisture Control:

Unlike traditional insulation materials, spray foam is resistant to moisture. This prevents the growth of mold and mildew, safeguarding your home’s structural integrity.

4. Longevity and Durability:

Once applied, spray foam can last for several decades without losing its effectiveness. It adheres firmly to surfaces, providing a durable and long-lasting solution for your attic insulation needs.

The Installation Process: Spray Foam on Attic Ceiling

  1. Preparation: Before application, the attic space is thoroughly inspected for any existing issues. Repairs are made, and the area is prepped for the spray foam installation.
  2. Application: Professional installers use specialized equipment to apply the spray foam evenly across the attic ceiling. The foam expands to fill gaps and creates a seamless barrier.
  3. Curing: After application, the foam undergoes a curing process, during which it hardens and forms a protective layer. This process is relatively quick, allowing homeowners to enjoy the benefits promptly.

Read too: Is Bathroom Ceiling Mold Dangerous to Your Health and Home? Unveiling the Threat

Common Concerns and Solutions

1. Cost Considerations:

While the initial cost of spray foam insulation may be higher than traditional options, its long-term energy savings often outweigh the upfront investment.

2. DIY vs. Professional Installation:

While some may consider a DIY approach, professional installation is recommended for optimal results. Trained experts ensure proper application and adherence to safety standards.

Conclusion

In conclusion, the application of spray foam on attic ceilings is a wise investment for homeowners seeking to enhance energy efficiency and overall comfort. The benefits, including improved insulation, moisture control, and durability, make it a popular choice in the realm of home improvement. If you’re contemplating ways to upgrade your home’s insulation and reduce energy costs, considering spray foam on your attic ceiling is a step in the right direction. Embrace the future of insulation and transform your attic into a well-insulated space that contributes to a more sustainable and cost-effective home.

Exploring the Enigmatic Space Between Ceiling and Roof in Your Home: Unlocking the Secrets

Have you ever glanced up at your ceiling and wondered about the mysterious space that exists between it and the roof? The “Space Between Ceiling And Roof” is often an overlooked aspect of our homes, concealing a world of potential knowledge and insights. In this comprehensive article, we embark on a journey to unravel the secrets behind this often-neglected area, shedding light on its significance and exploring the various aspects that make it a crucial element of your home’s structure.

Space Between Ceiling And Roof

Understanding the Basics: Space Between Ceiling And Roof

What lies above your ceiling?

The space between the ceiling and roof, often called the attic, is more than an empty void. It’s crucial for your home’s structure, serving various purposes like insulation, ventilation, storage, and structural support.

The Importance of Adequate Ventilation:

Why is proper airflow crucial in this hidden space?

One of the key aspects of the “Space Between Ceiling And Roof” is ventilation. Adequate airflow is essential to prevent issues such as moisture buildup, which can lead to mold growth and compromise the structural integrity of your home. We delve into the importance of proper ventilation and explore strategies to ensure a healthy and well-ventilated attic space.

Insulation Matters: Maintaining Comfort in the Space Between Ceiling And Roof

How does insulation impact your home’s energy efficiency?

Another critical consideration for the space between the ceiling and roof is insulation. Proper insulation not only regulates temperature but also contributes to energy efficiency. We discuss the types of insulation commonly used in attics, their benefits, and how they help create a comfortable living environment while reducing energy costs.

Exploring Potential Uses:

How can you maximize the utility of this hidden space?

Beyond its structural roles, the “Space Between Ceiling And Roof” offers an opportunity for homeowners to maximize their living space. From converting the attic into an additional bedroom or home office to using it as a storage area, we explore the creative possibilities that this often-underutilized space presents.

Read too: Is Bathroom Ceiling Mold Dangerous to Your Health and Home? Unveiling the Threat

Challenges and Solutions:

What challenges might you encounter, and how can they be addressed?

While this space offers numerous benefits, it may also present challenges. Issues such as leaks, pests, and inadequate insulation can arise. We provide practical solutions and tips for addressing these challenges, ensuring that your attic space remains a functional and trouble-free area of your home.

Conclusion: Unveiling the Secrets of the Space Between Ceiling And Roof

In conclusion, the “Space Between Ceiling And Roof” is not just an empty void but a crucial component of your home’s structure. From its role in ventilation and insulation to its potential for additional living space, this area deserves attention and understanding. By exploring its various facets, homeowners can make informed decisions to maintain a healthy, comfortable, and functional home. The next time you gaze up at your ceiling, you’ll have a newfound appreciation for the space that exists between it and the roof.

Understanding and Eliminating Black Spots on the Ceiling: Dealing with Unsightly Intruders

Discover the causes, prevention, and remedies for those pesky black spots on the ceiling. Transform your living space by addressing this common issue effectively.

Black Spots On The Ceiling

Unmasking the Culprits – Black Spots On The Ceiling

Delve into the world of black spots on the ceiling, unraveling the mysteries behind their appearance and conquering the battle against these unwelcome intruders.

Identifying the Causes of Black Spots On The Ceiling:

  1. Mold and Mildew:
    • Explore how mold and mildew can thrive in moist environments, leading to the formation of black spots.
  2. Water Leaks:
    • Understand the connection between water leaks and the development of black spots, signaling potential issues in your home’s infrastructure.
  3. Smoke Residue:
    • Delve into the impact of smoking indoors and its contribution to the formation of black spots on the ceiling.
  4. Inadequate Ventilation:
    • Learn how poor ventilation can create conditions conducive to the growth of mold and accumulation of airborne particles, resulting in black spots.

Addressing Black Spots On The Ceiling:

  1. Cleaning with Mold Removers:
    • Explore the use of mold removers and cleaning solutions to eliminate black spots caused by mold and mildew. Follow proper safety measures.
  2. Repairing Water Leaks:
    • Address water leaks promptly by identifying and repairing the source. This prevents further damage and the recurrence of black spots.
  3. Repainting:
    • Understand the importance of repainting affected areas after cleaning to restore the aesthetic appeal of the ceiling and prevent future issues.
  4. Improving Ventilation:
    • Implement strategies to enhance ventilation, such as using exhaust fans, opening windows, or installing a ventilation system to prevent black spots.

Preventing the Return of Black Spots On The Ceiling:

  1. Maintaining Optimal Humidity Levels:
    • Learn how to control indoor humidity levels to discourage the growth of mold and mildew.
  2. Regular Inspections:
    • Adopt a routine of inspecting ceilings and other susceptible areas for signs of water leaks, addressing any issues promptly.
  3. Avoiding Indoor Smoking:
    • Understand the impact of indoor smoking on air quality and how abstaining can contribute to a cleaner ceiling.
  4. Investing in Proper Ventilation Systems:
    • Consider investing in effective ventilation systems to ensure adequate air circulation throughout your living space.

Read too: Is Bathroom Ceiling Mold Dangerous to Your Health and Home? Unveiling the Threat

When to Seek Professional Assistance:

  1. Extensive Mold Growth:
    • If black spots are indicative of extensive mold growth, consult with professionals for a thorough assessment and remediation.
  2. Persistent Water Leaks:
    • Persistent water leaks may require the expertise of a plumber or contractor to identify and address the underlying issue.
  3. Complex Structural Problems:
    • In cases where black spots are symptoms of complex structural problems, enlist the assistance of structural engineers or specialists.

Conclusion: A Spotless Ceiling Awaits

In conclusion, conquering black spots on the ceiling involves understanding their causes and implementing effective prevention and remediation strategies. By taking proactive measures and addressing issues promptly, you can ensure a spotless and aesthetically pleasing ceiling in your home.

Transform your living space, bid farewell to black spots, and welcome a cleaner and healthier environment.

Understanding and Addressing the Intricacies of a Crack Between Wall and Ceiling: A Comprehensive Guide

Explore the nuances of dealing with a common household issue – the crack between wall and ceiling. Learn how to identify, prevent, and remedy this concern for a seamless and aesthetically pleasing living space.

Crack Between Wall And Ceiling

Decoding the Issue – Crack Between Wall and Ceiling

Unravel the mysteries behind the crack between wall and ceiling and empower yourself with insights on addressing this common household dilemma.

Identifying the Causes of a Crack Between Wall and Ceiling:

  1. Settling Foundation:
    • Understand how a settling foundation can lead to shifts in the structure, causing cracks to emerge between the wall and ceiling.
  2. Temperature Fluctuations:
    • Explore the impact of temperature variations on building materials, contributing to the development of cracks over time.
  3. Drywall Issues:
    • Delve into how problems with drywall installation or materials can manifest as cracks in the junction between the wall and ceiling.
  4. Structural Movement:
    • Learn about structural movements and how they can create stress points, resulting in visible cracks.

Addressing the Crack Between Wall and Ceiling:

  1. Inspect and Assess:
    • Begin by thoroughly inspecting the crack’s size, location, and pattern. Assess whether it’s a superficial issue or indicative of a more significant structural concern.
  2. Fill with Joint Compound:
    • For smaller, cosmetic cracks, use joint compound to fill and smooth the surface. Sand and repaint for a seamless finish.
  3. Utilize Flexible Caulk:
    • In cases where flexibility is needed, opt for flexible caulk to fill the crack. This is particularly useful for addressing cracks caused by minor structural movements.
  4. Address Underlying Issues:
    • If the crack is recurrent or indicative of a deeper issue, such as foundation settling, consult with professionals to address the root cause.

Preventing Future Cracks:

  1. Manage Humidity Levels:
    • Control indoor humidity levels to prevent materials from expanding and contracting, reducing the likelihood of cracks.
  2. Regular Maintenance:
    • Implement a routine maintenance schedule to identify and address minor cracks before they escalate.
  3. Proper Installation:
    • Ensure proper installation of drywall and other building materials during construction or renovations.
  4. Foundation Inspection:
    • Periodically inspect your home’s foundation for signs of settling or movement, addressing issues promptly.

Read too: Is Bathroom Ceiling Mold Dangerous to Your Health and Home? Unveiling the Threat

When to Seek Professional Assistance:

  1. Large or Growing Cracks:
    • If cracks are substantial or expanding, consult with structural engineers or contractors to assess and rectify the problem.
  2. Persistent Issues:
    • Persistent or recurrent cracks may indicate underlying structural issues that require professional intervention.
  3. Concerns About Foundation:
    • Any concerns about the foundation, such as visible shifts or settling, warrant immediate attention from professionals.

Conclusion: Maintaining the Integrity of Your Living Space

In conclusion, understanding the dynamics of a crack between wall and ceiling empowers homeowners to address and prevent this common issue. Whether it’s a cosmetic concern or a sign of deeper structural problems, timely intervention ensures the integrity and aesthetics of your living space.

Regular inspections, proactive maintenance, and professional assistance when needed contribute to a home that stands the test of time, free from the unsightly presence of cracks between walls and ceilings.

How To Paint Basement Ceiling for a Stylish and Inviting Atmosphere? Transform Your Space

Discover the art of enhancing your basement’s aesthetic appeal by learning how to paint basement ceiling creatively. Elevate your space with this step-by-step guide for a stylish and inviting atmosphere.

How To Paint Basement Ceiling

Unleashing Creativity – How To Paint Basement Ceiling

Uncover the secrets to transforming your basement into a stylish haven through the art of ceiling painting. Dive into the steps and tips on how to paint a basement ceiling to achieve a visually stunning and welcoming atmosphere.

Preparing Your Basement for Painting:

  1. Clean and Clear the Area:
    • Begin by clearing the basement of any furniture or items that may obstruct your painting efforts. Sweep and clean the area to ensure a dust-free surface.
  2. Inspect for Damage:
    • Conduct a thorough inspection of the ceiling for any signs of damage, leaks, or mold. Address these issues before proceeding with the painting process.
  3. Choose the Right Paint:
    • Select a high-quality paint suitable for ceilings. Consider light colors to brighten the space and make it feel more expansive.

Essential Tools and Materials:

  1. Paint Rollers and Brushes:
    • Invest in quality paint rollers and brushes for efficient and even application. Extension poles can be useful for reaching higher areas.
  2. Drop Cloths or Tarps:
    • Protect the floor and any remaining items in the basement with drop cloths or tarps to prevent paint splatters.
  3. Painter’s Tape:
    • Use painter’s tape to mask off areas you don’t want to paint, such as walls or light fixtures.
  4. Primer:
    • Apply a primer to the ceiling before painting to ensure better adhesion and a more even finish.

Read too: Is Bathroom Ceiling Mold Dangerous to Your Health and Home? Unveiling the Threat

Step-by-Step Guide on How To Paint Basement Ceiling:

  1. Prepare and Prime:
    • Clean the ceiling thoroughly and apply a coat of primer. Allow it to dry completely before proceeding.
  2. Cut In the Edges:
    • Use a brush to cut in around the edges of the ceiling, where the roller might not reach easily. This ensures a clean and precise finish.
  3. Roll the Ceiling:
    • Use a paint roller to cover the larger areas of the ceiling. Work in sections, and be mindful of even paint distribution.
  4. Apply Second Coat (if Necessary):
    • After the first coat has dried, assess the coverage. If needed, apply a second coat for a more vibrant and polished look.

Tips and Tricks for a Successful Basement Ceiling Paint Job:

  1. Use Light Colors:
    • Light-colored paint can help brighten the space and create a more open and airy feel in the basement.
  2. Consider Adding a Pop of Color:
    • If you’re feeling adventurous, consider adding a pop of color to create a focal point in the basement.
  3. Work in Well-Ventilated Spaces:
    • Ensure proper ventilation in the basement while painting. Open windows or use fans to disperse fumes.
  4. Take Breaks:
    • Painting a ceiling can be physically demanding. Take regular breaks to avoid strain and fatigue.

Finishing Touches and Clean-Up:

  1. Remove Painter’s Tape:
    • Once the paint has dried, carefully remove the painter’s tape from edges for a clean finish.
  2. Inspect for Touch-Ups:
    • Inspect the painted ceiling for any areas that may need touch-ups. Address these promptly for a flawless result.
  3. Clean Brushes and Rollers:
    • Clean your brushes and rollers thoroughly with soap and water. Properly store them for future use.

Conclusion: Elevate Your Basement’s Appeal with a Fresh Coat of Paint

In conclusion, mastering how to paint a basement ceiling allows you to transform a neglected space into a stylish and inviting area. With the right tools, materials, and a creative mindset, you can achieve a stunning result that enhances the overall aesthetics of your home.

Take the plunge into basement renovation, and elevate your living space with a fresh coat of paint on the ceiling.

Luxuriate Under the Stars at the Best Vegas Hotel with Sky Ceiling: Discover the Magic

Embark on a celestial journey at the most enchanting Vegas hotel with a sky ceiling. Uncover the allure and opulence of a starlit experience that transcends the ordinary.

Vegas Hotel With Sky Ceiling

Celestial Elegance – Vegas Hotel With Sky Ceiling

Immerse yourself in the celestial allure of a Vegas hotel with a sky ceiling, where luxury meets the cosmos. Explore the unique features that make these accommodations a celestial haven for discerning travelers.

The Mesmerizing Charm of Vegas Hotels with Sky Ceilings:

  1. Starlit Ambiance:
    • Experience the breathtaking ambiance created by a sky ceiling that mimics the vastness of the night sky. Enjoy the illusion of sleeping under the stars without leaving the comfort of your hotel room.
  2. Immersive Design:
    • Delve into the innovative design concepts that elevate the aesthetics of these hotels. From advanced lighting systems to intricate ceiling displays, every detail is curated to transport guests into a celestial realm.
  3. Thematic Elegance:
    • Each Vegas hotel boasting a sky ceiling incorporates unique themes to complement the celestial atmosphere. Whether it’s a futuristic space setting or a romantic stargazing backdrop, the thematic elegance adds a touch of magic to your stay.
  4. Technological Marvels:
    • Explore the technological marvels behind these sky ceilings. Advanced projection systems, LED displays, and state-of-the-art lighting create an immersive experience that captivates guests from the moment they enter.

Top Vegas Hotels Offering Sky Ceilings:

  1. Celestial Suites at Luxor Hotel and Casino:
    • Indulge in the celestial allure of Luxor’s Celestial Suites, where a stunning sky ceiling sets the stage for a night of luxury and wonder.
  2. Stellar Stays at ARIA Resort & Casino:
    • ARIA Resort & Casino offers stellar stays with its sky ceiling suites, combining modern luxury with the enchantment of a starlit sky.
  3. Cosmic Retreats at The Venetian Resort:
    • The Venetian Resort takes luxury to new heights with its cosmic retreats featuring expansive sky ceilings that transport guests to another realm.

Why Choose a Vegas Hotel with a Sky Ceiling?

  1. Romantic Getaways:
    • Create unforgettable memories with a romantic getaway under the stars. The celestial atmosphere sets the stage for a truly magical experience.
  2. Unique Staycation:
    • Elevate your staycation by choosing a hotel that offers a sky ceiling. Enjoy a unique and immersive escape without leaving the city.
  3. Corporate Events and Celebrations:
    • Host memorable corporate events or celebrations in venues with sky ceilings, adding a touch of sophistication and wonder to your gatherings.

Tips for Maximizing Your Sky Ceiling Experience:

  1. Select the Right Room Type:
    • When booking your stay, inquire about room types that feature a sky ceiling to ensure you get the full celestial experience.
  2. Opt for Special Packages:
    • Some hotels offer special packages that include exclusive access to amenities and experiences related to the sky ceiling. Explore these options for an enhanced stay.
  3. Coordinate with Hotel Concierge:
    • Coordinate with the hotel concierge to customize your experience. They can provide additional insights on the best ways to enjoy the sky ceiling during your stay.

Read too: Is Bathroom Ceiling Mold Dangerous to Your Health and Home? Unveiling the Threat

Conclusion: Elevate Your Vegas Experience Under the Stars

In conclusion, choosing a Vegas hotel with a sky ceiling adds a touch of celestial elegance to your stay. Whether you’re seeking a romantic getaway, a unique staycation, or a memorable venue for events, these hotels offer an unparalleled experience that goes beyond the ordinary.

Immerse yourself in the enchantment of a starlit sky, and let the magic of Vegas hotels with sky ceilings create lasting memories for your next luxurious escape.

Help! My Ceiling Is Falling Down: Understanding Causes and Solutions for a Deteriorating Ceiling

Discover the reasons behind a deteriorating ceiling and explore effective solutions to address the alarming issue. Learn how to navigate the challenges when you find that your ceiling is falling down and ensure the safety and integrity of your home.

My Ceiling Is Falling Down

Unveiling the Causes – My Ceiling Is Falling Down

When faced with the unsettling realization that your ceiling is falling down, it’s crucial to understand the underlying causes. Delve into the possible reasons and take proactive steps to rectify the situation.

Common Causes of a Falling Ceiling:

  1. Water Damage:
  2. Structural Issues:
    • Issues with the building’s structure, such as inadequate support or compromised load-bearing elements, can contribute to a ceiling’s deterioration over time.
  3. Age and Wear:
    • Ceilings, like any other part of a structure, have a lifespan. Aging materials and wear-and-tear can result in weakened ceilings that may eventually collapse.
  4. Termite or Pest Damage:
    • Infestations by termites or other pests can compromise the wood components of the ceiling, making it susceptible to falling.

What To Do If Your Ceiling Is Falling Down:

  1. Ensure Safety:
    • Prioritize safety by evacuating the affected area. Avoid standing directly under the sagging or falling section of the ceiling.
  2. Identify the Source:
    • Determine the cause of the ceiling damage. If it’s a water leak, address the leak promptly to prevent further damage.
  3. Consult Professionals:
    • Seek the expertise of contractors or structural engineers to assess the extent of the damage and recommend appropriate repairs.
  4. Temporary Supports:
    • Install temporary supports, such as braces or props, to prevent further collapse until permanent repairs can be undertaken.

Repairing a Falling Ceiling:

  1. Address Water Damage:
    • Repair the source of water leaks and ensure proper drainage to prevent future water-related issues.
  2. Structural Repairs:
    • Engage professionals to assess and repair any structural issues contributing to the ceiling’s deterioration.
  3. Ceiling Replacement:
    • In severe cases, a falling ceiling may need to be replaced. This involves removing the damaged sections and installing new materials.
  4. Pest Control Measures:
    • If pests are the culprits, implement pest control measures to eliminate the infestation and prevent further damage.

Preventive Measures for a Healthy Ceiling:

  1. Regular Inspections:
    • Conduct regular inspections of your home’s ceiling for signs of damage, sagging, or discoloration.
  2. Prompt Repairs:
    • Address any issues, such as leaks or structural concerns, promptly to prevent them from escalating.
  3. Termite Inspections:
    • Schedule periodic termite inspections to catch infestations early and mitigate potential damage.
  4. Proper Ventilation:
    • Ensure proper ventilation in your home to prevent moisture buildup, which can contribute to ceiling deterioration.

Read too: Is Bathroom Ceiling Mold Dangerous to Your Health and Home? Unveiling the Threat

Conclusion: Safeguarding Your Home from Ceiling Issues

In conclusion, discovering that your ceiling is falling down can be a distressing experience, but swift and informed action can mitigate further damage. Understanding the causes and seeking professional assistance for repairs are crucial steps in ensuring the safety and longevity of your home.

Remember to prioritize preventive measures and regular inspections to catch potential issues before they escalate. A well-maintained ceiling contributes to the overall structural integrity and safety of your living space.

Brown Water Dripping From Ceiling – Causes, Prevention, and Solutions: Troubleshooting Home Woes

Have you ever experienced the unnerving sight of brown water dripping from your ceiling? It’s a scenario that can send any homeowner into a panic. In this article, we will delve into the causes, prevention methods, and effective solutions for the concerning issue of “Brown Water Dripping From Ceiling.” Understanding the root of the problem is crucial for maintaining the integrity of your home and ensuring the safety of your loved ones.

Brown Water Dripping From Ceiling
508587208

Unveiling the Causes

Brown water dripping can be attributed to various causes, each requiring a unique approach for resolution. One common culprit is a leaky roof. When rainwater infiltrates through damaged shingles or compromised roofing, it can lead to discoloration and the alarming brown water dripping into your living space.

Other potential causes include burst pipes within the walls or ceiling, leading to water discoloration due to rust or other contaminants. Additionally, poorly sealed windows and doors can allow water to seep in, causing damage over time.

Identifying Signs of Brown Water Dripping From Ceiling

Detecting the early signs of brown water dripping is crucial for timely intervention. Look out for water stains on the ceiling, which can gradually darken and change in color. Sagging or bulging areas on the ceiling may indicate water accumulation, leading to the ominous brown drips.

If you notice a musty odor or mold growth in conjunction with the brown water, it’s a clear sign of a persistent moisture issue that requires immediate attention. Being proactive in identifying these signs can save you from more extensive damage and costly repairs in the long run.

Prevention Techniques

Preventing brown water from dripping through your ceiling involves a combination of regular maintenance and prompt action. Regular roof inspections can help identify and address any issues before they escalate. Ensure that your gutters are free from debris, allowing proper drainage during heavy rainfall.

Sealing any gaps around windows and doors can prevent water infiltration, maintaining the structural integrity of your home. Insulating pipes and monitoring for leaks can also play a pivotal role in preventing the occurrence of brown water from the ceiling.

Solutions for Brown Water Dripping From Ceiling

When faced with the distressing situation of brown water dripping from your ceiling, quick and effective solutions are imperative. Start by locating the source of the issue – whether it’s a leaky roof, burst pipe, or another cause. Addressing the root problem is essential for a lasting solution.

Repairing damaged roofing, fixing leaks, and replacing faulty pipes are critical steps in resolving the issue. After resolving the source, it’s essential to address the water damage by drying the affected areas thoroughly and repairing any structural harm that may have occurred.

Read too: Help! My Ceiling Is Falling Down: Understanding Causes and Solutions for a Deteriorating Ceiling

Conclusion:

Dealing with brown water dripping is undoubtedly a homeowner’s nightmare, but understanding the causes, signs, prevention techniques, and effective solutions can empower you to tackle the issue head-on. Regular maintenance, vigilant inspection, and swift action are your allies in maintaining a safe and dry home environment. By staying informed and proactive, you can safeguard your home from the distressing sight of brown water dripping from the ceiling.