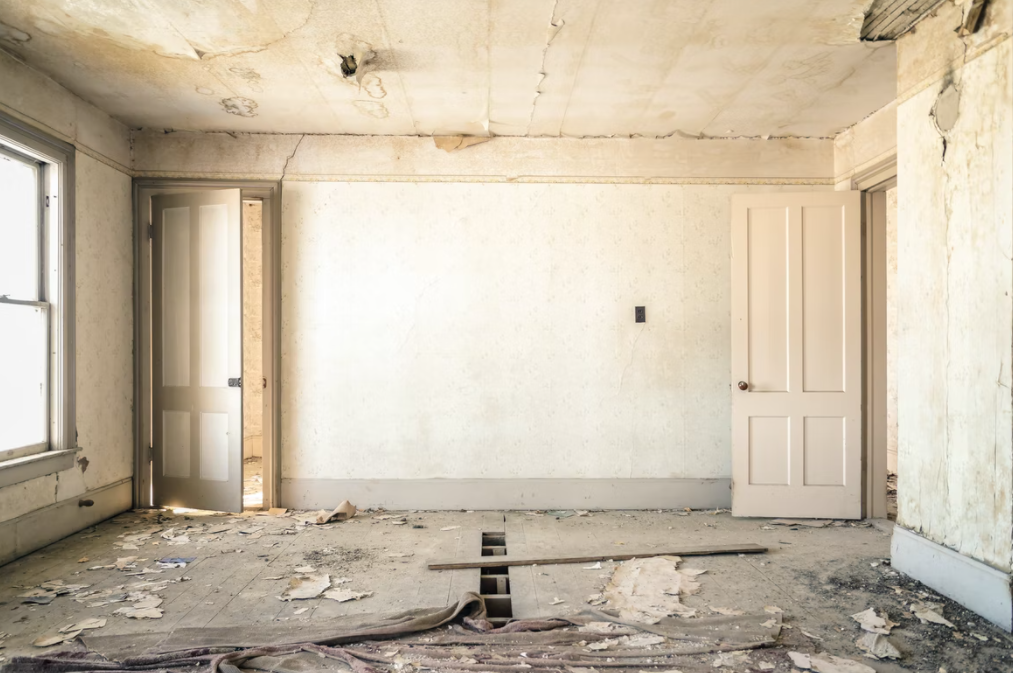
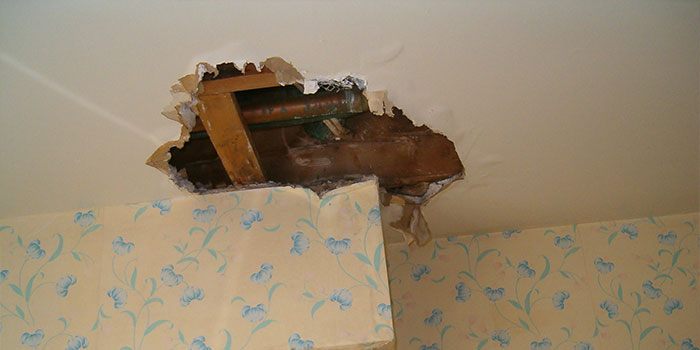
Toilet Leaks Through the Ceiling When Flushed — Causes and Solutions

Having a toilet leaks through the ceiling when flushed can be alarming. This issue is not only inconvenient but may also lead to extensive water damage, causing the ceiling to sag, stains to develop, and even structural damage if not promptly addressed. Toilet leaks that affect the ceiling often stem from various plumbing issues, such as faulty seals, broken flanges, or cracks in the toilet’s structure.

Toilet Leaks Through Ceiling When Flushed

In this article, we’ll cover common causes, how to recognize a ceiling leak when flushing the toilet, and effective ways to address the problem. Understanding why these leaks happen and knowing what to do can help prevent future damage and keep your home safe and dry.


Why Does My Toilet Leak Through the Ceiling When Flushed?

If water drips or stains appear on the ceiling directly beneath your toilet every time it’s flushed, you’re likely dealing with a plumbing issue. Understanding the underlying causes is essential for addressing this issue effectively. Here are some common reasons for this kind of leak:

1. Faulty Wax Ring Seal

The wax ring is a donut-shaped seal between the base of the toilet and the floor flange. This seal is crucial to prevent water and sewer gases from leaking into the floor or ceiling below. Over time, wax rings can deteriorate or become misaligned, causing a leak every time the toilet is flushed.

Read too: Kitchen Lighting For A Vaulted Ceiling: Illuminating Your Space with Style and Functionality

2. Cracked Toilet Base or Tank

Cracks in the toilet base or tank are another reason for ceiling leaks. Even a hairline crack can cause water to escape during each flush, leading to a slow leak that builds up over time. These cracks may not be visible to the naked eye but can still cause significant water damage.

3. Loose or Damaged Flange

The flange is the part that attaches the toilet to the floor and connects it to the waste pipe. If the flange is loose, damaged, or improperly installed, it can cause leaks. A damaged flange can create an uneven surface, making the wax ring seal ineffective, leading to water escaping during flushes.

4. Leaking Toilet Supply Line

The supply line is the pipe that connects the toilet tank to your home’s water supply. If this line is loose, damaged, or corroded, it can leak whenever the toilet is flushed. This type of leak might also worsen over time, eventually causing noticeable water damage to the ceiling below.

5. Condensation and Overflow

In some cases, condensation around the toilet tank or an overflowing tank can create water buildup around the toilet base. Although it’s less common, this water can trickle down through the floor and into the ceiling below, especially if the bathroom floor isn’t properly sealed.


Signs of a Toilet Leak Through the Ceiling When Flushed

Identifying a ceiling leak caused by a toilet is crucial to addressing the issue before it leads to costly repairs. Here are some common signs that indicate a toilet leak through the ceiling:

1. Water Stains or Discoloration

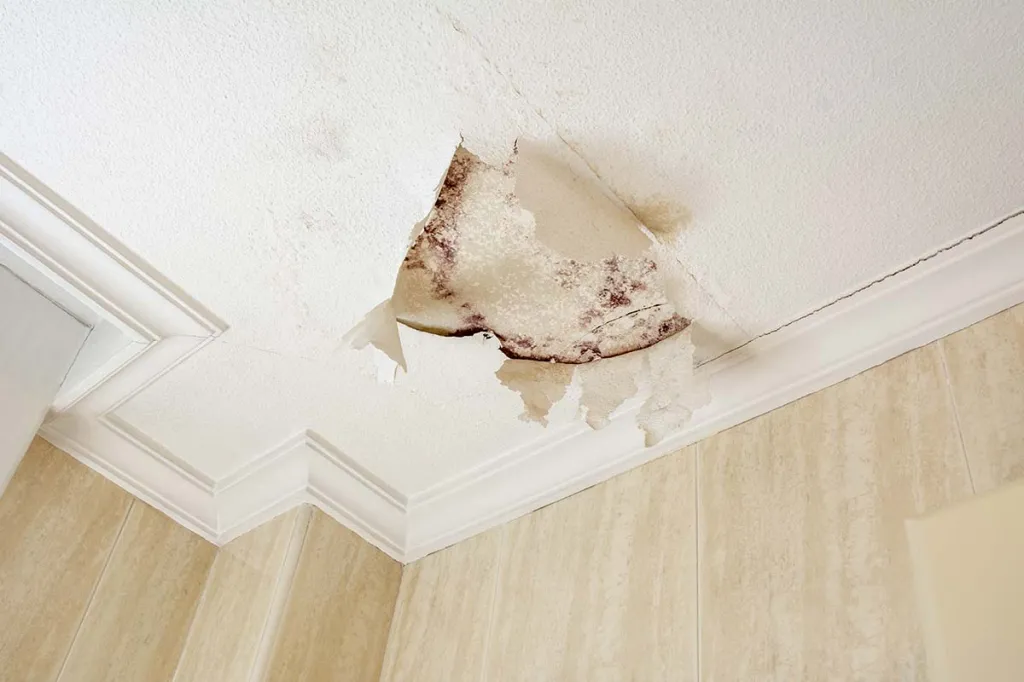
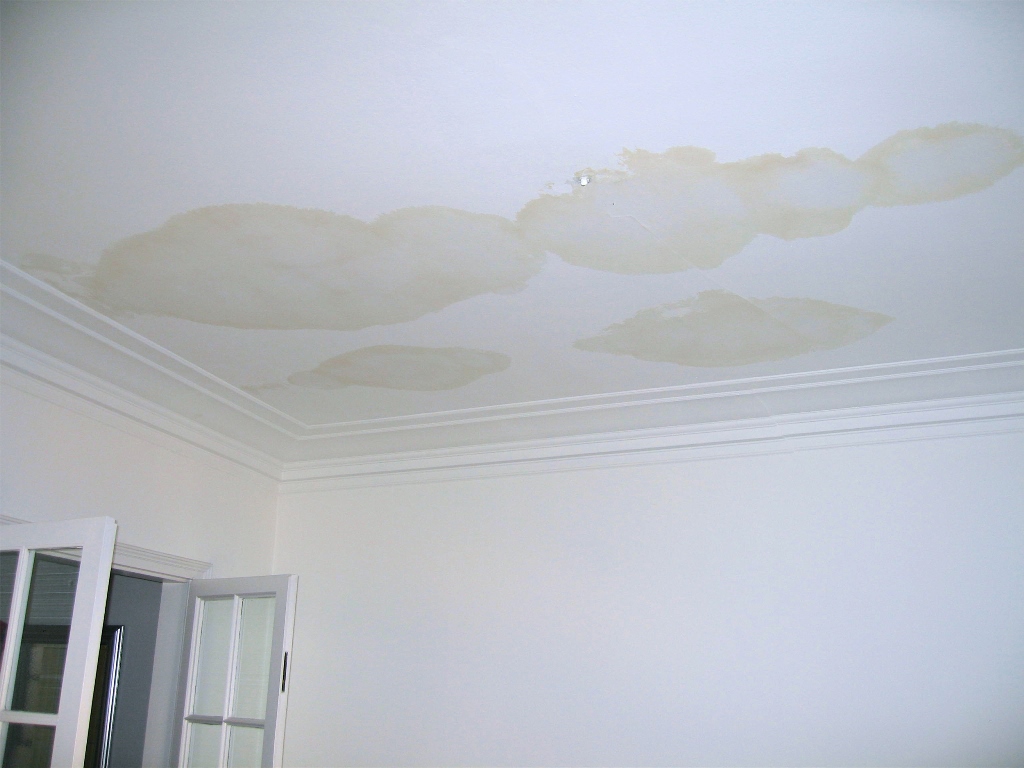
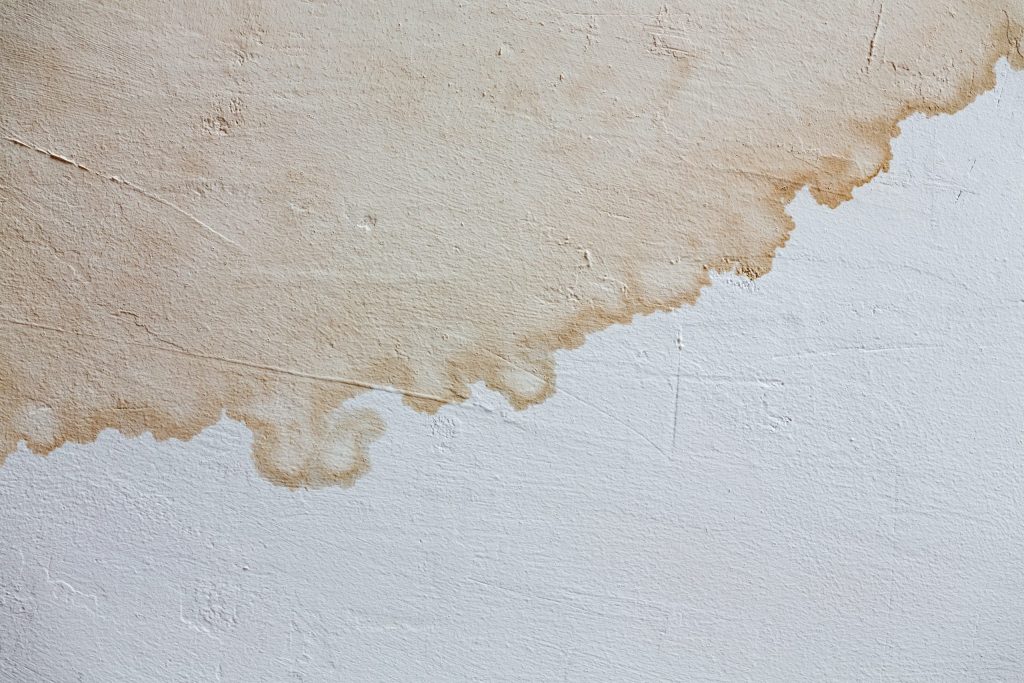
One of the most obvious signs of a ceiling leak is water stains or discoloration. These stains may appear as yellow, brown, or dark patches on the ceiling beneath the toilet.

2. Peeling Paint or Bubbling

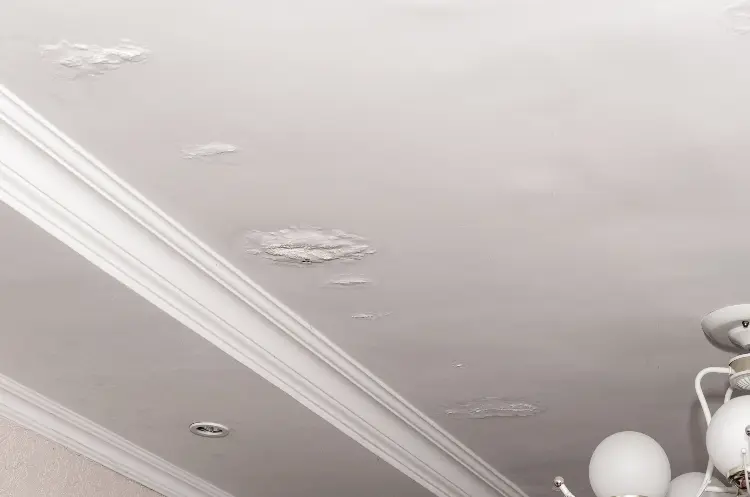
If the paint or plaster on your ceiling begins to peel, bubble, or blister, it’s likely due to moisture from a leak. This damage often occurs after prolonged exposure to water.

3. Sagging or Warping Ceiling

A significant water leak can cause the ceiling to sag or warp. This sagging is typically a sign that the leak has been ongoing and may require immediate attention to prevent further damage.

4. Mold or Mildew Growth

Moisture from a leak creates an ideal environment for mold and mildew growth. If you notice a musty odor, dark spots, or visible mold, it’s likely that there is a leak that needs immediate attention.

5. Dripping Water

If you see water dripping from the ceiling every time the toilet is flushed, this is a clear indication of a plumbing issue. At this point, the damage may be advanced, and urgent repairs are needed to prevent further structural issues.


How to Fix a Toilet Leak Through the Ceiling When Flushed

Once you’ve identified that your toilet is causing a leak in the ceiling, it’s essential to act quickly. Here’s a step-by-step guide on how to address this problem.

Step 1: Shut Off the Water Supply

Before you begin any repair, turn off the water supply to the toilet. This will prevent any additional water from leaking into the ceiling while you assess and repair the issue.

Step 2: Inspect the Toilet and Surrounding Areas

Carefully inspect the toilet for visible signs of damage. Check the base, tank, and supply line for any leaks, cracks, or looseness. Pay close attention to the wax ring seal and flange, as these are common culprits for leaks.

Step 3: Check the Wax Ring Seal

If the wax ring is old, worn, or damaged, it may need to be replaced. To do this:

  1. Remove the toilet by loosening the bolts that secure it to the floor.
  2. Carefully lift the toilet and set it aside.
  3. Scrape away the old wax ring and replace it with a new one.
  4. Reinstall the toilet and tighten the bolts securely.

This should help create a watertight seal between the toilet and the flange, preventing water from leaking through the ceiling.

Step 4: Replace or Repair the Flange

If the flange is damaged, it may need to be replaced. You may need a plumber if you’re unfamiliar with flange repairs, as improper installation can worsen leaks. A new flange should sit securely on the floor and connect snugly with the wax ring.

Step 5: Inspect and Replace the Supply Line

If the leak is caused by a faulty supply line, it’s best to replace the line entirely. You can find replacement supply lines at hardware stores. Make sure to choose a line that fits your toilet model and tighten it securely to prevent future leaks.

Step 6: Check for Cracks

If there are visible cracks in the toilet bowl or tank, replacing the toilet may be necessary. Attempting to repair cracks in the porcelain may not be effective, and leaks could worsen over time.

Step 7: Repair the Ceiling

Once the toilet leak is fixed, inspect the ceiling for water damage. Damaged drywall may need to be cut out and replaced, followed by repainting to restore the ceiling’s appearance.


How to Prevent Future Leaks

Preventing future leaks is essential for maintaining the integrity of your plumbing system and protecting your home. Here are some preventative measures to consider:

1. Regular Inspections

Perform regular checks of your toilet, wax seal, and supply lines to ensure everything is in good working order. Catching potential problems early can prevent leaks from forming.

2. Avoid Over-Tightening Bolts

Over-tightening the toilet bolts can cause the porcelain to crack, which may lead to leaks. Be mindful when reinstalling your toilet or making adjustments.

3. Keep Humidity Levels in Check

Bathrooms are prone to humidity, which can contribute to condensation issues. Installing a ventilation fan can help control humidity levels and reduce the risk of water damage.

4. Monitor Water Bills

If you notice an unexpected increase in your water bill, it could indicate a leak somewhere in your plumbing. Investigate promptly to prevent further damage.

5. Schedule Professional Plumbing Inspections

Routine inspections by a plumber can help you identify small issues before they become major problems. Professional inspections ensure your plumbing system remains in optimal condition.


Conclusion

A toilet leaks through the ceiling when flushed is an issue that requires immediate attention. Left unchecked, it can lead to significant water damage, mold growth, and costly repairs. By understanding the common causes—such as a faulty wax ring, damaged flange, or cracked toilet bowl—you can take action to repair the problem and protect your home.

If you are uncertain about any part of the repair process, consulting with a licensed plumber is always a good idea. Professional assistance can ensure the leak is properly fixed, giving you peace of mind and a dry, safe home environment. Remember to take preventative steps to maintain your plumbing, and you’ll minimize the chances of encountering this issue again in the future.

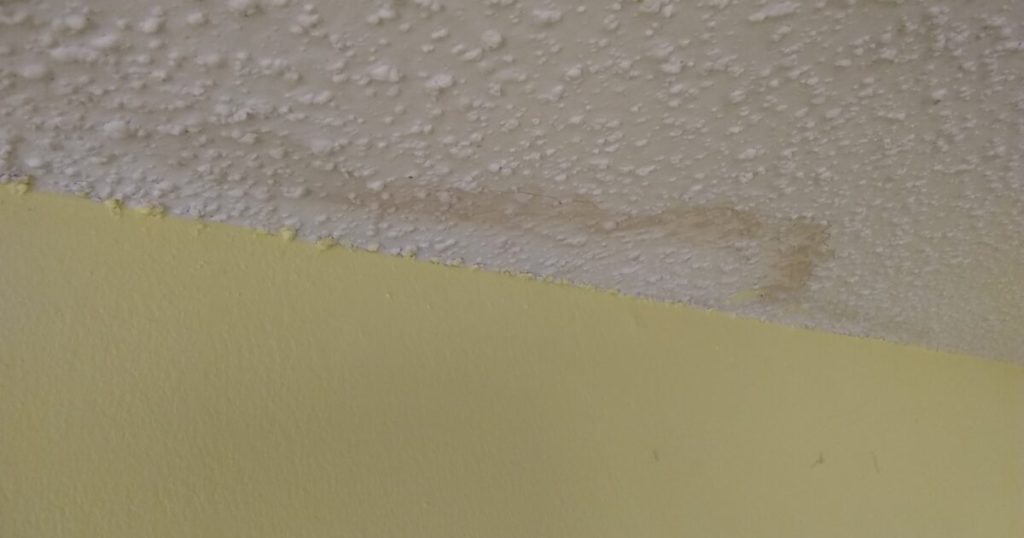
Toilet Causing Leak In Ceiling: Causes, Solutions, and Prevention Tips

Toilet Causing Leak In Ceiling. A leaking toilet can lead to significant problems in your home, especially if it results in a toilet causing leak in ceiling. This issue not only creates unsightly water stains but can also lead to structural damage and mold growth if left unaddressed. Understanding the potential causes of a toilet leak, how to identify them, and the necessary steps to take for repair is essential for any homeowner.

In this comprehensive guide, we will delve into the common reasons behind a leaking toilet, how to recognize the signs, and what you can do to fix and prevent these issues. By following these insights, you can maintain the integrity of your plumbing system and ensure a safe living environment.


Understanding the Problem: Why Toilets Leak

To understand why a toilet might cause a leak in the ceiling below, it’s essential to first know the various components of a toilet and how they function. Here are some of the primary reasons a toilet can leak:

1. Faulty Wax Seal

The wax seal is the barrier between the toilet base and the floor. Over time, this seal can wear out or become damaged, leading to leaks. If the wax seal fails, water can seep out and eventually make its way into the ceiling of the room below.

Read too: Kitchen Lighting For A Vaulted Ceiling: Illuminating Your Space with Style and Functionality

2. Loose or Damaged Flange

The flange is the part that connects the toilet to the floor and the waste pipe. If it is cracked, broken, or improperly installed, it can cause a leak. This issue is often exacerbated by improper toilet installation or age-related wear and tear.

3. Cracked Toilet Bowl or Tank

A visible crack in the toilet bowl or tank can lead to significant leaks. These cracks may not always be obvious, so it’s essential to inspect the toilet thoroughly. If the toilet is cracked, it may require replacement.

4. Damaged Supply Line

The supply line carries water from the wall to the toilet tank. If this line becomes damaged or corroded, it can cause water to leak out and eventually drip down to the ceiling below.

5. Overflowing Tank

If the toilet tank is overfilling due to a malfunctioning fill valve, it can cause water to spill over the top and leak onto the floor. This issue can lead to water pooling around the base of the toilet and dripping through the ceiling below.

6. Condensation

In some cases, condensation can form on the outside of the toilet tank due to temperature differences. While this is not a leak per se, it can lead to water pooling around the base, which may appear to be a leak. However, condensation can contribute to the growth of mold and mildew if not managed properly.


Recognizing the Signs of a Toilet Leak

Detecting a leak from your toilet early can save you from extensive water damage and costly repairs. Here are some common signs that your toilet may be leaking:

1. Water Stains on the Ceiling

One of the most noticeable signs of a toilet leak is water stains on the ceiling below. These stains often appear as dark spots or rings, indicating moisture intrusion from above.

2. Swelling or Warping

If the ceiling is sagging or warping in the area directly below the toilet, this may be a sign of water damage caused by a leak. Wood and drywall can become compromised when exposed to moisture over time.

3. Mold or Mildew Growth

Mold and mildew thrive in moist environments. If you notice a musty odor or visible mold on the ceiling or surrounding areas, it may indicate a leak from the toilet.

4. Increased Water Bills

If you observe a sudden spike in your water bill without a clear explanation, it could indicate a leak in your plumbing system, including the toilet.

5. Puddles of Water

Any puddles of water around the base of the toilet are a clear sign of a leak. It’s essential to address this immediately to prevent further damage.


Steps to Take When You Suspect a Toilet Leak

If you suspect that your toilet is causing a leak in the ceiling, it’s crucial to act quickly. Here are the steps you should take:

Step 1: Shut Off the Water Supply

The first thing you should do is shut off the water supply to the toilet. You can typically find the shut-off valve located behind the toilet near the floor. Turn it clockwise to stop the flow of water.

Step 2: Inspect the Toilet

Once the water supply is turned off, carefully inspect the toilet for signs of leaks. Check the following components:

  • Wax seal: Look for signs of water pooling around the base of the toilet.
  • Flange: Inspect for any visible cracks or damage.
  • Tank and bowl: Check for cracks or leaks when flushing.
  • Supply line: Look for corrosion or signs of leakage.

Step 3: Identify the Source of the Leak

After your inspection, identify where the leak is originating from. This will help you determine the appropriate repair method.

Step 4: Make Necessary Repairs

Depending on the source of the leak, you may need to undertake one of the following repairs:

  • Replace the wax seal: If the wax seal is damaged, you’ll need to remove the toilet, replace the seal, and re-install the toilet securely.
  • Repair or replace the flange: If the flange is broken, it may need to be repaired or replaced. This may involve lifting the toilet and replacing the flange.
  • Fix a cracked toilet: If you discover cracks in the toilet, you may need to replace the entire unit. Cracks can worsen over time and lead to significant leaks.
  • Replace the supply line: If the supply line is the source of the leak, replace it with a new one to stop the leakage.
  • Adjust the fill valve: If the toilet tank is overflowing, check and adjust the fill valve to prevent further overflows.

Step 5: Check for Damage in the Ceiling

Once you’ve made the necessary repairs, inspect the ceiling for any signs of water damage. You may need to patch or repaint the ceiling if there are stains or damage.


Preventing Toilet Leaks

Taking proactive measures can help prevent leaks from occurring in the first place. Here are some tips to help you maintain your toilet and plumbing system:

1. Regular Inspections

Make it a habit to inspect your toilet regularly. Look for any signs of wear or leaks, and address them immediately to prevent further damage.

2. Replace Old Components

Over time, the components of your toilet can wear out. If your toilet is older than 10 years, consider replacing parts such as the wax seal, flapper, and fill valve to prevent leaks.

3. Monitor Water Bills

Keep an eye on your water bill for any unexplained increases. Sudden spikes can indicate a leak in your plumbing system.

4. Maintain Humidity Levels

If condensation is a recurring issue, consider using a toilet tank insulation kit to prevent moisture from forming on the outside of the tank.

5. Professional Inspections

Consider scheduling regular plumbing inspections with a licensed plumber to ensure that your plumbing system is in good condition. They can identify potential issues before they become significant problems.


Conclusion

A toilet causing leak in ceiling can lead to extensive damage and costly repairs if not addressed promptly. By understanding the common causes of toilet leaks, recognizing the signs, and taking the necessary steps to fix and prevent them, you can protect your home from water damage.

If you encounter a leak, act quickly by shutting off the water supply, inspecting the toilet, and making the appropriate repairs. Regular maintenance and inspections can help keep your plumbing system in top shape, allowing you to enjoy your home without the worry of leaks and damage.

Remember, if you are unsure about any aspect of toilet repair or if the problem persists, it is always best to consult with a licensed plumber who can provide expert advice and service. Taking these steps will ensure that your toilet remains a reliable fixture in your home for years to come.

Dealing with Water Damage on Your Popcorn Ceiling: Unveiling the Consequences

Discovering water damage on your popcorn ceiling can be an alarming situation, requiring immediate attention. In this comprehensive guide, we’ll explore the intricacies of “Water Damage Popcorn Ceiling,” shedding light on the causes, identifying the signs, and offering effective solutions. Learn how to safeguard your ceiling from water-related issues and restore the aesthetic appeal of your home.

Water Damage Popcorn Ceiling

Understanding the Impact: Water Damage Popcorn Ceiling

Before delving into solutions, let’s decipher the issue of water damage on popcorn ceilings. This textured ceiling style is particularly susceptible to water-related problems, leading to discoloration, peeling, and potential structural damage.

Common Causes of Water Damage on Popcorn Ceilings

  1. Roof Leaks: Damaged or deteriorating roofs can allow water to seep through, impacting the popcorn ceiling below. Regular roof inspections are essential to identify and address leaks promptly.
  2. Plumbing Leaks: Leaky pipes within the home can result in water accumulation on ceilings, causing damage to popcorn textures. Regularly inspect plumbing systems for potential issues.
  3. Bathroom Water Damage: Leaks from bathrooms, especially on upper floors, can lead to water damage on popcorn ceilings below. Inspect fixtures, pipes, and shower enclosures for potential leaks.
  4. Condensation Issues: Poor ventilation and high humidity levels can cause condensation on ceilings, leading to water damage on popcorn textures. Improve ventilation to minimize this risk.
  5. Appliance Leaks: Malfunctioning appliances, such as water heaters or air conditioning units, can cause water leakage and damage popcorn ceilings. Regularly inspect and maintain appliances.

Addressing the Issue: Solutions for Water Damage Popcorn Ceiling

  1. Roof Repairs: Identify and address any issues with the roof promptly. Repair or replace damaged shingles and ensure proper drainage to prevent water from reaching the popcorn ceiling.
  2. Plumbing Inspections: Regularly inspect plumbing systems for leaks. Address any identified issues promptly, and consider professional assistance for complex plumbing problems.
  3. Bathroom Repairs: Inspect bathrooms for potential leaks. Repair damaged fixtures, address plumbing issues, and use waterproofing solutions to prevent water infiltration.
  4. Improved Ventilation: Enhance ventilation in your home to reduce condensation. Use exhaust fans, open windows, and consider dehumidifiers in areas prone to excess moisture.
  5. Appliance Maintenance: Schedule regular maintenance for appliances prone to leaks. Ensure proper functioning and address any issues promptly to prevent water damage on popcorn ceilings.

Read too: Understanding and Addressing a Leaky Ceiling in Your Apartment: Navigating the Drips

Preventive Measures: Safeguarding Your Popcorn Ceiling

  1. Regular Inspections: Conduct routine inspections of your ceiling for any signs of water damage. Early detection allows for prompt intervention and prevents extensive damage.
  2. Timely Repairs: Address any visible damage or wear promptly. Timely repairs can prevent minor issues from turning into major problems, avoiding water damage on popcorn ceilings.
  3. Waterproofing: Consider applying waterproofing solutions to your popcorn ceiling, especially in areas prone to water exposure. This adds an extra layer of protection against potential damage.

Conclusion

In conclusion, dealing with “Water Damage Popcorn Ceiling” requires a proactive and systematic approach to identify and address the root causes. Regular maintenance, prompt repairs, and preventive measures are crucial in preserving the integrity and aesthetics of your popcorn ceiling. By understanding common culprits and implementing the suggested solutions, homeowners can ensure the longevity and visual appeal of their ceilings.

Ceiling Bubbling From Water Issues Unveiled: Troubleshooting Tips for a Disturbing Dilemma

Discovering your ceiling bubbling from water can be a distressing sight, signaling potential water damage. In this comprehensive guide, we’ll delve into the common causes behind “Ceiling Bubbling From Water” and provide practical insights on identifying, addressing, and preventing this issue. Learn about the intricacies of ceiling bubbling and safeguard your home from the consequences of water infiltration.

Ceiling Bubbling From Water

Understanding the Phenomenon: Ceiling Bubbling From Water

Before exploring solutions, let’s unravel the phenomenon of a ceiling bubbling from water. This occurrence typically indicates water accumulating between the ceiling and the paint or drywall, potentially causing visible bulges or blisters.

Common Causes

  1. Roof Leaks: A damaged or aging roof may allow water to penetrate, leading to ceiling bubbling. Inspect your roof for missing shingles, cracks, or other signs of damage.
  2. Plumbing Leaks: Leaky pipes within the walls or ceiling can result in water accumulation, causing the ceiling to bubble. Regularly inspect plumbing for any signs of leaks.
  3. Condensation Issues: Excessive moisture in the air can lead to condensation on the ceiling, causing bubbling. Improve ventilation and address humidity concerns to mitigate this issue.
  4. Leaking HVAC Systems: Faulty HVAC systems can contribute to water leakage. Inspect your air conditioning units and ensure proper drainage to prevent water buildup.
  5. Bathroom Water Damage: Leaks from bathrooms, especially those on upper floors, can seep into ceilings below, causing bubbling. Inspect fixtures, pipes, and shower enclosures for potential issues.

Addressing the Issue:

  1. Roof Repairs: If the source is a damaged roof, consider professional roof repairs or replacement. Address issues promptly to prevent further water infiltration.
  2. Plumbing Inspections: Regularly inspect plumbing systems for leaks. Address any identified issues promptly, and consider professional assistance for complex plumbing problems.
  3. Improved Ventilation: Enhance ventilation in your home to reduce condensation. Use exhaust fans, open windows, and consider dehumidifiers in areas prone to excess moisture.
  4. HVAC Maintenance: Schedule regular maintenance for your HVAC systems. Ensure proper drainage and address any issues promptly to prevent water leaks.
  5. Bathroom Repairs: Inspect bathrooms for potential leaks. Repair damaged fixtures, address plumbing issues, and use waterproofing solutions to prevent water infiltration.

Read too: Dealing with Water Damage on Your Popcorn Ceiling: Unveiling the Consequences

Preventive Measures: Safeguarding Against Ceiling Bubbling From Water

  1. Regular Home Inspections: Conduct regular home inspections to identify potential issues before they escalate. Pay attention to ceilings, walls, and other susceptible areas.
  2. Timely Repairs: Address any visible damage or wear promptly. Timely repairs can prevent minor issues from turning into major problems, avoiding ceiling bubbling.
  3. Proper Roof Maintenance: Perform regular roof inspections and maintenance. Replace damaged shingles, fix any issues promptly, and consider professional roofing services.

Conclusion

In conclusion, addressing “Ceiling Bubbling From Water” requires a systematic approach to identify and resolve the root causes. Regular maintenance, prompt repairs, and proactive measures are crucial in preventing and mitigating this issue. By understanding common culprits and implementing the suggested solutions, homeowners can maintain a dry and damage-free environment within their homes.

Understanding and Addressing Wet Marks on Ceiling: Decoding the Damp Dilemma

Discovering wet marks on your ceiling can be a cause for concern, signifying potential issues that need attention. In this comprehensive guide, we will delve into the common reasons behind wet marks on the ceiling and provide practical solutions to address and prevent further damage.

Wet Marks On Ceiling
508587208

Understanding Wet Marks on Ceiling: A Troubling Sign

Detecting the Issue

The first step in addressing wet marks is understanding what they indicate. Whether it’s a subtle discoloration or noticeable water streaks, these signs suggest the presence of moisture, and identifying the source is crucial.

Potential Causes

Several factors can contribute to wet marks on the ceiling. Roof leaks, plumbing issues, condensation, or even poor ventilation can result in the accumulation of moisture, leading to unsightly and potentially damaging marks.

Investigating Wet Marks on Ceiling: Identifying the Culprit

Roof Leaks

Inspect your roof for missing or damaged shingles, as well as cracked flashing around chimneys and vents. Addressing these issues promptly can prevent further water penetration and damage to the ceiling.

Plumbing Issues

Leaks from plumbing fixtures or pipes can lead to wet marks. Check for visible leaks, water stains, or mold growth around pipes and fixtures. Address any plumbing issues promptly to prevent further damage.

Condensation Concerns

Poor ventilation can lead to condensation, especially in areas with high humidity. Check for signs of condensation on windows, walls, and ceilings. Improving ventilation and using dehumidifiers can help mitigate this issue.

Practical Solutions:

Locate and Repair the Source

Once the source of the moisture is identified, take necessary steps to repair it. Whether it’s fixing a roof leak, addressing plumbing issues, or improving ventilation, repairing the source is essential to prevent recurrence.

Remove Mold and Mildew

Wet marks can lead to mold and mildew growth. Clean affected areas with a mixture of water and mild detergent. For persistent mold issues, consider consulting professionals for thorough remediation.

Repaint and Restore

After addressing the root cause and ensuring the affected area is thoroughly dry, consider repainting the ceiling to restore its appearance. Use moisture-resistant paint to prevent future issues.

Preventing Future Wet Marks on Ceiling: Maintenance Tips

Regular Inspections

Schedule regular inspections of your roof, plumbing, and ventilation systems to catch potential issues before they escalate.

Ensure Proper Ventilation

Proper ventilation is crucial in preventing moisture buildup. Use exhaust fans in bathrooms and kitchens, and ensure attic spaces are adequately ventilated.

Read too: Condo Ceiling Leak Responsible and How to Address It: Unveiling the Culprit

Conclusion: A Dry and Secure Home

In conclusion, wet marks on the ceiling can be a red flag indicating potential issues that require prompt attention. By understanding the causes, identifying the source, and implementing practical solutions, you can maintain a dry and secure home, free from the troubles of water damage.

Understanding and Addressing the Wet Spot on Ceiling Dilemma: Unlocking the Mystery

Have you ever noticed an unsightly wet spot on your ceiling that seemed to appear out of nowhere? If so, you’re not alone. The perplexing issue of a wet spot on the ceiling can be a cause for concern for many homeowners. In this comprehensive guide, we’ll delve into the various aspects of this phenomenon, exploring its potential causes, consequences, and effective solutions.

Wet Spot On Ceiling

Read too: Understanding and Addressing a Condensation Leak in the Ceiling: Decoding the Drip

Unveiling the Mystery:

A wet spot on the ceiling can be a disconcerting sight, leaving homeowners puzzled and anxious about potential damage to their property. This phenomenon is often an indicator of an underlying issue that requires prompt attention.

Causes of Wet Spots On Ceiling: Decoding the Culprits

  1. Roof Leaks: One of the primary culprits behind a wet spot on the ceiling is a roof leak. Whether it’s a damaged shingle, compromised flashing, or an aging roof, water infiltration can lead to persistent wet spots.
  2. Plumbing Issues: Faulty plumbing can also contribute to wet spots on the ceiling. Leaking pipes, dripping fixtures, or even a burst pipe within the walls can result in water seepage, manifesting as wet spots overhead.
  3. Condensation Concerns: In some cases, condensation may be the root cause. Poor ventilation and insulation can lead to moisture buildup, forming unsightly wet spots on the ceiling.

Consequences of Ignoring Wet Spots On Ceiling: The Price of Neglect

Ignoring a wet spot on the ceiling can have severe consequences, both structurally and aesthetically. Mold growth, compromised structural integrity, and damage to belongings are among the potential outcomes. Addressing the issue promptly is crucial to preventing further deterioration.

Addressing the Issue: Solutions for Wet Spot On Ceiling

  1. Roof Repairs: If a roof leak is identified as the source, prompt repairs are imperative. This may involve patching up damaged areas, replacing shingles, or even investing in a new roof if necessary.
  2. Plumbing Inspection and Repairs: A thorough inspection of the plumbing system is essential. Any leaks or issues should be repaired promptly to prevent further water damage and the formation of wet spots on the ceiling.
  3. Improving Ventilation: Adequate ventilation is crucial in preventing condensation-related wet spots. Installing vents, exhaust fans, or improving overall ventilation in affected areas can help mitigate the issue.

Conclusion: Taking Action Against Wet Spots On Ceiling

In conclusion, a wet spot on the ceiling is not merely a cosmetic concern; it’s a symptom of underlying issues that demand attention. By understanding the potential causes and consequences, homeowners can take proactive steps to address the problem and safeguard their homes from further damage.

Remember, a vigilant approach to maintenance and timely repairs can save you from the headaches and expenses associated with neglecting the wet spots on your ceiling. If you notice this issue in your home, don’t hesitate to investigate and take corrective action promptly.

Don’t let a wet spot on your ceiling turn into a major headache. By staying informed and addressing the root causes, you can maintain a dry, comfortable, and structurally sound home for years to come.

Causes and Solutions for Water Droplets on Ceiling: Unveiling the Mystery

Witnessing water droplets on the ceiling can be a cause for alarm, prompting questions about the underlying issues. In this comprehensive guide, we will delve into the potential causes of water droplets, offering valuable insights and practical tips to safeguard your home.

Water Droplets On Ceiling

Investigating the Issue: Understanding Water Droplets on Ceiling

To effectively address the presence of water droplets on the ceiling, it’s crucial to understand the root causes behind this phenomenon. Let’s explore the possible reasons and proactive measures to mitigate the problem.

*1. Condensation and Humidity Buildup

One common cause of water droplets is condensation resulting from high humidity levels. In areas with poor ventilation, especially bathrooms and kitchens, warm air meeting a cold surface can lead to condensation.

Solution:

  • Improve ventilation by using exhaust fans or opening windows.
  • Consider using a dehumidifier to regulate indoor humidity levels.

*2. Roof Leaks and Water Infiltration

Roof leaks are a significant contributor to water droplets on the ceiling. Damaged or compromised roofing materials allow water to seep into the structure, leading to visible signs of moisture on the ceiling.

Solution:

  • Inspect the roof for any signs of damage or missing shingles.
  • Repair leaks promptly and ensure proper roof maintenance.

*3. Plumbing Issues and Pipe Leaks

Leaking pipes within the ceiling or walls can result in water droplets appearing on the ceiling. This may occur due to aging pipes, corrosion, or accidental damage.

Solution:

  • Regularly inspect plumbing systems for leaks and address them immediately.
  • Consider replacing old or deteriorating pipes to prevent future issues.

*4. Improper Insulation

Inadequate insulation can lead to temperature differentials between the interior and exterior surfaces, causing condensation and water droplets.

Solution:

  • Evaluate and improve insulation in the attic and other relevant areas.
  • Ensure a consistent thermal barrier to prevent temperature variations.

*5. Ceiling Ventilation Issues

Poor ceiling ventilation can contribute to stagnant air, increasing the likelihood of condensation and water droplets.

Solution:

Steps to Address and Prevent Water Droplets on Ceiling

  1. Regular Inspection Routine: Conduct regular inspections of your home, focusing on the roof, plumbing, and ceilings. Promptly address any signs of water damage or leaks.
  2. Effective Ventilation Practices: Implement effective ventilation strategies in high-humidity areas such as bathrooms and kitchens. Ensure exhaust fans are in good working condition.
  3. Roof Maintenance: Schedule routine roof inspections and address any damage promptly. Replace missing shingles, repair leaks, and maintain the overall integrity of the roofing system.
  4. Plumbing System Checks: Regularly inspect plumbing systems for leaks or signs of wear. Upgrade or replace aging pipes to prevent water-related issues.
  5. Insulation Improvement: Evaluate the insulation in your home, especially in the attic. Enhance insulation to maintain consistent temperatures and prevent condensation.
  6. Professional Assistance: If water droplets persist despite preventive measures, consult with professionals such as roofers or plumbers for a thorough assessment and targeted solutions.

Read too: Troubleshooting and Addressing a Water Bubble in Ceiling: Causes and Solutions Revealed

Conclusion: Safeguarding Your Home from Water Droplets on Ceiling

In conclusion, water droplets on the ceiling can indicate underlying issues that require attention and resolution. By understanding the potential causes and implementing proactive measures, homeowners can protect their homes from water-related damage.

Regular maintenance, timely repairs, and a vigilant approach to potential issues contribute to a secure and dry living environment. Remember, addressing water droplets on the ceiling promptly not only preserves the aesthetics of your home but also ensures the structural integrity and longevity of your property.

Uncover the Mystery: Why Is My Ceiling Wet and What You Can Do About It

A wet ceiling can be an alarming sight, leaving homeowners puzzled and concerned about the potential causes behind this issue. In this comprehensive guide, we will delve into the common reasons for a wet ceiling, explore the implications, and offer practical solutions to address the problem. If you’ve ever asked yourself, “Why is my ceiling wet?” you’re not alone. Let’s unravel the mystery together.

Why Is My Ceiling Wet

Understanding the Signs: Why Is My Ceiling Wet?

Have you noticed water stains on your ceiling? Perhaps there’s a damp or spongy texture when you touch it? These are clear indicators that something is amiss. To address the issue effectively, we first need to identify the root cause.

Common Culprits Behind a Wet Ceiling

  1. Roof Leaks: The Silent InvaderA damaged or aging roof is a leading cause of water intrusion into your home. Missing shingles, cracked flashing, or compromised seals can allow rainwater to seep through, leading to a wet ceiling. Regular roof inspections and timely repairs are crucial in preventing this issue.
  2. Leaky Pipes: Concealed DangersUndetected leaks in plumbing pipes can wreak havoc on your ceiling. Whether it’s a slow drip or a sudden burst, water damage can accumulate over time, leading to a wet and discolored ceiling. Regular plumbing maintenance and inspections are vital to catch these issues early.
  3. Condensation Woes: Humidity Takes Its TollHigh humidity levels within your home can result in condensation forming on the ceiling. This moisture buildup can eventually lead to a wet ceiling. Adequate ventilation, proper insulation, and the use of dehumidifiers can help control indoor humidity and prevent this issue.
  4. Faulty HVAC Systems: Cooling Down, Dripping UpAir conditioning units generate condensate as they cool the air. If the condensate drainage system is faulty or clogged, it can lead to water dripping onto your ceiling. Regular HVAC maintenance, including cleaning and inspecting drainage lines, can prevent this from happening.

Addressing the Issue: What to Do When Your Ceiling is Wet

Now that we’ve explored the possible culprits, it’s time to take action. Depending on the cause, there are several steps you can take to remedy a wet ceiling.

1. Roof Repairs

If the issue lies with your roof, consult a professional roofer to assess and repair any damage. Prompt action can prevent further water damage to your ceiling and the structural integrity of your home.

2. Plumbing Fixes

For plumbing-related issues, enlist the services of a qualified plumber. They can identify and repair leaks, ensuring your plumbing system is in top condition and preventing future ceiling wetness.

3. Humidity Control

Invest in proper ventilation and insulation to control indoor humidity levels. Additionally, consider using dehumidifiers in areas prone to excess moisture, such as basements or bathrooms.

4. HVAC Maintenance

Schedule regular maintenance for your HVAC system to prevent condensate-related issues. This includes cleaning or replacing filters and ensuring proper drainage from the unit.

Conclusion: A Dry and Secure Home Awaits

Understanding the causes of a wet ceiling empowers homeowners to take proactive steps in preventing and addressing this issue. Whether it’s a leaking roof, faulty plumbing, condensation, or HVAC-related problems, early detection and timely action are key.

Remember, if you ever find yourself wondering, “Why is my ceiling wet?” it’s crucial to investigate and address the root cause promptly. By doing so, you not only protect the structural integrity of your home but also ensure a dry and comfortable living space for you and your family.

Unveiling the Mystery: Causes and Solutions for Small Water Bubbles on Ceiling Surfaces

Are you noticing small water bubbles on your ceiling? Dive into the intricacies of “Small Water Bubbles on Ceiling” to understand the underlying issues and discover effective solutions for a dry and intact ceiling.

Small Water Bubbles On Ceiling

Unmasking the Culprits

Explore the various factors contributing to the appearance of small water bubbles and gain insights into their origins.

Common Causes of Small Water Bubbles On Ceiling:

  1. Roof Leaks: Roof leaks are a frequent culprit. Water seeping through the roof can accumulate in the ceiling, forming bubbles as it disrupts the surface.
  2. Plumbing Issues: Faulty plumbing, such as leaking pipes or water buildup in the ceiling, can manifest as small water bubbles. Regular plumbing inspections are essential.
  3. Condensation: Excessive moisture in the air can lead to condensation on the ceiling, resulting in small water bubbles. This is common in areas with poor ventilation.

Understanding the Impact

Grasp the potential consequences of small water bubbles and why immediate action is crucial.

  1. Structural Damage: Small water bubbles, if left unattended, can lead to structural damage. This includes compromised drywall, weakened ceiling materials, and even potential hazards like mold growth.
  2. Aesthetic Issues: Beyond structural concerns, water bubbles on the ceiling affect the aesthetic appeal of your space. Stains, discoloration, and peeling paint are common consequences.

Dealing with Small Water Bubbles On Ceiling

Discover practical solutions to address existing water bubbles and prevent their recurrence in the future.

Identifying and Fixing the Source: Small Water Bubbles

Learn the step-by-step process to identify the source of the issue and implement effective fixes.

  1. Inspecting the Roof: Begin with a thorough inspection of your roof. Look for missing or damaged shingles, cracks, or any signs of water entry. Addressing roof issues can prevent further water damage to your ceiling.
  2. Checking Plumbing Systems: Enlist the help of a professional plumber to inspect your plumbing systems. Identify and fix any leaks promptly, preventing water from accumulating in the ceiling.
  3. Improving Ventilation: Enhance ventilation in your home to minimize condensation-related issues. Use exhaust fans, ensure proper attic ventilation, and consider a dehumidifier in humid climates.

Preventive Measures

Implement proactive measures to prevent the recurrence of small water bubbles.

  1. Regular Inspections: Conduct regular inspections of your roof and plumbing systems. Early detection and intervention can prevent small issues from evolving into major problems.
  2. Maintaining Indoor Humidity: Control indoor humidity levels to reduce the likelihood of condensation. Proper insulation and ventilation contribute to a balanced indoor environment.
  3. Prompt Repairs: Address any water damage or leaks promptly. Quick repairs can prevent the formation of small water bubbles and mitigate potential structural damage.

Read too: How To Dry Wet Ceiling

Conclusion: A Dry and Pristine Ceiling Awaits

In conclusion, addressing small water bubbles on your ceiling requires a combination of identifying the root cause, implementing effective solutions, and adopting preventive measures. By understanding the common causes and consequences, you can take proactive steps to ensure a dry, intact, and aesthetically pleasing ceiling in your home. Remember, early intervention is key to preserving the structural integrity and visual appeal of your living space.

When Disaster Strikes Upstairs: What Causes a Toilet to Leak Through the Ceiling?

A leaking toilet can be a homeowner’s worst nightmare. It’s not just about the mess and inconvenience; when a toilet leak reaches your ceiling below, it can lead to significant damage and costly repairs. If you’re facing the distressing situation of a toilet leaking through the ceiling, it’s crucial to understand the possible causes and how to address them promptly.

What Causes Toilet To Leak Through Ceiling

Understanding the Consequences of a Toilet Leak

Before we dive into the causes, it’s essential to recognize the potential consequences of a toilet leak through the ceiling. Such leaks can lead to several issues:

  • Ceiling Damage: Water leaks can weaken the ceiling structure, cause discoloration, and even lead to mold growth if not addressed promptly.
  • Water Damage: Water can seep into the walls and floors, causing structural damage and compromising the integrity of your home.
  • Health Risks: Prolonged water exposure can result in mold growth, which can pose health risks to you and your family.

Now, let’s explore the common causes of a toilet leaking through the ceiling:

1. Faulty Wax Ring

The wax ring is a critical seal that sits between the base of the toilet and the flange on the floor. If this wax ring deteriorates or is not installed correctly, it can allow water to leak from the base of the toilet and seep into the floor, eventually making its way through the ceiling below.

2. Loose or Damaged Toilet Tank

A loose or damaged toilet tank can result in water leakage. The tank holds the water before it is released to flush the toilet. Cracks, loose connections, or damaged components in the tank can lead to water seepage.

3. Broken or Faulty Supply Line

The supply line connects the toilet tank to the water supply. If it develops a crack or a loose connection, it can leak water onto the bathroom floor, which may eventually find its way through the ceiling below.

4. Blocked or Clogged Drain Line

A blocked or clogged drain line can cause water to back up in the toilet, leading to overflow and leakage. Blockages can occur due to excessive toilet paper, foreign objects, or tree roots infiltrating the sewer line.

5. Damaged Flange

The flange is the piece that connects the toilet to the drainpipe. If it is cracked, corroded, or improperly installed, it can allow water to escape and leak through the ceiling.

6. Condensation

In some cases, condensation on the toilet tank or bowl can create the appearance of a leak. This usually occurs in humid environments. While it may not be an actual leak, it’s essential to rule out other causes of moisture on and around the toilet.

Addressing a Toilet Leak Through the Ceiling

If you’re dealing with a toilet leak through the ceiling, here are the steps to address the issue:

  1. Stop the Water Flow: Turn off the water supply to the toilet by closing the shutoff valve located behind or near the toilet.
  2. Assess the Damage: Inspect the ceiling for water damage and assess the extent of the leak.
  3. Call a Professional: Contact a licensed plumber to identify the cause of the leak and make the necessary repairs. It’s important to address the root of the problem to prevent future leaks.
  4. Address Water Damage: If the ceiling or surrounding areas have been damaged, consult a water damage restoration specialist to assess and repair the affected areas.
  5. Prevent Future Leaks: Ensure that the wax ring, supply line, flange, and other components are in good condition to prevent future leaks.

Read too: Water Leak In Ceiling From Washing Machine

Conclusion

A toilet leak through the ceiling is a stressful situation, but understanding the potential causes and taking prompt action can help mitigate the damage. Whether it’s a faulty wax ring, loose tank, damaged supply line, or any other issue, addressing the problem swiftly is key to preventing extensive damage to your home. Regular toilet maintenance and inspections can also help identify and prevent leaks before they lead to more significant issues.