Installing a Ceilings Fan on a Sloped Ceiling: Maximizing Comfort and Style

Learn how to enhance the functionality and aesthetics of your home by installing a ceilings fan on a sloped ceiling, ensuring optimal airflow and comfort in any room.

Ceiling Fan On Sloped Ceiling

Understanding

Installing a ceiling fan on a sloped ceiling presents unique challenges and considerations. However, with the right techniques and accessories, homeowners can successfully mount a ceiling fan on a sloped or vaulted ceiling, maximizing both comfort and style in their living spaces.

Challenges of Installing Ceiling Fan on Sloped Ceiling

Mounting a ceiling fan on a sloped ceiling requires careful planning and execution due to several challenges:

  1. Angle Adjustment: Sloped ceilings vary in angle, making it essential to select a ceiling fan with an adjustable mounting bracket that can accommodate different slopes.
  2. Stability: Ensuring the stability and balance of the ceiling fan on a sloped surface is crucial to prevent wobbling or shaking during operation.
  3. Wiring: Properly routing and concealing electrical wiring on a sloped ceiling can be more challenging than on a flat ceiling, requiring careful attention to safety and aesthetics.

Solutions for Installing Ceiling Fan on Sloped Ceiling

Follow these steps for a successful installation:

1. Choose the Right Ceiling Fan

  • Select a ceiling fan specifically designed for sloped ceilings, equipped with an adjustable mounting bracket and appropriate wiring for angled installations.

2. Measure the Slope

  • Use a carpenter’s level or inclinometer to determine the angle of the sloped ceiling and ensure compatibility with the fan’s adjustable mounting bracket.

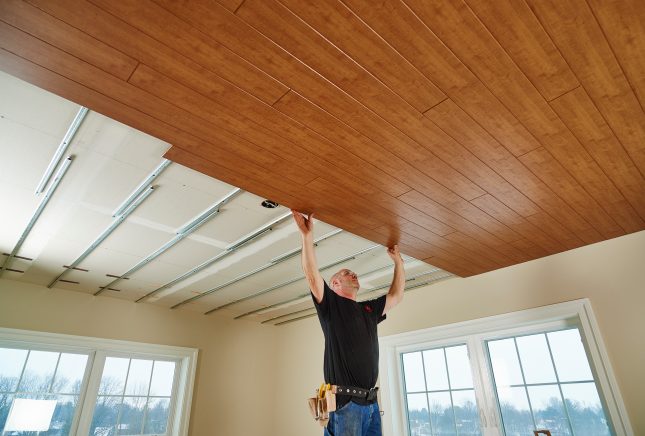
3. Install the Mounting Bracket

  • Securely attach the mounting bracket to the ceiling joist or support structure, following the manufacturer’s instructions and ensuring proper alignment with the ceiling slope.

4. Balance the Fan

  • Use a balancing kit to ensure the fan blades are properly aligned and balanced, minimizing noise and vibration during operation.

5. Conceal Wiring

  • Route electrical wiring along the ceiling joists or use conduit to conceal wiring on the sloped ceiling, ensuring a neat and professional-looking installation.

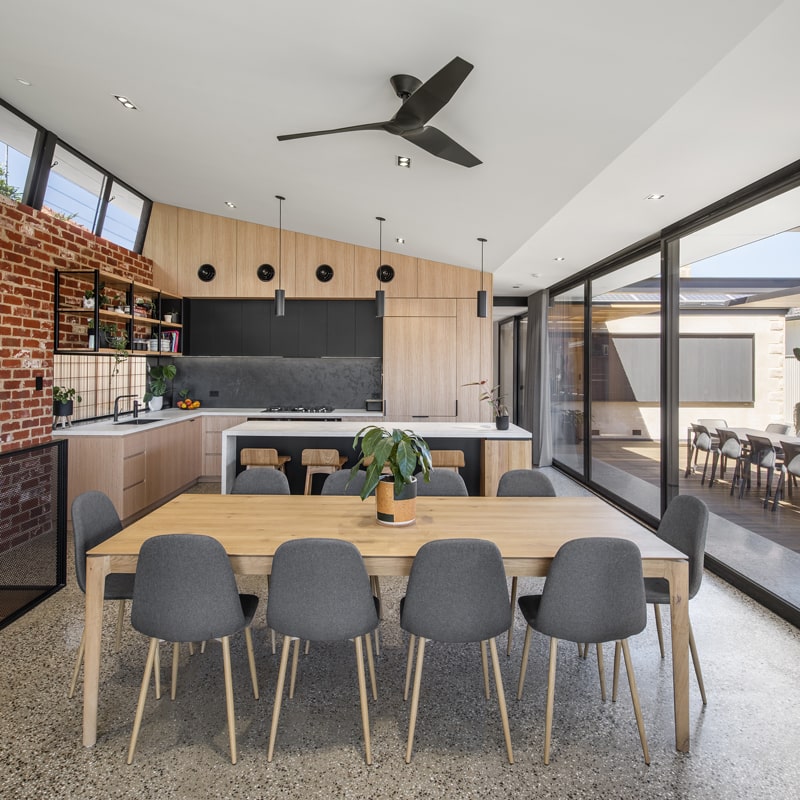
Benefits of Ceiling Fan on Sloped Ceiling

Installing a ceiling fan on a sloped ceiling offers several benefits:

  1. Improved Air Circulation: Ceiling fans help distribute air more evenly throughout the room, enhancing comfort and reducing energy costs.
  2. Enhanced Aesthetics: A ceiling fan adds visual interest to sloped ceilings, serving as both a functional fixture and a stylish design element.
  3. Space Optimization: By utilizing vertical space on sloped ceilings, ceiling fans maximize floor space and provide efficient cooling and air circulation.

Conclusion

Installing a ceilings fan on a sloped ceiling is an effective way to improve airflow, enhance comfort, and add visual appeal to any room. By understanding the challenges and solutions for mounting a ceiling fan on a sloped surface, homeowners can create a comfortable and stylish living environment that reflects their unique sense of style and functionality.

Read too: Flush Mount Rustic Ceiling Lights: Illuminate Your Space with Stunning

Short Throw Projector Ceiling Mount Solution: Enhance Your Viewing Experience

In the realm of home entertainment, a high-quality projector can transform any room into a captivating theater experience. However, to fully maximize the potential of your projector, choosing the right mounting solution is essential. Short throw projector ceiling mounts offer a convenient and space-saving option for achieving optimal projection quality and viewing angles. In this comprehensive guide, we’ll delve into everything you need to know about short throw projector ceiling mounts, from their benefits to installation tips and more.

Short Throw Projector Ceiling Mount

Understanding the Importance of Short Throw Projector Ceiling Mount

Space-Saving Solution

Short throw projector ceiling mounts are designed to position the projector closer to the screen, allowing for larger image sizes and minimizing the risk of shadows or obstructions. By mounting the projector on the ceiling, you can free up valuable floor space and create a cleaner, more streamlined home theater setup.

Read too: How To Extend Kitchen Cabinets To The Ceiling: A Complete Guide for Maximizing Space and Style

Exploring the Features of Short Throw Projector Ceiling Mount

Flexibility and Adjustability

Short throw projector ceiling mounts offer a range of features to accommodate different projector models and installation preferences. These may include adjustable arms, swivel capabilities, and quick-release mechanisms for easy installation and maintenance.

Installation Tips

Proper Positioning

Follow these tips for a successful installation of your short throw projector ceiling mount:

  1. Locate the Ideal Position: Determine the optimal placement for the projector screen and mount, taking into account factors such as viewing angle, screen size, and distance from the seating area.
  2. Secure Mounting Surface: Ensure that the ceiling surface where the mount will be installed is sturdy and capable of supporting the weight of the projector and mount. Use appropriate hardware and anchors to secure the mount in place.

Benefits of Short Throw Projector Ceiling Mount

Enhanced Viewing Experience

Mounting your projector on the ceiling with a short throw mount offers several benefits, including:

  • Improved Image Quality: By minimizing the distance between the projector and the screen, short throw mounts help reduce image distortion and enhance clarity and sharpness.
  • Space Optimization: Ceiling-mounted projectors free up floor space, allowing for more flexible seating arrangements and a cleaner, clutter-free home theater environment.

Expert Recommendations

Choosing the Right Mount

When selecting a short throw projector ceilings mount, consider factors such as:

  • Compatibility: Ensure that the mount is compatible with your projector model and weight requirements.
  • Adjustability: Look for mounts with adjustable arms and tilt angles to achieve the perfect projection setup for your space.

Conclusion

Elevate your home theater experience to new heights with a short throw projector ceiling mount. Mounting your projector on the ceiling offers larger screen sizes, improved image quality, and a streamlined setup. Follow the installation tips and expert recommendations in this guide to select the perfect mount and create the ultimate viewing environment at home.

Armstrong Ceiling Plank Installation: Tips and Techniques

Armstrong ceiling planks offer a stylish and durable solution for enhancing the look of any space. In this comprehensive guide, we’ll walk you through the steps of Armstrong ceiling plank installation, covering everything from preparation and tools to finishing touches. Whether you’re a seasoned DIY enthusiast or a first-time installer, this article will provide you with the knowledge and confidence to achieve professional results.

Armstrong Ceiling Plank Installation

Getting Started: Preparation and Planning

Before you begin the installation process, it’s essential to properly prepare your space and plan out the layout of your ceiling planks. Here are some key steps to consider:

  1. Measure the Space: Accurately measure the dimensions of your ceiling to determine how many planks you’ll need for the installation.
  2. Prepare the Surface: Ensure that the ceiling surface is clean, smooth, and free of any debris or imperfections that could affect the installation process.
  3. Gather the Necessary Tools: Gather all the tools and materials you’ll need for the installation, including ceiling planks, adhesive, nails or screws, a saw, a level, and safety equipment.

Armstrong Ceiling Plank Installation: Step-by-Step Guide

Follow these step-by-step instructions for a successful Armstrong ceiling plank installation:

  1. Prepare the First Row: Start by measuring and cutting the first row of planks to fit the length of the ceiling. Use a saw to make precise cuts as needed.
  2. Apply Adhesive: Apply a recommended adhesive to the back of the first plank using a caulk gun, following the manufacturer’s instructions.
  3. Secure the Planks: Press the first plank firmly onto the ceiling surface, ensuring that it is level and aligned with the starting point. Use nails or screws to secure the plank in place if necessary.
  4. Continue Installation: Repeat the process for the remaining rows of planks, making sure to stagger the joints for a seamless appearance.
  5. Cutting and Fitting: Use a saw to cut planks to size as needed to fit around corners, fixtures, and other obstacles.
  6. Finishing Touches: Once all the planks are installed, apply any finishing touches, such as trim or molding, to complete the look of your ceiling.

Read too: Exploring the Innovation and Efficiency of Ceiling Mounted Surgical Light Solutions: Illuminating Precision

Tips and Techniques for Success

  • Take Your Time: Patience is key when it comes to Armstrong ceiling plank installation. Take your time to ensure each plank is properly aligned and secured.
  • Use Proper Safety Gear: Wear safety goggles, gloves, and a dust mask to protect yourself during the installation process.
  • Follow Manufacturer’s Instructions: Always follow the manufacturer’s instructions and recommendations for the best results.
  • Check for Level: Regularly use a level to ensure even installation of the planks without any dips or unevenness.

Maintenance and Care

After installing your Armstrong ceiling planks, ensure proper maintenance to keep them looking their best. Here are some maintenance tips to keep in mind:

  • Regularly dust or vacuum the ceiling planks to remove any dirt or debris.
  • Avoid using harsh chemicals or abrasive cleaners, as they can damage the finish of the planks.
  • If necessary, touch up any scratches or dents with matching paint or stain to maintain the appearance of the planks.

Conclusion

With the right tools, preparation, and techniques, Armstrong ceiling plank installation can be a rewarding and enjoyable project. By following the steps outlined in this guide and incorporating expert tips and techniques, you can achieve professional-quality results that will enhance the beauty and functionality of any space.