Armstrong ceiling planks offer a stylish and durable solution for enhancing the look of any space. In this comprehensive guide, we’ll walk you through the steps of Armstrong ceiling plank installation, covering everything from preparation and tools to finishing touches. Whether you’re a seasoned DIY enthusiast or a first-time installer, this article will provide you with the knowledge and confidence to achieve professional results.
Getting Started: Preparation and Planning
Before you begin the installation process, it’s essential to properly prepare your space and plan out the layout of your ceiling planks. Here are some key steps to consider:
- Measure the Space: Accurately measure the dimensions of your ceiling to determine how many planks you’ll need for the installation.
- Prepare the Surface: Ensure that the ceiling surface is clean, smooth, and free of any debris or imperfections that could affect the installation process.
- Gather the Necessary Tools: Gather all the tools and materials you’ll need for the installation, including ceiling planks, adhesive, nails or screws, a saw, a level, and safety equipment.
Armstrong Ceiling Plank Installation: Step-by-Step Guide
Follow these step-by-step instructions for a successful Armstrong ceiling plank installation:
- Prepare the First Row: Start by measuring and cutting the first row of planks to fit the length of the ceiling. Use a saw to make precise cuts as needed.
- Apply Adhesive: Apply a recommended adhesive to the back of the first plank using a caulk gun, following the manufacturer’s instructions.
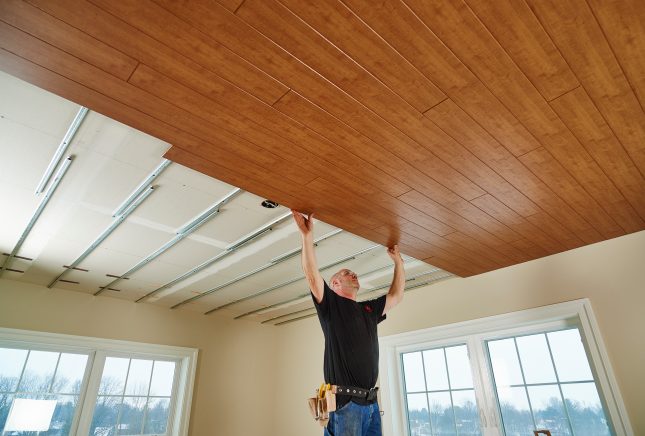
- Secure the Planks: Press the first plank firmly onto the ceiling surface, ensuring that it is level and aligned with the starting point. Use nails or screws to secure the plank in place if necessary.
- Continue Installation: Repeat the process for the remaining rows of planks, making sure to stagger the joints for a seamless appearance.
- Cutting and Fitting: Use a saw to cut planks to size as needed to fit around corners, fixtures, and other obstacles.
- Finishing Touches: Once all the planks are installed, apply any finishing touches, such as trim or molding, to complete the look of your ceiling.
Tips and Techniques for Success
- Take Your Time: Patience is key when it comes to Armstrong ceiling plank installation. Take your time to ensure each plank is properly aligned and secured.
- Use Proper Safety Gear: Wear safety goggles, gloves, and a dust mask to protect yourself during the installation process.
- Follow Manufacturer’s Instructions: Always follow the manufacturer’s instructions and recommendations for the best results.
- Check for Level: Regularly use a level to ensure even installation of the planks without any dips or unevenness.
Maintenance and Care
After installing your Armstrong ceiling planks, ensure proper maintenance to keep them looking their best. Here are some maintenance tips to keep in mind:
- Regularly dust or vacuum the ceiling planks to remove any dirt or debris.
- Avoid using harsh chemicals or abrasive cleaners, as they can damage the finish of the planks.
- If necessary, touch up any scratches or dents with matching paint or stain to maintain the appearance of the planks.
Conclusion
With the right tools, preparation, and techniques, Armstrong ceiling plank installation can be a rewarding and enjoyable project. By following the steps outlined in this guide and incorporating expert tips and techniques, you can achieve professional-quality results that will enhance the beauty and functionality of any space.