Overstock Ceiling Light Fixtures: Illuminate Your Home

Finding the perfect lighting for your home can transform your living spaces, adding warmth, style, and functionality. If you’re looking for high-quality, affordable options, Overstock Ceiling Light Fixtures are an excellent choice. This comprehensive guide will explore everything you need to know about Overstock Ceiling Light Fixtures, from their benefits and types to installation tips and design inspiration.

Overstock Ceiling Light Fixtures

Why Choose Overstock Ceiling Light Fixtures?

Overstock Ceiling Light Fixtures offer a variety of advantages that make them a popular choice among homeowners. Here are some compelling reasons to consider Overstock for your lighting needs:

Affordable Prices

One of the biggest advantages of shopping for ceiling light fixtures on Overstock is the affordability. Overstock frequently offers significant discounts on high-quality lighting fixtures, allowing you to find stylish and functional options within your budget.

Wide Selection

Overstock boasts a vast selection of ceiling light fixtures, including chandeliers, flush mounts, semi-flush mounts, pendant lights, and more. Whether you’re looking for modern, traditional, or eclectic designs, Overstock has something to suit every taste and home decor style.

High Quality

Despite the lower prices, Overstock does not compromise on quality. Many of their ceiling light fixtures are crafted from durable materials and come from reputable brands, ensuring that you get a reliable product that will last for years.

Convenient Shopping Experience

Shopping on Overstock is convenient and user-friendly. With detailed product descriptions, customer reviews, and easy navigation, finding the perfect ceiling light fixture for your home is a breeze.

Types of Overstock Ceiling Light Fixtures

Overstock offers a wide variety of ceiling light fixtures to meet different lighting needs and aesthetic preferences. Here are some of the most popular types:
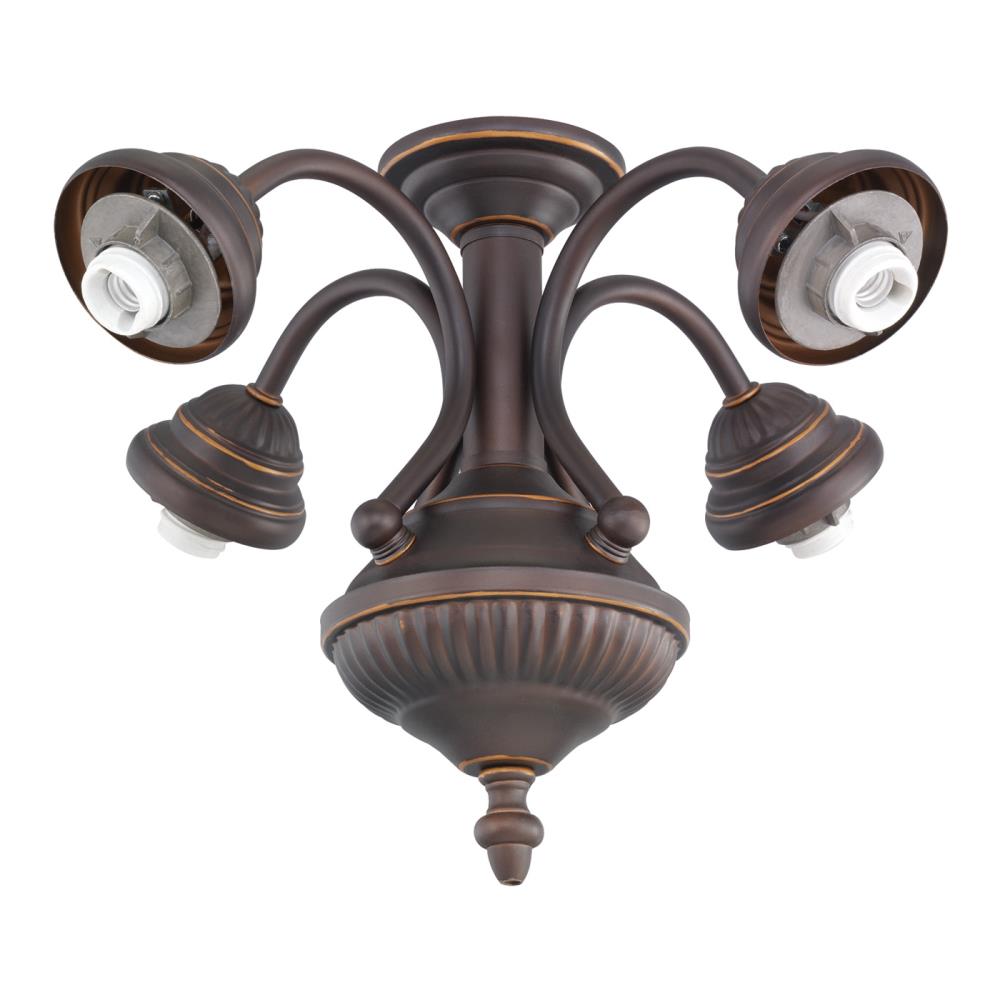
Chandeliers

Chandeliers are statement pieces that add elegance and sophistication to any room. Overstock offers chandeliers in various styles, including crystal, modern, rustic, and traditional designs. They are perfect for dining rooms, living rooms, and entryways.
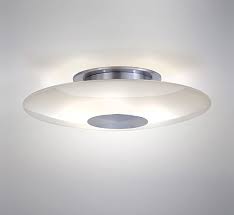
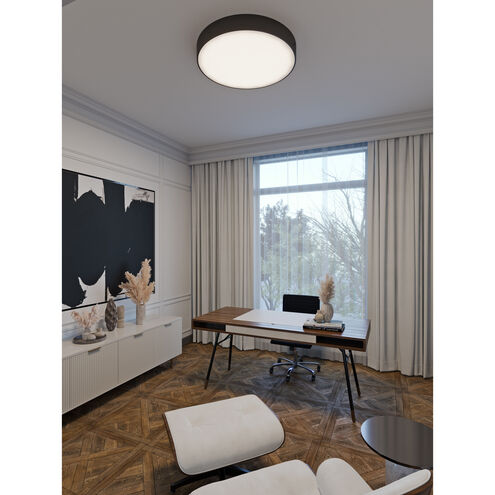
Flush Mounts

Flush mount ceiling lights are ideal for rooms with low ceilings. They sit close to the ceiling, providing ample lighting without taking up much space. Overstock offers a range of flush mounts, from simple and understated designs to more decorative options.

Semi-Flush Mounts

Semi-flush mount ceiling lights hang slightly below the ceiling, providing a stylish and functional lighting solution. These fixtures are perfect for rooms with slightly higher ceilings and can be found in a variety of designs on Overstock.
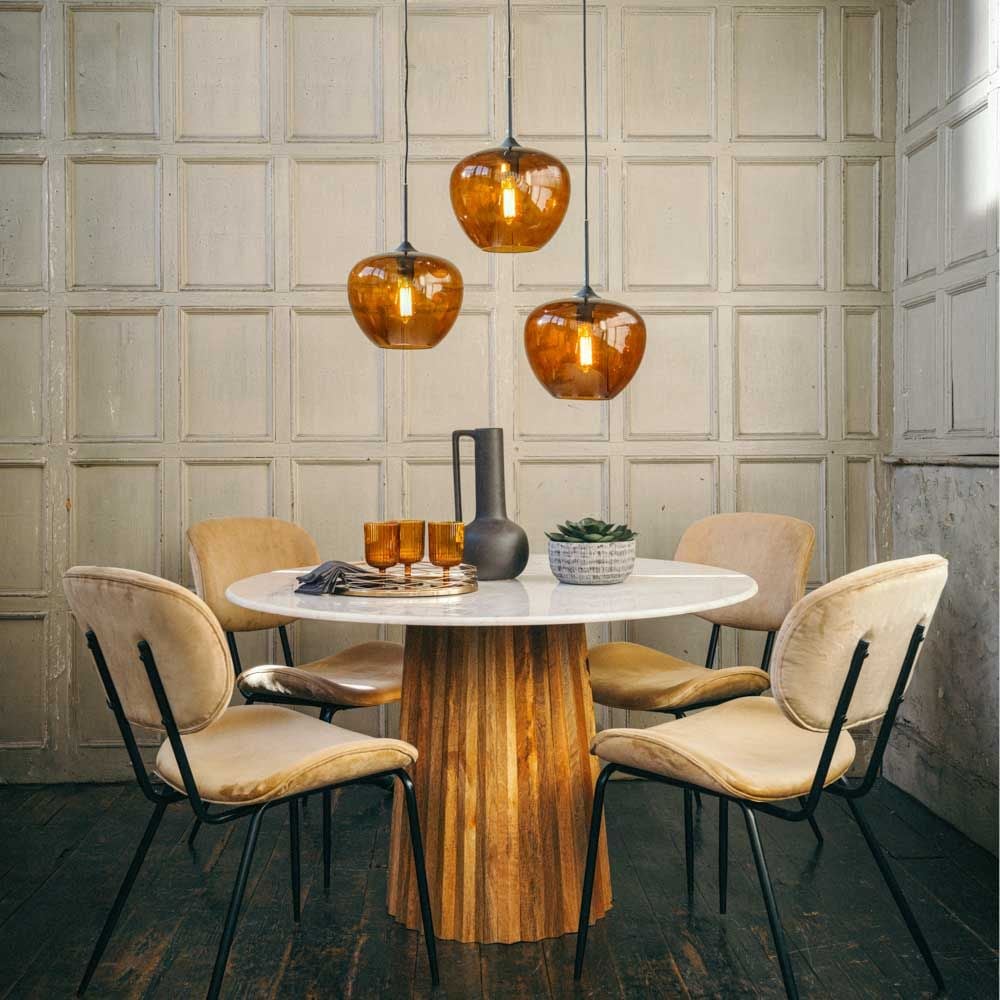
Pendant Lights

Pendant lights are versatile and can be used in various spaces, including kitchens, dining areas, and foyers. Overstock offers pendant lights in many styles, sizes, and finishes, allowing you to find the perfect match for your decor.

Recessed Lighting

Recessed lighting fixtures are installed into the ceiling, providing a sleek and modern look. They are ideal for creating a clean and unobtrusive lighting design. Overstock offers a range of recessed lighting options suitable for different room sizes and purposes.

Benefits of Overstock Ceiling Light Fixtures

Choosing Overstock Ceiling Light Fixtures comes with numerous benefits that can enhance your home’s lighting and overall aesthetic. Here are some key benefits:

Cost-Effective

Overstock’s discounted prices mean you can achieve a high-end look without breaking the bank. This makes it easier to upgrade multiple rooms or invest in higher-quality fixtures than you might otherwise be able to afford.

Diverse Options

The vast selection available on Overstock ensures that you can find ceiling light fixtures that match your specific taste and decor needs. From minimalist and modern to ornate and traditional, the options are nearly endless.

Easy Installation

Many Overstock ceiling light fixtures are designed with ease of installation in mind. They come with clear instructions and all the necessary mounting hardware, making it simple for homeowners to install them without professional help.

Customer Reviews

Overstock’s customer review system allows you to read feedback from other buyers, providing valuable insights into the quality and functionality of the light fixtures. This can help you make more informed purchasing decisions.

Installing Overstock Ceiling Light Fixtures

Proper installation is crucial to ensure your ceiling light fixtures are safe and functional. Here’s a step-by-step guide to help you install your Overstock Ceiling Light Fixtures:

Step 1: Gather Your Tools

Before you begin, make sure you have all the necessary tools:

  • Screwdrivers (Phillips and flathead)
  • Pliers
  • Wire strippers
  • Electrical tape
  • Ladder
  • Mounting hardware (usually included with the fixture)

Step 2: Turn Off the Power

Ensure the power is turned off at the circuit breaker to avoid electrical shock. Double-check with a voltage tester to confirm that the wires are not live.

Step 3: Remove the Existing Fixture

If replacing an existing fixture, carefully remove it by unscrewing the mounting hardware and disconnecting the wires. Keep the area clean and clear of debris.

Step 4: Install the Mounting Bracket

Attach the mounting bracket to the ceiling box using screws and washers. Make sure it is firmly attached and can support the weight of the light fixture.

Step 5: Connect the Wires

Connect the fixture’s wires to the ceiling wires. Typically, you’ll match the colors (black to black, white to white, and green/bare to ground). Use wire nuts and electrical tape to secure the connections.

Step 6: Attach the Fixture

Secure the light fixture to the mounting bracket. Ensure it is securely fastened and that all screws are tightened. Be careful not to overtighten, which could damage the fixture or ceiling.

Step 7: Install the Bulbs and Test

Insert the appropriate bulbs into the fixture and turn the power back on at the circuit breaker. Test the light to ensure it is working correctly and that all connections are secure.

Design Ideas with Overstock Ceiling Light Fixtures

Overstock Ceiling Light Fixtures can enhance the aesthetic appeal of any room. Here are some design ideas to inspire you:

Living Room

Create a focal point in your living room with a stunning chandelier or semi-flush mount light. Choose a design that complements your furniture and decor. For a modern look, opt for clean lines and minimalist designs. For a more traditional feel, choose fixtures with intricate details and warm finishes.

Kitchen

Illuminate your kitchen with pendant lights over the island or dining area. Choose fixtures that provide adequate task lighting and complement your kitchen’s style. Industrial-style pendant lights can add a contemporary edge, while glass or metal designs can offer a sleek, modern touch.

Bedroom

Add a touch of elegance to your bedroom with a stylish chandelier or flush mount light. Choose soft, warm lighting to create a cozy and relaxing atmosphere. Pair the fixture with complementary bedside lamps or wall sconces to enhance the overall look.

Bathroom

Update your bathroom with flush mount or semi-flush mount ceiling lights. Choose fixtures that are resistant to moisture and humidity. Opt for bright, clean lighting to ensure your bathroom is well-lit for daily grooming tasks.

Dining Room

Make a statement in your dining room with a grand chandelier. Choose a fixture that complements your dining table and adds a touch of sophistication to the space. Consider adjustable lighting options to create the perfect ambiance for both casual meals and formal dinners.

Maintenance Tips for Overstock Ceiling Light Fixtures

To keep your Overstock Ceiling Light Fixtures looking beautiful and functioning properly, regular maintenance is essential. Here are some tips to help you maintain your fixtures:

Regular Cleaning

Dust and dirt can accumulate on light fixtures over time. Clean the fixtures regularly with a soft, dry cloth. For stubborn dirt, use a slightly damp cloth, but avoid using harsh chemicals that could damage the finish.

Check Electrical Connections

Periodically inspect the electrical connections to ensure they remain secure and free of corrosion. If you notice any issues, turn off the power and make the necessary repairs.

Tighten Screws

Over time, screws can become loose due to the fixture’s operation. Periodically check and tighten all screws to ensure the light remains securely attached to the ceiling.

Replace Bulbs

If your light fixture uses traditional bulbs, replace them as needed to maintain optimal illumination. Consider switching to LED bulbs for better energy efficiency and longer lifespan.

Read too: Understanding and Dealing with Ants in the Ceiling Spaces: Navigating the Intrusion

Conclusion

Overstock Ceiling Light Fixtures offer an affordable and stylish solution for all your lighting needs. With a wide selection of high-quality fixtures, you can find the perfect lighting to enhance every room in your home. By following the installation and maintenance tips provided in this guide, you can enjoy the beauty and functionality of your Overstock Ceiling Light Fixtures for years to come. Whether you’re looking to create a cozy bedroom retreat, an inviting living room, or a stylish kitchen, Overstock has the perfect lighting options to illuminate your space with elegance and charm.

Olive Leaf Semi-Flush Ceiling Light: Transform Your Space

Lighting is one of the most important elements in home decor, impacting both functionality and ambiance. Among the myriad lighting options available, the Olive Leaf Semi-Flush Ceiling Light stands out for its unique design, combining elegance and practicality. This comprehensive guide will explore everything you need to know about the Olive Leaf Semi-Flush Ceiling Light, from its features and benefits to installation tips and design inspiration.

Olive Leaf Semi-Flush Ceiling Light

Why Choose an Olive Leaf Semi-Flush Ceiling Light?

The Olive Leaf Semi-Flush Ceiling Light offers a perfect blend of style and function, making it a popular choice for various spaces within a home. Here are some compelling reasons to consider this lighting option:

Aesthetic Appeal

The Olive Leaf design brings a touch of nature indoors, creating a visually appealing focal point in any room. The intricate leaf patterns add a sophisticated and organic feel, suitable for both modern and traditional decor styles.

Versatile Design

Semi-flush ceiling lights are versatile and can be installed in rooms with both high and low ceilings. The Olive Leaf Semi-Flush Ceiling Light provides ample illumination without overwhelming the space, making it ideal for living rooms, bedrooms, kitchens, and hallways.

Enhanced Lighting

This type of ceiling light offers effective ambient lighting, illuminating the entire room evenly. The semi-flush design allows light to diffuse through the room while also casting beautiful shadows from the leaf patterns, enhancing the overall ambiance.

Easy Installation

Compared to chandeliers or recessed lighting, semi-flush ceiling lights are relatively easy to install. They provide a stylish upgrade without the need for extensive electrical work or ceiling modifications.

Features of the Olive Leaf Semi-Flush Ceiling Light

Understanding the features of the Olive Leaf Semi-Flush Ceiling Light can help you make an informed decision. Here are some key features to look out for:

High-Quality Materials

These ceiling lights are typically made from high-quality materials such as metal and glass, ensuring durability and a premium finish. The leaves are often crafted from metal with a hand-painted finish to enhance their realistic look.

Various Finishes

The Olive Leaf Semi-Flush Ceiling Light is available in various finishes, including bronze, silver, gold, and antique. This variety allows you to choose a finish that complements your existing decor.

Multiple Bulb Options

Many Olive Leaf Semi-Flush Ceiling Lights are compatible with different types of bulbs, including incandescent, LED, and CFL. This flexibility allows you to choose the bulb type that best suits your lighting needs and energy efficiency preferences.

Dimmable Functionality

For added versatility, many models come with dimmable functionality, allowing you to adjust the light intensity to create the perfect ambiance for any occasion.

Installing Your Olive Leaf Semi-Flush Ceiling Light

Proper installation is crucial to ensure your ceiling light operates safely and looks its best. Here’s a step-by-step guide to help you install your Olive Leaf Semi-Flush Ceiling Lights:

Step 1: Gather Your Tools

Before you begin, make sure you have all the necessary tools:

  • Screwdrivers (Phillips and flathead)
  • Pliers
  • Wire strippers
  • Electrical tape
  • Ladder
  • Mounting hardware (usually included with the light fixture)

Step 2: Turn Off the Power

Ensure the power is turned off at the circuit breaker to avoid electrical shock. Double-check with a voltage tester to confirm that the wires are not live.

Step 3: Remove the Existing Fixture

If replacing an existing fixture, carefully remove it by unscrewing the mounting hardware and disconnecting the wires. Keep the area clean and clear of debris.

Step 4: Install the Mounting Bracket

Attach the mounting bracket to the ceiling box using screws and washers. Make sure it is firmly attached and can support the weight of the light fixture.

Step 5: Connect the Wires

Connect the light fixture’s wires to the ceiling wires. Typically, you’ll match the colors (black to black, white to white, and green/bare to ground). Use wire nuts and electrical tape to secure the connections.

Step 6: Attach the Fixture

Secure the light fixture to the mounting bracket. Ensure it is securely fastened and that all screws are tightened. Be careful not to overtighten, which could damage the fixture or ceiling.

Step 7: Install the Bulbs and Test

Insert the appropriate bulbs into the fixture and turn the power back on at the circuit breaker. Test the light to ensure it is working correctly and that all connections are secure.

Decorating with the Olive Leaf Semi-Flush Ceiling Light

The Olive Leaf Semi-Flush Ceiling Light is more than just a functional piece; it’s a decor statement that can enhance the aesthetic of any room. Here are some ideas for incorporating this elegant light fixture into your home decor:

Living Room

In the living room, the Olive Leaf Semi-Flush Ceiling Lights can serve as a stunning focal point. Pair it with neutral or earth-toned furniture to create a harmonious and inviting space. Add some indoor plants to complement the nature-inspired design.

Bedroom

Install the Olive Leaf Semi-Flush Ceiling Lights in the bedroom for a touch of elegance and tranquility. Choose soft, warm lighting to create a cozy and relaxing atmosphere. Complement the light with botanical prints and soft fabrics to enhance the natural theme.

Kitchen

In the kitchen, this ceiling light can provide ample illumination for cooking and dining. Choose a finish that matches your kitchen hardware and appliances. Consider using dimmable bulbs to adjust the lighting for different times of the day and activities.

Hallway

Illuminate your hallway with the Olive Leaf Semi-Flush Ceiling Lights to make a lasting impression on guests. The intricate design will add character to this often-overlooked space. Use it to highlight artwork or photographs along the hallway walls.

Maintenance Tips for Your Olive Leaf Semi-Flush Ceiling Light

To keep your ceiling light looking beautiful and functioning properly, regular maintenance is essential. Here are some tips to help you maintain your Olive Leaf Semi-Flush Ceiling Light:

Regular Cleaning

Dust and dirt can accumulate on the light fixture over time. Clean the light regularly with a soft, dry cloth. For stubborn dirt, use a slightly damp cloth, but avoid using harsh chemicals that could damage the finish.

Check Electrical Connections

Periodically inspect the electrical connections to ensure they remain secure and free of corrosion. If you notice any issues, turn off the power and make the necessary repairs.

Tighten Screws

Over time, screws can become loose due to the fixture’s operation. Periodically check and tighten all screws to ensure the light remains securely attached to the ceiling.

Replace Bulbs

If your light fixture uses traditional bulbs, replace them as needed to maintain optimal illumination. Consider switching to LED bulbs for better energy efficiency and longer lifespan.

Read too: Understanding and Dealing with Ants in the Ceiling Spaces: Navigating the Intrusion

Conclusion

The Olive Leaf Semi-Flush Ceiling Lights is a versatile and elegant lighting option that can enhance any room in your home. With its beautiful design and functional features, it offers both aesthetic appeal and practical benefits. By following the installation and maintenance tips provided in this guide, you can enjoy the beauty and functionality of your Olive Leaf Semi-Flush Ceiling Lights for years to come. Whether you’re looking to create a cozy bedroom retreat, an inviting living room, or a stylish kitchen, this ceiling light is sure to add a touch of elegance and charm to your space.

Halogen Ceiling Light Fixtures: Illuminating Your Home

Choosing the right lighting for your home is essential for creating the perfect ambiance and ensuring functionality. Among the various options available, Halogen Ceiling Light Fixtures stand out for their bright, crisp light and versatility. This comprehensive guide will explore everything you need to know about halogen ceiling light fixtures, from their benefits to installation tips, maintenance, and much more.

Halogen Ceiling Light Fixtures

What Are Halogen Ceiling Light Fixtures?

Halogen light fixtures use a type of incandescent lamp containing halogen gas, which increases light output and efficiency. These fixtures are known for their ability to produce bright, white light, making them ideal for a variety of settings in your home.

Advantages of Halogen Ceiling Light Fixtures

  1. Brightness: Halogen bulbs produce a bright, white light that closely resembles natural daylight, making them perfect for task lighting and areas where visibility is crucial.
  2. Energy Efficiency: Halogen lights are more energy-efficient than traditional incandescent bulbs, meaning they use less power to produce the same amount of light.
  3. Longevity: Halogen bulbs typically last longer than standard incandescent bulbs, reducing the frequency of replacements.
  4. Dimmability: Many halogen light fixtures are compatible with dimmer switches, allowing you to adjust the brightness to suit your needs and mood.

Common Uses for Halogen Ceiling Light Fixtures

Halogen ceiling light fixtures are versatile and can be used in various parts of your home:

  • Kitchens: Providing bright, focused light for cooking and food preparation.
  • Bathrooms: Ensuring excellent visibility for grooming and other tasks.
  • Living Rooms: Creating a welcoming and well-lit environment for socializing and relaxation.
  • Offices: Offering clear, bright light to reduce eye strain and enhance productivity.
  • Garages: Illuminating workspaces and ensuring safety.

Types of Halogen Ceiling Light Fixtures

There are several types of halogen ceiling light fixtures to choose from, each designed to meet different lighting needs and aesthetic preferences.

Recessed Halogen Ceiling Lights

Recessed lights, also known as can lights or downlights, are installed within the ceiling, creating a clean and unobtrusive look. These fixtures are ideal for providing general illumination or accent lighting.

Track Lighting with Halogen Bulbs

Track lighting systems consist of a track mounted to the ceiling with multiple adjustable fixtures attached. This setup allows you to direct light where it’s needed most, making it perfect for highlighting artwork, architectural features, or specific areas of a room.

Pendant Halogen Lights

Pendant lights hang from the ceiling and are available in a variety of styles and sizes. They can be used as task lighting over kitchen islands, dining tables, or as statement pieces in entryways and living rooms.

Flush and Semi-Flush Mount Halogen Fixtures

Flush mount fixtures sit directly against the ceiling, while semi-flush mounts hang slightly below. Both types provide ample general lighting and are well-suited for rooms with lower ceilings.

How to Choose the Right Halogen Ceiling Light Fixture

Selecting the perfect halogen ceiling light fixture involves considering several factors, including the purpose of the lighting, the style of the fixture, and the specific requirements of the space.

Determine the Purpose of the Lighting

Identify the primary function of the light fixture in the room. Are you looking for general illumination, task lighting, or accent lighting? This will help you narrow down your options and choose a fixture that meets your needs.

Consider the Room’s Design and Style

The style of the light fixture should complement the overall design of the room. Halogen light fixtures come in various styles, from modern and minimalist to traditional and ornate. Choose a fixture that enhances the aesthetic of your space.

Assess the Room’s Size and Ceiling Height

The size and height of the room will influence the type and size of the light fixture you need. Larger rooms or rooms with higher ceilings may require more powerful fixtures or multiple lights to provide adequate illumination.

Check for Dimmability

If you want the ability to adjust the brightness of your lights, ensure that the halogen light fixture you choose is compatible with dimmer switches. This feature can add versatility to your lighting and help create the perfect ambiance.

Installation Tips for Halogen Ceiling Light Fixtures

Installing halogen ceiling light fixtures can be a straightforward process, but it’s essential to follow proper safety guidelines and procedures. Here are some tips to ensure a successful installation:

Gather the Necessary Tools and Materials

Before you begin, make sure you have all the necessary tools and materials, including a ladder, screwdriver, wire strippers, electrical tape, and the light fixture.

Turn Off the Power

Safety first: always turn off the power to the circuit you’ll be working on at the breaker box. This will prevent electrical shock and ensure a safe installation.

Follow the Manufacturer’s Instructions

Each light fixture comes with specific installation instructions from the manufacturer. Follow these guidelines carefully to ensure proper installation and operation.

Connect the Wiring

Carefully connect the fixture’s wires to the corresponding wires in the ceiling, typically black to black, white to white, and green or bare copper to the ground wire. Use wire nuts to secure the connections and wrap them with electrical tape for added safety.

Mount the Fixture

Attach the fixture to the ceiling according to the manufacturer’s instructions, ensuring it is securely fastened and properly aligned.

Test the Light

Once the fixture is installed, turn the power back on at the breaker box and test the light to ensure it operates correctly. If the light doesn’t work, double-check your wiring connections and ensure everything is properly secured.

Maintenance Tips for Halogen Ceiling Light Fixtures

Proper maintenance of your halogen ceiling light fixtures can extend their lifespan and ensure they continue to operate efficiently.

Regular Cleaning

Dust and dirt can accumulate on light fixtures, reducing their brightness and efficiency. Regularly clean your fixtures with a soft cloth and mild detergent to keep them looking and functioning their best.

Replace Bulbs as Needed

Halogen bulbs have a longer lifespan than traditional incandescent bulbs, but they will still need to be replaced eventually. Always use the correct wattage and type of bulb specified by the manufacturer.

Read too: Striped Schoolhouse Ceiling Light Fixtures: Unveiling the Timeless Charm

Check for Loose Connections

Periodically inspect your light fixtures for any loose connections or signs of wear. Tighten any loose screws or connections and replace any damaged parts to maintain safe and reliable operation.

Conclusion: Enhancing Your Home with Halogen Ceiling Light Fixtures

Choosing the right Halogen Ceiling Light Fixtures can significantly enhance the lighting in your home, providing bright, efficient, and versatile illumination. Whether you’re looking to brighten up your kitchen, create a cozy ambiance in your living room, or ensure clear visibility in your garage, halogen ceiling light fixtures offer a range of benefits and options to suit your needs.

By understanding the types of fixtures available, considering your specific lighting needs, and following proper installation and maintenance procedures, you can enjoy the many advantages of halogen lighting in your home.

Key Takeaways

  • Versatility: Halogen ceiling light fixtures are suitable for various applications, including general illumination, task lighting, and accent lighting.
  • Brightness and Efficiency: Halogen bulbs produce bright, white light and are more energy-efficient than traditional incandescent bulbs.
  • Style and Design: Choose a fixture that complements your room’s design and meets your lighting needs.
  • Proper Installation and Maintenance: Ensure safe and effective installation by following manufacturer guidelines and performing regular maintenance.

Illuminate your home with the perfect Halogen Ceiling Light Fixtures and enjoy a brighter, more inviting living space.

30 Inch Flush Mount Ceiling Light: Brighten Your Home

Lighting plays a crucial role in defining the ambiance and functionality of a space. Among the various lighting options available, the 30 Inch Flush Mount Ceiling Light stands out for its blend of practicality and aesthetic appeal. This article explores the benefits, applications, installation tips, and maintenance of the 30 Inch Flush Mount Ceiling Light, providing you with all the information needed to make an informed decision for your home lighting needs.

30 Inch Flush Mount Ceiling Light

What is a 30 Inch Flush Mount Ceiling Light?

A 30 Inch Flush Mount Ceiling Light is a type of ceiling light fixture designed to be installed directly against the ceiling, without any gap between the light and the ceiling surface. The 30-inch measurement refers to the diameter of the light fixture, making it a substantial size that provides ample illumination for larger rooms. This style of lighting is ideal for spaces with low ceilings, where a pendant or chandelier might not be practical.

Benefits

Opting for a 30 Inch Flush Mount Ceiling Light offers numerous advantages:

  1. Space-Saving Design: Flush mount fixtures are perfect for rooms with low ceilings or where vertical space is limited.
  2. Wide Illumination: The 30-inch diameter provides a broad spread of light, ensuring even illumination across the room.
  3. Versatile Style: Available in various designs and finishes, these lights can complement any decor, from modern to traditional.
  4. Easy Maintenance: With no hanging parts, flush mount lights are easier to clean and maintain.
  5. Energy Efficiency: Many models come with energy-efficient LED bulbs, reducing energy consumption and costs.

Applications of 30 Inch Flush Mount Ceiling Lights

The 30 Inch Flush Mount Ceiling Light is versatile enough to be used in various settings, including:

  • Living Rooms: Provides ample lighting for social gatherings and family activities.
  • Kitchens: Ensures bright, even lighting for cooking and dining.
  • Bedrooms: Offers soft, diffused light for a cozy and relaxing atmosphere.
  • Hallways and Entryways: Illuminates transitional spaces, making them feel welcoming and safe.
  • Offices: Creates a bright, efficient workspace for maximum productivity.

Choosing the Right 30 Inch Flush Mount Ceiling Light

When selecting a 30 Inch Flush Mount Ceiling Light, consider the following factors to ensure it meets your needs:

Design and Style

Flush mount lights come in a variety of designs, from sleek and modern to ornate and classic. Choose a style that complements your existing decor. For a contemporary look, opt for minimalist designs with clean lines and metallic finishes. For a more traditional space, consider lights with intricate details and warm finishes.

Light Output and Bulb Type

Consider the amount of light you need in the room. LED bulbs are a popular choice due to their energy efficiency and long lifespan. Ensure the fixture is compatible with dimmable bulbs if you want to adjust the light intensity.

Color Temperature

The color temperature of the light affects the ambiance of the room. Warmer temperatures (around 2700K) create a cozy atmosphere, while cooler temperatures (4000K and above) are ideal for task-oriented spaces like kitchens and offices.

Installation Requirements

Ensure the fixture can be easily installed in your space. Check the weight and mounting requirements, and consider whether you need professional installation or can handle it as a DIY project.

Installing a 30 Inch Flush Mount Ceiling Light

Installing a 30 Inch Flush Mount Ceiling Light can be a straightforward process if you follow these steps:

Tools and Materials Needed

  • Ladder
  • Screwdriver
  • Wire stripper
  • Electrical tape
  • New light fixture
  • Light bulbs (if not included)

Step-by-Step Installation Guide

  1. Turn Off Power: Before starting, switch off the power to the existing light fixture at the circuit breaker to ensure safety.
  2. Remove Old Fixture: Carefully remove the old light fixture by unscrewing it from the ceiling and disconnecting the wires.
  3. Prepare Wires: Strip the ends of the wires coming from the ceiling and the new light fixture if necessary.
  4. Connect Wires: Match the wires from the ceiling to the corresponding wires on the new fixture (typically black to black, white to white, and green/bare to the ground).
  5. Secure the Fixture: Attach the new fixture to the ceiling using the provided hardware, ensuring it is securely fastened.
  6. Install Bulbs and Cover: Insert the appropriate bulbs and attach any covers or diffusers that come with the fixture.
  7. Turn On Power: Restore power at the circuit breaker and test the light to ensure it is working correctly.

Maintenance Tips for 30 Inch Flush Mount Ceiling Lights

Keeping your 30 Inch Flush Mount Ceiling Light in top condition ensures it remains both functional and visually appealing. Here are some maintenance tips:

  • Regular Cleaning: Dust the fixture regularly using a soft cloth or a vacuum with a brush attachment. For deeper cleaning, remove the cover and clean it with a mild detergent.
  • Check Bulbs: Periodically check the bulbs and replace them as needed to ensure consistent light output.
  • Inspect for Damage: Regularly inspect the fixture for any signs of wear or damage, such as loose screws or cracks in the cover.
  • Avoid Moisture: In areas with high humidity, such as bathrooms, ensure the fixture is rated for damp locations to prevent moisture damage.

Enhancing Your Home Decor with 30 Inch Flush Mount Ceiling Lights

The 30 Inch Flush Mount Ceiling Light is more than just a functional lighting solution; it can also be a key element in your home decor. Here are some ideas on how to use these lights to enhance your space:

Create a Focal Point

Use a statement flush mount light as the focal point in a room. Choose a design with unique features, such as a decorative metal frame or an intricate glass shade, to draw attention and add visual interest.

Read too: Exploring the Benefits and How-Tos of DIY Ceiling Cassette Mini Split Installation: Revolutionizing Comfort

Layered Lighting

Incorporate the 30 Inch Flush Mount Ceiling Lights into a layered lighting scheme. Pair it with wall sconces, table lamps, or floor lamps to create a balanced and versatile lighting setup that can be adjusted to suit different activities and moods.

Highlight Architectural Features

Use flush mount lights to highlight architectural features, such as a coffered ceiling or a decorative molding. The even, diffused light will accentuate these details and add depth to the room.

Complement Existing Decor

Choose a flush mount light that complements the colors and materials in your existing decor. For example, a fixture with a brass finish can tie in with brass hardware or accents in the room, creating a cohesive look.

Conclusion

The 30 Inch Flush Mount Ceiling Lights is an excellent choice for anyone looking to enhance their home’s lighting. Its combination of functionality, versatility, and aesthetic appeal makes it a standout option for various rooms and styles. By carefully selecting the right design, ensuring proper installation, and maintaining the fixture, you can enjoy the benefits of beautiful and effective lighting for years to come.

For those looking to upgrade their home lighting, the 30 Inch Flush Mount Ceiling Light offers a practical and stylish solution. Whether you’re aiming to brighten a living room, kitchen, or office, this type of lighting provides the perfect blend of form and function.

Exploring the Beauty of Amber Glass Ceiling Light Fixtures: Illuminate Your Space with Elegance

Elevate your home décor with the warm and inviting glow of amber glass ceiling light fixtures. Discover the timeless appeal and versatility of these stunning luminaires, perfect for adding a touch of sophistication to any room.

Amber Glass Ceiling Light

Introduction

Lighting plays a crucial role in shaping the ambiance and atmosphere of any space, and selecting the right fixtures can make a significant impact on your home décor. Amber glass ceiling light fixtures offer a unique blend of elegance and functionality, providing both illumination and aesthetic appeal. In this guide, we’ll delve into the beauty of amber glass ceiling lights and explore how they can enhance the style and ambiance of your home.

The Allure of Amber Glass Ceiling Lights

Amber glass ceiling lights feature shades or globes crafted from translucent amber-colored glass, known for its warm and inviting hue. This rich, golden tone adds a sense of warmth and coziness to any room, creating a welcoming ambiance that’s perfect for relaxation and comfort. Whether used as a focal point in the entryway, a statement piece in the living room, or as task lighting in the kitchen, amber glass ceiling lights bring a touch of sophistication and charm to any space.

Versatility in Design

One of the key advantages of amber glass ceiling lights is their versatility in design. These fixtures are available in a wide range of styles, shapes, and sizes, making them suitable for various interior design themes and preferences. Whether you prefer traditional, vintage-inspired fixtures with intricate metalwork or sleek and modern designs with clean lines, there’s an amber glass ceiling light to complement your aesthetic.

Enhancing Ambient Lighting

Amber glass ceiling lights are particularly effective at creating warm and inviting ambient lighting in any room. The soft, diffused glow emitted by the amber glass casts a flattering light that enhances the overall atmosphere, making it ideal for cozying up with a book in the living room, enjoying a leisurely meal in the dining area, or unwinding in the bedroom after a long day.

Amber Glass Ceiling Light in Action

Imagine stepping into your foyer and being greeted by the soft, golden glow of an amber glass ceiling light fixture suspended overhead. The warm light washes over the space, creating a welcoming ambiance that sets the tone for the rest of your home. In the living room, a trio of amber glass pendant lights adds a touch of elegance and sophistication, while casting a gentle glow that enhances conversation and relaxation. In the kitchen, an amber glass flush mount fixture provides task lighting over the island or dining nook, illuminating your culinary endeavors with style and flair.

Installing and Maintaining Amber Glass Ceiling Lights

Installing and maintaining amber glass ceiling lights is relatively straightforward, but there are a few tips to keep in mind:

  • Proper Installation: Follow the manufacturer’s instructions carefully when installing your amber glass ceiling light fixture. Ensure that the electrical connections are secure and that the fixture is properly anchored to the ceiling to prevent accidents or damage.
  • Cleaning and Care: Regularly dust the glass shade of your amber glass ceiling light fixture to keep it looking its best. Use a soft, lint-free cloth or a feather duster to gently remove dust and debris. For more thorough cleaning, use a mild glass cleaner and a soft cloth to wipe away smudges and fingerprints.
  • Replacing Bulbs: When replacing bulbs in your amber glass ceiling light fixture, be sure to choose bulbs that are compatible with the fixture’s wattage and size requirements. Consider opting for LED bulbs for energy efficiency and longevity.

Read too: Exploring the Innovation and Efficiency of Ceiling Mounted Surgical Light Solutions: Illuminating Precision

Conclusion

Amber glass ceiling light fixtures offer a timeless combination of elegance, warmth, and versatility that can enhance any interior space. Whether used as ambient lighting in the living room, task lighting in the kitchen, or decorative lighting in the foyer, these stunning luminaires add a touch of sophistication and charm to any room. Explore the beauty of amber glass ceiling lights and discover how they can transform your home into a haven of warmth and style.

Exploring the Versatility of Monte Carlo Ceiling Fans Light Kit: Illuminate Your Space

The Monte Carlo Ceiling Fans Light Kit is a versatile and stylish addition to any home, offering both functionality and elegance. In this article, we’ll delve into the features, benefits, and applications of the Monte Carlo Ceiling Fan Light Kit, exploring how it can enhance the lighting and aesthetics of your living space.

Monte Carlo Ceiling Fan Light Kit

Introducing the Monte Carlo Ceiling Fans Light Kit

The Monte Carlo Ceiling Fans Light Kit is designed to seamlessly integrate with Monte Carlo ceiling fans, adding ambient illumination and decorative flair to any room. These light kits are available in a variety of styles, finishes, and configurations to complement different fan models and personal preferences.

Features and Benefits of Monte Carlo Ceiling Fans Light Kit

Here are some key features and benefits of the Monte Carlo Ceiling Fan Light Kit:

  1. Enhanced Lighting: The addition of a light kit to your Monte Carlo ceiling fan provides supplemental lighting to brighten up your space, making it more functional and inviting.
  2. Versatility: Monte Carlo offers a wide range of light kit options, including integrated LED modules, traditional light fixtures, and customizable designs, allowing you to tailor the lighting to suit your needs and style.
  3. Aesthetic Appeal: The Monte Carlo Ceiling Fan Light Kit adds a decorative element to your ceiling fan, enhancing its visual appeal and making it a focal point in your room.
  4. Energy Efficiency: Many Monte Carlo light kits feature energy-efficient LED technology, providing ample illumination while consuming less energy and reducing your electricity bills.
  5. Convenience: With the Monte Carlo Ceiling Fan Light Kit, you can enjoy the convenience of having both a ceiling fan and a light fixture in one integrated unit, eliminating the need for separate installations and wiring.

Installation and Compatibility

Installing a Monte Carlo Ceiling Fan Light Kit is a straightforward process, and most kits are designed to be compatible with Monte Carlo ceiling fans. Here’s a basic overview of the installation steps:

  1. Preparation: Gather the necessary tools and materials, including the light kit, screws, and a screwdriver.
  2. Turn Off Power: Switch off the power to the ceiling fan at the circuit breaker to prevent electrical accidents.
  3. Remove Existing Light Fixture: If your ceiling fan already has a light fixture installed, remove it carefully by unscrewing the mounting screws and disconnecting the wiring.
  4. Attach Light Kit: Follow the manufacturer’s instructions to attach the Monte Carlo Ceiling Fan Light Kit to the fan’s housing, securing it in place with the provided screws.
  5. Connect Wiring: Connect the wiring from the light kit to the corresponding wires in the fan’s housing, ensuring a secure and proper connection.
  6. Test Operation: Once the installation is complete, restore power to the ceiling fan and test the operation of the light kit to ensure it is functioning correctly.

Applications in Home Decor

The Monte Carlo Ceiling Fan Light Kit offers endless possibilities for enhancing your home decor:

  • Living Room: Add a touch of elegance and sophistication to your living room with a Monte Carlo ceiling fan equipped with a stylish light kit, creating a comfortable and well-lit environment for relaxation and entertainment.
  • Bedroom: Create a cozy and inviting atmosphere in your bedroom with a Monte Carlo ceiling fan featuring integrated LED lighting, providing soft and ambient illumination for bedtime reading or relaxation.
  • Dining Area: Illuminate your dining area with a Monte Carlo Ceiling Fan Light Kit, enhancing the ambiance and creating an inviting space for family meals and gatherings.
  • Home Office: Boost productivity and focus in your home office with a Monte Carlo ceiling fan equipped with a bright LED light kit, providing ample task lighting for work and study.

Maintenance and Care

To ensure optimal performance and longevity, follow these maintenance tips for your Monte Carlo Ceiling Fan Light Kit:

  • Regular Cleaning: Dust the light fixture and fan blades regularly to prevent buildup and maintain optimal performance.
  • Replace Bulbs: If your light kit uses replaceable bulbs, replace them as needed to ensure consistent illumination.
  • Check for Loose Connections: Periodically inspect the wiring and connections to ensure they are secure and free of damage or corrosion.

Conclusion

The Monte Carlo Ceiling Fan Light Kit is a versatile and stylish accessory that enhances both the lighting and aesthetics of your home. With its wide range of styles, energy-efficient LED technology, and easy installation, the Monte Carlo light kit offers a convenient and elegant solution for illuminating your living space. Whether you’re looking to add ambiance to your living room, improve task lighting in your home office, or create a cozy atmosphere in your bedroom, the Monte Carlo Ceiling Fan Light Kit is sure to elevate your home decor.

Experience the functionality and elegance of the Monte Carlo Ceiling Fan Light Kit and transform your living space today.

Read too: A Comprehensive Mr Cool Ceiling Cassette Review: Unveiling Excellence

The Enchanting Alabaster Flush Mount Ceiling Light: Illuminate Your Space with Elegance

Step into a world of refined beauty and exquisite illumination with the Alabaster Flush Mount Ceiling Light. This article unveils the captivating features, installation insights, and the unmatched aesthetic appeal of this lighting fixture, setting a new standard for elegance in your living spaces.

Alabaster Flush Mount Ceiling Light

Understanding the Alabaster Flush Mount Ceiling Light:

  1. Alabaster Elegance: Explore the allure of alabaster and its transformative effect on light diffusion. Learn how this ceiling light elevates ambiance with its unique material properties.
  2. Design Dynamics: Delve into the design intricacies that make this flush mount ceiling light a statement piece. From intricate patterns to minimalist designs, understand how it seamlessly blends with diverse interior styles.

Installation Tips and Practical Insights: Alabaster Flush Mount Ceiling Light

  1. Installation Made Easy: Get a comprehensive guide to installing this ceiling light. Whether you’re a DIY enthusiast or relying on professional help, these tips ensure a hassle-free setup.
  2. Ideal Placement Scenarios: Discover the versatility of placement options for this ceiling light. From entryways to bedrooms, explore how this ceiling light can enhance different areas of your home.

Aesthetic Appeal and Style:

  1. Soft and Warm Illumination: Understand how the alabaster material influences the quality of light emitted. Learn how this ceiling light provides a soft and warm glow, creating a welcoming atmosphere.
  2. Versatile Design Options: Explore the variety of design options available for this lighting fixture. From classic and traditional to modern and contemporary, find a design that resonates with your interior preferences.

Performance and Durability:

  1. Longevity and Durability: Uncover the durability features that make the Alabaster Flush Mount Ceiling Light a lasting investment. From robust construction to high-quality materials, ensure your lighting fixture stands the test of time.
  2. Energy Efficiency: Learn about the energy-efficient aspects of this ceiling light. Explore how it combines aesthetic appeal with eco-friendly technology, contributing to a sustainable and stylish home.

Read too: Exploring the Advantages of Ceiling Mount Air Handler Systems: Revolutionizing Indoor Comfort