2 X 4 Drop Ceiling LED Light: Illuminate Your Space Efficiently

Lighting plays a crucial role in the design and functionality of any space, whether it’s an office, retail environment, or your own home. One of the most popular lighting solutions for commercial and residential settings is the 2 X 4 Drop Ceiling LED Light. These lights offer energy efficiency, longevity, and flexibility in installation, making them a top choice for various applications. In this comprehensive guide, we’ll delve into everything you need to know about 2 X 4 Drop Ceiling LED Lights—from their benefits and installation to design tips and maintenance.

2 X 4 Drop Ceiling Led Lights

What Are 2 X 4 Drop Ceiling LED Lights?

Overview

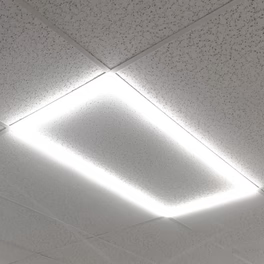
2 X 4 Drop Ceiling LED Lights are rectangular LED fixtures designed to fit into drop ceiling grids, which are commonly found in offices, schools, and commercial buildings. The “2 X 4” refers to the size of the light fixture, which measures 2 feet by 4 feet. These lights are an upgrade from traditional fluorescent lights, offering superior energy efficiency, brighter illumination, and a more modern aesthetic.

Key Features

  • Energy Efficiency: LED lights use significantly less energy than traditional fluorescent lights, reducing electricity costs and environmental impact.
  • Long Lifespan: LED lights can last up to 50,000 hours or more, reducing the frequency of replacements and maintenance costs.
  • Uniform Lighting: These fixtures provide even, consistent lighting across a wide area, minimizing shadows and dark spots.
  • Dimmability: Many 2 X 4 Drop Ceiling LED Lights are dimmable, allowing for customizable lighting levels to suit different activities or times of day.

Read too: Kitchen Lighting For A Vaulted Ceiling: Illuminating Your Space with Style and Functionality

Benefits of 2 X 4 Drop Ceiling LED Lights

1. Cost Savings

One of the most compelling reasons to switch to 2 X 4 Drop Ceiling LED Lights is the cost savings. Although the initial investment may be higher than traditional lighting options, the long-term savings on energy bills and reduced maintenance make LEDs a more economical choice. On average, LED lights consume 30-50% less energy than fluorescent lights, which can result in significant savings, especially in large facilities.

2. Improved Light Quality

2 X 4 Drop Ceiling LED Lights provide superior light quality compared to older fluorescent fixtures. They offer a higher color rendering index (CRI), which means colors appear more vibrant and true to life under LED lighting. This is particularly important in settings like retail stores or offices, where the appearance of products or workspaces is crucial.

3. Environmental Benefits

LED lighting is environmentally friendly for several reasons. First, LEDs use less energy, which reduces greenhouse gas emissions from power plants. Second, they contain no hazardous materials like mercury, which is present in fluorescent bulbs. Finally, the long lifespan of LEDs means fewer light bulbs end up in landfills.

4. Design Flexibility

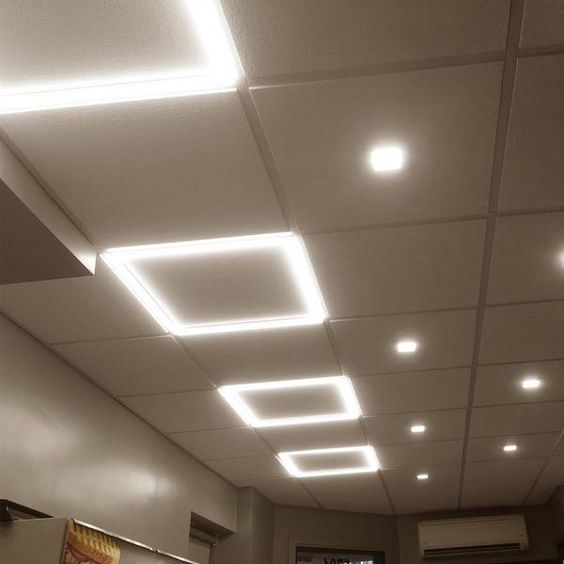
The sleek design of 2 X 4 Drop Ceiling LED Lights makes them a versatile choice for various applications. Whether you’re looking for a clean, modern look in an office or a bright, welcoming atmosphere in a retail space, these lights can be easily integrated into your existing ceiling grid system. Additionally, the availability of different color temperatures (ranging from warm to cool white) allows for customization based on the needs of the space.

5. Enhanced Productivity

Studies have shown that proper lighting can significantly impact productivity and mood. 2 X 4 Drop Ceiling LED Lights provide bright, even illumination that reduces eye strain and fatigue, creating a more comfortable and productive environment. This is particularly beneficial in workplaces, schools, and other settings where concentration and focus are essential.

How to Install 2 X 4 Drop Ceiling LED Lights

Step 1: Gather Your Tools and Materials

Before starting the installation, make sure you have all the necessary tools and materials. You will need:

  • 2 X 4 Drop Ceiling LED Lights
  • A ladder
  • A screwdriver or drill
  • Wire connectors
  • Electrical tape
  • A voltage tester
  • Safety glasses and gloves

Step 2: Turn Off the Power

Safety first! Always turn off the power to the area where you’ll be installing the lights. Use a voltage tester to ensure there’s no electrical current running through the wires before you begin working.

Step 3: Remove the Existing Fixture

If you’re replacing an existing light fixture, carefully remove it by disconnecting the wires and unscrewing the fixture from the ceiling grid. Be sure to support the fixture as you remove it to prevent it from falling.

Step 4: Connect the Wires

Once the old fixture is removed, you’ll need to connect the wires of the new 2 X 4 Drop Ceiling LED Lights to the electrical wires in the ceiling. Typically, this involves connecting the black wire to the black (hot) wire, the white wire to the white (neutral) wire, and the green or bare wire to the ground wire. Use wire connectors to secure the connections and wrap them with electrical tape for added safety.

Step 5: Secure the Fixture

Carefully place the new LED light fixture into the ceiling grid. Align the fixture so that it fits securely within the grid opening. Once in place, secure the fixture using screws or clips as required by the manufacturer.

Step 6: Restore Power and Test

After the fixture is securely installed, restore power to the area and test the light to ensure it’s working properly. If the light doesn’t turn on, double-check your wiring connections and make sure the fixture is properly secured in the ceiling grid.

Design Tips for Using 2 X 4 Drop Ceiling LED Lights

1. Office Spaces

In office settings, 2 X 4 Drop Ceiling LED Lights are ideal for providing bright, even illumination across large work areas. For an optimal work environment, consider using LED lights with a color temperature of around 4000K to 5000K, which provides a cool, daylight-like quality that enhances focus and reduces eye strain.

2. Retail Environments

For retail spaces, lighting plays a crucial role in showcasing products and creating an inviting atmosphere. 2 X 4 Drop Ceiling LED Lights with a higher CRI can make products look more appealing, while a mix of warm and cool color temperatures can be used to create contrast and highlight specific areas.

3. Educational Institutions

Schools and universities can benefit from the energy savings and improved light quality offered by LED lights. Installing 2 X 4 Drop Ceiling LED Lights in classrooms and libraries can create a bright, welcoming environment that promotes learning and concentration.

4. Healthcare Facilities

In healthcare settings, lighting must be both functional and comfortable. 2 X 4 Drop Ceiling LED Lights can be used to create a calm, soothing environment in patient rooms while providing the necessary illumination for medical tasks in operating rooms and labs.

Maintenance Tips for 2 X 4 Drop Ceiling LED Lights

Regular Cleaning

To maintain the efficiency and appearance of your 2 X 4 Drop Ceiling LED Lights, it’s important to clean them regularly. Dust and dirt can accumulate on the surface of the lights, reducing their brightness and lifespan. Use a soft, damp cloth to wipe down the fixtures, and avoid using harsh chemicals that could damage the LEDs.

Periodic Inspections

While 2 X 4 Drop Ceiling LED Lights require less maintenance than traditional lighting, it’s still important to perform periodic inspections. Check for any signs of wear or damage, such as flickering lights or loose connections. Address any issues promptly to prevent further damage and ensure the safety of your lighting system.

Replacement

Even though LED lights have a long lifespan, they will eventually need to be replaced. When it’s time for a replacement, make sure to recycle your old LED lights properly, as they contain components that can be harmful to the environment if not disposed of correctly.

Conclusion

2 X 4 Drop Ceiling LED Light are an excellent choice for anyone looking to upgrade their lighting system with a more energy-efficient, cost-effective, and visually appealing option. Whether you’re outfitting an office, a retail space, or another commercial setting, these lights offer numerous benefits that make them a smart investment. With proper installation, design, and maintenance, you can enjoy the bright, even illumination of LED lights for years to come.

Low Voltage Ceiling Light: A Comprehensive Guide

Low voltage ceiling light are increasingly popular for their energy efficiency, safety, and versatile design options. These lights are ideal for homeowners looking to enhance their living spaces while saving on energy costs. This article will delve into the benefits, installation process, and maintenance of low voltage ceiling light, ensuring you have all the information you need to make an informed decision.

Low Voltage Ceiling Light

Why Choose Low Voltage Ceiling Lights?

Energy Efficiency

Low voltage ceiling lights consume less power compared to traditional lighting options. They typically use 12V or 24V systems, which significantly reduce energy consumption. This efficiency translates to lower electricity bills and a reduced environmental footprint.

Safety

Lower voltage means reduced risk of electrical shock, making these lights safer for homes, especially those with children and pets. The reduced heat output also minimizes the risk of fire hazards, ensuring a safer living environment.

Versatile Design Options

Low voltage lighting systems come in various styles and designs, from sleek, modern fixtures to more traditional looks. This versatility allows you to find the perfect lighting solution that complements your home decor.

Read too: Striped Schoolhouse Ceiling Light Fixtures: Unveiling the Timeless Charm

Enhanced Lighting Quality

These lights provide bright, focused illumination, making them ideal for task lighting, accent lighting, and general ambient lighting. The quality of light can enhance the overall aesthetic of a room, highlighting features and creating a welcoming atmosphere.

Planning Your Low Voltage Ceiling Light Installation

Before installing low voltage ceiling lights, it’s crucial to plan the layout and gather necessary materials. Here’s a step-by-step guide to help you get started:

Determine the Layout

Plan where you want to install the lights. Consider the room’s layout, ceiling height, and the areas that require more illumination. Common areas for low voltage ceiling lights include kitchens, living rooms, hallways, and bathrooms.

Choose the Right Fixtures

Select fixtures compatible with low voltage systems. LED options are highly recommended due to their long lifespan and energy efficiency. Ensure the fixtures match your home’s aesthetic and provide the desired brightness.

Gather Tools and Materials

You will need the following tools and materials for installation:

  • Low voltage ceiling light fixtures
  • Low voltage transformer
  • Electrical wire (suitable for low voltage systems)
  • Wire cutters/strippers
  • Screwdrivers
  • Voltage tester
  • Measuring tape
  • Safety gloves and goggles

Check Local Building Codes

Ensure your installation complies with local building codes and regulations. You may need permits or an inspection, especially if you’re adding new electrical circuits. Consulting a licensed electrician is always a good idea.

Step-by-Step Guide to Installing Low Voltage Ceiling Lights

Follow these steps to successfully install your low voltage ceiling lights:

Step 1: Turn Off the Power

Safety first—turn off the power to the room where you’ll be working at the main electrical panel. Use a voltage tester to ensure the power is off before proceeding.

Step 2: Plan and Mark Locations

Using a measuring tape and a pencil, mark the locations on the ceiling where you’ll install the lights. Ensure the marks are even and aligned according to your layout plan.

Step 3: Cut Holes for Fixtures

Carefully cut holes in the ceiling at the marked locations using an appropriate tool, such as a hole saw. The holes should be slightly larger than the diameter of the light fixtures.

Step 4: Install the Transformer

A low voltage system requires a transformer to step down the voltage from 120V to 12V or 24V. Install the transformer in an accessible location, such as an attic or a utility room, following the manufacturer’s instructions.

Step 5: Run Electrical Wiring

Run electrical wire from the transformer to each light fixture location. Ensure the wiring is suitable for low voltage systems and is properly insulated. Secure the wires along the ceiling joists using cable clamps.

Step 6: Connect the Fixtures

At each fixture location, connect the wires to the light fixtures. Follow the manufacturer’s instructions to match the positive and negative leads correctly. Secure the connections with wire nuts and electrical tape.

Step 7: Install the Fixtures

Insert the light fixtures into the ceiling holes and secure them in place. Ensure they are flush with the ceiling and properly aligned. Install the appropriate bulbs if required.

Step 8: Connect to Power and Test

Connect the transformer to the main power supply. Turn the power back on at the main electrical panel and test the lights to ensure they are functioning correctly. Adjust the fixtures if necessary to achieve the desired lighting effect.

Maintenance Tips for Low Voltage Ceiling Lights

Regular maintenance ensures your low voltage ceiling lights remain efficient and effective. Here are some tips to keep them in top condition:

Regular Cleaning

Dust and dirt can accumulate on light fixtures and bulbs, reducing their brightness. Clean the fixtures regularly with a soft cloth. Avoid harsh chemicals that could damage the fixtures.

Inspect Wiring

Periodically check the wiring and connections to ensure they are secure and in good condition. If you notice any loose or damaged wires, consult a licensed electrician for repairs.

Replace Bulbs as Needed

LED bulbs used in low voltage systems have a long lifespan, but they will eventually need to be replaced. Replace them with compatible low voltage bulbs to maintain energy efficiency and consistent lighting quality.

Monitor Transformer

Ensure the transformer is functioning properly and not overheating. An overheating transformer can indicate a problem with the electrical system, which should be inspected by a professional.

Benefits of Low Voltage Ceiling Lights

Cost Savings

The energy efficiency of low voltage ceiling lights results in lower electricity bills. Additionally, the long lifespan of LED bulbs means you’ll spend less on replacements over time.

Eco-Friendly

Low voltage lighting systems consume less energy, reducing your home’s carbon footprint. Choosing LED bulbs further enhances the environmental benefits due to their energy efficiency and recyclability.

Enhanced Home Value

Modern, energy-efficient lighting can increase your home’s value. Potential buyers often appreciate the benefits of low voltage lighting, such as cost savings and safety.

Customizable Lighting

With various styles and brightness options, low voltage ceiling lights can be customized to fit any room’s needs. Whether you need bright task lighting in the kitchen or subtle ambient lighting in the living room, there are fixtures available to suit every requirement.

Conclusion

Low voltage ceiling lights offer numerous benefits, from energy efficiency and safety to versatile design options and enhanced lighting quality. By following the proper planning, installation, and maintenance steps, you can enjoy the advantages of these modern lighting solutions in your home. Whether you’re looking to save on energy costs, improve safety, or enhance your home’s aesthetics, low voltage ceiling lights are a smart investment.

Ceiling Tile LED Lights: Brighten Your Space

Lighting plays a crucial role in enhancing the ambiance, functionality, and aesthetic appeal of any space. Among the modern lighting solutions available, Ceiling Tile LED Lights have gained popularity due to their energy efficiency, versatility, and sleek design. This comprehensive guide will delve into the benefits of Ceiling Tile LED Lights, how to choose the right ones for your space, installation tips, and creative applications.

Ceiling Tile Led Lights

The Rise of Ceiling Tile LED Lights

Ceiling Tile LED Lights, also known as LED panel lights, are designed to fit seamlessly into ceiling grids, making them an excellent choice for both residential and commercial settings. These lights provide uniform illumination, are highly energy-efficient, and have a longer lifespan compared to traditional lighting options.

Read too: Kitchen Lighting For A Vaulted Ceiling: Illuminating Your Space with Style and Functionality

Benefits of Ceiling Tile LED Lights

Ceiling Tile LED Lights offer numerous advantages:

  1. Energy Efficiency: LED lights consume significantly less power than traditional incandescent or fluorescent lights, leading to lower energy bills and a reduced carbon footprint.
  2. Long Lifespan: LED lights can last up to 50,000 hours or more, reducing the need for frequent replacements and maintenance.
  3. Uniform Lighting: These lights provide consistent, even illumination, eliminating dark spots and creating a pleasant lighting environment.
  4. Design Flexibility: Available in various sizes, shapes, and color temperatures, Ceiling Tile LED Lights can be customized to fit any design aesthetic.
  5. Eco-Friendly: LED lights do not contain harmful chemicals like mercury, making them a safer and more environmentally friendly lighting option.

Choosing the Right Ceiling Tile LED Lights

Selecting the perfect Ceiling Tile LED Lights involves considering several factors to ensure they meet your lighting needs and complement your space.

1. Determine the Size and Shape

Ceiling Tile LED Lights come in various sizes and shapes, including square, rectangular, and circular panels. Measure your ceiling grid to determine the appropriate size and shape for your space. Common sizes include 2×2 feet and 2×4 feet panels.

2. Consider the Color Temperature

LED lights are available in different color temperatures, ranging from warm white to cool white. Warm white (2700K-3000K) creates a cozy and inviting atmosphere, ideal for residential spaces like living rooms and bedrooms. Cool white (3500K-4100K) and daylight (5000K-6500K) are suitable for commercial settings, offices, and areas requiring bright, clear lighting.

3. Assess the Lumen Output

Lumen output indicates the brightness of the light. Higher lumens mean brighter light. For general lighting purposes, a lumen output of 3000-4000 lumens is typically sufficient. For task lighting, such as in kitchens or workspaces, consider lights with higher lumen output.

4. Evaluate the Energy Efficiency

Check the wattage and energy efficiency ratings of the LED panels. Look for lights with high lumens per watt (lm/W) to ensure maximum efficiency and lower energy consumption.

5. Check for Dimmable Options

Dimmable Ceiling Tile LED Lights allow you to adjust the brightness according to your needs, creating a versatile lighting environment. Ensure compatibility with your existing dimmer switches or consider upgrading to LED-compatible dimmers.

Installing Ceiling Tile LED Lights

Proper installation of Ceiling Tile LED Lights is crucial for optimal performance and longevity. Here are some steps and tips to guide you through the installation process.

Tools and Materials Needed

  • Ceiling Tile LED Lights
  • Ladder
  • Measuring tape
  • Screwdriver
  • Wire nuts
  • Electrical tape
  • Safety gloves and goggles

Step-by-Step Installation Guide

  1. Turn Off the Power: Before starting the installation, turn off the power supply to the area where you will be working. This ensures your safety during the installation process.
  2. Remove Existing Tiles: If you are replacing old ceiling tiles with LED panels, carefully remove the existing tiles. Ensure the ceiling grid is clean and free of debris.
  3. Prepare the LED Panels: Unpack the LED panels and check for any damage. Follow the manufacturer’s instructions for assembling the panels, if necessary.
  4. Wiring the Panels: Connect the wires from the LED panel to the existing electrical wiring. Match the colors (black to black, white to white, and green to green) and secure the connections with wire nuts. Use electrical tape to cover the wire nuts for added safety.
  5. Insert the Panels into the Grid: Carefully insert the LED panels into the ceiling grid, ensuring they fit snugly and securely. Make sure the panels are level and properly aligned with the grid.
  6. Secure the Panels: Depending on the design, you may need to secure the panels with clips or screws. Follow the manufacturer’s instructions for securing the panels in place.
  7. Test the Lights: Once the installation is complete, turn the power back on and test the lights to ensure they are working correctly. Adjust the panels if necessary to achieve the desired lighting effect.

Creative Applications of Ceiling Tile LED Lights

Ceiling Tile LED Light are versatile and can be used in various settings to enhance the ambiance and functionality of a space.

Residential Spaces

  • Living Rooms: Create a warm and inviting atmosphere with dimmable LED panels in warm white. These lights can serve as the main source of illumination or as accent lighting to highlight specific areas.
  • Kitchens: Brighten up your kitchen with cool white LED panels, providing clear and bright lighting for cooking and food preparation.
  • Bedrooms: Use LED panels with adjustable color temperatures to create a relaxing and comfortable environment in your bedroom.

Commercial Spaces

  • Offices: Improve productivity and reduce eye strain with cool white LED panels that provide bright, even lighting for office spaces.
  • Retail Stores: Highlight merchandise and create an inviting shopping environment with LED panels that enhance the visibility of products.
  • Hospitals and Clinics: Ensure clear and bright lighting in medical facilities with LED panels, contributing to a clean and sterile environment.

Educational Institutions

  • Classrooms: Provide optimal lighting for learning environments with LED panels that reduce glare and eye strain.
  • Libraries: Create a comfortable and well-lit reading area with LED panels that offer uniform illumination.

Hospitality Industry

  • Hotels and Restaurants: Enhance the ambiance of hotel lobbies, dining areas, and conference rooms with LED panels that provide stylish and efficient lighting.

Conclusion

Ceiling Tile LED Light offer a modern, efficient, and versatile lighting solution for various settings. Their energy efficiency, long lifespan, and design flexibility make them an excellent choice for residential, commercial, educational, and hospitality applications. By understanding the key factors in choosing and installing Ceiling Tile LED Light, you can enhance the aesthetic appeal and functionality of your space, creating a bright and inviting environment.

LED Ceiling Grid Lights: Benefits, Installation, and Tips

When it comes to modern lighting solutions, LED ceiling grid lights stand out as an efficient and stylish choice. These lights are not only energy-efficient but also versatile and aesthetically pleasing. In this comprehensive guide, we will explore the benefits of LED ceiling grid lights, provide insights into their installation, and offer tips to make the most out of your lighting setup.

Led Ceiling Grid Lights

What Are LED Ceiling Grid Lights?

Definition and Purpose

LED ceiling grid lights are a type of lighting fixture designed to fit seamlessly into standard ceiling grid systems. They use Light Emitting Diodes (LEDs) as their light source, which offers numerous advantages over traditional lighting options. These lights are commonly used in commercial settings like offices, retail spaces, and educational institutions, but they are increasingly finding their way into residential applications due to their sleek design and energy efficiency.

Types of LED Ceiling Grid Lights

  1. Panel Lights: These are flat, rectangular lights that fit into the grid system. They provide even, diffused light and are ideal for environments requiring uniform illumination.
  2. Troffer Lights: Often used in commercial settings, troffer lights are deeper than panel lights and can offer more powerful illumination.
  3. Recessed Lights: These are designed to be installed within the ceiling grid, offering a more discrete and streamlined appearance.

Read too: Bathroom Flooded Through the Ceiling: A Comprehensive Guide

Benefits of LED Ceiling Grid Lights

Energy Efficiency

One of the most significant advantages of LED ceiling grid lights is their energy efficiency. LEDs consume up to 80% less energy compared to traditional incandescent bulbs. This reduced energy consumption leads to lower electricity bills and a smaller carbon footprint.

Long Lifespan

LED lights have a longer lifespan compared to conventional lighting options. On average, an LED light can last up to 25,000 hours or more. This longevity reduces the frequency of replacements, saving both time and money.

Superior Lighting Quality

LED ceiling grid lights provide high-quality illumination with minimal glare. They offer consistent color temperatures and brightness levels, which enhance visibility and reduce eye strain. This makes them ideal for environments where clear and reliable lighting is essential.

Low Heat Emission

Unlike incandescent bulbs, LEDs produce very little heat. This can help maintain a comfortable room temperature and reduce the load on air conditioning systems, further contributing to energy savings.

Design Flexibility

LED ceiling grid lights come in various designs and styles to suit different aesthetic preferences. Whether you need a modern, sleek look or a more traditional appearance, there is likely an LED ceiling grid light that meets your needs.

How to Install LED Ceiling Grid Lights

Preparation

  1. Assess the Space: Determine the type and number of LED ceiling grid lights required based on the size of the space and the level of illumination needed.
  2. Gather Tools and Materials: You will need tools such as a screwdriver, wire connectors, and mounting brackets. Ensure you have the correct LED fixtures for your ceiling grid system.

Installation Steps

  1. Turn Off Power: Before beginning installation, turn off the power supply to the existing lighting fixtures to ensure safety.
  2. Remove Existing Fixtures: Carefully remove any existing light fixtures from the ceiling grid.
  3. Install Mounting Brackets: Attach the mounting brackets for the LED ceiling grid lights to the ceiling grid. Ensure they are securely fastened.
  4. Connect Wiring: Connect the wiring from the LED fixtures to the power supply using wire connectors. Follow the manufacturer’s instructions for proper wiring connections.
  5. Insert LED Panels: Place the LED ceiling grid light into the mounting brackets. Ensure they are properly aligned and secured.
  6. Turn On Power and Test: Restore the power supply and test the LED lights to ensure they are functioning correctly.

Tips for a Successful Installation

  • Follow Manufacturer Instructions: Always refer to the manufacturer’s guidelines for installation to ensure proper setup and avoid potential issues.
  • Use Professional Help if Needed: If you are unsure about any aspect of the installation, consider hiring a professional electrician to ensure the job is done safely and correctly.
  • Check Local Codes: Make sure your installation complies with local building codes and regulations.

Maintenance and Care

Regular Cleaning

To maintain the appearance and performance of your LED ceiling grid lights, clean them regularly. Use a soft, dry cloth to wipe down the surface and remove dust or debris. Avoid using harsh chemicals or abrasive materials that could damage the light fixtures.

Inspect for Issues

Periodically inspect your LED ceiling grid lights for any signs of malfunction or damage. Check for flickering, dimming, or other issues that may indicate a problem. Address any issues promptly to ensure continued performance and safety.

Replacement and Upgrades

While LED lights have a long lifespan, they may eventually need to be replaced. When upgrading, consider choosing newer models with advanced features or improved energy efficiency.

Advantages Over Traditional Lighting

Cost Savings

LED ceiling grid light offer substantial cost savings over traditional lighting options due to their lower energy consumption and longer lifespan. While the initial investment may be higher, the long-term savings make them a cost-effective choice.

Environmental Impact

By reducing energy consumption and minimizing waste, LED ceiling grid light contribute to a more sustainable environment. They help reduce greenhouse gas emissions and decrease the need for frequent replacements.

Enhanced Performance

LED lights provide superior lighting quality with consistent brightness and color temperature. This enhances visibility and creates a more comfortable and productive environment.

Conclusion

LED ceiling grid light offer a range of benefits, including energy efficiency, long lifespan, and superior lighting quality. Whether you’re upgrading your office lighting or enhancing your home environment, these lights provide a practical and stylish solution. By understanding the benefits, installation process, and maintenance requirements, you can make an informed decision and enjoy the advantages of LED ceiling grid light for years to come.

LED Light Fixtures For Drop Ceilings: Efficiency and Design

Discover how LED light fixtures for drop ceilings can transform your space with energy-efficient illumination and stylish design options.

Led Light Fixtures For Drop Ceilings

Understanding LED Light Fixtures For Drop Ceilings

LED light fixtures designed for drop ceilings offer a versatile lighting solution suitable for various environments. These fixtures are specifically engineered to fit seamlessly into suspended ceiling grids, providing uniform lighting while enhancing energy efficiency and visual appeal.

Advantages of LED Light Fixtures For Drop Ceilings

  1. Energy Efficiency: LED technology is renowned for its energy efficiency, consuming significantly less electricity compared to traditional lighting sources like incandescent or fluorescent bulbs. LED light fixtures for drop ceiling help reduce energy costs and contribute to sustainability efforts.
  2. Long Lifespan: LED bulbs have an exceptionally long lifespan, often lasting up to 50,000 hours or more of continuous use. This longevity minimizes the frequency of bulb replacements and reduces maintenance costs over time.
  3. Brightness and Quality: LED light fixtures provide bright, high-quality illumination with options for various color temperatures (e.g., warm white, cool white) to suit different preferences and settings. They offer consistent light output without flickering or dimming over time.
  4. Design Versatility: Available in a range of styles, sizes, and shapes, LED light fixtures for drop ceiling can complement any interior décor. Whether you prefer recessed troffer lights, surface-mounted panels, or suspended fixtures, there’s an LED option to enhance your space.

Read too: Kitchen Lighting For A Vaulted Ceiling: Illuminating Your Space with Style and Functionality

Applications of LED Light Fixtures For Drop Ceiling

LED light fixtures for drop ceilings are suitable for diverse applications across residential, commercial, and institutional settings:

  • Office Environments: Create productive workspaces with bright, glare-free lighting that supports concentration and visual comfort for employees.
  • Retail Stores: Highlight merchandise and create inviting atmospheres with vibrant, evenly distributed light that enhances product visibility and customer experience.
  • Healthcare Facilities: Ensure optimal visibility and patient comfort in hospitals and clinics with clean, uniform lighting that promotes healing and wellbeing.
  • Educational Institutions: Facilitate learning in classrooms and libraries with efficient lighting solutions that aid student focus and engagement.

Choosing the Right LED Light Fixtures For Drop Ceilings

Consider the following factors when selecting LED light fixtures for your drop ceiling installation:

Fixture Type and Size

Determine whether you need recessed troffer lights, surface-mounted panels, or suspended fixtures based on your ceiling height and aesthetic preferences.

Light Output and Efficiency

Select LED fixtures with appropriate lumen output for the size of the space and desired brightness level. Consider the fixture’s efficiency rating in lumens per watt to maximize energy savings.

Color Temperature

Choose a color temperature (e.g., 3500K for neutral white, 4000K for cool white) that complements the ambiance of the room and enhances visual comfort.

Dimming and Control Options

Opt for LED fixtures that offer dimming capabilities and compatibility with advanced lighting control systems for flexibility in adjusting light levels based on usage and time of day.

Installing LED Light Fixtures For Drop Ceilings

Follow these steps for a successful installation of LED light fixtures in your drop ceiling:

Preparation

Ensure the power to the installation area is turned off. Gather necessary tools and components, including the LED fixtures, mounting hardware, and electrical wiring.

Fixture Placement

Carefully position each LED fixture within the designated drop ceiling grid space, ensuring proper alignment and spacing for uniform light distribution.

Wiring and Connections

Connect the fixtures to the electrical supply following manufacturer guidelines and local electrical codes. Secure wiring connections with appropriate connectors and ensure they are insulated.

Testing and Adjustment

After installation, restore power and test each LED fixture to verify functionality and light output. Adjust fixture positions or settings as needed to achieve optimal illumination throughout the space.

Maintaining LED Light Fixtures For Drop Ceilings

To prolong the lifespan and efficiency of your LED fixtures, perform regular maintenance tasks:

  • Cleaning: Remove dust and debris from fixture surfaces and lenses using a soft cloth or gentle cleaning solution to maintain optimal light output.
  • Inspecting for Damage: Periodically check fixtures for signs of wear, discoloration, or flickering. Replace any defective components promptly to prevent performance issues.
  • Monitoring Performance: Track energy usage and light quality over time to identify potential issues or changes in efficiency. Schedule professional inspections as needed for comprehensive maintenance.

Conclusion

LED light fixtures for drop ceilings offer a blend of energy efficiency, longevity, and design versatility, making them an ideal choice for modernizing residential, commercial, and institutional spaces. By selecting the right fixtures and following proper installation and maintenance practices, you can enhance both the aesthetic appeal and functional efficiency of your environment with LED lighting technology.

LED Ceiling Light Panel Replacement: A Step-by-Step Process

When it comes to modern lighting solutions, LED ceiling light panels have become a popular choice due to their energy efficiency, long lifespan, and superior illumination. However, like all electrical components, they can eventually wear out or become outdated, necessitating a replacement. This comprehensive guide will walk you through everything you need to know about LED ceiling light panel replacement, from identifying the need for a replacement to the step-by-step process of installation.

Led Ceiling Light Panel Replacement

Why You Might Need an LED Ceiling Light Panel Replacement

There are several reasons why you might consider replacing your LED ceiling light panel:

  1. Diminished Brightness: Over time, LED panels can lose their brightness, making your space less illuminated.
  2. Flickering Issues: If your LED panel starts to flicker, it could indicate a problem with the panel itself or the wiring.
  3. Outdated Design: Newer LED panels offer better designs and features, making an upgrade appealing for aesthetic or functional reasons.
  4. Energy Efficiency: Older panels might not be as energy-efficient as newer models, leading to higher electricity bills.

Tools and Materials Needed for LED Ceiling Light Panel Replacement

Before starting the replacement process, ensure you have the following tools and materials:

  • New LED ceiling light panel
  • Screwdriver
  • Ladder
  • Voltage tester
  • Wire connectors
  • Safety gloves
  • Safety glasses

Steps to Replace an LED Ceiling Light Panel

1. Turn Off the Power

Safety should always be your first priority. Turn off the power supply to the room where you will be replacing the LED ceiling light panel. Use a voltage tester to ensure that the power is completely off before proceeding.

2. Remove the Old Panel

Carefully remove the old LED panel. If it’s screwed into place, use a screwdriver to unscrew it. If it’s mounted in a different way, follow the manufacturer’s instructions for removal. Be gentle to avoid damaging the ceiling or the existing wiring.

3. Disconnect the Wiring

Once the old panel is removed, you will need to disconnect the wiring. Make sure to note how the wires are connected, as this will help when connecting the new panel. Typically, you will see three wires: live (brown or black), neutral (blue), and ground (green or yellow-green).

4. Connect the New LED Panel

Connect the new LED panel to the existing wiring. Match the wires from the panel to the corresponding wires in the ceiling: live to live, neutral to neutral, and ground to ground. Use wire connectors to secure the connections. Ensure all connections are tight and secure to prevent any electrical issues.

5. Secure the New Panel

Mount the new LED panel to the ceiling. Follow the manufacturer’s instructions for the specific mounting method. This may involve screwing the panel into place or using other mounting hardware. Make sure the panel is securely attached to prevent it from falling.

6. Test the New Panel

Once the new panel is installed, turn the power back on and test the panel to ensure it is working correctly. If the light does not turn on or if it flickers, turn off the power and check your connections again.

Tips for Choosing the Right LED Ceiling Light Panel Replacement

When selecting a new LED ceiling light panel, consider the following factors:

Brightness

The brightness of the panel is measured in lumens. Choose a panel that provides adequate lighting for your space. For general lighting, a panel with around 4,000 lumens is typically sufficient for a standard room.

Color Temperature

LED panels come in various color temperatures, ranging from warm white (2700K) to daylight (6500K). Choose a color temperature that suits the ambiance you want to create in your space.

Energy Efficiency

Look for panels with high energy efficiency ratings. LED panels with the ENERGY STAR label are a good choice as they meet strict energy efficiency guidelines set by the U.S. Environmental Protection Agency.

Size and Design

Ensure that the new panel fits the dimensions of your existing fixture. Additionally, choose a design that complements the aesthetics of your room.

Dimming Capabilities

If you prefer adjustable lighting, opt for an LED panel with dimming capabilities. This allows you to control the brightness to suit different activities and moods.

Maintaining Your LED Ceiling Light Panel

To extend the lifespan of your new LED ceiling light panel and ensure it operates efficiently, follow these maintenance tips:

  • Regular Cleaning: Dust and dirt can accumulate on the panel, reducing its brightness. Clean the panel regularly with a soft, dry cloth.
  • Avoid Overloading: Ensure that the electrical circuit is not overloaded, as this can cause the panel to malfunction.
  • Check Connections: Periodically check the wiring connections to ensure they remain tight and secure.

Benefits of Replacing Your LED Ceiling Light Panel

Enhanced Energy Efficiency

Newer LED panels are designed to be more energy-efficient than older models. This means you can enjoy the same level of brightness while using less electricity, leading to lower energy bills.

Improved Lighting Quality

Advancements in LED technology have led to better lighting quality. New panels offer more uniform light distribution and reduced glare, creating a more comfortable and visually appealing environment.

Longer Lifespan

Modern LED panels have a longer lifespan compared to older models. This means fewer replacements over time, saving you money and reducing environmental waste.

Better Aesthetic Appeal

Upgrading to a new LED panel can enhance the aesthetic appeal of your space. Newer panels come in sleek designs and can be integrated seamlessly into various interior styles.

Troubleshooting Common Issues After Replacement

Light Doesn’t Turn On

If your new LED panel doesn’t turn on, check the following:

  • Ensure the power supply is turned on.
  • Verify that all wire connections are secure.
  • Test the panel with a different power source to rule out a faulty panel.

Flickering Light

Flickering can be caused by several issues:

  • Loose wiring connections: Check and tighten all connections.
  • Incompatible dimmer switch: Ensure the dimmer switch is compatible with LED lighting.
  • Voltage fluctuations: Consult an electrician if you suspect voltage issues.

Uneven Lighting

If the light output appears uneven, ensure that the panel is mounted correctly and that there are no obstructions blocking the light.

Read too: Striped Schoolhouse Ceiling Light Fixtures: Unveiling the Timeless Charm

Conclusion

Replacing an LED ceiling light panel is a straightforward process that can significantly improve the lighting quality and energy efficiency of your space. By following the steps outlined in this guide, you can safely and effectively replace your old LED panel with a new, more efficient model. Remember to choose a panel that suits your needs in terms of brightness, color temperature, and design. Regular maintenance will ensure your new panel lasts for many years, providing you with reliable and high-quality lighting.

Exploring the Benefits of 2X2 LED Light Fixture Drop Ceilings: Illuminate Your Space with Style

The 2X2 LED Light Fixture Drop Ceilings is a versatile and efficient lighting solution that offers both functionality and style. In this article, we’ll delve into the features, benefits, and applications of the 2X2 LED Light Fixture Drop Ceiling, exploring how it can transform your space with its superior illumination and sleek design.

2X2 Led Light Fixture Drop Ceiling

Introducing the 2X2 LED Light Fixture Drop Ceiling

The 2X2 LED Light Fixture Drop Ceiling is specifically designed to fit into standard 2X2 drop ceiling grids, making it an ideal choice for commercial spaces, offices, classrooms, and other areas with suspended ceilings. These fixtures feature integrated LED technology, providing bright and uniform illumination while minimizing energy consumption and maintenance requirements.

Features and Benefits of 2X2 LED Light Fixture Drop Ceiling

Here are some key features and benefits of the 2X2 LED Light Fixture Drop Ceilings:

  1. Energy Efficiency: LED technology offers significant energy savings compared to traditional lighting sources, reducing electricity bills and environmental impact.
  2. Long Lifespan: LED bulbs have an extended lifespan, lasting up to 50,000 hours or more, which translates to reduced maintenance and replacement costs over time.
  3. Uniform Illumination: The 2X2 LED Light Fixture Drop Ceiling provides even and consistent lighting distribution, eliminating glare and hotspots for a comfortable and visually pleasing environment.
  4. Slim Profile: These fixtures have a sleek and low-profile design, seamlessly integrating into drop ceiling grids without protruding or creating visual clutter.
  5. Dimmable Options: Many 2X2 LED Light Fixture Drop Ceiling models offer dimmable capabilities, allowing users to adjust the brightness levels to suit their preferences and lighting needs.
  6. Instant On: LED lights provide instant illumination with no warm-up time, ensuring immediate visibility and productivity in your space.

Read too: A Comprehensive Mr Cool Ceiling Cassette Review: Unveiling Excellence

Installation and Compatibility

Installing a 2X2 LED Light Fixture Drop Ceiling is a straightforward process that typically involves the following steps:

  1. Prepare the Ceiling Grid: Ensure that the drop ceiling grid is clean and free from debris or obstructions before installing the light fixture.
  2. Remove Ceiling Tile: Carefully remove the ceiling tile from the grid where you intend to install the fixture, taking care not to damage surrounding tiles.
  3. Mount Fixture: Align the mounting brackets or clips on the fixture with the grid channels and gently push upward until the fixture is securely in place.
  4. Connect Wiring: Follow the manufacturer’s instructions to connect the fixture’s wiring to the building’s electrical system, ensuring proper polarity and insulation.
  5. Replace Ceiling Tile: Once the fixture is installed and wired, replace the ceiling tile, ensuring it is properly seated in the grid.

Applications in Various Settings

The 2X2 LED Light Fixture Drop Ceiling is suitable for a wide range of applications and settings, including:

  • Office Spaces: Illuminate workspaces with bright and energy-efficient LED lighting, enhancing productivity and comfort for employees.
  • Retail Stores: Highlight merchandise and create an inviting atmosphere for customers with vibrant and uniform lighting throughout the store.
  • Classrooms: Provide optimal lighting conditions for learning and concentration in educational settings, improving student focus and engagement.
  • Healthcare Facilities: Ensure bright and comfortable lighting in healthcare facilities, promoting a sense of well-being and safety for patients and staff.

Maintenance and Care

To maximize the performance and longevity of your 2X2 LED Light Fixture Drop Ceiling, consider the following maintenance tips:

  • Regular Cleaning: Wipe the fixture and surrounding area with a soft cloth or sponge to remove dust and debris, preventing buildup and maintaining optimal illumination.
  • Check for Damage: Periodically inspect the fixture for any signs of damage, such as cracked lenses or loose connections, and repair or replace as needed to ensure safety and functionality.
  • Replace Bulbs as Needed: While LED bulbs have a long lifespan, they will eventually need to be replaced when they reach the end of their operational life. Follow the manufacturer’s recommendations for bulb replacement intervals.

Conclusion

The 2X2 LED Light Fixture Drop Ceiling offers a versatile, efficient, and stylish lighting solution for a variety of commercial and residential spaces. With its energy-efficient LED technology, uniform illumination, and easy installation, this fixture provides superior lighting performance while reducing energy consumption and maintenance costs. Whether you’re looking to upgrade your office lighting, enhance the ambiance of your retail store, or improve visibility in educational facilities, the 2X2 LED Light Fixture Drop Ceiling is a reliable and cost-effective choice for all your lighting needs.

Experience the benefits of the 2X2 LED Light Fixture Drop Ceiling and transform your space with superior illumination and style.