Having a toilet leaks through the ceiling when flushed can be alarming. This issue is not only inconvenient but may also lead to extensive water damage, causing the ceiling to sag, stains to develop, and even structural damage if not promptly addressed. Toilet leaks that affect the ceiling often stem from various plumbing issues, such as faulty seals, broken flanges, or cracks in the toilet’s structure.
In this article, we’ll cover common causes, how to recognize a ceiling leak when flushing the toilet, and effective ways to address the problem. Understanding why these leaks happen and knowing what to do can help prevent future damage and keep your home safe and dry.
Why Does My Toilet Leak Through the Ceiling When Flushed?
If water drips or stains appear on the ceiling directly beneath your toilet every time it’s flushed, you’re likely dealing with a plumbing issue. Understanding the underlying causes is essential for addressing this issue effectively. Here are some common reasons for this kind of leak:
1. Faulty Wax Ring Seal
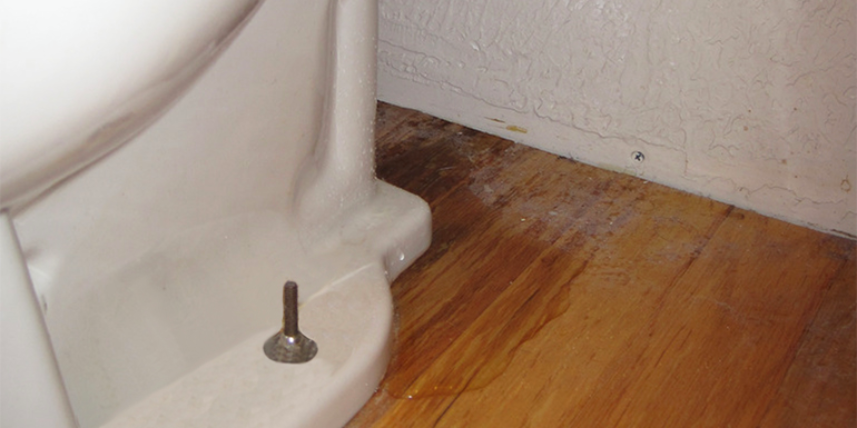
The wax ring is a donut-shaped seal between the base of the toilet and the floor flange. This seal is crucial to prevent water and sewer gases from leaking into the floor or ceiling below. Over time, wax rings can deteriorate or become misaligned, causing a leak every time the toilet is flushed.
Read too: Kitchen Lighting For A Vaulted Ceiling: Illuminating Your Space with Style and Functionality
2. Cracked Toilet Base or Tank
Cracks in the toilet base or tank are another reason for ceiling leaks. Even a hairline crack can cause water to escape during each flush, leading to a slow leak that builds up over time. These cracks may not be visible to the naked eye but can still cause significant water damage.
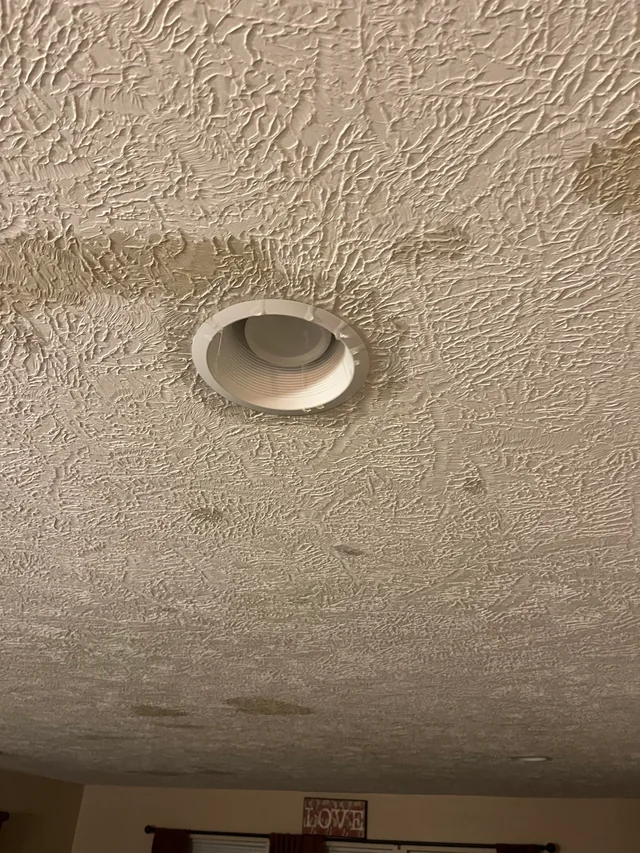
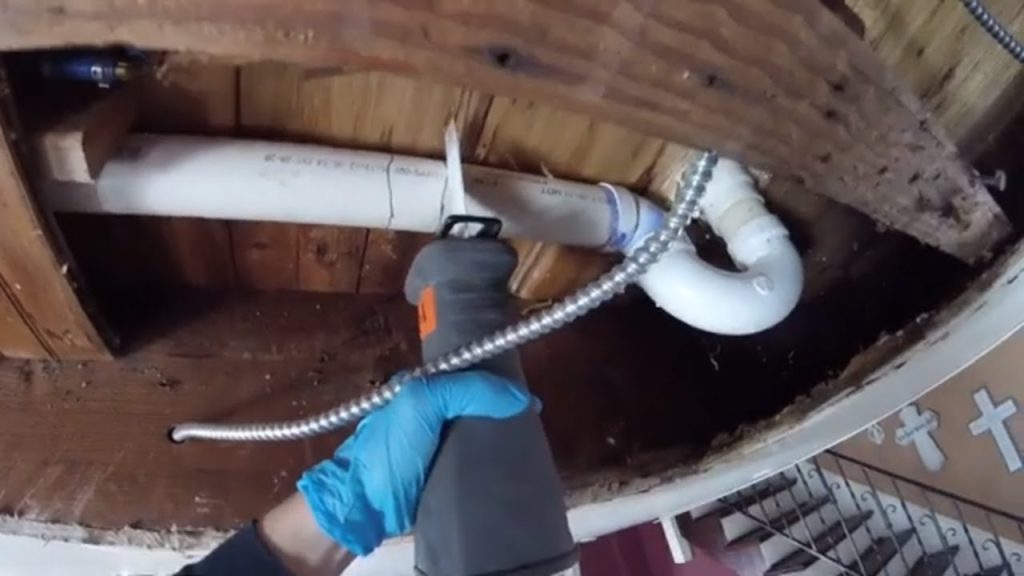
3. Loose or Damaged Flange
The flange is the part that attaches the toilet to the floor and connects it to the waste pipe. If the flange is loose, damaged, or improperly installed, it can cause leaks. A damaged flange can create an uneven surface, making the wax ring seal ineffective, leading to water escaping during flushes.
4. Leaking Toilet Supply Line
The supply line is the pipe that connects the toilet tank to your home’s water supply. If this line is loose, damaged, or corroded, it can leak whenever the toilet is flushed. This type of leak might also worsen over time, eventually causing noticeable water damage to the ceiling below.
5. Condensation and Overflow
In some cases, condensation around the toilet tank or an overflowing tank can create water buildup around the toilet base. Although it’s less common, this water can trickle down through the floor and into the ceiling below, especially if the bathroom floor isn’t properly sealed.
Signs of a Toilet Leak Through the Ceiling When Flushed
Identifying a ceiling leak caused by a toilet is crucial to addressing the issue before it leads to costly repairs. Here are some common signs that indicate a toilet leak through the ceiling:
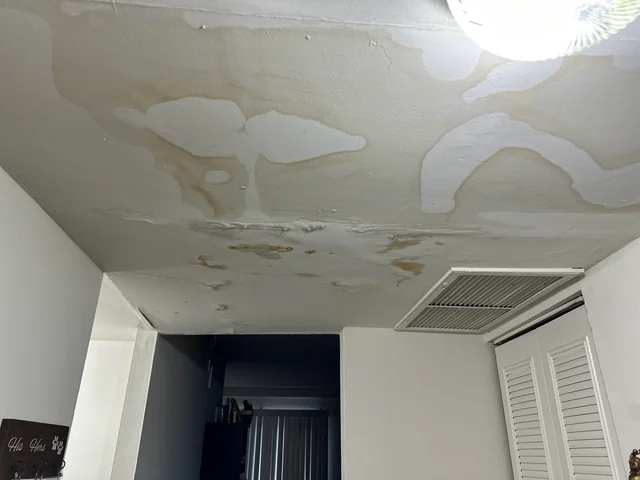
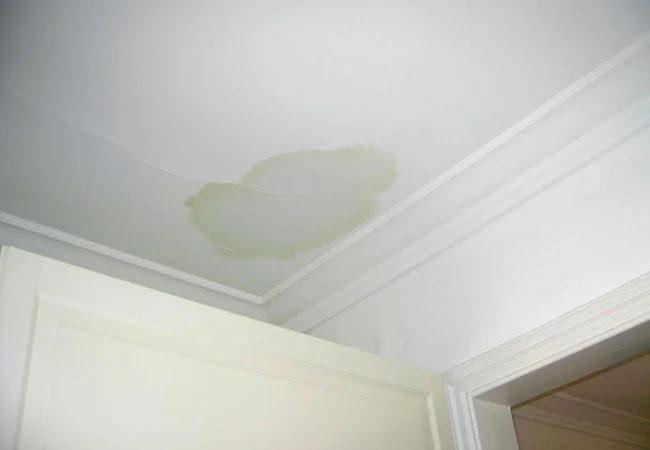
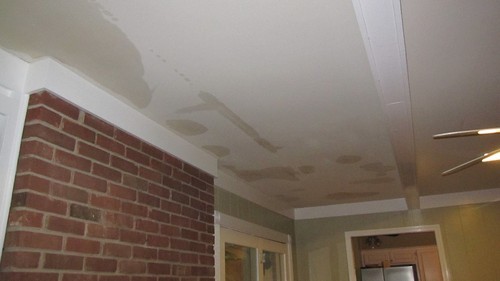
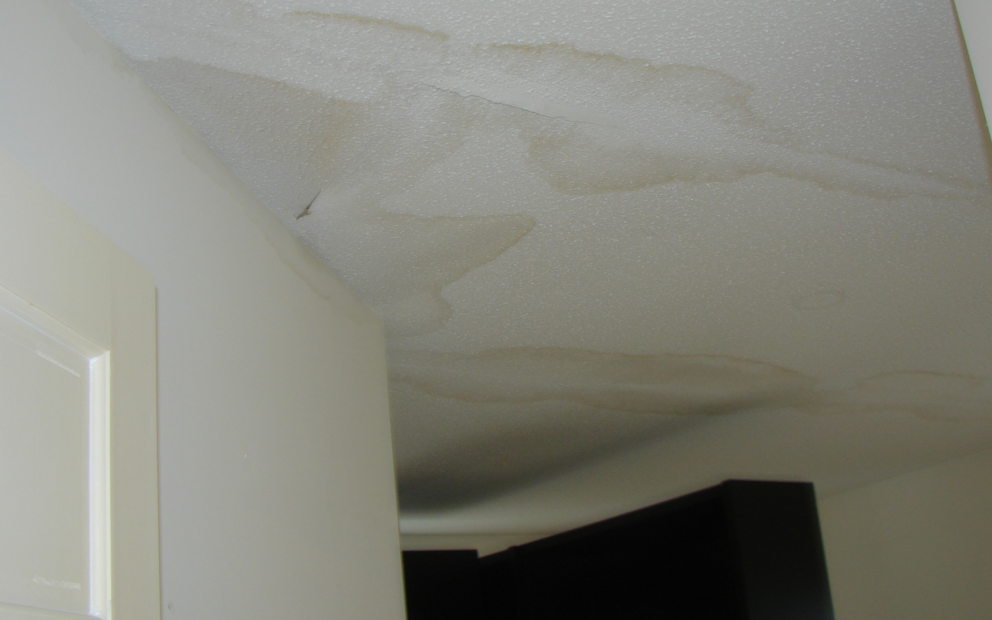
1. Water Stains or Discoloration
One of the most obvious signs of a ceiling leak is water stains or discoloration. These stains may appear as yellow, brown, or dark patches on the ceiling beneath the toilet.
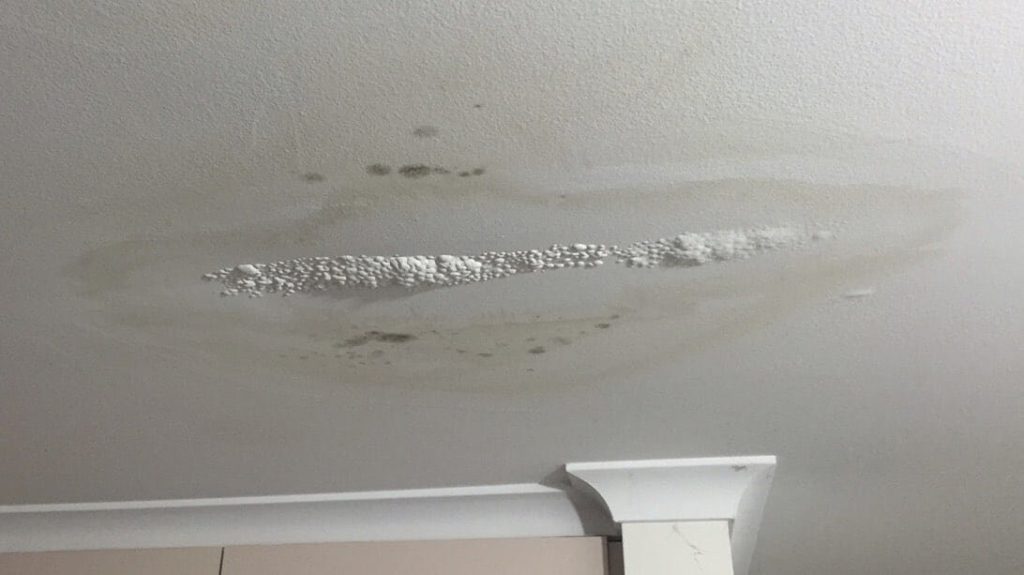
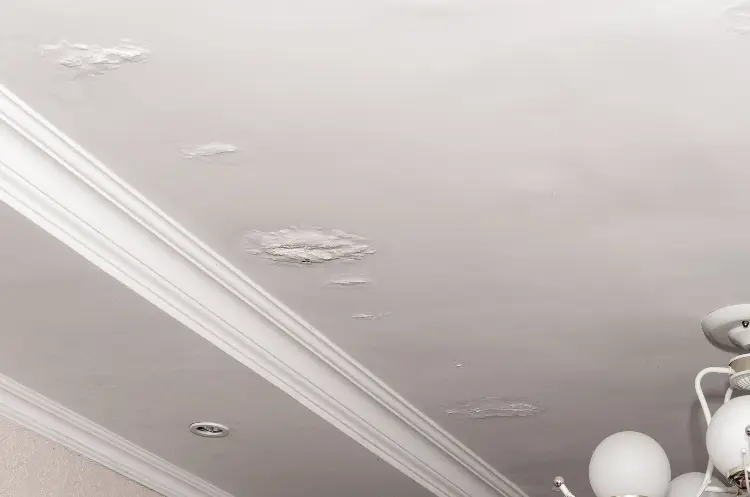
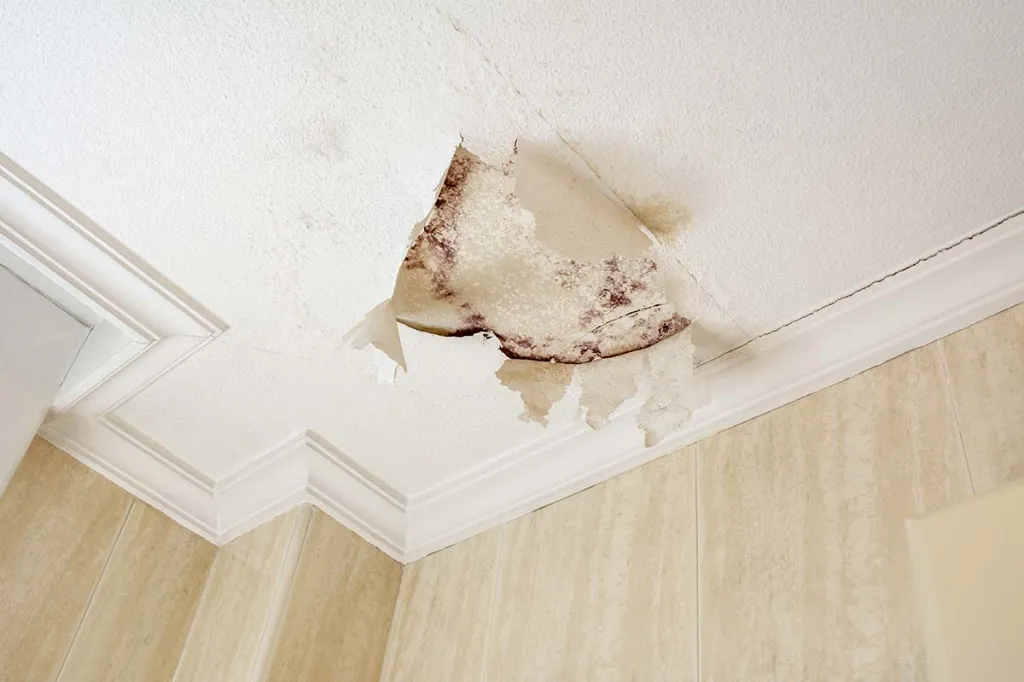
2. Peeling Paint or Bubbling
If the paint or plaster on your ceiling begins to peel, bubble, or blister, it’s likely due to moisture from a leak. This damage often occurs after prolonged exposure to water.
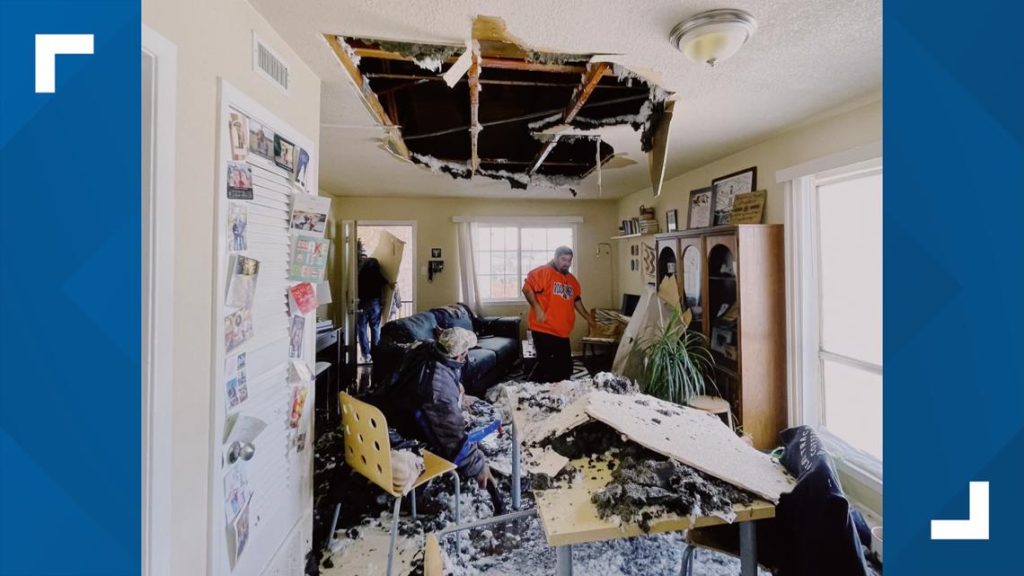
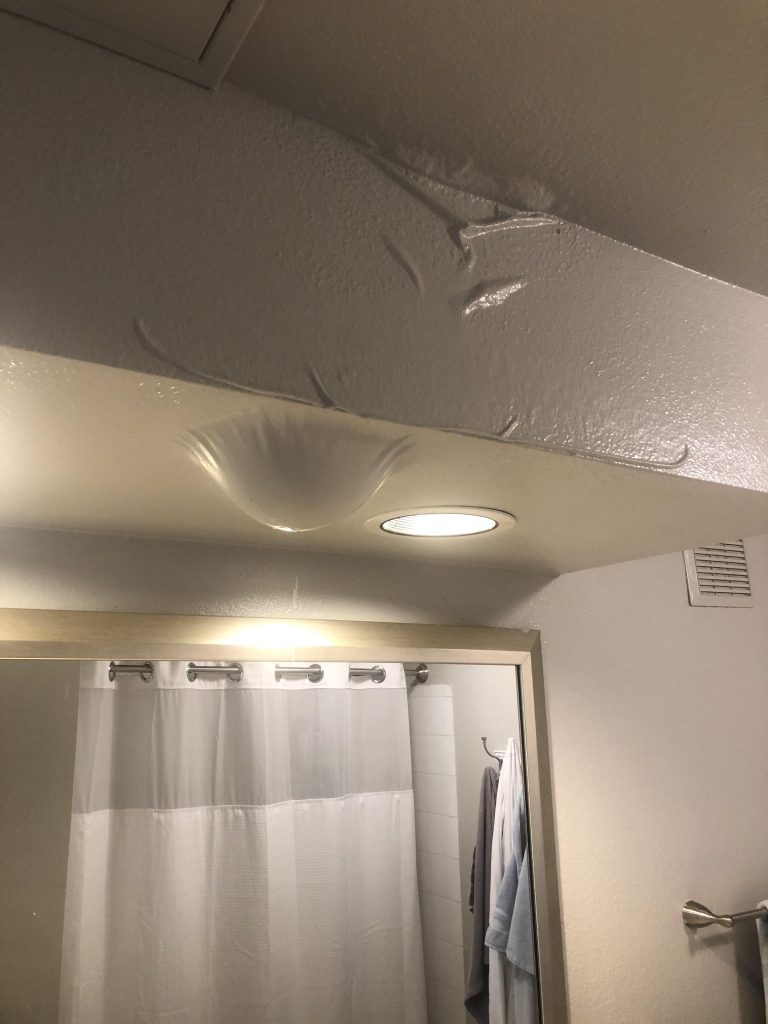
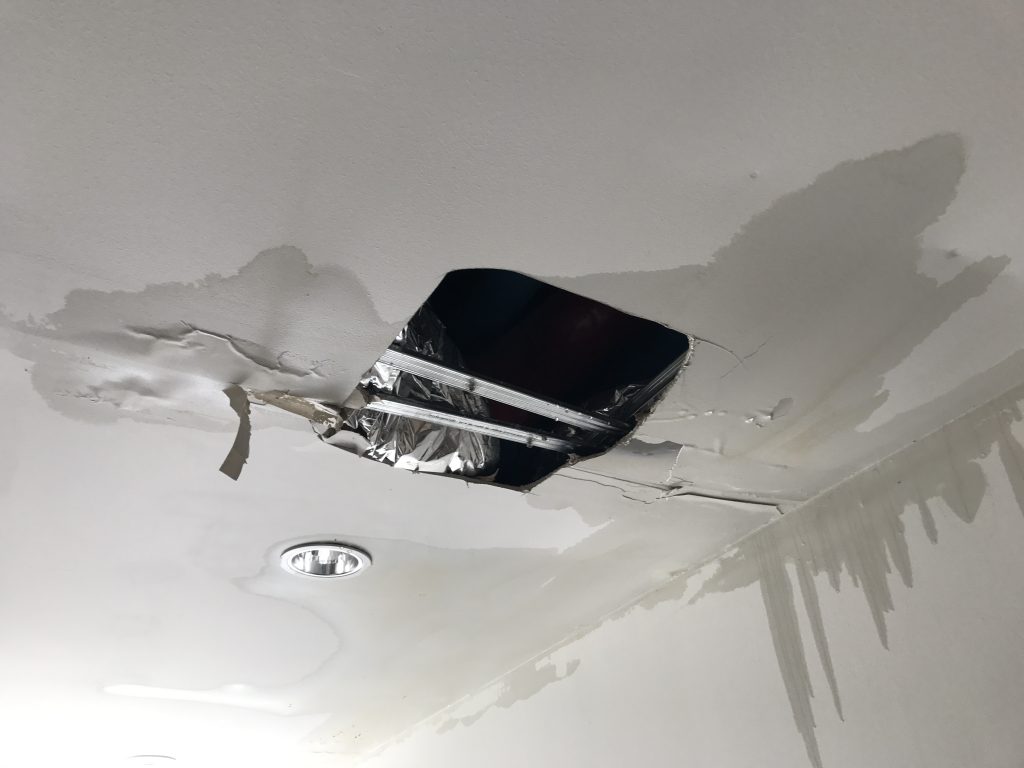
3. Sagging or Warping Ceiling
A significant water leak can cause the ceiling to sag or warp. This sagging is typically a sign that the leak has been ongoing and may require immediate attention to prevent further damage.
4. Mold or Mildew Growth
Moisture from a leak creates an ideal environment for mold and mildew growth. If you notice a musty odor, dark spots, or visible mold, it’s likely that there is a leak that needs immediate attention.
5. Dripping Water
If you see water dripping from the ceiling every time the toilet is flushed, this is a clear indication of a plumbing issue. At this point, the damage may be advanced, and urgent repairs are needed to prevent further structural issues.
How to Fix a Toilet Leak Through the Ceiling When Flushed
Once you’ve identified that your toilet is causing a leak in the ceiling, it’s essential to act quickly. Here’s a step-by-step guide on how to address this problem.
Step 1: Shut Off the Water Supply
Before you begin any repair, turn off the water supply to the toilet. This will prevent any additional water from leaking into the ceiling while you assess and repair the issue.
Step 2: Inspect the Toilet and Surrounding Areas
Carefully inspect the toilet for visible signs of damage. Check the base, tank, and supply line for any leaks, cracks, or looseness. Pay close attention to the wax ring seal and flange, as these are common culprits for leaks.
Step 3: Check the Wax Ring Seal
If the wax ring is old, worn, or damaged, it may need to be replaced. To do this:
- Remove the toilet by loosening the bolts that secure it to the floor.
- Carefully lift the toilet and set it aside.
- Scrape away the old wax ring and replace it with a new one.
- Reinstall the toilet and tighten the bolts securely.
This should help create a watertight seal between the toilet and the flange, preventing water from leaking through the ceiling.
Step 4: Replace or Repair the Flange
If the flange is damaged, it may need to be replaced. You may need a plumber if you’re unfamiliar with flange repairs, as improper installation can worsen leaks. A new flange should sit securely on the floor and connect snugly with the wax ring.
Step 5: Inspect and Replace the Supply Line
If the leak is caused by a faulty supply line, it’s best to replace the line entirely. You can find replacement supply lines at hardware stores. Make sure to choose a line that fits your toilet model and tighten it securely to prevent future leaks.
Step 6: Check for Cracks
If there are visible cracks in the toilet bowl or tank, replacing the toilet may be necessary. Attempting to repair cracks in the porcelain may not be effective, and leaks could worsen over time.
Step 7: Repair the Ceiling
Once the toilet leak is fixed, inspect the ceiling for water damage. Damaged drywall may need to be cut out and replaced, followed by repainting to restore the ceiling’s appearance.
How to Prevent Future Leaks
Preventing future leaks is essential for maintaining the integrity of your plumbing system and protecting your home. Here are some preventative measures to consider:
1. Regular Inspections
Perform regular checks of your toilet, wax seal, and supply lines to ensure everything is in good working order. Catching potential problems early can prevent leaks from forming.
2. Avoid Over-Tightening Bolts
Over-tightening the toilet bolts can cause the porcelain to crack, which may lead to leaks. Be mindful when reinstalling your toilet or making adjustments.
3. Keep Humidity Levels in Check
Bathrooms are prone to humidity, which can contribute to condensation issues. Installing a ventilation fan can help control humidity levels and reduce the risk of water damage.
4. Monitor Water Bills
If you notice an unexpected increase in your water bill, it could indicate a leak somewhere in your plumbing. Investigate promptly to prevent further damage.
5. Schedule Professional Plumbing Inspections
Routine inspections by a plumber can help you identify small issues before they become major problems. Professional inspections ensure your plumbing system remains in optimal condition.
Conclusion
A toilet leaks through the ceiling when flushed is an issue that requires immediate attention. Left unchecked, it can lead to significant water damage, mold growth, and costly repairs. By understanding the common causes—such as a faulty wax ring, damaged flange, or cracked toilet bowl—you can take action to repair the problem and protect your home.
If you are uncertain about any part of the repair process, consulting with a licensed plumber is always a good idea. Professional assistance can ensure the leak is properly fixed, giving you peace of mind and a dry, safe home environment. Remember to take preventative steps to maintain your plumbing, and you’ll minimize the chances of encountering this issue again in the future.