Brushed Nickel Ceiling Fan With Light Kit: A Stylish and Functional Addition to Your Home

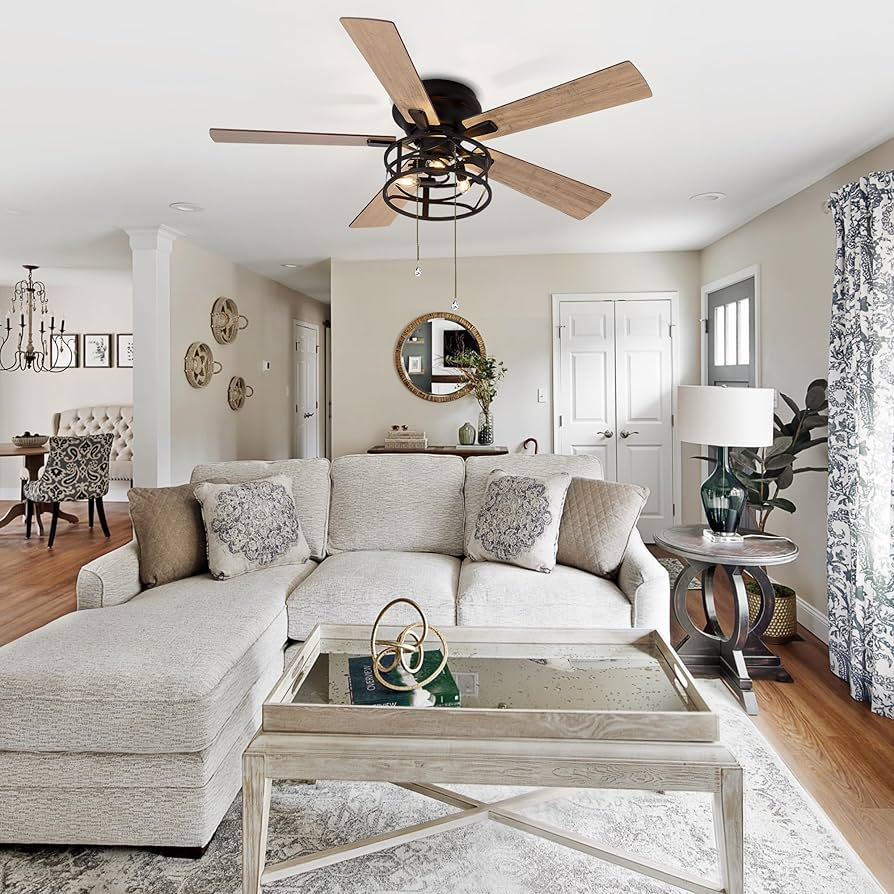
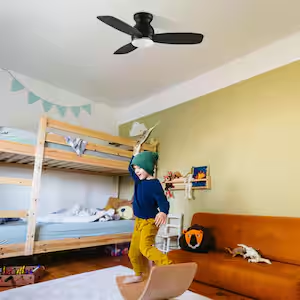
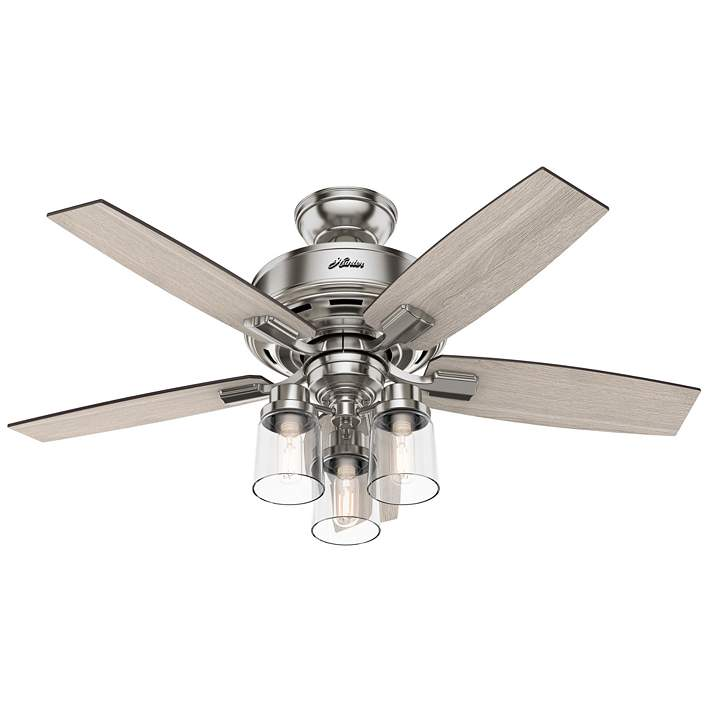
When it comes to enhancing the ambiance and comfort of a room, a Brushed Nickel Ceiling Fan With Light Kit is one of the best choices you can make. This versatile and stylish fixture combines the functionality of both a ceiling fan and a lighting solution, offering an elegant way to regulate temperature and brighten up your living space. Whether you’re outfitting a bedroom, living room, or office, a brushed nickel ceiling fan with a light kit can elevate the style and functionality of your home.

Brushed Nickel Ceiling Fan With Light Kit

In this article, we will explore the benefits, features, installation process, and design options for a Brushed Nickel Ceiling Fan With Light Kit. By the end of this guide, you’ll understand why this fixture is a great addition to any modern home and how it can improve both the aesthetics and the comfort of your space.

Read too: Discovering the Charm of Nautical Outdoor Ceiling Fans for Your Coastal Retreat: Sail into Style


What Is a Brushed Nickel Ceiling Fan With Light Kit?

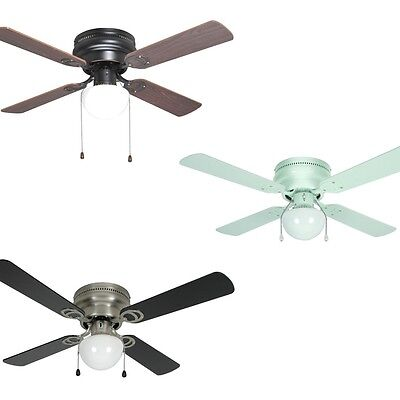
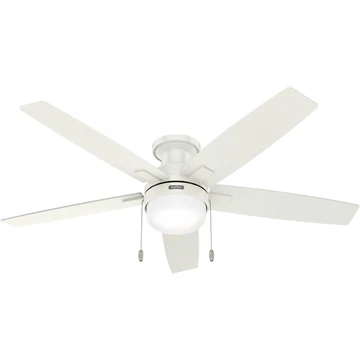
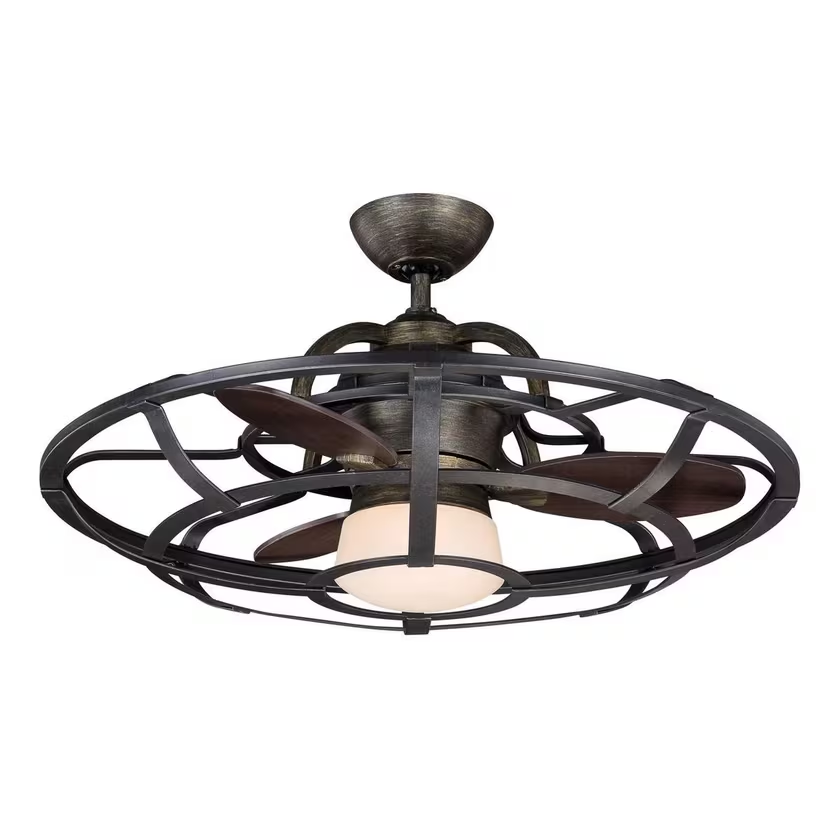
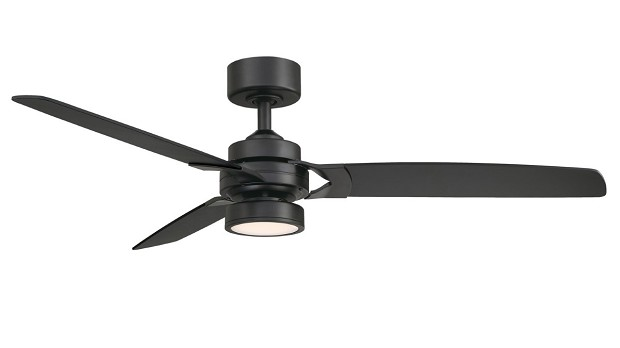
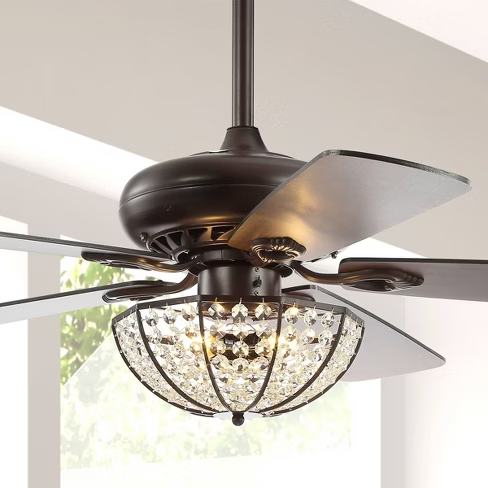
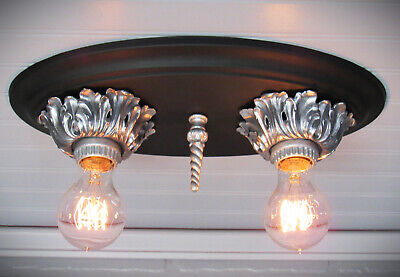
A Brushed Nickel Ceiling Fan With Light Kit is a ceiling fan that comes with a light fixture attached. The brushed nickel finish provides a sleek and modern appearance, making it a popular choice for contemporary homes. This fixture serves dual purposes: circulating air to improve comfort and providing illumination to light up a room. The fan and light can be operated together or independently, allowing you to customize the ambiance of your space.

Brushed nickel is a popular choice for many homeowners due to its subtle shine and durability. The finish offers a sophisticated yet understated aesthetic, making it easy to blend into various interior design styles. Whether you’re aiming for a modern, industrial, or traditional look, a Brushed Nickel Ceiling Fan With Light Kit can complement your design preferences.


Benefits of a Brushed Nickel Ceiling Fan With Light Kit

1. Improved Air Circulation

One of the main reasons people choose ceiling fans is to improve air circulation. A Brushed Nickel Ceiling Fan With Light Kit helps keep air moving throughout the room, preventing stagnant hot air in the summer and helping to distribute warmth in the winter. This can make your home feel more comfortable without the need to rely on central air conditioning or heating, which can be expensive.

2. Dual Functionality

By combining a ceiling fan with a light fixture, this product offers dual functionality in one unit. You get the benefits of both a fan and a light, saving space and offering more flexibility in your design. The light kit provides bright, efficient illumination for a room, while the fan keeps the air circulating. This feature makes a Brushed Nickel Ceiling Fan With Light Kit an ideal addition to rooms where space is limited or where both functions are needed.

3. Energy Efficiency

A Brushed Nickel Ceiling Fan With Light Kit can help reduce your energy consumption. Instead of using an air conditioning unit to cool a room, you can rely on the fan to keep the air cool and comfortable. Fans use much less energy than air conditioning, which can help lower your utility bills. Additionally, many modern ceiling fans come with LED light kits, which are energy-efficient and long-lasting.

4. Stylish Design

The brushed nickel finish is highly versatile, adding a touch of sophistication to any room. It’s a popular choice because it’s neutral and can complement a wide variety of color schemes and décor styles. Whether you have a modern, industrial, or even a traditional design, a Brushed Nickel Ceiling Fans With Light Kit can blend seamlessly into the space while adding an element of elegance.


Features to Consider When Choosing a Brushed Nickel Ceiling Fan With Light Kit

1. Fan Speed and Controls

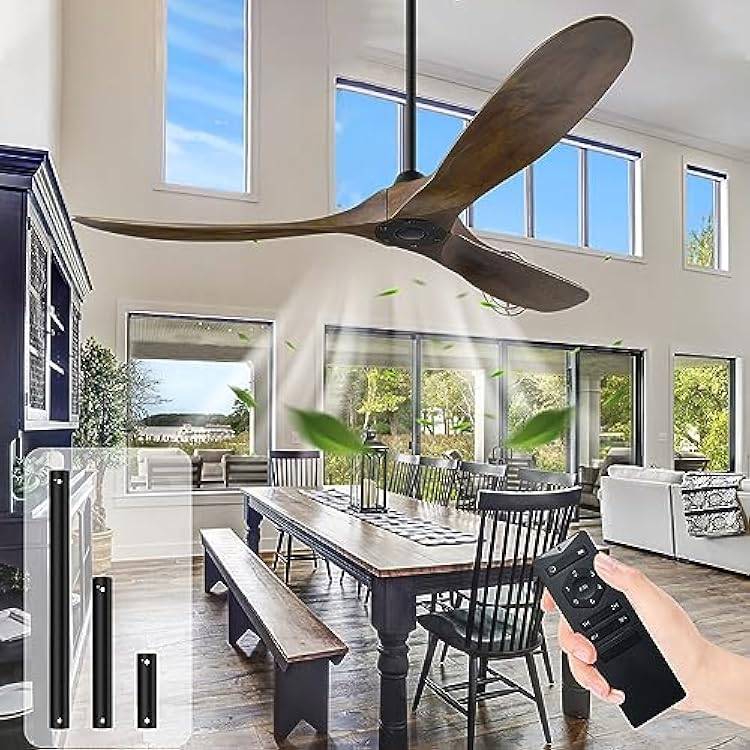
When selecting a Brushed Nickel Ceiling Fan With Light Kit, it’s essential to consider the fan speed options and the type of controls it offers. Most ceiling fans have multiple speed settings that allow you to adjust the airflow to your desired level. Some fans also come with remote controls or wall-mounted controls, giving you more convenience when adjusting the fan speed or light intensity.

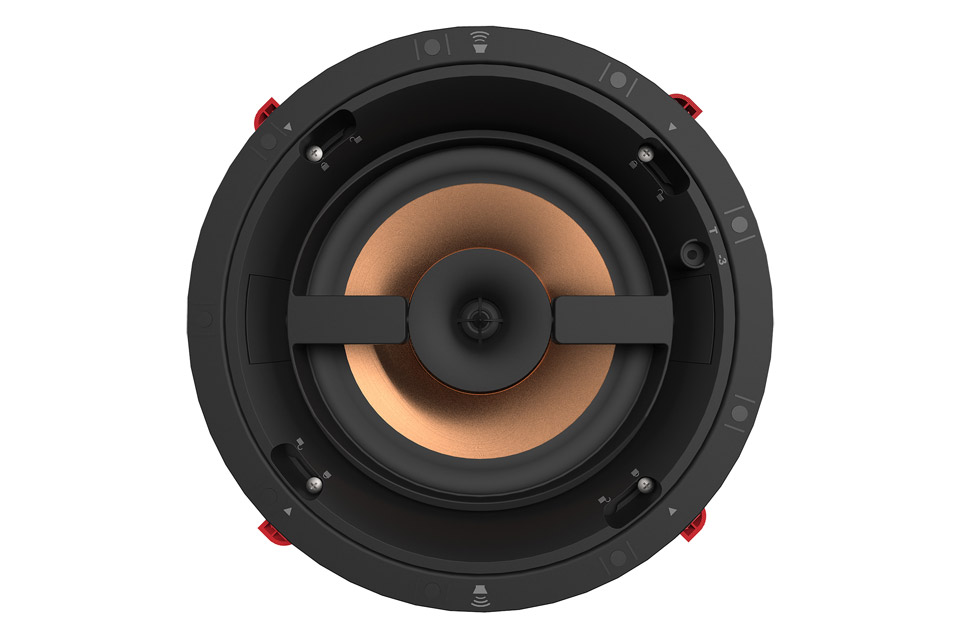
2. Light Bulb Compatibility

Many Brushed Nickel Ceiling Fans With Light Kits come with integrated LED bulbs, which are energy-efficient and long-lasting. However, some models allow you to use traditional bulbs, such as incandescent or CFL bulbs. Make sure to check the compatibility of the light kit with your preferred type of light bulb.

3. Size and Blade Span

The size of the ceiling fan is another critical consideration. A fan that’s too small for the room will not effectively circulate the air, while one that’s too large may overwhelm the space. Measure the size of your room to ensure you select a Brushed Nickel Ceiling Fan With Light Kit that is appropriately sized. For most average-sized rooms, a fan with a blade span of 42 to 52 inches works well.

4. Energy Star Rating

For homeowners interested in energy savings, it’s important to look for a Brushed Nickel Ceiling Fans With Light Kit that has an Energy Star rating. Fans with this rating meet strict energy efficiency guidelines set by the U.S. Environmental Protection Agency (EPA). Choosing an Energy Star-certified fan can help reduce your energy bills and make your home more eco-friendly.


Installation Tips

Installing a Brushed Nickel Ceiling Fans With Light Kit can be a DIY project if you have some basic electrical knowledge. However, if you’re unsure about handling electrical work, it’s best to hire a professional electrician to ensure the fan is installed safely and correctly.

Here’s a general guide to installing a Brushed Nickel Ceiling Fans With Light Kit:

1. Turn Off Power

Before you begin, ensure the power to the room is turned off at the circuit breaker to avoid any electrical accidents.

2. Assemble the Fan

If your fan comes in multiple pieces, follow the manufacturer’s instructions to assemble it. This may include attaching the blades to the motor, attaching the light kit to the fan, and connecting the wiring.

3. Mount the Fan Bracket

The fan bracket must be securely mounted to the ceiling. This step is critical for ensuring the fan stays in place during operation.

4. Connect the Wiring

Carefully connect the electrical wires according to the instructions. Typically, you’ll need to connect the fan wires to the corresponding wires in the ceiling. Make sure each connection is tightly secured.

5. Attach the Fan to the Bracket

Once the wiring is complete, attach the fan motor to the ceiling bracket. Make sure it is securely fastened to prevent any wobbling.

6. Install the Light Kit

Finally, install the light kit by connecting the wires and securing the light fixture in place. Ensure that the light bulbs are properly installed and ready to use.

7. Test the Fan

Once everything is assembled, turn the power back on and test the fan and light to make sure they function properly.


Where to Use a Brushed Nickel Ceiling Fan With Light Kit

A Brushed Nickel Ceiling Fan With Light Kit can be used in various areas of the home, including:

1. Living Rooms

For open spaces like living rooms, a ceiling fan with a light kit provides both the necessary lighting and air circulation, making it an ideal fixture for comfort and style.

2. Bedrooms

In bedrooms, the fan helps maintain a comfortable temperature while the light kit provides soft, relaxing illumination. The brushed nickel finish adds a touch of sophistication to any bedroom décor.

3. Offices

A Brushed Nickel Ceiling Fans With Light Kit can also be an excellent choice for home offices, providing both cooling airflow and sufficient lighting for working.

4. Dining Rooms

For dining rooms, a ceiling fan with a light kit can create a comfortable, inviting atmosphere. The light provides sufficient illumination for meals, while the fan keeps the space comfortable.


Conclusion

A Brushed Nickel Ceiling Fans With Light Kit is an excellent investment for any home. It combines style, functionality, and energy efficiency, making it a practical choice for any room in your home. Whether you’re looking to improve air circulation, reduce energy costs, or add a sleek design element, this versatile fixture checks all the boxes. With its modern brushed nickel finish and integrated lighting, a Brushed Nickel Ceiling Fans With Light Kit can transform your space into a comfortable and stylish haven.

Floor To Ceiling Power And Data Pole: The Perfect Solution for Modern Offices and Workspaces

In today’s fast-paced world, technology has become an integral part of every workspace. As businesses continue to evolve, so do the ways in which we design our office spaces to meet modern demands. One of the latest trends that cater to these needs is the Floor to Ceiling Power and Data Pole, an innovative solution that combines both power and data connectivity in one sleek, functional design. Whether you are designing a new office or upgrading an existing one, this solution can significantly enhance the efficiency and aesthetics of your space.

Floor To Ceiling Power And Data Pole

What is a Floor to Ceiling Power and Data Pole?

A Floor to Ceiling Power and Data Pole is a vertical unit that extends from the floor to the ceiling and provides access to power outlets, data ports, and sometimes even lighting and audiovisual connections. Typically, these poles are designed to streamline the wiring and infrastructure needed in an office environment, allowing for more flexibility and reducing clutter.

Read too: Discovering the Charm of Nautical Outdoor Ceiling Fans for Your Coastal Retreat: Sail into Style

These poles are commonly used in modern offices, conference rooms, and open workspaces. The primary goal of a Floor to Ceiling Power and Data Pole is to provide a centralized point for connecting devices, such as computers, phones, lighting systems, and audiovisual equipment, while maintaining a sleek and organized appearance.


Key Features

1. Integration of Power and Data

One of the most significant benefits of a Floor to Ceiling Power and Data Pole is the integration of both power and data. These units combine electrical outlets with network ports, making them a convenient solution for providing power and connectivity to multiple devices at once.

  • Power outlets: Typically, these poles are equipped with multiple electrical outlets to power computers, phones, lights, and other essential devices.
  • Data ports: The inclusion of Ethernet ports or USB connections in these poles allows for reliable and fast data transmission for a seamless working experience.

2. Cable Management

Cable management is one of the challenges of any modern office space. The Floor to Ceiling Power and Data Pole helps in this area by neatly containing and organizing cables within the structure. This not only reduces clutter but also ensures that wires are hidden from view, contributing to a clean and modern aesthetic.

3. Customizable Designs

One of the great advantages of these poles is their customization. The Floor to Ceiling Power and Data Pole comes in various sizes, colors, and configurations to suit the specific needs of your workspace. Some poles can accommodate additional features, such as lighting, heating, or cooling, providing an all-in-one solution for different requirements.

4. Aesthetic Appeal

With a sleek and modern design, these poles can blend in with the overall aesthetic of your office or work environment. Whether you are going for a minimalist look or a more industrial design, the Floor to Ceiling Power and Data Pole can be tailored to complement your space. Poles often come in finishes like brushed metal, matte black, or even wood-like finishes to match various office decors.


Benefits of Using a Floor to Ceiling Power and Data Pole

1. Space Efficiency

One of the biggest benefits of the Floor to Ceiling Power and Data Pole is its ability to save space. Rather than running power and data cables all around the room, this pole consolidates everything into one vertical unit, which is especially useful for offices with limited floor space or those that prefer a clean, organized environment.

2. Improved Flexibility

The design of the Floor to Ceiling Power and Data Pole offers significant flexibility in how you arrange and rearrange your office. The pole can be easily installed in various positions within the room, allowing for better placement of devices and equipment without being hindered by traditional power outlets or network ports on walls.

For example, in conference rooms or collaborative spaces, these poles can be positioned near tables to offer convenient access to power and data connections, improving workflow and communication.

3. Enhanced Safety

Exposed wires can pose safety hazards in a busy office space, with tripping or accidental unplugging being potential risks. The Floor to Ceilings Power and Data Pole helps eliminate this issue by housing cables securely within its structure. This reduces the likelihood of accidents and makes the space safer for everyone.

4. Clean and Professional Appearance

A Floor to Ceilings Power and Data Pole helps maintain a neat, professional appearance in the office. With fewer wires and cables visible, the workspace looks more polished and organized. This clean aesthetic can leave a positive impression on clients and visitors.


How to Incorporate a Floor To Ceiling Power And Data Pole in Your Office

1. Select the Right Location

When planning the installation of a Floor to Ceiling Power and Data Pole, it’s essential to choose a location that makes sense for the functionality of your office. Consider areas where multiple devices will be used, such as near desks, conference tables, or multimedia areas. Also, think about how often people move around the space, as the pole should be placed where it can be accessed easily without obstructing foot traffic.

2. Consider Office Layout and Design

The layout of your office will also influence where and how you place the pole. If you have a large open floor plan, you may want to opt for multiple poles spread out across the room. Alternatively, in a more compact space, a single central pole might be sufficient. Ensure that the pole’s design complements the style of your office and does not disrupt the overall aesthetic.

3. Plan for Future Growth

While a Floor to Ceiling Power and Data Pole offers plenty of connectivity options, it’s important to think ahead about future expansion. Choose a pole that can accommodate additional outlets or ports if you plan to add more devices or equipment later on. Many models offer flexibility for future upgrades, making them a wise investment for growing businesses.


Installation Process

The installation process of a Floor to Ceiling Power and Data Pole is relatively straightforward but may vary depending on the manufacturer and model. Most poles come with installation guides, but here’s a general overview of the steps involved:

1. Measure the Space

Before installation, measure the area where the pole will be placed. Ensure there is enough room for the pole to extend from the floor to the ceiling without obstructing other elements in the room.

2. Attach the Base

Start by securing the base of the pole to the floor. Some models may require drilling or anchoring to ensure stability, especially if the pole is heavy or contains multiple components.

3. Install the Pole

After securing the base, attach the pole itself. Depending on the design, you may need to slide the pole into the base and secure it with screws or bolts.

4. Connect Power and Data Cables

Once the pole is in place, connect the power and data cables according to the manufacturer’s instructions. This step may involve connecting electrical wires, Ethernet cables, or other types of connections.

5. Test the Connections

Before finishing the installation, test the power outlets and data ports to ensure everything works as expected. Check for any loose connections or issues that may need to be addressed.


Conclusion

The Floor to Ceilings Power and Data Pole is an innovative and highly functional solution for modern office spaces. By combining power outlets, data ports, and cable management in a single, sleek unit, it helps create a clean, organized, and efficient workspace. Whether you are designing a new office or upgrading an existing one, this versatile piece of office furniture can significantly enhance both the functionality and aesthetics of your environment.

By investing in a Floor to Ceilings Power and Data Pole, you not only improve the connectivity of your office but also promote a safer, more professional workspace for employees and visitors alike.

Black And Gold Ceiling Fan With Light: The Perfect Blend of Style and Functionality

Ceiling fans have long been a staple in home design, providing a functional solution for cooling and lighting while also enhancing the aesthetics of a space. Among the many options available, a Black and Gold Ceiling Fan with Light stands out as a luxurious and elegant choice. This design combines sleek black finishes with touches of gold to create a statement piece that fits seamlessly into various interior styles. Whether you’re renovating your home or designing a new space, this guide will help you understand the features, benefits, and versatility of black and gold ceiling fans with lights.

Black And Gold Ceiling Fan With Light

Why Choose a Black and Gold Ceiling Fan with Light?

Ceiling fans serve more than just a practical purpose; they contribute significantly to a room’s overall ambiance. Here’s why a Black and Gold Ceiling Fan with Light is worth considering:

1. Timeless Elegance

The black and gold color combination exudes sophistication, blending modernity with classic charm. The bold black provides a neutral base, while gold accents add a touch of luxury.

2. Dual Functionality

These fans combine cooling and lighting, reducing the need for separate installations. This dual-purpose design maximizes efficiency and saves space, making it perfect for both small and large rooms.

3. Versatile Design

Whether your decor leans towards contemporary, industrial, or traditional, a black and gold ceiling fan complements various styles. It’s an ideal choice for living rooms, bedrooms, or even outdoor spaces like covered patios.

4. Energy Efficiency

Modern ceiling fans, including black and gold designs, are energy-efficient. They help circulate air effectively, reducing reliance on air conditioning and lowering energy bills.

Read too: Discovering the Charm of Nautical Outdoor Ceiling Fans for Your Coastal Retreat: Sail into Style


Key Features of Black and Gold Ceiling Fans with Lights

1. Sleek Black Finish

The primary black finish serves as a sophisticated backdrop, making the fan suitable for both minimalist and bold interiors.

2. Gold Detailing

Gold accents on the blades, motor housing, or light fixtures create a striking contrast, elevating the overall look.

3. Integrated Lighting

Many designs come with LED lights, offering bright and energy-efficient illumination. Some models feature dimmable options for customized lighting.

4. Remote Control Functionality

Most black and gold ceiling fans are equipped with remote controls, allowing you to adjust speed, direction, and lighting with ease.

5. Silent Operation

Advanced motor technology ensures quiet performance, making these fans suitable for bedrooms and study areas.


How to Choose the Right Black and Gold Ceiling Fan with Light

When selecting a ceiling fan, consider the following factors to ensure it meets your needs:

1. Room Size

  • For smaller rooms (up to 75 sq. ft.), choose a fan with a blade span of 29–36 inches.
  • Medium rooms (76–144 sq. ft.) require blades spanning 36–42 inches.
  • Larger spaces (over 225 sq. ft.) need fans with blades measuring 50–54 inches or more.

2. Ceiling Height

  • Standard ceilings can accommodate most fans, but for high ceilings, opt for models with downrods.
  • Flush-mounted designs work best for low ceilings.

3. Lighting Requirements

Determine the type of lighting you need. Dimmable LEDs offer flexibility, while warm-toned lights create a cozy atmosphere.

4. Style Compatibility

Ensure the fan’s design aligns with your room’s decor. A black and gold fan adds a luxurious touch to both modern and traditional settings.


Black And Gold Ceiling Fan With Light: Enhancing Different Spaces

1. Living Rooms

In living areas, a black and gold ceiling fan serves as a central focal point. Pair it with neutral tones or bold color schemes to create a cohesive look.

2. Bedrooms

For bedrooms, choose a fan with a quiet motor and dimmable lighting to enhance comfort and relaxation.

3. Dining Areas

In dining rooms, a fan with warm-toned lighting adds ambiance, while the gold accents tie in with metallic elements like chandeliers or tableware.

4. Outdoor Spaces

Outdoor-rated black and gold ceiling fans are perfect for covered patios and porches. Ensure the model is resistant to moisture and harsh weather conditions.


Maintenance Tips

To keep your ceiling fan looking and functioning like new, follow these maintenance tips:

1. Regular Cleaning

Dust the blades and motor housing regularly using a soft cloth or vacuum attachment.

2. Check for Loose Parts

Inspect screws and mounting brackets periodically to ensure the fan remains secure.

3. Replace Bulbs as Needed

For fans with integrated lighting, replace bulbs promptly when they burn out. Opt for energy-efficient LEDs for longer-lasting performance.

4. Lubricate Moving Parts

If your fan begins to make noise, check the manufacturer’s guidelines for lubrication. Some models may require periodic oiling.


Popular Black and Gold Ceiling Fan with Light Models

Here are a few popular models to consider:

1. Westinghouse Lighting Xavier II

This fan features a sleek black finish with gold highlights and reversible blades. Its integrated LED light kit offers bright illumination.

2. Minka Aire Orb

The modern design of the Minka Aire Orb blends a matte black body with brushed gold accents, making it perfect for contemporary spaces.

3. Hunter Fan Company Hepburn

This fan boasts a vintage-inspired design with a matte black finish and antique gold accents. Its dimmable LED light provides a warm glow.


FAQs

1. Are black and gold ceiling fans suitable for small rooms?

Yes, they come in various sizes to fit small, medium, and large rooms. Look for compact models with smaller blade spans for limited spaces.

2. Can I install a black and gold ceiling fan outdoors?

Outdoor-rated models are designed to withstand moisture and weather conditions, making them suitable for covered patios and porches.

3. Are these fans energy-efficient?

Most modern ceiling fans, including black and gold designs, feature energy-efficient motors and LED lights.

4. How do I choose the right lighting color for my fan?

Warm tones (2700–3000K) create a cozy atmosphere, while cool tones (4000–5000K) are ideal for task lighting.


Conclusion

A Black and Gold Ceiling Fan with Light is more than just a functional appliance; it’s a statement piece that elevates the aesthetics of any room. Its timeless design, energy efficiency, and versatility make it an excellent choice for homeowners looking to combine practicality with style. Whether you’re revamping your living room, bedroom, or outdoor space, a black and gold ceiling fan is sure to make an impression.

42 Flush Mount Ceiling Fan With Light: A Stylish, Functional Addition to Any Room

When it comes to enhancing the comfort and aesthetic appeal of a room, a 42 Flush Mount Ceiling Fan With Light offers an ideal solution. This type of ceiling fan combines the cooling power of a fan with the bright illumination of a light fixture, providing an all-in-one solution for your home. Whether you need a solution for a small living room, bedroom, or even a compact office, the 42-inch diameter and flush mount design make it a versatile option for various spaces. In this guide, we’ll explore the benefits of a 42 Flush Mount Ceiling Fan With Light, key features to look for, and tips on choosing the perfect one for your needs.

42 Flush Mount Ceiling Fan With Light

What is a 42 Flush Mount Ceiling Fan With Light?

A 42 Flush Mount Ceiling Fan With Light is a ceiling fan that is designed to be installed directly against the ceiling, meaning it doesn’t hang down like traditional fans. This “flush mount” design makes it an excellent choice for rooms with low ceilings, providing both comfort and style without compromising on headroom. With a fan diameter of 42 inches, it’s perfect for smaller to medium-sized rooms, providing ample airflow and cooling power.

What sets this type of ceiling fan apart is the integrated lighting feature. The light fixture is built into the fan’s design, offering both illumination and air circulation in one convenient unit. The light is typically LED or energy-efficient bulbs, ensuring that your space stays bright while saving on electricity.


Why Choose a 42 Flush Mount Ceiling Fan With Light?

A 42 Flush Mount Ceiling Fan With Light offers many advantages that make it an appealing option for homeowners. Let’s dive deeper into the key reasons why this ceiling fan style might be the perfect choice for your home.

Read too: Kitchen Lighting For A Vaulted Ceiling: Illuminating Your Space with Style and Functionality

1. Space-Saving and Low Profile Design

The flush mount design of this ceiling fan is one of its biggest benefits. Traditional ceiling fans often hang low from the ceiling, making them unsuitable for rooms with lower ceilings. With the 42 Flush Mount Ceiling Fan With Light, the fan sits flush against the ceiling, offering a clean and modern look while also saving headspace. This design allows for more room in the space, making it an ideal solution for apartments, bedrooms, and other areas where low clearance might be an issue.

In addition to saving space, the low-profile design ensures that the fan doesn’t disrupt the overall look of the room. It complements various home decor styles, from contemporary to rustic, providing a sleek and elegant touch to your interior design.

2. Energy Efficiency

The 42 Flush Mount Ceiling Fan With Light is not just about comfort and style; it’s also about energy efficiency. Many of these units come with integrated LED lights, which use significantly less power than traditional incandescent bulbs. LED lights also last longer, which means fewer bulb replacements and less maintenance over time.

Moreover, the fan can help lower energy costs in the summer by cooling the room and allowing you to set your thermostat a few degrees higher. This means you can run your air conditioning less, saving money on cooling bills. The fan’s ability to circulate air efficiently creates a more comfortable indoor environment, making it an energy-efficient alternative to traditional air conditioning.

3. Versatile and Functional

The combination of a ceiling fan and light fixture in one unit offers great functionality. Not only do you get the cooling benefits of the fan, but the light provides illumination for various activities. Whether you’re reading, working, or simply relaxing, you’ll have the right amount of light and airflow to keep the room comfortable.

This dual functionality makes it a great option for rooms where space is limited, as it combines two essential elements into one fixture. The integrated light source can provide both ambient and task lighting, depending on the type of bulb used and the brightness level. Many models also feature dimmable lights, allowing you to adjust the lighting to suit your needs throughout the day.

4. Enhanced Aesthetic Appeal

With a 42 Flush Mount Ceiling Fan With Light, you don’t have to sacrifice style for functionality. These ceiling fans come in various designs, materials, and finishes, allowing you to choose one that fits your home’s decor perfectly. From sleek, modern styles with minimalist designs to more traditional options with intricate details, there’s a flush mount ceiling fan for every taste and home aesthetic.

Many models also feature elegant finishes such as matte black, brushed nickel, or polished chrome, giving the fan a sophisticated look that can enhance the visual appeal of any room. Whether you’re updating a living room or installing a new fan in your bedroom, the right 42 Flush Mount Ceiling Fan With Light can act as a striking centerpiece in the space.

5. Quiet Operation

Another great feature of the 42 Flush Mount Ceiling Fan With Light is its quiet operation. Unlike older ceiling fans that can be noisy when running, many of today’s models are designed to operate silently. This makes them ideal for bedrooms or spaces where you need to minimize distractions, such as offices or nurseries. The quiet operation ensures that the fan’s cooling effects won’t interfere with your sleep or work.


Key Features to Look for When Choosing a 42 Flush Mount Ceiling Fan With Light

When selecting a 42 Flush Mount Ceiling Fan With Light, there are a few key features to consider to ensure that you’re choosing the best option for your needs. Here are some factors to keep in mind:

1. Blade Material and Design

The material and design of the fan blades can affect both the performance and appearance of the ceiling fan. Look for blades made from durable materials like wood, metal, or high-quality plastic. The design of the blades can also vary, with some fans featuring traditional paddle blades, while others have more modern or contemporary blade shapes. Choose a design that complements the overall aesthetic of your room.

2. Light Bulb Type and Wattage

Most 42 Flush Mount Ceiling Fans With Light come with LED lights, but it’s important to check the light bulb type and wattage. LED lights are energy-efficient and long-lasting, but you’ll want to ensure that the brightness level suits your space. Some fans feature dimmable LED lights, giving you the ability to adjust the lighting according to the time of day or the activities you’re doing.

3. Motor Quality

The motor is the heart of the ceiling fan, and a good-quality motor ensures smooth operation and long-term reliability. Look for fans with high-quality motors that are energy-efficient and durable. Some fans also offer multiple speed settings, allowing you to adjust the airflow as needed for different weather conditions.

4. Remote Control or Wall Control

Many 42 Flush Mount Ceiling Fans With Light come with a remote control or wall-mounted control for easy operation. A remote control allows you to adjust the fan speed and light settings without having to get up, which can be a convenient feature, especially in larger rooms or when the fan is mounted higher up. Some fans may also offer smart technology options, enabling you to control them via your smartphone or voice assistant.


Conclusion

A 42 Flush Mount Ceiling Fan With Light is a practical, stylish, and energy-efficient choice for any home. Whether you’re looking to improve airflow in a small room or add a sleek light fixture to your space, this dual-function ceiling fan offers the best of both worlds. With its space-saving design, versatility, and modern aesthetic, it’s no wonder that it’s become a popular option for homeowners.

By considering key features such as blade material, light type, motor quality, and controls, you can ensure that you select the best 42 Flush Mount Ceiling Fan With Light to suit your home’s needs. With its combination of style, functionality, and comfort, a flush mount ceiling fan with light can transform any room into a more comfortable and beautiful space.


Mid Century Modern Flush Mount Ceiling Light: A Stylish and Functional Addition to Your Home

When it comes to lighting, the Mid Century Modern Flush Mount Ceiling Light is one of the most popular choices for homeowners who want to enhance the style and functionality of their living spaces. Its sleek design, timeless appeal, and ability to illuminate a room without taking up too much space make it an excellent option for a wide range of interior settings.

Mid Century Modern Flush Mount Ceiling Light

This article will explore the key features of the Mid Century Modern Flush Mount Ceiling Light, why it’s a great choice for modern homes, how to choose the right one, and installation tips. Whether you are renovating your home or designing a new space, this stylish lighting fixture is sure to elevate your décor while providing ample light for your room.

Read too: Kitchen Lighting For A Vaulted Ceiling: Illuminating Your Space with Style and Functionality


What Is a Mid Century Modern Flush Mount Ceiling Light?

The Mid Century Modern Flush Mount Ceiling Light is a lighting fixture that sits close to the ceiling, providing ample illumination without the need for hanging fixtures. Its design is inspired by the Mid-Century Modern era, which was popular between the 1940s and 1960s and is known for clean lines, geometric shapes, and minimalist aesthetics. These fixtures typically feature simple yet stylish designs with a mix of materials such as metal, glass, and wood.

Flush mount ceiling lights are ideal for spaces where you want a low-profile lighting solution. They work well in rooms with low ceilings, and their ability to distribute light evenly across the room makes them perfect for kitchens, bathrooms, bedrooms, and hallways.


Why Choose a Mid Century Modern Flush Mount Ceiling Light?

1. Timeless Design

One of the key reasons homeowners opt for a Mid Century Modern Flush Mount Ceiling Light is its timeless design. The Mid-Century Modern style is known for its ability to remain relevant over the years, thanks to its sleek lines and understated elegance. Whether your home features a minimalist or eclectic décor, a Mid Century Modern flush mount ceiling light can seamlessly complement any interior.

The design of these lights is often characterized by a mix of vintage and contemporary styles. With their geometric patterns, subtle curves, and choice of materials, they provide a touch of retro charm without overwhelming a room’s décor. They easily fit into both traditional and modern spaces, offering flexibility and versatility.

2. Space-Saving Solution

A Mid Century Modern Flush Mount Ceiling Light is perfect for rooms with low ceilings, where hanging fixtures like chandeliers or pendant lights might not be feasible. These lights sit directly on the ceiling, ensuring that you won’t lose valuable headspace or create a crowded feeling in the room.

Flush mount lights are especially ideal for smaller rooms like bathrooms, entryways, or bedrooms, where space is at a premium. By opting for a sleek, modern design, you can still enjoy ample lighting without sacrificing precious space.

3. Bright and Even Illumination

Mid Century Modern flush mount ceiling lights are known for providing bright, even illumination throughout a room. Unlike traditional ceiling lights that might have hot spots or uneven light distribution, flush mount lights help distribute light evenly across the entire space.

This makes them ideal for areas where you need consistent lighting, such as in kitchens, living rooms, or workspaces. The even illumination helps reduce shadows and ensures that every corner of the room is lit up, providing both aesthetic value and functionality.

4. Energy Efficiency

Many Mid Century Modern Flush Mount Ceiling Light options are designed with energy efficiency in mind. With the increasing focus on sustainability, many flush mount lights are now compatible with LED bulbs, which are energy-efficient and long-lasting.

LED lights consume less power and have a longer lifespan than traditional incandescent bulbs, making them a more sustainable and cost-effective option. Choosing an energy-efficient light fixture allows you to enjoy great lighting while reducing your energy bills and minimizing your environmental impact.


Features to Look for in a Mid Century Modern Flush Mount Ceiling Light

When shopping for a Mid Century Modern Flush Mount Ceiling Light, there are several features to consider to ensure that you choose the right fixture for your space. Here are some key elements to keep in mind:

1. Material and Finish

The material and finish of the light fixture will significantly impact its overall look and durability. Mid Century Modern lights typically feature materials like brass, nickel, glass, and wood. The finish of the fixture can be matte, polished, or brushed, depending on the desired aesthetic.

For a more industrial look, consider a fixture with metal finishes such as chrome, brass, or bronze. For a softer, more natural touch, wood or frosted glass can add warmth and texture to the design. Select a finish that complements your existing décor to create a cohesive look.

2. Size and Dimensions

When choosing a Mid Century Modern Flush Mount Ceiling Light, consider the size of your room and the scale of the fixture. A larger light fixture may overwhelm a small space, while a smaller light might not provide sufficient illumination for a larger room.

Measure the dimensions of your ceiling to determine how much space you have to work with. Ideally, the light should fit comfortably within the room without overcrowding the ceiling or taking away from the rest of the room’s design.

3. Design Style

Mid Century Modern flush mount ceiling lights come in a variety of design styles. Some feature clean geometric lines, while others incorporate organic shapes or retro elements such as globe-style designs. Choose a design that aligns with the overall aesthetic of your home.

If you have a minimalist or Scandinavian-inspired space, you may prefer a fixture with simple lines and neutral tones. For a more bold or eclectic design, opt for a fixture with eye-catching details, such as exposed bulbs or unique shapes.

4. Lighting Output

The lighting output is an essential consideration when choosing a flush mount ceiling light. A fixture that provides the right amount of light can enhance the ambiance and functionality of the room. Check the fixture’s lumen rating to determine how much light it will provide.

Additionally, some Mid Century Modern flush mount ceiling lights offer dimming capabilities, allowing you to adjust the light intensity based on your needs. This feature can be particularly useful in living rooms, bedrooms, or dining areas, where you may want to create different moods for different activities.


How to Install a Mid Century Modern Flush Mount Ceiling Light

Installing a Mid Century Modern Flush Mount Ceiling Light is a relatively simple process, but it does require basic electrical knowledge. Here’s a step-by-step guide to help you install your light fixture:

1. Turn Off the Power

Before beginning the installation process, ensure that the power to the area where you’ll be working is turned off. This will prevent any electrical hazards during the installation.

2. Remove the Old Fixture

If you are replacing an existing ceiling light, remove the old fixture. Carefully disconnect the wiring and remove any screws or mounting hardware holding the fixture in place. Keep track of the wires, as you will need to connect them to your new light.

3. Assemble the New Fixture

Most Mid Century Modern Flush Mount Ceiling Lights come with all the necessary components for installation. Assemble the fixture according to the manufacturer’s instructions. This may include attaching the light bulbs, glass shades, or mounting brackets.

4. Install the Mounting Bracket

Attach the mounting bracket to the ceiling box using screws. Ensure that the bracket is secure, as it will support the weight of the fixture.

5. Connect the Wires

Once the bracket is in place, connect the wires of the new fixture to the corresponding wires in the ceiling box. Typically, this involves matching the black (hot) wire, white (neutral) wire, and green (ground) wire.

Use wire nuts to secure the connections and ensure that the wires are properly insulated.

6. Attach the Fixture

Once the wiring is connected, carefully attach the light fixture to the mounting bracket. Secure it in place with screws or mounting hardware.

7. Test the Light

Once the fixture is installed, turn the power back on and test the light to ensure it works correctly. If everything is functioning properly, your new Mid Century Modern Flush Mount Ceiling Lights is ready to shine!


Conclusion

A Mid Century Modern Flush Mount Ceiling Lights is a stylish and functional addition to any home. With its clean lines, timeless design, and space-saving features, it can enhance the aesthetic and functionality of a room without overpowering the space. By considering the material, size, design, and lighting output, you can select the perfect fixture to complement your décor and meet your lighting needs.

Whether you’re updating your living room, kitchen, or hallway, a Mid Century Modern flush mount ceiling light offers a chic and practical solution to brighten up your home.

Floor To Ceiling Lazy Susan For Pantry: A Space-Saving Solution for Your Kitchen

When it comes to maximizing space in your kitchen, the floor to ceiling lazy susan for pantry is a game-changer. This rotating shelving unit allows you to easily store, organize, and access all your pantry items while keeping everything neat and tidy. Gone are the days of digging through cluttered shelves in search of the ingredients you need. With a lazy susan in your pantry, everything is within reach.

Floor To Ceiling Lazy Susan For Pantry

This article will explore the numerous benefits of a floor to ceiling lazy susan for pantry, how to choose the right one, installation tips, and why it is a must-have feature in modern kitchens. Whether you have a large walk-in pantry or a smaller space, a lazy susan is a practical and stylish addition to your kitchen organization.

Read too: Kitchen Lighting For A Vaulted Ceiling: Illuminating Your Space with Style and Functionality


Why Choose a Floor To Ceiling Lazy Susan For Pantry?

1. Maximizes Vertical Space

One of the biggest challenges in pantry organization is making the most of the available space. Many kitchens feature pantry areas with unused vertical space that is hard to reach. A floor to ceiling lazy susan for pantry solves this problem by using every inch of available height, transforming the area into an efficient storage solution.

The rotating shelves allow you to store items at every level, making it easier to access even the products stored at the back. Whether it’s canned goods, spices, or dry food, you won’t have to worry about losing track of items hidden in the far corners of your pantry.

2. Easy Access and Convenience

The biggest benefit of a lazy susan is the ease of access. Instead of having to bend down or reach into the back of your pantry, you can simply spin the shelves to bring everything into view. This is especially helpful for people with limited mobility or anyone who struggles with reaching high shelves.

By rotating the shelves, you can quickly grab the item you need without having to sift through multiple containers. This makes cooking and meal planning much more efficient and less stressful.

3. Improves Organization

A floor to ceiling lazy susan for pantry helps keep your pantry organized by creating a dedicated space for each type of item. The rotating shelves allow you to arrange your pantry items by category, making it easy to find what you need at a glance. Whether you prefer to organize by food type, frequency of use, or expiration date, the lazy susan makes it simple to keep your pantry neat and clutter-free.

Moreover, the design of the lazy susan ensures that everything is visible at all times, which reduces the risk of overbuying or wasting food because you forgot you already had something.

4. Versatile Storage

Another advantage of a lazy susan in the pantry is its versatility. The rotating shelves are perfect for storing a wide range of pantry essentials. From spices and condiments to baking supplies and snacks, there’s a spot for everything.

In addition to food items, a lazy susan can be used for storing other kitchen essentials, such as cleaning supplies, canned goods, or even small appliances. Its versatility makes it an ideal storage solution for almost any type of pantry.


Features to Look for in a Floor To Ceiling Lazy Susan For Pantry

When shopping for a floor to ceiling lazy susan for pantry, it’s essential to consider certain features that will enhance functionality and suit your pantry’s needs. Here are some key aspects to look for:

1. Material and Durability

The material of the lazy susan will impact its durability and appearance. Some common materials include wood, metal, and plastic. If you prefer a natural look that complements your kitchen decor, a wooden lazy susan may be the best choice. For a more modern, sleek aesthetic, a metal or stainless steel lazy susan may be ideal.

Make sure the material is strong enough to hold the weight of the items you plan to store. A high-quality, durable lazy susan will last longer and perform better over time.

2. Adjustable Shelves

Some floor to ceiling lazy susans for pantry offer adjustable shelves, allowing you to customize the height of each shelf based on the size of your pantry items. This flexibility can help accommodate larger or smaller items, making the unit more versatile.

If you plan to store a variety of items, adjustable shelves will ensure that you can maximize storage space without leaving gaps between products. This is especially useful if you need to store taller items like bottles or cereal boxes.

3. Smooth Rotating Mechanism

A lazy susan is only useful if it rotates smoothly. Look for a model with a high-quality rotating mechanism, such as a ball-bearing system, which allows the shelves to turn effortlessly. This ensures that you can easily spin the shelves to access whatever you need, even when the pantry is fully stocked.

A smooth rotating mechanism also reduces wear and tear on the unit, ensuring its longevity and continued functionality.

4. Size and Dimensions

Before purchasing a floor to ceiling lazy susan for pantry, measure the dimensions of your pantry to ensure the unit will fit. Lazy susans come in various sizes, so it’s essential to choose one that fits comfortably in your space while still offering plenty of storage.

Consider the height, width, and depth of the unit, and make sure it matches your pantry’s dimensions. A well-sized lazy susan can maximize the available space and prevent overcrowding.

5. Weight Capacity

Ensure that the lazy susan you choose can handle the weight of the items you intend to store. Some models are designed for lightweight items like spices and snacks, while others can accommodate heavier goods, such as canned food and bottles.

Check the product specifications for weight limits, and choose a model that suits your storage needs. Overloading a lazy susan can cause it to wear out prematurely or become difficult to rotate.


How to Install a Floor To Ceiling Lazy Susan For Pantry

Installing a floor to ceiling lazy susan for pantry is relatively straightforward, especially if you choose a pre-assembled unit. Here’s a step-by-step guide to installing your lazy susan:

1. Prepare the Pantry Space

Clear out the area where you plan to install the lazy susan. Remove any existing shelves or obstructions that might interfere with the installation process. Make sure the space is clean and ready for the new unit.

2. Measure and Mark the Location

Measure the height and width of the pantry and mark where the lazy susan will go. Ensure that there’s enough room for the unit to rotate freely without obstruction. Double-check the measurements to avoid errors during installation.

3. Install the Central Pole

Most floor-to-ceiling lazy susans have a central pole that supports the rotating shelves. Install this pole first, making sure it’s securely anchored to the floor and ceiling. Follow the manufacturer’s instructions to ensure proper installation.

4. Install the Shelves

Once the central pole is in place, attach the rotating shelves according to the product instructions. Make sure each shelf is securely fastened to the pole and can rotate smoothly. Test the shelves to ensure they turn easily and that the weight is distributed evenly.

5. Adjust the Shelves (Optional)

If your lazy susan has adjustable shelves, arrange them according to your preferred height for each section. Organize the shelves to make the most of the available space, and ensure that the unit functions efficiently.


Conclusion

A floor to ceiling lazy susan for pantry is an innovative and practical solution for organizing your kitchen. It maximizes vertical space, makes it easier to access items, and enhances the overall functionality of your pantry. Whether you’re looking to optimize space in a small pantry or improve accessibility in a larger one, a lazy susan offers a convenient and stylish option.

By considering features like material, adjustable shelves, and rotating mechanisms, you can select the perfect lazy susan for your pantry. With its versatile storage options and ease of use, a lazy susan is an essential addition to any well-organized kitchen.

White Low Profile Ceiling Fan With Light: A Perfect Blend of Style and Functionality

When it comes to home decor, every detail matters. The white low profile ceiling fan with light is a stunning addition to any room, combining both functionality and aesthetics. This type of ceiling fan is especially ideal for rooms with low ceilings, providing efficient airflow without overwhelming the space. Whether you’re redesigning your living room, bedroom, or even a smaller apartment, a white low profile ceiling fan with light can make all the difference.

White Low Profile Ceiling Fan With Light

In this article, we’ll dive into why this fan is a great choice, explore the features to look for, and guide you on how to select the best one for your home. We will also discuss the benefits of having a ceiling fan with built-in light, the reasons why the white color is a popular choice, and how it blends with various room styles.


Why Choose a White Low Profile Ceiling Fan With Light?

1. Space-Saving Design

The white low profile ceiling fan with light is specifically designed for rooms with low ceilings or spaces where a traditional ceiling fan would hang too low. This fan features a sleek, flush-mount design that ensures the blades stay closer to the ceiling. This reduces the risk of hitting your head on the fan, especially in rooms where clearance is an issue.

Low profile fans are especially perfect for bedrooms, apartments, or even kitchens where ceilings might be 8 feet or less. By offering the same powerful airflow as a standard ceiling fan, but in a compact form, this fan is ideal for making the most out of smaller spaces.

Read too: Kitchen Lighting For A Vaulted Ceiling: Illuminating Your Space with Style and Functionality

2. Efficient Lighting

Many white low profile ceiling fans with light feature integrated LED lighting, which offers both ambient and task lighting in the room. This combination of lighting and airflow can be incredibly convenient, particularly in spaces where you need both a fan and sufficient light to function well. Having both elements in one fixture saves space, eliminates the need for multiple light fixtures, and adds to the overall efficiency of the room.

LED lights are energy-efficient, providing bright illumination without the excessive power consumption of traditional light bulbs. They also tend to last longer, making them a great long-term investment for your home.

3. Aesthetic Versatility

The white color of the fan adds a clean, fresh look to any space. White is neutral and blends seamlessly with various types of decor. Whether your home has a modern, minimalist vibe or a more classic, traditional style, a white ceiling fan fits perfectly with the room’s aesthetic.

Moreover, the subtle design of a low-profile fan ensures that it won’t overpower the space. It’s perfect for creating a calm, cohesive look without being obtrusive. Whether you have a neutral color palette or a colorful scheme, the white fan can complement it.


Features to Look for in a White Low Profile Ceiling Fan With Light

When shopping for the ideal white low profile ceiling fan with light, there are several features to keep in mind. Here are the top considerations:

1. Size and Blade Span

Ceiling fans come in different sizes, so selecting the correct blade span is essential for optimal air circulation. Measure the size of your room and choose a fan that suits the space. A fan with a smaller blade span, usually between 44-50 inches, is great for small rooms, while larger rooms may benefit from a fan with a 52-inch or larger blade span.

2. Motor Power

The motor is the heart of the ceiling fan. Look for a motor that offers quiet and efficient operation. The white low profile ceiling fan with light should ideally have a motor that runs quietly, especially for bedrooms or living rooms where you want peace and tranquility.

3. Control Options

There are different control options for ceiling fans, and many modern fans come with remote controls, wall controls, or even smart functionality. If you prefer convenience, opt for a model that offers remote control or smart home integration, allowing you to control the fan and light with ease.

4. Light Source

The light source in a ceiling fan is just as important as the airflow. Look for a fan with LED lights, as they are energy-efficient and provide long-lasting brightness. You can also choose between warm or cool lighting based on your preference for ambiance. Some fans also allow you to adjust the light intensity to create the perfect atmosphere for your room.

5. Energy Efficiency

Choosing an energy-efficient white low profile ceiling fan with light will save you money in the long run. Look for fans with the Energy Star rating, as these consume less power and are more environmentally friendly.


Benefits of Having a White Low Profile Ceiling Fan With Light

1. Improved Air Circulation

The primary benefit of any ceiling fan is improved air circulation. In warm weather, the fan helps cool the room by moving the air, providing a refreshing breeze. In cooler months, many ceiling fans can also be reversed to push warm air down from the ceiling, helping with heating efficiency.

2. Space Optimization

By combining a ceiling fan with a light in one unit, you free up space that would have otherwise been taken up by separate light fixtures. This is especially beneficial for rooms with limited space, where every inch counts. Plus, the low profile design ensures that it’s ideal for tight spaces without compromising on performance.

3. Stylish and Modern Appeal

A white low profile ceiling fan with light adds a modern, stylish touch to any room. Whether you have contemporary decor or prefer a more traditional design, a sleek white fan adds elegance without being overpowering. The clean, minimal design makes it a timeless addition to any interior.

4. Reduced Energy Consumption

As mentioned earlier, many white low profile ceiling fans with light come with integrated LED lighting, which helps reduce energy consumption compared to traditional bulbs. In addition, ceiling fans reduce the need for air conditioning in the summer, making them a great energy-efficient choice for your home.


How to Install a White Low Profile Ceiling Fan With Light

Installing a white low profile ceiling fan with light can be a simple DIY project, provided you follow the right steps. Here’s a quick guide:

  1. Turn off the power to the area where you’ll be working to avoid any electrical accidents.
  2. Remove any existing light fixture or ceiling fan and disconnect the wiring.
  3. Mount the ceiling bracket for the new fan according to the manufacturer’s instructions.
  4. Wire the fan by connecting the corresponding wires from the fan to the electrical box (usually color-coded).
  5. Attach the fan blades and the light kit to the motor.
  6. Turn on the power and test the fan and light to ensure everything works as expected.

If you are not confident in your ability to install the fan yourself, it’s always a good idea to hire a professional electrician to handle the installation.


Conclusion

The white low profile ceiling fan with light is the perfect blend of functionality and design. Not only does it keep your room cool and comfortable, but it also provides excellent lighting and complements your home’s decor. Whether you have a low ceiling, want to save space, or simply need an efficient and stylish fan, this is an excellent choice.

When shopping for a white low profile ceiling fan with light, keep in mind the important features like size, motor power, control options, and energy efficiency. With the right fan, your room will feel more comfortable and look more polished than ever.

Atlas Ceiling Fan 6 Speed Wall Remote: Enhance Your Home Comfort

When it comes to upgrading your home’s comfort and style, the Atlas Ceiling Fan 6 Speed Wall Remote offers an exceptional combination of functionality, elegance, and convenience. This ceiling fan is designed to enhance airflow in your space while providing an easy-to-use wall remote for seamless operation. In this article, we’ll explore the features, benefits, and tips for selecting and maintaining an Atlas Ceiling Fan equipped with a 6-speed wall remote to elevate your living experience.

Atlas Ceiling Fan 6 Speed Wall Remote

Why Choose the Atlas Ceiling Fan 6 Speed Wall Remote?

The Atlas Ceiling Fan 6 Speed Wall Remote is more than just a cooling device—it’s a blend of modern technology and sleek design tailored to fit any home decor.

1. Customizable Speed Options

With six-speed settings, you can adjust the fan’s performance to match your comfort level and weather conditions.

Read too: Understanding and Dealing with Ants in the Ceiling Spaces: Navigating the Intrusion

Benefits of Six-Speed Settings:

  • Precision airflow control.
  • Energy efficiency with optimized settings.
  • Quiet operation at lower speeds for undisturbed relaxation.

2. Convenient Wall Remote Control

The wall-mounted remote ensures effortless operation without the hassle of searching for handheld remotes.

Key Features of the Wall Remote:

  • Easy speed adjustment and on/off control.
  • Stylish and space-saving design.
  • Accessibility for all household members.

3. Energy Efficiency

The Atlas Ceiling Fan is engineered with energy-saving technology, reducing your electricity bills while keeping your home comfortable.

Eco-Friendly Advantages:

  • Lower energy consumption compared to air conditioning.
  • Environmentally sustainable with efficient motor design.

Features of the Atlas Ceiling Fan 6 Speed Wall Remote

1. Sleek and Modern Design

The fan’s minimalist design makes it a versatile choice for various interior styles, from contemporary to industrial.

2. Reversible Motor

The reversible motor functionality allows year-round use by switching airflow directions:

  • Counterclockwise for cooling in summer.
  • Clockwise for redistributing warm air in winter.

3. Durable Construction

Built with high-quality materials, the Atlas Ceiling Fan ensures longevity and robust performance.

4. Silent Operation

Advanced motor technology minimizes noise, making it ideal for bedrooms, offices, or any quiet space.


Benefits of Using the Atlas Ceiling Fan 6 Speed Wall Remote

1. Improved Air Circulation

Ceiling fans are effective at distributing air evenly, creating a more comfortable indoor environment.

2. Cost Savings

By reducing reliance on air conditioning, the Atlas Ceiling Fan helps save on energy costs without compromising comfort.

3. Enhanced Aesthetics

The modern design of the fan adds a touch of elegance to any room, serving as both a functional and decorative piece.

4. Ease of Use

The wall remote provides a user-friendly experience, making it easy to operate the fan without fumbling with switches or handheld remotes.


How to Choose the Right Atlas Ceiling Fan 6 Speed Wall Remote

Room Size and Blade Span

Choose a blade span that matches your room size for optimal performance:

  • Small rooms: 36–42 inches.
  • Medium rooms: 44–50 inches.
  • Large rooms: 52 inches or more.

Ceiling Height

Ensure the fan is installed at the correct height—at least 7 feet from the floor. For high ceilings, consider a downrod extension.

Style and Finish

Select a fan finish that complements your room’s decor. Popular options include brushed nickel, matte black, and wood grain.


Installation Guide for the Atlas Ceiling Fan 6 Speed Wall Remote

Installing your Atlas Ceiling Fan 6 Speed Wall Remote can be straightforward with the right tools and preparation.

Tools Needed:

  • Screwdrivers
  • Drill
  • Ladder
  • Voltage tester

Step-by-Step Installation:

  1. Turn Off Power: Shut off the circuit breaker to avoid electrical hazards.
  2. Assemble the Fan: Follow the manufacturer’s instructions to assemble the fan components.
  3. Install the Mounting Bracket: Secure the bracket to the ceiling’s electrical box.
  4. Wire the Connections: Connect the fan wires to the ceiling wiring using wire nuts.
  5. Attach the Fan Blades and Housing: Secure the blades and attach the decorative housing.
  6. Install the Wall Remote: Mount the remote control panel on the wall and connect it according to the instructions.
  7. Test the Fan: Turn on the power and test all functions using the wall remote.

Maintenance Tips for Longevity

Proper maintenance is crucial to ensure your Atlas Ceiling Fan remains in excellent working condition.

Cleaning:

  • Wipe the blades with a damp cloth to remove dust.
  • Clean the motor housing with a soft, dry cloth.

Tighten Loose Screws:

Periodically check for and tighten any loose screws or bolts to prevent wobbling.

Inspect the Remote Control:

Ensure the wall remote is functioning properly and replace batteries as needed.

Lubricate the Motor:

If the fan starts making noise, apply lubrication to the motor bearings.


Frequently Asked Questions

1. Can I use the wall remote with other Atlas fans?

Most Atlas wall remotes are designed to be compatible with specific models. Refer to the product manual for compatibility details.

2. How do I reset the wall remote?

To reset, turn off the power for 30 seconds and then reconnect. Follow the pairing instructions in the manual.

3. What should I do if the fan wobbles?

Check if the blades are balanced and tighten any loose screws. You can also use a balancing kit for adjustments.


Why the Atlas Ceiling Fan 6 Speed Wall Remote is a Great Investment

The Atlas Ceiling Fan 6 Speed Wall Remote combines cutting-edge technology with timeless design, making it a valuable addition to any home. Its six-speed functionality, energy efficiency, and user-friendly remote control ensure a superior cooling experience while enhancing your space’s aesthetics.


Ceiling Fan With Light And Pull Chain: Maximize Your Home Comfort

A ceiling fan with light and pull chain is an essential home accessory that blends style, functionality, and convenience. These fans offer a practical solution for cooling your space while providing efficient lighting. The pull chain mechanism makes it easy to control both the fan and light, adding a layer of user-friendliness. This article delves into everything you need to know about choosing, using, and maintaining a ceiling fan with light and pull chain to enhance your home’s comfort and aesthetics.

Ceiling Fan With Light And Pull Chain

Why Choose a Ceiling Fan With Light And Pull Chain?

1. Dual Functionality

One of the biggest advantages of a ceiling fan with light and pull chain is its dual-purpose design. It cools your room and illuminates it simultaneously, saving you space and money on separate lighting fixtures.

Read too: Understanding and Dealing with Ants in the Ceiling Spaces: Navigating the Intrusion

Benefits of Dual Functionality:

  • Reduces clutter by combining two essential features into one fixture.
  • Efficient use of space, especially in rooms with low ceilings.
  • Cost-effective solution for lighting and ventilation needs.

2. Convenient Pull Chain Mechanism

The pull chain design offers straightforward operation. Whether you need to adjust the fan speed or turn the light on or off, the pull chain makes it simple.

Key Features of Pull Chains:

  • Easy control without needing a wall switch.
  • Ideal for spaces where remote control or smart systems are unnecessary.
  • Accessible for all age groups.

3. Energy Efficiency

Modern ceiling fans with lights are often equipped with energy-efficient features, including LED lighting and energy-saving fan motors.

Eco-Friendly Benefits:

  • Lower electricity bills.
  • Environmentally friendly operation.
  • Long-lasting LED bulbs reduce waste and maintenance costs.

Types of Ceiling Fans With Light And Pull Chain

1. Traditional Style Fans

These fans feature classic designs, often with wood or metal finishes, making them ideal for vintage or traditional interiors.

2. Modern Minimalist Fans

For contemporary spaces, sleek designs with neutral tones or metallic finishes provide a clean and modern aesthetic.

3. Industrial Ceiling Fans

Characterized by robust construction and larger blades, these fans are perfect for open spaces like lofts or large living areas.

4. Outdoor Ceiling Fans

Designed for patios or porches, these fans are moisture-resistant and durable, ensuring they can withstand the elements.


Features to Look for in a Ceiling Fan With Light And Pull Chain

1. Blade Size and Pitch

The size of the blades determines how effectively the fan circulates air. Larger blades work better in bigger rooms, while smaller blades are suitable for compact spaces.

2. Lighting Options

From frosted glass to exposed bulbs, the lighting style should complement your room’s décor. Some fans also offer dimmable lights for added flexibility.

3. Material and Finish

Choose materials and finishes that match your room’s style. Popular options include brushed nickel, matte black, or antique bronze.

4. Number of Speeds

Opt for a fan with multiple speed settings to tailor the airflow to your comfort level.

5. Reversible Motor

A reversible motor allows the fan to operate in two directions:

  • Counterclockwise for summer cooling.
  • Clockwise for winter warmth, circulating heated air downward.

Benefits of Installing a Ceiling Fan With Light And Pull Chain

1. Improved Air Circulation

Ceiling fans promote better airflow, creating a more comfortable environment by reducing humidity and maintaining consistent temperatures.

2. Enhanced Lighting

A ceiling fan with light and pull chain eliminates the need for additional light fixtures, providing ample illumination for your space.

3. Cost Savings

By reducing reliance on air conditioning and providing efficient lighting, these fans help lower energy bills.


Installation Tips for a Ceiling Fan With Light And Pull Chain

Installing a ceiling fan is a manageable task if you follow the right steps.

Tools Required:

  • Screwdrivers
  • Voltage tester
  • Ladder
  • Drill

Step-by-Step Guide:

  1. Turn Off the Power: Always switch off power at the circuit breaker before starting.
  2. Remove Existing Fixture: Detach the old light or fan fixture carefully.
  3. Install Mounting Bracket: Secure the bracket to the electrical box in the ceiling.
  4. Connect the Wiring: Match the wires from the fan to the ceiling wires. Use wire nuts to secure them.
  5. Attach the Fan and Light Kit: Fix the fan to the bracket and attach the light kit.
  6. Test the Fan and Light: Turn the power back on and test the pull chain operation.

Maintenance Tips for Longevity

Proper maintenance ensures your ceiling fan functions efficiently and lasts for years.

1. Clean Regularly

Dust the blades and light fixtures to prevent dirt buildup that can affect performance.

2. Tighten Screws

Periodically check and tighten any loose screws to avoid wobbling or noise.

3. Replace Bulbs and Chains

If the pull chain or light bulb stops working, replace them promptly to maintain functionality.

4. Lubricate the Motor

If your fan starts making noise, lubricate the motor bearings for smoother operation.


Choosing the Right Ceiling Fan With Light And Pull Chain for Your Space

When selecting a ceiling fan with light and pull chain, consider the following factors:

Room Size:

  • Small Rooms (Up to 75 sq. ft.): Fans with a blade span of 29–36 inches.
  • Medium Rooms (76–144 sq. ft.): Fans with a blade span of 36–42 inches.
  • Large Rooms (145–225 sq. ft.): Fans with a blade span of 44–50 inches.

Ceiling Height:

Ensure the fan is installed at least 7 feet above the floor for safety and optimal performance.

Style and Décor:

Match the fan’s design to your room’s overall aesthetic for a cohesive look.


Elevate Your Home with a Ceiling Fan With Light And Pull Chain

A ceiling fan with light and pull chain is a versatile and stylish addition to any home. With its dual functionality, energy efficiency, and user-friendly design, it’s an investment that enhances comfort and aesthetics. Whether you’re redecorating a cozy bedroom, upgrading a living room, or enhancing a patio, these fans are an excellent choice for improving air circulation and lighting.

Semi Flush Mid Century Modern Ceiling Light: Elevate Your Home Décor

The semi flush mid century modern ceiling light has become a popular choice for homeowners and designers alike. Combining the timeless elegance of mid-century design with a practical semi-flush mount style, this lighting fixture is perfect for enhancing any space. In this article, we’ll delve into the features, benefits, and tips for choosing the right semi flush mid century modern ceiling light, helping you create a stylish and functional living space.

Semi Flush Mid Century Modern Ceiling Light

Why Choose a Semi Flush Mid Century Modern Ceiling Light?

Timeless Mid-Century Design

Mid-century modern design is characterized by clean lines, organic shapes, and a focus on functionality. The semi flush mid century modern ceiling light embodies these principles, offering a stylish and versatile lighting solution that complements a variety of interior styles.

Read too: Understanding and Dealing with Ants in the Ceiling Spaces: Navigating the Intrusion

Key Features of Mid-Century Design:

  • Sleek metal finishes like brass, chrome, or matte black.
  • Globular or geometric glass shades.
  • Minimalist and functional aesthetics.

Ideal for Various Ceiling Heights

Unlike flush mount lights, which sit directly against the ceiling, semi flush lights hang slightly lower, making them ideal for rooms with standard or slightly higher ceilings. This allows for better light distribution without overwhelming the space.

Perfect for:

  • Living rooms
  • Bedrooms
  • Hallways
  • Kitchens

Enhances Your Home’s Ambience

A well-chosen semi flush mid century modern ceiling lights does more than illuminate—it sets the tone for your room. With warm, diffused lighting and eye-catching designs, these fixtures can transform any space into a cozy and inviting retreat.


Key Features of a Semi Flush Mid Century Modern Ceiling Light

1. Material and Finish

The choice of materials plays a significant role in the overall aesthetic of the light fixture. Popular finishes include:

  • Brushed brass for a warm, vintage look.
  • Matte black for a modern, edgy appeal.
  • Polished chrome for a sleek and sophisticated vibe.

2. Lighting Style

Mid-century modern lights often feature frosted or clear glass shades that diffuse light beautifully. This creates a warm and inviting glow, perfect for both functional and decorative purposes.

3. Fixture Size

The size of the fixture should be proportional to the room. For larger spaces, choose a light with multiple arms or globes to ensure sufficient illumination.

4. Energy Efficiency

Many modern semi flush mid century modern ceiling lights come equipped with LED bulbs, which are energy-efficient and long-lasting. This not only reduces energy consumption but also minimizes the need for frequent bulb replacements.


Where to Use a Semi Flush Mid Century Modern Ceiling Light

1. Living Room

Add a statement piece to your living area with a multi-globe semi flush light. Opt for a design that complements your existing furniture and décor for a cohesive look.

2. Bedroom

Create a serene and stylish retreat by choosing a semi flush light with soft, diffused lighting. Look for fixtures with warm tones to enhance the room’s coziness.

3. Kitchen

Illuminate your kitchen workspace with a functional yet fashionable mid-century modern light. A semi flush fixture with adjustable arms is ideal for evenly distributed lighting.

4. Hallway or Entryway

Make a bold first impression by installing a semi flush mid century modern ceiling lights in your entryway. Its unique design will set the tone for the rest of your home.


Tips for Choosing the Right Semi Flush Mid Century Modern Ceiling Light

1. Consider Your Ceiling Height

Measure the height of your ceilings to determine the appropriate size and drop length for the light fixture. Semi flush lights work best in rooms with ceilings 8-10 feet high.

2. Match Your Décor

Choose a light that complements your room’s existing color palette and furniture style. Brass finishes pair well with warm wood tones, while matte black is a versatile choice for modern interiors.

3. Evaluate Light Output

Ensure the fixture provides sufficient illumination for the space. If additional brightness is needed, consider using higher wattage bulbs or adding supplementary lighting.

4. Opt for Dimmable Options

For added versatility, select a dimmable fixture that allows you to adjust the light intensity based on the time of day or your activity.


Benefits of a Semi Flush Mid Century Modern Ceiling Light

1. Blends Functionality with Style

These fixtures offer the perfect balance of form and function, providing practical lighting while enhancing your home’s aesthetic appeal.

2. Adds Visual Interest

With their unique shapes and eye-catching designs, semi flush mid century modern ceiling lights serve as statement pieces in any room.

3. Versatility

Whether you’re decorating a contemporary, vintage, or eclectic space, these lights adapt seamlessly to various styles.

4. Durability

High-quality materials like metal and glass ensure that these fixtures are built to last, making them a worthwhile investment for your home.


Installation Guide for a Semi Flush Mid Century Modern Ceiling Light

Installing a semi flush light is a straightforward process that can be completed with basic tools.

Tools Needed:

  • Screwdrivers
  • Drill
  • Voltage tester
  • Ladder

Step-by-Step Instructions:

  1. Turn Off Power: Switch off the power at the circuit breaker to ensure safety.
  2. Remove the Old Fixture: Carefully detach the existing light fixture, disconnecting the wires.
  3. Install the Mounting Bracket: Secure the new bracket to the ceiling junction box.
  4. Connect Wiring: Match the wires from the fixture to the corresponding wires in the ceiling.
  5. Secure the Fixture: Attach the light fixture to the bracket, ensuring it’s properly aligned.
  6. Test the Light: Restore power and test the light to confirm proper installation.

Elevate Your Home with a Semi Flush Mid Century Modern Ceiling Light

Investing in a semi flush mid century modern ceiling lights is an excellent way to enhance your home’s style and functionality. With their timeless design, versatile applications, and practical features, these fixtures offer a perfect lighting solution for any space. Whether you’re redecorating a single room or embarking on a full home makeover, a mid-century modern light can elevate your décor while providing warm and inviting illumination.

Farmhouse Ceiling Fan With Light Flush Mount: Enhance Your Home

The farmhouse ceiling fan with light flush mount has become a sought-after addition to modern homes. Combining functionality, aesthetics, and a space-saving design, these fans add a rustic yet contemporary touch to any room. This article explores the benefits, styles, and tips for selecting the perfect farmhouse ceiling fans with a light flush mount, helping you make an informed choice for your home improvement project.

Farmhouse Ceiling Fan With Light Flush Mount

Why Choose a Farmhouse Ceiling Fan With Light Flush Mount?

Space-Saving Design

One of the primary advantages of a farmhouse ceiling fan with light flush mount is its ability to fit seamlessly into spaces with low ceilings. Unlike traditional fans with downrods, flush mount fans sit closer to the ceiling, making them ideal for rooms with limited overhead space.

Read too: Understanding and Dealing with Ants in the Ceiling Spaces: Navigating the Intrusion

Perfect for:

  • Bedrooms
  • Living rooms
  • Small kitchens
  • Offices

The compact design ensures that even smaller rooms maintain a spacious and uncluttered appearance.


Dual Functionality

These fans combine two essential features: air circulation and lighting. With a farmhouse ceiling fan with light flush mount, you can enjoy the practicality of a ceiling fan while illuminating your space with ambient light.

Benefits of Dual Functionality:

  1. Eliminates the need for separate lighting fixtures.
  2. Saves energy by allowing you to control light and fan speed simultaneously.
  3. Enhances the room’s overall functionality.

Rustic Aesthetics

The farmhouse style emphasizes a blend of vintage charm and modern simplicity. A farmhouse ceiling fans with light flush mount typically features rustic finishes like wood blades, wrought iron, or matte black hardware. These elements add a cozy and inviting feel to any space.

Popular Finish Options:

  • Distressed wood
  • Oil-rubbed bronze
  • Matte black
  • Antique white

Features to Look For in a Farmhouse Ceiling Fan With Light Flush Mount

1. Lighting Options

The lighting component is a key feature of these fans. Look for models that offer dimmable lights or adjustable brightness to create the perfect ambiance.

Common Lighting Types:

  • LED lights for energy efficiency.
  • Edison bulbs for a vintage look.
  • Frosted glass shades for a soft, diffused light.

2. Blade Material and Design

Farmhouse fans often feature wooden blades or wood-like finishes. The blade design can range from sleek and modern to more intricate patterns.

Pro Tip:

Choose a fan with reversible blades that allow you to switch between two finishes for added versatility.

3. Motor Efficiency

A high-quality motor ensures quiet operation and efficient air circulation. Look for models with DC motors, as they are more energy-efficient compared to AC motors.

4. Control Options

Modern farmhouse ceiling fans with light flush mounts often come with multiple control options:

  • Remote controls for convenience.
  • Wall switches for traditional functionality.
  • Smart home compatibility for integration with devices like Alexa or Google Assistant.

Best Rooms for a Farmhouse Ceiling Fan With Light Flush Mount

1. Living Room

Enhance the cozy vibe of your living space with a fan that complements your farmhouse décor. Look for fans with wider blades to cool larger areas effectively.

2. Kitchen

A flush mount fan works perfectly in a farmhouse kitchen, where low ceilings are common. Choose a design that blends with your cabinetry and fixtures.

3. Bedroom

In a bedroom, a farmhouse ceiling fans with light flush mount not only keeps the air flowing but also creates a calming atmosphere with soft lighting.


Installing Your Farmhouse Ceiling Fan With Light Flush Mount

Installing a ceiling fan can seem daunting, but with the right tools and a step-by-step approach, it’s manageable.

Tools You’ll Need:

  • Screwdrivers
  • Ladder
  • Drill
  • Voltage tester

Step-by-Step Installation:

  1. Turn Off Power: Always start by switching off power to the room at the circuit breaker.
  2. Assemble the Fan: Follow the manufacturer’s instructions to assemble the fan blades and light fixture.
  3. Mount the Bracket: Secure the mounting bracket to the ceiling junction box.
  4. Connect Wiring: Match the wires from the fan to the corresponding wires in the ceiling.
  5. Attach the Fan and Light: Secure the fan motor and light fixture to the mounting bracket.
  6. Test the Fan: Turn the power back on and test the fan and light to ensure they work correctly.

Popular Farmhouse Ceiling Fan With Light Flush Mount Styles

1. Rustic Vintage

  • Features distressed wood blades and Edison bulb lighting.
  • Ideal for creating a warm, inviting atmosphere.

2. Modern Farmhouse

  • Combines sleek lines with rustic finishes like matte black and brushed nickel.
  • Perfect for blending traditional and contemporary design elements.

3. Industrial Farmhouse

  • Includes metal accents, cage-style light fixtures, and darker finishes.
  • Adds an edgy, industrial touch to your décor.

Maintaining Your Farmhouse Ceiling Fan With Light Flush Mount

Proper maintenance ensures your fan stays functional and looks great for years to come.

Tips for Maintenance:

  1. Clean Blades Regularly: Dust and debris can accumulate on the blades, affecting performance.
  2. Check Light Fixtures: Replace burnt-out bulbs and clean glass shades to maintain optimal lighting.
  3. Inspect Wiring: Periodically check for loose wires or connections to prevent malfunctions.
  4. Lubricate the Motor: If your fan starts to make noise, lubricate the motor or consult the manufacturer.

Why Invest in a Farmhouse Ceiling Fan With Light Flush Mount?

Adding a farmhouse ceiling fans with light flush mount to your home is not just about functionality—it’s also about creating a space that feels welcoming and stylish. With the right fan, you can enhance the aesthetics of your room while enjoying practical benefits like improved air circulation and efficient lighting.

Ceiling Fans With Up And Down Lights for Your Home: Discover the Versatility and Elegance

Ceiling fans have long been an essential fixture in homes due to their practicality and efficiency in keeping spaces cool. However, as home decor continues to evolve, new designs have emerged that combine aesthetics with functionality. One of the most popular innovations in ceiling fan design is the “Ceiling Fans With Up And Down Lights.” These fans are not only excellent for air circulation but also feature lighting options that illuminate the space both upward and downward, providing optimal lighting for various activities. In this article, we will explore the benefits, features, and design considerations of ceiling fans with up and down lights, as well as tips on how to choose the right one for your space.

Ceiling Fans With Up And Down Lights

What Are Ceiling Fans With Up And Down Lights?

Ceiling Fans With Up And Down Lights are innovative ceiling fans that incorporate two lighting fixtures: one that directs light downward and another that directs light upward. This dual-lighting feature creates a unique lighting effect, combining the benefits of both task lighting (downward) and ambient lighting (upward). These fans are designed to provide the perfect balance of air circulation and illumination, making them ideal for both large and small rooms.

The upward light can help to brighten a room indirectly by casting a soft glow on the ceiling, which then disperses throughout the space. This creates a comfortable, ambient lighting effect. Meanwhile, the downward light is more focused, ideal for providing direct illumination where it is needed most, such as over a dining table, reading area, or kitchen counter.

Read too: Understanding and Dealing with Ants in the Ceiling Spaces: Navigating the Intrusion

Key Features of Ceiling Fans With Up And Down Lights

  1. Dual Lighting Design: As the name suggests, these ceiling fans come equipped with both upward and downward-facing lights. This dual-light design provides flexibility and a dynamic lighting atmosphere for the room.
  2. Energy Efficiency: Many modern ceiling fans with up and down lights use LED technology for both the fan and the light fixtures. LED bulbs are highly energy-efficient, providing bright light while consuming less energy compared to traditional incandescent bulbs.
  3. Improved Air Circulation: As with any ceiling fan, ceiling fans with up and down lights also circulate air, which can help cool a room during the warmer months and circulate warm air in the winter. The added fan functionality makes them a year-round solution for comfort.
  4. Stylish and Modern Design: These ceiling fans come in various styles, from sleek, minimalist designs to more ornate and traditional styles, making them a versatile option for any interior decor.
  5. Dimmable Lighting Options: Many of these ceiling fans offer dimming capabilities for both the upward and downward lights. This allows users to adjust the lighting based on the time of day or the ambiance they wish to create.

Benefits of Ceiling Fans With Up And Down Lights

Ceiling Fans With Up And Down Lights offer several benefits that make them a great addition to any home:

1. Enhanced Lighting Control

One of the most significant advantages of ceiling fans with up and down lights is the ability to control the light direction. The upward light provides ambient illumination that brightens the room without creating harsh shadows, while the downward light ensures you have focused, task-specific lighting where needed.

2. Space-Saving Solution

In rooms where space is at a premium, ceiling fans with lights offer a space-saving solution. You don’t need to install separate light fixtures or table lamps, as the fan’s built-in lighting serves both functions. This is particularly useful in smaller rooms or spaces with limited surface area.

3. Energy-Efficient

Ceiling fans with up and down lights are designed to be energy-efficient, particularly when they use LED lighting. LED bulbs consume significantly less power than traditional incandescent bulbs, and because ceiling fans circulate air, they can reduce the need for air conditioning, further lowering your energy consumption.

4. Customizable Lighting Ambiance

With dimming options available on many models, you can easily adjust the lighting to suit your mood or the activity you’re doing. Whether you’re hosting a dinner party and need bright lighting or winding down for the evening with soft, ambient lighting, a ceiling fan with up and down lights provides the flexibility to create the perfect environment.

5. Easy Installation

Unlike more complicated lighting systems, ceiling fans with up and down lights are relatively easy to install. Many models are designed for both new installations and replacements of existing ceiling fans, so you don’t have to worry about complicated setups or rewiring.

How to Choose the Right Ceiling Fan With Up And Down Lights for Your Home

When choosing a Ceiling Fan With Up And Down Lights, it’s important to consider the following factors to ensure you select the right one for your space:

1. Room Size and Ceiling Height

The size of the room and the height of the ceiling should play a key role in selecting your ceiling fan. Larger rooms will need fans with larger blades to provide adequate air circulation. If you have high ceilings, you may need to purchase a downrod to extend the fan to a more optimal height. The lighting intensity may also vary depending on the size of the room.

2. Fan Style and Design

The style of the fan should complement the overall aesthetic of the room. Whether your space is modern, industrial, traditional, or transitional, there are plenty of ceiling fans with up and down lights designed to fit any style. Opt for a design that enhances your room’s decor while providing the necessary air circulation and lighting.

3. Lighting Options

Check the lighting options available on the fan. Some ceiling fans come with dimmable lighting, while others offer adjustable color temperature, allowing you to switch from a warm to a cool light. Think about your lighting needs and choose a model that offers the right level of brightness for your room.

4. Fan Blade Material and Motor Type

The material of the fan blades can affect both the fan’s performance and aesthetic. Wood blades can provide a rustic, natural look, while metal blades give a more modern and sleek appearance. The motor type also matters; opt for a high-quality motor that operates quietly and efficiently to ensure the fan works without producing disruptive noise.

5. Energy Efficiency

As mentioned earlier, energy-efficient ceiling fans with LED lighting can significantly reduce your energy consumption. Look for fans that have earned an ENERGY STAR rating, which ensures they meet specific energy efficiency standards. This will help reduce your electricity bills and make your home more sustainable.

6. Remote Control and Smart Features

Many modern ceiling fans come with remote controls or are compatible with smart home systems. This feature allows you to control the fan speed and light settings without getting up, adding convenience and accessibility.

Best Rooms for Installing Ceiling Fans With Up And Down Lights

Ceiling Fans With Up And Down Lights can be installed in a variety of rooms, depending on your specific needs:

1. Living Rooms

In living rooms, the combination of ceiling fans and dual lighting provides comfort and ambiance. The downward light illuminates key areas, such as seating arrangements or coffee tables, while the upward light creates a soft glow across the room for a cozy atmosphere.

2. Bedrooms

For bedrooms, ceiling fans with up and down lights are ideal because they provide gentle illumination that doesn’t interfere with sleep. The fan helps regulate room temperature, while the dimmable lights can create a relaxing, peaceful environment.

3. Dining Rooms

In dining rooms, the downward light is perfect for task lighting over the dining table, while the upward light adds a warm ambiance. This dual-light function enhances the dining experience, whether you’re hosting guests or enjoying a meal with family.

4. Kitchens

Kitchens require both adequate illumination and ventilation. A ceiling fan with up and down lights can brighten countertops and workspaces while keeping the air circulating. The upward light creates an indirect, ambient glow, perfect for kitchen settings.

5. Home Offices

Ceiling fans with up and down lights are also great for home offices. The downlight provides task lighting for your desk, while the upward light ensures the entire room is evenly lit. The fan helps keep the room cool and comfortable during long work hours.

Conclusion

Ceiling Fans With Up And Down Lights offer a perfect blend of functionality and style. They not only enhance the look of your room but also improve air circulation and lighting. With their energy-efficient features, versatility, and range of design options, these ceiling fans are a smart investment for any home. Whether you’re updating your living room, bedroom, or dining space, a ceiling fan with up and down lights can elevate your home’s decor while providing year-round comfort.

Oil Rubbed Bronze Ceiling Fan With Lights: Enhance Your Home’s Style and Comfort

When it comes to home decor, one of the most functional yet stylish additions you can make is a ceiling fan. Whether you’re looking to keep your space cool in the summer or add a touch of elegance to your interior design, the “Oil Rubbed Bronze Ceiling Fan With Lights” is a perfect choice. Not only does it offer a stylish look, but it also enhances your room’s functionality by providing both light and airflow. In this article, we will explore everything you need to know about this beautiful and versatile ceiling fan, from its benefits to the best ways to incorporate it into your home.

Oil Rubbed Bronze Ceiling Fan With Light

What is an Oil Rubbed Bronze Ceiling Fan With Light?

An Oil Rubbed Bronze Ceiling Fan With Light is a ceiling fan that features an oil rubbed bronze finish, paired with a light fixture. This type of ceiling fan is especially popular due to its combination of aesthetics and functionality. The oil rubbed bronze finish is known for its rich, dark color and smooth texture, which makes it a great choice for creating a sophisticated and classic look in any room.

The light fixture integrated into the ceiling fan adds an extra layer of functionality. It provides illumination while simultaneously circulating air, making it a practical addition to both living spaces and bedrooms. The fan’s ability to improve airflow helps maintain a comfortable environment by keeping the room cool in the warmer months, while the light helps brighten the room during the evenings.

Read too: Understanding and Dealing with Ants in the Ceiling Spaces: Navigating the Intrusion

Benefits of Choosing an Oil Rubbed Bronze Ceiling Fan With Light

There are several reasons why an Oil Rubbed Bronze Ceiling Fan With Light should be on your radar when selecting the perfect ceiling fan for your home:

  1. Elegance and Sophistication: The oil rubbed bronze finish is timeless and adds a touch of luxury to any room. This finish gives the fan a vintage or antique feel while still offering modern functionality. The dark, rich hue complements many different design styles, making it versatile for both traditional and contemporary spaces.
  2. Energy Efficiency: Ceiling fans, including those with integrated light fixtures, can be energy-efficient alternatives to using air conditioning or other cooling systems. By circulating the air, the fan helps maintain a more consistent temperature in the room, meaning you can rely less on energy-draining cooling units.
  3. Space-Saving Design: The dual purpose of an Oil Rubbed Bronze Ceiling Fan With Light allows you to eliminate the need for additional light fixtures or standing fans. By combining both, it saves space and reduces clutter, while offering practical and stylish solutions.
  4. Enhanced Ambiance: The integrated light fixture of an Oil Rubbed Bronze Ceiling Fan With Light can be adjusted to create the perfect mood lighting for your space. Whether you need bright, direct lighting for reading or a softer, more ambient light for relaxation, this ceiling fan provides versatility.
  5. Durability: The oil rubbed bronze finish is not only visually appealing but also highly durable. It resists corrosion and wear over time, making it an excellent choice for long-term use. It also complements other metal fixtures in your home, maintaining its elegance without requiring frequent maintenance.

How to Choose the Right Oil Rubbed Bronze Ceiling Fan With Light

When selecting an Oil Rubbed Bronze Ceiling Fan With Light, it’s important to consider several factors to ensure you get the best option for your space. Here are some tips to help you choose the right one for your home:

1. Size of the Room

The size of the room plays a significant role in determining the appropriate size of the ceiling fan. Larger rooms will require a ceiling fan with a larger blade span, while smaller rooms can benefit from a more compact design. To determine the right size, measure the square footage of your room and match it with the fan’s blade span.

2. Style and Design

The design of the fan should complement your existing decor. Since Oil Rubbed Bronze Ceiling Fan With Light has a classic and elegant appeal, it pairs well with traditional, rustic, and industrial themes. However, it can also work in modern and contemporary rooms, offering a touch of contrast. Consider the shape and design of the fan blades, as well as the light fixture, when making your selection.

3. Lighting Options

Some Oil Rubbed Bronze Ceiling Fans With Light come with different lighting options, including LED bulbs, incandescent bulbs, or halogen bulbs. If energy efficiency is a priority, look for models with LED lighting, as they use less power and have a longer lifespan compared to traditional bulbs. Additionally, check if the fan offers dimming options or adjustable brightness to suit different lighting needs.

4. Motor Type and Noise Level

The motor of the ceiling fan is essential for ensuring quiet operation. When shopping for an oil rubbed bronze fan, choose one with a high-quality motor that operates quietly, especially in bedrooms or quiet living areas. Most modern ceiling fans feature whisper-quiet motors that provide powerful airflow without disturbing noise.

5. Installation and Maintenance

Ensure that the ceiling fan you select is easy to install and maintain. Many models come with detailed installation instructions, and some are even designed for easy DIY installation. Check the fan’s blades and light fixture for easy cleaning and maintenance, so your Oil Rubbed Bronze Ceiling Fan With Light continues to look beautiful for years to come.

Best Places to Install Your Oil Rubbed Bronze Ceiling Fan With Light

An Oil Rubbed Bronze Ceiling Fan With Light can elevate the style of various rooms in your home. Here are some of the best places to install this fan:

1. Living Rooms

The living room is often the centerpiece of a home, where family members gather and entertain guests. An oil rubbed bronze ceiling fan with a light fixture can add sophistication while keeping the air circulating and providing much-needed illumination.

2. Bedrooms

For a relaxing atmosphere, an Oil Rubbed Bronze Ceiling Fan With Light can help create a comfortable temperature, especially during the warmer months. It’s perfect for bedrooms because the light provides the right level of brightness, and the fan’s quiet operation ensures a restful night’s sleep.

3. Kitchens

In the kitchen, ventilation and lighting are essential. The ceiling fan will help reduce heat buildup from cooking, while the light fixture offers adequate illumination for meal preparation.

4. Dining Rooms

A ceiling fan with a light fixture in the dining room can enhance the ambiance during dinner parties and family meals. The light can set the mood, while the fan provides comfort by circulating air.

5. Patios and Outdoor Spaces

For outdoor spaces like patios or sunrooms, an Oil Rubbed Bronze Ceiling Fan With Lights can provide a charming and functional addition to your outdoor living area. It will help cool the space and brighten it up during evening gatherings.

Conclusion

An Oil Rubbed Bronze Ceiling Fan With Lights is a stylish and functional addition to any home. With its elegant design, energy efficiency, and ability to improve air circulation while offering illumination, it is a versatile piece of home decor that enhances comfort and aesthetics. By selecting the right fan based on size, style, and features, you can create the perfect environment for any room in your home. Whether you are updating your living room, refreshing your bedroom, or improving your outdoor space, an oil rubbed bronze ceiling fan with light is a choice that combines style with practicality.

60 Inch Outdoor Ceiling Fans Without Lights: The Ultimate Guide to Choosing the Right Fan for Your Outdoor Space

When it comes to enhancing the comfort and atmosphere of your outdoor living space, a ceiling fan is an essential addition. Among the wide variety of options available, 60 Inch Outdoor Ceiling Fans Without Lights stand out as an excellent choice for providing superior airflow and a stylish aesthetic without the need for additional lighting. In this guide, we’ll walk you through everything you need to know about choosing, installing, and maintaining 60-inch outdoor ceiling fans without lights to transform your patio, porch, or deck.

60 Inch Outdoor Ceiling Fans Without Lights

What Are 60 Inch Outdoor Ceiling Fans Without Lights?

A 60 Inch Outdoor Ceiling Fan Without Lights is a large ceiling fan designed specifically for outdoor use. With a blade span of 60 inches, these fans are ideal for medium to large outdoor spaces like patios, pergolas, decks, and porches. The main feature of these fans is that they operate without built-in lights, which makes them perfect for homeowners who do not require additional lighting fixtures but still want efficient air circulation.

Read too: Understanding and Dealing with Ants in the Ceiling Spaces: Navigating the Intrusion

These fans are designed to withstand outdoor conditions, typically featuring materials and finishes that are resistant to rust, corrosion, and weathering. Since they lack lighting features, these fans are typically simpler in design, focusing on functionality and durability while maintaining a sleek, modern appearance that complements various outdoor themes.


Why Choose 60 Inch Outdoor Ceiling Fans Without Lights?

1. Improved Airflow

One of the primary reasons to opt for a 60 Inch Outdoor Ceiling Fan Without Lights is to enhance airflow in your outdoor space. The 60-inch blade span provides excellent coverage, making it suitable for larger outdoor areas. Whether it’s a sweltering summer day or a humid evening, these fans are capable of circulating air efficiently, ensuring a comfortable environment regardless of the weather.

2. Sleek Design Without Extra Features

For homeowners who prefer a minimalist look, 60 Inch Outdoor Ceiling Fans Without Lights offer a clean, simple design. These fans focus on what matters most: airflow. Without the distraction of built-in lights, the fan’s structure becomes more streamlined and versatile, making it easy to incorporate into any outdoor decor. The absence of lights also means you can pair these fans with other lighting sources like outdoor wall sconces or string lights.

3. Durability and Weather Resistance

Since 60 Inch Outdoor Ceiling Fans Without Lights are designed for outdoor use, they are typically built with weather-resistant materials, such as stainless steel, aluminum, or rust-proof composites. This ensures they can handle the elements, whether they’re exposed to direct sunlight, heavy rain, or high humidity. Outdoor ceiling fans without lights are often rated for wet or damp locations, meaning they can be safely installed in areas that experience moisture.

4. Energy Efficiency

Many modern outdoor ceiling fans, including those without lights, are designed to be energy-efficient. By using high-quality motors and advanced technology, these fans can cool large spaces with minimal energy consumption. This is especially beneficial for homeowners looking to reduce their carbon footprint and lower electricity bills.


Key Features of 60 Inch Outdoor Ceiling Fans Without Lights

1. Size and Blade Span

The 60-inch blade span is the ideal size for large outdoor spaces. It’s large enough to provide ample airflow while maintaining a proportionate appearance in the room. A fan that is too small might not provide enough circulation, while a fan that’s too large might look out of place. The 60-inch fan strikes the perfect balance for spaces like patios, porches, and even some larger balconies.

2. Material and Construction

When choosing a 60 Inch Outdoor Ceiling Fan Without Lights, it’s important to consider the materials used in construction. Look for fans made with rust-resistant metals, such as stainless steel or aluminum, as these will endure the elements better than standard materials. Some fans also feature weather-resistant blades made from high-quality plastic or composite materials, ensuring durability in extreme weather conditions.

3. Motor Performance

The motor is a critical component of any ceiling fan. For optimal performance, you’ll want a fan with a high-quality motor that operates quietly and efficiently. Many outdoor ceiling fans are equipped with energy-efficient motors that provide powerful airflow without making much noise. Look for fans with reversible motors, which allow you to reverse the direction of the blades during colder months to circulate warm air throughout the space.

4. Design Aesthetic

While 60 Inch Outdoor Ceiling Fans Without Lights are often more minimalistic than their lighted counterparts, they still come in a variety of styles to match your outdoor decor. Whether you prefer modern, industrial, traditional, or coastal styles, there are numerous designs available to complement your outdoor space. Choose a fan that matches the overall aesthetic of your patio or porch for a cohesive, stylish look.


Benefits of Choosing 60 Inch Outdoor Ceiling Fans Without Lights

1. Aesthetic Flexibility

The absence of lights allows for more flexibility in terms of aesthetic design. You’re not confined to finding a fan that matches built-in lighting fixtures, which opens up more options for integrating the fan into your existing decor. This makes it easier to create a custom, personalized outdoor space.

2. Improved Comfort

Outdoor living spaces are often subjected to varying weather conditions, but 60 Inch Outdoor Ceiling Fans Without Lights can help regulate temperature and keep you comfortable. By circulating air, the fan helps create a breeze that cools the space during hot weather. In the winter, reversing the fan blades can help push warm air down, making your outdoor area more comfortable year-round.

3. Minimal Maintenance

Since these fans do not have lights, there are fewer components to maintain. Without the bulbs to replace or the additional wiring for lighting, you can spend more time enjoying your space and less time on upkeep. These fans are easy to clean, as the design is usually more straightforward than that of a lighted fan, and you can easily wipe down the blades and motor casing.


How to Choose the Right 60 Inch Outdoor Ceiling Fan Without Lights

1. Consider Your Outdoor Space Size

When selecting a 60 Inch Outdoor Ceiling Fan Without Lights, it’s important to consider the size of your outdoor area. While 60 inches is perfect for larger patios or porches, it might be too large for a smaller balcony or an apartment terrace. Measure the space before making a purchase to ensure the fan will provide enough airflow without overwhelming the area.

2. Check the Fan’s Rating

Outdoor ceiling fans are rated for specific environmental conditions. If your fan will be installed in an area exposed to rain, such as an open porch, look for a fan that is rated for wet or damp conditions. These fans are designed to withstand moisture and prevent rust, ensuring longevity even when exposed to the elements.

3. Select the Right Style for Your Home

A 60 Inch Outdoor Ceiling Fan Without Lights should complement the overall design of your home. If you have a modern or industrial outdoor design, look for a fan with sleek lines and metallic finishes. For coastal or traditional spaces, consider fans with wooden blades or rustic detailing.


Installation Tips for 60 Inch Outdoor Ceiling Fans Without Lights

1. Choose the Right Location

Before installation, ensure that the ceiling is strong enough to support the fan. Avoid areas with obstructions that may block airflow, and make sure the fan is installed at an appropriate height (usually 8 to 9 feet from the ground) for optimal circulation.

2. Professional Installation

If you’re not comfortable with electrical work, it’s best to hire a licensed electrician to install the fan. A professional can ensure that the fan is safely wired and mounted, and they can also help with any necessary modifications to your existing electrical setup.


Conclusion

A 60 Inch Outdoor Ceiling Fan Without Lights is an excellent choice for homeowners who want to improve the airflow in their outdoor spaces without the additional need for lighting. These fans combine sleek design with durable construction, offering both style and functionality. Whether you’re looking to enhance your patio, porch, or deck, choosing the right fan will ensure you can enjoy your outdoor space in comfort, regardless of the weather.

Black And Gold Flush Mount Ceiling Lights: The Ultimate Guide to Stylish and Elegant Lighting

When it comes to enhancing the ambiance of your home, lighting plays an essential role. A key trend in interior design today is the use of black and gold flush mount ceiling lights. These lighting fixtures are not only functional but also offer a stylish and elegant aesthetic that can elevate any room. If you’re looking to add a touch of sophistication and modern charm to your living space, this guide will walk you through everything you need to know about black and gold flush mount ceiling lights.

Black And Gold Flush Mount Ceiling Lights

What Are Black And Gold Flush Mount Ceiling Lights?

Black and gold flush mount ceiling lights combine two classic and versatile finishes – black, known for its bold, sleek appearance, and gold, which exudes warmth and elegance. Flush mount ceiling lights are fixtures that are mounted directly to the ceiling, without any visible gaps or hanging components. They are ideal for rooms with low ceilings or spaces where you don’t want the light fixture to protrude too much.

These light fixtures are popular in a variety of interior design styles, including contemporary, modern, industrial, and even traditional. The black and gold color combination enhances the overall design, making them a perfect choice for those looking to add a sense of luxury without overwhelming the room’s decor.

Read too: Understanding and Dealing with Ants in the Ceiling Spaces: Navigating the Intrusion


Why Choose Black And Gold Flush Mount Ceiling Lights?

1. Elegance and Sophistication

The striking contrast of black and gold creates a bold and luxurious look, making it perfect for adding sophistication to any room. Whether you’re designing your living room, bedroom, or hallway, these lights can act as a focal point in the space, drawing attention with their stunning visual appeal.

2. Versatility in Design

Black and gold are versatile colors that complement various design themes. The pairing of matte or glossy black with the warm, shiny gold provides a timeless elegance. These lights are perfect for different rooms in your home, including the kitchen, living room, dining area, or even bathrooms.

3. Space Enhancement

Flush mount ceiling lights like these are great for homes with low ceilings because they sit close to the ceiling and provide uniform, bright illumination without taking up too much vertical space. The combination of black and gold adds a touch of glamour and helps your space feel more open and airy while still offering beautiful lighting.


Key Features of Black And Gold Flush Mount Ceiling Lights

1. Design Options

Black and gold flush mount lights come in a variety of designs. Whether you prefer a sleek, minimalist look or an intricate, decorative pattern, there’s a fixture to suit your taste. Some popular styles include:

  • Geometric Designs: Angular and bold, perfect for modern spaces.
  • Industrial Style: With exposed bulbs and matte finishes for an edgy, rustic look.
  • Crystal Accents: These fixtures combine the opulence of gold with crystal elements for a luxurious aesthetic.
  • Soft Curves: For a more traditional or vintage-inspired touch, curved shapes with gold detailing offer an elegant yet understated look.

2. Material Durability

The combination of black metal and gold finishes ensures durability and longevity. Black and gold flush mount lights are typically made with high-quality materials, such as stainless steel, brass, or wrought iron, which can withstand the test of time while providing a polished appearance.

3. Energy Efficiency

Many black and gold flush mount ceiling lights are designed to accommodate LED bulbs, which are energy-efficient and long-lasting. This ensures that you not only enjoy the aesthetic appeal of the lights but also benefit from lower energy consumption and reduced utility bills.


How to Incorporate Black And Gold Flush Mount Ceiling Lights Into Your Home

1. Living Room

The living room is often the focal point of your home, and using a black and gold flush mount light can serve as the statement piece in the room. You can place the light above the central seating area or in the hallway leading to the living space. The combination of bold black with gold accents can create a sense of grandeur, especially when paired with neutral furniture and soft textures.

2. Kitchen

If you have a kitchen with a modern or industrial aesthetic, a black and gold flush mount ceiling light can add the perfect finishing touch. It can be placed above the kitchen island or along the ceiling to offer bright and even lighting while maintaining a chic, stylish look. The gold accents will add warmth to the space, balancing the sleekness of black appliances and countertops.

3. Bedroom

In the bedroom, black and gold flush mount ceiling lights can bring a luxurious and calming vibe. Choose a fixture with a softer design, such as a gold rimmed flush mount light with frosted glass, to create a relaxing atmosphere while maintaining elegance. The contrast of gold and black works well with dark-toned furniture, creating an inviting and cozy environment.

4. Bathroom

The bathroom can also benefit from the addition of black and gold flush mount ceiling lights. This combination of colors adds elegance and brightness, especially in smaller bathrooms where space is limited. The light can also complement gold fixtures or accents, creating a cohesive look throughout the space.


How To Choose the Right Black And Gold Flush Mount Ceiling Light

1. Consider the Room Size

When selecting the right light fixture, consider the size of the room. Larger rooms might benefit from a more intricate design, such as a chandelier-style black and gold flush mount light, while smaller spaces will look better with a more compact and subtle design. Ensure that the light you choose is proportionate to the size of the room.

2. Lighting Needs

Think about how much light the room requires. If you need bright, ambient light, opt for a flush mount light with multiple bulbs or the ability to accommodate higher wattage bulbs. For softer, mood lighting, consider fixtures with dimmable options or frosted glass.

3. Style of Decor

Take a look at your existing décor. If your room features minimalist design elements, a sleek black and gold flush mount light with simple lines might be the best option. For more ornate or eclectic décor, you may choose a fixture with added detailing, such as gold embellishments or decorative glass.


Benefits of Choosing Black And Gold Flush Mount Ceiling Lights

1. Timeless Appeal

Black and gold are classic colors that never go out of style. Whether your interior design trend changes or your tastes evolve, black and gold lighting fixtures remain versatile and timeless, ensuring your space always looks chic.

2. Easy Maintenance

Flush mount lights are typically easier to clean and maintain compared to hanging lights. The design keeps the light close to the ceiling, reducing the buildup of dust and dirt, making cleaning much simpler.

3. Increased Home Value

High-quality black and gold flush mount ceiling lights can increase your home’s aesthetic appeal and overall value. Proper lighting adds to the overall ambiance of your home and can make the space more attractive to potential buyers.


Conclusion

Black and gold flush mount ceiling lights are a stylish, versatile, and practical choice for any home. With their elegant design, these lights can brighten up a room while adding sophistication and luxury. Whether you’re redesigning your living room, kitchen, bedroom, or bathroom, these lights will effortlessly complement any décor style, providing both beauty and functionality. By understanding the features, benefits, and design options available, you can choose the perfect black and gold flush mount ceiling light that suits your home.

Universal Remote For Harbor Breeze Ceiling Fan: The Ultimate Guide for Convenience and Control

When it comes to ceiling fans, Harbor Breeze is one of the most trusted names in the industry. Offering a wide range of high-quality, stylish ceiling fans, Harbor Breeze has made a mark in homes across the United States. One feature that sets these fans apart is their ability to be controlled with a universal remote. The universal remote for Harbor Breeze ceiling fan provides convenience, ease of use, and enhanced functionality.

Universal Remote For Harbor Breeze Ceiling Fan

In this article, we will explore everything you need to know about using a universal remote for Harbor Breeze ceiling fan, from installation to troubleshooting. Whether you’re looking to install a new remote or replace an old one, this guide will ensure you can make the most of your Harbor Breeze ceiling fan with a universal remote.


What Is a Universal Remote for Harbor Breeze Ceiling Fan?

A universal remote for Harbor Breeze ceiling fan is a device that allows you to control your ceiling fan’s speed, light settings, and direction from a distance. Designed to work with a wide variety of Harbor Breeze models, a universal remote provides you with the convenience of adjusting your fan settings without having to manually interact with the fan’s pull chains or wall switches.

Key Features of a Universal Remote for Harbor Breeze Ceiling Fan:

  1. Control Speed: Adjust the speed settings (low, medium, high) of your fan with ease.
  2. Control Light Settings: Turn the fan light on and off, dim it, or change the brightness with the remote.
  3. Fan Direction: Reverse the fan’s rotation direction for summer or winter modes.
  4. Convenience: Operate the fan from anywhere in the room with the simple push of a button.
  5. Compatibility: Designed to work with most Harbor Breeze ceiling fan models, eliminating the need for multiple remotes.

Read too: Bathroom Flooded Through the Ceiling: A Comprehensive Guide


Benefits of Using a Universal Remote for Harbor Breeze Ceiling Fan

Using a universal remote for Harbor Breeze ceiling fan comes with numerous benefits that enhance the overall experience of having a ceiling fan in your home. Let’s look at some of these advantages:

1. Increased Convenience

With a universal remote, you no longer need to get up to adjust your fan. You can change the settings from your couch, bed, or even while cooking in the kitchen. This convenience is particularly useful when you’re relaxing or when the fan is installed in a hard-to-reach location.

2. More Control

The universal remote allows you to precisely control the fan speed, light intensity, and direction. Instead of relying on pull chains or wall switches, you can effortlessly make adjustments with a single device.

3. Eliminate Clutter

If your ceiling fan uses a separate remote for the light and fan, a universal remote can combine both functions, reducing the number of remotes you need to keep track of. This eliminates clutter and provides a more streamlined approach to controlling your ceiling fan.

4. Better Energy Efficiency

By adjusting the fan speed and direction using the remote, you can make more effective use of your ceiling fan throughout the year. Reversing the fan direction in winter can help circulate warm air, while higher speeds in summer keep the room cooler, optimizing energy usage.


How to Install a Universal Remote for Harbor Breeze Ceiling Fan

Installing a universal remote for Harbor Breeze ceiling fans is a relatively simple task that can be done by most homeowners. The process typically involves installing a receiver inside the fan’s canopy and synchronizing the remote to control the fan’s functions.

Tools You’ll Need:

  • Universal remote kit (includes remote and receiver)
  • Screwdriver
  • Ladder or step stool
  • Electrical tape (optional)

Step-by-Step Guide:

  1. Turn off the Power: Before starting, make sure to turn off the power to the ceiling fan at the circuit breaker to avoid electrical shocks.
  2. Remove the Canopy Cover: Use the screwdriver to remove the screws that hold the fan’s canopy cover in place. The canopy is typically located near the ceiling, where the fan motor is housed.
  3. Install the Receiver: The receiver is a small box that comes with your universal remote kit. It is installed inside the canopy, between the fan motor and the ceiling. Connect the wires from the receiver to the existing wiring in the fan using wire nuts. Follow the manufacturer’s wiring diagram carefully to ensure proper connections.
  4. Attach the Remote Control Transmitter: In some kits, the transmitter may be designed to fit directly into the fan’s existing pull chain or wall control. In others, you may need to mount the remote control unit on the wall using screws. Follow the instructions in your remote kit for the specific setup.
  5. Program the Remote: After installing the receiver and transmitter, you will need to program the remote to sync with the fan. This typically involves pressing a button on the receiver to activate pairing mode and then pressing a corresponding button on the remote.
  6. Test the Remote: Once everything is installed and connected, turn the power back on and test the remote. Check if you can control the fan speed, light, and direction.

Troubleshooting Common Issues with Universal Remote for Harbor Breeze Ceiling Fan

While using a universal remote for Harbor Breeze ceiling fan is usually a hassle-free experience, there may be times when issues arise. Below are some common problems and solutions:

1. The Remote Doesn’t Work

  • Check the Batteries: Ensure the batteries in the remote are fresh and properly installed.
  • Reset the Remote: If the remote is not syncing with the fan, try resetting it by removing the batteries, waiting for 10-15 seconds, and then reinstalling them.
  • Reprogram the Remote: Sometimes the remote may need to be reprogrammed to sync with the fan after installation or if the settings have been changed.

2. Fan Speed is Unresponsive

  • Check the Receiver: If the fan speed doesn’t change, ensure the receiver is properly wired and securely connected to the fan motor.
  • Reset the Receiver: If the receiver is malfunctioning, try resetting it by turning off the power, waiting for a minute, and then turning the power back on.

3. Light Isn’t Working

  • Check the Bulbs: If the fan light isn’t working, make sure the light bulbs are properly installed and are not burnt out.
  • Check the Light Switch: If the light is still unresponsive, ensure that the light control on the remote is functioning correctly.

Universal Remote for Harbor Breeze Ceiling Fan: FAQs

1. Can I use a universal remote for any Harbor Breeze ceiling fans model?

Yes, most Harbor Breeze fans are compatible with universal remotes, but it’s always best to check the model compatibility before purchasing the remote kit.

2. Do I need to hire a professional to install a universal remote for my Harbor Breeze ceiling fan?

Installing a universal remote is usually straightforward, but if you’re uncomfortable working with electrical wiring, it’s best to hire a professional electrician.

3. What is the range of the universal remote?

Most universal remotes for Harbor Breeze ceiling fans have a range of up to 30 feet, depending on the environment and any obstructions.


Conclusion

A universal remote for Harbor Breeze ceiling fans is a valuable addition to any home. It provides greater control, enhances convenience, and can even improve the efficiency of your ceiling fan. Whether you’re upgrading your current fan or installing a new one, a universal remote simplifies your experience by combining all functions into one easy-to-use device. With proper installation and maintenance, you can enjoy smooth operation for years to come.


Vintage Art Deco Flush Mount Ceiling Light

The vintage Art Deco flush mount ceiling light is a timeless piece that brings a touch of sophistication to any room. Rooted in the 1920s and 1930s, Art Deco design represents luxury, glamour, and modernity. Flush mount ceiling lights, characterized by their compact design, are both functional and stylish, making them ideal for homes with lower ceilings. Combining the charm of vintage aesthetics with practical lighting solutions, these fixtures are a popular choice for homeowners and interior designers alike.

Vintage Art Deco Flush Mount Ceiling Light

This comprehensive guide explores everything you need to know about vintage Art Deco flush mount ceiling lights—from their history and design features to tips for selecting the perfect piece for your home.


The History and Allure of Art Deco Lighting

A Brief History of Art Deco

The Art Deco movement began in France in the early 20th century, gaining global recognition after the 1925 Exposition Internationale des Arts Décoratifs et Industriels Modernes in Paris. It celebrated modernity through bold geometric shapes, intricate patterns, and luxurious materials like chrome, glass, and brass.

Why Art Deco Lighting Stands Out

Art Deco lighting is renowned for its ability to merge form and function. A vintage Art Deco flush mount ceiling light embodies this principle, combining elegant design with efficient lighting. These fixtures often feature materials like frosted glass, etched patterns, and metallic accents, offering a sense of timeless beauty.

Read too: Bathroom Flooded Through the Ceiling: A Comprehensive Guide


Features of a Vintage Art Deco Flush Mount Ceiling Light

1. Geometric Shapes

Art Deco is synonymous with symmetry and geometry. Flush mount ceiling lights from this era often showcase designs like concentric circles, stepped patterns, and angular motifs.

2. Luxurious Materials

Materials such as frosted glass, polished brass, nickel, and chrome are common. These elements not only enhance durability but also elevate the visual appeal of the light fixture.

3. Compact Design

Flush mount lights sit close to the ceiling, making them perfect for spaces with low ceilings while still offering ample illumination.

4. Warm and Ambient Lighting

Many vintage Art Deco lights are designed to create a soft, ambient glow, making them ideal for living rooms, dining areas, and bedrooms.


Why Choose a Vintage Art Deco Flush Mount Ceiling Light?

1. Timeless Style

The classic appeal of Art Deco design ensures that these fixtures never go out of style, making them a long-term investment for your home decor.

2. Versatile Applications

These lights work well in various settings, from modern minimalist spaces to traditional interiors, adding a touch of elegance wherever they are placed.

3. Unique Craftsmanship

Vintage Art Deco pieces often feature handcrafted details, ensuring that each fixture is a work of art.

4. Eco-Friendly Option

Opting for vintage lighting reduces the demand for new manufacturing, promoting sustainability and eco-conscious living.


Where to Use a Vintage Art Deco Flush Mount Ceiling Light

1. Living Room

Create a focal point by installing a flush mount ceiling light with bold geometric patterns. Pair it with furniture that complements the Art Deco style.

2. Dining Room

Enhance your dining experience with a warm, ambient glow from a vintage light fixture. Look for designs with frosted or etched glass shades.

3. Bedroom

Add a cozy yet luxurious touch to your bedroom with a compact flush mount light. Choose a piece with metallic accents for added elegance.

4. Hallway or Entryway

Impress guests with an eye-catching vintage Art Deco light in your entryway or hallway. Its unique design sets the tone for the rest of your home.


How to Choose the Perfect Vintage Art Deco Flush Mount Ceiling Light

1. Consider the Room Size

Choose a fixture that complements the size of your room. Larger rooms may require multiple flush mount lights or one with a wider diameter.

2. Match Your Decor

Ensure the light fits your existing interior design. Opt for brass or chrome finishes for a classic look, or go for bold colors and patterns for a modern twist.

3. Check the Condition

When purchasing vintage pieces, inspect the fixture for damage or missing components. Ensure the wiring is up to date for safety.

4. Energy Efficiency

Consider retrofitting your vintage fixture with LED bulbs for an eco-friendly and cost-effective lighting solution.


Installing a Vintage Art Deco Flush Mount Ceiling Light

Tools You’ll Need:

  • Screwdriver
  • Voltage tester
  • Ladder
  • Wire connectors

Step-by-Step Installation:

  1. Turn Off the Power
    Switch off the circuit breaker to avoid electrical hazards.
  2. Remove the Old Fixture
    Carefully detach the existing light fixture, exposing the wiring.
  3. Prepare the Vintage Fixture
    Inspect the wiring and components of your vintage light to ensure everything is in working order.
  4. Connect the Wires
    Match the wires from the light fixture to those in your ceiling (black to black, white to white, and green to ground). Use wire connectors to secure them.
  5. Mount the Fixture
    Attach the fixture to the ceiling using the provided screws and brackets. Ensure it is securely fastened.
  6. Test the Light
    Turn the power back on and test the fixture to ensure it’s functioning correctly.

Caring for Your Vintage Art Deco Ceiling Light

  1. Regular Cleaning
    Dust the fixture and clean the glass shades with a damp cloth to maintain their shine.
  2. Inspect Wiring
    Periodically check the wiring to ensure safety and functionality.
  3. Avoid Harsh Cleaners
    Use gentle cleaning agents to avoid damaging the vintage materials.

FAQs: Vintage Art Deco Flush Mount Ceiling Light

1. What Makes a Light Fixture “Vintage”?

Vintage light fixtures are typically 20–100 years old, reflecting the design trends of their era.

2. Can Vintage Fixtures Be Retrofitted with LED Bulbs?

Yes, most vintage fixtures can be adapted to use energy-efficient LED bulbs. Ensure the bulb size and wattage are compatible.

3. Are Art Deco Lights Suitable for Modern Homes?

Absolutely. Their timeless design blends seamlessly with both traditional and modern interiors.

4. Where Can I Find Authentic Vintage Art Deco Lights?

Look for authentic pieces at antique stores, online marketplaces, and estate sales.


Conclusion

A vintage Art Deco flush mount ceiling light is more than just a lighting solution; it’s a statement piece that adds character and charm to any space. By combining functionality with timeless design, these fixtures create a warm and inviting atmosphere in your home. Whether you’re restoring a historic property or enhancing a modern space, an Art Deco flush mount ceiling light is a versatile and elegant choice that never goes out of style.

Ceiling Fan Slope Kit With Room For Transmitter: The Complete Installation Guide

Ceiling fans add comfort and style to any home, but installing one on a sloped ceiling can be tricky. Thankfully, a ceiling fan slope kit with room for transmitter makes this task much simpler. These kits not only provide the necessary hardware for angled ceilings but also ensure space for wireless transmitter systems that control your fan and light fixtures seamlessly.

Ceiling Fan Slope Kit With Room For Transmitter

This article covers everything you need to know about slope kits, including their features, benefits, installation tips, and how to choose the right one for your needs.


What Is a Ceiling Fan Slope Kit?

A ceiling fan slope kit is a specialized accessory designed to enable ceiling fan installation on sloped or angled ceilings. It compensates for the incline, providing a stable mounting platform for your fan. The added feature of room for a transmitter in some kits allows for the integration of remote control systems, making the setup even more convenient.

Key Features of a Slope Kit with Transmitter Space:

  1. Adjustable Design: Accommodates various ceiling angles, usually up to 45–55 degrees.
  2. Integrated Transmitter Space: A built-in compartment to house wireless control transmitters.
  3. Durable Materials: Often made of high-quality metal or ABS plastic to ensure stability.

Benefits of a Ceiling Fan Slope Kit With Room For Transmitter

  1. Simplified Installation
    Installing a ceiling fan on a sloped ceiling can be challenging, but slope kits simplify the process by providing the correct mounting angle.
  2. Seamless Integration of Controls
    With room for a transmitter, you can easily integrate remote-controlled systems without extra wiring or modifications.
  3. Enhanced Aesthetic Appeal
    Slope kits are designed to blend seamlessly with ceiling fans, maintaining a sleek and professional look.
  4. Versatility
    Compatible with a wide range of ceiling fans and transmitter models, these kits are ideal for modern and traditional fan designs.

Read too: Bathroom Flooded Through the Ceiling: A Comprehensive Guide


Choosing the Right Ceiling Fan Slope Kit With Room For Transmitter

1. Compatibility with Ceiling Fan Models

Ensure the kit matches your ceiling fan’s brand and model. Many manufacturers offer slope kits designed specifically for their products.

2. Angle Capacity

Check the maximum angle the kit can accommodate. Most standard kits support angles up to 30 degrees, but some advanced kits handle angles of 45–55 degrees.

3. Transmitter Size

Ensure the transmitter space is compatible with your wireless control system. Measure the transmitter beforehand to avoid compatibility issues.

4. Material and Finish

Choose a kit that complements your fan’s finish—whether brushed nickel, matte black, or wood-tone.


Installation Guide for Ceiling Fan Slope Kit With Room For Transmitter

Tools You’ll Need:

  • Screwdriver
  • Ladder
  • Measuring tape
  • Wiring tools (if necessary)

Step-by-Step Installation:

Step 1: Turn Off the Power

Before beginning, switch off the power to the fan at the circuit breaker to avoid electrical hazards.

Step 2: Prepare the Slope Kit

Unpack the slope kit and confirm all components are included. Review the instruction manual provided by the manufacturer.

Step 3: Attach the Slope Adapter

  1. Remove the existing mounting bracket if one is installed.
  2. Attach the slope adapter to the ceiling joist or beam. Ensure it is securely fastened to handle the fan’s weight.

Step 4: Install the Transmitter

Insert the wireless transmitter into the designated compartment within the slope kit. Ensure it fits snugly and does not obstruct any wiring or components.

Step 5: Connect the Wiring

Follow the wiring diagram provided in the slope kit’s instructions. Typically, you’ll connect:

  • Black (hot) wire to the fan’s motor wire.
  • Blue wire for light controls (if applicable).
  • White wire (neutral) and green wire (ground).

Step 6: Attach the Ceiling Fan

Secure the fan’s downrod to the slope adapter and tighten all screws and bolts. Ensure the fan is balanced and spins freely.

Step 7: Test the Fan

Turn the power back on and test the fan and remote control system to ensure everything functions properly.


Maintenance Tips for Your Slope Kit and Ceiling Fan

  1. Regular Cleaning: Dust the fan blades and slope kit to prevent dirt buildup.
  2. Check Connections: Periodically inspect the kit for loose screws or wires.
  3. Update Controls: Upgrade the transmitter or remote system if needed for better functionality.

FAQs: Ceiling Fan Slope Kit With Room For Transmitter

1. Do All Ceiling Fans Need a Slope Kit for Angled Ceilings?

Not all ceiling fans require a slope kit. Some models come with built-in adjustments for angled ceilings. However, a slope kit is essential for steeper angles.

2. Can I Install a Slope Kit Myself?

Yes, if you’re comfortable with basic DIY tasks. Follow the manufacturer’s instructions carefully, and don’t hesitate to consult a professional electrician if needed.

3. What Happens if My Transmitter Doesn’t Fit?

If the transmitter is too large, consider purchasing a larger slope kit or an external transmitter housing.

4. Are Slope Kits Universal?

No, slope kits are not universal. Always check compatibility with your ceiling fan model and transmitter system.


How to Choose the Best Ceiling Fan for Your Slope Kit

When selecting a ceiling fan to pair with your slope kit, consider the following:

  1. Fan Size: Choose a fan size appropriate for the room’s dimensions.
  2. Weight: Ensure the slope kit is rated to support the fan’s weight.
  3. Lighting Options: If you want integrated lighting, choose a fan with a built-in light kit.
  4. Energy Efficiency: Look for fans with Energy Star ratings to reduce energy consumption.

Popular Brands Offering Ceiling Fan Slope Kits

  1. Hunter Fans: Known for their durability and design versatility.
  2. Minka Aire: Offers slope kits with modern aesthetics.
  3. Casablanca: Ideal for both traditional and contemporary ceiling fans.
  4. Kichler: Known for their robust build quality and sleek designs.

Conclusion

Installing a ceiling fan on a sloped ceiling doesn’t have to be a daunting task. With a ceiling fan slope kit with room for transmitter, you can easily create a stylish, functional setup that integrates modern control systems. By following this guide, you’ll be equipped with the knowledge to select the right kit, install it properly, and enjoy the comfort and convenience of your upgraded ceiling fan.

Better Than Pro Series 18Rc In Ceiling Speakers: The Ultimate Guide to Superior Sound Quality

When it comes to creating the perfect sound environment for your home, in-ceiling speakers are an excellent choice. These speakers blend seamlessly into your space, providing high-quality audio without taking up valuable floor space. One particular model that has garnered attention is the Pro Series 18Rc In Ceiling Speakers. But what if there was a product even better than this? In this article, we will explore what makes Better Than Pro Series 18Rc In Ceiling Speakers stand out and why you should consider upgrading to them for your home audio setup.

Better Than Pro Series 18Rc In Ceiling Speakers

What Are In-Ceiling Speakers and Why Should You Consider Them?

In-ceiling speakers are speakers that are installed directly into the ceiling, offering a discreet, space-saving option for high-quality audio. They are commonly used for whole-home audio systems, home theaters, or multi-room sound setups. When installed correctly, in-ceiling speakers deliver excellent sound quality while maintaining a clean and minimalistic appearance.

Read too: Shiplap Ceiling in Kitchen: A Timeless Trend for a Stylish and Cozy Space

The benefits of in-ceiling speakers include:

  • Space Efficiency: Perfect for small spaces or rooms where you want to avoid large, bulky speaker units.
  • Aesthetic Appeal: These speakers can be blended seamlessly with your ceiling, providing a clean and modern look.
  • Enhanced Sound Coverage: They allow for more evenly distributed sound throughout the room.

The Pro Series 18Rc In Ceiling Speakers are widely recognized for their strong sound performance and integration in high-end home audio setups. However, there are alternatives that may outperform these speakers, offering additional features, better sound quality, and improved installation options.


Better Than Pro Series 18Rc In Ceiling Speakers: What Sets Them Apart?

There are several key areas in which Better Than Pro Series 18Rc In Ceiling Speakers can outperform the Pro Series 18Rc model. Let’s dive deeper into each factor to see why these speakers may be the ideal choice for your audio needs.

1. Sound Quality: Crisp, Clear, and Powerful Audio

Better Than Pro Series 18Rc In Ceiling Speakers are designed to offer superior sound quality that outshines the Pro Series 18Rc. The advanced driver technology in these speakers ensures that you experience clear highs, rich mids, and deep, booming lows. Some models may feature larger woofers or specialized tweeters, allowing for a more immersive and dynamic listening experience. Whether you’re listening to music, watching movies, or playing video games, these speakers provide a fuller, more well-rounded sound that rivals even the best in-ceiling speaker options.

Pro Series 18Rc speakers are known for delivering high-quality audio, but they sometimes fall short in terms of deep bass or clarity at higher volumes. On the other hand, the speakers better than the Pro Series 18Rc tend to offer more balanced audio, ensuring an optimal listening experience across all frequencies.

2. Advanced Acoustic Technology

The Better Than Pro Series 18Rc In Ceiling Speakers often incorporate advanced acoustic technologies that elevate the audio performance even further. These technologies can include things like:

  • Customizable Tweeter Angles: Some models allow you to adjust the angle of the tweeter, ensuring the sound is directed precisely where you need it, especially in large or oddly shaped rooms.
  • Acoustic Optimization: With advanced frequency response tuning, these speakers can provide more accurate sound reproduction, even in less-than-ideal acoustic environments.
  • Bass Enhancing Technology: Improved subwoofers and bass response technology ensure that your speakers deliver deep, resonant bass without distortion, even at higher volumes.

These enhancements are often not present in the Pro Series 18Rc In Ceiling Speakers, giving the better models a notable edge in terms of sound quality.

3. Better Power Handling and Efficiency

Another crucial aspect of Better Than Pro Series 18Rc In Ceiling Speakers is their ability to handle more power without distorting the sound. These speakers typically have higher power handling capabilities, meaning they can deliver louder, cleaner sound even when paired with high-power amplifiers.

In contrast, the Pro Series 18Rc In Ceiling Speakers may experience some limitations when pushed to their maximum output. They might struggle to maintain clarity and bass response at higher volumes, especially in larger rooms. With more efficient designs and advanced materials, the Better Than Pro Series 18Rc In Ceiling Speakers offer superior performance across the board.

4. Enhanced Durability and Longevity

When it comes to speaker longevity, you want a product that’s built to last. Better Than Pro Series 18Rc In Ceiling Speakers often feature more durable materials and advanced construction techniques that make them resistant to damage from heat, humidity, or wear and tear. Many higher-end models use materials like carbon fiber, aluminum, or reinforced plastic, which contribute to the speaker’s overall durability.

The Pro Series 18Rc In Ceiling Speakers, while still durable, may not have the same level of protection against environmental factors. The longevity of your speakers depends on how well they are constructed and the materials used, and in this area, the Better Than Pro Series 18Rc In Ceiling Speakers shine through.

5. Improved Installation Features

While the Pro Series 18Rc speakers are relatively easy to install, there are newer models that offer even more convenient installation features. These improvements can save you time and effort during setup, especially if you are doing the installation yourself.

  • Quick-Connect Terminals: Some models come with quick-connect terminals that make the wiring process much faster and easier.
  • Seamless Integration: Enhanced designs ensure that the speakers can be integrated seamlessly into various ceiling types without the need for additional tools or modifications.
  • More Installation Options: With better mounting brackets, these speakers can be installed in a variety of spaces, offering more flexibility and reducing installation time.

Why Choose Better Than Pro Series 18Rc In Ceiling Speakers?

There are several reasons why opting for Better Than Pro Series 18Rc In Ceiling Speakers might be the ideal choice for your home or commercial audio setup:

1. Superior Sound Performance

The main reason people upgrade to better models is to experience superior sound. With better frequency response, bass response, and clarity, these speakers ensure an immersive listening experience that will elevate your audio setup.

2. Enhanced Features and Technology

The inclusion of cutting-edge technologies ensures that you not only enjoy fantastic sound but also have the flexibility to fine-tune and optimize your listening environment. Whether you’re after crisp highs, deep bass, or a more balanced midrange, these speakers deliver.

3. Long-Term Investment

While these speakers might have a higher initial cost, they are often built to last longer, ensuring that you won’t need to replace them as quickly as lower-end models. With better durability, they are well worth the investment for audiophiles who prioritize longevity and quality.

4. Aesthetics and Seamless Integration

Better Than Pro Series 18Rc In Ceiling Speakers often feature sleek designs that blend seamlessly into your home decor. These speakers offer an aesthetic advantage over other models, providing high-quality sound without detracting from the overall visual appeal of your space.


Conclusion

In summary, Better Than Pro Series 18Rc In Ceiling Speakers stand out as the superior option for those who are serious about sound quality, longevity, and ease of installation. While the Pro Series 18Rc offers excellent sound, newer models incorporate better technology, power handling, and design features that elevate the listening experience to new heights. If you’re looking to enhance your audio setup with top-tier performance, better than Pro Series 18Rc models are the way to go.

Wall Mount Garage Door Opener Vs Ceiling Mount: Which Is the Best Option for Your Home?

When it comes to installing a garage door opener, one of the key decisions you’ll face is choosing between a Wall Mount Garage Door Opener vs Ceiling Mount option. Both types of openers come with their own set of advantages and considerations. In this article, we will explore the features, benefits, and potential drawbacks of each option to help you determine which garage door opener is best for your specific needs.

Wall Mount Garage Door Opener Vs Ceiling Mount

What is a Wall Mount Garage Door Opener?

A Wall Mount Garage Door Opener (also known as a side-mounted opener) is a type of garage door opener that is mounted on the wall beside the door, rather than on the ceiling. This system uses a direct drive mechanism to open and close the door, which is typically quieter and more space-efficient than traditional ceiling-mounted openers.

What is a Ceiling Mount Garage Door Opener?

A Ceiling Mount Garage Door Opener is the most common type of opener, where the motor and drive system are mounted on the ceiling of your garage. These openers use a chain, belt, or screw drive to move the door. Ceiling-mounted openers can be more affordable and are widely available, but they tend to take up more space and can be louder than their wall-mounted counterparts.

Read too: Shiplap Ceiling in Kitchen: A Timeless Trend for a Stylish and Cozy Space


Wall Mount Garage Door Opener Vs Ceiling Mount: Key Differences

When comparing a Wall Mount Garage Door Opener vs Ceiling Mount, several factors need to be considered, including installation, noise levels, space efficiency, maintenance, and overall convenience. Let’s break down these key differences to help you make an informed decision.

1. Space Efficiency

Wall Mount Garage Door Opener:
One of the most significant advantages of a wall-mounted garage door opener is the space it saves. By mounting the opener on the wall next to your garage door, you free up valuable ceiling space. This is particularly beneficial if you have a low ceiling, use your garage for storage, or want to maintain a clean, open look. Wall-mounted openers are also ideal for garages with vaulted ceilings or those with other obstructions in the ceiling space.

Ceiling Mount Garage Door Opener:
In contrast, ceiling-mounted openers use up space on the ceiling, which can be a disadvantage in smaller garages. The tracks, motor, and other components take up a significant amount of room, leaving less space for overhead storage. If you have a high ceiling or an expansive garage, this may not be a concern, but in smaller spaces, ceiling-mounted openers can feel intrusive.

2. Installation Process

Wall Mount Garage Door Opener:
The installation process for a wall-mounted garage door opener is typically more complex and requires professional installation. Since the motor is mounted on the wall beside the garage door, the installer needs to ensure the proper alignment and that the wall is sturdy enough to support the weight of the opener. This type of installation is often more expensive due to the labor involved.

Ceiling Mount Garage Door Opener:
On the other hand, ceiling-mounted openers are generally easier and more affordable to install. These openers are commonly sold as DIY kits, and many homeowners can install them with basic tools. However, if you’re not comfortable with electrical work or heavy lifting, it’s always recommended to hire a professional to ensure the opener is installed safely and properly.

3. Noise Levels

Wall Mount Garage Door Opener:
Wall-mounted openers tend to be quieter than ceiling-mounted openers. This is because they use a direct drive mechanism, which eliminates the need for traditional moving parts like chains or belts. If noise is a concern—especially if you have bedrooms or living areas near the garage—a wall-mounted opener could be the better option.

Ceiling Mount Garage Door Opener:
Ceiling-mounted openers, especially those with chain-driven systems, can be louder during operation. Although there are quieter options available, such as belt-driven openers, the noise level of ceiling-mounted openers can still be higher compared to wall-mounted systems. If noise reduction is a priority, a ceiling-mounted opener may require additional noise-dampening measures, such as insulation or vibration pads.

4. Maintenance and Durability

Wall Mount Garage Door Opener:
Wall-mounted garage door openers generally require less maintenance compared to ceiling-mounted systems. Since the motor is mounted on the wall and has fewer moving parts, there is less wear and tear over time. However, it’s important to regularly check for any mechanical issues and ensure that the wall mount is securely attached.

Ceiling Mount Garage Door Opener:
Ceiling-mounted openers, especially those with chain or screw-drive systems, may require more maintenance. The chains, belts, or screws may need periodic adjustment, lubrication, or replacement. Additionally, since these systems are mounted on the ceiling, they are subject to dust and debris accumulation, which can affect their performance over time.

5. Cost

Wall Mount Garage Door Opener:
Wall-mounted garage door openers tend to be more expensive due to their specialized design and installation process. They also often require more robust electrical components, which can contribute to the higher price. However, the extra cost might be worth it for those seeking space efficiency, quieter operation, and a sleeker appearance.

Ceiling Mount Garage Door Opener:
In contrast, ceiling-mounted openers are usually more affordable, with many options available at lower price points. The installation process is generally simpler and less costly, making ceiling-mounted openers a popular choice for budget-conscious homeowners. While they may not offer the same level of quiet operation or space efficiency, their affordability makes them an attractive option for many.

6. Aesthetic Appeal

Wall Mount Garage Door Opener:
Wall-mounted openers are often seen as more modern and aesthetically pleasing. They have a clean, minimalist design that doesn’t take away from the overall appearance of the garage. If you have a more modern or upscale garage, a wall-mounted opener can complement your style and add to the overall look of the space.

Ceiling Mount Garage Door Opener:
Ceiling-mounted openers, while effective, are more visible and may interrupt the clean look of your garage. The tracks, motor, and other components are mounted on the ceiling and can be an eyesore in some garage layouts. However, there are plenty of designs available that aim to blend in with your garage’s decor, particularly if you have a larger garage with high ceilings.


Which One is Right for You?

Deciding between a Wall Mount Garage Door Opener vs Ceiling Mount comes down to a few key considerations:

  • For Smaller or Low Ceilings: A wall-mounted opener is an excellent choice for smaller garages or those with low ceilings. It helps you free up valuable overhead space, making your garage feel less cluttered.
  • For Quieter Operation: If noise is a concern—particularly if you have rooms above the garage—a wall-mounted opener may be the better option due to its quieter operation.
  • For Budget-Friendly Solutions: Ceiling-mounted openers are often more affordable and easier to install, making them a solid choice for those on a budget.
  • For Larger Garages: Ceiling-mounted openers are often better suited for larger garages where space is not as much of a concern. They also tend to have a more traditional design and are available in a variety of price points.

Conclusion

Both Wall Mount Garage Door Openers and Ceiling Mount Garage Door Openers have their distinct advantages and drawbacks. Wall-mounted systems offer space efficiency, quieter operation, and a sleek modern look, while ceiling-mounted systems are generally more affordable, easier to install, and are a proven option for many homeowners.

Your choice will depend on your specific needs, budget, and garage layout. Either way, both options can provide reliable and long-lasting performance, making them worthy investments for your home.