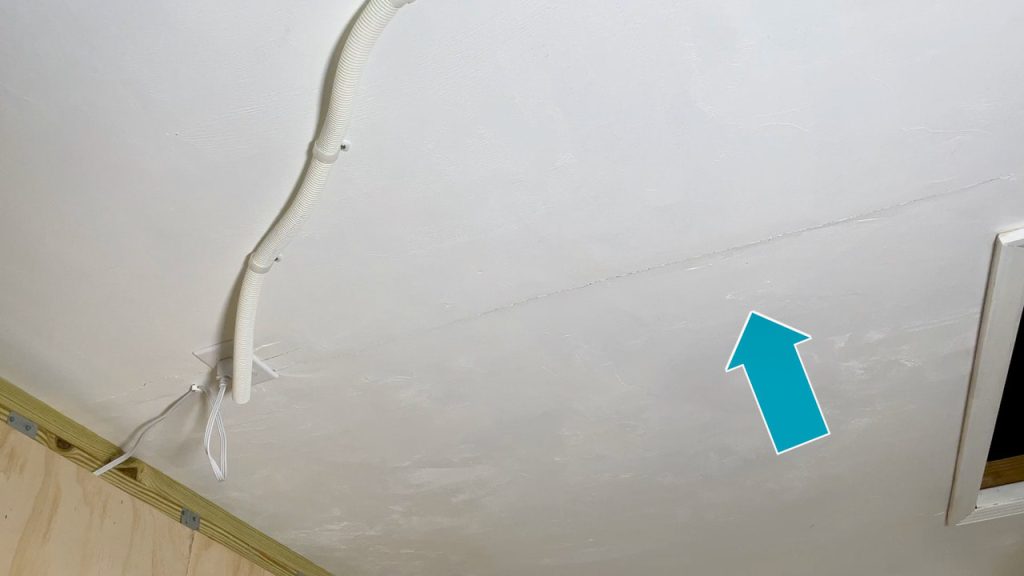
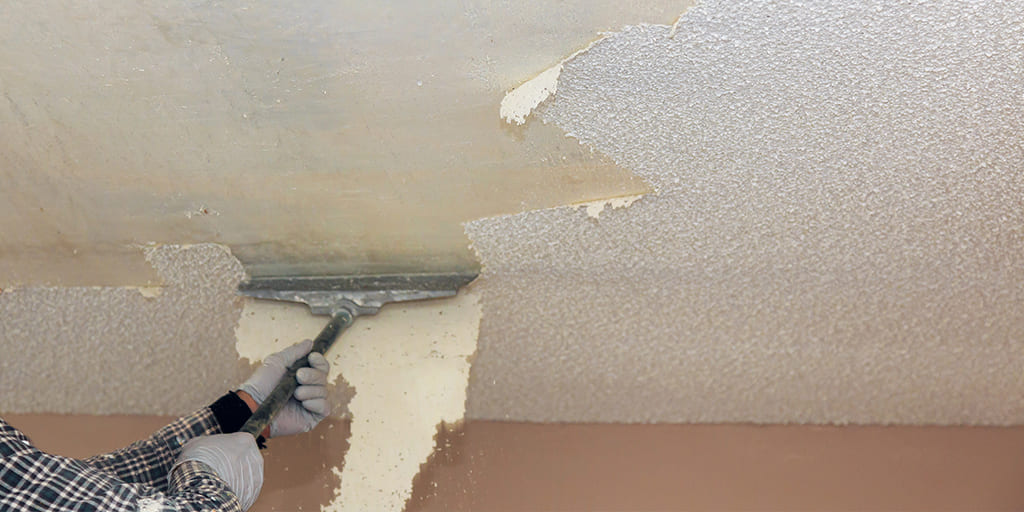
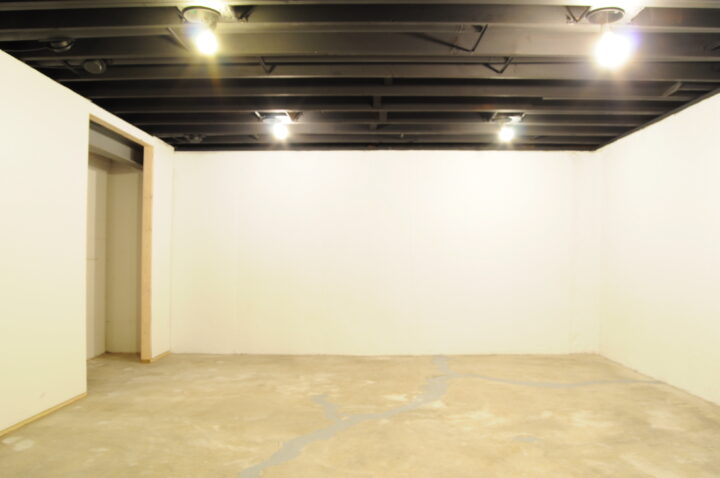
Signs of Water Damage on Ceilings

Water damage on ceilings can be a major problem. It can lead to mold growth, structural damage, and other issues. If you notice any signs of water damage on your ceiling, it is important to take action immediately to prevent further damage.

In this article, we will discuss the signs of water damage on ceilings, how to identify them, and what to do if you find them.
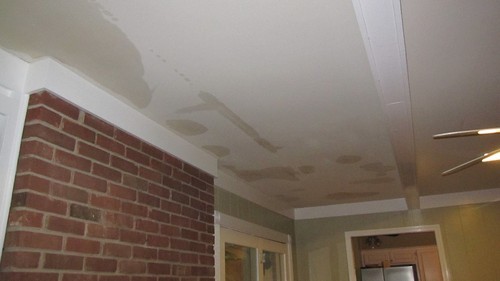
Signs Of Water Damage On Ceiling

Signs of Water Damage on Ceilings

There are a number of signs that can indicate water damage on ceilings. Some of the most common signs include:

  • Wet spots or stains: Water damage will often appear as wet spots or stains on the ceiling. These stains can be brown, black, or another color.
  • Blisters or bubbles: Water damage can also cause blisters or bubbles to form on the ceiling. These blisters or bubbles are caused by water that has seeped between the layers of drywall.
  • Mold or mildew growth: Mold and mildew can grow on ceilings that have been exposed to water damage. Mold and mildew can cause health problems, so it is important to remove them as soon as possible.
  • Drywall damage: Water damage can also cause drywall to become damaged. This damage can appear as cracks, holes, or other imperfections in the drywall.
  • Sagging or bowing: In severe cases, water damage can cause the ceiling to sag or bow. This is a sign that the damage is significant and that structural repairs may be necessary.
  • Musty odor: Water damage can also cause a musty odor in the home. This odor is caused by mold and mildew growth.

Identifying Water Damage

If you notice any of the signs of water damage on your ceiling, it is important to identify the source of the leak. This will help you to determine the best course of action for repair.

Here are a few tips for identifying the source of a leak:

  • Check for leaks in plumbing fixtures: Leaks in plumbing fixtures, such as faucets, toilets, and showers, are a common cause of water damage on ceilings.
  • Inspect the roof: Leaks in the roof can also cause water damage on ceilings.
  • Check for leaks in the attic: Leaks in the attic can also cause water damage on ceilings.
  • Check for leaks in the walls: Leaks in the walls can also cause water damage on ceilings.

Repairing Water Damage

Once you have identified the source of the leak, you can begin repairing the water damage. The specific steps you will need to take will vary depending on the cause of the leak.

In general, you will need to take the following steps to repair water damage:

  1. Stop the leak: The first step is to stop the leak. This may involve repairing a leaky pipe, replacing damaged caulking or sealant, or clearing a clogged drain.
  • Clean up the damage: Once the leak has been stopped, you will need to clean up any damage that has already occurred. This may involve removing wet drywall, scraping mold, or repairing structural damage.
  • Dry the area: It is important to dry the area completely before you begin repairs. This will help to prevent mold and mildew growth.
  • Make repairs: Once the area is dry, you can begin making repairs. This may involve replacing damaged drywall, repairing structural damage, or applying a sealant to prevent future leaks.

Preventing Water Damage

The best way to prevent water damage on ceilings is to take steps to prevent leaks. Here are a few tips for preventing leaks:

  • Regularly inspect your plumbing fixtures for leaks.
  • Have your roof inspected and repaired by a professional regularly.
  • Check your attic for leaks regularly.
  • Seal any cracks or holes in your walls or ceiling.

Conclusion

Water damage on ceilings can be a major problem. By being aware of the signs of water damage and taking steps to prevent leaks, you can help to protect your home from this damage.
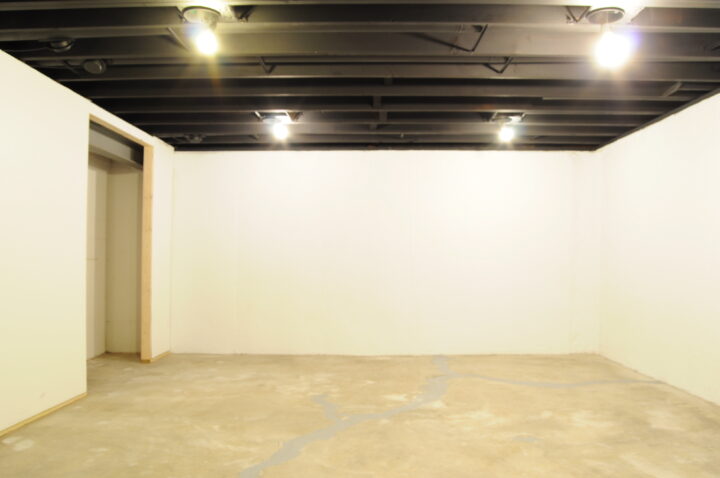

Unveiling the Secrets: How To Paint A Basement Ceiling

How to paint a basement ceiling? Your basement is a hidden gem in your home, offering valuable additional living space. However, many homeowners overlook the ceiling when it comes to renovation and design. A painted basement ceiling can add character and charm to the space, making it feel like an integral part of your home. In this article, we will guide you through the process of painting a basement ceiling, from preparation to execution, and reveal the magic of this transformation.

How To Paint A Basement Ceiling

The Importance of a Well-Designed Ceiling

Elevating the Aesthetics of Your Basement

The ceiling of your basement plays a crucial role in the overall aesthetics of the space. A well-designed ceiling can:

1. Enhance the Ambiance:

  • A carefully chosen color and design can make your basement feel warm and inviting.

2. Hide Imperfections:

  • A painted ceiling can conceal imperfections, pipes, wires, and ducts that are often present in basements.

3. Define Zones:

  • By using different colors or finishes, you can create distinct zones within your basement for various purposes.

Preparing for the Paint Job

Setting the Stage for Success

Before you dive into painting your basement ceiling, it’s essential to prepare adequately. Here are the steps to get you started:

1. Clean the Ceiling:

  • Dust and clean the ceiling to ensure that the paint adheres properly. Use a vacuum cleaner with a brush attachment or a duster to remove loose particles.

2. Repair Damage:

  • Inspect the ceiling for any damage, such as cracks or holes. Repair these issues using a suitable filler or patching compound.

3. Protect the Area:

  • Cover the floor and any items in your basement with drop cloths or plastic sheets to prevent paint splatters.

4. Choose the Right Paint:

  • Select a paint that is suitable for your ceiling’s material and your desired finish. Latex or water-based paints are typically recommended for basement ceilings.

Painting the Basement Ceiling

Turning Your Vision into Reality

Now that your basement ceiling is prepped and you’ve gathered the necessary materials, it’s time to start painting.

1. Start with a Primer:

  • Apply a coat of primer to the ceiling to create an even base for the paint. Primer helps the paint adhere better and provides a smoother finish.

2. Use a Roller:

  • A paint roller is an effective tool for applying paint to the ceiling. Use an extension pole to reach high or hard-to-access areas.

3. Work in Sections:

  • Divide the ceiling into manageable sections and work on one section at a time. This approach ensures even coverage and prevents the paint from drying too quickly.

4. Apply Multiple Coats:

  • Depending on the desired finish and the color you’re using, you may need to apply two or more coats of paint. Allow each coat to dry before applying the next.

5. Be Mindful of Drips:

  • Watch out for drips and streaks, especially when applying paint to an overhead surface. Correct any imperfections immediately.

Read too: How Much Ceiling Height For Treadmill

Finishing Touches and Ideas

Bringing Your Vision to Life

As you near the end of your basement ceiling painting project, consider these finishing touches and creative ideas:

1. Accent Colors:

2. Stencils or Patterns:

  • Add flair to your ceiling by using stencils or creating patterns that complement the overall design of your basement.

3. Incorporate Lighting:

  • Well-placed lighting fixtures can highlight your newly painted ceiling, creating a dynamic and appealing look.

Conclusion:

How to paint a basement ceiling? A painted basement ceiling can transform a neglected space into a captivating and functional part of your home. By following the steps outlined in this guide and considering creative ideas for your ceiling, you can achieve a unique and visually appealing basement that suits your style and needs. Don’t let your basement’s potential go to waste; start your ceiling painting project and unlock the beauty of this often-overlooked area.

Finishing A Basement With Low Ceilings

Basements often serve as untapped potential in our homes, offering valuable space that can be transformed into functional living areas. However, if you have a basement with low ceilings, it presents a unique set of challenges and opportunities. In this article, we will explore how to effectively finishing a basement with low ceilings, making the most of this area while ensuring it remains comfortable and visually appealing.

Finishing A Basement With Low Ceilings

Understanding the Challenges of Low Ceilings

Low ceilings in a basement can be limiting, but with careful planning and creative design, you can make the space both attractive and functional. Here are some common challenges associated with low ceilings:

  1. Headroom: Low ceilings can restrict headroom, making the space feel cramped and potentially uncomfortable for taller individuals.
  2. Natural Light: Limited ceiling height can affect the placement and size of windows, which impacts the amount of natural light that enters the space.
  3. Ventilation: Adequate ventilation is essential for a basement, and low ceilings may complicate the installation of ventilation systems.
  4. Design Aesthetics: Traditional design elements such as chandeliers or ceiling fans may not be practical or visually appealing in a low-ceilinged space.

Planning Your Basement Finishing Project

  1. Measure Ceiling Height: Start by measuring the exact ceiling height throughout the basement. This will help you understand the scope of the low-ceiling issue and make informed design decisions.
  2. Light Colors: Use light colors for walls and ceilings. Light hues create an illusion of space and brightness, making the room feel less confining.
  3. Recessed Lighting: Recessed lighting fixtures are an excellent choice for low-ceiling basements. They provide ample light without taking up headroom.
  4. Flooring Selection: Opt for low-profile flooring materials like laminate, engineered wood, or vinyl. These options help maximize ceiling height and are easy to maintain.

Creating Illusions of Height

  1. Vertical Lines: Incorporate vertical design elements like tall bookshelves or vertical stripes on the walls. These draw the eye upward and create an illusion of greater height.
  2. Mirrors: Mirrors can make a space feel more expansive. Strategically place mirrors to reflect light and give the impression of a higher ceiling.
  3. Minimalistic Furniture: Choose furniture with sleek lines and low profiles. Bulky or oversized furniture can make a low-ceiling room feel even smaller.

Functional Design for Low Ceilings

  1. Multi-Purpose Furniture: Consider furniture that serves multiple functions, such as a sofa bed or a coffee table with storage. This saves space and makes the most of the room’s functionality.
  2. Built-Ins: Built-in shelves, cabinets, and seating can be tailored to fit the space precisely, maximizing storage while maintaining a clean and uncluttered appearance.
  3. Open Concept Layout: An open floor plan can make the space feel less confined. Minimize the use of interior walls and partitions to create a more open and airy feel.

Ceiling Finishing Options

  1. Drop Ceilings: Drop ceilings, also known as suspended ceilings, can be installed to hide structural elements while providing easy access to utilities. They can also improve acoustics.
  2. Painted Exposed Ceilings: Sometimes, you can paint exposed ductwork and pipes in the same color as the ceiling to create an industrial or modern look.
  3. Ceiling Tiles: Decorative ceiling tiles are an option for adding texture and style to your low-ceiling space. They come in various patterns and materials.

Maintaining Adequate Ventilation

Proper ventilation is essential for basements. If low ceilings restrict traditional ventilation options, consider installing a ductless mini-split HVAC system or using a combination of small windows and exhaust fans to ensure fresh air circulation.

Read too: How To Dispose Of Ceiling Fans

Conclusion

Finishing a basement with low ceilings may present challenges, but it also offers a unique opportunity to create a cozy and inviting space. With the right design choices, lighting, and functional layout, your low-ceiling basement can become a valuable extension of your home, adding comfort and style to your living environment. By carefully planning your project and considering the specific challenges posed by low ceilings, you can make the most of this valuable space.

Troubleshooting and Repairing Garage Ceiling Drywall Cracking at Seams

When you think about home improvement, your garage might not be the first area that comes to mind. However, a well-maintained garage can significantly enhance the overall appeal and functionality of your home. One common issue that many homeowners face is garage ceiling drywall cracking at seams. Not only is it unsightly, but it can also be a sign of underlying problems. In this article, we’ll explore the causes, potential risks, and steps to repair and prevent garage ceiling drywall cracking.

Garage Ceiling Drywall Cracking At Seams

Understanding Garage Ceiling Drywall Cracking

Drywall cracking at seams in your garage’s ceiling can be caused by various factors, and it’s essential to understand what’s behind this issue to address it effectively.

Causes of Garage Ceiling Drywall Cracking

Several factors can contribute to drywall cracking at the seams of your garage ceiling. These include:

  1. Temperature Fluctuations: The garage is exposed to a wide range of temperatures throughout the year. Fluctuations in temperature can cause the materials to expand and contract, leading to stress on the drywall seams.
  2. Poor Installation: If the drywall was not installed correctly, with proper fastening and seam taping, it can lead to cracks over time.
  3. Moisture and Humidity: Garages often experience higher humidity levels due to their proximity to the outdoors. Moisture can weaken the drywall and lead to cracking.
  4. Structural Issues: Sometimes, cracks in the garage ceiling drywall are symptoms of underlying structural problems. These could include foundation settling, roof issues, or even earthquakes in areas prone to seismic activity.

The Risks Associated with Cracking Drywall in Your Garage

While a few cracks in your garage’s drywall may seem like a minor aesthetic issue, they can lead to more significant problems if left unattended. These risks include:

  1. Further Structural Damage: Cracking drywall can be an early warning sign of deeper structural problems, like roof leaks or foundation issues. Ignoring these cracks may lead to costly repairs down the road.
  2. Mold and Mildew: The presence of moisture in your garage can create an environment conducive to mold and mildew growth. This not only affects the appearance of your garage but can also pose health risks to you and your family.
  3. Reduced Energy Efficiency: Gaps in your garage ceiling can allow heat or cold air to escape, making it harder to maintain a comfortable temperature in your home. This, in turn, can increase your energy bills.

Repairing Garage Ceiling Drywall Cracking

Now that you understand the causes and risks associated with garage ceiling drywall cracking, it’s time to address the issue and prevent it from getting worse.

Steps to Repair Cracked Drywall in Your Garage

  1. Assess the Damage: Begin by examining the extent of the damage. Are the cracks minor, or do they span a significant portion of the ceiling? Understanding the severity will help you determine whether you can handle the repair yourself or if you need professional assistance.
  2. Gather Materials: For minor cracks, you’ll need drywall joint compound, a putty knife, sandpaper, and paint. For larger cracks or more extensive damage, you may need additional materials and possibly a drywall patch.
  3. Preparation: Clean the cracked area, removing any loose debris. If there is peeling paint or old joint compound, scrape it away. Sand the area to create a smooth surface for the new joint compound to adhere.
  4. Apply Joint Compound: Use a putty knife to apply a thin layer of joint compound over the crack. Feather the edges to blend it with the surrounding surface. Allow it to dry according to the manufacturer’s instructions, usually 24 hours.
  5. Sand and Repeat: After the first layer of joint compound has dried, sand it smooth, and apply a second layer. Repeat this process until the crack is no longer visible, feathering the edges each time.
  6. Prime and Paint: Once the joint compound is dry and the repaired area is smooth, prime and paint the ceiling to match the existing finish. This will not only make the repair visually seamless but also protect the drywall from future moisture damage.

Preventing Future Cracking

Preventing garage ceiling drywall cracking at seams is essential to avoid recurring issues. Here are some preventive measures:

  1. Control Humidity: Install a dehumidifier in your garage to maintain consistent humidity levels and reduce the chances of moisture-related damage.
  2. Proper Installation: If you’re building a new garage or renovating an existing one, ensure that the drywall is installed correctly by a professional to minimize the risk of cracking.
  3. Regular Inspections: Periodically inspect your garage’s ceiling for signs of cracking or damage. Catching issues early can prevent them from escalating.

Conclusion:

Garage ceiling drywall cracking at seams may start as a minor cosmetic concern but can lead to more significant problems if not addressed promptly. By understanding the causes, assessing the risks, and following the steps to repair and prevent future cracking, you can maintain a functional and aesthetically pleasing garage. Don’t let these cracks go unnoticed; take action to preserve the integrity of your home.

A Clear View to Luxury: How Expensive Are Floor To Ceiling Windows?

How Expensive Are Floor To Ceiling Windows? When it comes to architectural aesthetics and maximizing natural light, floor-to-ceiling windows are an attractive choice for homeowners and designers alike. But with their undeniable allure, there’s a question that often comes to mind: just how expensive are floor-to-ceiling windows? In this article, we’ll explore the factors that impact the cost of these stunning window designs and help you understand what to expect when considering them for your home.

How Expensive Are Floor To Ceiling Windows

Understanding Floor-to-Ceiling Windows

Floor-to-ceiling windows, as the name suggests, are expansive windows that stretch from the floor to the ceiling of a room. These windows offer several benefits:

  1. Abundant Natural Light: The primary advantage is the abundant natural light they bring into a space. This not only enhances the overall ambiance but can also reduce energy costs by minimizing the need for artificial lighting during the day.
  2. Stunning Views: Floor-to-ceiling windows often provide stunning panoramic views, making them a popular choice in homes with scenic surroundings.
  3. Architectural Statement: They serve as an architectural statement, adding a modern, spacious, and luxurious feel to any room.

Now, let’s delve into the factors that impact the cost of floor-to-ceiling windows.

Factors Affecting the Cost

The cost of floor-to-ceiling windows can vary widely based on several key factors:

  1. Size: The size of the windows is one of the most significant factors influencing the cost. Larger windows require more materials and labor, which drives up the price.
  2. Materials: The choice of materials for the frames and glass affects the cost. High-quality, energy-efficient glass and durable frame materials will come at a premium.
  3. Installation: The complexity of the installation can affect the cost. If significant structural modifications are necessary, such as removing walls or reinforcing the structure, the installation cost will increase.
  4. Location: The location of your home can also impact the cost. Homes in urban areas with high living costs may see higher installation prices.
  5. Energy Efficiency: If you opt for energy-efficient glass that helps regulate indoor temperature, you may incur additional expenses. However, this can lead to long-term energy savings.

Average Cost Ranges

On average, the cost of floor-to-ceiling windows can range from $700 to $1,600 per linear foot. This cost includes both the materials and labor. For a standard-sized room with an 8-foot ceiling height, you can expect to pay between $5,600 and $12,800 for floor-to-ceiling windows.

It’s important to note that this is a general range, and the final cost may differ significantly based on the factors mentioned earlier. To get an accurate estimate, it’s advisable to consult with window professionals or contractors who can assess your specific requirements.

Read too: How To Fix Water Bubble In Ceiling

Additional Considerations

When considering floor-to-ceiling windows, keep these additional considerations in mind:

  1. Maintenance Costs: High-quality materials often require less maintenance, but it’s important to budget for occasional cleaning and upkeep.
  2. Window Coverings: You may need window coverings for privacy, light control, and energy efficiency. Consider these costs when budgeting.
  3. Local Regulations: Check local building codes and regulations, as they may impact the design and cost of your windows.

Conclusion:

Floor-to-ceiling windows bring luxury, style, and natural light to your home, but they come at a cost. By understanding the factors that influence the price and carefully budgeting for the installation, you can make an informed decision about incorporating these stunning windows into your living space. While they may be an investment, the aesthetic and functional benefits they offer can be well worth the expense, adding value and sophistication to your home.

How Much Does It Cost To Remove Asbestos Popcorn Ceiling?

Popcorn ceilings, once a popular choice in home design, have lost their appeal due to their dated appearance and potential health risks. If you have an older home with a popcorn ceiling that might contain asbestos, you might be wondering, “How much does it cost to remove asbestos popcorn ceiling?” In this article, we’ll explore the factors that influence the cost and provide you with insights into this essential home improvement project.

how much does it cost to remove asbestos popcorn ceiling

The Dangers of Asbestos in Popcorn Ceilings

Asbestos was commonly used in popcorn ceiling texture for its fire-resistant properties and soundproofing capabilities. However, asbestos is a known carcinogen, and inhaling asbestos fibers can lead to serious health issues, including lung cancer and mesothelioma. As a result, many homeowners are opting to remove popcorn ceilings that may contain asbestos, especially when renovations or repairs are planned.

Factors Affecting Asbestos Popcorn Ceiling Removal Costs

The cost of removing an asbestos popcorn ceiling can vary significantly depending on various factors. Here’s a breakdown of these cost considerations:

  1. Ceiling Size: The size of the ceiling, measured in square footage, directly affects the amount of material and labor required. Larger ceilings will naturally cost more to remove.
  2. Containment: Proper containment is essential when removing asbestos to prevent the spread of asbestos fibers. The level of containment, including sealing off the area and using specialized equipment, can affect the cost.
  3. Abatement Method: There are two primary methods for asbestos popcorn ceiling removal: wet removal and dry removal. Wet removal involves misting the ceiling to prevent asbestos fibers from becoming airborne, while dry removal can be faster but riskier due to the potential for fiber release.
  4. Testing and Inspection: Before removal, it’s necessary to test and confirm the presence of asbestos. The time and cost of testing and inspection can add to the overall expense.
  5. Repairs and Refinishing: After removal, the ceiling may require repairs and refinishing, further extending the project’s cost.

Estimating Asbestos Popcorn Ceiling Removal Costs

On average, the cost to remove an asbestos popcorn ceiling can range from $3 to $7 per square foot, with the majority of the expenses attributed to material and labor. Here’s a general breakdown of estimated costs:

  • Material: This includes the cost of asbestos removal supplies, such as containment materials and disposal bags, and can range from $1 to $2 per square foot.
  • Labor: Professional labor costs can range from $2 to $5 per square foot, depending on your location and the complexity of the project. Labor includes the removal, proper disposal, and cleanup.
  • Equipment and Supplies: Budget an additional $200 to $500 for necessary tools and supplies, including safety gear and asbestos testing.

For a smaller room with a standard-sized ceiling, the cost may be closer to the lower end of the range. Larger rooms or those with extensive repairs or refinishing needs may fall toward the higher end.

Conclusion: A Wise Investment in Health and Home Value

Removing an asbestos popcorn ceiling is a critical project that not only ensures your family’s safety but also enhances the overall aesthetics and value of your home. While the cost can vary, it’s essential to prioritize safety and compliance with asbestos regulations during the removal process. Hiring professionals experienced in asbestos abatement is strongly recommended to ensure the safe and efficient removal of your popcorn ceiling, protecting your family’s health and adding value to your home.

How Much Does It Cost To Paint A Kitchen Ceiling?

Your kitchen is the heart of your home, and a fresh coat of paint on the ceiling can breathe new life into this essential space. But how much does it cost to paint a kitchen ceiling? In this article, we’ll explore the various factors that influence the cost and provide you with an estimate for this common home improvement project.

how much does it cost to paint a kitchen ceiling

Why Paint Your Kitchen Ceiling

Before we delve into the cost considerations, let’s understand why painting your kitchen ceiling is a worthwhile investment:

  1. Enhanced Aesthetics: A freshly painted ceiling can make your kitchen look brighter and more inviting. It’s an excellent way to update the overall appearance of your kitchen.
  2. Improved Hygiene: Kitchens can accumulate grease and grime over time. Painting the ceiling helps maintain a clean and hygienic environment.
  3. Prevent Stains: Kitchens are prone to stains and water damage, especially in areas near sinks and stovetops. A new coat of paint can hide these imperfections.
  4. Value Addition: A well-maintained and aesthetically pleasing kitchen can add value to your home, making it more appealing to potential buyers.

Factors Affecting Kitchen Ceiling Painting Costs

Several factors can influence the cost of painting a kitchen ceiling. Here’s a breakdown of these cost considerations:

  1. Ceiling Size: The size of your kitchen ceiling, measured in square footage, directly affects the amount of paint and labor required. Larger ceilings naturally cost more to paint.
  2. Ceiling Condition: Ceilings in poor condition may require more prep work, including patching cracks, addressing water damage, or removing old paint. This can increase the overall cost.
  3. Paint Type: The type of paint you choose, such as standard latex paint or specialty kitchen paint with moisture and stain resistance, affects costs. Specialized paints may be more expensive.
  4. Labor Costs: Labor costs depend on your location and the complexity of the project. Hiring a professional painter can be more costly but ensures a high-quality finish.

Estimating Kitchen Ceiling Painting Costs

On average, the cost to paint a kitchen ceiling can range from $100 to $300, with most costs attributed to paint and labor. Here’s a general breakdown of estimated costs:

  • Material: A gallon of quality kitchen paint typically costs $30 to $50 and covers approximately 350 square feet.
  • Labor: Professional labor costs can range from $50 to $150 for a painter’s service per hour, depending on your location and the complexity of the project.
  • Equipment and Supplies: Budget an additional $20 to $50 for brushes, rollers, drop cloths, and other necessary tools.

For a smaller kitchen with a standard-sized ceiling, the cost may be closer to the lower end of the range. Larger kitchens or those with more extensive repairs may fall toward the higher end.

Conclusion: A Fresh and Inviting Kitchen Space

Painting your kitchen ceiling is an effective and budget-friendly way to enhance your kitchen’s appearance and maintain a clean, inviting space. By considering the size, condition, and paint type for your ceiling, you can better estimate the project’s expenses. Whether you decide to hire a professional or take on the task yourself, a freshly painted kitchen ceiling provides a fresh and appealing environment for your cooking and dining activities.

How Much Does It Cost To Paint A Basement Ceiling?

The basement is often an underutilized space in many homes. However, with some thoughtful renovations, it can become a valuable addition to your living area. One way to transform the look and feel of your basement is by painting the ceiling. But, how much does it cost to paint a basement ceiling? In this article, we’ll provide you with insights into the factors that influence the cost and help you estimate the expenses for this home improvement project.

how much does it cost to paint a basement ceiling

The Importance of Painting a Basement Ceiling

Before we dive into the cost considerations, it’s essential to understand the significance of painting a basement ceiling. Basements are notorious for having low ceilings and exposed pipes, ducts, and other utilities. Painting the ceiling not only enhances the aesthetics but also offers practical benefits:

  • Brightening the Space: A fresh coat of paint can make your basement look brighter and more inviting. Light colors can help reflect the limited natural light in the space.
  • Hiding Imperfections: Painting can cover up unsightly marks, stains, and imperfections on the ceiling, creating a smoother and more finished appearance.
  • Protecting Surfaces: Painting can help protect ceiling materials from moisture, reducing the risk of mold or mildew growth in damp basement environments.
  • Adding Value: A well-painted basement ceiling can add value to your home, making it more appealing to potential buyers.

Factors Affecting Basement Ceiling Painting Costs

Several factors can influence the cost of painting a basement ceiling. Here’s a breakdown of these cost considerations:

  1. Ceiling Size: The size of your basement ceiling, measured in square footage, directly affects the amount of paint and labor required. Larger ceilings will naturally cost more to paint.
  2. Ceiling Height: The height of your basement ceiling plays a role in the cost. Higher ceilings may require additional equipment, such as ladders or scaffolding, which can add to labor costs.
  3. Ceiling Condition: If the ceiling requires repairs or significant preparation work, such as removing old paint or addressing water damage, this will increase the overall cost.
  4. Paint Type: The type of paint you choose, such as standard latex paint or a specialty basement paint, can impact costs. Some basement paints are designed to resist moisture and mold, but they may be more expensive.
  5. Labor Costs: Labor costs vary depending on your location and the complexity of the project. Hiring a professional painter can be more costly but ensures a high-quality finish.

Estimating Basement Ceiling Painting Costs

On average, the cost to paint a basement ceiling can range from $300 to $600, with most costs attributed to paint and labor. Here’s a general breakdown of estimated costs:

  • Paint: $30 to $50 per gallon for a quality paint suitable for basement ceilings.
  • Primer: $20 to $30 per gallon if needed for preparation.
  • Labor: $200 to $400 or more for a professional painter’s service, depending on the scope of work.
  • Equipment and Supplies: $20 to $50 for brushes, rollers, drop cloths, and other painting supplies.

For a smaller basement with a standard ceiling, the cost may be closer to the lower end of the range. Larger basements, those requiring extensive repairs, or specialty paints may fall toward the higher end.

Conclusion: Enhancing Your Basement Space

Painting your basement ceiling is a cost-effective and transformative way to enhance your basement space. By considering the size, height, condition, and paint type for your ceiling, you can better estimate the project’s expenses. Whether you decide to hire a professional or take on the task yourself, a freshly painted basement ceiling can make a significant difference in the overall appearance and functionality of your basement, turning it into a more inviting and valuable part of your home.

How Much Does It Cost To Paint A Bathroom Ceiling?

When it comes to bathroom renovations, painting is a cost-effective and transformative way to freshen up the space. Painting the bathroom ceiling, in particular, can breathe new life into the room. However, you may wonder how much it costs to paint a bathroom ceiling. In this article, we’ll break down the factors that influence the cost and provide you with an estimate for this common home improvement project.

how much does it cost to paint a bathroom ceiling

Understanding the Bathroom Ceiling Painting Process

Before we delve into the cost considerations, let’s briefly outline the steps involved in painting a bathroom ceiling. Painting a ceiling, especially in a bathroom, requires careful preparation and attention to detail:

  1. Preparation: Clear the bathroom of any obstacles, including shower curtains, fixtures, and personal items. Cover the floor and any remaining fixtures with drop cloths or plastic sheets to protect them from paint splatter.
  2. Cleaning: Ensure the ceiling is clean and free from dust, dirt, and any mold or mildew. If necessary, clean the surface and allow it to dry completely.
  3. Priming: Apply a coat of primer to the ceiling. Primer helps the paint adhere better and provides a uniform surface for the paint to cover.
  4. Painting: Once the primer is dry, apply the paint. Using a roller or paintbrush, paint the ceiling with your chosen paint color.
  5. Drying: Allow the paint to dry completely before removing any protective coverings and reassembling the bathroom.

Factors Affecting Bathroom Ceiling Painting Costs

Several factors can influence the cost of painting a bathroom ceiling. Let’s explore these considerations:

  1. Ceiling Size: The size of your bathroom ceiling is a primary cost factor. Larger ceilings require more paint and time, which increases the cost.
  2. Ceiling Height: Higher ceilings may require special equipment, such as ladders or scaffolding, which can add to the labor costs.
  3. Paint Type: The type of paint you choose, such as standard latex paint or a special bathroom paint with mold and mildew resistance, affects the cost.
  4. Repairs: If your bathroom ceiling has damage, such as cracks or water stains, repairs are necessary before painting. Repair costs are an additional expense.
  5. Labor Costs: Labor costs depend on the complexity of the project and the rates charged by professional painters. DIY painting may save on labor costs.

Estimating Bathroom Ceiling Painting Costs

On average, the cost to paint a bathroom ceiling can range from $100 to $300, with the majority of costs going towards paint and labor. Here’s a general breakdown of estimated costs:

  • Paint: $30 to $50 for a gallon of quality bathroom paint.
  • Primer: $20 to $30 for a gallon.
  • Labor: $50 to $150 for a professional painter per hour, depending on your location and the complexity of the job.
  • Repairs: Varies based on the extent of damage but can add $50 to $200 to the cost.
  • Equipment and Supplies: $20 to $50 for brushes, rollers, drop cloths, and other painting supplies.

For a small bathroom with a standard ceiling, the cost may be closer to the lower end of the range, while larger bathrooms or those with extensive repairs may fall toward the higher end.

Conclusion: Refreshing Your Bathroom on a Budget

Paint a bathroom ceiling is a simple and cost-effective way to give your bathroom a fresh look and feel. While the cost of this project can vary, estimating the expenses based on the size of your ceiling, required repairs, and the type of paint you choose will help you budget accordingly. Whether you decide to hire a professional or tackle the project yourself, a freshly painted bathroom ceiling can make a significant difference in the overall aesthetics of your bathroom space.