Canopy kit for ceiling light fixtures offer a practical and stylish solution for upgrading your home lighting. In this comprehensive guide, we’ll delve into the world of canopy kits, exploring their installation process, design versatility, and the numerous benefits they bring to your interior space.
Elevating Your Lighting: Canopy Kit For Ceiling Light Fixtures
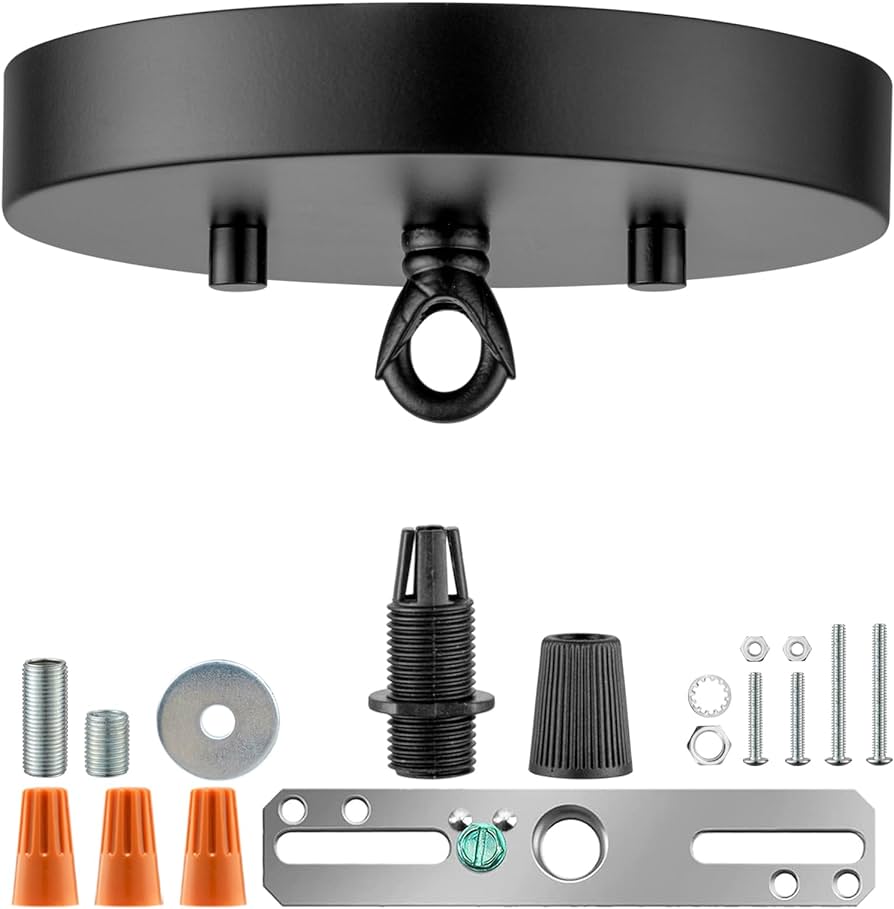
A canopy kit is an accessory used to cover and conceal the electrical junction box that connects ceiling light fixtures to the wiring in your home. These kits come in various styles and finishes, allowing you to customize the look of your ceiling lights while providing a clean and polished appearance.
Exploring Canopy Kit Options
When shopping for canopy kits for your ceiling light fixtures, consider the following factors:
- Material: Canopy kits are available in materials such as metal, plastic, and wood, each offering different aesthetics and durability.
- Finish: Choose from finishes like brushed nickel, oil-rubbed bronze, or matte black to complement your existing decor and light fixture.
- Size and Shape: Ensure that the canopy kit is compatible with the size and shape of your ceiling light fixture and electrical junction box for a seamless installation.
Read too: Discovering the Charm of Nautical Outdoor Ceiling Fans for Your Coastal Retreat: Sail into Style
Installation Process
Installing a canopy kit for your ceiling light fixture is a straightforward process that typically involves the following steps:
- Turn Off Power: Before starting the installation, turn off the power to the light fixture at the circuit breaker to prevent electrical accidents.
- Remove Existing Canopy: If your light fixture already has a canopy, carefully remove it using a screwdriver or other appropriate tools.
- Attach New Canopy: Place the new canopy over the electrical junction box, aligning the screw holes with the mounting screws on the box.
- Secure in Place: Use screws or bolts to secure the canopy to the junction box, ensuring that it is firmly attached and level.
- Wire Connections: Make the necessary wire connections between the light fixture and the electrical wiring in the junction box, following the manufacturer’s instructions.
- Finishing Touches: Once the wiring is complete, attach the light fixture to the canopy according to the fixture’s instructions, and test the light to ensure it is functioning properly.
Benefits of Canopy Kit For Ceiling Light Fixtures
Canopy kits offer several benefits for ceiling light fixtures, including:
- Concealed Wiring: Canopy kits hide unsightly wiring and electrical components, providing a clean and professional-looking installation.
- Enhanced Safety: By covering the electrical junction box, canopy kits reduce the risk of accidental contact with live wires, improving safety in your home.
- Design Flexibility: With a variety of styles and finishes available, canopy kits allow you to customize the look of your ceiling lights to suit your personal taste and decor style.
Conclusion
Canopy kits for ceiling light fixtures are a simple yet effective way to enhance the aesthetics and functionality of your home lighting. With their easy installation process, design versatility, and practical benefits, canopy kits offer a convenient solution for upgrading your ceiling lights with style.