Water Stain on Ceiling Below Bathroom: A Comprehensive Guide

Water stains on the ceiling below a bathroom can be alarming for homeowners. These unsightly marks can indicate underlying problems that, if left unaddressed, may lead to significant damage and costly repairs. Understanding the causes, identifying the signs, and knowing how to effectively deal with a water stain on the ceiling below your bathroom are crucial for maintaining the integrity of your home. In this guide, we will delve deep into the topic, covering everything from identification to prevention.

Water Stain On Ceiling Below Bathroom

What Causes Water Stains on the Ceiling Below the Bathroom?

Before addressing the issue, it is essential to understand what typically causes water stains. Here are some common culprits:

1. Leaky Plumbing Fixtures

One of the primary causes of water stains in ceilings below bathrooms is leaks from plumbing fixtures. Toilets, sinks, and bathtubs are often connected to complex plumbing systems that can develop leaks over time. Common signs of leaking plumbing include:

  • Dripping sounds
  • Increased water bills
  • Wet spots around fixtures

2. Shower and Tub Leaks

Showers and bathtubs can also be sources of water damage. Improper sealing or caulking around these fixtures can allow water to seep through and accumulate in the ceiling below. This type of leak may not be immediately noticeable but can lead to significant staining over time.

Read too: Shiplap Ceiling in Kitchen: A Timeless Trend for a Stylish and Cozy Space

3. Roof Leaks

In some cases, water stains can be attributed to issues with the roof rather than plumbing. If your bathroom is located near an exterior wall, rainwater may be seeping in through the roof or siding and causing stains on the ceiling below.

4. Condensation Issues

Bathrooms are typically humid environments due to showering and bathing. If your bathroom lacks adequate ventilation, condensation can form on pipes and ceilings, leading to water stains.

5. Faulty Ventilation

Without proper ventilation, warm, moist air can collect in the bathroom, leading to increased humidity and condensation. This moisture can accumulate on ceilings and eventually lead to water stains.

6. Faulty Appliances

Appliances such as washing machines and dishwashers that are located near the bathroom can also contribute to water stains. If a hose bursts or a connection leaks, the resulting water can seep into the ceiling below.

Signs of Water Damage to Look For

Identifying a water stain on the ceiling below the bathroom is the first step in addressing the issue. Here are some signs that you may have a water problem:

1. Discoloration

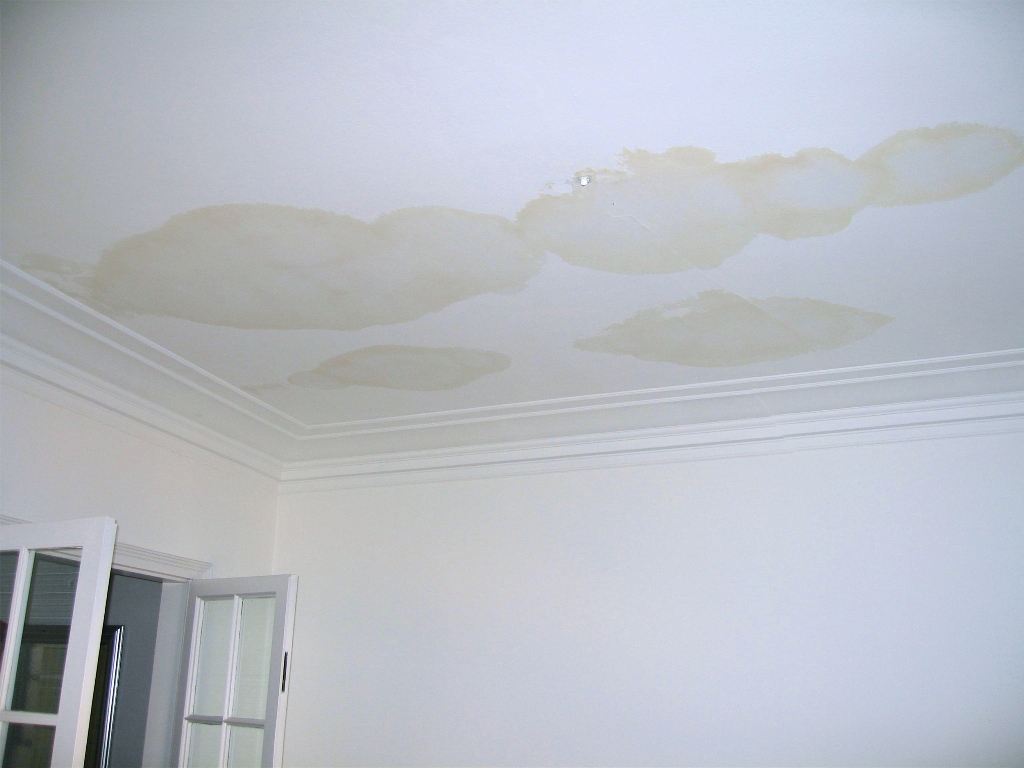
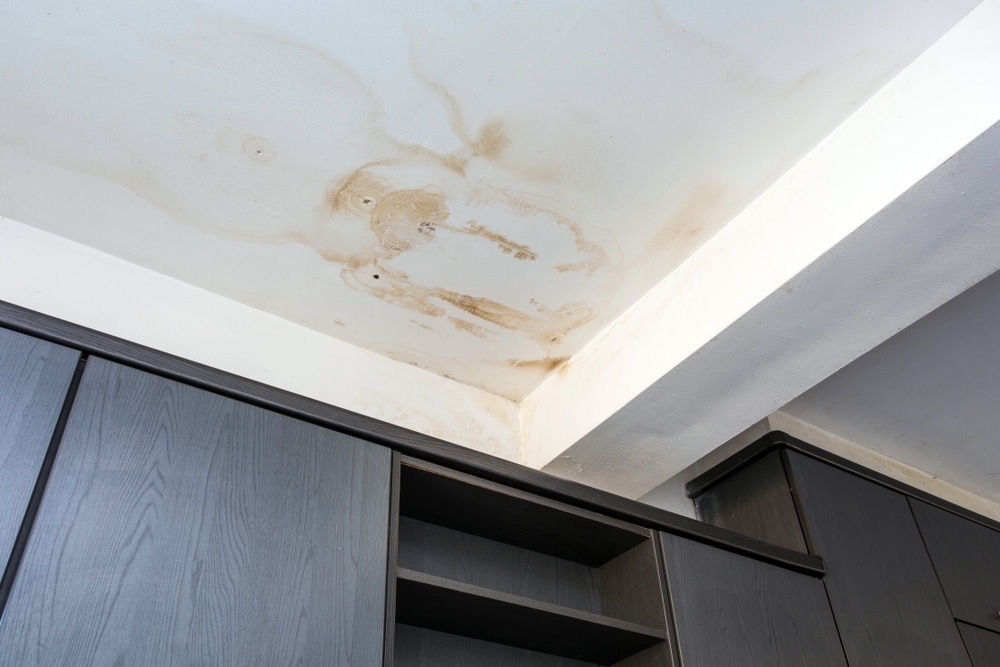
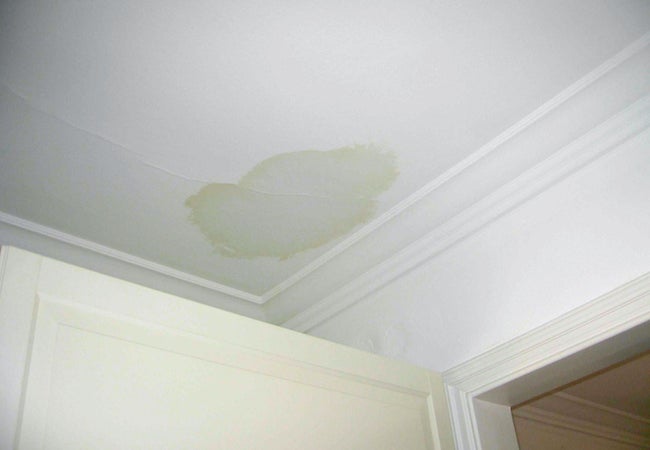
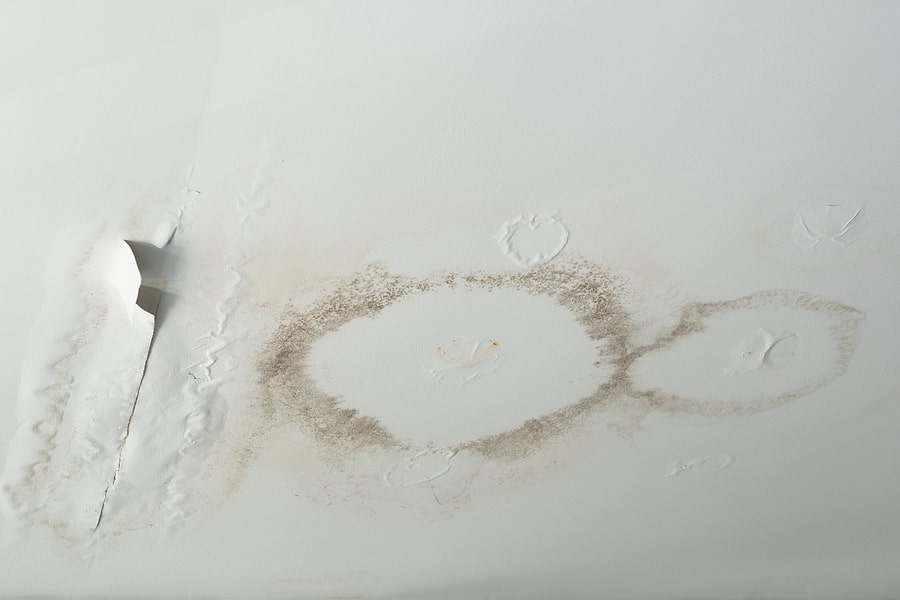
Water stains often appear as brown or yellow spots on the ceiling. These stains can grow larger over time, indicating an ongoing leak.

2. Peeling or Bubbling Paint

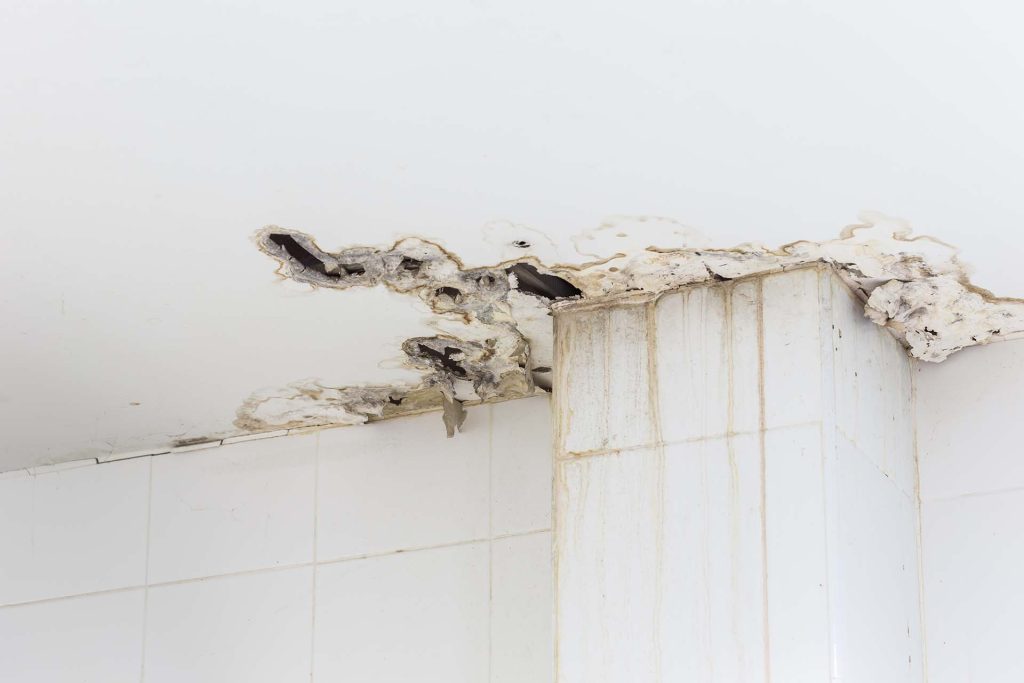
If the paint on your ceiling is peeling, bubbling, or flaking, it could be a sign of moisture accumulation. This is often seen in conjunction with visible water stains.

3. Mold Growth

Excess moisture can lead to mold growth, which is not only unsightly but also poses health risks. If you see black or green patches on your ceiling, it is essential to address the moisture problem immediately.

4. Soft Spots or Sagging

If you notice any soft spots or sagging areas on your ceiling, it may indicate that water has saturated the drywall or plaster. This situation is more serious and requires immediate attention.

Steps to Take When You Notice a Water Stain on the Ceiling Below Bathroom

1. Investigate the Source

The first step in addressing a water stain is to investigate its source. Look for visible signs of leaks from plumbing fixtures, including:

  • Inspecting under sinks and around toilets for moisture.
  • Checking shower and bathtub seals for any gaps.
  • Examining the roof and walls for leaks or damage.

2. Turn Off the Water Supply

If you suspect that the water stain is due to a plumbing issue, turn off the water supply to the affected area to prevent further damage. This will help mitigate the risk of additional water leaking into your ceiling.

3. Fix the Underlying Issue

Once you have identified the source of the leak, it’s crucial to repair it promptly. Depending on the cause, this may involve:

  • Replacing damaged pipes or fittings.
  • Resealing shower or tub fixtures.
  • Repairing any roofing issues.
  • Improving bathroom ventilation to reduce condensation.

4. Dry the Affected Area

After repairing the source of the leak, it is essential to dry the affected area thoroughly. Use fans, dehumidifiers, and good ventilation to help remove moisture. This step is crucial to prevent mold growth and further damage to your ceiling.

5. Repair the Ceiling

Once the area is dry, you can address the visible water stain. Here are some repair steps:

  • Clean the Area: Remove any mold or mildew with a mixture of water and bleach or a specialized cleaner.
  • Patch Holes or Cracks: If there are any cracks or holes in the ceiling, patch them with a suitable filler.
  • Repaint: After the patching compound has dried, repaint the affected area with a moisture-resistant ceiling paint to ensure a uniform appearance and prevent future stains.

6. Monitor for Recurrence

After addressing the issue, it’s essential to monitor the area for any signs of recurring water stains. Regularly check plumbing fixtures and inspect the ceiling for any new discoloration.

Preventing Water Stains on Ceiling Below Bathroom

Once you’ve addressed the existing water stains, consider implementing preventative measures to avoid future issues:

1. Regular Inspections

Conduct regular inspections of your plumbing fixtures and appliances to catch potential leaks early. Look for any signs of moisture around pipes and connections.

2. Maintain Proper Ventilation

Ensure your bathroom has proper ventilation to reduce humidity levels. This can be achieved through:

  • Installing exhaust fans that vent outside.
  • Opening windows to allow fresh air to circulate.
  • Using dehumidifiers in particularly humid climates.

3. Use Moisture-Resistant Materials

When remodeling or renovating, consider using moisture-resistant materials, such as:

  • Mold-resistant drywall for ceilings.
  • Waterproof paint for high-moisture areas.

4. Seal Gaps and Cracks

Regularly check for and seal any gaps or cracks in your bathroom’s plumbing and fixtures. This will help prevent moisture from escaping into the ceiling.

5. Proper Appliance Maintenance

Ensure that appliances such as washing machines are properly maintained and that hoses are checked for leaks regularly.

Conclusion

Dealing with a water stain on the ceiling below the bathroom can be a daunting task, but with the right approach, you can effectively address and prevent these issues. By identifying the source of the leak, fixing it, and taking preventive measures, you can ensure that your home remains a safe and comfortable environment. Regular maintenance and inspections will go a long way in avoiding future water stains, protecting both your ceiling and your peace of mind.

If you find yourself overwhelmed or unable to locate the source of the leak, don’t hesitate to reach out to a professional plumber or contractor. Addressing these issues early will save you time and money in the long run, ensuring the longevity of your home.
Dealing with Ceiling Water Spot: Causes, Prevention, and Remediation Tips

Are unsightly ceiling water spots casting a shadow over your home’s aesthetics? Discover the ins and outs of addressing the elusive issue of “Ceiling Water Spot” in this comprehensive guide. From understanding the root causes to implementing preventive measures and effective remediation, we’ve got you covered.

Ceiling Water Spot

Unraveling the Mystery of Ceiling Water Spots

Ceiling water spots can emerge for various reasons, and identifying the root cause is the first step towards resolving the issue. Let’s delve into the common causes of these troublesome spots and explore effective ways to address them.

1. Leaky Roofs: A Major Culprit

One of the primary reasons for ceiling water spots is a leaky roof. When rainwater infiltrates through damaged or deteriorating roof materials, it can seep into the ceiling, leaving visible stains. Regular roof inspections and prompt repairs can prevent this source of water intrusion.

2. Plumbing Leaks: Hidden Culprits

Leaky pipes or plumbing fixtures located above the ceiling can contribute to water spots. The constant drip of water over time can weaken the ceiling material and create visible stains. Periodic plumbing inspections and swift repairs can mitigate this issue.

3. Condensation: A Stealthy Invader

Condensation can form when warm, humid air comes into contact with cooler surfaces, leading to water droplets. Inadequate insulation or ventilation in the ceiling can contribute to condensation-related water spots. Improving insulation and ventilation can help combat this problem.

Ceiling Water Spot: Identifying and Addressing the Issue

1. Locating the Water Source

Before attempting to fix a ceiling water spot, it’s crucial to pinpoint the source of the water. This may involve inspecting the roof, checking plumbing lines, and evaluating the possibility of condensation.

2. Repairing Roof Leaks

If the culprit is a leaky roof, repair or replace damaged roofing materials promptly. This may involve patching up small leaks, replacing damaged shingles, or even resealing the entire roof, depending on the severity of the issue.

3. Fixing Plumbing Issues

For water spots caused by plumbing leaks, enlist the help of a professional plumber to identify and fix the problematic pipes or fixtures. This may involve pipe repairs, replacing faulty connections, or addressing issues with plumbing appliances.

4. Addressing Condensation Problems

To combat condensation-related water spots, improve insulation and ventilation in the affected area. This may include adding insulation to the attic, installing proper ventilation fans, or using dehumidifiers to reduce moisture levels.

Preventing Future Ceiling Water Spots

1. Regular Maintenance Checks

Prevention is key when it comes to ceiling water spots. Conduct regular maintenance checks on your roof, plumbing systems, and ventilation to catch potential issues before they escalate.

2. Adequate Insulation and Ventilation

Ensure that your home is adequately insulated and ventilated to prevent condensation. Proper airflow can reduce the likelihood of moisture accumulation in ceilings and walls.

3. Timely Repairs

Address any signs of damage or wear promptly. Whether it’s a small roof leak or a minor plumbing issue, tackling problems early can prevent them from causing extensive damage.

Read too: Understanding and Addressing Termite Ceiling Damage: Unveiling the Hidden Threat

Conclusion

Ceiling water spots can be a source of frustration for homeowners, but with a proactive approach, they can be effectively managed and prevented. By understanding the common causes, taking swift action to address issues, and implementing preventive measures, you can keep your ceilings spot-free and maintain the integrity of your home.

In conclusion, the phrase “Ceiling Water Spot” may evoke concern, but armed with knowledge and a proactive mindset, homeowners can successfully navigate through the challenges associated with these unsightly stains. Regular maintenance, timely repairs, and a focus on prevention are the keys to keeping your ceilings pristine and free from water spots.

Exploring Different Types of Ceiling Damage and Their Solutions: Unveiling the Culprits

Discover the diverse world of ceiling issues in our guide on “Types of Ceiling Damage.” Explore the causes, signs, and effective solutions to keep your ceilings in top condition.

Types Of Ceiling Damage

Types of Ceiling Damage: An In-Depth Exploration

Introduction to Ceiling Damage

Embark on a comprehensive journey as we delve into the intricate world of “Types of Ceiling Damage.” Learn about the various factors that contribute to the deterioration of your ceilings.

Common Culprits Behind Ceiling Damage

  1. Water Damage: Explore how water intrusion can lead to ceiling discoloration, sagging, and the development of mold and mildew.
  2. Structural Issues: Understand how structural problems can manifest as cracks, uneven surfaces, and other visible signs of wear and tear.

Types of Ceiling Damage: Signs and Characteristics

Water Stains

  1. Causes: Uncover the causes of water stains on ceilings, ranging from leaky roofs to plumbing issues.
  2. Identification: Learn how to identify different types of water stains and their implications for ceiling health.

Cracks and Fractures

  1. Structural Implications: Explore how cracks in ceilings can indicate underlying structural issues and compromise the integrity of the entire structure.
  2. Types of Cracks: Understand the various types of cracks, including hairline cracks, settling cracks, and more.

Sagging Ceilings

  1. Causes: Delve into the causes of sagging ceilings, from water damage to inadequate support structures.
  2. Safety Concerns: Understand the safety implications of sagging ceilings and the urgency of addressing this issue.

Detecting and Assessing Ceiling Damage

Visual Inspection

  1. Identifying Water Stains: Learn how to visually identify water stains and trace their source to address water-related damage.
  2. Crack Analysis: Understand how to analyze the type, size, and location of cracks to determine the severity of structural issues.

Professional Assessment

  1. Consultation with Experts: Explore the benefits of consulting with professionals for a thorough assessment of ceiling damage.
  2. Use of Technology: Understand how technology, such as moisture meters and infrared imaging, aids in accurate damage assessment.

Read too: Condo Ceiling Leak Responsible and How to Address It: Unveiling the Culprit

Solutions for Different Types of Ceiling Damage

Water Damage Repair

  1. Leak Identification: Learn about the importance of identifying and repairing leaks promptly to prevent water damage.
  2. Ceiling Repainting: Explore the role of repainting in restoring the aesthetic appeal of ceilings affected by water stains.

Crack and Structural Repairs

  1. Crack Filling Techniques: Understand different crack filling techniques and materials to restore the smoothness of ceilings.
  2. Reinforcement Strategies: Explore structural reinforcement methods to address underlying issues and prevent further damage.

Sagging Ceiling Remediation

  1. Support Reinforcement: Learn about reinforcing support structures to correct sagging ceilings and ensure long-term stability.
  2. Ceiling Replacement: Understand when and how to replace sections of ceilings that are beyond repair.

Preventive Measures for Ceiling Health

Regular Maintenance

  1. Roof Inspections: Explore the importance of regular roof inspections to prevent water damage and maintain a watertight structure.
  2. Ceiling Checks: Learn how routine ceiling inspections can help detect and address issues before they escalate.

Moisture Control

  1. Proper Ventilation: Understand the role of proper ventilation in controlling humidity and preventing moisture-related ceiling damage.
  2. Use of Dehumidifiers: Explore how dehumidifiers can be effective tools in maintaining optimal indoor humidity levels.

Conclusion: Preserving the Integrity of Your Ceilings

Empower yourself with knowledge about the different “Types of Ceiling Damage” to proactively address issues and preserve the integrity of your home. By understanding the signs, causes, and solutions, you can ensure your ceilings remain not only visually appealing but structurally sound for years to come.

Types of Ceiling Cracks with Pictures: A Comprehensive Guide

Ceiling cracks can be a common occurrence in many homes and can result from various factors, including structural settling, temperature fluctuations, or moisture issues. Understanding the types of ceiling cracks is essential for effective repair and maintenance. In this article, we will explore the various types of ceiling cracks, complete with pictures to help you identify and address them.

Types Of Ceiling Cracks With Pictures

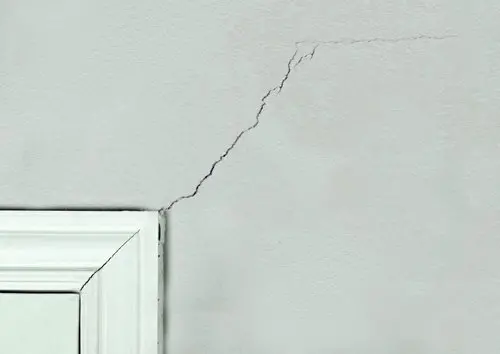
1. Hairline Cracks

Description: Hairline cracks are extremely thin cracks that may appear in a straight line or a spiderweb pattern. They are often barely visible and can result from minor settling or temperature changes.

2. Settlement Cracks

Description: Settlement cracks are common in both old and new homes. They occur as the building settles, and they often follow the natural lines of construction materials. These cracks can be more noticeable than hairline cracks.

3. Expansion and Contraction Cracks

Description: These cracks occur due to the natural expansion and contraction of building materials in response to temperature and humidity changes. They are often more pronounced during extreme weather conditions.

4. Stair-Step Cracks

Description: Stair-step cracks form a pattern resembling a staircase. They are typical in masonry or brick ceilings and can indicate structural movement or settling issues.

5. Sagging Ceiling Cracks

Description: When a ceiling sags, it can develop cracks along the area of the sag. These cracks are often a sign of a more significant structural issue and should be addressed promptly.

6. Water Stain Cracks

Description: Water stain cracks occur when water infiltrates the ceiling, leaving behind a discolored mark along with the crack. Identifying the source of the water infiltration is crucial to prevent further damage.

7. Popcorn Ceiling Cracks

Description: Popcorn ceiling cracks appear in textured or popcorn ceilings. These cracks can be challenging to repair, as they require matching the texture of the surrounding area.

8. Drywall Joint Cracks

Description: Drywall joint cracks often occur at the seams of drywall sheets. They can result from poor installation, house settling, or temperature fluctuations. Proper taping and patching are essential for repairs.

How to Address Ceiling Cracks

Addressing ceiling cracks depends on the type and severity of the crack. Here are some general steps to consider:

  1. Assessment: Begin by identifying the type of crack and its cause. This will help determine the appropriate repair method.
  2. Surface Repair: For minor cracks, you can use a joint compound or patching material to fill the crack. Sand and paint the repaired area to match the ceiling.
  3. Structural Assessment: For significant cracks, especially those related to sagging or structural issues, consult a professional for a thorough assessment and repair.
  4. Moisture Control: If water stains are present, address the source of the water infiltration, whether it’s a roof leak, plumbing issue, or condensation problem.
  5. Texture Matching: When dealing with textured ceilings like popcorn ceilings, matching the texture can be challenging. Consider consulting a professional for these repairs.

Read too: Can Clogged Gutters Cause Ceiling Leaks

Conclusion

Ceiling cracks come in various types, each with its own causes and repair considerations. Identifying the type of crack and understanding its root cause is essential for effective repair and maintenance. Whether it’s a minor hairline crack or a more significant structural issue, addressing ceiling cracks promptly can help maintain the integrity and aesthetics of your home.

What Causes Water Stains On Ceiling?

Water stains on the ceiling are not only unsightly but can also be a sign of underlying issues in your home. Whether you’re dealing with a faint discoloration or a more prominent stain, understanding the root causes is essential to address the problem effectively. In this article, we’ll explore the common reasons behind water stains on ceilings and how to deal with them.

What Causes Water Stains On Ceiling
508587208

Understanding Water Stains on the Ceiling

Water stains on your ceiling are typically characterized by brown or yellowish discolorations. These stains can vary in size and intensity, but they all share a common cause: the infiltration of water from above. Water stains are a clear indicator that water has made its way into your home, and it’s essential to determine the source and remedy the issue promptly.

Common Causes of Water Stains

  1. Roof Leaks:
    • Damaged Roof Shingles: Over time, roof shingles can deteriorate, crack, or be blown off by strong winds, leaving your roof vulnerable to leaks during rain or snowfall.
    • Clogged Gutters: When gutters are clogged with debris, rainwater can overflow, seep under the shingles, and ultimately find its way into your home.
    • Ice Dams: In colder regions, ice dams can form on the roof, preventing melting snow from draining properly. This trapped water can penetrate the roof and cause stains on the ceiling.
  2. Plumbing Leaks:
    • Leaky Pipes: Faulty or damaged plumbing pipes can lead to water leaks that travel through your walls and eventually stain the ceiling below.
    • Bathroom Fixtures: Leaks from toilets, sinks, bathtubs, or showers can often go unnoticed until water stains appear on the ceiling.
  3. Condensation Issues:
    • Poor Ventilation: In areas with high humidity, like bathrooms or kitchens, inadequate ventilation can lead to condensation buildup, which may create water stains over time.
  4. Appliance Leaks:
    • Water Heater Leaks: A faulty water heater can lead to leaks that affect the ceiling below.
    • Refrigerator Leaks: If your refrigerator has a water or ice dispenser, a malfunction or damaged water line can lead to ceiling stains.
  5. Exterior Water Infiltration:
    • Cracks or Gaps in Exterior Walls: Damage to the exterior walls or improper sealing around doors and windows can allow rainwater to enter your home.

How to Deal with Water Stains on Ceiling

Once you’ve identified the source of the water infiltration, it’s essential to take appropriate actions to address the issue:

  1. Repair the Source: The first step is to repair the root cause of the water infiltration. This may involve fixing a leaking roof, replacing damaged plumbing, or sealing exterior walls.
  2. Ceiling Stain Removal:
    • Ceiling Paint*: For minor stains, you can often address the issue by applying a stain-blocking primer and repainting the affected area.
    • Ceiling Panels: In more severe cases, it may be necessary to replace damaged ceiling panels or drywall.
  3. Preventive Measures:
    • Regular Inspections: Conduct routine inspections of your roof, plumbing, and appliances to identify and address issues early.
    • Gutter Maintenance: Keep your gutters clean and free of debris to ensure proper drainage.
    • Proper Ventilation: Improve ventilation in high-humidity areas by installing exhaust fans or opening windows to reduce condensation.
  4. Consult Professionals: In many cases, it’s advisable to consult with professionals to assess and repair the damage. Roofers, plumbers, and contractors can provide expertise and ensure that the problem is thoroughly resolved.

Read too: How Is Radiant Ceiling Heat Installed

Conclusion

Water stains on the ceiling are not just cosmetic issues; they can indicate significant problems within your home. Understanding the common causes of water stains and taking prompt action to address them is essential to prevent further damage and maintain the integrity of your living space. By identifying the source and seeking professional help when needed, you can enjoy a dry and stain-free home.

Unraveling the Mystery of Water Marks on the Ceiling with No Visible Leak

Water marks on your ceiling can be a concerning sight, often indicating a potential leak or water damage. However, what’s puzzling is when you notice these water marks, but there is no apparent source of water or leak in your ceiling. In this article, we will explore the common reasons behind this phenomenon and what you can do to address it.

Water Marks On Ceiling But No Leak

Understanding Water Marks on the Ceiling

Water marks, also known as water stains, are discolored patches on your ceiling that result from water infiltrating the surface. They can take on various forms, from faint discolorations to more pronounced stains. While they are usually associated with leaks from the roof, plumbing, or other sources, water marks can also appear even when there’s no visible water source.

Common Causes of Water Marks with No Visible Leak

Several factors can lead to water marks on your ceiling without a visible leak:

  1. Previous Leak: Sometimes, water marks are remnants of a past leak that has since been repaired. Even after the source of the leak is fixed, the stains may persist if the affected area is not adequately treated or repainted.
  2. Condensation: In areas with high humidity or temperature variations, condensation can form on the ceiling’s surface. This condensation can cause water marks over time, even though it’s not related to a structural leak.
  3. Roofing Issues: Problems with your roof, such as damaged shingles, worn flashing, or poor ventilation, can allow water to seep in and create water marks on the ceiling. These issues may not always result in visible leaks but can still cause staining.
  4. Plumbing Problems: Plumbing issues, such as slow, undetected pipe leaks within the walls or ceiling, can lead to water marks without any overt signs of a leak.
  5. External Factors: Water marks can also be caused by external factors like a leaking air conditioning unit, an overflowing bathtub, or even water entering through windows during heavy rain or wind-driven storms.

Read too: What Causes Toilet To Leak Through Ceiling

Troubleshooting and Solutions

Here are some steps you can take to troubleshoot and address water marks on your ceiling with no visible leak:

1. Investigate the History:

  • Determine if there has been any recent work done on your roof, plumbing, or other areas that could be related to the issue.

2. Monitor for Changes:

  • Keep an eye on the water marks to see if they expand, change color, or become more pronounced. This could help identify the source of the issue.

3. Check the Roof:

  • Inspect your roof for damaged shingles, flashing issues, or any other signs of damage that may allow water to infiltrate.

4. Plumbing Assessment:

  • Have a professional plumber check for any hidden pipe leaks within your home’s structure.

5. Ventilation and Insulation:

  • Ensure your attic or crawl space has proper ventilation and insulation to minimize condensation issues.

6. Ceiling Repair:

  • If the source of the water marks remains elusive, consider repainting the affected area with a stain-blocking primer and ceiling paint to cover the stains.

Conclusion

Water marks on the ceiling with no visible leak can be a perplexing issue. While they may not always indicate a serious problem, it’s essential to investigate and address them promptly to prevent any potential long-term damage. By considering the common causes mentioned above and following the troubleshooting steps, you can get closer to identifying and resolving the issue, restoring the aesthetics and integrity of your home. If you can’t identify the issue, consult a professional contractor or plumber for an accurate assessment.

Dealing with a Water Stain on the Ceiling But No Leak in Sight

Discovering a water stain on your ceiling can be a cause for concern. However, what’s perplexing is when you notice a water stain on the ceiling but no leak seems to be evident. In this article, we will explore the potential causes of such stains, the importance of addressing them, and how to tackle this puzzling issue.

Water Stain On Ceiling But No Leak

Understanding the Mysterious Water Stain

Water stains on the ceiling can be a distressing sight, prompting homeowners to fear the worst – a leaky roof or plumbing issue. However, when there’s no visible sign of water infiltration from the ceiling or above, it can be challenging to identify the source of the problem.

Potential Causes of Water Stains on the Ceiling

Several factors can lead to water stains on your ceiling, even when there’s no visible leak:

  1. Previous Leaks: Sometimes, a water stain may be a lingering effect of a past leak that has since been repaired. Stains can persist even after the source of the issue has been addressed.
  2. Condensation: Moisture in the air can condense on the ceiling’s surface, leading to water stains. This often occurs in areas with poor ventilation or during extreme temperature fluctuations.
  3. Roofing Issues: Roof problems, such as inadequate flashing or damaged shingles, can allow water to seep in, travel through the structure, and surface as a stain in an unexpected location.
  4. Plumbing Condensation: If there are water pipes running through the ceiling, condensation can form on the pipes’ surface, causing water stains on the ceiling below.
  5. Exterior Wall Leaks: Leaks in the exterior walls, such as from windows or siding, can allow water to enter and travel within the wall, ultimately appearing as stains on the ceiling.

Importance of Addressing Water Stains

Ignoring water stains on the ceiling is not advisable, even if there is no visible leak. Here’s why addressing them is crucial:

  1. Structural Damage: Water stains can indicate underlying structural damage, including rotting wood, deteriorating drywall, or compromised insulation.
  2. Mold and Mildew Growth: Moisture from the stain can encourage the growth of mold and mildew. These microorganisms can be harmful to your health and difficult to eradicate once they take hold.
  3. Aesthetic Concerns: Even if there’s no active leak, water stains can be unsightly and negatively impact the appearance of your home.

Read too: Why Is My Ceiling Fan Leaking Water

Dealing with Water Stains on the Ceiling

To address water stains on the ceiling with no apparent leak, follow these steps:

  1. Identify the Source: Begin by ruling out any possible sources of water infiltration, such as plumbing or roof issues. Consult with professionals if needed.
  2. Inspect Attic or Crawlspace: Check the attic or crawlspace above the affected area. Look for signs of past or ongoing leaks.
  3. Ventilation Improvement: Ensure that the room is adequately ventilated to minimize condensation. Use exhaust fans in areas prone to moisture, like bathrooms and kitchens.
  4. Address Exterior Issues: If the stain is near an exterior wall, inspect the area for potential leaks from windows, doors, or siding. Seal any gaps or leaks.
  5. Repainting or Repairing: Once you’ve identified and resolved the source of the issue, you can consider repainting or repairing the stained ceiling.

Conclusion:

Water stains on the ceiling, even when no leak is visible, require attention. They can indicate underlying problems that, if left unaddressed, may lead to structural damage and health concerns. By identifying the source of the stain and taking necessary steps to resolve it, you can maintain the integrity and appearance of your home.