Flooded Bathroom Coming Through the Ceiling: Tips and Solutions

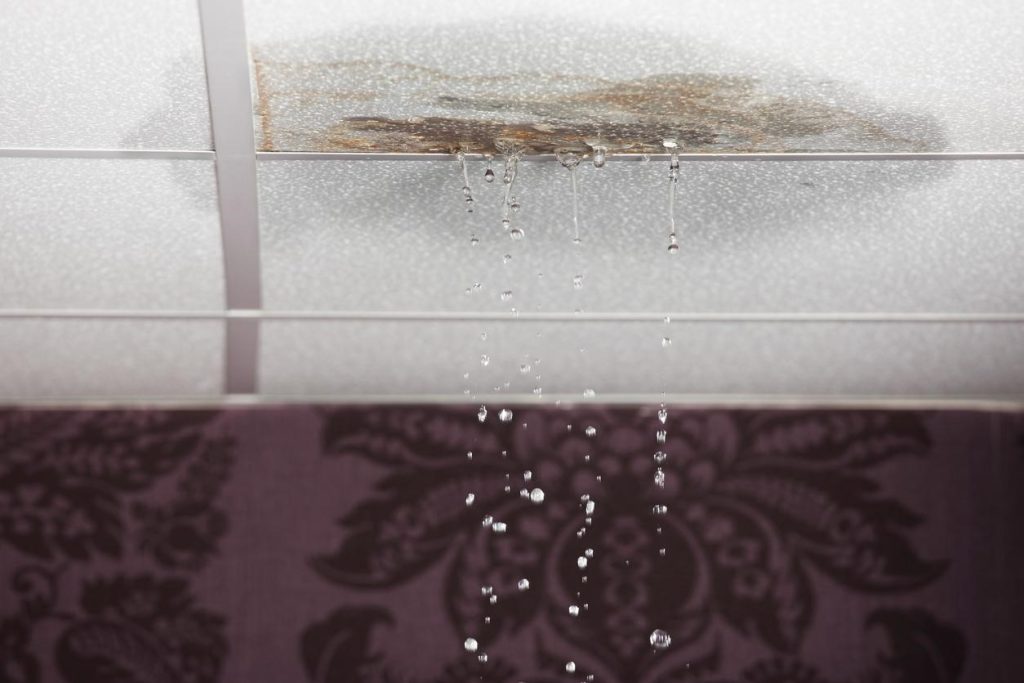
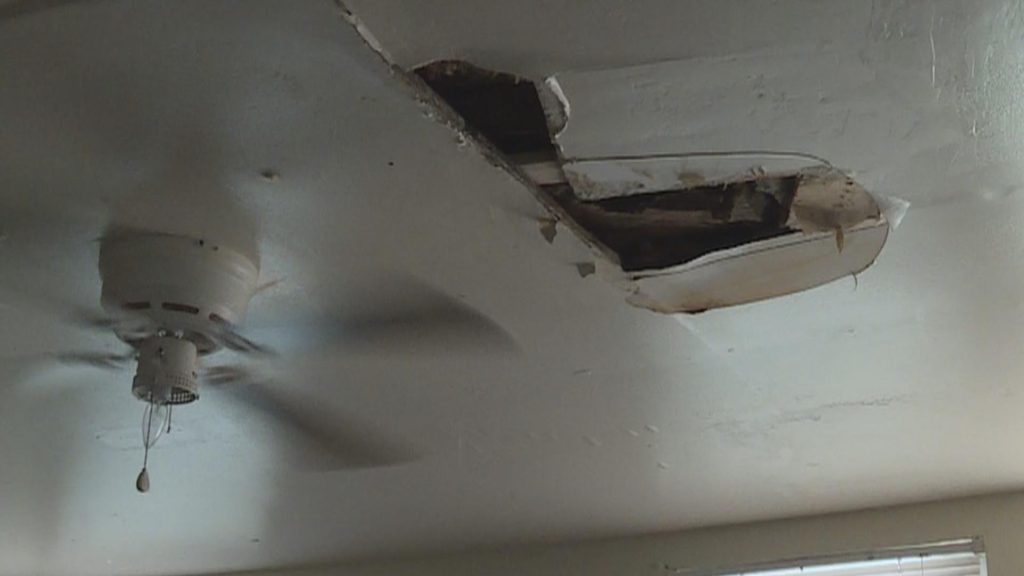
A flooded bathroom coming through the ceiling is a homeowner’s worst nightmare. Water leaking through the ceiling can lead to extensive damage, mold growth, and costly repairs. If you’ve experienced this unfortunate situation, it’s essential to act quickly and effectively to minimize the damage and find the root cause of the flooding. In this article, we’ll explore the common causes of a flooded bathroom leaking through the ceiling, how to address the immediate problem, and steps to prevent it from happening again.

Flooded Bathroom Coming Through Ceiling

Immediate Steps to Take When Water Comes Through the Ceiling

If you notice water seeping through your ceiling from the bathroom above, there are several immediate actions you should take to reduce damage and ensure safety.

1. Turn Off the Water Source

The first thing you need to do when facing a flooded bathroom coming through the ceiling is to turn off the water supply. Depending on the severity of the leak, you may need to shut off the water to the entire house, or simply turn off the supply to the affected fixture (sink, toilet, or shower). This will prevent further water from entering the space and worsening the flood.

Read too: Shiplap Ceiling in Kitchen: A Timeless Trend for a Stylish and Cozy Space

2. Move Furniture and Belongings

Quickly move any furniture, electronics, or valuable items from the area under the leaking ceiling. Water damage can destroy these items, and exposure to moisture can also lead to mold growth. Moving these belongings away will help save them from permanent damage.

3. Contain the Water

Use buckets, towels, and tarps to collect and absorb water that’s already leaking through the ceiling. This can help prevent the water from spreading and causing more widespread damage to your floors or lower-level rooms.

4. Turn Off the Electricity

If there is any chance that the water could reach electrical outlets, light fixtures, or wiring, it’s crucial to turn off the electricity to the affected area. Water and electricity don’t mix, and you don’t want to risk the possibility of electric shock or a short circuit.

5. Call a Plumber or Water Damage Professional

After you’ve contained the water and ensured the safety of your home, it’s time to call in professionals. A plumber can assess the cause of the flooding, and a water damage expert can help with the drying and repair process. Both services are essential to preventing long-term structural damage and mold growth.

Common Causes of a Flooded Bathroom Coming Through the Ceiling

There are several reasons why a flooded bathroom coming through the ceiling might occur. Identifying the root cause is critical for making the necessary repairs and preventing future incidents. Below are some of the most common causes of bathroom flooding that leads to ceiling damage.

1. Burst or Leaking Pipes

Leaky or burst pipes are among the most frequent causes of water damage in bathrooms. Pipes can crack, corrode, or freeze during cold weather, leading to water leaking out and potentially soaking through walls and ceilings. If you experience water seeping from the ceiling directly below the bathroom, a leaking pipe might be the culprit.

How to Address It:

  • A plumber can assess the condition of your bathroom pipes and determine whether they need to be repaired or replaced.
  • It’s important to inspect pipes regularly and repair any visible leaks to avoid a full-blown burst pipe.

2. Overflowing Toilets or Sinks

Overflowing fixtures, such as toilets or sinks, can cause water to spill over and seep through bathroom floors, eventually reaching the ceiling of the room below. This is often due to a clogged drain or malfunctioning fixture. In many cases, people fail to notice the overflow until it’s too late.

How to Address It:

  • Shut off the water supply immediately and unclog the drain if possible.
  • Make sure to use appropriate plungers or drain snakes to clear blockages, and never flush large items that could clog the toilet.

3. Faulty Shower Seals or Bathtub Leaks

Showers and bathtubs that aren’t properly sealed can allow water to leak out over time. The caulking around the base of the shower or tub may deteriorate, leading to gradual water leaks that soak through the floor and damage the ceiling below.

How to Address It:

  • Reseal the area around the shower or tub by applying waterproof caulking.
  • Inspect the seals regularly and replace them as soon as they show signs of wear and tear.

4. Clogged Drains

Clogged drains in showers, sinks, or bathtubs can lead to slow drainage, causing water to pool on the bathroom floor. This excess water can eventually make its way through floor tiles and into the ceiling below.

How to Address It:

  • Regularly clean drains to remove hair, soap scum, and other debris.
  • If a drain is completely clogged, use a drain cleaner or contact a plumber to clear the blockage.

5. Improperly Installed Plumbing Fixtures

Sometimes, the issue may stem from improper installation of plumbing fixtures, such as sinks, bathtubs, or toilets. If connections aren’t sealed correctly, leaks can develop over time and cause water to seep through the ceiling.

How to Address It:

  • Have a licensed plumber inspect the plumbing installations to ensure they are secure and properly sealed.
  • Fix any installation issues before they escalate into significant water damage.

How to Prevent Future Flooded Bathroom Issues

Once you’ve dealt with the immediate problem of a flooded bathroom coming through the ceiling, it’s essential to take proactive steps to prevent future issues. Regular maintenance and quick repairs are key to avoiding another ceiling leak disaster.

1. Regular Plumbing Inspections

Have your plumbing system inspected regularly, especially if you live in an older home. Catching small issues like corrosion or minor leaks early can prevent larger, more costly problems down the line.

2. Install Water Alarms

Consider installing water sensors or alarms in your bathroom, particularly near the bathtub, sink, and toilet. These devices can alert you to leaks or flooding early, giving you time to react before water causes significant damage.

3. Check Caulking and Seals

Inspect the caulking around your bathtub, shower, and sink frequently. Over time, caulking can deteriorate, leading to leaks. Reapply caulking as needed to maintain a tight seal.

4. Ensure Proper Ventilation

Bathrooms are high-moisture areas, so proper ventilation is essential. Ensure that your bathroom has a functional exhaust fan to prevent condensation buildup. Excessive moisture can weaken the floor and ceiling materials over time, leading to leaks.

5. Use Drain Screens

Prevent debris from clogging your drains by using drain screens or stoppers. Hair, soap scum, and other particles can easily clog drains, leading to overflows and leaks.

When to Call a Professional

In most cases, addressing a flooded bathroom coming through the ceiling will require professional assistance. If you’re dealing with extensive water damage or unsure of the cause of the flooding, it’s best to call a plumber or water damage restoration expert. They can provide a thorough inspection, make necessary repairs, and ensure that your home is safe from future leaks.

Water damage that is not addressed promptly can lead to more serious problems, including:

  • Structural damage to floors, walls, and ceilings
  • Mold and mildew growth, which can pose health risks
  • Electrical hazards if water reaches wiring or outlets

For these reasons, always err on the side of caution and consult with professionals if you’re unsure about the severity of the damage.

Conclusion

A flooded bathroom coming through the ceiling is a stressful and potentially costly situation for any homeowner. However, with prompt action, careful attention to the root cause, and preventive maintenance, you can minimize the damage and reduce the chances of future flooding.

By addressing plumbing issues early, regularly inspecting your bathroom fixtures, and being vigilant about water leaks, you can keep your home safe and avoid the headaches associated with water damage. Whether it’s a small leak or a major flood, knowing what to do can make all the difference in protecting your home from further damage.
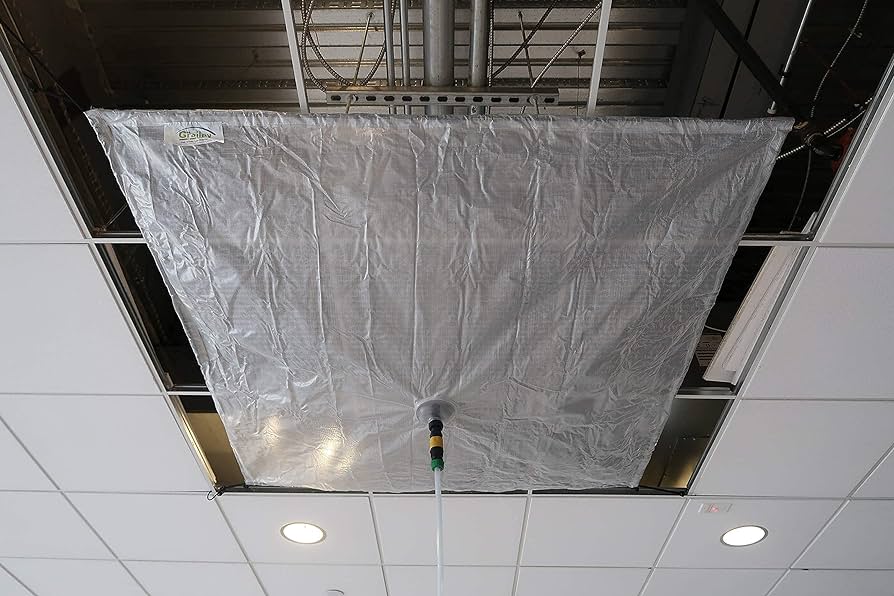
How to Effectively Use a Ceiling Tile Leak Diverter to Prevent Water Damage

Discover the importance of a ceiling tile leak diverter and learn how to effectively use this essential tool to protect your property from water damage caused by leaks and drips.

Ceiling Tile Leak Diverter

Introduction

Water leaks can cause significant damage to ceilings, walls, and other structures in your home or workplace. When it comes to addressing leaks from overhead sources, such as roof leaks or plumbing issues, a ceiling tile leak diverter is an invaluable tool for containing and redirecting water away from sensitive areas. In this comprehensive guide, we’ll explore the role of a ceiling tile leak diverter, how it works, and best practices for its use to prevent water damage and maintain the integrity of your property.

Understanding the Ceiling Tile Leak Diverter

A ceiling tile leak diverter serves as a specialized device designed to capture and redirect water from leaking ceilings to a designated drainage point. It consists of a durable tarp or plastic sheeting suspended from a frame, with a flexible hose or tubing attached to channel water away from the affected area. These diverters are available in various sizes and configurations to accommodate different ceiling layouts and leak severity.

The Role of a Ceiling Tile Leak Diverter

The primary purpose of a ceiling tiles leak diverter is to prevent water damage by containing and redirecting leaks away from sensitive areas. By capturing water before it has a chance to saturate ceiling tiles or penetrate underlying structures, a leak diverter helps minimize the risk of mold growth, structural damage, and costly repairs. Additionally, diverting water away from occupied areas helps maintain a safe and comfortable environment for occupants.

How Does a Ceiling Tile Leak Diverter Work?

A ceiling tile leak diverter works by positioning the diverter directly beneath the source of the leak and allowing water to collect in a designated catchment area. A flexible hose or tubing, attached to the diverter, channels the water and directs it to a drainage point, such as a floor drain or collection bucket. This process effectively prevents water from spreading beyond the affected area and provides temporary relief until permanent repairs can be made.

Using a Ceiling Tiles Leak Diverter: Best Practices

When using a ceiling tiles leak diverter, it’s essential to follow these best practices to ensure effective water containment and damage prevention:

  1. Identify the Source of the Leak: Before installing a leak diverter, identify the source of the leak and address any immediate concerns, such as shutting off water supply lines or patching roof leaks.
  2. Select the Appropriate Size and Configuration: Choose a leak diverter that is appropriately sized and configured to accommodate the size and severity of the leak and the layout of the ceiling tiles.
  3. Position the Diverter Correctly: Position the leak diverter directly beneath the source of the leak, ensuring that it covers the affected area completely. Secure the diverter in place using adjustable straps or hooks.
  4. Monitor and Empty the Catchment Area: Regularly monitor the catchment area of the leak diverter and empty it as needed to prevent overflow and ensure continuous water containment.
  5. Inspect and Maintain the Diverter: Periodically inspect the condition of the leak diverter and make any necessary repairs or replacements to ensure its continued effectiveness.

Conclusion

A ceiling tiles leak diverter is an essential tool for addressing water leaks and preventing water damage in homes, offices, and commercial buildings. By understanding its role, how it works, and best practices for its use, you can effectively contain leaks, protect property assets, and maintain a safe and comfortable environment for occupants.

Read too: Exploring the Efficiency of Radiant Ceiling Heater Electric: A Comprehensive Guide

Understanding and Addressing the Menace of the Black Spot on Ceiling: Unveiling the Mystery

The ambiance of a room can quickly turn from inviting to concerning when an unexpected black spot appears on the ceiling. Homeowners and tenants alike may find themselves puzzled by this unwelcome addition to their living space. In this comprehensive guide, we will explore the phenomenon of the “Black Spot on Ceiling,” unraveling its potential causes, implications, and the steps to address and prevent it.

Black Spot On Ceiling

Black Spot On Ceiling: Decoding the Enigma

The Appearance of the Intruder: What Causes a Black Spot on Ceiling?

The sudden emergence of a black spot on the ceiling can be disconcerting, prompting a series of questions about its origin. Understanding the various causes is crucial for effective identification and resolution.

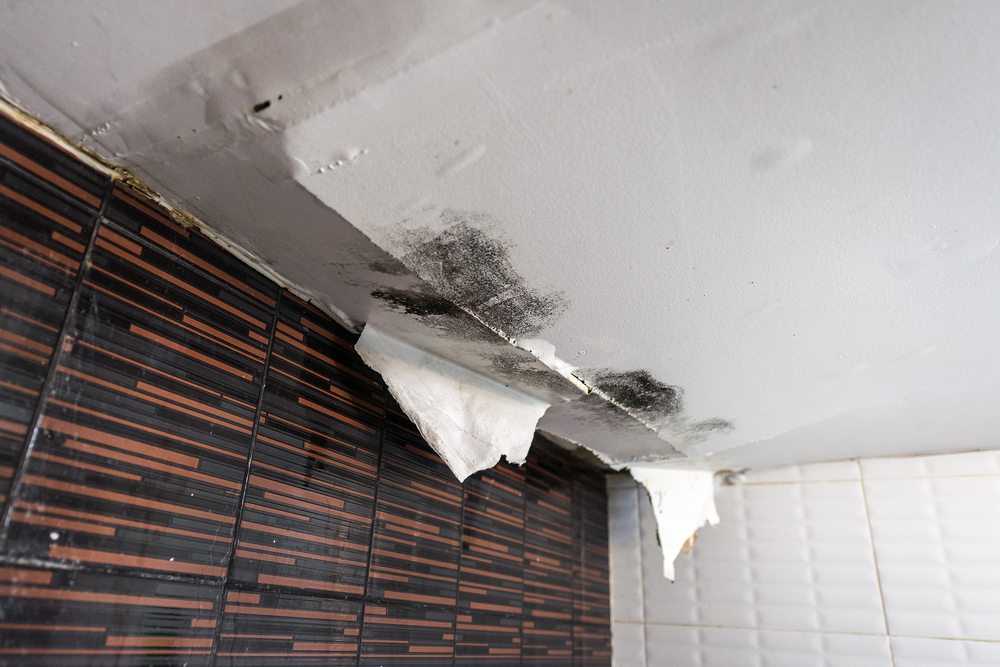
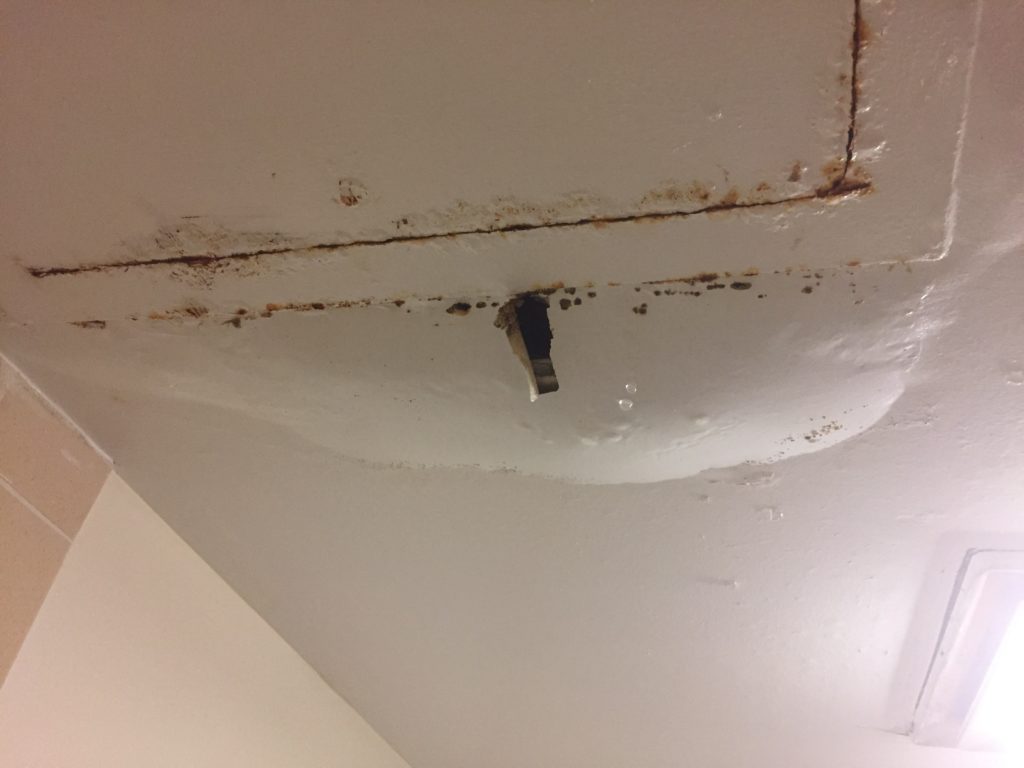
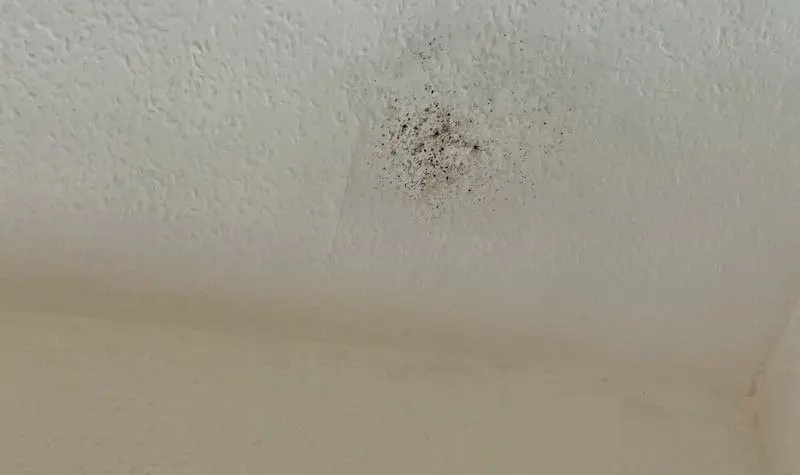
  1. Water Damage: The Silent CulpritOne of the primary culprits behind black spots on the ceiling is water damage. Leaky roofs, burst pipes, or condensation issues can lead to the growth of mold and mildew. These fungi manifest as dark spots on the ceiling and often accompany a musty odor. It’s essential to address the water source promptly to prevent further damage.
  2. Smoke Stains: Lingering RemnantsIn homes with a history of smoking or insufficient ventilation, smoke stains can accumulate on the ceiling. Over time, these stains may darken, resulting in noticeable black spots. Proper ventilation and cleaning are essential to prevent the recurrence of these spots.
  3. Mold and Mildew: The Menace WithinMoisture-rich environments, such as bathrooms and kitchens, are breeding grounds for mold and mildew. These fungi thrive in damp conditions and can lead to the development of black spots on the ceiling. Regular cleaning and adequate ventilation can help keep these unwelcome guests at bay.
  4. Soot Accumulation: Fireplace FalloutHomes with fireplaces may experience black spots on the ceiling due to soot accumulation. While the aesthetic impact is immediate, prolonged exposure can pose respiratory risks. Regular chimney maintenance and cleaning are vital to preventing soot-related issues.

Identifying Water Damage

Understanding the specific cause of the black spot is crucial for effective remediation. In this section, we will delve deeper into the identification and resolution of black spots resulting from water damage.

Recognizing Water Damage: Signs and Symptoms

  1. Discoloration and Staining:Water-damaged areas often exhibit discoloration and staining. The black spot on the ceiling may be accompanied by water rings or streaks, indicating a persistent leak.
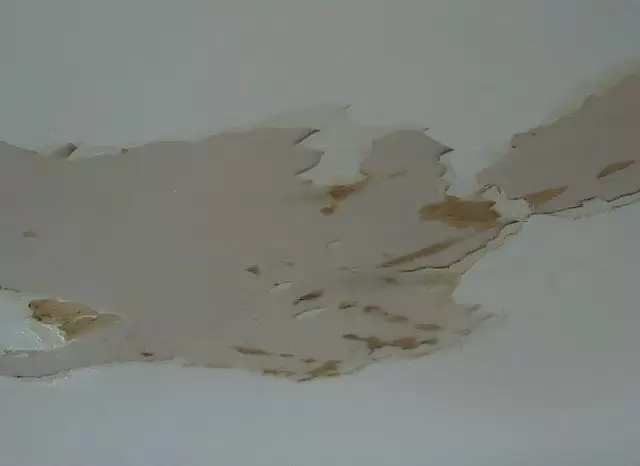
  2. Peeling Paint or Wallpaper:Moisture intrusion can compromise the integrity of paint or wallpaper. If the black spot is surrounded by peeling paint or wallpaper, it is likely a result of water damage.
  3. Musty Odor:A distinctive musty odor accompanies mold growth. If the black spot emits a musty smell, it’s a clear indicator of fungal presence, necessitating prompt attention.

Addressing Water Damage: Steps to Remediation

  1. Locate and Fix the Source:Identifying and repairing the source of water intrusion is paramount. Whether it’s a leaky roof, malfunctioning plumbing, or poor ventilation, addressing the root cause is crucial for preventing recurrence.
  2. Mold Removal:If mold is present, professional remediation may be necessary. DIY efforts may exacerbate the issue, leading to spore dispersion. Consultation with a mold remediation specialist ensures thorough and safe removal.
  3. Ceiling Repair:Once the water source and mold issues are resolved, repairing the damaged ceiling becomes the final step. This may involve patching, repainting, or, in severe cases, replacing portions of the ceiling.

Preventing the Return of the Black Spot: Maintenance Tips

Prevention is key when it comes to avoiding the reappearance of the black spot on the ceiling. Implementing proactive measures can safeguard your home from potential water damage and associated issues.

  1. Regular Roof Inspections:Schedule periodic roof inspections to identify and address potential vulnerabilities. Damaged shingles, flashing, or seals can contribute to water infiltration.
  2. Prompt Plumbing Repairs:Attend to plumbing issues promptly, addressing leaks and ensuring proper drainage. Regular maintenance can prevent water-related damage to ceilings and walls.
  3. Proper Ventilation:Enhance ventilation in moisture-prone areas such as bathrooms and kitchens. Vent fans, dehumidifiers, and open windows contribute to a drier environment, inhibiting mold and mildew growth.
  4. Chimney Maintenance:If your home features a fireplace, adhere to a regular chimney maintenance schedule. This includes professional cleaning to prevent the accumulation of soot and potential black spot formation.

Read too: Understanding Asbestos in Ceiling Plaster and Ensuring a Safe Home: Unveiling the Dangers

Conclusion: Banishing the Black Spot and Embracing Home Wellness

The black spot on the ceiling may initially evoke concern, but armed with knowledge, homeowners can tackle the issue effectively. By identifying the root cause, implementing remediation measures, and adopting preventative strategies, the menace of the black spot can be banished, leaving behind a home environment that promotes health, safety, and aesthetic appeal.

In your journey to a spot-free ceiling, remember that early detection and proactive maintenance are your strongest allies. Stay vigilant, address issues promptly, and enjoy a home free from the unwelcome presence of black spots.

Dealing with Bathroom Ceiling Water Damage and Effective Solutions: Unveiling the Culprit

Discover the ins and outs of managing and preventing the consequences of “Bathroom Ceiling Water Damage.” Learn how to safeguard your home from potential issues and restore your bathroom to its former glory.

Bathroom Ceiling Water Damage

Understanding the Impact of Bathroom Ceiling Water Damage

Identifying the Signs

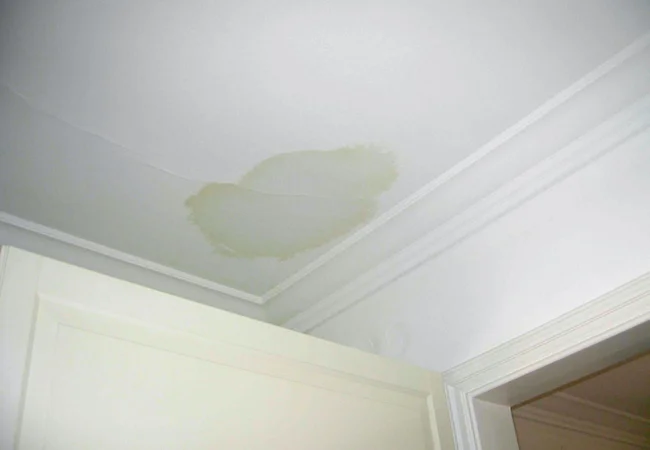
Spotting early signs of bathroom ceiling damage is crucial for prompt intervention. Stains, discoloration, sagging, or peeling paint on your bathroom ceiling are indicators that water damage may be present. Investigate the source promptly to prevent further deterioration.

The Causes Behind Bathroom Ceiling Water Damage

Leaky Fixtures

Leaky faucets, showerheads, or pipes within the walls can lead to water accumulation in the ceiling. Regularly inspect and repair any leaks to mitigate the risk of water damage.

Poor Ventilation

Inadequate ventilation in the bathroom can result in moisture buildup, contributing to water damage. Ensure proper ventilation through exhaust fans or windows to promote air circulation and prevent condensation.

Dealing with the Consequences

Immediate Action

When faced with bathroom ceiling damage swift action is essential. Begin by identifying and fixing the source of the leak. Then, address the damaged area promptly to prevent the spread of mold and further structural issues.

Repairing Water-Damaged Ceilings

For minor damage, you can use a joint compound or patching plaster to repair water-damaged areas. However, extensive damage may require the expertise of a professional contractor to ensure a thorough and lasting repair.

Preventive Measures for a Water-Resistant Bathroom

Regular Maintenance

Stay proactive by routinely checking for leaks, inspecting caulking, and ensuring proper ventilation. Timely maintenance reduces the likelihood of bathroom ceiling damage and prolongs the life of your bathroom.

Waterproofing

Consider waterproofing your bathroom surfaces, including the ceiling. Waterproof paints, sealants, and membranes can create a protective barrier against moisture, preventing water damage.

Adequate Insulation

Proper insulation in your bathroom helps regulate temperature and reduce condensation, minimizing the risk of water damage. Insulate walls, ceilings, and pipes to create a more resilient and water-resistant environment.

Repairing and Restoring Your Bathroom Ceiling After Water Damage

Professional Restoration

In cases of severe water damage, seeking professional restoration services is advisable. Professionals have the expertise and equipment to assess the extent of the damage, conduct thorough repairs, and restore your bathroom to its pre-damaged condition.

Read too: Understanding and Addressing a Crack in the Basement Ceiling: Unveiling the Dilemma

Conclusion: Safeguarding Your Bathroom Against Water Damage

In conclusion, understanding the causes and consequences of “Bathroom Ceiling Water Damage” empowers homeowners to take proactive measures. Regular maintenance, immediate action in the face of damage, and preventive strategies are key elements in safeguarding your bathroom and home from the potentially costly and hazardous effects of water damage.

What to Do When Your Bathroom Ceiling is Dripping Water? Troubleshooting Woes

Embark on a journey of understanding and resolving the perplexing issue of a “Bathroom Ceiling Dripping Water.” Uncover the reasons behind this concern and explore effective solutions for a dry and secure bathroom space.

Bathroom Ceiling Dripping Water

Bathroom Ceiling Dripping Water: A Dilemma Explored

Bathroom Ceiling Dripping Water: Unveiling the Mystery

Discover the unsettling sight of water dripping from your bathroom ceiling and its potential causes. Delve into the complexities of identifying and addressing this issue to ensure a safe and dry environment.

Decoding the Signs: Recognizing Bathroom Ceiling Water Drips

Learn to recognize the signs of water dripping from your bathroom ceiling. From visible water stains to the sound of dripping water, understand the indicators that signal potential leaks and the need for immediate attention.

Understanding the Causes of Bathroom Ceiling Water Drips

1. Plumbing Issues: Leaks and Bursts

Explore the role of plumbing issues in causing water drips from the bathroom ceiling. Understand how leaks, burst pipes, or faulty plumbing connections can lead to water infiltration and subsequent ceiling damage.

2. Roof Leaks and Seepage

Delve into the consequences of roof leaks and seepage affecting your bathroom ceiling. Learn about the potential sources of water intrusion from the roof and how it can manifest as dripping water in your bathroom.

3. Condensation and Humidity

Understand the impact of condensation and high humidity levels on your bathroom ceiling. Explore how these environmental factors can contribute to water accumulation and dripping, leading to potential structural damage.

Read too: Exploring Hunter Douglas Architectural Ceilings for Modern Design: Elevate Your Space with Elegance

The Consequences of Neglected Bathroom Ceiling Water Drips

1. Structural Compromises

Uncover the potential structural compromises resulting from prolonged water drips. Learn how untreated issues can weaken the integrity of your bathroom ceiling and the overall structure of your home.

2. Mold and Mildew Growth

Explore the risk of mold and mildew growth associated with persistent water drips. Understand the health hazards and the importance of addressing water leaks promptly to prevent these issues.

3. Aesthetic Deterioration

Beyond structural concerns, water drips affect the aesthetics of your bathroom. Learn about the impact on the appearance of your ceiling, including discoloration, peeling paint, and potential damage to decorative elements.

Dealing with Bathroom Ceiling Water Drips: Effective Solutions

1. Immediate Action: Emergency Measures

In the event of water drips, take immediate action to contain the issue. Explore emergency measures, including identifying and addressing the source of water infiltration, drying the affected area, and preventing further damage.

2. Professional Assessment: Seeking Expert Advice

Consult with professionals for a thorough assessment of the damage. Learn about the importance of seeking expert advice to identify the extent of the water drips and determine the most effective resolution methods.

3. Repair Techniques: Preserving Your Bathroom Space

Explore repair techniques to preserve the integrity of your bathroom ceiling. From fixing plumbing issues to repairing roof leaks, discover the steps involved in restoring a bathroom with water drips.

Preventive Measures: Safeguarding Your Bathroom

1. Regular Maintenance and Inspections

Implement regular maintenance and inspections to prevent water drips. Explore the significance of inspecting plumbing, checking the roof for leaks, and ensuring proper ventilation to protect your bathroom from potential issues.

2. Waterproofing Solutions

Consider waterproofing solutions for vulnerable areas prone to water infiltration. Explore options such as sealants, coatings, and other preventive measures to create a protective barrier against water drips.

3. Prompt Repairs

Address any signs of potential issues promptly. Learn about the importance of prompt repairs to plumbing problems, roof leaks, or other sources of water infiltration to prevent water drips in your bathroom.

Conclusion: Ensuring a Dry and Secure Bathroom Environment

In conclusion, dealing with “Bathroom Ceiling Dripping Water” requires a combination of vigilance, immediate action, and professional expertise. By understanding the causes, consequences, and effective resolution methods, you can safeguard your bathroom from the challenges of water drips. Remember, early intervention is key to minimizing damage and ensuring the longevity and safety of your bathroom space.

Dealing with the Challenges of Rain Coming Through Ceiling in Your Home: Unexpected Woes

As homeowners, we often face unexpected challenges, and one of the most disconcerting experiences is discovering “Rain Coming Through Ceiling.” In this comprehensive guide, we’ll explore the causes, potential damages, and effective solutions to address this alarming issue and safeguard your home.

Rain Coming Through Ceiling

Understanding the Phenomenon: Rain Coming Through Ceiling

Rain Coming Through Ceiling: A Troubling Intrusion into Your Home

Discovering rainwater infiltrating your home through the ceiling can be a distressing sight. Let’s delve into the potential causes and consequences of this phenomenon, ensuring you have the knowledge to address the issue promptly and effectively.

Identifying the Causes: Why Is Rain Coming Through My Ceiling?

1. Damaged Roofing Materials

Examine the impact of damaged roofing materials on your home’s structural integrity. Learn how wear and tear, severe weather, or aging can compromise the protective barrier of your roof, allowing rainwater to seep through.

2. Missing or Damaged Shingles

Explore the role of shingles in safeguarding your roof. Discover how missing or damaged shingles can create vulnerable spots, leading to leaks and ultimately resulting in rainwater making its way into your home.

3. Clogged or Damaged Gutters

Understand the importance of well-maintained gutters in diverting rainwater away from your home. Explore the consequences of clogged or damaged gutters, which can contribute to water pooling on your roof and finding its way through the ceiling.

Dealing with Rain Coming Through Ceiling: Effective Solutions

1. Emergency Measures: Containing the Damage

In the immediate aftermath of discovering rain coming through your ceiling, take swift action to contain the damage. Learn how to identify and safely address the affected areas, minimizing the impact on your home’s interior.

2. Identifying the Source: Roof Inspection

To effectively address the issue, conduct a thorough inspection of your roof. Explore steps to identify the source of the leak, whether it’s damaged flashing, missing shingles, or compromised roofing materials.

3. Temporary Fixes: Tarping and Sealants

In emergency situations, temporary fixes can be implemented to prevent further water intrusion. Understand the use of tarps and sealants as effective measures to provide immediate relief while awaiting permanent repairs.

4. Professional Repairs: Roofing Experts to the Rescue

Consulting with roofing professionals is crucial for a long-term solution. Explore the benefits of hiring experts to assess the extent of the damage, recommend necessary repairs, and restore the integrity of your roof.

The Cost of Ignoring the Issue

1. Structural Damage

Learn about the potential structural damage caused by prolonged exposure to rainwater. Understand how untreated leaks can compromise the stability of your home, leading to costly repairs.

2. Mold and Mildew Growth

Explore the risk of mold and mildew growth resulting from moisture intrusion. Understand the health hazards associated with mold and the importance of addressing leaks promptly to prevent these issues.

3. Compromised Insulation and Energy Efficiency

Discover how rain coming through the ceiling can compromise your home’s insulation. Explore the implications for energy efficiency and the potential increase in utility costs if the issue is not addressed promptly.

Read too: Exploring Hunter Douglas Architectural Ceilings for Modern Design: Elevate Your Space with Elegance

Preventive Measures: Safeguarding Your Home

Regular Roof Maintenance

Implementing a routine roof maintenance schedule is essential for preventing rainwater leaks. Explore the importance of inspecting your roof regularly, addressing minor issues before they escalate into major problems.

Gutter Maintenance

Understand the role of gutters in preventing rainwater damage. Learn about the significance of regular gutter maintenance, including cleaning and repairs, to ensure proper water drainage.

Conclusion: Taking Control of Rain Coming Through Ceiling

In conclusion, discovering rain coming through your ceiling is a homeowner’s nightmare, but with proactive measures and prompt action, you can take control of the situation. From identifying the causes to implementing effective solutions and preventive measures, this guide empowers you to safeguard your home from the challenges of rainwater intrusion. Remember, early intervention is key to preventing extensive damage and maintaining the comfort and integrity of your living space.

Understanding and Removing Water Marks on Ceiling: Unveiling the Culprits and Solutions

Water marks on the ceiling can be distressing and aesthetically displeasing. In this comprehensive guide, explore the causes, prevention, and effective solutions to tackle “Water Marks On Ceiling” and restore the beauty of your living space.

Water Marks On Ceiling

Introduction

Discovering water marks is often a cause for concern. It not only hints at a potential water intrusion issue but also poses the risk of structural damage and mold growth. This guide aims to shed light on the causes behind “Water Marks On Ceilings,” empowering you to take informed steps to address and prevent further damage.

Understanding Water Marks on Ceiling

Causes of Water Marks

  1. Leaky Roof: One of the primary culprits is a leaky roof. Damaged or missing shingles, deteriorated flashing, or compromised roof vents can allow water to infiltrate and stain the ceiling.
  2. Plumbing Issues: Leaking pipes, faulty plumbing fixtures, or burst pipes within the walls or ceiling can lead to water stains as the moisture seeps through.
  3. Condensation: In humid environments, condensation can accumulate on the ceiling surface, resulting in water marks over time.

Identifying

Types of Stains

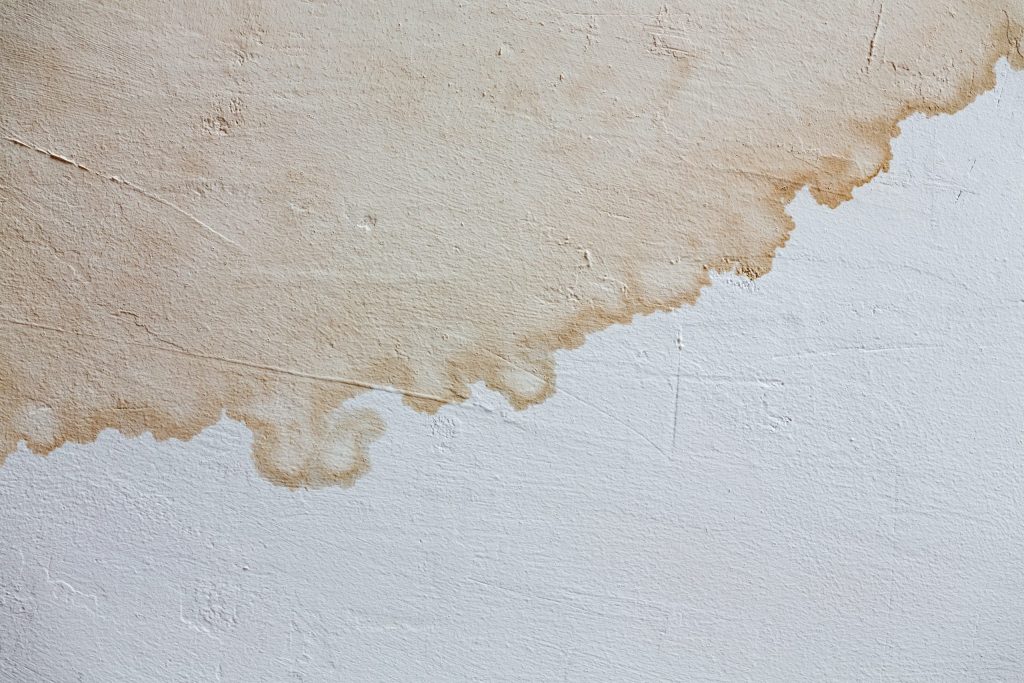
  1. Brown Stains: Often caused by roof leaks, brown stains indicate water has traveled through the roof structure, carrying dirt and debris.
  2. Yellow Stains: Commonly associated with plumbing issues, yellow stains suggest water with a higher mineral content.
  3. Black Stains: If left unaddressed, water marks can promote mold growth, leading to unsightly black stains on the ceilings.

Addressing

1. Locate and Repair the Source of Water Intrusion:

  • Conduct a thorough inspection of the roof, attic, and plumbing to identify and fix the source of the leak.

2. Ceiling Stain Removal:

  • For mild stains, a mixture of water and vinegar or hydrogen peroxide can be used to gently scrub and remove the stain.

3. Repainting the Ceiling:

  • After addressing the root cause and removing the stain, consider repainting the ceiling to restore its appearance.

Preventing Water Marks on Ceiling

Regular Maintenance

  1. Inspect Roof Regularly: Conduct periodic roof inspections to identify and fix potential issues before they lead to water intrusion.
  2. Check Plumbing Fixtures: Regularly inspect plumbing fixtures for leaks, and address any issues promptly.

Preventive Measures

  1. Use Dehumidifiers: In humid climates, use dehumidifiers to control indoor humidity levels and prevent condensation.
  2. Apply Waterproof Sealants: Consider applying waterproof sealants on the roof and around vulnerable areas to create an additional barrier against water intrusion.

Read too: Understanding and Addressing a Leaky Ceiling in Your Apartment: Navigating the Drips

Conclusion

Water marks on the ceiling are not only a cosmetic concern but also indicative of potential structural and safety issues. By understanding the causes, identifying stains, and taking proactive measures, you can effectively address “Water Marks On Ceiling” and prevent future damage. Regular maintenance, timely repairs, and preventive strategies are key to maintaining a dry, safe, and aesthetically pleasing living environment.

Understanding and Tackling the Water Spot On Ceiling Mystery: Decoding the Dilemma

Water spots on the ceiling can be more than just unsightly; they might indicate underlying issues. In this comprehensive guide, we’ll delve into the causes, identification, and effective solutions for the enigmatic “Water Spot On Ceiling.” Unravel the mystery and safeguard your home from potential water damage.

Water Spot On Ceiling

The Significance of Water Spots On Ceiling

Water spots on the ceiling are not just cosmetic concerns; they can be indicative of more profound issues within your home. Identifying the causes and addressing them promptly is crucial to preventing further damage and maintaining the structural integrity of your living space.

Potential Causes of Water Spots On Ceiling

  1. Roof Leaks:
    • Damaged or missing shingles
    • Faulty flashing or compromised roof structure
  2. Plumbing Issues:
    • Leaky pipes within the ceiling or walls
    • Plumbing fixture malfunctions leading to water seepage
  3. Condensation Concerns:
    • Excessive moisture and condensation in the ceiling space
    • Lack of proper ventilation causing water buildup

Identifying Water Spots On Ceiling

1. Visual Inspection:

Conduct a thorough visual examination of your ceilings for any water stains or discoloration. Water spots are often visible indicators of an ongoing or past leak.

2. Check for Texture Changes:

Feel the affected area for any changes in texture. Soft or spongy spots may suggest the presence of trapped water beneath the surface.

3. Trace the Source:

Trace the source of the water spot, either from the roof, plumbing, or potential condensation issues. Understanding the origin is crucial for effective and targeted solutions.

Read too: Dealing with Water Damage on Your Popcorn Ceiling: Unveiling the Consequences

Water Spot On Ceiling Solutions

1. Address Roof Leaks:

Identify and repair any issues with the roof, including damaged shingles, compromised flashing, or structural problems. Prompt roof repairs are essential for preventing water spots.

2. Plumbing Repairs:

If the water spot is linked to plumbing issues, seek assistance from a professional plumber to repair or replace faulty pipes, fixtures, or connections.

3. Enhance Ventilation:

Improve ventilation in your home, particularly in areas prone to moisture buildup. Adequate ventilation helps prevent condensation-related water spots on the ceiling.

Preventive Measures

1. Regular Roof Maintenance:

Schedule routine inspections and maintenance for your roof to identify and address potential issues before they lead to water spots.

2. Timely Plumbing Checks:

Regularly inspect plumbing fixtures and pipes for leaks or malfunctions. Timely repairs can prevent water spots on the ceiling.

3. Proper Ventilation:

Ensure proper ventilation throughout your home to minimize condensation and reduce the risk of water spots forming on the ceiling.

Conclusion

A “Water Spot On Ceiling” is not just a cosmetic concern; it’s a potential indicator of underlying issues that demand attention. By understanding the potential causes, identifying the issue early, and implementing effective solutions, homeowners can protect their homes from the detrimental effects of water damage.

Regular maintenance, prompt repairs, and a proactive approach to potential issues can contribute to the longevity and structural integrity of your home. Stay vigilant, conduct inspections regularly, and ensure that your living spaces remain free from the threat of water spots on the ceiling.

Understanding Roof Leak Ceiling Bubble Issues: Unraveling the Mystery

Roof leaks can lead to unexpected problems, and one common issue homeowners face is the formation of a “Roof Leak Ceiling Bubble.” In this comprehensive guide, we will explore the causes, identification, and solutions for this particular concern.

Roof Leak Ceiling Bubble

The Menace of Roof Leak Ceiling Bubbles

When water infiltrates the roof and causes a ceiling bubble, it’s a clear sign of a more significant issue. Understanding the potential causes and addressing them promptly can prevent further damage to your home.

Potential Causes of Roof Leak Ceiling Bubbles

  1. Roof Damage:
    • Missing or damaged shingles
    • Cracked or deteriorating flashing
    • Punctures or holes in the roof surface
  2. Poor Ventilation:
    • Inadequate attic ventilation leading to moisture buildup
    • Condensation issues causing water to seep into the ceiling
  3. Leaky Pipes or Plumbing Issues:
    • Faulty plumbing or leaking pipes in the attic or ceiling space
    • Water damage from plumbing fixtures on higher floors

Identifying Roof Leak Ceiling Bubbles

1. Visual Inspection:

Perform a thorough visual inspection of your ceilings for any unusual bulges or discoloration. Bubbles in the ceiling are often a clear indicator of trapped water.

2. Touch Test:

Gently touch the affected area. If it feels soft or spongy, there’s likely trapped water beneath the surface.

3. Water Stains:

Look for water stains on the ceiling or nearby walls, as these can provide additional clues about the source of the leak.

Roof Leak Ceiling Bubble Solutions

1. Locate and Repair the Roof Leak:

Identify the source of the roof leak and repair it promptly. This may involve patching up damaged shingles, replacing flashing, or addressing any structural issues.

2. Improve Attic Ventilation:

Enhance attic ventilation to prevent moisture buildup. Proper ventilation helps regulate temperature and reduces the risk of condensation.

3. Plumbing Repairs:

If the leak is attributed to plumbing issues, consult a plumber to repair or replace faulty pipes, fixtures, or connections.

Read too: Dealing with Water Damage on Your Popcorn Ceiling: Unveiling the Consequences

Prevention Tips

1. Regular Roof Inspections:

Schedule regular roof inspections to identify and address potential issues before they escalate.

2. Adequate Ventilation:

Ensure proper attic ventilation to prevent moisture buildup and reduce the risk of condensation-related leaks.

3. Prompt Repairs:

Address any signs of roof damage or plumbing issues promptly. Timely repairs can prevent extensive water damage and the formation of ceiling bubbles.

Conclusion

A “Roof Leak Ceiling Bubble” is a visible indication of a roof leak, and addressing it promptly is crucial to prevent further damage to your home. By understanding the potential causes, identifying the issue early, and implementing effective solutions, homeowners can protect their property from the detrimental effects of water damage.

Regular maintenance, prompt repairs, and a proactive approach to potential issues can contribute to the longevity and structural integrity of your roof. Stay vigilant, conduct inspections regularly, and ensure that your home remains a safe and dry haven for you and your family.

Understanding the Causes Behind a Crack in the Ceiling: Unveiling the Mystery

Discover the potential reasons behind a puzzling “Crack In Ceiling Causes” and gain insights into addressing this common issue.

Introduction

A crack in the ceiling can be a cause for concern and may leave homeowners wondering about the underlying issues. In this comprehensive guide, we will delve into the various factors contributing to a crack in the ceiling, offering valuable information to help you identify, address, and prevent such occurrences.

Crack In Ceiling Causes

Decoding the Culprit: Exploring Crack In Ceiling Causes

Understanding the root causes behind a crack in the ceiling is essential for effective resolution. Let’s investigate the potential factors that may contribute to this common issue.

*1. Structural Settling and Foundation Movements

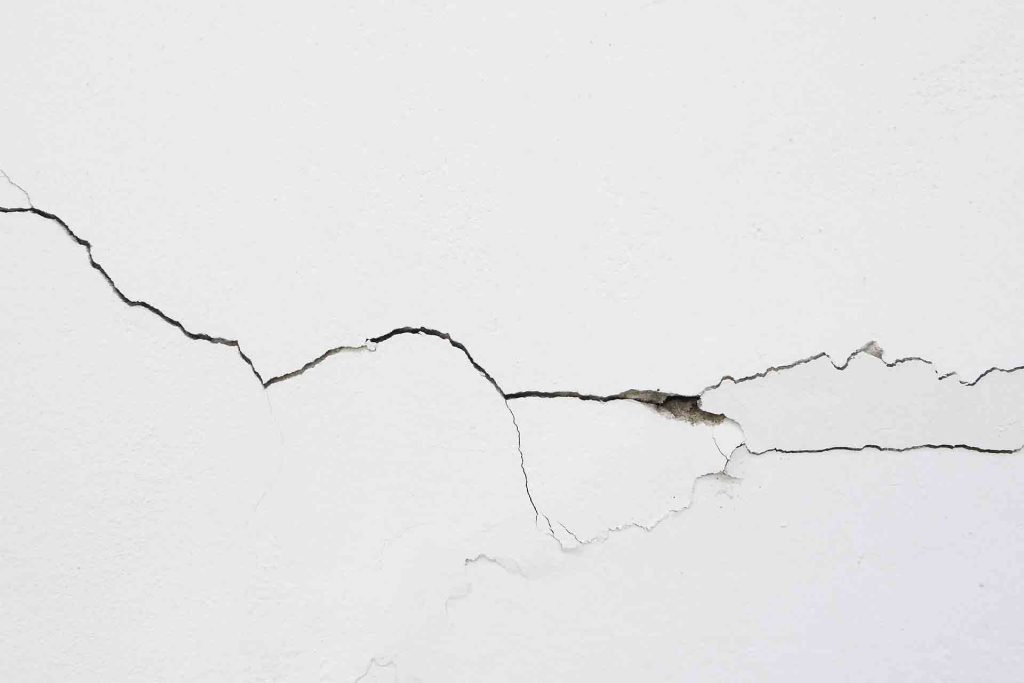
One of the primary reasons for cracks in the ceiling is the natural settling of a house over time. As the building materials adjust to the foundation’s movements, minor cracks may appear. These cracks are often characterized by a vertical or diagonal pattern.

Solution:

  • Monitor the crack for any signs of worsening.
  • Consult with a structural engineer to assess the foundation and determine if any corrective measures are necessary.

*2. Temperature and Humidity Fluctuations

Extreme temperature changes and high humidity levels can impact building materials, causing them to expand and contract. This expansion and contraction can lead to stress on the ceiling, resulting in cracks.

Solution:

  • Ensure proper ventilation and insulation to regulate temperature and humidity levels.
  • Consider using a dehumidifier in areas prone to high humidity.

*3. Water Damage and Leaks: Crack In Ceiling Causes

Water infiltration is a common culprit for ceiling cracks. Leaky roofs, plumbing issues, or even condensation can compromise the integrity of the ceiling material, leading to cracks and stains.

Solution:

  • Identify and repair the source of the water leak promptly.
  • Repair any water-damaged areas and repaint the ceiling after ensuring it is completely dry.

*4. Poor Construction or Materials

In some cases, poor construction practices or the use of substandard materials during the building process can contribute to ceiling cracks. This is more common in older homes or properties with inadequate construction standards.

Solution:

  • Conduct a thorough inspection to identify any construction-related issues.
  • Consult with a professional contractor to address structural deficiencies and consider necessary renovations.

*5. Earthquakes and Seismic Activity

Homes in earthquake-prone regions may experience ceiling cracks as a result of seismic activity. The intensity of the shaking can cause structural movements and compromise the integrity of the ceiling.

Solution:

  • Implement earthquake-resistant construction measures.
  • Conduct regular structural assessments and reinforce vulnerable areas.

Read too: Troubleshooting and Addressing a Water Bubble in Ceiling: Causes and Solutions Revealed

Steps to Address and Prevent Ceiling Cracks

  1. Regular Inspections: Conduct routine inspections of your home, paying close attention to the ceilings. Address any cracks or signs of deterioration promptly.
  2. Maintain Consistent Temperature and Humidity: Regulate the indoor climate to minimize extreme temperature and humidity fluctuations. Proper insulation and ventilation play a crucial role in maintaining a stable environment.
  3. Prompt Water Leak Repairs: Identify and repair any water leaks promptly to prevent further damage. Regularly inspect the roof, plumbing, and windows for potential sources of water infiltration.
  4. Professional Structural Assessment: If you notice persistent or worsening cracks, consult with a structural engineer for a comprehensive assessment. Implement recommended corrective measures to ensure the stability of your home.
  5. Use Quality Construction Materials: When renovating or constructing, invest in high-quality materials and adhere to proper construction practices. This minimizes the risk of structural issues leading to ceiling cracks.

Conclusion: Navigating the Solution Path for Ceiling Cracks

In conclusion, a crack in the ceiling can be attributed to various factors, each requiring a specific approach for resolution. By understanding the potential causes and implementing proactive measures, homeowners can effectively address current cracks and prevent future occurrences.

Regular maintenance, timely repairs, and a vigilant eye for signs of structural issues contribute to a stable and secure home environment. Remember, consulting with professionals is crucial for accurate assessments and informed decisions in tackling the root causes of ceiling cracks.

Uncover the Mystery: Why Is My Ceiling Wet and What You Can Do About It

A wet ceiling can be an alarming sight, leaving homeowners puzzled and concerned about the potential causes behind this issue. In this comprehensive guide, we will delve into the common reasons for a wet ceiling, explore the implications, and offer practical solutions to address the problem. If you’ve ever asked yourself, “Why is my ceiling wet?” you’re not alone. Let’s unravel the mystery together.

Why Is My Ceiling Wet

Understanding the Signs: Why Is My Ceiling Wet?

Have you noticed water stains on your ceiling? Perhaps there’s a damp or spongy texture when you touch it? These are clear indicators that something is amiss. To address the issue effectively, we first need to identify the root cause.

Common Culprits Behind a Wet Ceiling

  1. Roof Leaks: The Silent InvaderA damaged or aging roof is a leading cause of water intrusion into your home. Missing shingles, cracked flashing, or compromised seals can allow rainwater to seep through, leading to a wet ceiling. Regular roof inspections and timely repairs are crucial in preventing this issue.
  2. Leaky Pipes: Concealed DangersUndetected leaks in plumbing pipes can wreak havoc on your ceiling. Whether it’s a slow drip or a sudden burst, water damage can accumulate over time, leading to a wet and discolored ceiling. Regular plumbing maintenance and inspections are vital to catch these issues early.
  3. Condensation Woes: Humidity Takes Its TollHigh humidity levels within your home can result in condensation forming on the ceiling. This moisture buildup can eventually lead to a wet ceiling. Adequate ventilation, proper insulation, and the use of dehumidifiers can help control indoor humidity and prevent this issue.
  4. Faulty HVAC Systems: Cooling Down, Dripping UpAir conditioning units generate condensate as they cool the air. If the condensate drainage system is faulty or clogged, it can lead to water dripping onto your ceiling. Regular HVAC maintenance, including cleaning and inspecting drainage lines, can prevent this from happening.

Addressing the Issue: What to Do When Your Ceiling is Wet

Now that we’ve explored the possible culprits, it’s time to take action. Depending on the cause, there are several steps you can take to remedy a wet ceiling.

1. Roof Repairs

If the issue lies with your roof, consult a professional roofer to assess and repair any damage. Prompt action can prevent further water damage to your ceiling and the structural integrity of your home.

2. Plumbing Fixes

For plumbing-related issues, enlist the services of a qualified plumber. They can identify and repair leaks, ensuring your plumbing system is in top condition and preventing future ceiling wetness.

3. Humidity Control

Invest in proper ventilation and insulation to control indoor humidity levels. Additionally, consider using dehumidifiers in areas prone to excess moisture, such as basements or bathrooms.

4. HVAC Maintenance

Schedule regular maintenance for your HVAC system to prevent condensate-related issues. This includes cleaning or replacing filters and ensuring proper drainage from the unit.

Conclusion: A Dry and Secure Home Awaits

Understanding the causes of a wet ceiling empowers homeowners to take proactive steps in preventing and addressing this issue. Whether it’s a leaking roof, faulty plumbing, condensation, or HVAC-related problems, early detection and timely action are key.

Remember, if you ever find yourself wondering, “Why is my ceiling wet?” it’s crucial to investigate and address the root cause promptly. By doing so, you not only protect the structural integrity of your home but also ensure a dry and comfortable living space for you and your family.