Flexible Drop Ceiling Tile: Enhance Your Space

When renovating or designing a space, the ceiling is often overlooked despite its significant impact on the room’s aesthetics and functionality. Flexible drop ceiling tile offer a versatile solution that combines practicality with design flexibility. This article explores the benefits, features, and considerations of using flexible drop ceiling tiles in your home or office.

Flexible Drop Ceiling Tiles

What Are Flexible Drop Ceiling Tiles?

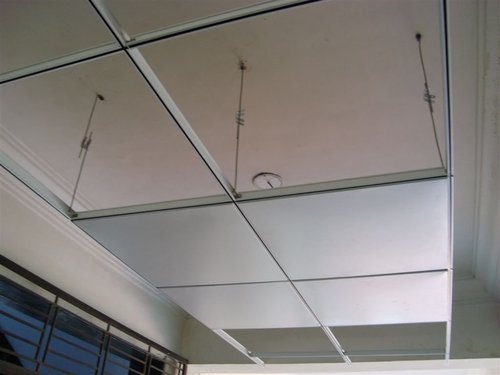
Flexible drop ceiling tiles, also known as suspended ceiling tiles, are panels that hang below the structural ceiling using a metal grid. Unlike traditional ceiling tiles, flexible options are made from materials like PVC, vinyl, or fiberglass, which allow them to bend or adjust to irregular surfaces without cracking or breaking.

Read too: Discovering the Charm of Nautical Outdoor Ceiling Fans for Your Coastal Retreat: Sail into Style

Benefits of Using Flexible Drop Ceiling Tiles

1. Versatility in Design

Flexible drop ceiling tiles come in various colors, patterns, and textures, allowing for a wide range of design possibilities. Whether you prefer a modern, sleek look or a more traditional style, there’s a flexible tile to suit your aesthetic needs.

2. Easy Installation

These tiles are lightweight and easy to handle, making installation straightforward even for DIY enthusiasts. Their flexibility allows for easy fitting around obstacles like pipes, ducts, or uneven surfaces.

3. Cost-Effective

Flexible drop ceiling tiles are generally more affordable than rigid alternatives. They can also reduce energy costs by providing an extra layer of insulation, helping to maintain a consistent temperature in your space.

4. Sound Absorption

Many flexible drop ceiling tiles have sound-absorbing properties, which can enhance acoustics in a room. This feature is particularly beneficial in offices, classrooms, and entertainment rooms where noise control is important.

5. Moisture Resistance

Materials used in flexible drop ceiling tiles are often resistant to moisture and mildew, making them ideal for use in basements, bathrooms, and kitchens where humidity levels are high.

Key Features of Flexible Drop Ceiling Tiles

Durability

Despite their flexibility, these tiles are designed to withstand wear and tear, maintaining their appearance and functionality over time.

Ease of Maintenance

Flexible drop ceiling tiles are easy to clean and maintain. Many options can be wiped down with a damp cloth or mild detergent, making them a practical choice for high-traffic areas.

Fire Resistance

Some flexible drop ceiling tiles are treated with fire-resistant coatings, enhancing the safety of your space by slowing the spread of flames in the event of a fire.

Customizability

With a wide range of finishes and designs, flexible drop ceiling tiles can be customized to match your specific design requirements, adding a personal touch to any room.

Installation Guide for Flexible Drop Ceiling Tiles

  1. Measure Your Space: Begin by measuring the dimensions of your room to determine how many tiles and grid components you will need.
  2. Prepare the Grid System: Install the metal grid framework, ensuring it is level and securely attached to the ceiling joists.
  3. Cut the Tiles: If necessary, cut the flexible tiles to fit around obstacles or edges. The flexibility of the material makes this step easier than with rigid tiles.
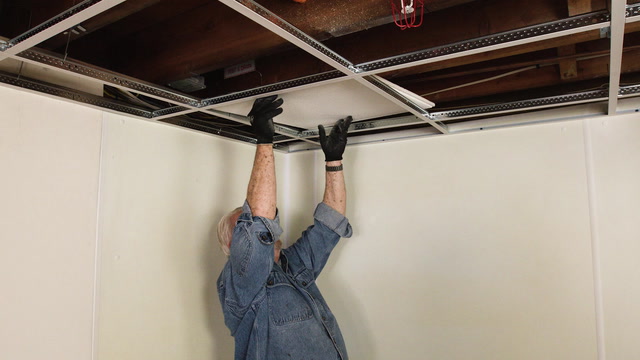
  4. Install the Tiles: Place the tiles into the grid, starting from one corner of the room and working your way across. Ensure each tile sits flush with the grid for a clean, professional finish.
  5. Finishing Touches: Once all the tiles are in place, inspect the ceiling for any gaps or misalignments and make adjustments as needed.

Where to Use Flexible Drop Ceiling Tiles

Residential Spaces:

  • Basements: Moisture-resistant and easy to install around ductwork.
  • Kitchens: Provides a clean, sleek look with easy maintenance.
  • Living Rooms: Enhances the design with various styles and textures.

Commercial Spaces:

  • Offices: Improves acoustics and aesthetics while being cost-effective.
  • Retail Stores: Adds to the ambiance and can be customized to fit the store’s branding.
  • Healthcare Facilities: Easy to clean and maintain, promoting hygiene.

Maintenance Tips

  • Regular Cleaning: Wipe down the tiles with a damp cloth regularly to remove dust and grime.
  • Inspect for Damage: Periodically check for any signs of wear or damage and replace tiles as necessary.
  • Maintain the Grid: Ensure the metal grid remains secure and level to prevent tiles from sagging or shifting.

Conclusion

Flexible drop ceiling tile offer a practical and aesthetically pleasing solution for both residential and commercial spaces. Their versatility, ease of installation, and maintenance make them an ideal choice for anyone looking to enhance their ceiling design while maintaining functionality. By understanding the benefits and features of flexible drop ceiling tiles, you can confidently choose the best option for your next renovation project.
Gypsum Suspended Ceiling Tiles: Enhancing Interiors with Style and Functionality

When it comes to interior design and building construction, Gypsum Suspended Ceiling Tiles are a popular choice. These tiles offer a perfect blend of aesthetic appeal and practical benefits, making them an ideal solution for both residential and commercial spaces. This comprehensive guide will delve into the various aspects of Gypsum Suspended Ceiling Tiles, including their benefits, installation process, maintenance tips, and more.

Gypsum Suspended Ceiling Tiles

What Are Gypsum Suspended Ceiling Tiles?

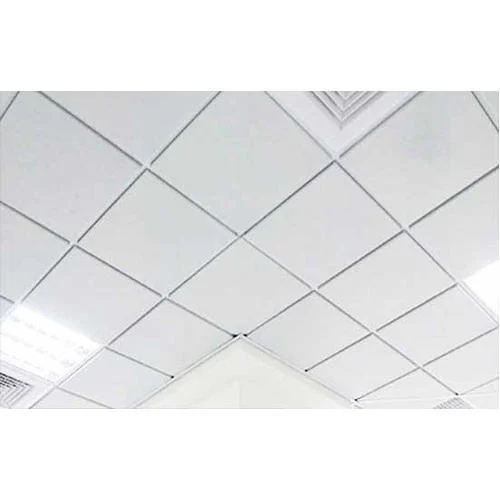
Gypsum Suspended Ceiling Tiles are a type of ceiling system that consists of a metal grid suspended from the structural ceiling and lightweight gypsum tiles that are placed within this grid. These tiles are made from gypsum, a soft sulfate mineral composed of calcium sulfate dihydrate. Gypsum is widely used in construction due to its fire-resistant properties, ease of installation, and ability to create a smooth, uniform surface.

Benefits of Gypsum Suspended Ceiling Tiles

1. Aesthetic Appeal

Gypsum Suspended Ceiling Tiles offer a clean and modern look that enhances the overall aesthetic of any space. They come in various designs, textures, and finishes, allowing for customization to match the interior decor.

2. Acoustic Properties

These tiles are excellent at improving acoustics by absorbing sound, reducing echo, and minimizing noise levels. This makes them ideal for offices, schools, hospitals, and other environments where sound control is crucial.

3. Fire Resistance

One of the standout features of gypsum is its natural fire-resistant properties. Gypsum Suspended Ceiling Tiles provide an additional layer of fire protection, helping to prevent the spread of flames and providing valuable time for evacuation during emergencies.

Read too: Discovering the Charm of Nautical Outdoor Ceiling Fans for Your Coastal Retreat: Sail into Style

4. Easy Installation and Maintenance

Gypsum Suspended Ceiling Tiles are relatively easy to install and maintain. The suspension system allows for quick access to the space above the ceiling, making it convenient for repairs, upgrades, or maintenance of electrical and HVAC systems.

5. Thermal Insulation

These tiles offer good thermal insulation properties, helping to maintain a consistent indoor temperature and reducing energy costs.

Installation Process of Gypsum Suspended Ceiling Tiles

1. Planning and Preparation

Before installation, it’s essential to plan the layout and design of the suspended ceiling. Measurements of the room should be taken to determine the amount of material needed. Ensure all necessary tools and materials are on hand, including the suspension grid, gypsum tiles, and any additional components.

2. Installing the Suspension Grid

The first step in the installation process is to set up the suspension grid. This involves:

  • Marking the Ceiling: Use a laser level or chalk line to mark the desired height of the suspended ceiling on the walls.
  • Installing Wall Angles: Attach wall angles along the marked lines to provide support for the suspension grid.
  • Hanging Main Tees: Main tees are the primary support beams that run parallel to the longest walls. Hang them from the structural ceiling using wires or hangers.
  • Installing Cross Tees: Cross tees are placed perpendicular to the main tees, creating a grid pattern. They should be spaced according to the size of the gypsum tiles.

3. Placing the Gypsum Tiles

Once the grid is in place, the gypsum tiles can be installed. Simply lift the tiles and place them within the grid, ensuring they fit snugly and are level. Cut tiles as needed to fit around fixtures, vents, or other obstacles.

4. Finishing Touches

After all the tiles are in place, inspect the ceiling for any gaps or uneven areas. Make necessary adjustments to ensure a smooth, uniform appearance.

Maintenance Tips for Gypsum Suspended Ceiling Tiles

1. Regular Cleaning

Dust and dirt can accumulate on ceiling tiles over time. Regularly clean the tiles with a soft cloth or vacuum to maintain their appearance. For stubborn stains, use a mild detergent solution.

2. Inspect for Damage

Periodically inspect the ceiling tiles for any signs of damage, such as cracks, chips, or sagging. Replace any damaged tiles promptly to maintain the integrity and appearance of the ceiling.

3. Moisture Control

Gypsum tiles can be susceptible to moisture damage. Ensure that the space above the ceiling is well-ventilated and free from leaks. Address any moisture issues immediately to prevent damage to the tiles.

4. Avoid Heavy Loads

Avoid placing heavy objects on top of the suspended ceiling grid, as this can cause sagging or damage to the tiles.

Applications of Gypsum Suspended Ceiling Tiles

1. Residential Spaces

Gypsum Suspended Ceiling Tiles are a popular choice for residential spaces, including living rooms, kitchens, and basements. They provide a clean, modern look and offer practical benefits such as improved acoustics and fire resistance.

2. Commercial Spaces

In commercial settings, such as offices, retail stores, and restaurants, these tiles offer a professional appearance and enhance the overall ambiance. Their acoustic properties are particularly beneficial in open office environments where noise control is essential.

3. Educational Institutions

Schools and universities can benefit from the sound-absorbing qualities of Gypsum Suspended Ceiling Tile. They help create a conducive learning environment by reducing noise levels and improving speech clarity.

4. Healthcare Facilities

Hospitals and clinics require ceilings that are easy to clean, fire-resistant, and provide good acoustics. Gypsum Suspended Ceiling Tile meet these requirements, making them an ideal choice for healthcare facilities.

Conclusion

Gypsum Suspended Ceiling Tile are a versatile and practical solution for both residential and commercial spaces. Their aesthetic appeal, acoustic properties, fire resistance, and ease of installation make them a popular choice among homeowners and professionals alike. By understanding the benefits, installation process, and maintenance tips, you can make an informed decision when selecting Gypsum Suspended Ceiling Tile for your next project.

Suspended Ceiling LED Light Panels: Illuminate Your Space with Stylish

Are you looking to enhance the ambiance of your space while maximizing energy efficiency? Explore the world of suspended ceiling LED light panels. In this comprehensive guide, we’ll delve into the features, installation techniques, and design possibilities of these modern lighting solutions, empowering you to transform any room with ease.

Suspended Ceiling Led Light Panels

Introducing Suspended Ceiling LED Light Panels

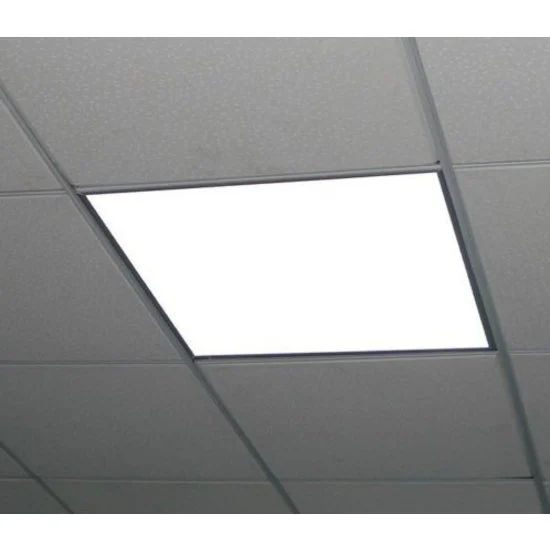
Suspended ceiling LED light panels, also known as drop ceiling light panels, are innovative lighting fixtures that are installed within a suspended ceiling grid. These panels offer a sleek and contemporary lighting solution for a variety of spaces, including offices, retail stores, schools, healthcare facilities, and more. They provide uniform illumination while seamlessly blending into the ceiling, creating a clean and minimalist aesthetic.

Features of Suspended Ceiling LED Light Panels

  1. Energy Efficiency: LED technology offers superior energy efficiency, consuming less power than traditional lighting sources while producing bright and consistent illumination.
  2. Customizable Designs: Suspended ceiling LED light panels are available in a range of sizes, shapes, and color temperatures to suit different applications and design preferences.
  3. Long Lifespan: LED light panels have a long lifespan, reducing maintenance costs and the need for frequent bulb replacements.
  4. Dimmable Options: Many LED light panels are dimmable, allowing users to adjust the brightness level to create the desired ambiance and save additional energy.

Read too: Exploring the Innovation and Efficiency of Ceiling Mounted Surgical Light Solutions: Illuminating Precision

Installation Methods for Suspended Ceiling LED Light Panels

  1. Standard Grid Installation: LED light panels are designed to fit seamlessly into standard drop ceiling grids. Simply remove the existing ceiling tile and replace it with the LED panel, ensuring that it is securely seated within the grid.
  2. Surface Mounting: In spaces without a suspended ceiling grid, LED light panel can be surface-mounted using mounting brackets or suspension kits. This installation method allows for greater flexibility in placement and design.
  3. Recessed Installation: For a sleek and integrated look, LED light panels can be recessed into the ceiling using recessed mounting kits. This installation method minimizes the profile of the panels while still providing ample illumination.

Design Options

  1. Panel Shapes: LED light panels are available in various shapes, including square, rectangular, and round, allowing for versatile design possibilities.
  2. Color Temperatures: Choose from different color temperatures, such as warm white, cool white, and daylight, to create the desired ambiance and mood in your space.
  3. Custom Graphics: Some LED light panels can be customized with graphics, logos, or patterns, adding a unique touch to your ceiling design.
  4. Diffuser Options: Select from different diffuser materials, such as acrylic or polycarbonate, to achieve the desired light distribution and visual effect.

Conclusion

Suspended ceiling LED light panel offer a modern, energy-efficient, and versatile lighting solution for a wide range of applications. Whether you’re illuminating an office, retail space, or educational facility, these sleek and stylish fixtures provide uniform illumination while seamlessly integrating into the ceiling design. With their customizable options and easy installation, suspended ceiling LED light panel are an excellent choice for enhancing the aesthetics and functionality of any space.

Now that you’re familiar with the features, installation methods, and design options of suspended ceiling LED light panel, why not brighten up your space with these innovative lighting solutions?

Mastering the Art of Installing Drop Ceiling T Bar Systems: A Comprehensive Guide

Are you ready to transform your space with a sleek and modern drop ceiling? Dive into the world of Drop Ceiling T Bar systems in this in-depth guide. Learn everything you need to know about installation techniques, design options, and maintenance tips to create the perfect suspended ceiling for your home or office.

Drop Ceiling T Bar

Introduction

Drop ceilings, also known as suspended ceilings, are a popular choice for commercial and residential spaces due to their versatility and functionality. At the heart of every drop ceiling system is the T Bar grid, which provides support for ceiling tiles while allowing easy access to utilities above. In this article, we’ll explore the ins and outs of Drop Ceiling T Bar systems and how to install them like a pro.

Understanding Drop Ceiling T Bar Systems

Drop Ceiling T Bar systems consist of interlocking metal grids suspended from the ceiling joists or structure above. These grids form a framework that supports ceiling tiles or panels, creating a seamless and uniform ceiling surface. T Bar systems are available in various configurations, including standard flat grids and more intricate designs for added visual interest.

Benefits of Drop Ceiling T Bar Systems

  • Concealed Utilities: Drop ceilings hide unsightly wires, pipes, and ductwork, creating a cleaner and more polished appearance.
  • Acoustic Control: T Bar systems can improve acoustics by absorbing sound and reducing noise levels within a space.
  • Accessibility: Drop ceilings allow easy access to utilities above, making maintenance and repairs quick and hassle-free.
  • Design Flexibility: With a wide range of ceiling tile options available, T Bar systems offer endless design possibilities to suit any aesthetic preference.

Read too: A Comprehensive Mr Cool Ceiling Cassette Review: Unveiling Excellence

Installation Process

Installing a Drop Ceiling T Bar system requires careful planning and precise execution. Here’s a step-by-step guide to help you navigate the installation process:

  1. Preparation: Measure the dimensions of the room and plan the layout of the T Bar grid, taking into account any obstructions such as lights, vents, or ceiling fixtures.
  2. Installation of Main Tees: Begin by installing the main tees along the perimeter of the room, ensuring they are level and securely anchored to the ceiling.
  3. Installation of Cross Tees: Insert cross tees between the main tees at regular intervals, spacing them according to the size of the ceiling tiles.
  4. Attachment of Wall Angles: Secure wall angles to the walls around the perimeter of the room, providing additional support for the T Bar grid.
  5. Placement of Ceiling Tiles: Once the T Bar grid is in place, carefully insert ceiling tiles into the grid, ensuring they fit snugly and evenly.

Maintenance and Care

  • Regular Cleaning: Dust the surface of the ceiling tiles periodically to prevent dirt and debris buildup.
  • Inspect for Damage: Check the T Bar grid and ceiling tiles for any signs of damage or wear, repairing or replacing them as needed.
  • Address Water Damage: In the event of water damage, identify and repair the source of the leak promptly to prevent further damage to the ceiling system.

Conclusion

Drop Ceiling T Bar systems offer a practical and stylish solution for creating a seamless and functional ceiling surface. Whether you’re renovating a commercial space or updating your home, mastering the art of installing T Bar systems will elevate your interior design to new heights. With the right tools, techniques, and attention to detail, you can achieve a professional-quality finish that enhances the overall look and feel of your space.

A Guide to Ceiling Fan Suspended Ceiling Installation: Elevate Your Space with Style

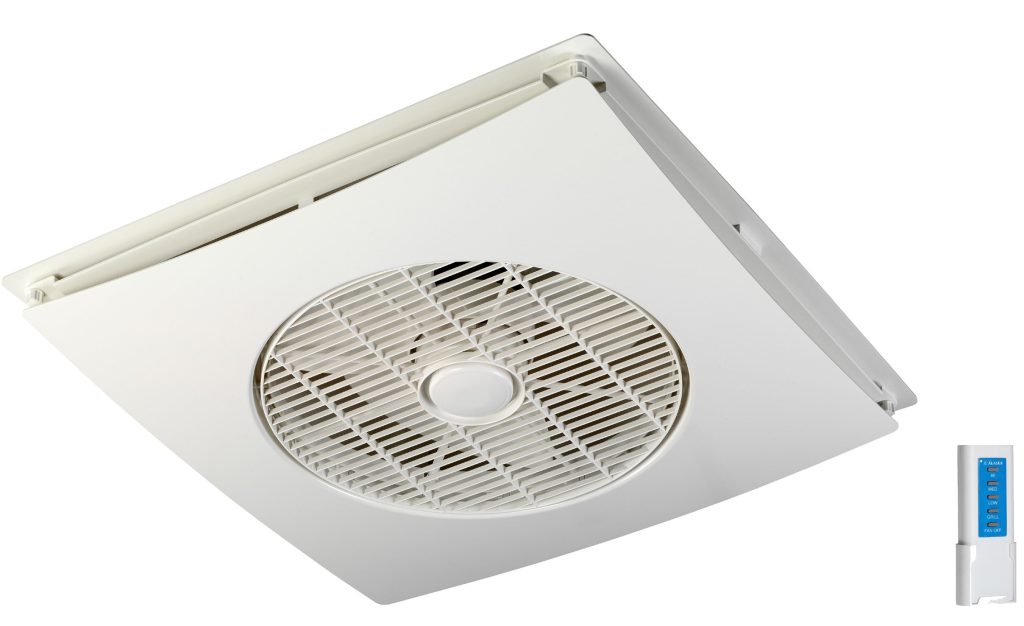
Transform your living or working environment with the perfect synergy of comfort and style – the Ceiling Fan Suspended Ceiling. Discover the ins and outs of installing these innovative fans, providing not only optimal air circulation but also a touch of sophistication to your suspended ceiling design.

Ceiling Fan Suspended Ceiling

Unveiling the Charm: Ceiling Fan Suspended Ceiling

Explore the marriage of form and function with Ceiling Fan Suspended Ceiling installations. From sleek modern offices to cozy home spaces, these fans seamlessly integrate into suspended ceilings, offering a refreshing and stylish alternative to traditional fan installations.

Why Choose Ceiling Fan Suspended Ceiling?

1. Space Optimization: Suspended ceilings, often found in offices or modern homes, can be challenging to work with. Ceiling Fan Suspended Ceiling installations optimize space utilization, offering a cooling solution without compromising floor or wall space.

2. Aesthetic Appeal: These fans enhance the visual appeal of your space, blending seamlessly with the clean lines of suspended ceilings. Choose from a variety of designs, finishes, and sizes to complement your interior decor.

3. Efficient Air Circulation: Ceiling Fans Suspended Ceilings installations are strategically positioned to ensure even air circulation throughout the room. This helps maintain a comfortable temperature and eliminates the need for multiple fans or complicated HVAC systems.

Ceiling Fan Suspended Ceiling Installation: Step-by-Step Guide

Let’s delve into the step-by-step process of installing a Ceiling Fans in a Suspended Ceilings, ensuring a seamless integration with your interior design.

1. Ceiling Grid Compatibility Check

Before installation, ensure that your suspended ceilings grid is compatible with the weight and dimensions of the ceiling fan. Consult the manufacturer’s guidelines and seek professional advice if needed.

2. Grid Reinforcement if Necessary

Depending on the weight of the fan, you may need to reinforce the ceiling grid to ensure it can support the additional load. This step is crucial for safety and proper functionality.

3. Fan Mounting Location Determination

Identify the ideal location for mounting the fan within the suspended ceilings. Consider factors such as room size, seating arrangements, and the overall aesthetic you want to achieve.

4. Grid Panel Removal

Carefully remove one or more grid panels from the chosen mounting location to make space for the fan. Ensure that the opening aligns with the dimensions specified in the fan’s installation instructions.

5. Secure Mounting Bracket Installation

Install the fan’s mounting bracket to the ceiling grid, ensuring it is securely fastened. This bracket will support the weight of the fan and keep it stable during operation.

6. Wiring Connection

Carefully connect the fan’s wiring to the existing electrical system. Follow the manufacturer’s instructions and, if needed, consult an electrician to ensure a safe and proper connection.

7. Fan Installation

With the mounting bracket in place and the wiring connected, install the fan onto the bracket. Secure it according to the manufacturer’s instructions, ensuring it is level and stable.

8. Grid Panel Replacement

Replace the removed grid panels, adjusting them to fit around the installed fan. Ensure a seamless integration with the surrounding suspended ceiling.

9. Testing and Calibration

Once the installation is complete, test the fan to ensure it operates smoothly. Check for any wobbling, unusual noises, or issues with speed control. Make necessary adjustments for optimal performance.

Enhancing Comfort and Style with Ceiling Fan Suspended Ceiling

Elevate your space to new heights by exploring the unique features and benefits of Ceiling Fans Suspended Ceiling installations.

1. Silent Operation

Ceiling Fans Suspended Ceiling installations are designed for quiet operation, making them an ideal choice for offices, bedrooms, or any space where noise is a concern.

2. Energy Efficiency

These fans are energy-efficient, contributing to reduced electricity consumption. Enjoy a comfortable environment without the guilt of high energy bills.

3. Customizable Designs

Choose from a variety of customizable designs to match your interior decor. From minimalist white fans to sleek metallic finishes, Ceiling Fans Suspended Ceilings installations offer versatility in design.

Read too: Unveiling the Essentials of Vaulted Ceiling Insulation Requirements: Elevate Your Space

A Comprehensive Guide to Successful Suspended Ceiling Installation: Mastering Elegance

Embark on a journey of refinement as we unveil the art of “Suspended Ceiling Installation.” Discover the intricacies, benefits, and step-by-step process for achieving a sophisticated and functional suspended ceiling.

Suspended Ceiling Installation

Suspended Ceiling Installation: Elevating Spaces with Elegance

Introduction: The Allure of Suspended Ceilings

  1. Defining Elegance: Understanding the Appeal of Suspended CeilingsBegin your exploration by delving into the aesthetic and functional appeal of suspended ceilings. Uncover how these installations contribute to the overall ambiance of a space.
  2. Versatility Unleashed: Where and Why to Opt for Suspended CeilingsExplore the diverse environments where suspended ceilings excel. From commercial spaces to residential interiors, understand the versatility that makes them a popular choice.

Navigating the Installation Process: Mastering the Art

Essential Steps: A Blueprint for Success

  1. Preparation Phase: Setting the Foundation for a Flawless InstallationDive into the initial steps of preparation, including assessing the space and gathering the necessary tools and materials. Lay the foundation for a seamless installation process.
  2. Grid Installation: Constructing the Framework for EleganceLearn the art of installing the grid system, the backbone of a suspended ceiling. Understand the precision required to create a sturdy framework that enhances the overall structure.
  3. Panel Placement: Achieving Symmetry and Visual HarmonyExplore techniques for placing panels with precision. From ensuring symmetry to optimizing visual appeal, grasp the finer details that contribute to a visually stunning suspended ceiling.
  4. Finishing Touches: Edging and Trim for a Polished LookDelve into the finishing touches that elevate the aesthetics of your suspended ceiling. Master the art of edging and trim installation to achieve a polished and refined appearance.

Practical Considerations: Maximizing the Benefits

1. Acoustic Enhancement: Harnessing the Power of Suspended Ceilings

Uncover the acoustic benefits of suspended ceilings. Understand how these installations contribute to sound control and create environments conducive to focused work or relaxation.

2. Lighting Integration: Illuminating Spaces with Grace

Explore strategies for seamlessly integrating lighting fixtures into suspended ceilings. Discover how strategic placement enhances both functionality and visual appeal.

Read too: Unveiling the Essentials of Vaulted Ceiling Insulation Requirements: Elevate Your Space

Conclusion: Elevate Your Space with a Flawless Suspended Ceiling Installation

As we conclude our journey into the world of “Suspended Ceiling Installation,” you’ve gained insights into the art and science behind creating elegant and functional ceilings. Empower yourself with the knowledge to transform spaces with sophistication, making every installation a masterpiece.