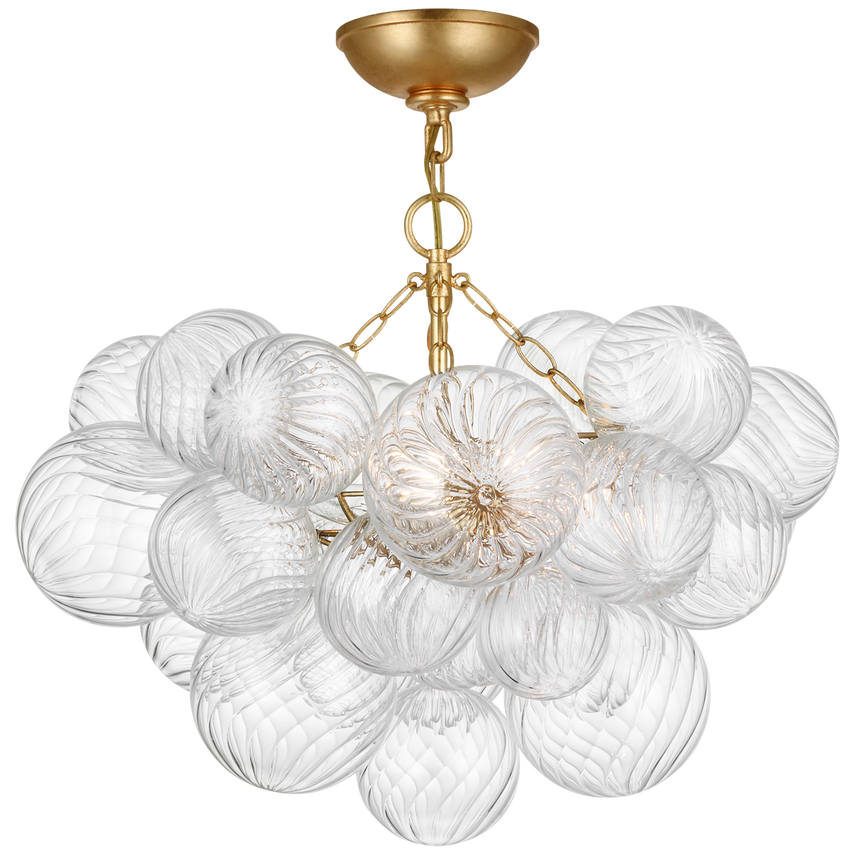
Glass Semi Flush Mount Ceiling Light: The Ultimate Lighting Guide

Lighting is one of the most critical elements in home design. Not only does it provide essential functionality, but it also enhances the overall ambiance of any room. One lighting solution that offers both practicality and style is the glass semi flush mount ceiling light. This type of lighting is a popular choice for homeowners looking to add sophistication and a warm glow to their space without the bulk of a full chandelier or pendant. In this guide, we will explore everything you need to know about glass semi flush mount ceiling lights, including how to choose the perfect one for your home and tips for installation and maintenance.

Glass Semi Flush Mount Ceiling Light

What is a Glass Semi Flush Mount Ceiling Light?

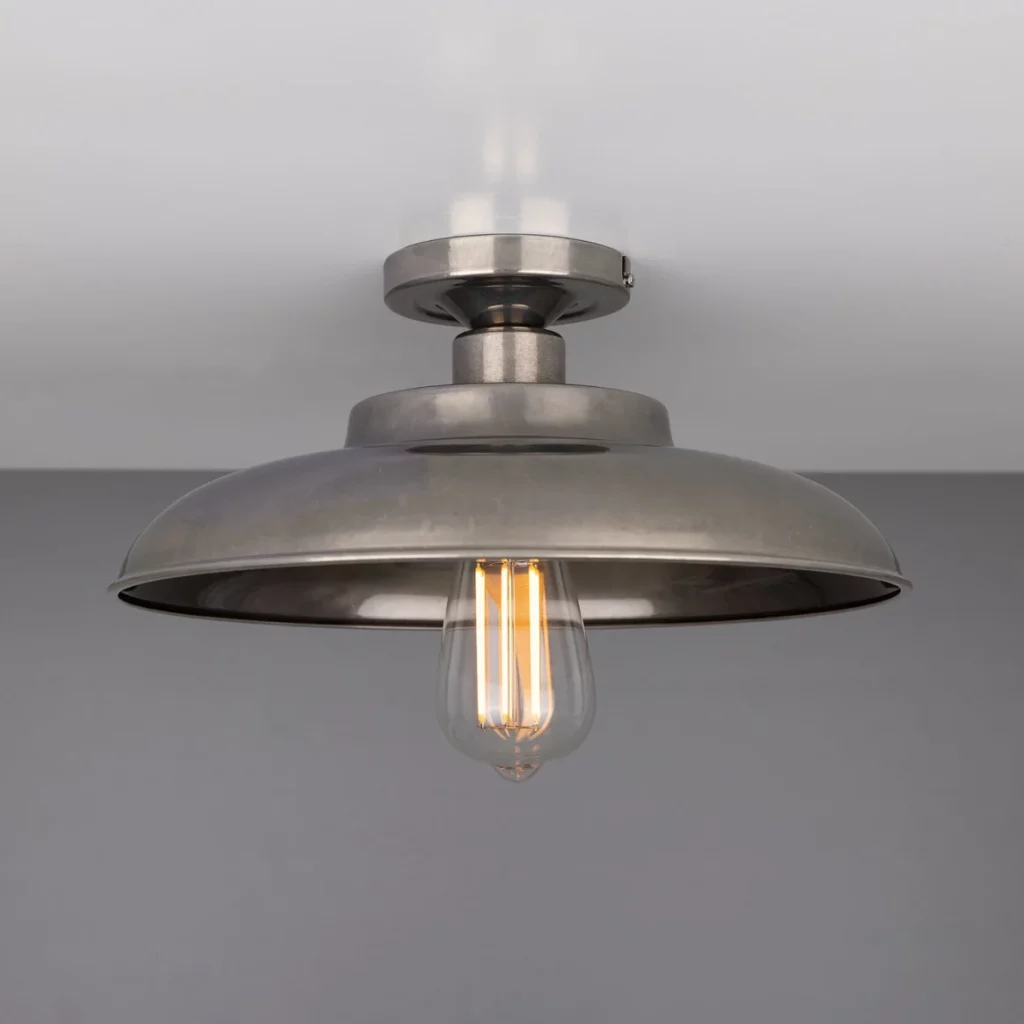
A glass semi flush mount ceiling light is a type of ceiling fixture that is installed close to the ceiling but hangs slightly down, typically by a few inches. Unlike flush mount lights, which sit directly against the ceiling, semi flush mount fixtures allow for a small gap, offering a more decorative appearance while maintaining a low profile.

The addition of glass in these fixtures elevates the look, adding elegance and transparency that can diffuse light beautifully across the room. Whether you’re upgrading a hallway, dining room, bedroom, or even a kitchen, glass semi flush mount ceiling lights are versatile enough to suit various design preferences, from traditional to modern.

Read too: Kitchen Lighting For A Vaulted Ceiling: Illuminating Your Space with Style and Functionality

Why Choose a Glass Semi Flush Mount Ceiling Light?

Opting for a glass semi flush mount ceiling light offers several advantages, making it a preferred choice for many interior designers and homeowners alike. Here are a few key benefits:

1. Space-Saving Design

One of the primary reasons people choose a glass semi flush mount ceiling light is its compact size. If you have low ceilings or small rooms, a full chandelier or pendant light may overwhelm the space. Semi flush mounts provide the best of both worlds, offering a decorative design element without occupying too much vertical space.

2. Versatile Aesthetic

Glass fixtures have a timeless appeal. Whether your home décor leans toward modern, industrial, or vintage, a glass semi flush mount light can complement your style. The glass component also allows the fixture to blend seamlessly with other materials, such as metal or wood, to match any interior theme.

3. Balanced Light Distribution

Glass semi flush mount fixtures are designed to emit light both upwards and downwards, providing a balanced, diffused glow throughout the room. This makes them ideal for spaces where you need general lighting, such as foyers, hallways, or living rooms. The glass shade further softens the light, reducing glare and creating a pleasant ambiance.

4. Cost-Effective

Compared to more elaborate lighting options like chandeliers or large pendant lights, semi flush mounts are typically more affordable, while still offering a high-end appearance. Their combination of style, functionality, and price point makes them an excellent value for homeowners looking to upgrade their lighting on a budget.

5. Easy Installation

Since these fixtures don’t hang too far from the ceiling, they’re generally easier to install than more complex lighting options. Many glass semi flush mount ceiling lights are designed for straightforward installation, even for those with limited DIY skills.

Choosing the Right Glass Semi Flush Mount Ceiling Light for Your Home

With so many styles and features available, selecting the right glass semi flush mount ceiling light can feel overwhelming. To simplify the process, here are a few considerations to keep in mind when making your decision.

1. Room Size and Ceiling Height

One of the most important factors to consider is the size of the room and the height of the ceiling. Semi flush mount lights work well in spaces with standard-height ceilings, typically between 8 to 10 feet. If your room has a lower ceiling, opt for a light fixture with a compact profile to avoid making the space feel cramped. For larger rooms, choose a fixture with a wider diameter or multiple bulbs to ensure adequate light distribution.

2. Fixture Style and Finish

Think about the overall design style of your home. Do you prefer sleek, modern fixtures or something more ornate and traditional? The style of the light fixture should align with the existing décor. For example, a frosted glass semi flush mount ceiling light with brushed nickel hardware would complement a modern or contemporary room, while a clear glass fixture with bronze or antique brass accents might work better in a rustic or vintage-inspired space.

3. Light Bulb Type and Wattage

Consider the type of bulb that the fixture requires. Many modern semi flush mount lights are compatible with energy-efficient LED bulbs, which not only last longer but also reduce energy consumption. Additionally, check the wattage capacity to ensure the light will provide sufficient brightness for the intended space. Some glass fixtures can accommodate dimmable bulbs, which allow you to adjust the lighting intensity to suit your mood or activity.

4. Glass Shade Type

The type of glass used in the fixture can dramatically affect the look and lighting effect. Clear glass offers a more vibrant and direct light, while frosted or tinted glass provides a softer, diffused glow. Ribbed or etched glass adds texture and can serve as a decorative feature, enhancing the visual appeal of the fixture.

5. Color Temperature

The color temperature of the bulbs you choose can also influence the atmosphere in the room. Warm white (2700K-3000K) creates a cozy, inviting feel, perfect for living rooms or bedrooms. Cool white (4000K-5000K) is more energizing and crisp, making it suitable for kitchens, bathrooms, or offices.

How to Install a Glass Semi Flush Mount Ceiling Light

Installing a glass semi flush mount ceiling light is a relatively simple process, but if you’re unfamiliar with electrical work, it’s always best to consult with a professional. If you feel confident doing it yourself, here’s a general step-by-step guide to help you through the installation process:

1. Turn Off the Power

Before starting, ensure the power to the light fixture is turned off at the breaker box to avoid any accidents.

2. Remove the Old Fixture

If you’re replacing an old light, carefully remove the fixture by unscrewing it from the ceiling. Disconnect the wires from the old light fixture and set it aside.

3. Attach the Mounting Bracket

Most glass semi flush mount ceiling lights come with a mounting bracket. Attach this bracket to the ceiling box using the screws provided in the installation kit.

4. Connect the Wires

Connect the wires from the new fixture to the corresponding wires in the ceiling box (usually black to black, white to white, and ground wire to ground). Secure the connections with wire nuts.

5. Attach the Fixture

Once the wires are connected, carefully secure the fixture to the mounting bracket, ensuring it’s flush against the ceiling. Use screws to hold the fixture in place.

6. Install the Glass Shade

Attach the glass shade to the fixture, following the manufacturer’s instructions. Some fixtures use screws, while others may have a locking mechanism.

7. Turn the Power Back On

After everything is securely in place, turn the power back on at the breaker box. Test the light to make sure it’s functioning properly.

Maintaining Your Glass Semi Flush Mount Ceiling Light

To keep your glass semi flush mount ceiling light looking beautiful and working efficiently, regular maintenance is essential. Here are some tips for maintaining your fixture:

1. Regular Cleaning

Dust and dirt can accumulate on both the glass shade and the light fixture itself. Clean the glass regularly with a soft, damp cloth to remove any debris. For more stubborn grime, use a mild glass cleaner, but be sure to avoid harsh chemicals that could damage the finish.

2. Check for Loose Components

Periodically check the fixture to ensure that all components, including the glass shade, screws, and mounting bracket, are secure. This will prevent any rattling or potential damage.

3. Replace Burnt-Out Bulbs Promptly

When a bulb burns out, replace it as soon as possible to maintain the desired level of brightness in the room. If you’re using LED bulbs, this will happen less frequently, but it’s still important to check periodically.

Best Places to Use a Glass Semi Flush Mount Ceiling Light

Thanks to their versatility and stylish design, glass semi flush mount ceiling lights can be used in various spaces around the home. Here are some ideal locations:

  • Hallways and Entryways: A semi flush mount light with a glass shade can create a welcoming atmosphere in narrow spaces while offering plenty of illumination.
  • Bedrooms: These lights add a touch of elegance without overwhelming the room, making them perfect for master bedrooms or guest rooms.
  • Kitchens: Semi flush mounts provide excellent task lighting in kitchens, especially over islands or breakfast nooks.
  • Living Rooms: Add a statement piece to your living room with a decorative glass semi flush mount light that enhances both the style and functionality of the space.

Conclusion

A glass semi flush mount ceiling light is an ideal lighting solution for homeowners seeking a stylish yet practical fixture. It combines the elegance of glass with the functionality of a ceiling-mounted light, making it suitable for various spaces, including bedrooms, hallways, and kitchens. By carefully choosing the right style, size, and type of glass, you can transform your room into a well-lit, aesthetically pleasing area. With proper installation and maintenance, your semi flush mount ceiling light will serve you beautifully for years to come.


Ceiling Light Canopy Kits: Elevate Your Lighting Fixture with a Stylish

Transform the look of your ceiling light fixture with the addition of a sophisticated ceiling light canopy kits, enhancing both functionality and aesthetic appeal.

Ceiling Light Canopy Kit

Understanding Ceiling Light Canopy Kit

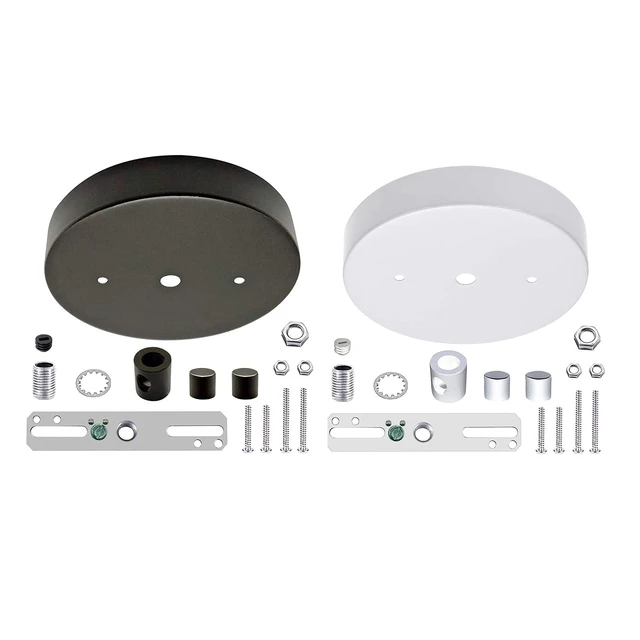
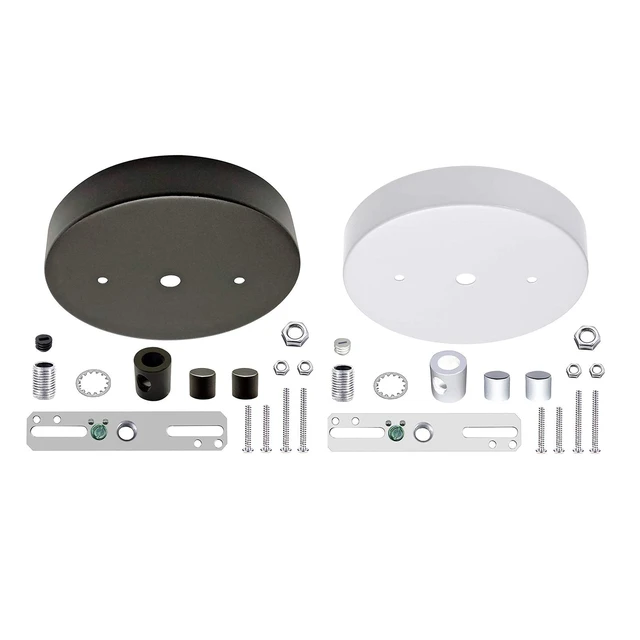
A ceiling light canopy kit is a versatile accessory that serves both practical and decorative purposes. It is used to cover and conceal the electrical wiring and junction box of a ceiling light fixture, providing a clean and polished look to the ceiling while offering support and stability to the fixture.

Exploring the Components of a Ceiling Light Canopy Kit

A typical ceiling light canopy kit includes the following components:

  1. Canopy: The canopy is a decorative cover that attaches to the ceiling and hides the electrical box and wiring. It comes in various shapes, sizes, and finishes to complement different styles of light fixtures and interior décor.
  2. Mounting Hardware: The kit usually includes screws, bolts, or other mounting hardware necessary for attaching the canopy to the ceiling and securing it in place.
  3. Decorative Elements: Some canopy kits may feature additional decorative elements such as rosettes, medallions, or trim pieces to further enhance the aesthetic appeal of the ceiling light fixture.

Benefits of Using a Ceiling Light Canopy Kit

Installing a ceiling light canopy kit offers several benefits:

  1. Enhanced Aesthetics: A canopy kit provides a finished and polished look to ceiling light fixtures, making them appear more attractive and visually appealing.
  2. Concealed Wiring: The canopy conceals unsightly wiring and junction boxes, creating a cleaner and more streamlined appearance on the ceiling.
  3. Added Stability: By securely attaching the canopy to the ceiling, the kit adds stability and support to the light fixture, reducing the risk of wobbling or shaking.
  4. Customization: With a wide range of canopy designs and finishes available, homeowners can customize their ceiling light fixtures to match their unique style preferences and interior décor.

Installing a Ceiling Light Canopy Kit

Follow these steps for a successful installation:

1. Turn Off Power

  • Before beginning the installation, turn off the power to the light fixture at the circuit breaker to avoid electrical hazards.

2. Remove Existing Canopy (if applicable)

  • If there is an existing canopy or ceiling medallion, remove it carefully to access the wiring and junction box.

3. Attach Mounting Bracket

  • Install the mounting bracket included in the canopy kit to the electrical box on the ceiling, ensuring it is securely fastened.

4. Connect Wires

  • Connect the wires from the ceiling to the corresponding wires on the light fixture, following the manufacturer’s instructions.

5. Secure Canopy

  • Attach the canopy to the mounting bracket using the provided screws or hardware, making sure it is level and stable.

Maintenance and Care Tips

To keep your ceiling light canopy kit looking its best, follow these maintenance tips:

  1. Regular Cleaning: Wipe the canopy and hardware with a soft, damp cloth to remove dust and debris regularly.
  2. Check for Loose Fasteners: Periodically inspect the mounting hardware and tighten any loose screws or bolts to maintain stability.
  3. Inspect for Damage: Check the canopy for any signs of damage or wear, such as cracks or discoloration, and replace it if necessary.

Conclusion

Ceiling light canopy kits enhance both appearance and functionality. They conceal wiring, add stability, and offer decorative flair. Upgrade your lighting fixtures stylishly and elevate your home’s interior design.

Read too: Flush Mount Rustic Ceiling Lights: Illuminate Your Space with Stunning

Koa Ceiling Fan With Lights: Illuminate Your Space with Elegance

Ceiling fans are more than just functional fixtures; they can also serve as stunning focal points in any room. Among the many options available, a Koa ceiling fan with lights stands out for its combination of style, functionality, and craftsmanship. In this guide, we delve into the allure of a Koa ceiling fan with light, exploring its features, benefits, and why it’s the perfect addition to any home décor.

Koa Ceiling Fan With Light

Introduction

The right lighting and airflow can transform the ambiance of any space, whether it’s a cozy living room, a stylish bedroom, or a welcoming patio. A Koa ceiling fan with light offers the perfect solution, combining the cooling breeze of a fan with the illumination of a light fixture. But what sets a Koa ceiling fan apart? Let’s find out.

Read too: Exploring the Efficiency of Radiant Ceiling Heater Electric: A Comprehensive Guide

Unveiling the Beauty of a Koa Ceiling Fan With Light

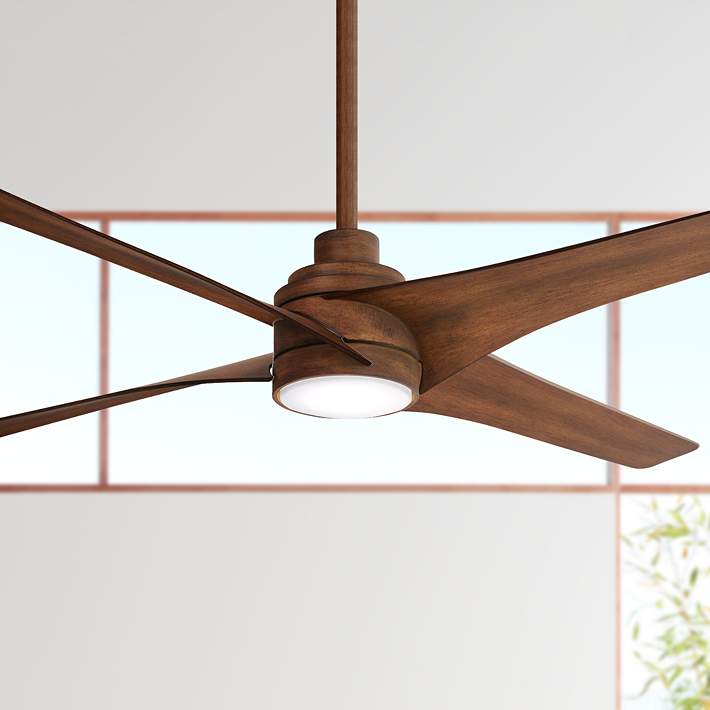
A Koa ceiling fan is more than just a functional appliance; it’s a piece of art that adds warmth and sophistication to any room. Crafted from quality materials and designed with attention to detail, a Koa ceiling fan with light exudes elegance and style, making it a standout feature in your home.

Key Features of a Koa Ceiling Fan With Light

  1. Exquisite Koa Wood Blades: Koa wood is prized for its rich, honey-colored tones and distinctive grain patterns. A Koa ceiling fan with light showcases this natural beauty, with blades crafted from genuine Koa wood for a luxurious touch.
  2. Integrated Lighting Fixture: Illuminate your space with the integrated light fixture of a Koa ceiling fan. Whether you prefer soft, ambient lighting or bright task lighting, the adjustable light fixture offers versatility to suit your needs.
  3. Silent and Efficient Motor: Enjoy the gentle breeze of a Koa ceiling fan with light, powered by a silent and energy-efficient motor. Whisper-quiet operation ensures a peaceful environment, while efficient performance helps reduce energy costs.
  4. Remote Control Convenience: Control the fan speed, light intensity, and direction from the comfort of your couch or bed with the included remote control. Adjust settings with ease to create the perfect atmosphere for any occasion.

Enhancing Your Home Décor with a Koa Ceiling Fan With Light

A Koa ceiling fan with light isn’t just a functional appliance; it’s a statement piece that adds character and charm to your home décor. Whether your style is modern and minimalist or classic and traditional, a Koa ceiling fan with light complements a variety of interior design themes, creating a cohesive look that ties the room together.

Installation and Maintenance

Installing a Koa ceiling fan with light is a straightforward process, but it’s essential to follow the manufacturer’s instructions carefully for optimal performance. Regular maintenance, such as dusting the blades and checking for loose screws, helps ensure smooth operation and prolongs the lifespan of your fan.

Conclusion

In conclusion, a Koa ceiling fan with lights is more than just a functional appliance; it’s a beautiful addition to any home décor. With its exquisite craftsmanship, elegant design, and practical features, a Koa ceiling fan with light enhances the ambiance of any room while providing cooling comfort and illumination. Elevate your space with the timeless beauty of a Koa ceiling fan with light and enjoy both style and functionality for years to come.

Spitfire Ceiling Fan With Lights: A Perfect Blend of Style and Functionality

The Spitfire Ceiling Fan With Lights is more than just a cooling solution—it’s a stylish addition to any room that enhances both comfort and aesthetics. In this article, we’ll explore the features and benefits of the Spitfire Ceiling Fan With Light, and why it’s the perfect choice for your home.

Spitfire Ceiling Fan With Light

Introducing the Spitfire Ceiling Fan With Light

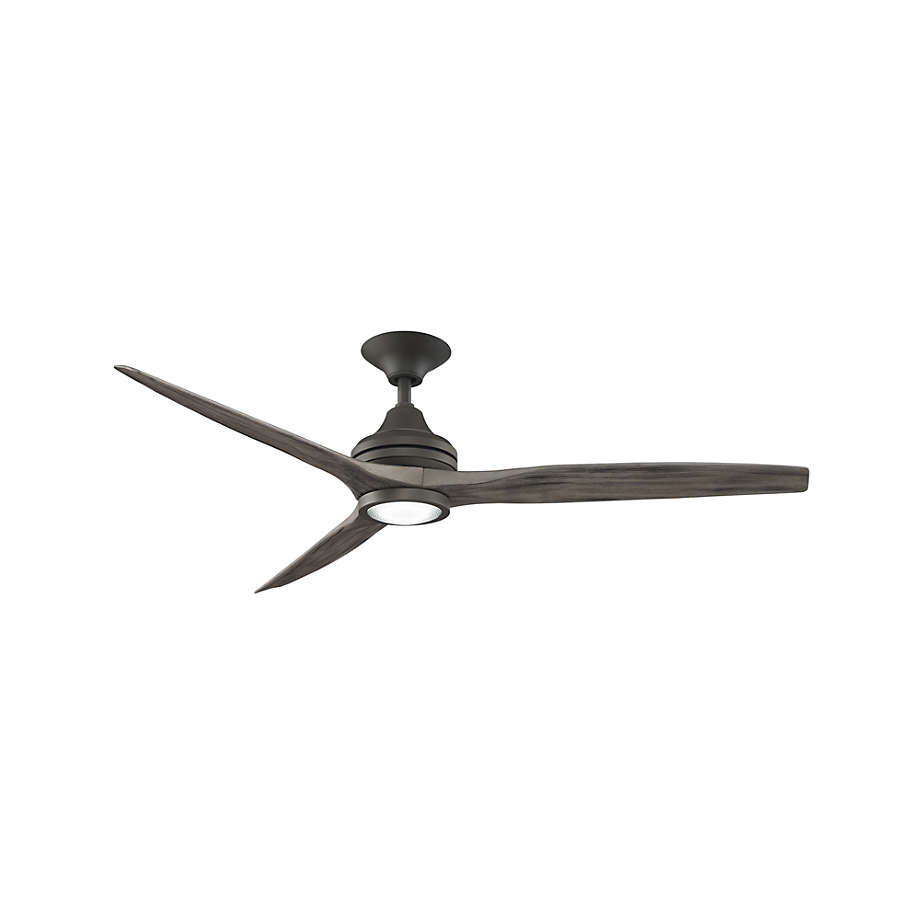
The Spitfire Ceiling Fan With Light is a versatile and elegant fixture designed to provide optimal airflow and illumination while adding a touch of sophistication to your living space. With its sleek design and advanced features, this ceiling fan offers the perfect blend of style and functionality.

Key Features

  1. Sleek Design: The Spitfire Ceiling Fan With Light features a modern and streamlined design that complements a variety of interior styles. Its clean lines and understated elegance make it a focal point in any room.
  2. Efficient Cooling: Equipped with high-quality blades and a powerful motor, the Spitfire Ceiling Fan With Light delivers exceptional airflow to keep your space cool and comfortable, even on the hottest days.
  3. Integrated Light Fixture: Unlike traditional ceiling fans, the Spitfire comes with an integrated light fixture, providing both illumination and airflow in one sleek package. This feature makes it ideal for rooms where space is limited or where additional lighting is desired.
  4. Remote Control Operation: With the included remote control, you can easily adjust the fan speed and light settings from anywhere in the room, providing convenience and ease of use.

Installing and Using the Spitfire Ceiling Fan With Light

Installing the Spitfire Ceiling Fan With Light is a straightforward process that can be completed by most homeowners with basic tools and DIY skills. However, if you’re not comfortable with electrical work, it’s always best to hire a professional.

Once installed, using the Spitfire Ceiling Fan With Light is a breeze. Simply use the remote control to adjust the fan speed and light settings to your liking, ensuring optimal comfort and ambiance in any room.

Benefits of Choosing the Spitfire Ceiling Fan With Light

  1. Enhanced Comfort: With its powerful airflow and integrated light fixture, the Spitfire Ceiling Fan With Light enhances comfort and convenience in any room of your home.
  2. Energy Efficiency: Compared to traditional lighting and cooling solutions, the Spitfire Ceiling Fan With Light is highly energy-efficient, helping you save on utility bills while reducing your environmental footprint.
  3. Versatile Design: Whether you’re looking to add a touch of elegance to your living room, bedroom, or outdoor space, the Spitfire Ceiling Fan With Light is a versatile fixture that complements any decor.

Conclusion

The Spitfire Ceiling Fan With Lights is more than just a practical appliance—it’s a statement piece that elevates the style and functionality of any room. With its sleek design, efficient cooling, and integrated lighting, this ceiling fan is the perfect choice for homeowners looking to enhance their living spaces.

Read too: Exploring the Efficiency of Radiant Ceiling Heater Electric: A Comprehensive Guide

Chandelier for High Ceiling: Choosing the Perfect

When it comes to illuminating a room with high ceilings, ordinary lighting fixtures often fall short in both style and functionality. That’s where the majestic chandelier comes into play, offering a stunning focal point that not only provides ample illumination but also adds a touch of elegance and grandeur to any space. In this comprehensive guide, we’ll delve into everything you need to know about selecting the perfect chandelier for high ceiling, from design considerations to installation tips and beyond.

Chandelier For High Ceiling

Understanding the Impact of Chandelier For High Ceiling

Making a Statement

A chandelier for high ceilings is more than just a lighting fixture – it’s a statement piece that commands attention and sets the tone for the entire room. With its intricate design and dazzling illumination, a well-chosen chandelier can transform an ordinary space into a show-stopping masterpiece.

Read too: How To Extend Kitchen Cabinets To The Ceiling: A Complete Guide for Maximizing Space and Style

Factors to Consider When Choosing a Chandelier For High Ceiling

Size and Scale

When selecting a chandelier for a high-ceilinged room, size matters. Opt for a fixture that is proportionate to the size of the space and the height of the ceiling. A chandelier that is too small may get lost in the vastness of the room, while one that is too large can overwhelm the space and feel out of place.

Design Options for Chandelier For High Ceiling

Variety of Styles

Chandeliers for high ceilings come in a wide range of styles to suit any decor preference, from classic and traditional to modern and contemporary. Consider the overall aesthetic of your space when choosing a chandelier design, ensuring that it complements the existing decor and architectural features.

Installation Tips for Chandelier For High Ceiling

Safety First

Installing a chandelier for a high ceiling requires careful planning and attention to safety. Follow these tips to ensure a successful installation:

  1. Secure Mounting: Use a secure mounting bracket or ceiling hook to support the weight of the chandelier and prevent it from swaying or falling.
  2. Professional Installation: If you’re unsure about installing the chandelier yourself, consider hiring a professional electrician or contractor to handle the installation process safely and efficiently.

Benefits of Chandelier For High Ceiling

Enhanced Ambiance

A chandelier for a high ceiling creates a warm and inviting ambiance, casting a soft and flattering glow that enhances the overall atmosphere of the room. Whether you’re hosting a dinner party or enjoying a quiet evening at home, the right chandelier can elevate any occasion.

Conclusion

Elevate your high-ceilinged space to new heights of elegance and sophistication with the perfect chandelier. By considering factors such as size, style, and installation, you can select a chandelier that not only illuminates your room but also enhances its aesthetic appeal. Whether you prefer a timeless crystal design or a sleek modern fixture, there’s a chandelier for high ceilings to suit every taste and preference. Explore your options, unleash your creativity, and transform your space with the timeless beauty of a stunning chandelier.

56 Inch Ceiling Fan With Light And Remote: Exploring the Benefits

In the realm of home comfort and convenience, few fixtures offer as much versatility and functionality as a 56 inch ceiling fan with light and remote control. Combining the cooling power of a ceiling fan with the illumination of a light fixture and the convenience of remote control operation, these multifunctional fixtures are a must-have for any modern home. In this comprehensive guide, we’ll delve into the benefits, features, and considerations of a 56 inch ceiling fan with light and remote, empowering you to make an informed decision for your home.

56 Inch Ceiling Fan With Light And Remote

Understanding the Features

Cooling Power

The primary function of a ceiling fan is to circulate air, creating a gentle breeze that helps to cool the room. With a 56 inch fan blade span, these ceiling fans are capable of generating a significant airflow, effectively cooling larger rooms with ease. Whether you’re looking to combat the summer heat or improve air circulation year-round, a 56 inch ceiling fan is up to the task.

Illumination Options

In addition to cooling, many 56 inch ceiling fans come equipped with built-in light fixtures, providing both functionality and ambiance to the room. Whether you prefer the soft glow of integrated LED lights or the versatility of traditional light bulbs, there are options to suit every preference. With the ability to control both the fan and the light independently, you can customize the atmosphere of your space to suit any occasion.

Read too: Understanding and Dealing with Ants in the Ceiling Spaces: Navigating the Intrusion

Remote Control Convenience

Gone are the days of struggling with pull chains or wall switches to adjust your ceiling fan settings. With a remote-controlled ceiling fan, you can easily adjust the fan speed, light brightness, and direction of airflow from the comfort of your couch or bed. This added convenience makes it effortless to fine-tune the comfort level of your space without having to get up from your seat.

Choosing the Right Fan

Size Matters

When selecting a 56 inch ceiling fan, consider the size of the room where it will be installed. For larger rooms or spaces with high ceilings, a fan with a larger blade span may be more effective at circulating air and cooling the space. Conversely, smaller rooms may benefit from a fan with a smaller blade span to prevent overpowering the space.

Style and Design

Ceiling fans come in a variety of styles and designs to complement any decor aesthetic. Whether your home boasts a modern, traditional, or transitional design theme, there’s a fan to suit your style preferences. Look for features such as reversible fan blades, customizable finishes, and decorative accents to enhance the visual appeal of your space.

Energy Efficiency

Opt for a ceiling fan with energy-efficient features to minimize electricity consumption and reduce utility costs. Look for fans with ENERGY STAR certification or integrated LED lighting to ensure optimal energy efficiency without sacrificing performance. Additionally, consider features such as reversible motor direction and timer settings to further maximize energy savings.

Installation and Maintenance

Professional Installation

While some homeowners may choose to install a ceiling fan themselves, professional installation is recommended for optimal safety and performance. A licensed electrician can ensure that the fan is installed correctly, including proper wiring, mounting, and balancing, to prevent accidents and prolong the life of the fixture.

Regular Maintenance

To keep your 56 inch ceiling fan running smoothly and efficiently, it’s important to perform regular maintenance tasks. This includes cleaning the fan blades and motor housing to remove dust and debris, lubricating moving parts to reduce friction and wear, and checking for any signs of damage or wear and tear.

Conclusion

In conclusion, a 56 inch ceiling fan with light and remote control offers a winning combination of style, functionality, and convenience for any home. Whether you’re looking to cool a large living room, bedroom, or outdoor patio, these versatile fixtures provide an efficient and effective solution. By selecting the right fan for your space, considering factors such as size, style, and energy efficiency, and ensuring proper installation and maintenance, you can enjoy enhanced comfort and style in your home for years to come.

Stylish Canopy Kit for Ceiling Light: Enhance Your Lighting Fixture

A canopy kit for ceiling light is a simple yet effective accessory that can elevate the appearance of your lighting fixture while providing added functionality. In this comprehensive guide, we’ll explore the benefits of using a canopy kit, discuss its components and installation process, and offer creative ideas for incorporating it into your home décor.

Canopy Kit For Ceiling Light

Understanding Canopy Kits for Ceiling Lights

A canopy kit for ceiling light is a decorative cover that conceals the electrical box and wiring used to mount a light fixture to the ceiling. It typically consists of a metal or plastic canopy, mounting hardware, and decorative elements such as finials or medallions. Canopy kits come in a variety of sizes, shapes, and finishes to complement different types of light fixtures and interior styles.

Benefits of Using a Canopy Kit for Ceiling Light

  1. Enhanced Aesthetics: A canopy kit adds a polished finishing touch to your ceiling light, covering unsightly electrical components and creating a seamless transition between the fixture and the ceiling. With various designs and finishes available, you can choose a canopy kit that complements your décor and enhances the overall aesthetic appeal of the room.
  2. Improved Safety: By concealing the electrical box and wiring, a canopy kit helps protect against accidental contact and reduces the risk of electrical hazards. This is especially important in homes with high ceilings or exposed wiring, where safety is a top priority.
  3. Easy Installation: Canopy kits are designed for easy installation, typically requiring just a few basic tools and minimal electrical knowledge. Most kits come with detailed instructions, making it simple for homeowners to upgrade their lighting fixtures without professional assistance.
  4. Versatile Design Options: Whether you prefer a sleek and minimalist look or a more ornate and decorative style, there’s a canopy kit available to suit your taste. From classic metal finishes like brushed nickel and oil-rubbed bronze to modern options like matte black and polished chrome, the possibilities are endless.

Components of a Canopy Kit for Ceiling Light

A typical canopy kit for ceiling light consists of the following components:

  1. Canopy: The main component of the kit, the canopy is a cover that attaches to the ceiling and conceals the electrical box and wiring. It may have a flat or domed shape, depending on the design preference.
  2. Mounting Hardware: The kit includes screws, bolts, or other mounting hardware to secure the canopy to the ceiling and attach it to the electrical box.
  3. Decorative Elements: Some canopy kits come with decorative elements such as finials, medallions, or decorative nuts to add visual interest and enhance the overall appearance of the fixture.

Installation Process

Installing a canopy kit for ceiling light is a straightforward process that can be completed in a few simple steps:

  1. Turn Off Power: Before beginning any electrical work, turn off the power to the existing light fixture at the circuit breaker or fuse box.
  2. Remove Existing Fixture: Unscrew the existing light fixture from the ceiling and disconnect the wiring. Remove any mounting hardware or decorative elements attached to the fixture.
  3. Attach Canopy: Position the canopy over the electrical box, ensuring that it covers the wiring and fits securely against the ceiling. Use the provided mounting hardware to secure the canopy in place.
  4. Connect Wiring: Connect the wiring from the electrical box to the corresponding wires on the new light fixture according to the manufacturer’s instructions. Use wire nuts to secure the connections and tuck any excess wiring into the electrical box.
  5. Install Fixture: Attach the light fixture to the canopy using the provided hardware, making sure it is level and securely fastened. Install any decorative elements included with the canopy kit.
  6. Test the Fixture: Turn the power back on and test the new light fixture to ensure it is functioning properly. Make any necessary adjustments or repairs as needed.

Creative Ideas for Using Canopy Kits for Ceiling Lights

  1. Kitchen Lighting: Upgrade your kitchen lighting with a stylish canopy kit for ceiling light. Choose a sleek, modern design to complement contemporary kitchen décor or opt for a more traditional style to add warmth and character to the space.
  2. Entryway Lighting: Make a bold statement in your entryway with a decorative canopy kit for ceiling light. Select a design that reflects your personal style and sets the tone for the rest of your home’s interior.
  3. Bedroom Lighting: Create a cozy and inviting atmosphere in your bedroom with a canopy kit for ceiling light. Choose a soft, diffused light fixture for a calming effect or opt for adjustable brightness to suit your needs.

Conclusion

A canopy kit for ceiling light is a versatile and functional accessory that can enhance the appearance and performance of your lighting fixtures. Whether you’re updating an existing fixture or installing a new one, a canopy kit offers numerous benefits, including improved aesthetics, enhanced safety, and easy installation. With a wide range of design options available, you can easily find the perfect canopy kit to complement your décor and illuminate your space with style.

Read too: Exploring the Efficiency of Radiant Ceiling Heater Electric: A Comprehensive Guide

Craftsman Style Ceiling Fan With Light Fixture: Elevate Your Home Decor

Are you looking to add a touch of timeless elegance and functionality to your home? Consider installing a craftsman-style ceiling fan with integrated lighting. In this comprehensive guide, we’ll explore everything you need to know about craftsman-style ceiling fans with light, from their design features to installation tips and more.

Craftsman Style Ceiling Fan With Light

Understanding Craftsman Style Ceiling Fans With Light Fixtures

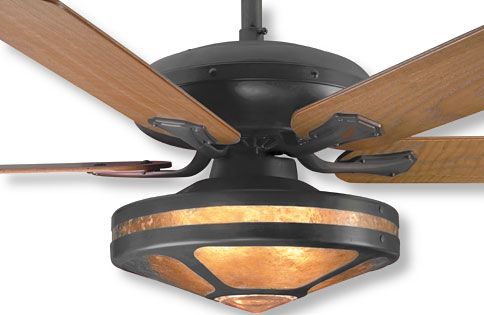
Craftsman-style ceiling fans are characterized by their distinctive design elements inspired by the Arts and Crafts movement of the late 19th and early 20th centuries. These fans often feature clean lines, geometric shapes, and natural materials such as wood and stained glass. When equipped with integrated lighting fixtures, they provide both illumination and air circulation, making them practical and stylish additions to any home.

Key Features of Craftsman Style Ceiling Fans With Lights

  1. Unique Aesthetic Appeal: Craftsman-style ceiling fans with light fixtures boast a distinctive aesthetic that blends seamlessly with various interior design styles, including Craftsman, Mission, and Arts and Crafts.
  2. Integrated Lighting: These ceiling fans come equipped with built-in lighting fixtures, eliminating the need for separate light sources and providing efficient illumination to the room.
  3. High-Quality Materials: Crafted from premium materials such as wood, metal, and stained glass, craftsman-style ceiling fans with lights are built to last and withstand the test of time.
  4. Versatile Design Options: From rustic wood finishes to sleek metal accents, craftsman-style ceiling fans with lights are available in a wide range of designs, allowing you to find the perfect match for your home decor.

Read too: Exploring Craftsman Style Ceiling Fans for Your Home: Embracing Timeless Elegance

Incorporating Craftsman Style Ceiling Fans With Lights Into Your Home

  1. Choose the Right Size: Consider the size of your room when selecting a craftsman-style ceiling fan with a light fixture. Opt for a fan with an appropriate blade span to ensure optimal air circulation and lighting coverage.
  2. Select a Suitable Finish: Match the finish of the ceiling fan with the existing decor elements in your room. Whether you prefer a rich wood tone, an oil-rubbed bronze finish, or a matte black look, choose a finish that complements your overall design scheme.
  3. Pay Attention to Lighting Features: Evaluate the lighting features of the ceiling fan, such as the type of bulbs used and the availability of dimming options. LED bulbs are energy-efficient and long-lasting, while dimming capabilities allow you to adjust the brightness according to your needs.
  4. Install with Care: Follow the manufacturer’s instructions carefully when installing your craftsman-style ceiling fan with a light fixture. If you’re unsure about the installation process, consider hiring a professional electrician to ensure proper setup and wiring.

Conclusion

Craftsman-style ceiling fans with integrated lighting fixtures offer a perfect blend of form and function, enhancing the beauty and comfort of any living space. Whether you’re updating your home decor or embarking on a new construction project, consider incorporating a craftsman-style ceiling fan to elevate your interior design with its timeless appeal.

Exploring the Versatility of 4 Light Flush Mount Ceiling Light Fixtures: Illuminate Your Space in Style

Are you looking to add both illumination and style to your space? Consider the versatility of 4 light flush mount ceiling light fixtures. These sleek and modern lighting solutions offer a perfect blend of functionality and aesthetics, ideal for any room in your home. In this guide, we’ll delve into the features, benefits, and design possibilities of 4 light flush mount ceiling light fixtures, helping you find the perfect lighting solution for your space.

4 Light Flush Mount Ceiling Light

Understanding 4 Light Flush Mount Ceiling Light Fixtures

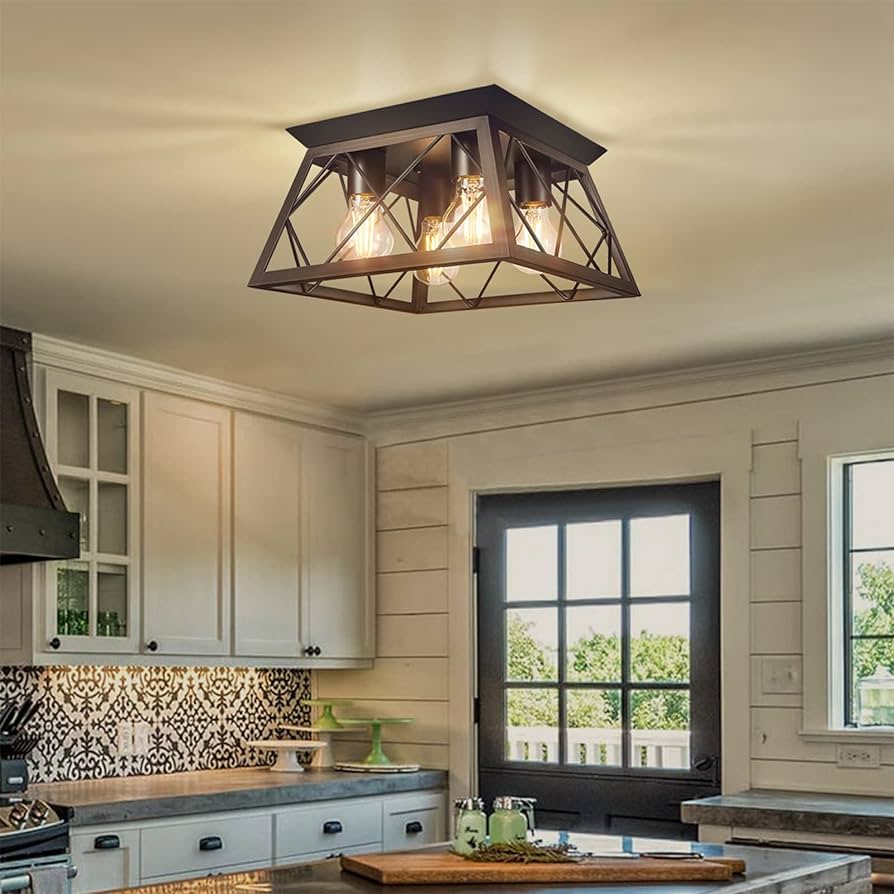
4 light flush mount ceiling light fixtures are designed to provide ample illumination while maintaining a low-profile and streamlined appearance. Unlike traditional pendant or chandelier-style lights, flush mount fixtures sit close to the ceiling, making them ideal for rooms with limited ceiling height or for creating a clean and modern look. With four individual light sources, these fixtures offer even and widespread illumination, perfect for larger rooms or areas that require ample lighting coverage.

Read too: Discovering the Charm of Nautical Outdoor Ceiling Fans for Your Coastal Retreat: Sail into Style

Benefits of Using 4 Light Flush Mount Ceiling Light Fixtures

There are several advantages to choosing 4 light flush mount ceiling light fixtures for your space:

  1. Ample Illumination: With four individual light sources, these fixtures provide ample illumination to brighten up any room or space. Whether you’re lighting up a living room, kitchen, bedroom, or hallway, 4 light flush mount fixtures offer even and widespread light coverage.
  2. Space-Saving Design: Flush mount ceiling lights are perfect for rooms with low ceilings or for spaces where you want to maintain a clean and uncluttered appearance. Their low-profile design allows them to sit close to the ceiling, making them ideal for rooms with limited vertical space.
  3. Versatile Styling Options: 4 light flush mount ceiling lights fixtures come in a variety of styles, finishes, and designs to suit any aesthetic preference or decor theme. Whether you prefer a sleek and modern look or a more traditional design, there’s a flush mount fixture to complement your space.
  4. Easy Installation: Flush mount ceiling lights are relatively easy to install, making them a convenient lighting solution for DIY enthusiasts or homeowners looking to upgrade their lighting fixtures. With basic electrical knowledge and tools, you can quickly and easily replace existing fixtures with 4 light flush mount options.

Design Inspirations for 4 Light Flush Mount Ceiling Light Fixtures

Let’s explore some design inspirations and ideas for incorporating 4 light flush mount ceilings lights fixtures into your space:

  1. Modern Minimalism: Choose sleek and streamlined flush mount fixtures with clean lines and minimalist design elements for a modern and contemporary look. Opt for finishes such as brushed nickel or matte black for a touch of sophistication.
  2. Traditional Elegance: For a more classic and timeless aesthetic, select flush mount fixtures with decorative details, such as ornate metalwork or frosted glass shades. Choose finishes like antique brass or oil-rubbed bronze for a traditional touch.
  3. Industrial Chic: Embrace the industrial trend with flush mount fixtures featuring exposed bulbs, metal cages, and rugged finishes. Look for fixtures with Edison-style bulbs or wire mesh shades for an edgy and urban vibe.
  4. Vintage Charm: Add a touch of vintage charm to your space with flush mount fixtures inspired by retro designs from the mid-20th century. Choose fixtures with sleek lines, bold colors, and frosted glass shades for a nostalgic nod to the past.

Installation Tips

When installing 4 light flush mount ceilings lights fixtures, consider the following tips to ensure a successful and safe installation:

  1. Turn Off Power: Before starting any electrical work, turn off the power to the existing light fixture at the circuit breaker or fuse box to prevent the risk of electric shock.
  2. Follow Manufacturer’s Instructions: Read and follow the manufacturer’s installation instructions carefully to ensure proper mounting and wiring of the fixture. Use the recommended tools and materials for the installation process.
  3. Secure Mounting: Ensure that the mounting bracket or hardware provided with the fixture is securely attached to the ceiling junction box. Use screws and anchors as needed to support the weight of the fixture.
  4. Connect Wiring Properly: Make sure to connect the wiring from the fixture to the corresponding wires in the ceiling junction box, following standard electrical wiring practices. Use wire connectors to secure the connections and prevent exposed wires.

Conclusion

4 light flush mount ceilings lights fixtures offer a versatile and stylish lighting solution for any room or space in your home. With their ample illumination, space-saving design, versatile styling options, and easy installation, these fixtures are perfect for brightening up your space with style and functionality. Whether you prefer a modern minimalist look, traditional elegance, industrial chic, or vintage charm, there’s a 4 light flush mount fixture to suit your aesthetic preferences. Illuminate your space in style and transform the ambiance of your home with the perfect flush mount

Discover the Beauty of Telal Flush Ceiling Lights: Illuminate Your Space with Elegance

Are you searching for the perfect lighting solution to add a touch of elegance to your space? Look no further than the Telal flush ceiling light. In this comprehensive guide, we’ll delve into the features, installation process, and benefits of the Telal flush ceiling lights, helping you illuminate your home with style and sophistication.

Telal Flush Ceiling Light

Exploring Telal Flush Ceiling Light

Understanding the Design

The Telal flush ceiling light features a sleek and modern design, with a low-profile canopy that sits flush against the ceiling, creating a seamless and minimalist look. The light fixture typically consists of a metal frame and a diffuser to evenly distribute the light.

Key Features

  1. Sleek and Modern Design: The Telal flush ceiling light boasts a contemporary design that complements a wide range of interior styles, from modern to transitional.
  2. Energy Efficiency: Many Telal flush ceiling lights come equipped with LED technology, offering energy-efficient lighting with long-lasting performance and reduced electricity bills.
  3. Versatile Lighting: With its flush mount design, the Telal light fixture provides both ambient and task lighting, making it suitable for various spaces such as living rooms, kitchens, and hallways.
  4. Easy Installation: The Telal flush ceiling light is designed for easy installation, with a simple mounting process that does not require extensive wiring or electrical expertise.

Read too: Exploring the Efficiency of Radiant Ceiling Heater Electric: A Comprehensive Guide

Benefits of Telal Flush Ceiling Light

1. Enhanced Ambiance

The soft and diffused light emitted by the Telal flush ceiling light creates a warm and inviting ambiance, perfect for relaxation and entertaining.

2. Space-Saving Design

The flush mount design of the Telal light fixture makes it ideal for rooms with low ceilings or limited overhead space, maximizing the available vertical space.

3. Stylish Addition to Any Room

With its sleek and modern design, the Telal flush ceiling light serves as a stylish addition to any room, adding a touch of sophistication and refinement to your home décor.

Installation Process

Step 1: Preparation

Before starting the installation process, turn off the power to the existing ceiling light fixture at the circuit breaker to prevent any electrical accidents.

Step 2: Mounting the Fixture

Attach the mounting bracket included with the Telal flush ceiling light to the ceiling junction box securely, using screws provided. This will provide a stable foundation for mounting the light fixture.

Step 3: Wiring

Connect the wires from the ceiling junction box to the corresponding wires on the Telal flush ceiling light, following the manufacturer’s instructions carefully. Secure the connections with wire nuts and tuck any excess wiring into the junction box.

Step 4: Attaching the Fixture

Carefully position the Telal flush ceiling light over the mounting bracket and secure it in place using the screws provided. Double-check to ensure that the fixture is level before tightening the screws completely.

How Telal Flush Ceiling Light Enhances Home Ambiance

The Telal flush ceiling light adds a touch of modern elegance to any room, enhancing the ambiance and creating a welcoming atmosphere for you and your guests to enjoy. Its soft and diffused light output helps to create a cozy and inviting environment, perfect for relaxing evenings or lively gatherings.

Conclusion

In conclusion, the Telal flush ceiling lights is a versatile and stylish lighting fixture that can elevate the ambiance of any room in your home. With its sleek design, energy-efficient lighting, and easy installation, the Telal flush ceiling light is a perfect choice for illuminating your space with sophistication and style.

Talia Semi Flush Ceiling Lights: Elevate Your Space with the Elegant Charm

Are you searching for the perfect lighting fixture to add a touch of elegance to your space? Look no further than the Talia semi flush ceiling light. In this comprehensive guide, we’ll explore everything you need to know about the Talia semi flush ceiling lights, from its exquisite design and features to installation tips and how it can elevate your home décor.

Talia Semi Flush Ceiling Light

Exploring Talia Semi Flush Ceiling Light

Understanding the Design

The Talia semi flush ceiling light is characterized by its sleek and sophisticated design, featuring a semi-flush mount that hugs the ceiling closely while still providing ample illumination. It typically consists of a metal frame with decorative accents and a diffuser to soften the light output.

Key Features

  1. Elegant Design: The Talia semi flush ceiling light boasts a timeless and elegant design that complements a wide range of interior styles, from traditional to modern.
  2. Versatile Lighting: With its semi flush mount design, the Talia light fixture provides both ambient and task lighting, making it suitable for various spaces such as living rooms, bedrooms, and entryways.
  3. Energy Efficiency: Many Talia semi flush ceiling lights feature LED technology, offering energy-efficient lighting with long-lasting performance and reduced electricity bills.
  4. Decorative Accents: Talia lights often come with decorative accents such as crystal embellishments, glass shades, or intricate metalwork, adding a touch of sophistication to any room.

Read too: Exploring the Efficiency of Radiant Ceiling Heater Electric: A Comprehensive Guide

Benefits of Talia Semi Flush Ceiling Light

1. Enhanced Ambiance

The soft and diffused light emitted by the Talia semi flush ceiling light creates a warm and inviting ambiance, perfect for relaxing evenings or entertaining guests.

2. Space-Saving Design

Unlike pendant lights or chandeliers that hang lower from the ceiling, the semi flush mount design of the Talia light fixture makes it ideal for rooms with lower ceilings or limited overhead space.

3. Stylish Statement Piece

With its elegant design and decorative details, the Talia semi flush ceiling light serves as a stylish statement piece that can enhance the overall aesthetic of your space.

Installation Tips

1. Turn Off Power

Before starting the installation process, be sure to turn off the power to the existing ceiling light fixture at the circuit breaker to prevent any electrical accidents.

2. Follow Manufacturer’s Instructions

Carefully read and follow the manufacturer’s instructions provided with the Talia semi flush ceiling light to ensure proper installation and safety compliance.

3. Secure Mounting Bracket

Attach the mounting bracket included with the light fixture to the ceiling junction box securely, using screws provided. This will provide a stable foundation for mounting the Talia light fixture.

How Talia Semi Flush Ceiling Light Enhances Home Décor

The Talia semi flush ceiling light can serve as a focal point in your room, adding a touch of sophistication and style to your home décor. Its elegant design and warm illumination can complement various interior styles, from classic to contemporary, and create a welcoming atmosphere for you and your guests to enjoy.

Conclusion

In conclusion, the Talia semi flush ceiling lights is a versatile and stylish lighting fixture that can enhance the ambiance and aesthetics of any space. With its elegant design, energy-efficient lighting, and easy installation, the Talia light fixture is a perfect choice for illuminating your home with timeless beauty and sophistication.