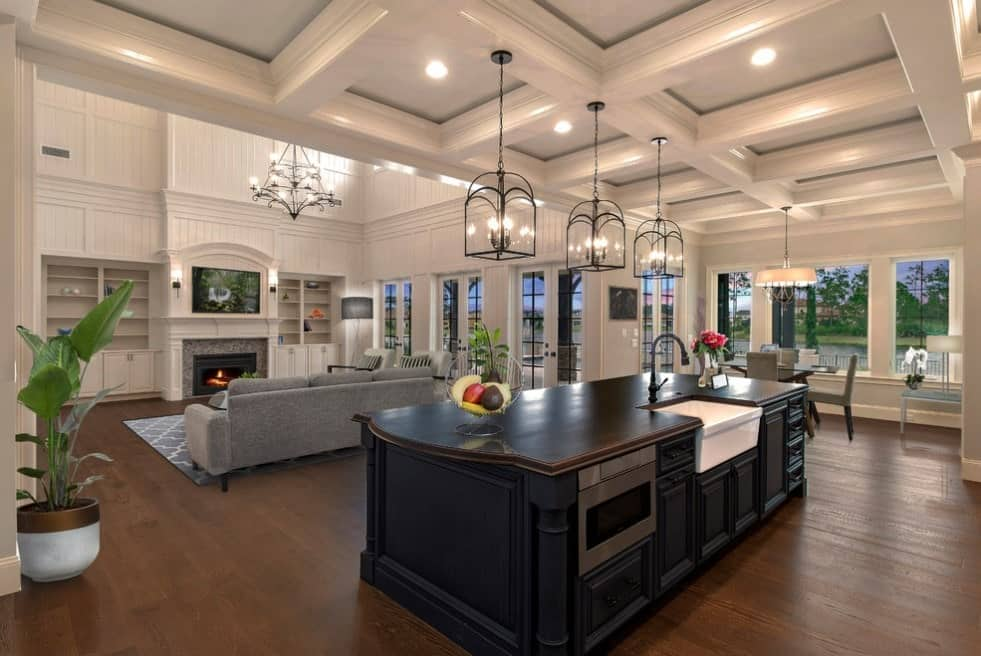
Metal Ceiling Tiles As Backsplash: A Trendy and Durable Option for Your Home

When it comes to home design, the kitchen and bathroom are two areas where creativity and functionality meet. One element that is gaining popularity for both these spaces is metal ceiling tiles as backsplash. Traditionally used on ceilings, metal tiles are now being adapted to function as an eye-catching and durable backsplash material. This article explores why metal ceiling tiles make an excellent choice for backsplash installation, the benefits they offer, how to choose the right design, and tips for installation.

Metal Ceiling Tiles As Backsplash

Why Choose Metal Ceiling Tiles As Backsplash?

Metal ceiling tiles have long been known for their ability to bring a sense of elegance and texture to ceilings. However, in recent years, interior designers and homeowners have realized their potential for use as backsplash materials. By incorporating these tiles into your kitchen or bathroom, you can achieve a chic, modern, and highly functional design. Here are several reasons why metal ceiling tiles as backsplash are becoming a sought-after option:

1. Durability and Long-Lasting Appeal

Metal tiles are extremely durable and resistant to wear and tear, making them a perfect choice for high-traffic areas like kitchens and bathrooms. Whether you are dealing with grease splatters in the kitchen or moisture in the bathroom, metal ceiling tiles as backsplash can withstand these elements much better than traditional materials like ceramic or glass. They are also less prone to cracking, chipping, or staining, making them a practical investment for the long term.

2. Easy Maintenance

One of the most significant advantages of using metal ceiling tiles as backsplash is their ease of maintenance. Unlike other backsplash materials that may require frequent cleaning and resealing, metal tiles are incredibly easy to wipe down. A simple clean with mild soap and water is enough to maintain their shine and prevent buildup. The non-porous surface of metal tiles also prevents mold, mildew, and bacteria from settling, which is a common issue with porous materials.

3. Aesthetic Variety

Metal tiles come in a wide range of finishes, patterns, and colors, allowing you to choose the style that best suits your home’s aesthetic. Whether you’re going for a vintage, industrial, or modern look, there’s a metal ceiling tile design that will complement your decor. You can opt for shiny, polished finishes for a sleek look, or matte finishes for a more understated and sophisticated design.

Read too: Shiplap Ceiling in Kitchen: A Timeless Trend for a Stylish and Cozy Space

4. Reflective Qualities

Another benefit of metal ceiling tiles as backsplash is their reflective qualities. The metallic surface of the tiles reflects light, brightening up your kitchen or bathroom and making the space feel larger. This is especially useful in smaller or darker spaces where you want to create a more open and airy atmosphere.

5. Eco-Friendly

Many metal ceiling tiles are made from recycled materials, making them an environmentally friendly option for those looking to reduce their ecological footprint. By choosing metal ceiling tiles as backsplash, you not only enhance the beauty of your home but also contribute to sustainability.


Metal Ceiling Tiles As Backsplash: Design Ideas and Inspiration

There are many ways to incorporate metal ceiling tiles as backsplash into your space. Here are some ideas to get you started:

1. Vintage or Retro Kitchen Style

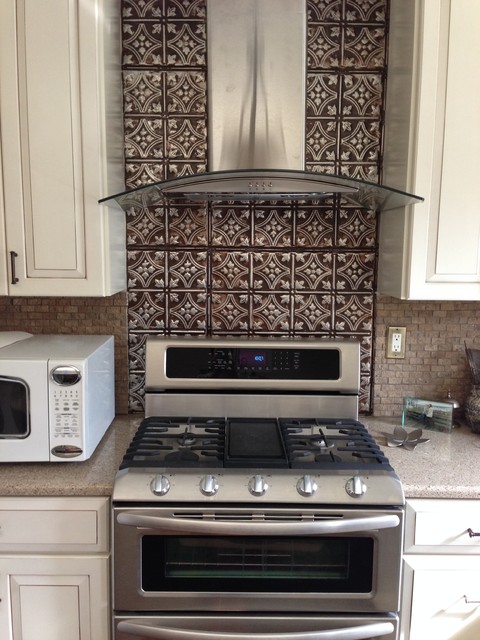
If you love vintage or retro design, consider opting for metal ceiling tiles as backsplash with intricate patterns and antique finishes. Tin tiles, for example, are a popular choice for achieving a nostalgic, old-world feel. Pair these tiles with vintage appliances, such as a retro stove or refrigerator, and complete the look with classic checkered floors or wooden cabinetry.

2. Modern Minimalism

For a sleek, modern kitchen or bathroom, go for metal ceiling tiles as backsplash in a smooth, matte finish. Aluminum tiles in neutral colors like silver, gray, or black can give your space a minimalist, clean look. The simplicity of the design can be complemented with modern cabinetry and appliances, creating a stylish, cohesive atmosphere.

3. Industrial Chic

Industrial style is all about raw materials and exposed finishes, making metal ceiling tiles as backsplash a perfect fit. Opt for tiles with a weathered, distressed look or with bold geometric patterns. Combine these tiles with exposed brick walls, concrete floors, and stainless steel appliances for an authentic industrial vibe.

4. High Contrast Designs

If you want your metal ceiling tiles as backsplash to stand out as the focal point of the room, choose tiles with bold colors or high-contrast patterns. A mix of matte black metal tiles with gold accents, for example, can create a dramatic effect. This design works well in kitchens with light-colored cabinetry or countertops to create a striking contrast.


How to Choose the Right Metal Ceiling Tiles As Backsplash

When selecting metal ceiling tiles as backsplash, there are several factors to consider to ensure the tiles will fit your space both functionally and aesthetically.

1. Material Choices

The most common metals used for ceiling tiles include aluminum, stainless steel, and tin. Each of these materials offers its own unique benefits:

  • Aluminum: Lightweight and resistant to corrosion, aluminum tiles are ideal for areas exposed to moisture, such as kitchens and bathrooms.
  • Stainless Steel: Known for its strength and sleek appearance, stainless steel tiles work well in modern or industrial-themed spaces.
  • Tin: Tin tiles provide a vintage or antique look and are often used to create a warm, rustic feel in kitchens.

2. Tile Size and Shape

Consider the size and shape of the tiles before purchasing. Smaller tiles, such as square or rectangular ones, are easier to install and offer a more traditional backsplash look. If you prefer a more modern and unique design, you can go for larger, more irregularly shaped tiles.

3. Finish and Texture

The finish of your metal ceiling tiles as backsplash can drastically alter the overall look of your space. Polished finishes provide a shiny, reflective surface, while matte finishes give a more subtle, sophisticated appearance. Additionally, consider the texture of the tiles—whether you want a smooth surface or tiles with embossed patterns for added dimension and visual interest.

4. Color Options

While silver, gold, and copper are the most common colors for metal ceiling tiles as backsplash, you can also find tiles in a variety of other hues. Some manufacturers offer custom colors, allowing you to match your backsplash to your kitchen or bathroom’s existing color scheme.


Installation Tips for Metal Ceiling Tiles As Backsplash

Installing metal ceiling tiles as backsplash is relatively simple, and many homeowners choose to handle the installation themselves. However, there are a few essential steps to ensure a successful installation:

  1. Measure Your Space: Carefully measure the area where you plan to install the tiles. This will help you determine how many tiles you need and whether you need to make any cuts for a perfect fit.
  2. Prepare the Surface: Clean the wall surface thoroughly before installation. Remove any dirt, grease, or old adhesive to ensure that the tiles will stick properly.
  3. Use the Right Adhesive: For a strong bond, use a high-quality adhesive suitable for metal tiles. Some adhesive products are specifically designed for backsplash installation, offering excellent grip and durability.
  4. Cutting Tiles: If you need to cut the tiles to fit your space, use a metal saw or tin snips. Make sure to wear gloves and eye protection when handling metal tiles.
  5. Grout (Optional): Depending on the look you desire, you may choose to grout the gaps between the tiles. However, many people opt for a grout-free installation to highlight the seamless design of the metal tiles.

Final Thoughts

Metal ceiling tiles as backsplash provide a unique and stylish alternative to traditional backsplash materials. With their durability, easy maintenance, and wide range of designs, metal tiles are an excellent choice for homeowners looking to elevate the look and functionality of their kitchen or bathroom. Whether you prefer a vintage, modern, or industrial look, metal ceiling tiles as backsplash can transform your space into a stunning, long-lasting area that is sure to impress.


Kitchen Lighting for Vaulted Ceilings: Elevate Your Space with Style and Functionality

When it comes to designing a kitchen, lighting plays a pivotal role in enhancing both the aesthetics and functionality of the space. This is especially true for kitchens with vaulted ceilings, which offer unique architectural features and challenges. Properly designed kitchen lighting for vaulted ceilings not only illuminates the area effectively but also complements the overall decor. In this article, we’ll explore the different types of lighting suitable for vaulted ceilings, tips for effective installation, and design ideas to create a stunning culinary space.

Kitchen Lighting For Vaulted Ceilings

Understanding the Importance of Lighting in Kitchens with Vaulted Ceilings

A kitchen with vaulted ceilings has a distinctive charm that can create an open and airy feeling. However, the height can make it difficult to achieve a well-lit environment. Adequate kitchen lighting for vaulted ceilings is essential for a few reasons:

  1. Enhanced Visibility: Cooking and food preparation require sufficient lighting to ensure safety and efficiency. Inadequate lighting can lead to accidents and make tasks cumbersome.
  2. Aesthetic Appeal: Good lighting can highlight architectural features, enhance the color scheme, and create a warm and inviting atmosphere.
  3. Functionality: A well-lit kitchen can make the space more functional, allowing you to focus on specific areas such as the countertop, sink, or dining area.
  4. Mood Setting: Lighting can influence the mood of a space. A well-designed lighting plan can transform your kitchen from a functional area to a welcoming space for family and friends.

Read too: Shiplap Ceiling in Kitchen: A Timeless Trend for a Stylish and Cozy Space

Types of Kitchen Lighting for Vaulted Ceilings

When considering kitchen lighting for vaulted ceilings, it’s important to understand the different types of lighting available and how they can work together. Here are the three primary types of lighting you should consider:

1. Ambient Lighting

Ambient lighting is the general illumination that fills the room. It provides a uniform level of brightness and serves as the foundation of your kitchen lighting design. For vaulted ceilings, ambient lighting can be achieved through:

  • Recessed Lighting: Installed directly into the ceiling, recessed lights can be placed strategically to illuminate the kitchen evenly. Opt for adjustable fixtures to direct light where it’s needed most.
  • Flush Mount Ceiling Fixtures: These fixtures are installed close to the ceiling and are ideal for lower vaulted ceilings. They come in various designs, making it easy to find one that complements your kitchen decor.
  • Pendant Lights: Hanging pendant lights can provide ambient lighting while also serving as decorative elements. They can be hung above an island or dining area to create a focal point.

2. Task Lighting

Task lighting focuses on specific areas where you perform activities such as cooking, chopping, and reading recipes. This type of lighting is essential in a kitchen with vaulted ceilings for its practical benefits. Options include:

  • Under-Cabinet Lighting: LED strips or puck lights installed beneath cabinets can illuminate countertops, making food preparation safer and easier.
  • Pendant Lights Over Workspaces: Hang pendant lights over the kitchen island or other work areas to provide direct lighting where it’s needed most.
  • Track Lighting: Adjustable track lighting allows you to direct light to specific areas, providing excellent task lighting for cooking and prep areas.

3. Accent Lighting

Accent lighting adds visual interest and highlights architectural features, artwork, or decorative elements in your kitchen. For vaulted ceilings, consider:

  • Wall Sconces: Installing sconces on walls can draw attention to features like stonework or cabinetry, adding depth and character to your kitchen.
  • Spotlights: Use adjustable spotlights to highlight artwork or unique architectural elements in your kitchen.
  • Decorative Fixtures: Statement fixtures, such as a large chandelier or an eye-catching pendant light, can serve as both ambient and accent lighting, becoming a central piece of decor.

Design Ideas for Kitchen Lighting with Vaulted Ceilings

When designing kitchen lighting for vaulted ceilings, consider the overall style of your kitchen. Here are some design ideas to inspire your lighting choices:

1. Rustic Charm

For a rustic kitchen, opt for wrought iron or wooden fixtures that echo the natural materials used in the space. Pendant lights with warm bulbs can enhance the cozy atmosphere. Recessed lighting can be used to provide ambient light without detracting from the rustic aesthetic.

2. Modern Minimalism

In a modern kitchen, sleek and simple fixtures are ideal. Choose pendant lights with clean lines and metallic finishes. Consider using recessed lighting to maintain a clutter-free look while providing ample ambient light.

3. Industrial Style

Industrial kitchens often feature exposed beams and raw materials. Choose large, bold pendant lights made of metal or glass to complement the industrial aesthetic. Use track lighting to highlight specific areas, like open shelving or workspaces.

4. Traditional Elegance

For a traditional kitchen, chandeliers or ornate pendant lights can add an elegant touch. Pair them with recessed lighting for practicality. Wall sconces can also enhance the overall ambiance and provide additional light.

Tips for Installing Kitchen Lighting for Vaulted Ceilings

Installing lighting in a kitchen with vaulted ceilings requires careful planning and consideration. Here are some tips to ensure effective and safe installation:

1. Plan Your Layout

Before purchasing fixtures, sketch a layout of your kitchen and determine where you need light the most. Consider the workflow in your kitchen and how lighting can enhance your cooking and prep areas.

2. Choose the Right Fixtures

Select fixtures that not only provide adequate lighting but also fit the scale of your kitchen. Large chandeliers can look stunning in high-ceiling spaces, while smaller pendant lights may get lost in the space.

3. Use Dimmer Switches

Install dimmer switches to allow for adjustable lighting levels. This is particularly useful for creating ambiance during gatherings or intimate dinners.

4. Consider Professional Help

If you’re unsure about the electrical work involved, consider hiring a professional electrician to ensure safe and proper installation of your lighting fixtures.

Maintenance of Kitchen Lighting Fixtures

To keep your kitchen lighting for vaulted ceilings looking and functioning their best, regular maintenance is essential:

  1. Dust Regularly: Dust and debris can accumulate on fixtures, affecting their performance. Regularly wipe down all light fixtures to keep them clean.
  2. Replace Bulbs Promptly: When a bulb burns out, replace it as soon as possible to maintain consistent lighting levels.
  3. Check Wiring and Connections: Periodically inspect the wiring and connections for any signs of wear or damage. Address any issues immediately to ensure safety.
  4. Adjust as Needed: If you find certain areas of your kitchen are under-illuminated, consider adding additional fixtures or adjusting the positioning of existing lights.

Conclusion

Selecting the right kitchen lighting for vaulted ceilings is crucial for creating a functional and inviting culinary space. By understanding the different types of lighting, exploring various design ideas, and implementing smart installation tips, you can enhance the beauty and functionality of your kitchen. Whether your style is rustic, modern, or traditional, the right lighting will illuminate your kitchen and create a warm atmosphere for cooking and entertaining.

Commercial Kitchen Drop Ceiling Tiles: Benefits, Types, and Installation

When designing or renovating a commercial kitchen, every detail counts, from the layout to the equipment and finishes. One often overlooked but crucial component is the ceiling. Commercial Kitchen Drop Ceiling Tiles not only enhance the aesthetic appeal of your kitchen but also contribute to functionality, hygiene, and acoustics. In this article, we will explore the various aspects of commercial kitchen drop ceiling tiles, including their benefits, types, installation tips, and maintenance.

Commercial Kitchen Drop Ceiling Tiles

What Are Drop Ceiling Tiles?

Drop ceiling tiles, also known as suspended ceiling tiles, are a popular choice for commercial spaces, including kitchens. These tiles are installed below the structural ceiling, creating a space between the two. The drop ceiling framework consists of metal grids that support the tiles, allowing for easy access to plumbing, electrical wiring, and HVAC systems.

Read too: Shiplap Ceiling in Kitchen: A Timeless Trend for a Stylish and Cozy Space

Benefits of Using Drop Ceiling Tiles in Commercial Kitchens

  1. Hygiene and Cleanliness
    • Commercial kitchens are subject to strict hygiene regulations. Drop ceiling tiles can be made from materials that resist moisture, mold, and mildew, making them easier to clean and maintain. This is particularly important in a kitchen environment where spills and splatters are common.
  2. Sound Absorption
    • Noise can be a significant issue in busy kitchens. Drop ceiling tiles can help absorb sound, reducing noise levels and creating a more pleasant working environment. This can be particularly beneficial in open kitchen designs or restaurants where communication is essential.
  3. Accessibility
    • The space above drop ceiling tiles allows for easy access to plumbing, electrical systems, and HVAC units. This makes maintenance and repairs more straightforward, as tiles can be removed without disturbing the entire ceiling structure.
  4. Aesthetic Flexibility
    • Drop ceiling tiles come in various colors, designs, and finishes, providing flexibility in design. Whether you’re looking for a modern, sleek appearance or a more traditional look, there’s a drop ceiling tile option that can meet your needs.
  5. Energy Efficiency
    • Many drop ceiling tiles are designed to be energy-efficient, reflecting light and helping to reduce energy costs. Bright, reflective tiles can enhance the overall lighting in the kitchen, making it a more welcoming and functional space.

Types of Commercial Kitchen Drop Ceiling Tiles

When selecting drop ceiling tiles for your commercial kitchen, it’s essential to consider the various types available. Here are some popular options:

1. Acoustic Tiles

Acoustic tiles are designed to absorb sound and reduce noise levels. They are often used in commercial kitchens to create a quieter work environment. These tiles come in various thicknesses and densities, providing different levels of sound absorption.

2. Moisture-Resistant Tiles

Moisture-resistant tiles are specifically designed for areas where high humidity is common, such as kitchens. These tiles are treated to resist moisture, mold, and mildew, making them an excellent choice for commercial kitchens.

3. Metal Tiles

Metal drop ceiling tiles provide a sleek, modern look. They are durable, easy to clean, and resistant to damage from moisture and grease. Metal tiles are often used in high-end commercial kitchens and restaurants to create a stylish appearance.

4. Mineral Fiber Tiles

Mineral fiber tiles are made from natural and recycled materials, making them an environmentally friendly choice. These tiles offer good sound absorption and are often treated to resist moisture and mold.

5. Plastic Tiles

Plastic drop ceiling tiles are lightweight, easy to install, and highly resistant to moisture and stains. They can be a cost-effective option for commercial kitchens where durability and cleanliness are priorities.

How to Choose the Right Commercial Kitchen Drop Ceiling Tiles

Selecting the right drop ceiling tiles for your commercial kitchen involves several factors:

  1. Compliance with Regulations
    • Ensure that the tiles comply with local health and safety regulations. Some jurisdictions have specific requirements for materials used in commercial kitchens.
  2. Durability
    • Consider the durability of the tiles. Commercial kitchens experience high traffic and exposure to heat, moisture, and grease. Choose tiles that can withstand these conditions.
  3. Aesthetics
    • The appearance of the tiles should complement the overall design of your kitchen. Consider the color, finish, and style that will create a cohesive look.
  4. Installation and Maintenance
    • Consider how easy the tiles are to install and maintain. Some tiles require more maintenance than others, so factor this into your decision-making process.
  5. Cost
    • The cost of the tiles will play a role in your decision. While it’s essential to stay within budget, don’t compromise on quality. Investing in durable, high-quality tiles can save money in the long run.

Installation of Commercial Kitchen Drop Ceiling Tiles

Installing drop ceiling tiles in a commercial kitchen can be a straightforward process if done correctly. Here’s a step-by-step guide:

1: Gather Your Materials

Before you begin, make sure you have all the necessary materials, including:

  • Drop ceiling tiles
  • Metal grid system (rails and cross tees)
  • Suspension wires
  • A level
  • A measuring tape
  • A utility knife or tile cutter
  • Safety goggles and gloves

2: Measure the Space

Measure the dimensions of the kitchen to determine how many tiles and grid components you will need. Create a layout plan, taking into account any fixtures or obstacles, such as lights or vents.

3: Install the Grid System

  1. Mark the Installation Height: Use a chalk line to mark the height where the ceiling will be installed. Ensure it is level around the entire perimeter of the kitchen.
  2. Install Wall Angle: Attach wall angles along the marked line using screws or anchors.
  3. Suspend the Main Runners: Install the main runners (long metal rails) perpendicular to the desired direction of the tiles. Use suspension wires to secure the runners to the ceiling joists.
  4. Add Cross Tees: Insert cross tees into the main runners at the designated intervals according to the tile size. This will create a grid for the tiles to fit into.

4: Cut and Install the Tiles

  1. Measure and Cut: Measure and cut the tiles as necessary to fit around edges, fixtures, or vents. A utility knife or tile cutter can help achieve clean cuts.
  2. Place Tiles in the Grid: Gently place the tiles into the grid system, ensuring they fit snugly and are level with one another.

5: Finishing Touches

Once all the tiles are in place, check for any gaps or misalignments. Adjust as necessary, and then clean the tiles to remove any dust or debris from the installation process.

Maintenance of Commercial Kitchen Drop Ceiling Tiles

Regular maintenance is essential to keep your drop ceiling tiles looking their best and performing optimally:

  1. Regular Cleaning
    • Dust and grime can accumulate on drop ceiling tiles over time. Use a damp cloth or sponge to wipe down the tiles periodically. For tougher stains, a mild detergent can be used.
  2. Inspect for Damage
    • Regularly inspect the tiles for signs of damage, such as cracks, stains, or warping. Replace any damaged tiles promptly to maintain a clean and professional appearance.
  3. Monitor for Mold and Mildew
    • Given the high humidity levels in commercial kitchens, keep an eye out for mold or mildew. If you notice any growth, take immediate action to clean the area and prevent further issues.
  4. Check the Grid System
    • Periodically check the metal grid system for rust or damage. If necessary, tighten any loose components or replace damaged sections to ensure the tiles remain securely in place.

Conclusion

Commercial Kitchen Drop Ceiling Tiles are an essential component in creating a functional and visually appealing kitchen environment. With their numerous benefits, including hygiene, sound absorption, and aesthetic flexibility, these tiles can significantly enhance the overall quality of your commercial kitchen. By understanding the different types of tiles available and following proper installation and maintenance practices, you can create a space that not only meets health regulations but also provides a pleasant atmosphere for staff and customers alike.

Kitchen Cabinets That Extend to the Ceiling: Elevate Your Space

When designing a kitchen, homeowners often focus on aesthetics, functionality, and maximizing storage space. One trend that has gained immense popularity in recent years is the installation of kitchen cabinets that extend to the ceiling. This design choice not only enhances the overall look of the kitchen but also offers numerous practical benefits. In this article, we will explore the advantages of ceiling-high cabinets, tips for installation, design ideas, and considerations to keep in mind when choosing this feature for your kitchen.

Kitchen Cabinets Extend To Ceiling

Why Choose Kitchen Cabinets That Extend to the Ceiling?

The decision to opt for kitchen cabinets that extend to the ceiling can significantly influence the overall feel and functionality of your kitchen. Here are some compelling reasons to consider this design choice:

1. Maximizes Storage Space

One of the most practical advantages of extending cabinets to the ceiling is the additional storage space they provide. Kitchen storage is often at a premium, especially in smaller kitchens. By utilizing the vertical space, you can store less frequently used items, such as holiday dishes or kitchen appliances, without cluttering your countertops. This can help keep your kitchen organized and functional.

2. Creates a Sleek, Modern Look

Ceiling-high cabinets offer a seamless and cohesive appearance, making your kitchen look polished and modern. This design choice eliminates the gap often found between standard cabinets and the ceiling, which can collect dust and grease. The result is a clean, streamlined look that enhances the visual appeal of your kitchen.

3. Enhances the Perception of Height

For kitchens with lower ceilings, extending cabinets to the ceiling can create the illusion of greater height. This can make the space feel more open and airy. The visual effect of tall cabinets draws the eye upward, helping to make the room feel more spacious and inviting.

Read too: Bathroom Flooded Through the Ceiling: A Comprehensive Guide

4. Offers Design Flexibility

Kitchen cabinets that extend to the ceiling provide greater design flexibility. You can choose to have cabinets with decorative moldings, glass fronts, or open shelving at the top for displaying decorative items. This versatility allows you to customize your kitchen to suit your personal style while maintaining functionality.

5. Increases Home Value

Investing in high-quality, ceiling-high kitchen cabinets can increase the overall value of your home. Potential buyers often appreciate the added storage space and modern look that these cabinets provide. When it comes time to sell, a kitchen with well-designed, functional cabinetry can set your home apart from the competition.

Considerations When Choosing Kitchen Cabinets That Extend to the Ceiling

While the benefits of kitchen cabinets that extend to the ceiling are numerous, there are also several factors to consider before making this design choice:

1. Cost

Ceiling-high cabinets can be more expensive than standard cabinets due to the additional materials and labor involved in installation. It’s important to consider your budget and explore various options, such as stock, semi-custom, and custom cabinets, to find a solution that meets your financial needs.

2. Access to Upper Cabinets

While extending cabinets to the ceiling increases storage, it may also make some items less accessible. Consider how often you use the items you plan to store in the upper cabinets. If you frequently use certain items, you may want to keep them in lower cabinets or invest in a sturdy step stool for easy access to higher shelves.

3. Cabinet Style

The style of your cabinets should complement the overall design of your kitchen. Traditional cabinets often work well with ceiling extensions, but modern kitchens may benefit from sleek, minimalistic designs. Be sure to choose cabinetry that enhances your kitchen’s aesthetic while providing the necessary functionality.

4. Professional Installation

Installing cabinets that extend to the ceiling typically requires the expertise of a professional contractor or carpenter. Proper installation is crucial to ensure the cabinets are securely mounted and level. Hiring a professional can save you time and ensure that the cabinets are installed correctly, preventing any potential issues down the line.

Tips for Designing and Installing Ceiling-High Kitchen Cabinets

If you’re convinced that kitchen cabinets that extend to the ceiling are right for you, here are some tips to consider when designing and installing them:

1. Plan for Functionality

Before selecting cabinets, consider how you use your kitchen. Think about your cooking habits, the types of items you need to store, and how you can best utilize the available space. This will help you determine the number of cabinets you’ll need and their ideal configuration.

2. Choose the Right Materials

The materials you choose for your cabinets will impact both their durability and appearance. Solid wood, plywood, and engineered wood are common materials for kitchen cabinets. Each has its advantages and disadvantages in terms of cost, maintenance, and aesthetics. Choose materials that align with your budget and style preferences.

3. Consider Lighting

When designing your kitchen, don’t overlook the importance of lighting. Installing upper cabinets that extend to the ceiling can create shadowed areas that may require additional lighting. Consider under-cabinet lighting to illuminate your countertops and brighten up the space. This can enhance the overall ambiance and functionality of your kitchen.

4. Incorporate Decorative Elements

To make your ceiling-high cabinets more visually appealing, consider incorporating decorative elements. Crown molding can add an elegant touch and help transition the cabinets to the ceiling. Glass-front cabinets can showcase beautiful dishware, while open shelves can provide a space for decorative items or cookbooks.

5. Utilize Corner Cabinets

In kitchens with an L-shape or U-shape layout, corner cabinets can often be challenging to access. Consider using lazy Susans or pull-out shelves to maximize the functionality of corner cabinets that extend to the ceiling. This can help you make the most of every inch of your kitchen.

The Future of Kitchen Design: Embracing Vertical Space

The trend of kitchen cabinets that extend to the ceiling reflects a broader shift in kitchen design towards maximizing vertical space. As homes become smaller and urban living spaces evolve, homeowners are increasingly looking for ways to make the most of every square inch. Ceiling-high cabinets not only provide additional storage but also create an elegant, modern aesthetic that enhances the overall look of the kitchen.

Conclusion

Choosing kitchen cabinets that extend to the ceiling is a practical and stylish decision that can transform your kitchen into a functional and beautiful space. From maximizing storage to enhancing the overall aesthetic, the benefits of ceiling-high cabinets are numerous. However, careful consideration of costs, accessibility, and design elements is crucial to ensure that your kitchen meets your needs and reflects your style.

If you’re considering a kitchen remodel or upgrade, don’t overlook the impact that extending cabinets to the ceiling can have on your space. With the right planning, materials, and professional installation, you can create a kitchen that is not only stunning but also highly functional.

Restaurant Kitchen Ceiling Tiles: Enhancing Your Dining Experience

When it comes to designing a restaurant, every detail matters, and that includes the ceilings. Restaurant kitchen ceiling tiles may not be the first thing that comes to mind when considering the overall aesthetics and functionality of a dining space, but they play a crucial role in creating the right atmosphere. In this article, we will explore the various types of ceiling tiles suitable for restaurant kitchens, their benefits, installation methods, and maintenance tips, providing you with comprehensive knowledge to make informed decisions for your establishment.

Restaurant Kitchen Ceiling Tiles

Understanding the Role of Ceiling Tiles in Restaurant Kitchens

Ceiling tiles serve multiple purposes in a restaurant kitchen. They not only contribute to the aesthetic appeal but also enhance functionality, safety, and cleanliness. Here’s how:

  1. Aesthetic Enhancement: Ceiling tiles can dramatically change the look and feel of a restaurant. A well-chosen design can complement the overall theme of the restaurant, whether it be modern, rustic, or traditional.
  2. Acoustic Control: Many ceiling tiles are designed to reduce noise, making the dining experience more pleasant. This is particularly important in bustling environments where background noise can detract from the customer experience.
  3. Fire Safety: Certain ceiling tiles are made from fire-resistant materials, which can be crucial in kitchen environments where heat and flames are common.
  4. Ease of Cleaning: Kitchen ceilings can accumulate grease, smoke, and dust. Ceiling tiles designed for easy cleaning can help maintain hygiene standards, essential for any food establishment.
  5. Energy Efficiency: Insulated ceiling tiles can help in regulating the temperature of the restaurant, leading to potential savings in energy costs.

Read too: Kitchen Lighting For A Vaulted Ceiling: Illuminating Your Space with Style and Functionality

Types of Restaurant Kitchen Ceiling Tiles

1. Acoustic Ceiling Tiles

Acoustic ceiling tiles are a popular choice for restaurant kitchens, especially in areas where noise control is a priority. These tiles are designed to absorb sound, creating a quieter environment. They are often made from mineral fiber, fiberglass, or other sound-absorbing materials.

Benefits:

  • Reduces noise levels, enhancing the dining experience.
  • Available in various designs and colors to match the restaurant’s decor.

2. Vinyl Ceiling Tiles

Vinyl ceiling tiles are another excellent option for restaurant kitchens. They are highly durable, moisture-resistant, and easy to clean, making them ideal for environments that experience high humidity and grease accumulation.

Benefits:

  • Water-resistant and easy to wipe clean.
  • Wide variety of styles and textures to choose from.

3. Metal Ceiling Tiles

Metal ceiling tiles offer a modern and stylish look, adding a touch of elegance to restaurant kitchens. They are available in different metals such as aluminum, copper, and stainless steel, and can be finished in various colors.

Benefits:

  • Extremely durable and resistant to damage.
  • Fire-resistant and can withstand high temperatures.

4. Fiberglass Ceiling Tiles

Fiberglass ceiling tiles are lightweight and highly effective at sound absorption. They are also resistant to moisture, making them suitable for kitchens where humidity levels can be high.

Benefits:

  • Excellent thermal insulation properties.
  • Resistant to mold and mildew.

5. Mineral Fiber Ceiling Tiles

Mineral fiber tiles are one of the most commonly used types in commercial settings. They offer good sound absorption and are usually treated for fire resistance. They come in a variety of finishes and styles.

Benefits:

  • Cost-effective and easy to install.
  • Good acoustic properties and can be painted to match decor.

Factors to Consider When Choosing Restaurant Kitchen Ceiling Tiles

Choosing the right ceiling tiles for your restaurant kitchen requires careful consideration of several factors:

1. Hygiene and Cleanability

In a kitchen environment, hygiene is paramount. Look for tiles that are easy to clean and maintain. Vinyl and metal tiles are often easier to wipe down and resist grease buildup.

2. Durability

Restaurant kitchens can be harsh environments. Choose tiles that can withstand heat, moisture, and potential impacts from kitchen equipment.

3. Aesthetics

The visual appeal of the ceiling should match the overall design of the restaurant. Consider the colors, textures, and styles that will enhance the dining experience.

4. Sound Absorption

If your restaurant has an open kitchen or a bustling dining area, consider tiles that offer sound absorption to minimize noise levels.

5. Installation and Maintenance

Consider how easy the tiles are to install and how much maintenance they will require. Some tiles can be easily replaced if damaged, while others may require professional installation.

Installation of Restaurant Kitchen Ceiling Tiles

Installing restaurant kitchen ceiling tiles can be a straightforward process, but it’s essential to follow the right steps for a professional finish.

1. Preparation

Before installation, ensure that the ceiling is clean and free of any debris. Remove any old tiles if necessary and check for any damage to the ceiling structure.

2. Choose Your Layout

Determine the layout for your ceiling tiles. You can use a grid system or a direct glue-down method, depending on the type of tiles you’ve chosen.

3. Cutting Tiles

If needed, cut the tiles to fit your layout. Use a utility knife or tile cutter for clean edges, especially if you are working around fixtures like lights or vents.

4. Installing Tiles

  • Grid System: If using a grid system, assemble the grid on the ceiling first, ensuring it is level. Then, place the tiles into the grid.
  • Glue-Down Method: Apply adhesive to the back of each tile and press it firmly against the ceiling, ensuring they are aligned correctly.

5. Finishing Touches

Once all tiles are installed, inspect the ceiling for any gaps or unevenness. Address any issues to ensure a polished look.

Maintenance Tips for Restaurant Kitchen Ceiling Tiles

Proper maintenance of your restaurant kitchen ceiling tiles is essential for longevity and hygiene:

  1. Regular Cleaning: Clean the tiles regularly to prevent grease and dust buildup. Use a damp cloth for vinyl and metal tiles, and a mild detergent for more stubborn stains.
  2. Check for Damage: Periodically inspect the ceiling for any damage or sagging tiles. Replace any damaged tiles promptly to maintain a clean and professional appearance.
  3. Control Humidity: Use exhaust fans and dehumidifiers to control moisture levels in the kitchen, reducing the risk of mold and mildew on your ceiling tiles.
  4. Address Stains Immediately: If any spills occur, clean them immediately to prevent staining. For persistent stains, consider using a specialized cleaning product.
  5. Professional Inspections: Schedule regular inspections of your ceiling to ensure everything is in good condition, especially if you notice any issues.

Conclusion

Investing in the right restaurant kitchen ceiling tiles is essential for creating a safe, clean, and visually appealing dining environment. By understanding the different types of ceiling tiles available, their benefits, and the factors to consider when making your choice, you can enhance the overall experience for both your staff and customers. With proper installation and maintenance, your ceiling tiles will not only serve their practical purposes but also contribute to the inviting atmosphere of your restaurant.

Lighting A Vaulted Ceiling Kitchen: Bright Ideas for Stunning Spaces

When it comes to designing a kitchen with a vaulted ceiling, proper lighting is crucial for both aesthetics and functionality. Lighting A Vaulted Ceiling Kitchen can transform the space, making it not only visually appealing but also practical for daily activities. In this comprehensive guide, we will explore the best lighting options, techniques, and tips for illuminating your vaulted ceiling kitchen effectively.

Lighting A Vaulted Ceiling Kitchen

Understanding Vaulted Ceilings

Vaulted ceilings are characterized by their high, sloping structures that create an open and airy atmosphere. While they add architectural interest, they can also pose unique challenges when it comes to lighting. The height and angles can create shadows and dark spots if not planned carefully. Therefore, selecting the right lighting solutions is essential.

Why Lighting Matters

Lighting serves multiple purposes in a kitchen:

  • Functionality: Adequate lighting is necessary for cooking and food preparation.
  • Safety: Well-lit areas prevent accidents and improve visibility.
  • Aesthetics: The right lighting enhances the beauty of your kitchen design.

Key Considerations for Lighting A Vaulted Ceiling Kitchen

1. Layered Lighting Approach

To achieve a well-lit space, consider a layered lighting approach. This method incorporates three types of lighting:

  • Ambient Lighting: This is the general light that fills the room. For vaulted ceilings, consider using recessed lighting, chandeliers, or pendant lights that can distribute light evenly across the space.
  • Task Lighting: Task lighting focuses on specific areas where activities take place, such as countertops or islands. Under-cabinet lights, pendant lights over the island, and track lighting are excellent options.
  • Accent Lighting: This type highlights architectural features or decor elements, such as artwork or shelves. Wall sconces and decorative fixtures can be used to add depth and interest.

Read too: Kitchen Lighting For A Vaulted Ceiling: Illuminating Your Space with Style and Functionality

2. Choosing the Right Fixtures

The choice of fixtures plays a significant role in the overall effect of your kitchen lighting. Here are some popular options for vaulted ceilings:

  • Chandeliers: A stunning chandelier can serve as a focal point in your kitchen. Choose one that complements your decor style—whether modern, rustic, or traditional.
  • Pendant Lights: Hanging pendant lights above an island or breakfast bar can create an inviting atmosphere. Select adjustable fixtures that can be hung at various heights to accommodate the ceiling’s slope.
  • Recessed Lighting: For a clean and modern look, recessed lights can be strategically placed to provide ambient lighting without taking up visual space.
  • Wall Sconces: These fixtures can add character and warmth to the room. They are ideal for highlighting specific areas or architectural features.

Effective Techniques for Lighting A Vaulted Ceiling Kitchen

1. Utilize Dimmer Switches

Dimmer switches allow you to control the brightness of your lights, providing flexibility for different times of day or activities. This is particularly useful in a kitchen where you might want bright lighting while cooking but softer light during gatherings.

2. Positioning Lights Strategically

Proper positioning of lights is crucial in a vaulted ceiling kitchen:

  • Over the Island: Install pendant lights or a chandelier above the island to create a central focal point and provide task lighting.
  • Along the Perimeter: Use recessed lighting along the walls to enhance the ambient light and make the space feel larger.
  • Accent Features: Highlight architectural details, such as beams or high shelves, with accent lighting to add depth and interest.

3. Consider Color Temperature

The color temperature of your lights affects the mood of the kitchen. Generally, a warmer color temperature (2700K to 3000K) creates a cozy atmosphere, while cooler temperatures (4000K to 5000K) provide a brighter, more energetic feel. Choose a color temperature that complements your kitchen’s design and your personal preferences.


Common Mistakes to Avoid

1. Overlooking Natural Light

If your kitchen has windows or skylights, don’t forget to consider natural light as part of your overall lighting plan. Use sheer curtains or blinds to control light without blocking it out completely.

2. Inadequate Lighting

Avoid underestimating the amount of light needed in a vaulted ceiling kitchen. The high ceilings can create shadows, so ensure you have enough light sources to illuminate the entire area effectively.

3. Ignoring Maintenance

Consider the maintenance of your lighting fixtures. Choose materials that are easy to clean, especially in a kitchen where grease and dust can accumulate. Additionally, opt for bulbs with longer lifespans to reduce the need for frequent replacements.


Maintenance Tips for Your Lighting Fixtures

  1. Regular Cleaning: Dust and dirt can diminish the brightness of your fixtures. Regularly clean glass and metal surfaces to keep them looking their best.
  2. Check Bulbs: Periodically check all bulbs to ensure they are functioning correctly. Replace any burnt-out bulbs promptly to maintain consistent lighting.
  3. Inspect Wiring: If you notice flickering lights or unusual behavior, inspect the wiring. It may be time to consult an electrician to ensure everything is safe.

Conclusion

Lighting A Vaulted Ceiling Kitchen is a blend of art and science. By understanding the unique challenges that vaulted ceilings present and employing a layered lighting approach, you can create a space that is both functional and beautiful. Choose the right fixtures, position them wisely, and don’t forget to consider the ambiance you want to achieve. With these tips, your vaulted ceiling kitchen will be a bright, inviting, and stylish space for cooking and gathering.

Cathedral Ceiling Kitchen Cabinets: Maximizing Your Space

In the world of kitchen design, cathedral ceiling kitchen cabinets stand out for their ability to enhance both the functionality and aesthetic appeal of a space. Cathedral ceilings, known for their high, vaulted structure, offer a unique architectural element that can dramatically transform a kitchen. When paired with the right cabinetry, this design choice not only maximizes space but also elevates the overall look of your kitchen. This article will explore the benefits, design considerations, and practical tips for incorporating cathedral ceiling kitchen cabinets into your home.

Cathedral Ceiling Kitchen Cabinets

What Are Cathedral Ceiling Kitchen Cabinets?

Cathedral ceiling kitchen cabinets are specifically designed to complement kitchens with vaulted or cathedral ceilings. These ceilings typically feature a high, sloped design that creates a spacious and airy feel. Cathedral ceiling cabinets are often taller than standard cabinets and are crafted to fit the unique angles and heights of a cathedral ceiling. This type of cabinetry can help you make the most of the vertical space in your kitchen, offering both aesthetic appeal and additional storage.

The Benefits of Cathedral Ceiling Kitchen Cabinets

Cathedral ceiling kitchen cabinets offer numerous benefits that make them a popular choice for homeowners with high ceilings. Here are some key advantages:

1. Maximizing Vertical Space

One of the most significant benefits of cathedral ceiling kitchen cabinets is their ability to maximize vertical space. In kitchens with high ceilings, standard cabinets often leave a large gap between the top of the cabinet and the ceiling, which can make the space feel unfinished. Cathedral ceiling cabinets, however, are designed to extend higher, filling this gap and providing additional storage space.

Read too: Bathroom Flooded Through the Ceiling: A Comprehensive Guide

2. Enhanced Aesthetic Appeal

Cathedral ceiling kitchen cabinets contribute to the grandeur and elegance of a kitchen. The tall, vertical lines of the cabinets draw the eye upward, emphasizing the height and openness of the space. This design choice can make your kitchen feel larger and more luxurious.

3. Increased Storage Capacity

By extending the height of the cabinets, cathedral ceiling kitchen cabinets offer increased storage capacity. This additional space is perfect for storing items that are not used daily, such as seasonal dishes, large cookware, or rarely-used appliances. The extra storage helps keep your kitchen organized and clutter-free.

4. Customizable Design

Cathedral ceiling kitchen cabinets can be customized to fit your specific needs and preferences. Whether you prefer a traditional look with intricate woodwork or a modern, minimalist design, these cabinets can be tailored to suit your style. You can also choose from a variety of finishes, hardware, and shelving options to create a look that is uniquely yours.

Design Considerations for Cathedral Ceiling Kitchen Cabinets

While cathedral ceiling kitchen cabinets offer numerous benefits, there are several design considerations to keep in mind to ensure that they work harmoniously with your space.

1. Proportions and Scale

When designing a kitchen with cathedral ceiling cabinets, it’s essential to consider the proportions and scale of the cabinetry in relation to the ceiling height. Cabinets that are too tall can overwhelm the space, while those that are too short may not take full advantage of the available height. Work with a designer to find the right balance that complements the overall design of your kitchen.

2. Lighting

Proper lighting is crucial in a kitchen with cathedral ceiling cabinets. The high ceilings and tall cabinets can create shadows, making it essential to incorporate adequate lighting. Consider installing under-cabinet lighting to illuminate countertops and work areas, as well as pendant lights or chandeliers that draw attention to the height of the space. Recessed lighting can also be used to ensure even illumination throughout the kitchen.

3. Access to Upper Cabinets

While the extra storage space provided by cathedral ceiling cabinets is a significant advantage, it’s important to consider how you will access items stored in the upper cabinets. If the cabinets are too high, it may be challenging to reach items without a step stool or ladder. To address this, you can incorporate features such as pull-down shelves or install a built-in ladder system for easier access.

4. Material and Finish

The material and finish of your cathedral ceiling kitchen cabinet play a crucial role in the overall aesthetic of your kitchen. Wood is a popular choice for its warmth and versatility, but you can also opt for painted cabinets for a more modern look. When selecting the finish, consider how it will complement other elements in the kitchen, such as the countertops, backsplash, and flooring. A cohesive color scheme and material palette will help create a harmonious and visually appealing space.

How to Incorporate Cathedral Ceiling Kitchen Cabinets into Different Kitchen Styles

Cathedral ceiling kitchen cabinet can be adapted to suit a variety of kitchen styles. Here’s how you can incorporate them into different design themes:

1. Traditional Kitchens

In traditional kitchens, cathedral ceiling cabinets can be designed with ornate details, such as raised panel doors, crown molding, and decorative hardware. Opt for rich wood tones like cherry or mahogany to enhance the classic feel of the space. Pair the cabinets with a stone or granite countertop and a tile backsplash to complete the traditional look.

2. Modern Kitchens

For a modern kitchen, cathedral ceiling cabinets can be streamlined and minimalist. Choose flat-panel doors with sleek hardware for a clean and contemporary look. White or gray cabinets with a glossy finish can create a sense of openness and lightness in the space. To add contrast, consider using a darker countertop material, such as black quartz or concrete.

3. Rustic or Farmhouse Kitchens

Cathedral ceiling cabinets are a natural fit for rustic or farmhouse-style kitchens. Consider using reclaimed wood or distressed finishes to create a warm, lived-in feel. Open shelving or glass-front cabinets can also add to the rustic charm. Pair the cabinets with a farmhouse sink, butcher block countertops, and vintage-inspired lighting to complete the look.

4. Transitional Kitchens

In transitional kitchens, which blend elements of traditional and contemporary design, cathedral ceiling cabinets can offer the best of both worlds. Choose cabinets with simple, clean lines, but incorporate traditional touches like crown molding or decorative glass inserts. Neutral tones like beige, taupe, or soft gray work well in transitional spaces, allowing you to mix and match styles seamlessly.

Practical Tips for Maintaining

Once you’ve installed your cathedral ceiling kitchen cabinet, proper maintenance is key to keeping them looking their best. Here are some tips to help you care for your cabinets:

1. Regular Cleaning

Dust and grease can accumulate on kitchen cabinets, especially those that are higher up. Regularly dust the cabinets with a microfiber cloth, and use a gentle cleaner to wipe down the surfaces. Avoid using harsh chemicals that can damage the finish.

2. Inspect for Damage

Periodically inspect your cabinets for signs of wear and tear, such as scratches, dents, or loose hardware. Address any issues promptly to prevent further damage. If you notice any loose hinges or handles, tighten them to ensure that the cabinets remain secure.

3. Protect the Finish

To protect the finish of your cathedral ceiling kitchen cabinet, avoid placing hot items directly on the cabinet surfaces, and use coasters or placemats to prevent scratches. If your cabinets are made of wood, consider applying a wood conditioner periodically to keep the wood looking vibrant and to prevent drying out or cracking.

Conclusion

Cathedral ceiling kitchen cabinets are a stylish and functional addition to any kitchen with high ceilings. They maximize vertical space, enhance the aesthetic appeal of the room, and offer increased storage capacity. By considering factors such as proportions, lighting, access, and material, you can create a kitchen that is both beautiful and practical. Whether your style is traditional, modern, rustic, or transitional, cathedral ceiling kitchen cabinets can be customized to suit your design preferences, making them a versatile choice for any home. With proper maintenance, these cabinets will remain a stunning feature in your kitchen for years to come.

Kitchen Cabinets for Vaulted Ceiling: Design Ideas & Tips

Designing a kitchen with a vaulted ceiling is an exciting opportunity to create an open, airy space that feels both expansive and elegant. Vaulted ceilings elevate a room, making it feel larger and more luxurious. However, choosing the right kitchen cabinets to complement these soaring ceilings can be a bit challenging. With the right approach, though, you can create a stunning kitchen that maximizes both space and style.

This article will guide you through various aspects of choosing and designing kitchen cabinets with vaulted ceiling, including the best styles, materials, and design ideas to help you create a beautiful and functional kitchen. Whether you’re renovating your current kitchen or designing a new one from scratch, this guide will offer valuable insights to make the most of your vaulted ceiling space.

The Appeal of Kitchen Cabinets with Vaulted Ceilings

A vaulted ceiling instantly draws the eye upward, creating an impressive visual impact that can transform an ordinary kitchen into something extraordinary. However, the challenge lies in making sure that your kitchen cabinets complement rather than compete with this architectural feature.

When it comes to kitchen cabinets, the key is to choose designs that enhance the sense of space while providing ample storage and functionality. With vaulted ceilings, you have the opportunity to experiment with taller cabinets, open shelving, and even statement pieces like custom range hoods or oversized pendant lights.

Key Benefits of Vaulted Ceilings in Kitchens:

  1. Increased Natural Light: Vaulted ceilings often allow for larger windows or skylights, which flood the kitchen with natural light, making it feel more welcoming and spacious.
  2. Enhanced Airflow: The additional height promotes better air circulation, which can be particularly beneficial in a kitchen where heat and cooking odors can accumulate.
  3. Aesthetic Appeal: Vaulted ceilings create a sense of grandeur and elegance, making your kitchen feel more luxurious and upscale.
  4. Versatile Design Options: The added height allows for more creative design choices, from floor-to-ceiling cabinets to dramatic light fixtures.

Read too: Bathroom Flooded Through the Ceiling: A Comprehensive Guide

Choosing the Right Kitchen Cabinets for Vaulted Ceiling

When selecting kitchen cabinets for a space with a vaulted ceiling, it’s essential to consider both aesthetics and functionality. The right cabinets should complement the architectural lines of the ceiling while providing practical storage solutions.

1. Tall Cabinets

One of the most popular choices for kitchens with vaulted ceilings is tall cabinets. These cabinets take advantage of the extra height, offering more storage space and emphasizing the vertical lines of the ceiling. Tall cabinets can be designed to reach the ceiling or stop a few feet below, depending on your preference.

Advantages of Tall Cabinets:

  • Maximized Storage: With additional shelving, tall cabinets offer more space for storing kitchen essentials, from dishes to pantry items.
  • Visual Impact: The height of these cabinets draws the eye upward, accentuating the vaulted ceiling and creating a cohesive look.
  • Customizable: You can customize the height, finish, and door style of tall cabinets to match the overall design of your kitchen.

2. Open Shelving

Open shelving is another excellent option for kitchens with vaulted ceilings. It helps maintain the open, airy feel of the space while providing accessible storage for frequently used items. Open shelves can be installed at varying heights, creating a dynamic visual effect that complements the ceiling’s slope.

Advantages of Open Shelving:

  • Light and Airy Feel: Open shelving contributes to the spacious atmosphere of a kitchen with vaulted ceilings.
  • Display Opportunities: Shelving allows you to showcase your favorite dishes, glassware, or decorative items, adding personality to your kitchen.
  • Cost-Effective: Open shelves are generally less expensive than full cabinets, making them a budget-friendly option.

3. Custom Cabinetry

Custom cabinetry is ideal for kitchens with vaulted ceilings because it allows you to design cabinets that fit perfectly within the unique dimensions of your space. With custom cabinets, you can choose the exact height, width, and depth that best suits your kitchen’s layout, ensuring a seamless integration with the vaulted ceiling.

Advantages of Custom Cabinetry:

  • Tailored Fit: Custom cabinets are designed to fit your kitchen’s specific dimensions, making the most of every inch of space.
  • Unlimited Design Options: You can choose from a wide range of materials, finishes, and door styles to create a look that reflects your personal taste.
  • Built-In Features: Custom cabinets can include built-in features like pull-out drawers, lazy Susans, or integrated lighting, enhancing both functionality and style.

4. Glass-Front Cabinets

Glass-front cabinets are a stylish option for kitchens with vaulted ceilings. The glass doors reflect light, contributing to the bright, open feel of the space. These cabinets can be installed at varying heights, creating a visually appealing transition between the lower cabinets and the vaulted ceiling.

Advantages of Glass-Front Cabinets:

  • Elegant Look: Glass-front cabinets add a touch of sophistication and elegance to your kitchen.
  • Enhanced Light: The glass doors help distribute light throughout the kitchen, making it feel more spacious.
  • Showcase Items: These cabinets allow you to display your best dishware, creating a focal point in the kitchen.

Design Tips for Kitchen Cabinets with Vaulted Ceilings

Designing a kitchen with vaulted ceilings requires careful planning to ensure that the space feels cohesive and functional. Here are some design tips to help you make the most of your kitchen cabinets with vaulted ceilings.

1. Consider the Ceiling’s Slope

The slope of the vaulted ceiling will influence the placement and height of your cabinets. For example, in a kitchen with a steeply pitched ceiling, you may want to install cabinets that follow the ceiling’s slope, creating a harmonious look. Alternatively, if the ceiling has a more gradual slope, you might opt for cabinets that stop a few feet below the ceiling, leaving space for decorative elements like crown molding or artwork.

2. Use Light Colors

Light-colored cabinets are an excellent choice for kitchens with vaulted ceilings, as they help to reflect natural light and make the space feel more open. White, cream, or pastel-colored cabinets are popular options that create a fresh, airy atmosphere. If you prefer a bolder look, consider two-tone cabinets with a lighter color on the upper cabinets and a darker shade on the lower ones.

3. Incorporate Statement Lighting

Vaulted ceilings provide the perfect opportunity to incorporate statement lighting fixtures. Oversized pendant lights, chandeliers, or a series of smaller pendants can create a striking visual focal point in the kitchen. Be sure to choose lighting that complements the style of your cabinets and the overall design of your kitchen.

4. Mix and Match Cabinet Styles

Don’t be afraid to mix and match different cabinet styles to create a unique and personalized kitchen. For example, you could combine tall cabinets with open shelving or pair glass-front cabinets with traditional solid wood cabinets. Mixing different styles adds visual interest and can help you make the most of the vertical space in a kitchen with vaulted ceilings.

5. Maximize Storage with Creative Solutions

In a kitchen with vaulted ceilings, it’s essential to maximize storage without overwhelming the space. Consider creative solutions like pull-out pantry cabinets, built-in spice racks, or corner cabinets with rotating shelves. These features can help you make the most of your cabinet space while keeping your kitchen organized and clutter-free.

Materials and Finishes for Kitchen Cabinets with Vaulted Ceilings

The materials and finishes you choose for your kitchen cabinets will have a significant impact on the overall look and feel of your kitchen. Here are some popular options to consider:

1. Wood Cabinets

Wood cabinets are a timeless choice that adds warmth and character to any kitchen. In a kitchen with vaulted ceilings, wood cabinets can create a cozy, inviting atmosphere. Popular wood species for kitchen cabinets include oak, maple, cherry, and walnut, each offering a unique grain pattern and color.

2. Painted Cabinets

Painted cabinets are a versatile option that allows you to customize your kitchen’s color scheme. White or light-colored painted cabinets are particularly well-suited to kitchens with vaulted ceilings, as they enhance the room’s brightness and openness. For a more dramatic look, consider dark painted cabinets, such as navy blue or charcoal gray.

3. Laminate Cabinets

Laminate cabinets are a budget-friendly option that offers a wide range of colors and finishes. They are durable and easy to maintain, making them a practical choice for busy kitchens. Laminate cabinets can mimic the look of wood, stone, or other materials, providing a stylish and cost-effective alternative to more expensive options.

4. Metal Cabinets

Metal cabinets, such as stainless steel or aluminum, are a modern option that works well in contemporary kitchens. They are sleek, durable, and easy to clean, making them ideal for high-traffic areas. Metal cabinets can be paired with other materials, such as wood or glass, to create a unique and stylish kitchen design.

Conclusion

Designing a kitchen with vaulted ceiling offers a unique opportunity to create a space that is both beautiful and functional. By choosing the right kitchen cabinets and incorporating thoughtful design elements, you can maximize the potential of your vaulted ceiling and create a kitchen that is truly one-of-a-kind.

Whether you opt for tall cabinets that reach the ceiling, open shelving that adds a light and airy feel, or custom cabinetry that fits your space perfectly, the possibilities are endless. With careful planning and attention to detail, your kitchen with vaulted ceiling can become the heart of your home—a place where style and functionality come together in perfect harmony.

Kitchen With Coffered Ceiling: Elevate Your Culinary Space

The kitchen is often referred to as the heart of the home, a place where functionality and style meet. One way to enhance this vital space is by incorporating a coffered ceiling. Coffered ceilings, with their grid-like pattern of recessed panels, add depth, texture, and a touch of sophistication to any room. In this article, we’ll explore the benefits, design considerations, and installation tips for creating a stunning kitchen with a coffered ceiling.

Kitchen With Coffered Ceiling

What is a Coffered Ceiling?

A coffered ceiling is a series of sunken panels, usually in the shape of squares or rectangles, that are framed by beams. This architectural feature dates back to ancient Rome and has been used in various styles of architecture throughout history. The result is a ceiling that adds visual interest and architectural detail to any room.

Benefits of a Kitchen With Coffered Ceiling

Enhanced Aesthetics

A coffered ceiling instantly elevates the aesthetic appeal of a kitchen. The grid pattern creates a sense of depth and dimension, making the space feel larger and more open. This can be particularly beneficial in kitchens with lower ceilings, as the coffered design draws the eye upward.

Read too: Kitchen Lighting For A Vaulted Ceiling: Illuminating Your Space with Style and Functionality

Increased Property Value

Adding a coffered ceiling to your kitchen can increase the value of your home. This architectural feature is often associated with luxury and high-end design, making your property more attractive to potential buyers.

Improved Acoustics

Coffered ceilings can help improve the acoustics in a kitchen by reducing echo and noise levels. The recessed panels and beams can absorb sound, making conversations and activities in the kitchen more pleasant.

Versatile Design Options

Coffered ceilings are highly customizable, allowing homeowners to choose from various materials, finishes, and styles. Whether you prefer a traditional, modern, or transitional look, a coffered ceiling can be tailored to complement your kitchen’s design.

Design Considerations for a Kitchen With Coffered Ceiling

Ceiling Height

One of the first considerations when planning a coffered ceiling is the height of your kitchen ceiling. Coffered ceilings work best in rooms with ceilings that are at least nine feet high. This allows enough space for the beams and panels without making the room feel cramped.

Material Selection

The choice of materials for your coffered ceiling will significantly impact the overall look and feel of your kitchen. Common materials include wood, MDF (medium-density fiberboard), and plaster. Each material offers different advantages:

  • Wood: Offers a warm, natural look and can be stained or painted.
  • MDF: A cost-effective option that can be painted to match your kitchen’s color scheme.
  • Plaster: Provides a smooth, seamless finish and is ideal for creating intricate designs.

Beam and Panel Design

The design of the beams and panels will determine the style of your coffered ceiling. Traditional coffered ceilings often feature deep, ornate beams with decorative molding. Modern designs tend to have simpler, cleaner lines with shallower beams. Consider the overall style of your kitchen when choosing the design of your coffered ceiling.

Lighting Integration

Integrating lighting into a coffered ceiling can enhance its visual impact and provide functional illumination. Recessed lighting, pendant lights, or LED strips can be installed within the panels to create a dramatic effect. Ensure that your lighting plan complements the design of the coffered ceiling and provides adequate illumination for cooking and dining.

Color and Finish

The color and finish of your coffered ceiling can either blend with the existing decor or create a striking contrast. A white or light-colored ceiling can make the room feel more spacious and airy, while darker colors can add warmth and coziness. Consider using a glossy finish for a polished look or a matte finish for a more understated elegance.

How to Install a Coffered Ceiling in Your Kitchen

Step-by-Step Guide

Step 1: Planning and Measuring

Begin by measuring the dimensions of your kitchen ceiling. Use these measurements to create a scale drawing of the ceiling, including the layout of the coffered panels. Determine the size and spacing of the beams to ensure a balanced design.

Step 2: Installing the Perimeter Beams

Start by installing the perimeter beams around the edges of the ceiling. These beams will form the outer frame for the coffered ceiling. Use a level to ensure the beams are straight and secure them to the ceiling joists with screws or nails.

Step 3: Adding the Cross Beams

Next, install the cross beams to create the grid pattern. These beams should be spaced evenly and securely attached to the perimeter beams and ceiling joists. Use a carpenter’s square to ensure the beams are aligned correctly.

Step 4: Installing the Panels

Once the beams are in place, it’s time to install the panels. Cut the panels to size and fit them into the grid created by the beams. Secure the panels with finishing nails or adhesive, depending on the material used.

Step 5: Adding Decorative Molding

For a more finished look, add decorative molding around the edges of the beams and panels. This step is optional but can enhance the overall appearance of the coffered ceiling.

Step 6: Finishing Touches

Finally, paint or stain the beams and panels to match your desired color scheme. If you’re integrating lighting, install the fixtures and ensure they are properly wired and functional.

Maintenance and Care for a Coffered Ceiling

Regular Cleaning

Dust and debris can accumulate on the beams and panels of a coffered ceiling. Regularly dust the ceiling using a microfiber cloth or a vacuum with a soft brush attachment. For deeper cleaning, use a mild detergent and water to wipe down the beams and panels.

Inspecting for Damage

Periodically inspect your coffered ceiling for any signs of damage, such as cracks, peeling paint, or loose panels. Address any issues promptly to prevent further damage and maintain the ceiling’s appearance.

Repainting or Staining

Over time, the paint or stain on your coffered ceiling may fade or become worn. Repaint or restain the ceiling as needed to keep it looking fresh and new. Use high-quality paint or stain to ensure a long-lasting finish.

Conclusion

A kitchen with a coffered ceiling can transform your culinary space into a stylish and functional area. By considering factors such as ceiling height, material selection, design, and lighting, you can create a custom coffered ceiling that enhances the beauty and value of your home. Whether you choose to tackle the installation yourself or hire a professional, the result will be a stunning focal point that elevates your kitchen to new heights.

Kitchen Floor To Ceiling Cabinets: Transform Your Space

When it comes to maximizing storage and creating a streamlined look in your kitchen, Kitchen Floor To Ceiling Cabinets are an excellent choice. These cabinets not only enhance the functionality of your kitchen but also add a touch of elegance and modernity. This comprehensive guide will explore everything you need to know about kitchen floor to ceiling cabinets, from their benefits and design options to installation tips and maintenance.

Kitchen Floor To Ceiling Cabinets

What Are Kitchen Floor To Ceiling Cabinets?

Kitchen Floor To Ceiling Cabinets are storage units that extend from the floor to the ceiling, providing a seamless and uniform appearance. Unlike traditional cabinets that stop at eye level, these cabinets maximize vertical space, offering ample storage and a sleek, cohesive look.

Key Features of Kitchen Floor To Ceiling Cabinets

  1. Maximum Storage: With their extended height, these cabinets offer more storage space compared to standard cabinets.
  2. Sleek Design: They create a clean, uninterrupted look that enhances the overall aesthetic of your kitchen.
  3. Customization Options: Available in various styles, finishes, and configurations to suit different design preferences.
  4. Efficient Use of Space: Ideal for smaller kitchens or those with high ceilings, as they utilize every inch of available space.
  5. Modern Appeal: Adds a contemporary and elegant touch to your kitchen decor.

Read too: Striped Schoolhouse Ceiling Light Fixtures: Unveiling the Timeless Charm

Benefits of Kitchen Floor To Ceiling Cabinets

Choosing Kitchen Floor To Ceiling Cabinets for your kitchen comes with numerous benefits. Here’s a closer look at why these cabinets are a popular choice among homeowners and designers:

1. Increased Storage Capacity

One of the most significant advantages of floor to ceiling cabinets is the increased storage capacity they offer. By extending the cabinets all the way to the ceiling, you can store more items, including kitchen essentials, cookware, and pantry items. This is particularly beneficial for smaller kitchens where space is limited.

2. Enhanced Kitchen Aesthetics

Floor to ceiling cabinets create a streamlined and cohesive look in the kitchen. They eliminate the gap between the top of the cabinets and the ceiling, resulting in a more polished and sophisticated appearance. This design choice can make the kitchen feel more expansive and visually appealing.

3. Better Organization

With more vertical storage space, you can organize your kitchen items more efficiently. Floor to ceiling cabinets often come with adjustable shelves, built-in organizers, and pull-out drawers, allowing you to customize the storage solutions to meet your specific needs.

4. Improved Cleanliness

The lack of open space between the top of the cabinets and the ceiling reduces the accumulation of dust and debris. This makes cleaning easier and helps maintain a cleaner, more hygienic kitchen environment.

5. Maximized Vertical Space

Utilizing vertical space is crucial in smaller kitchens. Floor to ceiling cabinets make the most of available height, making your kitchen feel larger and more functional. This design is also ideal for homes with high ceilings, allowing you to fully utilize the vertical space.

Design Options for Kitchen Floor To Ceiling Cabinets

When it comes to designing your kitchen floor to ceiling cabinets, there are various options to consider. Here are some popular design choices and styles to help you create the perfect look for your kitchen:

1. Shaker Style Cabinets

Shaker style cabinets are known for their simple, clean lines and classic appeal. They feature a flat panel with a frame around the edges, offering a timeless look that works well in both traditional and modern kitchens. Shaker cabinets can be painted or stained to match your desired color scheme.

2. Flat-Panel Cabinets

Flat-panel cabinets have a sleek, minimalist design with no visible frames or hardware. They create a smooth, contemporary look and are often used in modern kitchens. Flat-panel cabinets can be finished in a variety of materials, including wood, laminate, or high-gloss surfaces.

3. Glass-Front Cabinets

For a touch of elegance and sophistication, consider glass-front cabinets. These cabinets feature glass panels in the doors, allowing you to display decorative items or glassware. Glass-front cabinets can be combined with solid doors for a balanced look.

4. Open Shelving

Incorporating open shelving into your floor to ceiling cabinets can add visual interest and provide easy access to frequently used items. Open shelves are ideal for displaying cookbooks, decorative pieces, or everyday dishes. They can be integrated into the cabinet design or used as a separate feature.

5. Two-Tone Cabinets

Two-tone cabinets add a dynamic element to your kitchen design. This style involves using different colors or finishes for the upper and lower sections of the cabinets. For example, you might choose a darker color for the lower cabinets and a lighter color for the upper cabinets to create contrast and visual interest.

Installation of Kitchen Floor To Ceiling Cabinets

Installing kitchen floor to ceiling cabinets involves several steps, each crucial to ensuring a successful and professional result. Here’s a step-by-step guide to help you through the installation process:

1. Plan and Measure

Before installation, carefully plan the layout and measure your kitchen space. Determine the height, width, and depth of the cabinets, and make note of any obstacles or features that may affect installation. Accurate measurements are essential for a perfect fit.

2. Prepare the Area

Clear the area where the cabinets will be installed. Remove any existing cabinetry, trim, or fixtures that may obstruct the installation process. Ensure that the walls and floors are clean, level, and in good condition.

3. Install Wall Cabinets

Start by installing the wall cabinets. Use a stud finder to locate the wall studs and mark their positions. Secure the cabinets to the wall studs using appropriate mounting hardware. Ensure that the cabinets are level and properly aligned before securing them in place.

4. Install Base Cabinets

Once the wall cabinets are installed, move on to the base cabinets. Position the base cabinets in place and check for levelness. Secure the base cabinets to the wall and to each other using screws or brackets. Make any necessary adjustments to ensure a snug fit.

5. Add Cabinet Doors and Hardware

After the cabinets are securely installed, attach the cabinet doors and hardware. Install hinges, handles, or knobs according to the manufacturer’s instructions. Ensure that the doors are properly aligned and operate smoothly.

6. Finish and Seal

Complete the installation by adding any finishing touches, such as trim, crown molding, or backsplash. Seal any gaps or seams with caulk or filler to create a polished and seamless look. Clean the cabinets and the surrounding area to remove any dust or debris from the installation process.

Maintenance and Care for Kitchen Floor To Ceiling Cabinets

Proper maintenance and care are essential to keep your kitchen floor to ceiling cabinets looking their best and functioning effectively. Here are some tips for maintaining your cabinets:

1. Regular Cleaning

Clean your cabinets regularly to remove dust, spills, and stains. Use a soft cloth and mild detergent to wipe down the surfaces. Avoid using abrasive cleaners or scrubbing tools that may damage the finish.

2. Inspect and Repair

Periodically inspect your cabinets for any signs of damage, such as scratches, dents, or loose hardware. Address any issues promptly to prevent further damage and maintain the appearance of your cabinets.

3. Avoid Excessive Moisture

Excessive moisture can damage the wood or finish of your cabinets. Avoid placing wet items on the cabinets or exposing them to high humidity. Use a dehumidifier if necessary to maintain optimal humidity levels in the kitchen.

4. Protect from Heat

Avoid placing hot pots, pans, or appliances directly on the cabinet surfaces. Use trivets or protective pads to prevent heat damage and maintain the integrity of the cabinet finish.

Conclusion

Kitchen Floor To Ceiling Cabinets offer a stylish and functional solution for maximizing storage and enhancing the overall appearance of your kitchen. With their sleek design, increased storage capacity, and customizable options, these cabinets are a valuable addition to any kitchen space. By understanding the benefits, design options, installation process, and maintenance tips, you can make informed decisions and create a kitchen that is both beautiful and efficient.

Commercial Kitchen Ceiling Tiles: Enhancing Functionality and Aesthetics

When designing or renovating a commercial kitchen, every detail counts. One often overlooked but critical component is the ceiling. Choosing the right ceiling tiles for your commercial kitchen can significantly impact both functionality and aesthetics. In this guide, we will explore the various aspects of commercial kitchen ceiling tiles, including their benefits, types, installation tips, and maintenance. Our goal is to provide you with the information needed to make an informed decision and optimize your kitchen environment.

Commercial Kitchen Ceiling Tiles

Why Choose Commercial Kitchen Ceiling Tiles?

Ceiling tiles designed specifically for commercial kitchens offer several benefits that are essential for maintaining a safe, clean, and efficient workspace. Here are some of the primary reasons to consider them:

Hygiene and Cleanliness

Commercial kitchens require stringent hygiene standards. Ceiling tiles in these environments must be easy to clean and resistant to mold, mildew, and bacteria. Many commercial kitchen ceiling tiles are designed with smooth, non-porous surfaces that can be wiped down easily, ensuring a hygienic environment.

Fire Resistance

Safety is paramount in any commercial kitchen. Ceiling tiles with fire-resistant properties help prevent the spread of fire and provide additional time for evacuation in case of an emergency. Look for tiles that meet industry standards for fire resistance to enhance the safety of your kitchen.

Moisture and Humidity Resistance

Kitchens are exposed to high levels of moisture and humidity, which can damage regular ceiling tiles. Commercial kitchen ceiling tiles are typically designed to withstand these conditions without warping, sagging, or deteriorating, ensuring longevity and maintaining a clean appearance.

Aesthetic Appeal

While functionality is crucial, aesthetics should not be ignored. Commercial kitchen ceiling tiles are available in various styles and finishes, allowing you to choose options that complement your kitchen’s design. A well-designed ceiling can enhance the overall ambiance of the space.

Acoustic Control

Noise control is essential in a busy commercial kitchen. Ceiling tiles with acoustic properties can help reduce noise levels, creating a more comfortable and efficient working environment. This is particularly important in open kitchen designs where noise can easily travel to dining areas.

Types of Commercial Kitchen Ceiling Tiles

There are several types of ceiling tiles suitable for commercial kitchens, each with its unique properties and benefits. Understanding the different options can help you select the best tiles for your needs.

Vinyl Faced Gypsum Ceiling Tiles

Vinyl faced gypsum ceiling tiles are a popular choice for commercial kitchens due to their durability and ease of maintenance. The vinyl surface is smooth and non-porous, making it easy to clean and resistant to moisture and bacteria. These tiles are also fire-resistant, adding an extra layer of safety.

Fiberglass Ceiling Tiles

Fiberglass ceiling tiles are lightweight and offer excellent sound absorption, making them ideal for noisy kitchen environments. They are resistant to moisture and mold, ensuring they remain in good condition even in humid conditions. The tiles can be easily cleaned with a damp cloth, maintaining hygiene standards.

Read too: Kitchen Lighting For A Vaulted Ceiling: Illuminating Your Space with Style and Functionality

Metal Ceiling Tiles

Metal ceiling tiles, such as aluminum or stainless steel, are highly durable and resistant to moisture, mold, and bacteria. They are easy to clean and maintain, making them a practical choice for commercial kitchens. Metal tiles also provide a sleek, modern aesthetic that can enhance the overall look of the kitchen.

PVC Ceiling Tiles

PVC ceiling tiles are another excellent option for commercial kitchens. They are lightweight, moisture-resistant, and easy to clean. PVC tiles are available in various styles and finishes, allowing you to achieve the desired look for your kitchen while maintaining functionality.

Mineral Fiber Ceiling Tiles

Mineral fiber ceiling tiles offer good acoustic properties and are fire-resistant, making them suitable for commercial kitchens. However, they may require more maintenance compared to other types of tiles, as they can be more susceptible to moisture damage.

Installation Tips for Commercial Kitchen Ceiling Tiles

Proper installation is crucial for ensuring the longevity and effectiveness of your ceiling tiles. Here are some tips to help you achieve a successful installation:

Prepare the Area

Before installation, ensure that the ceiling area is clean, dry, and free of any debris. This will help the tiles adhere properly and prevent any potential issues.

Measure Accurately

Accurate measurements are essential for ensuring that the tiles fit correctly. Measure the ceiling area carefully and cut the tiles to size if necessary. Having the right tools, such as a utility knife and a straight edge, can help achieve precise cuts.

Use the Right Adhesive

Using the appropriate adhesive is critical for ensuring that the tiles stay in place. Follow the manufacturer’s recommendations for the type of adhesive to use and apply it evenly to the back of each tile.

Follow a Grid Pattern

Installing the tiles in a grid pattern can help achieve a uniform and professional look. Start from the center of the ceiling and work your way outwards, ensuring that the tiles are aligned correctly.

Secure the Tiles

Make sure the tiles are securely attached to the ceiling. Press each tile firmly into place and ensure that there are no gaps or loose edges. This will help prevent any tiles from falling or shifting over time.

Maintenance of Commercial Kitchen Ceiling Tiles

Proper maintenance is essential for keeping your ceiling tiles in good condition and ensuring a hygienic environment. Here are some maintenance tips:

Regular Cleaning

Regularly clean the ceiling tiles to remove any dirt, grease, or grime. Use a mild detergent and a damp cloth to wipe down the tiles. For tougher stains, a soft-bristled brush may be used. Avoid using abrasive cleaners that could damage the tile surface.

Inspect for Damage

Periodically inspect the ceiling tiles for any signs of damage, such as cracks, warping, or discoloration. Replace any damaged tiles promptly to maintain the integrity of the ceiling and prevent further issues.

Check for Moisture

Ensure that the kitchen is well-ventilated to prevent moisture buildup, which can damage the tiles and promote mold growth. If you notice any signs of moisture damage, such as staining or sagging tiles, address the issue immediately.

Maintain Fire Safety

If your ceiling tiles have fire-resistant properties, ensure that they remain effective by following proper maintenance procedures. Do not paint over the tiles or apply any coatings that could compromise their fire resistance.

Design Ideas with Commercial Kitchen Ceiling Tiles

Commercial kitchen ceiling tiles can enhance the overall design and functionality of your space. Here are some design ideas to inspire you:

Modern Industrial

For a modern industrial look, consider metal ceiling tiles with a sleek finish. Pair them with exposed ductwork, stainless steel appliances, and concrete countertops for a contemporary and stylish kitchen.

Classic Elegance

Vinyl faced gypsum ceiling tiles in a neutral color can create a clean and elegant look. Combine them with white cabinetry, marble countertops, and classic lighting fixtures to achieve a timeless design.

Rustic Charm

Fiberglass or PVC ceiling tiles with a textured finish can add warmth and character to a rustic kitchen. Complement them with wooden beams, brick walls, and vintage-inspired decor for a cozy and inviting space.

Bold and Vibrant

For a bold and vibrant kitchen, choose ceiling tiles in bright colors or patterns. This can add a playful and dynamic element to the space. Pair them with colorful backsplashes, modern appliances, and unique lighting fixtures to create a lively atmosphere.

Conclusion

Choosing the right ceiling tiles for your commercial kitchen is crucial for maintaining a functional, safe, and aesthetically pleasing environment. Commercial kitchen ceiling tiles offer numerous benefits, including hygiene, fire resistance, moisture resistance, and acoustic control. By understanding the different types of tiles available and following proper installation and maintenance procedures, you can enhance the overall performance and appearance of your kitchen. Whether you prefer a modern, classic, rustic, or vibrant design, there are commercial kitchen ceiling tiles to suit your needs and style.

Kitchen Cabinets 12 Foot Ceiling: Enhancing Your Kitchen

Discover effective design strategies and considerations for installing kitchen cabinets in spaces with 12-foot ceilings, ensuring both functionality and aesthetic appeal.

Kitchen Cabinets 12 Foot Ceiling

Kitchen Cabinets 12 Foot Ceiling: Designing for Height and Space

Kitchen cabinets play a crucial role in both storage and visual appeal within a kitchen space. When dealing with higher ceilings, such as 12-foot ceilings, the design and installation of cabinets require careful planning to optimize the available space and maintain a harmonious balance with the room’s proportions.

Understanding Kitchen Cabinets 12 Foot Ceiling

Kitchen cabinets designed for 12-foot ceilings often feature:

  • Extended Height: Taller cabinets that maximize vertical space and offer additional storage capacity.
  • Customization Options: Adjustable shelving and custom configurations to accommodate varying storage needs.
  • Aesthetic Considerations: Design elements such as crown molding or decorative accents to enhance visual appeal.

Read too: Exploring the Benefits and How-Tos of DIY Ceiling Cassette Mini Split Installation: Revolutionizing Comfort

Benefits of Kitchen Cabinets 12 Foot Ceiling

  1. Increased Storage: Utilize the vertical space effectively for storing infrequently used items or seasonal kitchenware.
  2. Enhanced Design Flexibility: Options for incorporating design elements like glass doors, lighting fixtures, or open shelving.
  3. Room Proportion: Maintain a balanced look within the kitchen by filling the vertical space with functional and decorative cabinets.
  4. Personalization: Customize cabinet heights and configurations to suit specific kitchen layouts and user preferences.

Design Considerations for Installing Kitchen Cabinets

When planning for kitchen cabinets in a space with 12-foot ceilings, consider the following:

  • Cabinet Heights: Opt for taller cabinets to utilize the vertical space efficiently without overwhelming the room.
  • Storage Needs: Assess storage requirements and prioritize accessibility for frequently used items.
  • Decorative Elements: Incorporate crown molding, lighting features, or decorative panels to enhance cabinet aesthetics.
  • Color and Material: Choose cabinet finishes that complement the overall kitchen design and style.

Installation and Maintenance Tips

Ensure successful installation and long-term maintenance of kitchen cabinets with these tips:

  • Professional Installation: Hire experienced contractors to ensure precise measurements and secure installation.
  • Hardware Selection: Choose durable hinges, handles, and drawer slides that can support the weight of taller cabinets.
  • Ventilation Considerations: Ensure proper ventilation around cabinets, especially if installing above cooking areas.
  • Regular Cleaning: Maintain cabinets by wiping down surfaces regularly and addressing spills or stains promptly.

Conclusion

Kitchen cabinets designed for 12-foot ceilings offer practical storage solutions and enhance the overall aesthetics of the kitchen space. By carefully planning the design, installation, and maintenance of these cabinets, homeowners can create a functional and visually appealing kitchen environment. Explore the possibilities of customizing cabinet configurations and incorporating design elements to elevate your kitchen’s style while maximizing storage efficiency.

American Tin Ceilings Backsplash: Transform Your Kitchen

Are you looking to add a touch of elegance and vintage charm to your kitchen? An American Tin Ceilings Backsplash might be the perfect solution. This guide will delve into the benefits, installation process, design ideas, and maintenance tips for American tin ceilings backsplashes, providing you with all the information you need to make an informed decision.

American Tin Ceilings Backsplash

Why Choose an American Tin Ceilings Backsplash?

Timeless Elegance and Charm

American tin ceilings backsplashes bring a unique aesthetic appeal that combines vintage charm with modern elegance. The intricate patterns and metallic finishes can transform an ordinary kitchen into a stylish space reminiscent of early 20th-century design.

Durability and Longevity

Tin is a durable material that can withstand the rigors of kitchen environments. Unlike other backsplash materials, tin does not crack or chip easily, ensuring your backsplash will maintain its beauty for years to come.

Read too: Elevate Your Home Décor with Exquisite Japanese Style Ceiling Lamp Designs

Easy to Clean and Maintain

One of the standout features of an American tin ceilings backsplash is its ease of maintenance. Tin surfaces are non-porous, which means they don’t absorb stains or spills. A simple wipe with a damp cloth is usually sufficient to keep your backsplash looking pristine.

Affordable Luxury

Compared to other high-end backsplash materials like marble or granite, tin is relatively affordable. You can achieve a luxurious look without breaking the bank, making it an excellent option for budget-conscious homeowners.

Installation Process of American Tin Ceilings Backsplash

Preparation

Before starting the installation, measure the area where you plan to install the backsplash. This will help you determine the number of tin panels you need. Ensure the wall surface is clean, dry, and free from any grease or debris.

Cutting the Panels

Tin panels can be easily cut to fit your space using tin snips or a utility knife. Measure and mark the panels before cutting to ensure a precise fit. Always wear protective gloves to prevent injury while handling tin.

Applying Adhesive

Use a high-quality adhesive specifically designed for metal. Apply the adhesive to the back of each tin panel using a trowel, ensuring an even layer. Press the panel firmly onto the wall, starting from the bottom and working your way up.

Securing the Panels

For additional security, you can use small nails or screws along the edges of each panel. This will ensure the panels remain firmly in place. Make sure the nails or screws are evenly spaced for a uniform appearance.

Finishing Touches

Once all the panels are in place, use caulk to fill any gaps between the panels and the wall. This will create a seamless look and prevent moisture from seeping behind the panels. Allow the adhesive and caulk to dry completely before using the backsplash area.

Design Ideas for American Tin Ceilings Backsplash

Classic Victorian

For a classic Victorian look, choose tin panels with intricate floral or geometric patterns. Pair the backsplash with dark wood cabinetry and vintage fixtures to create a timeless kitchen design.

Modern Minimalist

If you prefer a modern aesthetic, opt for tin panels with simple, clean lines. A brushed or matte finish can add a subtle yet sophisticated touch to a contemporary kitchen. Pair with sleek, white cabinets and stainless steel appliances for a cohesive look.

Rustic Farmhouse

For a cozy, rustic farmhouse feel, choose tin panels with a distressed or aged finish. Pair the backsplash with wooden countertops and open shelving to create a warm and inviting kitchen space.

Industrial Chic

For an industrial chic look, go for tin panels with a metallic finish and bold patterns. Pair the backsplash with exposed brick walls, metal accents, and reclaimed wood furniture to achieve a trendy, urban vibe.

Maintaining Your American Tin Ceilings Backsplash

Regular Cleaning

To keep your tin backsplash looking its best, clean it regularly with a soft cloth and mild detergent. Avoid using abrasive cleaners or scrubbers, as they can scratch the tin surface.

Preventing Moisture Damage

While tin is resistant to moisture, prolonged exposure can cause rusting. Ensure your backsplash is properly sealed, especially around seams and edges. Wipe up any spills or splashes promptly to prevent water damage.

Addressing Scratches and Dents

If your tin backsplash gets scratched or dented, you can often repair it with a little effort. Minor scratches can be buffed out with a soft cloth, while deeper scratches may require touch-up paint. For dents, gently tap the area from the back with a rubber mallet.

Benefits of Choosing American Tin Ceilings Backsplash

Customizable and Versatile

American tin ceilings backsplashes come in a variety of patterns, finishes, and colors, allowing you to customize your kitchen to suit your personal style. Whether you prefer a sleek modern look or a vintage charm, there’s a tin backsplash option for you.

Eco-Friendly Option

Tin is a recyclable material, making it an environmentally friendly choice for your kitchen. By choosing a tin backsplash, you’re not only enhancing your home’s aesthetic but also contributing to sustainable living practices.

Increased Home Value

A well-designed kitchen with a stylish backsplash can significantly increase the value of your home. Potential buyers are often attracted to unique, high-quality features like an American tin ceilings backsplash, making your home stand out in the real estate market.

Conclusion: Elevate Your Kitchen with an American Tin Ceilings Backsplash

An American tin ceilings backsplash is an excellent choice for homeowners looking to add a touch of elegance, durability, and easy maintenance to their kitchen. With various design options, straightforward installation, and numerous benefits, it’s no wonder that tin backsplashes are becoming increasingly popular. By following this guide, you can confidently transform your kitchen into a stylish and functional space that you’ll love for years to come.

Ceiling Hung Kitchen Cabinets: Maximizing Style and Functionality

Kitchen design has evolved significantly over the years, with a focus on maximizing both style and functionality. One of the latest trends that cater to both these aspects is the use of ceiling hung kitchen cabinets. These innovative cabinets not only provide additional storage space but also add a modern and unique touch to your kitchen. In this comprehensive guide, we will explore everything you need to know about ceiling hung kitchen cabinets, including their benefits, design considerations, installation tips, and how they can transform your kitchen space.

Ceiling Hung Kitchen Cabinets

The Benefits of Ceiling Hung Kitchen Cabinets

Maximizing Storage Space

One of the primary benefits of ceiling hung kitchen cabinets is their ability to maximize storage space in your kitchen. By utilizing the vertical space between the countertop and the ceiling, you can significantly increase the amount of storage available. This is especially beneficial in smaller kitchens where space is at a premium.

Creating an Open and Airy Feel

Traditional wall-mounted cabinets can sometimes make a kitchen feel cramped and closed in. Ceiling hung cabinets, on the other hand, can create an open and airy feel. They allow for more natural light to flow through the space and provide a less obstructed view, making your kitchen appear larger and more inviting.

Adding a Modern Touch

Ceiling hung kitchen cabinets are a contemporary design element that can instantly update the look of your kitchen. They offer a sleek and minimalist aesthetic that is perfect for modern and transitional kitchen styles. The unique placement of these cabinets can serve as a focal point, adding visual interest to the space.

Enhancing Accessibility

For those who find it difficult to reach items stored in traditional upper cabinets, ceiling hung cabinets can be a more accessible option. They are typically mounted at a height that makes it easier to access everyday items without the need for a step stool.

Design Considerations for Ceiling Hung Kitchen Cabinets

Choosing the Right Style

When selecting ceiling hung kitchen cabinets, it’s important to choose a style that complements your overall kitchen design. There are several styles to consider, including:

  1. Open Shelving: This style features open shelves without doors, allowing you to display decorative items and keep frequently used items within easy reach. Open shelving creates a casual and airy feel in the kitchen.
  2. Glass-Front Cabinets: Glass-front cabinets offer a compromise between open shelving and traditional closed cabinets. They allow you to showcase your dishes and glassware while keeping them protected from dust.
  3. Closed Cabinets: For a more streamlined look, closed cabinets with solid doors provide ample storage while keeping your items out of sight. This style is ideal for those who prefer a clean and clutter-free kitchen.

Selecting the Right Material

The material of your ceiling hung kitchen cabinets can significantly impact their durability and appearance. Some popular materials include:

  1. Wood: Wood is a classic and versatile material that can be stained or painted to match your kitchen decor. It offers a warm and natural look but requires regular maintenance to prevent damage from moisture and heat.
  2. Metal: Metal cabinets, such as stainless steel or aluminum, are durable and easy to clean. They are ideal for modern and industrial kitchen styles and can withstand the wear and tear of a busy kitchen.
  3. Glass: Glass cabinets add a touch of elegance and sophistication to your kitchen. They can be combined with wood or metal frames for added durability. However, they require frequent cleaning to keep them looking their best.

Color and Finish Options

The color and finish of your ceiling hung kitchen cabinets can set the tone for your kitchen design. Neutral colors like white, gray, and beige create a timeless and versatile look, while bold colors like navy blue, emerald green, and deep red can make a statement. Matte finishes offer a contemporary and understated look, while glossy finishes add a touch of glamour and reflect light to brighten the space.

Installation Tips for Ceiling Hung Kitchen Cabinets

Hiring a Professional

Installing ceiling hung kitchen cabinets can be a complex task that requires precise measurements and secure mounting. It’s recommended to hire a professional contractor or cabinet installer to ensure the cabinets are properly and safely installed. A professional can also help with any necessary modifications to the ceiling or walls.

Ensuring Proper Support

Ceiling hung cabinets need to be securely anchored to the ceiling to prevent them from falling. This typically involves using heavy-duty brackets or support rods that are attached to ceiling joists. It’s important to ensure the ceiling structure can support the weight of the cabinets and their contents.

Measuring and Planning

Accurate measurements are crucial for a successful installation. Measure the height, width, and depth of the space where the cabinets will be installed. Plan the layout to ensure the cabinets are evenly spaced and aligned with other elements in the kitchen, such as countertops and appliances.

Installing Lighting

Consider integrating lighting into your ceiling hung kitchen cabinets to enhance their functionality and aesthetic appeal. Under-cabinet lighting can illuminate the countertop workspace, while interior lighting can showcase the contents of glass-front cabinets.

Integrating Ceiling Hung Kitchen Cabinets Into Your Home Decor

Creating a Focal Point

Ceiling hung kitchen cabinets can serve as a striking focal point in your kitchen. Choose a bold color or unique design to make them stand out. Pair them with complementary elements, such as a stylish backsplash or statement lighting, to create a cohesive and visually appealing look.

Mixing and Matching Styles

Don’t be afraid to mix and match different cabinet styles and materials to create a personalized and eclectic look. For example, you can combine open shelving with closed cabinets or mix wood and metal finishes for added texture and interest.

Coordinating with Existing Elements

To ensure a harmonious and balanced design, coordinate your ceiling hung kitchen cabinets with existing elements in your kitchen, such as countertops, flooring, and appliances. Choose colors and finishes that complement the overall color scheme and style of your kitchen.

Adding Decorative Accents

Enhance the visual appeal of your ceiling hung kitchen cabinets by adding decorative accents, such as decorative brackets, trim, or hardware. These small details can add character and personality to your kitchen design.

Maintaining Ceiling Hung Kitchen Cabinets

Regular Cleaning

To keep your ceiling hung kitchen cabinets looking their best, regular cleaning is essential. Wipe down the exterior and interior surfaces with a mild detergent and water. For wood cabinets, use a wood cleaner or polish to maintain the finish. Avoid using abrasive cleaners or scouring pads that can damage the surface.

Checking for Wear and Tear

Periodically inspect your cabinets for any signs of wear and tear, such as loose hinges, damaged finishes, or sagging shelves. Address any issues promptly to prevent further damage and ensure the cabinets remain safe and functional.

Read too: A Comprehensive Mr Cool Ceiling Cassette Review: Unveiling Excellence

Reorganizing and Decluttering

To maximize the functionality of your ceiling hung kitchen cabinet, regularly reorganize and declutter the contents. Remove any items you no longer use or need, and keep frequently used items within easy reach. Use storage organizers, such as baskets, bins, and dividers, to keep the contents neat and organized.

Conclusion

Ceiling hung kitchen cabinet are a stylish and practical addition to any kitchen. They offer numerous benefits, including maximizing storage space, creating an open and airy feel, adding a modern touch, and enhancing accessibility. By carefully selecting the right style, material, color, and finish, you can create a kitchen that is both functional and visually appealing. Whether you choose to hire a professional for installation or tackle the project yourself, proper planning and support are essential for a successful outcome. With regular maintenance and thoughtful integration into your home decor, ceiling hung kitchen cabinet can transform your kitchen into a beautiful and efficient space.

Vaulted Ceiling Kitchen Hood: Elevate Your Culinary Space with a Stylish

A vaulted ceiling adds architectural interest and spaciousness to any room, especially in the kitchen where functionality meets design. Pairing this architectural feature with a stylish kitchen hood not only enhances ventilation but also serves as a striking focal point. In this article, we’ll delve into the world of vaulted ceiling kitchen hoods, exploring their features, benefits, and how they can transform your culinary space.

Vaulted Ceiling Kitchen Hood

Understanding Vaulted Ceiling Kitchen Hoods

A vaulted ceiling kitchen hood is a specialized ventilation system designed to fit seamlessly into kitchens with high or sloped ceilings. Unlike traditional range hoods, which are typically mounted against flat ceilings, vaulted ceiling kitchen hoods are customized to accommodate the unique angles and dimensions of vaulted ceilings, ensuring efficient airflow and aesthetic harmony.

Key Features of Vaulted Ceiling Kitchen Hoods

  1. Customized Design: Vaulted ceiling kitchen hoods are available in a variety of designs and configurations to suit your kitchen’s layout and style. From sleek and modern stainless steel models to rustic and charming copper hoods, there’s a wide range of options to choose from to complement your decor.
  2. Optimal Ventilation: One of the primary functions of a kitchen hood is to remove smoke, steam, grease, and odors from the cooking area, promoting a healthier and more comfortable environment. Vaulted ceiling kitchen hoods feature powerful ventilation systems that efficiently capture and exhaust cooking byproducts, ensuring clean air and minimal buildup of grease and moisture.
  3. Enhanced Lighting: Many vaulted ceiling kitchen hoods come with built-in lighting features, illuminating the cooking surface below and adding ambiance to the kitchen space. LED lights are a popular choice for their energy efficiency and bright, even illumination, making cooking tasks easier and more enjoyable.
  4. Statement Piece: Beyond their practical function, vaulted ceiling kitchen hoods serve as striking visual elements that contribute to the overall design aesthetic of the kitchen. Whether you prefer a minimalist hood that blends seamlessly into the ceiling or a bold, decorative hood that makes a statement, there’s a hood style to suit every taste and preference.

Installing and Maintaining

Installing a vaulted ceiling kitchen hood requires careful planning and precise measurements to ensure a proper fit and optimal performance. It’s essential to consult with a qualified contractor or kitchen designer to determine the best placement and configuration for your specific kitchen layout.

Once installed, maintaining your vaulted ceiling kitchen hood is relatively straightforward. Regular cleaning of the hood filters and surfaces is essential to prevent the buildup of grease and debris and maintain optimal airflow and ventilation efficiency.

Benefits of Vaulted Ceiling Kitchen Hoods

  1. Improved Air Quality: By removing smoke, steam, and odors from the kitchen, vaulted ceiling kitchen hoods help maintain a cleaner and healthier indoor environment, free from cooking-related pollutants.
  2. Enhanced Design: Vaulted ceiling kitchen hoods add visual interest and elegance to the kitchen space, serving as both functional appliances and stylish design elements that elevate the overall aesthetic appeal of the room.
  3. Increased Home Value: A well-designed and properly installed vaulted ceiling kitchen hood can enhance the value of your home, making it more attractive to potential buyers and adding to its resale value.

Conclusion

A vaulted ceiling kitchen hood is more than just a ventilation appliance—it’s a design statement that enhances the beauty and functionality of your kitchen. With customizable designs, powerful ventilation capabilities, and aesthetic appeal, vaulted ceiling kitchen hoods are an essential addition to any culinary space.

Read too: Exploring the Efficiency of Radiant Ceiling Heater Electric: A Comprehensive Guide

Flush Ceiling Mount Range Hood with Remote Control: Enhance Your Kitchen Experience

A well-equipped kitchen is not just about appliances; it’s also about the convenience and functionality they offer. When it comes to range hoods, the flush ceiling mount design with remote control capabilities is a game-changer. In this guide, we’ll delve into the features, benefits, and installation of the flush ceiling mount range hood with remote control, and why it’s a must-have addition to any modern kitchen.

Flush Ceiling Mount Range Hood With Remote

Understanding Flush Ceiling Mount Range Hoods with Remote Control

What is a Flush Ceiling Mount Range Hood?

A flush ceiling mount range hood is a type of ventilation hood that is installed directly into the ceiling, creating a seamless and integrated look with the kitchen space. Unlike traditional range hoods that protrude from the wall or cabinets, flush ceiling mount hoods sit flush with the ceiling, providing a sleek and minimalist appearance.

Features and Benefits

  • Space-saving Design: Flush ceiling mount range hoods are ideal for kitchens with limited space or low ceilings, as they do not take up valuable wall or cabinet space.
  • Enhanced Airflow: Despite their discreet appearance, flush ceiling mount range hoods offer powerful ventilation capabilities, effectively removing smoke, odors, and grease from the kitchen environment.
  • Remote Control Operation: The inclusion of a remote control allows for convenient operation of the range hood from a distance, eliminating the need to reach up and manually adjust settings.
  • Adjustable Fan Speeds: With multiple fan speeds, users can customize the airflow according to cooking needs, from gentle ventilation during simmering to high-speed extraction during intense cooking sessions.
  • LED Lighting: Many flush ceiling mount range hoods feature built-in LED lighting, providing bright and energy-efficient illumination over the cooktop area.

Installation of Flush Ceiling Mount Range Hoods

Installing a flush ceiling mount range hood with remote control requires careful planning and attention to detail. Here’s a general overview of the installation process:

  1. Selecting the Location: Determine the optimal location for the range hood, taking into account the size and layout of the kitchen, as well as the proximity to the cooktop or range.
  2. Preparing the Ceiling: Cut an opening in the ceiling according to the dimensions provided by the manufacturer, ensuring proper clearance for ventilation ducts and wiring.
  3. Mounting the Hood: Secure the mounting bracket to the ceiling joists or rafters, then attach the range hood to the bracket using the provided hardware.
  4. Connecting Electrical Wiring: Follow the manufacturer’s instructions to connect the electrical wiring, ensuring proper grounding and compliance with local building codes.
  5. Testing and Adjustment: Once installed, test the range hood to ensure proper operation of the fan, lights, and remote control functions. Make any necessary adjustments to fan speed and airflow direction.

Applications and Considerations

  • Open-Concept Kitchens: Flush ceiling mount range hoods are well-suited for open-concept kitchen layouts, where a seamless integration with the ceiling enhances the overall aesthetic appeal.
  • Modern Kitchen Designs: For homeowners seeking a modern and minimalist look, flush ceiling mount range hoods offer clean lines and unobtrusive functionality.
  • Low Ceilings: In kitchens with low ceilings or limited clearance, flush mount range hoods provide effective ventilation without compromising headroom or obstructing sightlines.
  • Remote Control Convenience: The convenience of remote control operation allows users to adjust fan speeds and lighting levels without interrupting cooking activities.

Read too: Exploring the Efficiency of Radiant Ceiling Heater Electric: A Comprehensive Guide

Conclusion

A flush ceiling mount range hood with remote control brings together form and function, offering powerful ventilation performance in a sleek and stylish package. Whether you’re renovating your kitchen or designing a new space, consider the benefits of incorporating this innovative appliance into your culinary environment. With its space-saving design, customizable features, and convenient remote control operation, the flush ceiling mount range hood is sure to elevate your cooking experience to new heights.

Elevate Your Kitchen Design with a Coffered Ceiling: Ideas and Inspiration

Are you looking to add a touch of luxury and sophistication to your kitchen? Consider installing a coffered ceiling! In this guide, we’ll explore everything you need to know about coffered ceiling in kitchen spaces, from their benefits to design ideas and installation tips.

Coffered Ceiling In Kitchen

Understanding Coffered Ceilings in Kitchen Design

A coffered ceiling is a series of recessed panels or beams arranged in a grid pattern on the ceiling. This architectural feature adds depth, dimension, and visual interest to the space while evoking a sense of elegance and grandeur. In kitchen design, coffered ceilings serve as a focal point, enhancing the overall aesthetic appeal of the room.

Benefits of Coffered Ceilings in Kitchen Spaces

  1. Enhanced Visual Appeal: Coffered ceilings add architectural interest and sophistication to the kitchen, elevating its overall design aesthetic.
  2. Increased Ceiling Height Perception: The recessed panels of a coffered ceiling create the illusion of a higher ceiling, making the kitchen feel more spacious and open.
  3. Improved Acoustic Performance: Coffered ceilings can help absorb sound and reduce noise levels in the kitchen, creating a more pleasant and comfortable environment for cooking and dining.
  4. Versatile Design Options: With a variety of materials, finishes, and configurations available, coffered ceilings offer endless design possibilities to suit any kitchen style, from traditional to modern.

Read too: Exploring Craftsman Style Ceiling Fans for Your Home: Embracing Timeless Elegance

Incorporating Coffered Ceilings Into Your Kitchen Design

  1. Choose the Right Style: Select a coffered ceiling style that complements the overall design theme of your kitchen. Traditional kitchens may benefit from classic coffered designs with intricate molding details, while modern kitchens may opt for sleek and minimalist coffered patterns.
  2. Consider Scale and Proportion: Ensure that the scale and proportion of the coffered ceiling are appropriate for the size of your kitchen. Large kitchens may accommodate more elaborate and expansive coffered designs, while smaller kitchens may benefit from simpler and more understated patterns.
  3. Select Quality Materials: Invest in high-quality materials for your coffered ceiling to ensure durability and longevity. Options include wood, MDF (medium-density fiberboard), plaster, and lightweight polyurethane foam.
  4. Work with a Professional: For optimal results, enlist the services of a qualified contractor or carpenter experienced in coffered ceiling installation. They can help you navigate the design process, recommend suitable materials, and ensure proper installation for a flawless finish.

Conclusion

Coffered ceilings are a timeless architectural feature that can enhance the beauty and elegance of any kitchen space. Whether you’re renovating an existing kitchen or building a new one, consider incorporating a coffered ceiling to add depth, dimension, and sophistication to your design.