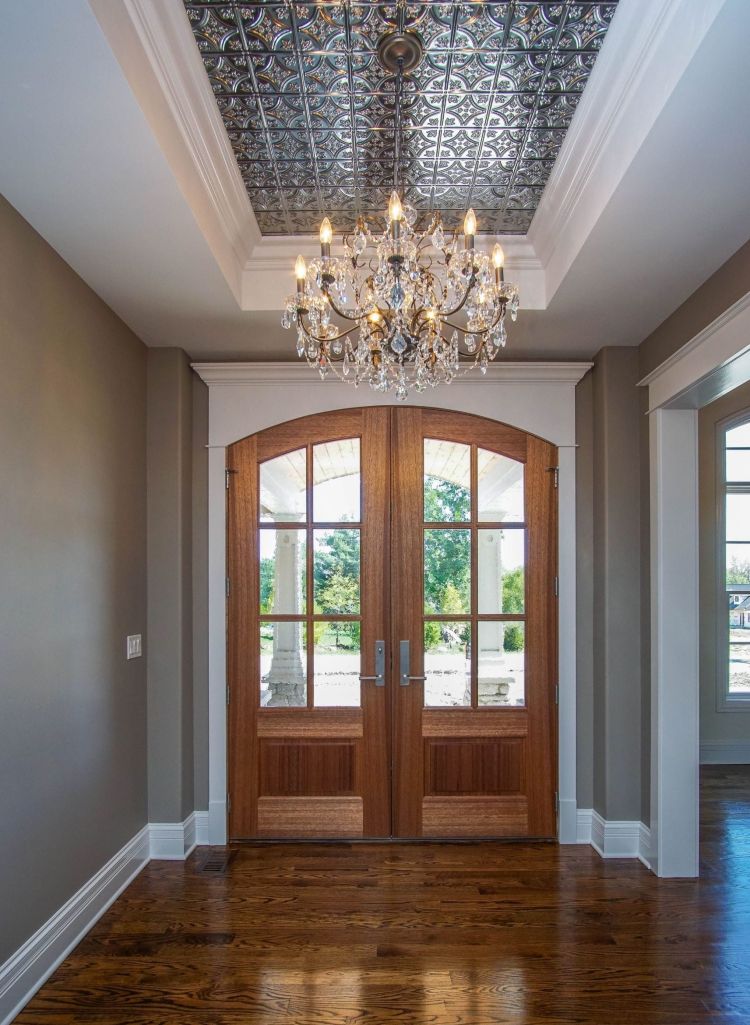
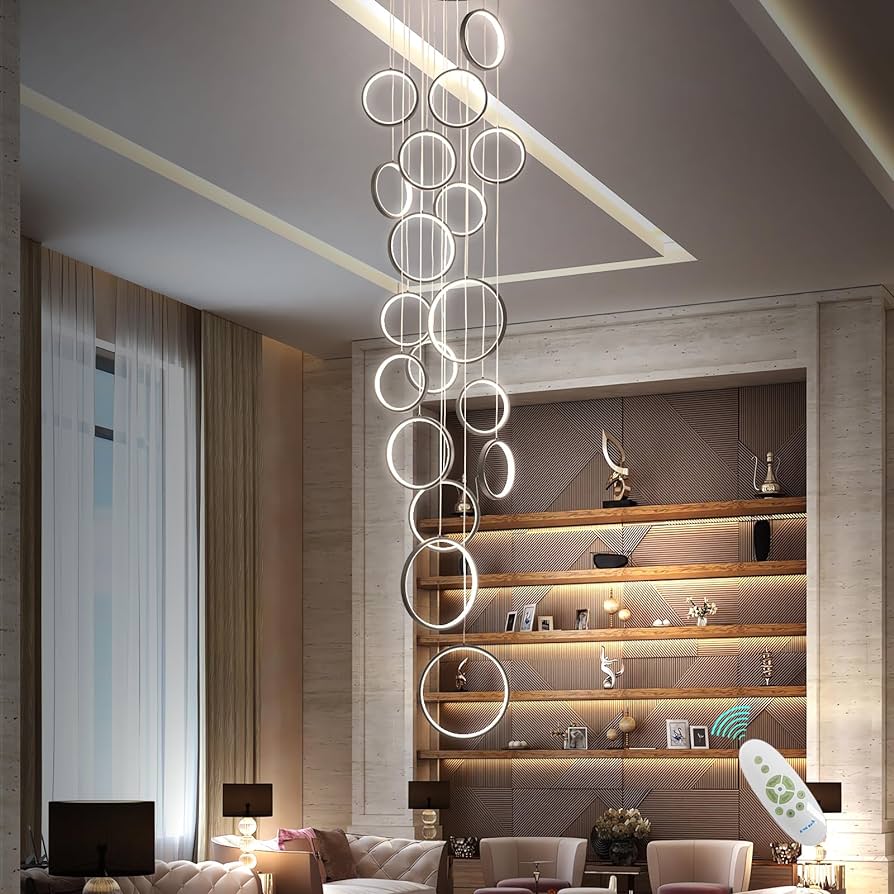
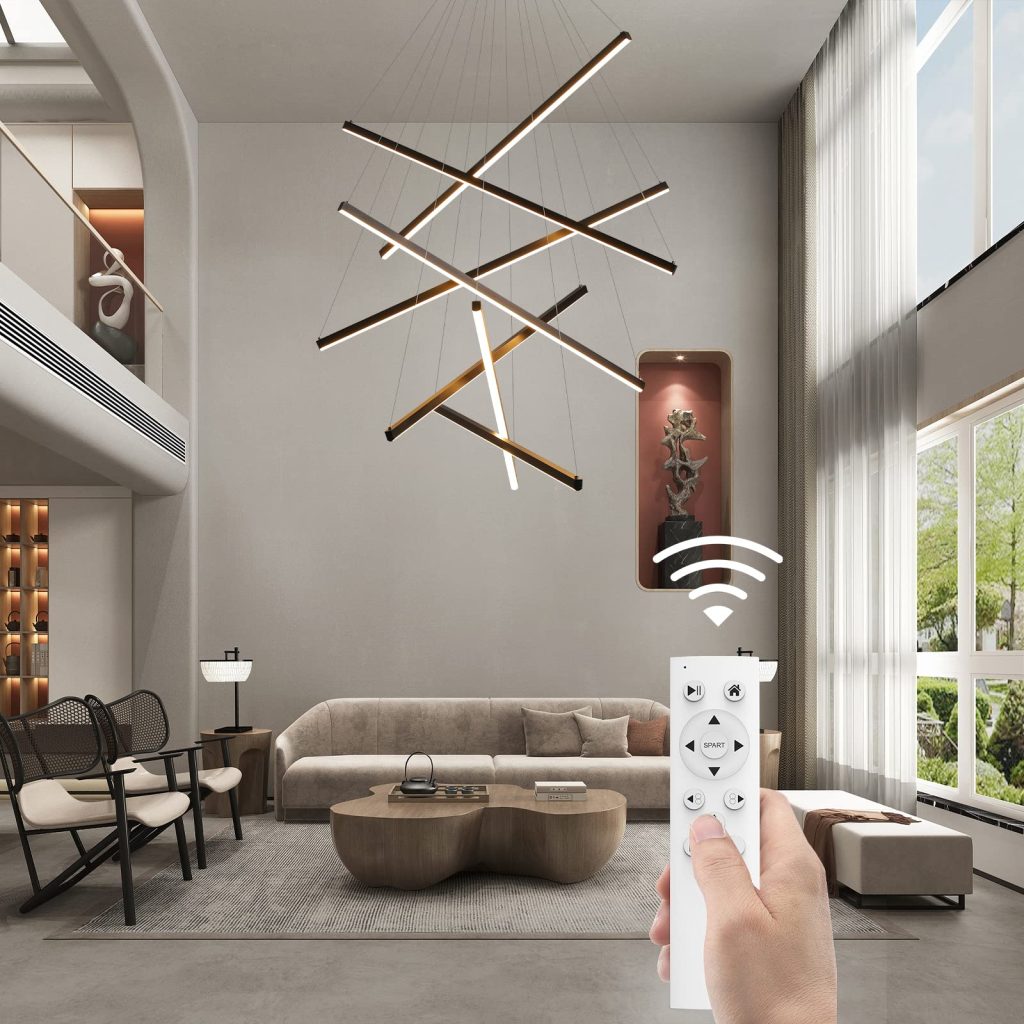
Install Chandelier on High Ceilings: A Complete Guide for Homeowners

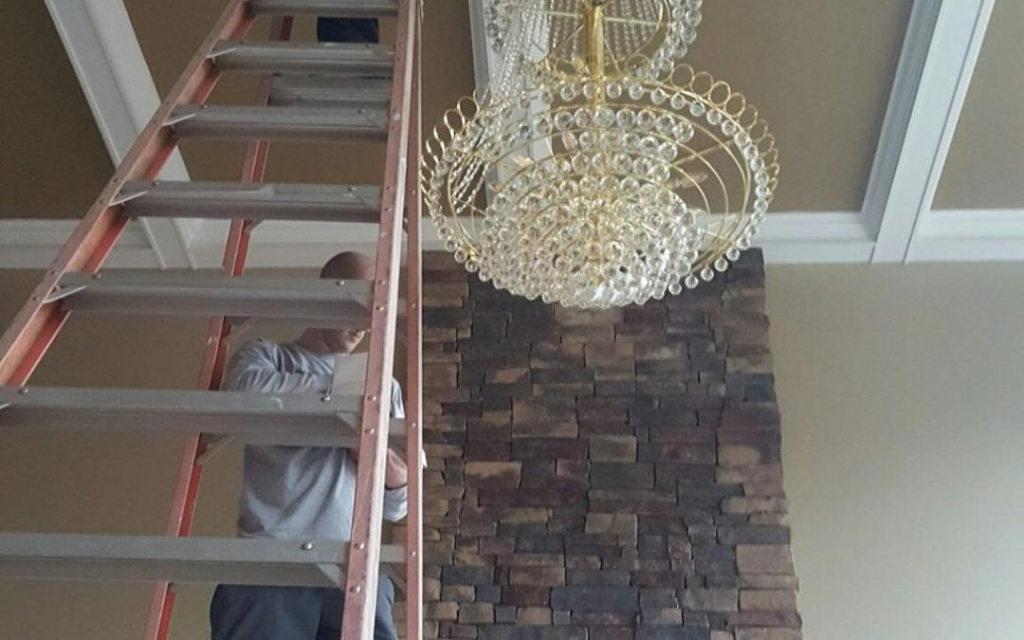
Install Chandelier On High Ceiling. Installing a chandelier can transform any room, adding elegance and ambiance. However, installing a chandelier on high ceilings presents unique challenges that require careful planning and execution. In this comprehensive guide, we will cover everything you need to know about installing a chandelier on high ceilings, from selecting the right chandelier to safety considerations and installation techniques.
Install Chandelier On High Ceiling

Why Choose a Chandelier for High Ceilings?

Chandeliers are often the focal point of a room, drawing the eye and enhancing the overall aesthetic. When you have high ceilings, a chandelier can help fill the vertical space, making the room feel more balanced and inviting. Here are some reasons why you should consider installing a chandelier in a room with high ceilings:

  1. Aesthetic Appeal: Chandeliers come in various styles, from traditional to modern, and can significantly enhance the decor of your space.
  2. Improved Lighting: A chandelier can provide both ambient and task lighting, making the room feel brighter and more inviting.
  3. Increased Property Value: A well-placed chandelier can add to the value of your home, appealing to potential buyers who appreciate elegant lighting fixtures.
  4. Personalization: Choosing a chandelier that reflects your style can help personalize your space, making it uniquely yours.

Preparing to Install a Chandelier on High Ceilings

Before you begin the installation process, there are several important factors to consider:

1. Selecting the Right Chandelier

When selecting a chandelier for a high ceiling, consider the following:

  • Size: The size of the chandelier should be proportionate to the room. A general rule of thumb is to add the room’s dimensions (in feet) and convert that number to inches. For example, a room that is 15 feet by 20 feet would need a chandelier that is approximately 35 inches wide.
  • Height: The height of the chandelier should be appropriate for the ceiling height. Ideally, the bottom of the chandelier should be 30 to 36 inches above a table if it’s being hung above one.
  • Style: Choose a style that complements the room’s decor. Whether you prefer traditional, modern, or eclectic styles, there are countless options available.

Read too: Shiplap Ceiling in Kitchen: A Timeless Trend for a Stylish and Cozy Space

2. Tools and Materials Needed

Before starting the installation, gather the necessary tools and materials:

  • Ladder (preferably adjustable for different heights)
  • Drill and drill bits
  • Screwdriver
  • Wire cutters/strippers
  • Electrical tape
  • A helper (recommended for safety)

3. Safety Considerations

Safety should always be your top priority when installing a chandelier. Consider the following safety tips:

  • Turn Off the Power: Always turn off the power to the existing light fixture at the circuit breaker to avoid any electrical hazards.
  • Use a Stable Ladder: Ensure your ladder is stable and positioned on a flat surface. If necessary, have someone hold the ladder while you work.
  • Use Proper Safety Gear: Consider wearing safety goggles and gloves to protect yourself during the installation process.

Steps to Install a Chandelier on High Ceilings

Once you’ve gathered your tools and selected your chandelier, follow these steps to successfully install it:

Step 1: Remove the Existing Fixture

If you are replacing an existing light fixture, you’ll need to remove it first:

  1. Turn Off the Power: Go to the circuit breaker and turn off the power to the room.
  2. Remove the Old Fixture: Unscrew the old fixture from the ceiling and carefully disconnect the wiring. Make a note of how the wires are connected, as you’ll need to replicate this with the new chandelier.

Step 2: Prepare the Chandelier

Before hanging the chandelier, prepare it for installation:

  1. Assemble the Chandelier: If your chandelier requires assembly, do this according to the manufacturer’s instructions.
  2. Check the Wiring: Ensure that all wiring is intact and that there are no damaged parts.

Step 3: Attach the Mounting Bracket

The next step is to attach the mounting bracket that will hold the chandelier:

  1. Position the Bracket: Align the mounting bracket with the electrical box in the ceiling.
  2. Secure the Bracket: Use screws to secure the mounting bracket in place, ensuring it is tight and secure.

Step 4: Hang the Chandelier

Now that the bracket is in place, it’s time to hang the chandelier:

  1. Lift the Chandelier: This step may require a helper, as chandeliers can be heavy. Lift the chandelier and align it with the mounting bracket.
  2. Connect the Wires: Following the notes you made earlier, connect the chandelier wires to the electrical wires in the ceiling. Typically, you will connect:
    • Black (or red) wire from the chandelier to the black wire in the ceiling (hot).
    • White wire from the chandelier to the white wire in the ceiling (neutral).
    • Green or bare wire to the grounding wire in the ceiling.
  3. Secure the Connections: Use wire nuts to secure the connections, and wrap them with electrical tape for extra safety.
  4. Attach the Chandelier: Once the wiring is secure, carefully tuck the wires into the electrical box and attach the chandelier to the mounting bracket.

Step 5: Final Adjustments

After the chandelier is secured:

  1. Adjust the Height: If your chandelier has adjustable cables or chains, adjust them to your desired height.
  2. Check Stability: Ensure the chandelier is stable and securely attached to the ceiling.
  3. Install Light Bulbs: Insert the appropriate light bulbs into the chandelier.

Step 6: Restore Power and Test

Once everything is in place, it’s time to restore power:

  1. Turn On the Power: Go back to the circuit breaker and turn the power back on.
  2. Test the Chandelier: Turn on the switch to ensure the chandelier is functioning correctly. Check for any flickering lights or other issues.

Troubleshooting Common Issues

After installing a chandelier on a high ceiling, you may encounter some common issues. Here are a few troubleshooting tips:

1. Flickering Lights

If your chandelier flickers, it may indicate a loose connection or an incompatible bulb. Check the wiring connections and ensure you’re using the correct type of bulb.

2. Insufficient Light

If the chandelier doesn’t provide enough light, consider adding more bulbs or using higher wattage bulbs, provided they are compatible with the fixture.

3. Chandelier Sways or Moves

If your chandelier sways or feels loose, double-check that all connections are secure and that the mounting bracket is tightly fastened.

Maintenance Tips for Your Chandelier

Once your chandelier is installed, proper maintenance is key to keeping it looking its best:

  1. Regular Cleaning: Dust your chandelier regularly with a soft cloth. For crystal chandeliers, use a mixture of water and vinegar to clean the crystals without damaging them.
  2. Check the Bulbs: Periodically check the bulbs and replace any that are burnt out.
  3. Inspect Wiring: Every few months, inspect the wiring and connections to ensure everything remains secure.

When to Hire a Professional

While installing a chandelier can be a DIY project, there are times when it’s best to hire a professional:

  • Complex Installations: If your chandelier requires extensive electrical work or modifications to the existing wiring, hiring a licensed electrician is advisable.
  • Heavy Fixtures: For large and heavy chandeliers, it may be safer to have professionals handle the installation to avoid accidents.
  • Lack of Experience: If you are unsure about your skills, hiring a professional can ensure that the job is done safely and correctly.

Conclusion

Installing a chandelier on high ceilings can enhance the beauty and functionality of your space, but it requires careful planning and execution. By following the steps outlined in this guide, you can successfully install a chandelier that complements your decor and adds elegance to your home. Remember to prioritize safety and consider hiring a professional if the installation becomes too complex.

Kitchen Lights for High Ceilings: Illuminate Your Space with Style

When designing a kitchen, lighting plays a critical role in both functionality and aesthetics. In homes with high ceilings, selecting the right kitchen lights for high ceilings can transform an ordinary kitchen into an inviting and stylish space. Whether you’re planning a complete renovation or simply updating your fixtures, understanding the various lighting options available is essential for creating a well-lit and attractive kitchen.

Kitchen Lights For High Ceilings

Understanding the Importance of Proper Lighting

Lighting is not merely a functional necessity; it also significantly impacts the mood and ambiance of a room. In kitchens, especially those with high ceilings, the right lighting can:

  1. Enhance Visibility: Good lighting ensures that work areas are well-illuminated, making cooking and food preparation safer and more efficient.
  2. Create a Welcoming Atmosphere: The right fixtures and lighting techniques can turn your kitchen into a warm gathering space for family and friends.
  3. Highlight Architectural Features: High ceilings often come with unique architectural details. Proper lighting can accentuate these features, adding character to your kitchen.
  4. Influence Design Choices: The type of lighting you choose can complement your overall kitchen design, whether it’s modern, traditional, or somewhere in between.

Read too: Shiplap Ceiling in Kitchen: A Timeless Trend for a Stylish and Cozy Space

Types of Kitchen Lights for High Ceilings

When choosing kitchen lights for high ceilings, it’s crucial to understand the different types of lighting available and how they can work together. Below are the main types of lighting to consider:

1. Ambient Lighting

Ambient lighting provides the general illumination necessary for navigating and working in the kitchen. It sets the overall mood and tone of the space. For high ceilings, consider the following options:

  • Chandeliers: A striking chandelier can serve as a stunning centerpiece while providing ample light. Choose one that complements your kitchen’s style and is proportionate to the ceiling height.
  • Pendant Lights: Hang pendant lights over islands or dining areas. These fixtures can add a decorative element while providing focused light. Select adjustable models to control the height according to your ceiling.
  • Recessed Lighting: Installed into the ceiling, recessed lights offer a clean and unobtrusive look. They can be used in combination with other light sources to create a well-lit environment without overwhelming the space.

2. Task Lighting

Task lighting focuses on specific areas where activities are performed, such as food preparation and cooking. This type of lighting is essential in a kitchen for practicality. Here are some effective task lighting options:

  • Under-Cabinet Lighting: LED strips or puck lights installed under cabinets illuminate countertops, making cooking and preparation easier and safer.
  • Directional Track Lighting: Track lighting can be adjusted to shine light on work areas, making it an excellent option for high ceilings. This flexibility allows you to direct light exactly where it’s needed.
  • Hanging Fixtures: Consider using adjustable pendant lights above islands or workstations to provide direct illumination for cooking and preparation tasks.

3. Accent Lighting

Accent lighting adds visual interest and depth to your kitchen. It can highlight architectural features, artwork, or decorative elements. For high ceilings, consider:

  • Wall Sconces: Install sconces to accentuate features like cabinetry or artwork. They can add a warm glow and enhance the overall ambiance of the kitchen.
  • Spotlights: Use adjustable spotlights to focus on particular areas, such as open shelving or a feature wall.
  • Cove Lighting: If your kitchen design allows, cove lighting can be installed along the perimeter of the ceiling. This indirect lighting creates a soft glow that enhances the feeling of space.

Choosing the Right Fixtures

When selecting kitchen lights for high ceilings, consider the following factors to ensure you make the best choices:

1. Scale and Proportion

The scale of your lighting fixtures is critical, especially in a kitchen with high ceilings. Large chandeliers or pendant lights can create a dramatic effect, while smaller fixtures might get lost in the space. Always consider the proportions of the room when selecting fixtures.

2. Style and Design

Your lighting fixtures should complement your kitchen’s overall design aesthetic. Whether you opt for modern, rustic, traditional, or industrial styles, ensure that your lighting choices align with your kitchen’s decor.

3. Color Temperature

The color temperature of your bulbs affects the mood of your kitchen. Warmer tones (around 2700K to 3000K) create a cozy atmosphere, while cooler tones (around 4000K to 5000K) offer a more modern and energetic feel. Choose a color temperature that aligns with the ambiance you wish to create.

4. Energy Efficiency

With the increasing focus on sustainability, consider energy-efficient options like LED lighting. LEDs consume less energy, have a longer lifespan, and are available in various styles to suit your design preferences.

Installation Considerations

Installing kitchen lights for high ceilings can be a bit more complex than standard installations. Here are some tips to consider:

1. Professional Installation

For high ceilings, it’s often best to hire a professional electrician. They have the tools and expertise to safely install fixtures and ensure proper wiring.

2. Accessibility

Consider how easy it will be to change bulbs or perform maintenance on your fixtures. Opt for fixtures that are accessible or easily adjustable to make upkeep simpler.

3. Wiring and Outlets

Ensure that your kitchen has sufficient outlets and that the wiring can handle the additional load if you plan to add multiple fixtures. It’s important for safety and functionality.

Creative Ideas for Kitchen Lights in High Ceilings

Incorporating lighting in a kitchen with high ceilings opens up various creative opportunities. Here are some inspiring ideas:

1. Layered Lighting

Layering different types of lighting—ambient, task, and accent—can create a balanced and visually interesting kitchen. Use a combination of fixtures to achieve the perfect ambiance.

2. Statement Pieces

Invest in a stunning chandelier or a group of eye-catching pendant lights to serve as a focal point in your kitchen. This can enhance the space’s visual interest and provide a conversation starter.

3. Dimmers and Controls

Install dimmers to control the intensity of your lighting. This allows you to create different moods for various occasions, from bright lighting for cooking to soft lighting for dining.

4. Highlight Architectural Features

Use lighting to accentuate the unique features of your kitchen, such as a vaulted ceiling, exposed beams, or intricate cabinetry. This draws attention to these details and enhances the overall design.

Maintenance Tips for Your Kitchen Lighting

To keep your kitchen lights for high ceilings looking and functioning their best, consider these maintenance tips:

1. Regular Cleaning

Dust and debris can accumulate on fixtures, diminishing their effectiveness. Regularly clean your lights to ensure maximum brightness.

2. Replace Burned-Out Bulbs Promptly

When bulbs burn out, replace them as soon as possible. This ensures that your kitchen remains well-lit and functional.

3. Inspect Wiring and Connections

Periodically check the wiring and connections for signs of wear or damage. Address any issues immediately to ensure safety.

4. Consider Seasonal Changes

Adjust your lighting choices based on seasonal changes. In summer, you might prefer cooler light tones, while warmer tones can enhance coziness in winter.

Conclusion

Selecting the right kitchen lights for high ceilings is essential for creating a functional, stylish, and inviting culinary space. By understanding the various types of lighting available, considering the scale and style of your fixtures, and implementing proper installation techniques, you can significantly enhance your kitchen’s ambiance. Whether you prefer a rustic charm, modern minimalism, or traditional elegance, the right lighting will illuminate your kitchen beautifully.

High Ceiling Cleaning Services: Elevating Your Space to New Heights

When it comes to maintaining a clean and appealing environment in your home or workplace, high ceilings can present a unique challenge. Dust and cobwebs accumulate in hard-to-reach places, leaving you with a less-than-pleasant aesthetic. Fortunately, high ceiling cleaning services offer a solution to this problem, ensuring that your space remains pristine and inviting. In this article, we’ll explore the benefits of high ceiling cleaning services, the techniques used, and why you should consider hiring professionals for the job.

High Ceiling Cleaning Services

Understanding the Need for High Ceiling Cleaning Services

The Challenge of High Ceilings

High ceilings, while aesthetically pleasing, can create cleaning challenges that many individuals and even cleaning companies may overlook. Dust, grime, and cobwebs can accumulate on beams, light fixtures, and other high surfaces. Regular cleaning routines often neglect these areas, resulting in a buildup that can negatively affect indoor air quality and the overall ambiance of your space.

Moreover, the difficulty of reaching these heights can lead to dangerous situations for untrained individuals. Attempting to clean high ceilings without the proper equipment and knowledge can result in accidents or damage to your property. High ceiling cleaning services specialize in addressing these concerns safely and effectively.

Read too: Shiplap Ceiling in Kitchen: A Timeless Trend for a Stylish and Cozy Space

Benefits of High Ceiling Cleaning Services

  1. Improved Aesthetic Appeal: A clean ceiling and high surfaces enhance the overall look of your space. Whether it’s a residential home or a commercial office, cleanliness contributes to a positive impression.
  2. Health Benefits: Dust and allergens can accumulate in hard-to-reach areas, affecting indoor air quality. Regular cleaning of high ceilings helps reduce allergens, promoting a healthier environment for occupants.
  3. Extended Lifespan of Surfaces: Dust and dirt can damage paint, wood finishes, and other materials over time. Regular cleaning helps protect these surfaces, extending their lifespan and reducing the need for costly repairs.
  4. Professional Equipment and Techniques: High ceiling cleaning services employ specialized equipment designed for reaching high areas safely. This ensures that the cleaning is done effectively without risking damage to your property.
  5. Time-Saving: Hiring professionals allows you to focus on your daily activities while ensuring that your high ceilings are cleaned thoroughly.

Techniques Used in High Ceiling Cleaning Services

High ceiling cleaning services utilize various techniques and equipment to ensure effective cleaning. Here are some common methods used by professionals:

1. Specialized Ladders and Scaffolding

Professional cleaners often use specialized ladders and scaffolding to access high ceilings safely. These tools are designed to provide stability and safety, allowing workers to reach heights without the risk of falling.

2. Vacuuming and Dusting

Cleaning professionals typically start by vacuuming high surfaces to remove loose dust and debris. They may use attachments that can reach corners and crevices, ensuring that no area is left untouched. Following this, they use microfiber cloths or dusters to wipe down surfaces, effectively capturing any remaining particles.

3. Chemical Cleaning Solutions

Depending on the type of surface being cleaned, professionals may use specialized cleaning solutions that effectively break down grime and stains. For example, if cleaning a painted ceiling, they may choose a gentle cleaner that won’t damage the paint. For harder surfaces, such as metal beams, stronger solutions might be used.

4. Power Washing

In some cases, high ceiling cleaning services may employ power washing techniques, especially for outdoor areas or spaces with significant buildup. Power washing effectively removes dirt and grime from surfaces, leaving them looking fresh and new.

5. Window and Light Fixture Cleaning

High ceiling cleaning services often include the cleaning of windows and light fixtures that are difficult to reach. Professionals use specialized equipment, such as extension poles and squeegees, to ensure these areas are thoroughly cleaned.

Choosing the Right High Ceiling Cleaning Service

1. Experience and Expertise

When selecting a high ceiling cleaning service, consider the company’s experience and expertise in the field. Look for a service with a proven track record of successfully cleaning high ceilings and references from satisfied customers.

2. Safety Measures

Ensure that the cleaning company prioritizes safety by employing trained professionals who are knowledgeable about safety protocols. They should use appropriate safety equipment, such as harnesses and helmets, when working at heights.

3. Equipment Used

Inquire about the type of equipment the company uses for high ceiling cleaning. A reputable service will have specialized tools designed for cleaning high areas efficiently and safely.

4. Customer Reviews

Check online reviews and testimonials to gauge the quality of service provided by the cleaning company. Positive feedback from previous customers can give you confidence in their ability to deliver satisfactory results.

5. Insurance and Licensing

Ensure that the cleaning company is licensed and insured. This protects you from liability in case of accidents or damages that may occur during the cleaning process.

Cost of High Ceiling Cleaning Services

The cost of high ceiling cleaning services can vary widely depending on several factors, including:

  • Size of the Area: Larger spaces will typically require more time and resources to clean, resulting in higher costs.
  • Type of Cleaning: The extent of cleaning needed (e.g., basic dusting versus deep cleaning) will affect the overall price.
  • Frequency of Service: Regular maintenance cleanings may be offered at a discounted rate compared to one-time services.
  • Location: The geographical location of your property can also influence pricing, as costs of living and operational expenses vary by region.

It’s advisable to obtain quotes from multiple cleaning services to find one that fits your budget while also meeting your quality standards.

The Process of High Ceiling Cleaning Services

Understanding the process that high ceiling cleaning services follow can help you prepare for their visit and know what to expect:

1. Initial Assessment

The cleaning service will typically begin with an initial assessment of your space. They will evaluate the height of the ceilings, the type of materials present, and the level of dirt or grime that needs to be addressed. This assessment helps them determine the most appropriate cleaning methods and equipment required for the job.

2. Preparation

Before cleaning begins, the service team will prepare the area. This may include moving furniture, covering items with protective sheets, and ensuring that all safety protocols are in place.

3. Cleaning Process

Once everything is prepared, the cleaning team will proceed with the cleaning process. This typically involves dusting, vacuuming, and using cleaning solutions as necessary. They will work methodically to ensure that all areas are thoroughly cleaned, paying special attention to corners, light fixtures, and high beams.

4. Final Inspection

After cleaning is complete, the team will conduct a final inspection to ensure that all areas have been addressed. They will also clean up any debris or protective coverings used during the cleaning process, leaving your space tidy.

5. Follow-Up Recommendations

Many professional cleaning services will offer follow-up recommendations for maintaining your high ceilings. This might include suggestions for regular maintenance schedules or tips for keeping your space clean in between professional cleanings.

Conclusion

High ceiling cleaning services play a crucial role in maintaining the aesthetic appeal and air quality of your home or workplace. By utilizing specialized techniques and equipment, these services ensure that even the hardest-to-reach areas remain clean and inviting. When choosing a high ceiling cleaning service, consider their experience, safety measures, equipment used, and customer reviews to make an informed decision.

Investing in professional cleaning services not only enhances the appearance of your space but also contributes to a healthier indoor environment. So, if you’re tired of looking up at dusty beams and neglected ceilings, it may be time to consider high ceiling cleaning services.

Living Room Chandelier for High Ceiling: Illuminating Elegance

When it comes to home decor, the living room serves as a central hub for relaxation, entertainment, and family gatherings. One of the most striking elements you can incorporate into this space is a living room chandelier for high ceiling. This article will explore the various aspects of choosing and installing a chandelier in a living room with high ceilings, ensuring that your space is not only well-lit but also beautifully adorned.

Living Room Chandelier High Ceiling

Understanding High Ceilings

High ceilings are a defining architectural feature in many modern and traditional homes. They create an open and airy atmosphere, adding a sense of grandeur to any room. However, the height of these ceilings can present specific challenges and opportunities when it comes to lighting design.

Benefits of High Ceilings

  1. Aesthetic Appeal: High ceilings add visual interest and drama to a space, making it feel larger and more inviting.
  2. Increased Natural Light: Taller ceilings allow for larger windows, which can enhance natural light flow and improve overall ambiance.
  3. Design Versatility: The height offers the opportunity to use larger and more elaborate fixtures, such as chandeliers, which can become stunning focal points.

Read too: Kitchen Lighting For A Vaulted Ceiling: Illuminating Your Space with Style and Functionality

Challenges of High Ceilings

  1. Difficult Installation: Installing fixtures can be challenging and may require professional help due to the height.
  2. Lighting Distribution: Ensuring that light is evenly distributed throughout the room can be tricky.
  3. Maintenance: Changing light bulbs or cleaning fixtures can be more cumbersome with elevated heights.

Choosing the Right Living Room Chandelier for High Ceilings

When selecting a chandelier for your high ceiling living room, consider the following factors:

1. Scale and Size

Choosing the right size chandelier is crucial. A small chandelier can get lost in a room with high ceilings, while an overly large fixture can overwhelm the space. A good rule of thumb is to measure the height of the ceiling in feet and convert that measurement into inches for the diameter of the chandelier. For example, if your ceiling is 10 feet high, your chandelier should be approximately 30 inches in diameter.

2. Style and Design

Chandeliers come in various styles, from modern and contemporary to traditional and rustic. When selecting a chandelier, consider the overall decor of your living room:

  • Modern Chandeliers: Often characterized by clean lines, geometric shapes, and minimalist designs. These fixtures work well in contemporary homes.
  • Traditional Chandeliers: These often feature ornate details, such as crystal accents and intricate metalwork. They are suitable for classic and traditional interiors.
  • Rustic Chandeliers: Typically made from wood or wrought iron, these fixtures add warmth and charm to farmhouse or cottage-style homes.

3. Type of Lighting

The type of bulbs used in your chandelier can significantly affect the overall ambiance of your living room:

  • LED Bulbs: Energy-efficient and long-lasting, LED bulbs come in various color temperatures, allowing you to choose between warm or cool light.
  • Incandescent Bulbs: These provide a warm glow and are ideal for creating a cozy atmosphere, although they consume more energy and have a shorter lifespan than LEDs.
  • Halogen Bulbs: A type of incandescent bulb that provides bright, white light, ideal for showcasing artwork and decor.

4. Height Considerations

The placement of your chandelier is critical in maximizing its impact:

  • Dining Areas: If your living room includes a dining space, hang the chandelier about 30-36 inches above the table for optimal lighting.
  • Living Room Areas: For general living areas, the chandelier should be hung at a height that provides ample light without being too low to cause obstruction. Generally, it should be at least 7 feet from the floor.

Installing a Living Room Chandelier for High Ceilings

Once you’ve selected the perfect chandelier for your high ceiling living room, the next step is installation. Here are some tips:

1. Gather the Right Tools

Before installation, ensure you have all necessary tools, including:

  • A ladder or scaffolding
  • A drill
  • Wire strippers
  • A screwdriver
  • A voltage tester

2. Turn Off the Power

Safety first! Always turn off the power at the circuit breaker before beginning any electrical work. Use a voltage tester to ensure that the wires are not live.

3. Prepare the Mounting Bracket

Most chandeliers come with a mounting bracket. Secure this bracket to the ceiling, ensuring that it is anchored properly to support the weight of the fixture.

4. Wire the Chandelier

Carefully connect the chandelier wires to the corresponding wires in your ceiling. Typically, this involves matching the colors: black to black (hot), white to white (neutral), and green or copper to the grounding wire.

5. Hang the Chandelier

Once the wiring is complete, lift the chandelier into place and secure it to the mounting bracket. Ensure that it hangs evenly and at the desired height.

6. Turn the Power Back On

After installation is complete, turn the power back on and test the chandelier to ensure it is working correctly.

7. Final Adjustments

Make any necessary adjustments to the height or angle of the chandelier, and clean any dust or fingerprints from the fixture.

Decorating Around Your Chandelier

Once your chandelier is installed, consider how to decorate the rest of your living room to complement this stunning fixture.

1. Arrange Furniture Thoughtfully

Position your furniture to create a conversation area around the chandelier. This not only draws the eye to the fixture but also promotes a cozy, inviting atmosphere.

2. Use Accent Lighting

In addition to your chandelier, consider adding other lighting sources, such as floor lamps, table lamps, or wall sconces, to create layered lighting. This adds depth and interest to the space.

3. Hang Artwork Strategically

Consider hanging artwork that draws the eye upward towards the chandelier. Use the chandelier’s height to your advantage by displaying pieces that are proportionate and balanced with the fixture.

4. Choose Complementary Colors

Select paint colors and decor that harmonize with the chandelier. If your chandelier is bold, consider neutral walls and furnishings to balance the space.

5. Add Decorative Elements

Incorporate decorative elements, such as plants, vases, or bookshelves, that enhance the ambiance of the living room without cluttering the space.

Maintenance for Living Room Chandeliers

To ensure your chandelier remains a stunning focal point, regular maintenance is essential.

1. Cleaning

Dust can accumulate on chandeliers, dulling their shine. Clean your chandelier regularly using a microfiber cloth or a feather duster. For more intricate fixtures, consider using a damp cloth and a gentle cleaning solution.

2. Bulb Replacement

Regularly check your bulbs and replace any that are burnt out. This will not only keep your chandelier looking its best but will also maintain adequate lighting in the room.

3. Inspect Wiring

Periodically inspect the wiring and connections to ensure everything is secure and functioning properly. If you notice any signs of wear or damage, contact a professional electrician for repairs.

Conclusion

A living room chandelier for high ceiling is more than just a lighting fixture; it’s an elegant statement piece that enhances the beauty and functionality of your space. With careful consideration of style, size, and placement, you can create a warm and inviting atmosphere that reflects your personal taste. By following the tips outlined in this article, you can choose, install, and maintain a chandelier that not only brightens your living room but also adds a touch of sophistication and charm.

Large Light Fixtures for High Ceilings: Elevate Your Space

When it comes to designing your living spaces, lighting plays a crucial role in both functionality and aesthetics. If you have high ceilings, you may find that standard light fixtures simply don’t make the impact you desire. This is where large light fixtures for high ceilings come into play. Not only do they provide adequate illumination, but they also serve as stunning focal points that can transform a room. In this comprehensive guide, we’ll explore the benefits of using large light fixtures, different styles available, installation tips, and maintenance advice.

Large Light Fixtures For High Ceilings

Understanding the Importance of Large Light Fixtures

Why Size Matters

In rooms with high ceilings, lighting fixtures should be proportional to the space. Large light fixtures not only fill vertical space but also draw the eye upward, creating an illusion of greater height and openness. Here are some reasons why investing in large light fixtures for high ceilings is a smart choice:

  1. Improved Illumination: Large fixtures can produce more light, making your space feel brighter and more welcoming. They often accommodate multiple bulbs, which can increase overall brightness.
  2. Aesthetic Appeal: Large light fixtures serve as artwork for your ceilings. They can add a dramatic flair and complement your interior design theme.
  3. Versatile Styles: From modern to traditional, large fixtures come in various styles that can suit any décor, allowing for personalized expression.
  4. Enhanced Room Functionality: Proper lighting can improve the functionality of a room, making tasks easier and more enjoyable.

Read too: Kitchen Lighting For A Vaulted Ceiling: Illuminating Your Space with Style and Functionality

Types of Large Light Fixtures for High Ceilings

When selecting large light fixtures for high ceilings, it’s essential to consider your space, decor style, and functionality. Here are some popular types to consider:

1. Chandeliers

Chandeliers are classic choices for high ceilings and can range from ornate to minimalist designs.

  • Traditional Chandeliers: Often made of crystal or glass, these fixtures add elegance and sophistication.
  • Modern Chandeliers: Featuring sleek lines and unique materials, modern chandeliers provide a contemporary touch.

Ideal For: Dining rooms, entryways, and living rooms where you want to make a statement.

2. Pendant Lights

Large pendant lights can also serve as eye-catching focal points while providing functional lighting.

  • Single Large Pendants: A single, oversized pendant can hang directly above a dining table or kitchen island, drawing attention.
  • Clustered Pendants: Multiple pendants hung at different heights can create an artistic arrangement.

Ideal For: Kitchens, dining areas, and living spaces where adjustable lighting is required.

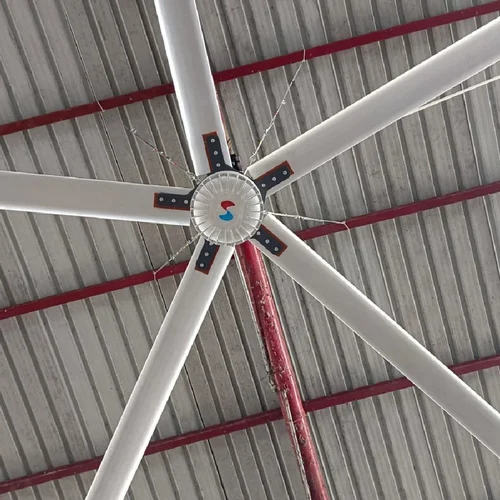
3. Ceiling Fans with Lights

Combining functionality with aesthetics, ceiling fans with integrated lighting can be both stylish and practical.

  • Contemporary Designs: Many ceiling fans now come with sleek designs and energy-efficient LED lights.

Ideal For: Bedrooms and family rooms where both cooling and lighting are necessary.

4. Large Flush Mounts

Flush mount fixtures are mounted directly to the ceiling and are ideal for spaces where a chandelier may be too low.

  • Statement Flush Mounts: Large, decorative flush mounts can serve as a bold statement piece without overwhelming the room.

Ideal For: Hallways, bathrooms, and spaces with extremely high ceilings where hanging fixtures may not be practical.

5. Wall Sconces

Although typically smaller, wall sconces can complement larger fixtures by providing additional lighting and creating layers.

  • High Wall Sconces: Placing sconces higher on the wall can enhance the vertical space.

Ideal For: Hallways, staircases, and rooms with large wall space.

Choosing the Right Size

When selecting large light fixtures for high ceilings, size is a critical factor. Here are some guidelines to help you determine the right size for your space:

Measuring Your Ceiling Height

  1. Standard Formula: For rooms with high ceilings, a good rule of thumb is to add an additional inch of height for every foot of ceiling height. For instance, if your ceiling is 10 feet high, aim for a fixture that is at least 10 inches in height.
  2. Consider Scale: Ensure the fixture doesn’t overpower the space. A common mistake is selecting a fixture that is too large or too small for the room.

Visual Balance

  1. Consider Room Size: Large fixtures can look disproportionate in smaller rooms. Balance the scale of your fixture with the room’s dimensions.
  2. Visual Harmony: Make sure the light fixture complements other elements in the room, such as furniture, wall art, and architectural features.

Installation Tips for Large Light Fixtures

Installing large light fixtures requires careful planning and sometimes professional help. Here are some tips to consider:

1. Use a Qualified Electrician

For heavy fixtures, especially chandeliers, it’s advisable to hire a licensed electrician for installation. They can ensure proper electrical wiring and secure installation.

2. Check Weight Limits

Ensure that your ceiling can support the weight of your chosen fixture. Heavy fixtures may require additional support beams or hardware.

3. Determine the Right Height

  • General Guidelines: Hang fixtures about 30-34 inches above a dining table. For entryways, ensure that the bottom of the fixture is at least 7 feet above the ground.

4. Ensure Proper Lighting

Consider the type of bulbs used in your fixture. Opt for LED bulbs for energy efficiency and longevity, ensuring they provide the brightness you need.

Maintenance of Large Light Fixtures

To keep your large light fixtures for high ceilings looking their best, regular maintenance is essential. Here’s how to care for them:

1. Dust Regularly

Dust can accumulate on light fixtures, affecting their brightness and appearance. Use a microfiber cloth or duster to gently clean surfaces.

2. Check Bulbs

Regularly check bulbs to ensure they are functioning correctly. Replace any burned-out bulbs promptly to maintain consistent lighting.

3. Inspect for Damage

Periodically inspect the fixture for any signs of wear, such as frayed wires or loose components. Addressing these issues quickly can prevent accidents.

4. Deep Clean

For fixtures with intricate designs, consider a deep clean every few months. Use a gentle cleaner and avoid harsh chemicals that can damage finishes.

Final Thoughts

Large light fixtures for high ceilings are more than just functional; they add personality, elegance, and warmth to your living spaces. From dramatic chandeliers to sleek pendant lights, the options are plentiful. When choosing the right fixture, consider the size of your room, the style of your decor, and how the fixture will complement your space.

With proper installation and maintenance, your large light fixtures can enhance the beauty of your home for years to come. So go ahead—let your light shine brightly!

Ceiling Fan For High Vaulted Ceiling: A Complete Guide

High vaulted ceilings add a dramatic and spacious feel to any room, but they also come with unique challenges, especially when it comes to choosing the right ceiling fan. Proper air circulation is crucial in large, open spaces, and a ceiling fan can be both functional and aesthetic. In this article, we’ll explore everything you need to know about selecting the ideal ceiling fan for a high vaulted ceiling, from the best designs to installation tips, ensuring your space remains comfortable and stylish.

Ceiling Fan For High Vaulted Ceiling

Why You Need a Ceiling Fan For High Vaulted Ceiling

Benefits of Ceiling Fans in High Ceilings

  1. Enhanced Air Circulation: High ceilings can cause heat to rise and stay trapped above, making the lower areas feel cooler than desired. A ceiling fan helps redistribute warm air during the winter and creates a cooling breeze in the summer, ensuring a consistent temperature throughout the room.
  2. Energy Efficiency: By improving air circulation, ceiling fans can reduce the reliance on HVAC systems, leading to lower energy bills. This is particularly important in rooms with high ceilings, where temperature regulation can be more challenging.
  3. Aesthetic Appeal: A well-chosen ceiling fan can enhance the architectural beauty of a high vaulted ceiling. With various styles and finishes available, you can find a fan that complements your décor and becomes a focal point in the room.

Key Considerations When Choosing a Ceiling Fan For High Vaulted Ceiling

1. Blade Span

The size of the ceiling fan should correspond to the dimensions of the room. Larger rooms with high ceilings require fans with a greater blade span to effectively circulate air. Here’s a general guide:

  • Small Rooms (up to 75 sq. ft.): 29” – 36” blade span
  • Medium Rooms (76 – 144 sq. ft.): 36” – 42” blade span
  • Large Rooms (144 – 225 sq. ft.): 44” – 50” blade span
  • Extra-Large Rooms (225+ sq. ft.): 52” – 60”+ blade span

Read too: Kitchen Lighting For A Vaulted Ceiling: Illuminating Your Space with Style and Functionality

2. Downrod Length

High vaulted ceilings require a longer downrod to position the fan at the optimal height for air circulation. The recommended height for ceiling fans is approximately 8-9 feet from the floor, allowing for effective cooling without sacrificing headroom. Here’s how to calculate the downrod length:

  • Ceiling Height (ft.): Subtract 8 ft. (standard ceiling height) from your total ceiling height.
  • Downrod Length: Use the difference as your downrod length. For example, if your ceiling is 12 ft. high, you’ll need a 4 ft. downrod.

3. Motor Power

Fans for high vaulted ceilings require powerful motors to move a significant amount of air effectively. Look for fans with high CFM (Cubic Feet per Minute) ratings, which indicate the volume of air the fan can move. Higher CFM ratings are ideal for large, open spaces.

4. Design and Aesthetics

Ceiling fans come in a wide variety of designs, from modern and sleek to rustic and traditional. When selecting a fan for a high vaulted ceiling, consider the overall style of the room. A fan that complements your interior design can enhance the room’s ambiance while serving its functional purpose.

5. Lighting Options

Many ceiling fans come with integrated lighting fixtures, which can be particularly useful in rooms with high ceilings. Choose a fan with dimmable LED lights to create the perfect atmosphere. If the fan doesn’t include lighting, consider adding separate lighting fixtures that complement the fan’s design.

Installation Guide: Ceiling Fan For High Vaulted Ceiling

Tools and Materials Needed

  • Ceiling fan kit
  • Downrod (appropriate length)
  • Ladder or scaffolding
  • Electrical tape
  • Screwdrivers and wrenches
  • Wire connectors
  • Ceiling fan mounting bracket
  • Voltage tester

Step-by-Step Installation

  1. Turn Off Power
    • Ensure safety by turning off the power to the circuit at the breaker box. Use a voltage tester to confirm the power is off.
  2. Assemble the Fan
    • If not already assembled, put together the ceiling fan components according to the manufacturer’s instructions. Attach the blades to the motor housing.
  3. Attach the Downrod
    • Secure the downrod to the fan motor. Ensure it’s tightly fastened to prevent wobbling during operation. The downrod length should be appropriate for the height of your vaulted ceiling.
  4. Mount the Fan Bracket
    • Install the ceiling fan mounting bracket to the electrical box in the ceiling. The bracket must be securely fastened to handle the fan’s weight and movement.
  5. Wire the Fan
    • Connect the fan wiring to the house wiring using wire connectors. Match the wires by color (black to black, white to white, etc.), and secure them with electrical tape.
  6. Attach the Fan to the Bracket
    • Carefully lift the fan and attach it to the mounting bracket. Secure all screws and ensure the fan is stable and level.
  7. Test the Fan
    • Turn the power back on at the breaker and test the fan. Ensure it operates smoothly, with no wobbling or unusual noises.
  8. Adjust Settings
    • Set the fan to the appropriate speed and direction. For cooling, the fan blades should rotate counterclockwise. For heating, set the blades to rotate clockwise to push warm air down from the ceiling.

Maintenance Tips for Ceiling Fans in High Vaulted Ceilings

Regular Cleaning

Dust can accumulate on the fan blades, which can reduce efficiency and lead to wobbling. Regularly clean the fan blades using a microfiber cloth or a vacuum with a soft brush attachment. For high ceilings, you may need an extendable duster or ladder.

Inspect and Tighten

Periodically check all screws and connections to ensure they remain tight. Loose screws can cause the fan to wobble or make noise during operation. If you notice any wobbling, use a blade balancing kit to restore balance.

Check Electrical Connections

Ensure all wiring connections remain secure and free from corrosion. If you notice flickering lights or other electrical issues, turn off the power and inspect the connections or consult a professional electrician.

Seasonal Adjustment

Remember to adjust the fan’s rotation direction with the change of seasons. Use the forward setting (counterclockwise) in summer for cooling and the reverse setting (clockwise) in winter to redistribute warm air.

Popular Ceiling Fan Designs for High Vaulted Ceilings

1. Contemporary Fans

Contemporary ceiling fans feature sleek lines, minimalist designs, and often incorporate modern materials like brushed nickel or chrome. These fans are ideal for modern or urban spaces with high vaulted ceilings.

2. Rustic Fans

Rustic ceiling fans typically include wood or faux wood finishes, distressed metals, and natural elements. These fans complement farmhouse, lodge, or cabin-style homes with vaulted ceilings.

3. Chandelier Fans

Also known as “fandeliers,” chandelier fans combine the elegance of a chandelier with the functionality of a ceiling fan. These are perfect for adding a touch of luxury to high-ceilinged spaces.

4. Industrial Fans

Industrial-style fans are known for their bold, robust designs and metal finishes. They’re a great fit for lofts, converted industrial spaces, or modern homes with high ceilings.

Common Mistakes to Avoid When Installing Ceiling Fan For High Vaulted Ceiling

1. Choosing the Wrong Downrod Length

Selecting a downrod that is too short or too long can affect the fan’s performance and safety. Always calculate the correct downrod length based on your ceiling height and desired fan height.

2. Ignoring Fan Size

A fan that is too small won’t effectively circulate air in a large room with a high ceiling, while a fan that is too large may overpower a small space. Use the blade span guide mentioned earlier to select the right fan size.

3. Improper Installation

Installing a ceiling fan on a high vaulted ceiling can be challenging. If you’re unsure about the process, it’s best to hire a professional. Incorrect installation can lead to safety hazards, such as wobbling, electrical issues, or even the fan falling.

4. Overlooking Style Compatibility

While functionality is crucial, don’t overlook the fan’s style. The ceiling fan should enhance the room’s décor, not detract from it. Choose a design that aligns with your interior design theme.

Conclusion

Selecting and installing a ceiling fan for a high vaulted ceiling requires careful consideration of several factors, including size, downrod length, motor power, and design. By choosing the right fan and following proper installation and maintenance procedures, you can ensure that your room remains comfortable, energy-efficient, and visually appealing.

Whether you prefer a modern, rustic, or industrial look, there’s a ceiling fan out there that will perfectly complement your high vaulted ceiling. Remember to periodically check the fan for dust and balance issues, and adjust the rotation direction seasonally to maximize its efficiency.

Investing in a quality ceiling fan is a great way to enhance both the comfort and style of your home, particularly in rooms with high vaulted ceilings.

Pendant Lighting For High Ceilings: Elevating Your Home’s Aesthetic

Pendant lighting is a popular choice for homeowners looking to add a touch of elegance and functionality to their living spaces. When it comes to homes with high ceilings, pendant lighting not only enhances the visual appeal but also provides practical illumination that bridges the gap between floor and ceiling. In this article, we will explore the various aspects of Pendant Lighting For High Ceilings, offering insights on how to select, install, and optimize this lighting style to elevate your home’s aesthetic.

Pendant Lighting For High Ceilings

The Importance of Pendant Lighting For High Ceilings

Homes with high ceilings present a unique opportunity to make a bold design statement. However, they also come with certain challenges, particularly in lighting. Standard light fixtures might not suffice, leaving parts of the room in shadows or failing to create the desired ambiance. This is where Pendant Lighting For High Ceilings comes into play.

1. Enhancing Room Proportions

One of the main advantages of pendant lighting in high-ceilinged rooms is its ability to enhance the proportions of the space. High ceilings can sometimes make a room feel cold or cavernous. Pendant lights, especially those with adjustable cords or chains, allow you to bring the light source closer to eye level, creating a more intimate and balanced environment. The vertical space is utilized effectively, drawing the eye upward and accentuating the room’s height.

Read too: Bathroom Flooded Through the Ceiling: A Comprehensive Guide

2. Versatile Design Options

Pendant lighting is available in a wide range of styles, materials, and finishes, making it a versatile choice for any interior design. Whether your home is modern, rustic, industrial, or traditional, there is a pendant light design that can complement your decor. For high ceilings, larger or multi-light pendants can create a focal point, while clusters of smaller pendants can be arranged to cover a larger area, adding both style and substance to the room.

3. Focused Lighting

Unlike other types of lighting, pendant lights provide focused illumination, making them ideal for specific areas within a room. For example, in a kitchen with high ceilings, pendant lights can be hung over an island or dining area to provide direct light for cooking or eating. In living rooms, they can highlight a seating area or art piece, creating zones of activity or relaxation.

4. Energy Efficiency

Modern pendant lights often come equipped with energy-efficient LED bulbs, which not only save on electricity bills but also have a longer lifespan compared to traditional bulbs. This is particularly beneficial for high ceilings, where changing a bulb can be a challenging task. LED pendants offer bright, consistent lighting without the frequent need for replacement.

Selecting the Right Pendant Lighting For High Ceilings

Choosing the right pendant lighting for high ceilings involves considering several factors, including the height of the ceiling, the size of the room, and the overall design aesthetic. Here are some tips to help you make the best choice.

1. Ceiling Height and Pendant Length

The height of your ceiling will significantly influence the type of pendant light you choose. For very high ceilings, you’ll want a pendant light with an adjustable cord or chain that can be customized to hang at the desired height. The general rule of thumb is to hang the pendant so that the bottom of the light is about 7 feet (84 inches) above the floor, but this can vary depending on the room’s purpose and the furniture layout.

For example, in a dining room with a high ceiling, the pendant should be hung 30-36 inches above the table surface. This ensures sufficient lighting for dining while maintaining an unobstructed view across the table. In other areas like a foyer or living room, you may want the pendant to hang lower or higher depending on the space’s function.

2. Size and Scale

The size of the pendant light should be proportional to the room and the area it will illuminate. A large, open space with high ceilings can accommodate a larger pendant or multiple pendants, while smaller rooms might benefit from a single, moderately sized fixture.

When choosing the size, consider the diameter and height of the fixture. For instance, in a grand foyer with a high ceiling, a large, dramatic pendant can serve as a stunning centerpiece. On the other hand, in a kitchen with high ceilings, a series of smaller pendants spaced evenly across the island may be more appropriate.

3. Design and Material

Pendant lights come in various materials, including glass, metal, wood, and fabric, each bringing a different feel to the space. Glass pendants offer a sleek, modern look and can be clear, frosted, or colored. Metal pendants are often used in industrial or contemporary designs, while wood or fabric pendants lend warmth and texture to a room.

Consider the existing decor and color scheme when selecting a pendant light. A metal pendant with a matte finish might suit a modern, minimalist space, while a wood pendant with a warm hue could enhance a rustic or bohemian interior.

4. Light Output and Bulb Type

The type of bulb and its brightness are critical factors in the effectiveness of pendant lighting. LED bulbs are recommended for their energy efficiency and long life. Ensure that the light output (measured in lumens) is sufficient for the room’s size and purpose.

For ambient lighting in a large room, you may need pendants with higher lumen outputs or multiple fixtures. In contrast, for task lighting over a kitchen island or desk, focused light with a lower lumen output might be sufficient.

Installing Pendant Lighting For High Ceilings

Installation is a critical step in achieving the perfect lighting setup for high ceilings. While some homeowners may choose to hire a professional, others might opt for a DIY approach. Here’s a general guide to installing pendant lighting for high ceilings.

1. Planning the Layout

Before installing pendant lights, plan the layout carefully. Determine where the lights will hang, considering the room’s focal points and the areas that require the most illumination. Use a measuring tape to ensure even spacing between multiple pendants and check the height at which each pendant will hang.

2. Wiring and Safety Considerations

Safety is paramount when working with electrical fixtures. Turn off the power at the circuit breaker before beginning any installation work. Ensure that the wiring is compatible with the new fixture and that the ceiling can support the weight of the pendant. If the pendant is particularly heavy or large, you may need to install additional support, such as a brace or a junction box.

3. Adjusting the Pendant Height

For high ceilings, adjusting the pendant height is crucial to achieving the desired look and functionality. Most pendant lights come with adjustable cords or chains that can be shortened or lengthened as needed. Test the height before finalizing the installation by temporarily hanging the pendant and observing how it looks from different angles.

4. Mounting the Fixture

Once you’ve determined the height, mount the fixture to the ceiling. Attach the pendant light’s canopy to the junction box using screws, ensuring that it is secure. Connect the wires according to the manufacturer’s instructions, typically matching the black (live), white (neutral), and green or copper (ground) wires. Once connected, carefully tuck the wires into the junction box and secure the canopy.

5. Testing the Lighting

After installation, turn the power back on and test the pendant light. Check that the light is functioning correctly and that the height and alignment are as planned. If the fixture wobbles or appears uneven, adjust the mounting hardware or the cord length as necessary.

Optimizing Pendant Lighting For High Ceilings

Once installed, there are several ways to optimize pendant lighting to enhance your space further.

1. Layering Light Sources

For a well-lit room with high ceilings, consider layering your lighting sources. Combine pendant lighting with other fixtures, such as recessed lights, wall sconces, or floor lamps, to create a balanced and dynamic lighting scheme. This approach ensures that the room is well-lit from multiple angles, reducing shadows and highlighting architectural features.

2. Using Dimmers

Installing dimmers for your pendant lights allows you to adjust the brightness according to your needs and mood. Dimmers are especially useful in living rooms, dining rooms, and bedrooms, where you might want to change the light intensity throughout the day. A dimmer can also extend the life of your bulbs by reducing the overall energy consumption.

3. Highlighting Architectural Features

Pendant lighting can be used strategically to highlight architectural features in a room with high ceilings. For example, hanging pendants at varying heights can draw attention to a vaulted ceiling or a tall fireplace. In a hallway or foyer, pendants can emphasize the length of the space, creating a dramatic entryway.

4. Color and Temperature Control

Some modern pendant lights come with options for color temperature control, allowing you to switch between warm and cool lighting. This feature can be particularly useful in multifunctional spaces, where you might prefer warmer tones for relaxation and cooler tones for tasks or activities.

Conclusion

Pendant Lighting For High Ceilings offers a perfect blend of style and functionality, making it an excellent choice for modern homes. By carefully selecting and installing pendant lights, you can transform a high-ceilinged room into a well-lit, aesthetically pleasing space. Whether you’re looking to make a bold statement with a large, dramatic fixture or create a cozy atmosphere with a cluster of smaller pendants, the possibilities are endless. Remember to consider factors such as ceiling height, pendant size, and lighting needs when making your selection, and don’t be afraid to experiment with different layouts and designs to find what works best for your space.

Large Modern Chandeliers for High Ceilings: Elevate Your Space with Style and Elegance

When it comes to lighting up a room with high ceilings, few fixtures make a statement quite like large modern chandeliers for high ceilings. These impressive lighting pieces not only illuminate your space but also serve as a focal point that can enhance the overall design of your room. In this guide, we’ll explore the different styles and benefits of large modern chandeliers, how to choose the right one for your high-ceilinged space, and tips for installation and maintenance.

Why Choose Large Modern Chandeliers for High Ceilings?

Large modern chandeliers for high ceilings are designed to complement and accentuate the grandeur of rooms with elevated ceilings. Here’s why they are an excellent choice:

1. Visual Impact

A large chandelier adds a dramatic focal point to a room, making it the centerpiece of your décor. Its size and design can enhance the room’s architectural features, creating a striking visual impact that draws attention.

Read too: Bathroom Flooded Through the Ceiling: A Comprehensive Guide

2. Proportional Balance

In a room with high ceilings, a small light fixture can look out of place. Large chandeliers provide proportional balance, ensuring that the lighting fixture matches the scale of the room and complements its spaciousness.

3. Enhanced Lighting

Modern chandeliers often come with advanced lighting technology that can provide both ambient and task lighting. This ensures that the room is well-lit, making it both functional and aesthetically pleasing.

4. Design Versatility

Large modern chandeliers come in various styles, from sleek and minimalistic to intricate and ornate. This versatility allows you to choose a chandelier that aligns with your personal taste and complements your interior design.

Choosing the Right Large Modern Chandelier for High Ceilings

Selecting the perfect chandelier for high ceilings involves considering several factors to ensure that it meets your needs and complements your space. Here’s what to keep in mind:

1. Room Dimensions

Before purchasing a chandelier, measure the dimensions of the room, including the height of the ceiling. A general rule of thumb is that the chandelier should hang 30 to 34 inches above the floor in a dining room or foyer. For rooms with very high ceilings, you may need to adjust this height to maintain a balanced look.

2. Chandelier Size

The size of the chandelier should be proportional to the room’s dimensions. For large rooms, opt for a chandelier with a substantial diameter to ensure that it makes a significant impact. As a guideline, the diameter of the chandelier should be about half the width of the room.

3. Ceiling Height and Mounting

High ceilings often require chandeliers to be mounted at a height that maximizes their visual impact without interfering with the room’s functionality. Consider installing a chandelier with an adjustable downrod or chain to customize the hanging length according to your space.

4. Style and Design

Choose a chandelier style that complements the room’s decor. Modern chandeliers come in various designs, including:

  • Minimalistic: Sleek, simple designs with clean lines and understated elegance.
  • Industrial: Features exposed bulbs and raw materials like metal and glass for an edgy, contemporary look.
  • Crystal: Adds a touch of luxury with sparkling crystal elements that reflect and refract light.
  • Geometric: Incorporates bold shapes and patterns for a modern, artistic flair.

5. Lighting Features

Consider the type of lighting your chandelier provides. Some modern chandeliers come with dimming capabilities, adjustable light settings, or LED technology for energy efficiency. Choose a chandelier that offers the lighting features you need for your space.

Installation Tips for Large Modern Chandeliers

Proper installation is crucial to ensure that your chandelier is safe, functional, and visually appealing. Here are some tips for installing large modern chandeliers:

1. Hire a Professional

For heavy or complex chandeliers, it’s advisable to hire a professional electrician or installer. They can ensure that the chandelier is securely mounted and properly wired, minimizing the risk of accidents or electrical issues.

2. Check Electrical Capacity

Ensure that your home’s electrical system can handle the additional load of the chandelier. Verify that the circuit is equipped to support the chandelier’s wattage and that all wiring is up to code.

3. Use the Right Mounting Hardware

Use appropriate mounting hardware and ensure that it is securely attached to a ceiling joist or support beam. This is especially important for large chandeliers, which can be heavy and require robust support.

4. Adjust the Hanging Height

Adjust the chandelier’s hanging height to ensure that it is positioned correctly within the room. For high ceilings, use an adjustable downrod or chain to achieve the desired height.

5. Ensure Proper Alignment

Ensure that the chandelier is centered in the room and properly aligned. This helps maintain visual balance and ensures that the chandelier enhances the room’s overall aesthetic.

Maintenance Tips for Large Modern Chandeliers

To keep your large modern chandelier looking its best and functioning properly, follow these maintenance tips:

1. Regular Cleaning

Dust and clean your chandelier regularly to prevent buildup that can dull its appearance. Use a soft, lint-free cloth to wipe down the fixture and avoid harsh chemicals that could damage the finish.

2. Check and Replace Bulbs

Regularly check the chandelier’s bulbs to ensure they are functioning properly. Replace any burnt-out bulbs promptly to maintain consistent lighting and avoid uneven illumination.

3. Inspect Wiring and Mounting

Periodically inspect the chandelier’s wiring and mounting to ensure that everything is secure and in good condition. Address any issues promptly to prevent potential safety hazards.

4. Professional Servicing

For complex chandeliers or those with intricate components, consider scheduling professional servicing to address any issues or perform thorough cleaning and maintenance.

Popular Large Modern Chandeliers for High Ceilings

Here are some popular styles of large modern chandeliers for high ceilings that can enhance your space:

1. The Crystal Chandelier

Featuring sparkling crystal elements, this chandelier adds a touch of elegance and luxury to any room. Ideal for grand foyers or dining rooms, its reflective qualities create a dazzling effect.

2. The Geometric Chandelier

Bold and contemporary, the geometric chandelier incorporates unique shapes and patterns to create a striking visual impact. Perfect for modern living rooms or loft spaces.

3. The Industrial Chandelier

With exposed bulbs and raw metal components, the industrial chandelier brings an edgy, modern look to high-ceilinged spaces. It’s a great choice for urban lofts or contemporary homes.

4. The Minimalistic Chandelier

Sleek and understated, the minimalistic chandelier focuses on clean lines and simplicity. It complements modern and minimalist interiors, adding a touch of sophistication without overwhelming the space.

Conclusion: Elevate Your Space with Large Modern Chandeliers

Large modern chandeliers for high ceilings are a fantastic way to enhance the beauty and functionality of your space. By choosing the right size, style, and lighting features, you can create a stunning focal point that complements your room’s design and makes a lasting impression. Whether you opt for a crystal chandelier for a touch of luxury or a geometric design for a modern twist, the right chandelier will elevate your space and bring a sense of grandeur to your high-ceilinged room.

If you’re considering installing a large modern chandelier, consult with a professional to ensure proper installation and maintenance. With the right care, your chandelier will remain a captivating feature of your home for years to come.

High Ceiling Living Room Chandelier: Transform Your Space with the Perfect

A living room with high ceilings is a stunning architectural feature that creates a sense of openness and grandeur. However, decorating such a space can be challenging, particularly when it comes to choosing the right lighting. A High Ceiling Living Room Chandelier can be the perfect solution to not only illuminate the space but also add a touch of elegance and style. In this guide, we will explore the various factors to consider when selecting a chandelier for your high-ceiling living room, along with tips on installation, maintenance, and design ideas to help you make the most of this beautiful lighting feature.

Why Choose a High Ceiling Living Room Chandelier?

High ceilings are a desirable feature in many homes, offering an expansive and airy feel. However, they also require thoughtful lighting solutions to ensure the space is well-lit and aesthetically pleasing. A High Ceiling Living Room Chandelier is an excellent choice for several reasons:

1. Statement Piece

A chandelier can serve as a stunning focal point in a room, drawing the eye upward and accentuating the height of the ceiling. It adds a layer of sophistication and luxury that other lighting fixtures may not provide.

Read too: Bathroom Flooded Through the Ceiling: A Comprehensive Guide

2. Proper Illumination

High ceilings require more powerful lighting to adequately illuminate the space. A chandelier with multiple bulbs or tiers can provide ample light, ensuring every corner of your living room is well-lit.

3. Enhancing Ambiance

Chandeliers come in a variety of designs, from classic to contemporary, allowing you to choose one that complements your living room’s style. The right chandelier can create a warm, inviting atmosphere and set the tone for the entire room.

4. Maximizing Vertical Space

In a room with high ceilings, a chandelier can fill the vertical space beautifully, preventing the room from feeling too cavernous or empty. It helps balance the proportions of the room and brings everything together cohesively.

Choosing the Right High Ceiling Living Room Chandelier

Selecting the perfect High Ceiling Living Room Chandelier involves more than just picking a design you like. Here are key factors to consider:

1. Size and Scale

One of the most important considerations is the size of the chandelier. A fixture that is too small may get lost in the vastness of the room, while one that is too large can overwhelm the space. As a general rule, the diameter of the chandelier should be about one-third to one-half the width of the room.

For example, if your living room is 18 feet wide, the chandelier should be between 6 to 9 feet in diameter. Additionally, the height of the chandelier should be proportional to the ceiling height. For rooms with ceilings 10 feet or higher, consider chandeliers with multiple tiers or a longer drop.

2. Style and Design

The design of the chandelier should complement the overall aesthetic of your living room. Whether your space is modern, traditional, rustic, or transitional, there is a chandelier style to match.

  • Modern Chandeliers: These often feature clean lines, geometric shapes, and a minimalist design. Materials like chrome, glass, and polished metals are common.
  • Traditional Chandeliers: These typically have intricate details, ornate designs, and may feature materials like crystal, brass, or bronze.
  • Rustic Chandeliers: Ideal for a cozy, farmhouse feel, these often incorporate natural materials like wood and wrought iron.
  • Transitional Chandeliers: These blend elements from both traditional and contemporary styles, offering a versatile option that suits various decors.

3. Lighting Needs

Consider the lighting needs of your living room. Do you need bright, task-oriented lighting, or are you looking for something more ambient and mood-setting? Some chandeliers come with adjustable brightness levels or are compatible with dimmer switches, allowing you to customize the lighting to suit different occasions.

Also, think about the type of bulbs the chandelier uses. LED bulbs are energy-efficient and long-lasting, making them a popular choice. Some chandeliers also allow for color temperature adjustments, enabling you to switch between warm and cool lighting.

4. Material and Finish

The material and finish of the chandelier should coordinate with the other elements in your living room, such as the furniture, wall color, and decor. A metal chandelier with a matte black finish can complement a modern industrial space, while a gold or brass chandelier might be perfect for a more luxurious, traditional room.

5. Installation Considerations

Installing a chandelier in a high-ceiling living room can be a complex task that often requires professional help. Ensure that the chandelier is securely mounted and that the wiring is capable of handling the load. Additionally, consider the accessibility of the fixture for maintenance, such as cleaning or changing bulbs.

Installing a High Ceiling Living Room Chandelier

Installing a High Ceiling Living Room Chandelier requires careful planning and the right tools. Here’s a step-by-step guide to help you through the process:

1. Gather the Necessary Tools

Before starting the installation, make sure you have all the required tools, including a ladder tall enough to reach the ceiling, a voltage tester, screwdrivers, wire strippers, and a wrench. Additionally, consider having a helper to assist with lifting and securing the chandelier.

2. Turn Off the Power

Safety is paramount when working with electrical fixtures. Before you begin, turn off the power to the room at the circuit breaker to avoid any risk of electric shock.

3. Assemble the Chandelier

If your chandelier comes disassembled, carefully follow the manufacturer’s instructions to put it together. Be sure to check that all parts are included and that the fixture is securely assembled.

4. Install the Mounting Bracket

Most chandeliers come with a mounting bracket that attaches to the electrical box in the ceiling. Use the provided screws to securely fasten the bracket. Ensure it is level and capable of supporting the weight of the chandelier.

5. Connect the Wiring

Carefully connect the wires from the chandelier to the wires in the ceiling. Typically, this involves matching the black wire (live), white wire (neutral), and green or copper wire (ground). Use wire nuts to secure the connections, and wrap them with electrical tape for added safety.

6. Secure the Chandelier

Once the wiring is complete, lift the chandelier into place and attach it to the mounting bracket. This step may require the help of a second person to hold the chandelier steady while you secure it.

7. Attach the Canopy

The canopy is the decorative cover that hides the wiring and mounting bracket. Slide it up to the ceiling and secure it in place with the provided screws.

8. Test the Fixture

After securing the chandelier, restore power to the room and test the fixture to ensure it is working correctly. If everything is functioning as expected, proceed to install any remaining decorative elements, such as crystals or shades.

9. Clean and Adjust

Finally, clean the chandelier to remove any fingerprints or dust from the installation process. Adjust the height or angle if necessary to ensure the fixture hangs evenly.

Maintaining Your High Ceiling Living Room Chandelier

Once your High Ceiling Living Room Chandelier is installed, regular maintenance is essential to keep it looking its best and functioning properly. Here are some maintenance tips:

1. Regular Cleaning

Dust and debris can accumulate on the chandelier over time, dulling its appearance and reducing light output. Regularly dust the fixture with a soft cloth or use a long-handled duster for hard-to-reach areas. For a more thorough cleaning, consider using a chandelier cleaner spray.

2. Check for Loose Parts

Over time, the components of the chandelier may become loose due to vibrations or movement. Periodically check the fixture for any loose screws, bolts, or crystals and tighten them as needed.

3. Replace Bulbs Promptly

If a bulb burns out, replace it promptly to maintain even lighting. When replacing bulbs, ensure they are the correct wattage and type as recommended by the manufacturer.

4. Inspect Wiring

Occasionally, inspect the wiring for any signs of wear or damage. If you notice any frayed wires or other issues, contact a professional electrician to address the problem.

Design Ideas for High Ceiling Living Room Chandeliers

A High Ceiling Living Room Chandelier can be a versatile design element that enhances the overall look of your living room. Here are some design ideas to inspire you:

1. Layered Lighting

Combine your chandelier with other lighting sources, such as recessed lights or wall sconces, to create a layered lighting effect. This approach allows you to adjust the ambiance of the room based on the time of day or the occasion.

2. Mix and Match Styles

Don’t be afraid to mix different styles in your living room. A contemporary chandelier can look stunning in a traditionally furnished space, adding a modern twist to the overall design.

3. Use Bold Colors

If your living room features neutral tones, consider a chandelier with bold colors or unique finishes to create a striking contrast. A black or bronze chandelier can make a dramatic statement against a light-colored ceiling.

4. Focus on Symmetry

In large, high-ceilinged living rooms, symmetry can create a harmonious and balanced look. Consider installing matching chandeliers or pairing your chandelier with complementary furniture and decor.

Conclusion

A High Ceiling Living Room Chandelier is more than just a lighting fixture; it’s a statement piece that can transform your living room into a stylish and inviting space. By choosing the right chandelier, properly installing it, and maintaining it regularly, you can enjoy both the functional and aesthetic benefits it brings to your home. Whether your style is modern, traditional, or somewhere in between, there’s a perfect chandelier out there to elevate your high-ceiling living room.

Extra Large Chandeliers For High Ceilings: Transform Your Space with Elegance

When it comes to illuminating and decorating large spaces, few fixtures make as bold a statement as “Extra Large Chandeliers For High Ceilings.” These magnificent pieces not only provide ample lighting but also serve as stunning focal points that can elevate the aesthetic of your home. In this guide, we’ll explore why extra large chandeliers are ideal for high ceilings, how to choose the perfect one for your space, and tips for installation and maintenance.

Extra Large Chandeliers For High Ceilings

Why Extra Large Chandeliers Are Perfect for High Ceilings

The Impact of Scale and Proportion

High ceilings offer a unique opportunity to use larger fixtures that wouldn’t be suitable in spaces with lower ceilings. Extra large chandeliers are designed to fill these expansive vertical spaces, creating a sense of grandeur and balance. Their scale ensures that they don’t get lost in the room, making them ideal for large living areas, grand foyers, or spacious dining rooms.

These chandeliers often feature intricate designs and elaborate details that add a touch of luxury and sophistication. By choosing an appropriately scaled chandelier, you enhance the overall design of the room and create a cohesive look that emphasizes the height and volume of your space.

Read too: Discovering the Charm of Nautical Outdoor Ceiling Fans for Your Coastal Retreat: Sail into Style

Creating a Dramatic Focal Point

An extra large chandelier can serve as a dramatic focal point in a room, drawing the eye upward and highlighting the architectural features of your high ceiling. Its size and design can set the tone for the entire space, whether you’re aiming for a classic, modern, or eclectic style.

When positioned correctly, these chandeliers can enhance other design elements in the room, such as architectural moldings, grand staircases, or expansive windows. They also provide excellent ambient lighting, which can transform the ambiance of the space and make it feel warm and inviting.

How to Choose the Perfect Extra Large Chandelier For High Ceilings

Consider the Room’s Dimensions and Style

When selecting an extra large chandelier, it’s essential to consider the dimensions and style of the room. The chandelier should complement the room’s scale and design while also serving its functional purpose. Here are some key factors to keep in mind:

  • Room Size: Ensure that the chandelier’s size is proportionate to the room’s dimensions. A general rule of thumb is to add the room’s length and width in feet to determine the chandelier’s diameter in inches. For example, a room that is 20 feet by 30 feet might suit a chandelier with a diameter of 50-60 inches.
  • Ceiling Height: The height of the chandelier should be appropriate for the ceiling height. For high ceilings, you may need a chandelier with a longer drop or use a downrod to ensure the fixture hangs at the right level. The bottom of the chandelier should be about 30-36 inches above the floor in dining areas and at least 7 feet above the floor in other spaces.
  • Design Style: Choose a chandelier that complements the room’s design style. Whether you prefer a traditional crystal chandelier, a modern geometric design, or a rustic wrought iron fixture, the chandelier should enhance the room’s aesthetic and harmonize with other decor elements.

Lighting Needs and Functionality

In addition to its aesthetic appeal, the chandelier should meet the room’s lighting needs. Consider the following:

  • Brightness: Extra large chandeliers can provide significant illumination, but you should also consider the type of bulbs and the total wattage to ensure adequate lighting. Some chandeliers have dimmable features or multiple light sources that allow you to adjust the brightness based on the occasion.
  • Lighting Type: Depending on the room’s use, you may need a combination of ambient, task, and accent lighting. Choose a chandelier that provides the right balance of light and complements other lighting fixtures in the room.
  • Maintenance: Larger chandeliers can be more challenging to clean and maintain. Look for designs that are easier to access and clean, and consider using LED bulbs to reduce the frequency of bulb replacements.

Choosing the Right Material and Finish

The material and finish of the chandelier can significantly impact its appearance and durability. Some common materials include:

  • Crystal: Crystal chandeliers are known for their elegance and ability to refract light, creating a dazzling effect. They are ideal for traditional or formal settings.
  • Glass: Glass chandeliers offer a more contemporary look and can be found in various colors and styles. They are versatile and can suit modern or transitional decor.
  • Metal: Metal chandeliers, such as those made from brass, bronze, or wrought iron, add a rustic or industrial touch. They are durable and can fit a variety of design styles.
  • Wood: For a more rustic or farmhouse look, wooden chandeliers with intricate carvings or distressed finishes can add warmth and character to the space.

Installation Tips for Extra Large Chandeliers

Professional Installation vs. DIY

Given their size and weight, extra large chandeliers typically require professional installation to ensure safety and proper placement. An experienced electrician or lighting specialist will have the tools and expertise to handle the installation, including securing the fixture and properly wiring it.

If you choose to install the chandelier yourself, ensure you have a sturdy ladder, the necessary tools, and a helper to assist with lifting and positioning the fixture. Follow the manufacturer’s installation instructions carefully and make sure the chandelier is securely mounted to a ceiling junction box rated for its weight.

Placement and Positioning

Proper placement and positioning are crucial for achieving the desired effect with your chandelier. Here are some tips:

  • Centering: Position the chandelier in the center of the room or the main seating area to ensure it serves as a focal point and provides balanced illumination.
  • Height: Adjust the chandelier’s height to ensure it hangs at the appropriate level. In dining areas, it should be low enough to provide adequate light but high enough to avoid obstructing views.
  • Safety: Ensure that the chandelier is securely mounted and that all electrical connections are properly made. Double-check that the fixture is level and that all components are securely attached.

Maintenance and Care for Extra Large Chandeliers

Regular Cleaning

Keeping your extra large chandelier clean is essential for maintaining its appearance and functionality. Here are some cleaning tips:

  • Dusting: Use a soft, dry cloth or a feather duster to remove dust from the chandelier’s surface. For more intricate designs, use a small brush or a vacuum cleaner with a soft brush attachment.
  • Cleaning Crystals and Glass: For crystal or glass chandeliers, use a mild glass cleaner and a soft cloth to clean the surfaces. Avoid using harsh chemicals that could damage the finish.
  • Checking for Bulb Issues: Regularly inspect the bulbs to ensure they are functioning correctly. Replace any burned-out bulbs promptly to maintain consistent lighting.

Professional Maintenance

For larger chandeliers or those with intricate designs, consider hiring a professional for periodic maintenance. Professionals can perform tasks such as deep cleaning, checking electrical connections, and ensuring that all components are in good working order.

The Benefits of Investing in Extra Large Chandeliers For High Ceilings

Enhancing Aesthetic Appeal

An extra large chandelier adds a touch of luxury and sophistication to any high-ceilinged room. It serves as a statement piece that can elevate the overall design and create a stunning visual impact.

Improving Functionality

Beyond their aesthetic appeal, these chandeliers provide ample lighting, helping to illuminate large spaces effectively. By choosing a chandelier with adjustable lighting options, you can tailor the illumination to suit various activities and moods.

Increasing Property Value

High-quality, well-designed chandeliers can enhance the value of your home. Prospective buyers often appreciate the elegance and functionality of a well-chosen chandelier, making it a worthwhile investment for improving your home’s appeal and value.

Conclusion: Choosing Extra Large Chandeliers For High Ceilings for a Majestic Touch

Extra large chandeliers for high ceilings are a magnificent way to enhance the beauty and functionality of large spaces. With their impressive scale, intricate designs, and functional lighting capabilities, these chandeliers can transform your home into a luxurious and inviting environment. By considering the size, style, and features of the chandelier, you can select the perfect fixture to complement your high-ceilinged room and make a lasting impression.

Suspended Track Lighting for High Ceilings: Maximizing Light and Style

When it comes to illuminating spaces with high ceilings, suspended track lighting for high ceilings offers a stylish and practical solution. This type of lighting not only enhances the overall aesthetic of a room but also provides ample light to reach every corner. In this comprehensive guide, we’ll explore the benefits, design considerations, installation tips, and maintenance of suspended track lighting, helping you make the most out of this lighting choice for your space.

Suspended Track Lighting For High Ceilings

What is Suspended Track Lighting?

Suspended track lighting for high ceilings refers to a lighting system where light fixtures are mounted on a track that hangs from the ceiling. This setup allows for flexibility in positioning the lights and adjusting their angles, making it ideal for spaces with high or vaulted ceilings.

Types of Suspended Track Lighting

  1. Fixed Track Lighting: This system features a fixed track from which the light fixtures are suspended. The fixtures can usually be adjusted along the track but cannot be repositioned vertically.
  2. Adjustable Track Lighting: This system allows for more flexibility, as both the track and the fixtures can be adjusted. This type is especially useful in high-ceiling spaces where precise lighting control is needed.
  3. Monorail Lighting: A monorail system uses a single, flexible track to support the light fixtures. This allows for creative and custom designs, making it suitable for modern or artistic interiors.

Read too: Bathroom Flooded Through the Ceiling: A Comprehensive Guide

Benefits of Suspended Track Lighting for High Ceilings

Choosing suspended track lighting for high ceilings offers several advantages, making it a popular choice for both residential and commercial spaces:

1. Enhanced Flexibility

Suspended track lighting provides exceptional flexibility in directing light. You can easily adjust the position and angle of each fixture, ensuring that light is distributed exactly where it is needed. This is particularly useful in spaces with high ceilings, where traditional ceiling-mounted fixtures might struggle to provide adequate illumination.

2. Stylish and Modern Aesthetic

The sleek design of suspended track lighting adds a contemporary touch to any room. The track itself can be finished in various materials and colors, allowing it to blend seamlessly with your interior décor. This type of lighting can serve as both a functional and decorative element in your space.

3. Focused Illumination

With the ability to direct light precisely, suspended track lighting is excellent for highlighting specific areas or objects. Whether you’re showcasing artwork, illuminating a workspace, or creating a dramatic effect, this lighting system can be tailored to meet your needs.

4. Easy to Install and Reconfigure

Suspended track lighting systems are generally straightforward to install. Additionally, they can be easily reconfigured if you decide to change the layout or design of your space. This makes them a versatile choice for both new installations and renovations.

5. Enhanced Safety

For high ceilings, suspended track lighting can improve safety by reducing the need for ladder use. Fixtures mounted on a track are easier to access for maintenance compared to traditional ceiling-mounted lights, minimizing the risk of accidents during upkeep.

Design Considerations for Suspended Track Lighting

When planning suspended track lighting for high ceilings, several design factors should be considered to ensure optimal functionality and aesthetics:

1. Ceiling Height

The height of your ceiling will influence the type of track lighting system you choose. For very high ceilings, you may need a system with adjustable features to ensure that the light fixtures are positioned correctly for effective illumination.

2. Room Functionality

Consider the primary use of the room when designing your track lighting setup. Different areas may require different lighting intensities and angles. For instance, a living room might benefit from ambient lighting, while a kitchen or workspace may need focused task lighting.

3. Track Design

Choose a track design that complements your room’s décor. Tracks can come in various styles, including straight, curved, or flexible, allowing for customization based on the layout and design of the space.

4. Fixture Types

Select light fixtures that fit your lighting needs and aesthetic preferences. Options include spotlights, floodlights, pendant lights, and more. Ensure that the fixtures you choose are compatible with the track system and provide the desired type of light.

5. Lighting Controls

Consider incorporating dimmers or remote controls into your track lighting system. These features offer added convenience and control over the lighting intensity and can enhance the functionality of the system.

Installation Tips for Suspended Track Lighting

Installing suspended track lighting for high ceilings involves several key steps. Here’s a guide to help you through the process:

1. Plan Your Layout

Begin by planning the layout of your track lighting. Determine the placement of the track and fixtures, taking into account the room’s dimensions and the areas you want to illuminate.

2. Measure and Mark

Measure the length of the track needed and mark the ceiling where the track will be installed. Ensure that the track will be level and positioned correctly to achieve the desired lighting effect.

3. Install Mounting Hardware

Install the mounting hardware that will support the track. This may include ceiling brackets or anchors, depending on the weight and design of the track. Ensure that the hardware is securely attached to the ceiling to support the track and fixtures.

4. Attach the Track

Once the mounting hardware is in place, attach the track to the ceiling. Follow the manufacturer’s instructions to ensure proper installation. For systems with adjustable tracks, make any necessary adjustments to achieve the desired positioning.

5. Install the Fixtures

Install the light fixtures onto the track, following the manufacturer’s instructions. Adjust the position and angle of each fixture as needed to ensure even and effective lighting.

6. Connect the Wiring

Connect the wiring for the track lighting system. Ensure that all connections are secure and that the system is properly wired to the power source. If you’re not comfortable with electrical work, consider hiring a professional electrician for this step.

7. Test the System

Once installed, test the track lighting system to ensure that it is functioning correctly. Check that all fixtures are working and that the lighting effect meets your expectations. Make any necessary adjustments to optimize the lighting.

Maintenance and Care

Maintaining suspended track lighting for high ceilings is relatively simple but important for ensuring long-term performance:

1. Regular Cleaning

Dust and clean the track and fixtures regularly to maintain their appearance and performance. Use a soft cloth or duster to avoid scratching the surfaces.

2. Check for Light Bulb Issues

Periodically check the light bulbs or LEDs to ensure they are functioning correctly. Replace any burnt-out bulbs promptly to maintain consistent lighting.

3. Inspect the Track and Fixtures

Regularly inspect the track and fixtures for any signs of wear or damage. Address any issues promptly to prevent further problems and ensure the system remains safe and functional.

4. Professional Maintenance

Consider having a professional inspect the system periodically, especially if you encounter any issues. A professional can perform more detailed maintenance and repairs if needed.

Conclusion

Suspended track lighting for high ceilings offers a versatile and stylish lighting solution that enhances both the functionality and aesthetics of your space. With its flexibility, modern design, and ease of installation, it’s an excellent choice for illuminating high-ceilinged rooms. By understanding the benefits, design considerations, and installation tips, you can make an informed decision and enjoy the perfect lighting solution for your home or commercial space.

Extra Large Crystal Chandeliers for High Ceilings: Elevate Your Space

When it comes to illuminating and enhancing the grandeur of a room with high ceilings, nothing beats the dramatic impact of extra large crystal chandeliers. These magnificent fixtures not only provide ample lighting but also serve as a statement piece that can transform an ordinary space into a luxurious haven. In this comprehensive guide, we will explore everything you need to know about choosing and installing extra large crystal chandeliers for high ceilings, including design tips, maintenance, and more.

Extra Large Crystal Chandeliers For High Ceilings

What Are Extra Large Crystal Chandeliers?

Extra large crystal chandeliers are oversized lighting fixtures designed specifically for rooms with high ceilings. These chandeliers are often adorned with hundreds or thousands of sparkling crystals that reflect and refract light, creating a stunning visual effect. They come in various styles and designs, from traditional to contemporary, making them suitable for a wide range of interior aesthetics.

Why Choose Extra Large Crystal Chandeliers for High Ceilings?

1. Visual Impact

The primary reason to choose an extra large crystal chandelier for a high ceiling is the visual impact it delivers. These chandeliers become the focal point of the room, drawing the eye upward and emphasizing the height of the space. Their opulence and scale create a dramatic effect that smaller fixtures simply cannot achieve.

Read too: Kitchen Lighting For A Vaulted Ceiling: Illuminating Your Space with Style and Functionality

2. Enhanced Lighting

Extra large crystal chandeliers provide ample illumination for large spaces. The multiple layers of crystals and bulbs ensure that light is distributed evenly, making the room well-lit and inviting. This type of chandelier is ideal for areas where both ambient and accent lighting are needed.

3. Luxurious Aesthetic

Crystal chandeliers are synonymous with luxury and elegance. The intricate design and sparkling crystals add a touch of sophistication and glamour to any room. Whether you’re decorating a grand foyer, a spacious living room, or a lavish dining area, an extra large crystal chandelier can elevate the overall design.

4. Customization Options

Many manufacturers offer customizable options for extra large crystal chandeliers. You can select the number of tiers, the type of crystals, and the finish to match your specific design preferences and complement the room’s decor.

Design Considerations for Extra Large Crystal Chandeliers

1. Scale and Proportion

When choosing an extra large crystal chandelier, consider the scale and proportion of the room. The chandelier should be large enough to make a statement but not so overwhelming that it dwarfs other elements in the space. For high ceilings, ensure that the chandelier is proportionate to the room’s size and height.

2. Room Style

The style of the chandelier should complement the overall design of the room. Traditional crystal chandeliers with elaborate detailing work well in classic interiors, while sleek, modern designs are suited for contemporary spaces. Choose a chandelier that enhances the room’s aesthetic without clashing with other design elements.

3. Lighting Needs

Assess the lighting needs of the room before selecting a chandelier. Extra large crystal chandeliers often come with multiple bulbs or tiers, providing both ambient and accent lighting. Consider the type of light bulbs used and the fixture’s brightness to ensure it meets your lighting requirements.

4. Ceiling Height

For high ceilings, the height at which the chandelier is installed is crucial. Ensure that the chandelier is hung at a height that allows it to be the focal point without obstructing views or interfering with daily activities. Typically, chandeliers are hung so that the bottom of the fixture is 30 to 36 inches above the floor.

Installation Tips for Extra Large Crystal Chandeliers

1. Professional Installation

Given the size and weight of extra large crystal chandeliers, professional installation is highly recommended. A qualified electrician or chandelier installer can ensure that the fixture is securely mounted and properly connected to the electrical system.

2. Support Structure

Ensure that the ceiling can support the weight of the chandelier. High ceilings often require additional support structures or reinforcement to accommodate the heavy fixture. A professional installer can assess and address any structural concerns.

3. Wiring and Electrical

Proper wiring and electrical connections are essential for safe and effective operation. Ensure that the chandelier is connected to a suitable power source and that all wiring is done according to local building codes.

4. Height Adjustment

During installation, adjust the height of the chandelier to achieve the desired look. Consider using adjustable chains or rods to fine-tune the fixture’s positioning.

Maintenance and Care

1. Regular Cleaning

Crystal chandeliers require regular cleaning to maintain their sparkle and clarity. Use a soft, lint-free cloth and a mild cleaning solution to gently clean the crystals. Avoid harsh chemicals or abrasive materials that could damage the crystals.

2. Bulb Replacement

Check the light bulbs periodically and replace any that are burned out. Ensure that you use the correct wattage and type of bulbs as specified by the manufacturer.

3. Inspection

Inspect the chandelier regularly for any signs of wear or damage. Ensure that all crystals are securely attached and that there are no loose or broken parts.

4. Professional Maintenance

For thorough cleaning and maintenance, consider hiring a professional chandelier cleaning service. They have the expertise and equipment to clean and repair large chandeliers safely.

Design Inspirations for Extra Large Crystal Chandeliers

1. Grand Foyer

A grand foyer is the perfect place for an extra large crystal chandelier. The chandelier serves as a striking centerpiece, welcoming guests with its elegance and grandeur.

2. Luxurious Dining Room

In a luxurious dining room, an extra large crystal chandelier can create a sophisticated ambiance. The chandelier provides ample lighting for dining and adds a touch of opulence to the space.

3. Elegant Living Room

An elegant living room benefits from the dramatic effect of an extra large crystal chandelier. The chandelier enhances the room’s design and creates a focal point that draws the eye upward.

4. Spacious Ballroom

For a spacious ballroom or event space, an extra large crystal chandelier adds a sense of grandeur and luxury. The chandelier’s illumination and sparkle create a stunning visual effect for special occasions.

Conclusion

Extra large crystal chandeliers for high ceilings are more than just lighting fixtures; they are pieces of art that transform any space into a luxurious and elegant environment. By considering design elements, installation tips, and maintenance practices, you can ensure that your chandelier enhances the beauty and functionality of your room. Whether you’re decorating a grand foyer, a luxurious dining room, or an elegant living space, an extra large crystal chandelier can create a stunning and memorable impression.

Large Chandeliers for High Ceilings: Enhance Your Space

Large chandeliers for high ceilings can redefine the ambiance of any room, adding elegance and grandeur. Discover how these stunning fixtures can transform your space into a masterpiece.

Large Chandeliers For High Ceilings

Large Chandeliers For High Ceilings: A Perfect Blend of Style and Functionality

Large chandeliers for high ceilings are more than just lighting fixtures; they are statement pieces that create a focal point in any room. Here’s everything you need to know about choosing and installing these magnificent fixtures.

Understanding Large Chandeliers For High Ceilings

Large chandeliers are designed to complement spacious interiors with high ceilings, providing ample illumination while enhancing the aesthetic appeal of the room. These fixtures typically feature intricate designs and multiple light sources, making them ideal for grand entrances, dining rooms, and ballrooms.

Read too: Kitchen Lighting For A Vaulted Ceiling: Illuminating Your Space with Style and Functionality

Factors to Consider When Choosing Large Chandeliers For High Ceilings

1. Size and Scale

Select a chandelier that suits the scale of your space. Measure the height and width of the room to ensure the chandelier’s proportions are balanced and visually appealing.

2. Design and Style

Choose a design that complements your interior decor. Options range from classic crystal chandeliers to modern, minimalist designs. Consider the overall theme of your space to find a chandelier that enhances the ambiance.

3. Lighting Capacity

Ensure the chandelier provides sufficient light for the room. High ceilings require fixtures with multiple bulbs or larger wattage capacity to effectively illuminate the space.

4. Installation Requirements

Consider the weight and installation requirements of the chandelier. High ceilings may require professional installation due to the complexity of mounting and wiring the fixture.

Benefits of Large Chandeliers For High Ceilings

– Visual Impact

Large chandeliers serve as a striking focal point, drawing attention upward and highlighting the architectural features of high ceilings.

– Ambiance and Atmosphere

These fixtures create a luxurious ambiance, transforming ordinary rooms into elegant spaces suitable for entertaining and relaxation.

– Versatility

Large chandeliers are versatile and can be customized to suit various interior styles, from traditional to contemporary, adding character and charm to any room.

Installation Tips for Large Chandeliers For High Ceilings

– Determine Hanging Height

Ensure the chandelier hangs at an appropriate height to maximize visual impact and light distribution. Consider the viewing angles from different parts of the room.

– Use a Supportive Ceiling Mount

Install the chandelier using a sturdy ceiling mount capable of supporting its weight. Consult a professional if unsure about the structural integrity of your ceiling.

– Coordinate with Other Lighting

Supplement chandelier lighting with additional fixtures such as wall sconces or recessed lights to create layered lighting effects.

Maintenance and Care

– Cleaning and Dusting

Regularly clean the chandelier to maintain its sparkle and remove dust buildup. Use a soft cloth or duster to gently wipe each crystal or fixture.

– Bulb Replacement

Replace bulbs as needed to ensure consistent illumination. Consider energy-efficient LED bulbs to reduce energy consumption and maintenance frequency.

Conclusion

Large chandeliers for high ceilings are more than just lighting fixtures; they are symbols of luxury and sophistication. By carefully selecting and installing these fixtures, you can enhance the beauty and functionality of your space while creating a lasting impression on guests and visitors.

Chandelier Lighting for High Ceilings: Enhance Your Space with Stunning

Chandelier lighting for high ceilings adds a touch of elegance and grandeur to any space. Whether you’re designing a new home or looking to upgrade your current decor, incorporating a chandelier designed for tall ceilings can dramatically enhance the aesthetic appeal of your interior. In this comprehensive guide, we will delve into everything you need to know about chandelier lighting for high ceilings, including its benefits, considerations for installation, maintenance tips, and why it’s a popular choice among interior designers and homeowners alike.

Chandelier Lighting For High Ceilings

What is Chandelier Lighting for High Ceilings?

Chandelier lighting designed for high ceilings is specifically crafted to complement and illuminate spaces with lofty overheads. These fixtures are characterized by their size, often featuring multiple tiers and intricate designs that draw the eye upward. Whether placed in a grand foyer, dining room, or living area with high ceilings, these chandeliers serve as both functional lighting and stunning decorative elements.

Read too: Exploring the Benefits and How-Tos of DIY Ceiling Cassette Mini Split Installation: Revolutionizing Comfort

Benefits of Chandelier Lighting for High Ceilings

Visual Impact

One of the primary benefits of chandelier lighting for high ceilings is its visual impact. These fixtures command attention and serve as focal points within a room, adding a sense of luxury and sophistication. They can transform an otherwise ordinary space into a visually stunning area that impresses guests and residents alike.

Illumination and Ambiance

Chandeliers designed for tall ceilings provide ample illumination across large areas. Their placement high above the ground ensures that light is dispersed evenly, creating a well-lit environment that enhances the overall ambiance of the room. This is particularly advantageous in rooms where natural light may be limited.

Versatility in Design

From traditional crystal chandeliers to modern, minimalist designs, there is a wide range of styles available to suit various interior aesthetics. Whether your decor leans towards classic elegance or contemporary chic, you can find a chandelier that complements your design vision while making a bold statement in your space.

Space Utilization

Chandeliers for high ceilings effectively utilize vertical space, making them ideal for rooms with expansive overheads. They add depth and dimension to the room without occupying valuable floor space, allowing other elements of your decor to shine.

Choosing the Right Chandelier for High Ceilings

Factors to Consider

  1. Ceiling Height: Measure the height of your ceiling to determine the appropriate size and scale of the chandelier. A general rule of thumb is to select a fixture that leaves at least 7 feet of clearance from the floor to the bottom of the chandelier.
  2. Room Size: Consider the dimensions of the room where the chandelier will be installed. A larger room may require a more substantial chandelier to maintain visual balance, while a smaller room could benefit from a more compact design that still makes an impact.
  3. Style and Aesthetic: Choose a chandelier that complements the overall style of your home. Traditional homes may favor ornate crystal chandeliers, while modern interiors may lean towards sleek, geometric designs in materials like metal or glass.

Installation and Maintenance Tips

Installation Considerations

  • Professional Installation: Due to their size and weight, chandeliers for high ceilings often require professional installation. Ensure that the ceiling structure can support the weight of the chandelier and that electrical connections are safely secured.
  • Proper Mounting: Follow manufacturer guidelines for mounting the chandelier to ensure stability and safety. Use appropriate hardware and consider using a ceiling medallion to enhance the fixture’s aesthetic appeal.

Maintenance Practices

  • Regular Cleaning: Dust the chandelier regularly to maintain its sparkle and prevent dust buildup on crystals or glass elements. Use a soft cloth or duster to gently wipe down the surface and avoid abrasive cleaners that could damage the finish.
  • Check Electrical Components: Periodically inspect electrical connections and bulbs to ensure they are functioning correctly. Replace any burnt-out bulbs promptly and address any wiring issues to prevent safety hazards.

Why Choose Chandelier Lighting for High Ceilings?

Architectural Emphasis

Chandeliers designed for tall ceilings highlight the architectural features of your home, such as vaulted ceilings or grand staircases. They draw the eye upward, emphasizing vertical space and creating a sense of openness and grandeur.

Customization Options

Many chandeliers for high ceilings offer customization options such as adjustable heights, dimmable lights, and compatibility with smart home systems. These features allow you to personalize your lighting experience and adapt to different occasions and moods.

Investment in Quality

Investing in a high-quality chandelier for your high ceilings is an investment in both style and functionality. These fixtures are often crafted from durable materials and designed to withstand the test of time, making them a worthwhile addition to your home decor.

Popular Brands and Models

When selecting a chandelier for high ceilings, consider reputable brands known for their craftsmanship and design innovation:

  • Swarovski: Renowned for their luxurious crystal chandeliers that exude elegance and timeless beauty.
  • Schonbek: Specializes in high-end crystal chandeliers with intricate designs and superior craftsmanship.
  • Visual Comfort: Offers a range of designer chandeliers in various styles, from classic to contemporary, known for their quality and versatility.

Conclusion

Chandelier lighting for high ceilings is more than just a source of illumination; it’s a statement piece that enhances the beauty and ambiance of your living space. Whether you’re looking to add drama to a grand foyer or create an intimate dining experience, a carefully chosen chandelier can transform your home into a place of elegance and sophistication.

By understanding the benefits, considerations for installation, and maintenance tips outlined in this guide, you can confidently select the perfect chandelier for your high ceilings. Embrace the opportunity to elevate your interior design with a fixture that combines functionality with unparalleled visual appeal.

10 Foot Ceiling Fan for Your Space: Discover the Best Features

When it comes to cooling and enhancing airflow in large rooms with high ceilings, a 10-foot ceiling fan can be a game-changer. In this guide, we’ll explore the features, benefits, and installation considerations of these impressive fans, perfect for spaces with ample vertical room.

10 Foot Ceiling Fan

Understanding 10 Foot Ceiling Fans

What Sets 10 Foot Ceiling Fans Apart?

Specifically designed for rooms with high ceilings, typically ranging from 9 to 12 feet in height, 10-foot ceiling fans are larger compared to standard ones. They effectively circulate air in spacious areas while making a stylish statement.

Key Features of 10 Foot Ceiling Fans

  • Extended Blade Length: To accommodate larger rooms, 10-foot ceiling fans come with longer blades, ranging from 60 to 80 inches or more. These longer blades help maximize airflow and circulation throughout the space.
  • High-Quality Motor: A powerful motor is essential for ensuring optimal performance and efficiency, especially in rooms with high ceilings. Look for fans with high-quality motors that are designed to operate quietly and reliably.

Read too: Exploring Craftsman Style Ceiling Fans for Your Home: Embracing Timeless Elegance

Benefits of Installing a 10 Foot Ceiling Fan

Improved Air Circulation

In rooms with tall ceilings, air tends to stratify, with warmer air rising to the top and cooler air settling near the floor. A 10-foot ceiling fan helps combat this issue by gently circulating air throughout the space, promoting more consistent temperatures and reducing the need for supplemental heating or cooling.

Enhanced Aesthetics

Beyond their functional benefits, 10-foot ceiling fans can also serve as stylish focal points in larger rooms. With a variety of designs, finishes, and blade options available, you can find a fan that complements your décor and adds visual interest to your space.

Installation Considerations

Height and Clearance Requirements

Before installing a 10-foot ceiling fan, ensure that you have adequate clearance between the fan blades and the ceiling, as well as between the blades and any walls or obstacles. This will prevent airflow obstruction and ensure safe operation.

Professional Installation

Due to their size and weight, installing a 10-foot ceiling fan may require professional assistance. Hiring a licensed electrician or contractor can ensure secure mounting and proper balancing of the fan for optimal performance.

Conclusion

A 10-foot ceiling fan is a practical and stylish addition to any large room with high ceilings. By understanding its features, benefits, and installation considerations, you can select the perfect fan to improve airflow, enhance comfort, and elevate the aesthetics of your space.

Long Chandeliers for High Ceilings: Elevate Your Space with Stunning

Long chandeliers for high ceilings offer a striking combination of elegance and grandeur, making them the perfect focal point for any room. In this article, we’ll explore the beauty and functionality of long chandeliers designed specifically for high ceilings, as well as how they can enhance the aesthetic appeal of your living spaces.

Long Chandeliers For High Ceilings

Understanding Long Chandeliers for High Ceilings

Long chandeliers, also known as linear chandeliers or rectangular chandeliers, are characterized by their elongated shape and multiple light sources. These chandeliers are specifically designed to complement high ceilings, adding visual interest and drama to expansive spaces such as entryways, foyers, and great rooms.

Features of Long Chandeliers for High Ceilings

  1. Impressive Size: Long chandeliers are typically larger in scale compared to traditional chandeliers, making them well-suited for rooms with high ceilings where they can make a bold statement.
  2. Linear Design: Unlike traditional chandeliers that feature a circular or spherical design, long chandeliers have a linear or rectangular shape, providing a modern and sophisticated aesthetic.
  3. Multiple Light Sources: Long chandeliers often feature multiple light sources arranged along the length of the fixture, ensuring ample illumination for large spaces.
  4. Variety of Styles: From sleek and contemporary to ornate and traditional, long chandeliers are available in a wide range of styles to suit any decor preference.

Benefits of Long Chandeliers for High Ceilings

  1. Enhanced Visual Impact: Long chandeliers draw the eye upward, accentuating the height of high ceilings and creating a sense of spaciousness and grandeur.
  2. Dramatic Lighting: With their multiple light sources, long chandeliers provide even illumination throughout the room, creating a warm and inviting ambiance.
  3. Versatile Placement: Long chandeliers are not limited to entryways or dining rooms; they can also be installed in living rooms, kitchens, and bedrooms to add drama and sophistication to any space.
  4. Customizable Options: Many long chandelier designs offer customization options such as adjustable height, finish choices, and dimmable lighting, allowing you to tailor the fixture to your specific needs and preferences.

Choosing the Right Long Chandelier for Your Space

When selecting a long chandelier for your high-ceilinged room, consider the following factors:

  1. Ceiling Height: Measure the height of your ceiling to ensure the chandelier is proportionate to the space and allows for adequate clearance.
  2. Style and Finish: Choose a chandelier style and finish that complements your existing decor and enhances the overall aesthetic of the room.
  3. Light Output: Consider the desired level of illumination and choose a chandelier with sufficient light sources to adequately brighten the room.
  4. Installation Requirements: Determine whether professional installation is required based on the size and weight of the chandelier, as well as any electrical considerations.

Installing Long Chandeliers for High Ceilings

Installing a long chandelier for a high ceiling requires careful planning and execution to ensure safety and proper functionality. Consider hiring a licensed electrician or professional installer to handle the installation process, especially if it involves working at heights or making electrical connections.

Conclusion

Long chandeliers for high ceilings offer a stunning combination of style and functionality, adding drama and sophistication to any room. Whether you prefer a sleek modern design or a more traditional aesthetic, there’s a long chandelier option to suit your taste and complement your space. Elevate your home with the timeless elegance of long chandeliers for high ceilings and transform your living spaces into captivating works of art.

Read too: Striped Schoolhouse Ceiling Light Fixtures: Unveiling the Timeless Charm

Exploring Modern LED Chandeliers for High Ceilings: Illuminate Your Space

High ceilings offer a sense of grandeur and spaciousness to any room, but finding the right lighting fixtures to complement such spaces can be a challenge. Modern LED chandeliers for high ceilings provide the perfect solution, offering both style and functionality to illuminate large areas with ease. In this guide, we’ll delve into the world of modern LED chandeliers designed specifically for high ceilings, exploring various styles, installation considerations, and benefits for your space.

Modern Led Chandeliers For High Ceilings
Version 1.0.0

Understanding Modern LED Chandeliers for High Ceilings

Modern LED chandeliers are a popular choice for contemporary interiors, offering energy-efficient lighting solutions with sleek and stylish designs. When it comes to high ceilings, these chandeliers are particularly well-suited due to their ability to provide ample illumination across expansive areas while adding a touch of elegance and sophistication to the space.

Read too: Understanding and Dealing with Ants in the Ceiling Spaces: Navigating the Intrusion

Exploring Styles and Designs

Modern LED chandeliers come in a wide range of styles and designs to suit various aesthetic preferences and interior themes. Some popular options for high ceilings include:

  • Sleek and Minimalist: Minimalist chandeliers with clean lines and simple designs offer a modern and understated look that complements contemporary interiors with high ceilings.
  • Crystal and Glass: Crystal and glass chandeliers add a touch of glamour and luxury to high-ceilinged spaces, creating a dazzling focal point that enhances the overall ambiance.
  • Industrial and Urban: For a more urban and industrial aesthetic, consider chandeliers with metal accents, exposed bulbs, and geometric shapes, adding a touch of edgy sophistication to your space.

Installation Considerations

When installing modern LED chandeliers in rooms with high ceilings, there are several factors to consider to ensure optimal performance and aesthetics:

  • Height and Scale: Choose a chandelier size and height that complements the proportions of the room and the height of the ceiling. Opt for larger fixtures with multiple tiers for grand spaces, while smaller rooms may benefit from more streamlined designs.
  • Mounting Options: Depending on the height of your ceiling, you may need to consider different mounting options for your chandelier, such as flush mount, semi-flush mount, or adjustable suspension systems.
  • Dimming Capabilities: Select chandeliers with dimming capabilities to provide flexibility in lighting levels and create the desired ambiance for different occasions and activities.

Benefits of Modern LED Chandeliers for High Ceilings

Investing in modern LED chandeliers for high ceilings offers several benefits for homeowners and interior designers alike:

  • Energy Efficiency: LED technology provides energy-efficient lighting solutions that help reduce electricity consumption and lower utility costs over time.
  • Longevity: LED bulbs have a longer lifespan compared to traditional incandescent or fluorescent bulbs, reducing the frequency of bulb replacements and maintenance.
  • Customization: LED chandeliers offer customizable lighting options, allowing users to adjust brightness levels, color temperatures, and even control lighting remotely via smart devices.

Conclusion

Modern LED chandeliers for high ceilings offer a perfect blend of style, functionality, and energy efficiency, making them an ideal choice for illuminating expansive spaces with elegance and sophistication. Whether you prefer sleek and minimalist designs or glamorous crystal accents, there’s a modern LED chandelier to suit your high-ceilinged space perfectly.

By understanding the various styles, installation considerations, and benefits of modern LED chandeliers, you can make informed decisions to enhance the ambiance and visual appeal of your home or commercial space.

Extra Large Modern Chandeliers For High Ceiling: Elevate Your Space

Illuminate your home in style with Extra Large Modern Chandeliers For High Ceiling, the epitome of elegance and sophistication. Discover how these stunning fixtures can transform your space into a breathtaking masterpiece.

Extra Large Modern Chandeliers For High Ceilings

Introduction

Chandeliers have long been associated with luxury and grandeur, serving as focal points in any room they adorn. However, for spaces with high ceilings, finding the perfect chandelier can be a challenge. Enter Extra Large Modern Chandeliers For High Ceilings – the solution to your lighting woes. In this article, we’ll explore the beauty and functionality of these statement pieces and why they’re the perfect choice for tall spaces.

Understanding Extra Large Modern Chandeliers For High Ceilings

What sets these chandeliers apart?

Extra Large Modern Chandeliers For High Ceilings actively enhance tall spaces, making a bold statement while actively providing ample illumination. These fixtures feature sleek, contemporary designs that add a touch of modern sophistication to any room.

Benefits of Extra Large Modern Chandeliers For High Ceilings

  1. Dramatic Impact: With their impressive size and striking designs, Extra Large Modern Chandeliers For High Ceilings command attention and instantly elevate the ambiance of any room.
  2. Optimal Lighting: High ceilings can often result in poor lighting distribution, but Extra Large Modern Chandeliers are equipped to illuminate even the largest of spaces with ease, ensuring every corner is bathed in warm, inviting light.
  3. Contemporary Style: Unlike traditional chandeliers, which may feel outdated in modern spaces, Extra Large Modern Chandeliers boast sleek lines and innovative designs that complement contemporary interiors perfectly.
  4. Versatile Placement: While these chandeliers are ideal for high ceilings, their versatility allows them to enhance the beauty of any space, whether it’s a grand foyer, dining room, or even a commercial venue.

Applications of Extra Large Modern Chandeliers For High Ceilings

Extra Large Modern Chandeliers For High Ceilings are suitable for a variety of settings, including:

  • Luxury Homes: Make a statement in your high-ceilinged living room or foyer with a dazzling Extra Large Modern Chandelier that exudes elegance and sophistication.
  • Hotel Lobbies: Create a memorable first impression for guests with a show-stopping chandelier that adds a touch of opulence to your hotel’s entrance.
  • Event Spaces: Whether it’s a wedding venue or a corporate event space, Extra Large Modern Chandeliers can enhance the atmosphere and leave a lasting impression on attendees.

Conclusion

In conclusion, Extra Large Modern Chandeliers For High Ceiling are more than just lighting fixtures – they’re works of art that can transform any space into a luxurious haven. With their dramatic impact, optimal lighting, and contemporary style, these chandeliers are the perfect choice for spaces with soaring ceilings. Elevate your home or commercial venue with the timeless beauty of Extra Large Modern Chandeliers For High Ceilings today.

Read too: Exploring the Benefits and How-Tos of DIY Ceiling Cassette Mini Split Installation: Revolutionizing Comfort

Essential Guide to Scaffolding for High Ceilings: Safety, Types, and Usage Tips

Are you planning to work on projects in spaces with lofty ceilings? Whether it’s painting, maintenance, or construction, accessing high ceilings safely and efficiently requires the right equipment. In this comprehensive guide, we’ll explore everything you need to know about scaffolding for high ceilings, including safety considerations, types of scaffolding, and practical usage tips.

Scaffolding For High Ceilings

Understanding Scaffolding for High Ceilings

What Is Scaffolding?

Scaffolding is a temporary structure used to support workers and materials during construction, maintenance, or repair tasks. It provides a stable platform for working at heights, ensuring safety and productivity.

Scaffolding for High Ceilings

When working in spaces with high ceilings, standard scaffolding may not suffice. Specialized scaffolding designed for high ceilings offers additional height and stability to accommodate the unique requirements of such environments.

Safety Considerations

1. Stability

  • Ensure that the scaffolding structure is stable and securely anchored to the ground or floor.
  • Regularly inspect the scaffolding components for signs of damage or wear and tear.

2. Fall Protection

  • Install guardrails, toe boards, and safety nets to prevent falls from elevated platforms.
  • Provide workers with personal protective equipment, including harnesses and lanyards.

3. Weight Capacity

  • Adhere to the manufacturer’s weight capacity specifications for the scaffolding system.
  • Avoid overloading the scaffolding with excessive materials or equipment.

Types of Scaffolding for High Ceilings

1. Suspended Scaffolding

  • Suspended scaffolding hangs from the ceiling using ropes or chains, providing access to elevated areas with minimal obstruction.
  • It is ideal for tasks such as painting, maintenance, or window cleaning in high-ceilinged spaces.

2. Mobile Scaffolding Towers

  • Mobile scaffolding towers feature wheels or casters, allowing for easy movement and positioning within a workspace.
  • They offer flexibility and accessibility for various tasks, including installation, repairs, or renovations in high-ceilinged areas.

3. Cantilever Scaffolding

  • Cantilever scaffolding extends horizontally from a supporting structure, providing access to areas beyond obstacles or obstructions.
  • It is commonly used in industrial settings with high ceilings, such as warehouses or manufacturing facilities.

Practical Usage Tips for Scaffolding in High Ceilings

1. Proper Assembly

  • Follow the manufacturer’s instructions carefully when assembling the scaffolding system.
  • Ensure that all components are securely connected and in good condition before use.

2. Regular Inspections

  • Conduct routine inspections of the scaffolding for any signs of damage, instability, or malfunction.
  • Address any issues promptly and refrain from using damaged scaffolding.

Read too: Discovering the Charm of Nautical Outdoor Ceiling Fans for Your Coastal Retreat: Sail into Style

3. Training and Supervision

  • Provide workers with comprehensive training on scaffold usage, safety procedures, and fall prevention measures.
  • Assign a competent person to supervise scaffold erection, usage, and dismantling processes.

Conclusion

Scaffolding for high ceilings plays a crucial role in enabling safe and efficient work at elevated heights. By understanding the safety considerations, types, and practical usage tips outlined in this guide, you can ensure the successful completion of projects in spaces with lofty ceilings while prioritizing worker safety.

A Complete Guide to Choosing the Perfect Crystal Chandelier for High Ceiling

Crystal Chandelier for High Ceiling. A crystal chandelier is a stunning lighting fixture that can add a touch of glamour and sophistication to any room. They are especially well-suited for spaces with high ceilings, where they can make a dramatic statement.

Crystal Chandelier For High Ceiling

When choosing a crystal chandelier for a high ceiling, there are a few factors to consider:

  • The size of the room: The size of the room will affect the size of the chandelier you choose. A small room will be overwhelmed by a large chandelier, while a large room will look bare with a small chandelier.
  • The height of the ceiling: The height of the ceiling will also affect the size of the chandelier you choose. A chandelier that is too small will get lost in a high-ceilinged room, while a chandelier that is too large will be overbearing.
  • The style of the room: The style of the room will also affect the type of chandelier you choose. A traditional room will look best with a traditional chandelier, while a modern room will look best with a modern chandelier.
  • Your budget: Crystal chandeliers can range in price from a few hundred dollars to several thousand dollars. It’s important to set a budget before you start shopping so that you don’t overspend.

Types of Crystal Chandeliers

There are many different types of crystal chandeliers available, so you’re sure to find one that is perfect for your taste and décor. Some of the most popular types of crystal chandeliers include:

  • Traditional chandeliers: Traditional chandeliers are characterized by their ornate designs and use of crystals. They are perfect for formal dining rooms and living rooms.
  • Modern chandeliers: Modern chandeliers are characterized by their sleek and simple designs. They are perfect for contemporary living spaces.
  • Empire chandeliers: Empire chandeliers are characterized by their tall, slender frames and use of crystal drops. They are perfect for foyers and entryways.
  • Maria Theresa chandeliers: Maria Theresa chandeliers are characterized by their cascading tiers of crystals. They are perfect for ballrooms and grand dining rooms.

Caring for Your Crystal Chandelier

Crystal chandeliers are delicate fixtures that require regular care. Here are a few tips for keeping your crystal chandelier looking its best:

  • Dust the chandelier regularly: Use a soft, dry cloth to dust the chandelier. Avoid using harsh chemicals or cleaners, as these can damage the crystals.
  • Clean the crystals regularly: Crystals can become dirty over time. To clean the crystals, mix a solution of warm water and mild dish soap. Dip a soft cloth in the solution and gently wipe the crystals.
  • Replace broken crystals: If any of the crystals on your chandelier break, it’s important to replace them as soon as possible. Broken crystals can make the chandelier look unsightly and can also be dangerous.

Conclusion

A crystal chandelier is a beautiful and elegant addition to any home. By following the tips in this guide, you can choose the perfect crystal chandelier for your space and keep it looking its best for years to come.