When dealing with low ceilings, one of the most common challenges is maintaining proper airflow without compromising the aesthetics or comfort of a room. Ceiling fans for a low ceiling can provide an effective solution, ensuring that you have adequate ventilation without sacrificing headroom. Whether you’re renovating your home, moving into a new place, or just looking to upgrade your existing space, choosing the right ceiling fan is essential for both functionality and style.
This article will explore the best ceiling fans for a low ceiling, the factors to consider when choosing the right one, and how to install and maintain it for long-lasting performance. Let’s dive into why ceiling fans are ideal for low ceilings and how they can improve your home environment.
Why Choose Ceiling Fans for Low Ceilings?
Many people believe that ceiling fans are only suitable for rooms with high ceilings, but that’s not the case. Ceiling fans for low ceilings are specifically designed to work in smaller spaces, making them ideal for apartments, basements, and homes with low or vaulted ceilings. The benefits of these fans go far beyond just keeping the air moving. Here are some key reasons to consider installing a ceiling fan in a room with low ceilings:
1. Efficient Air Circulation
The primary function of a ceiling fan is to circulate air, and this is especially crucial in rooms with low ceilings. The fans help to keep the air cool in summer and circulate warm air during winter. In the winter, fans can help redistribute warm air that rises, making rooms more comfortable year-round. With a low-profile ceiling fan, you won’t have to worry about blocking airflow or causing discomfort in lower spaces.
Read too: Bathroom Flooded Through the Ceiling: A Comprehensive Guide
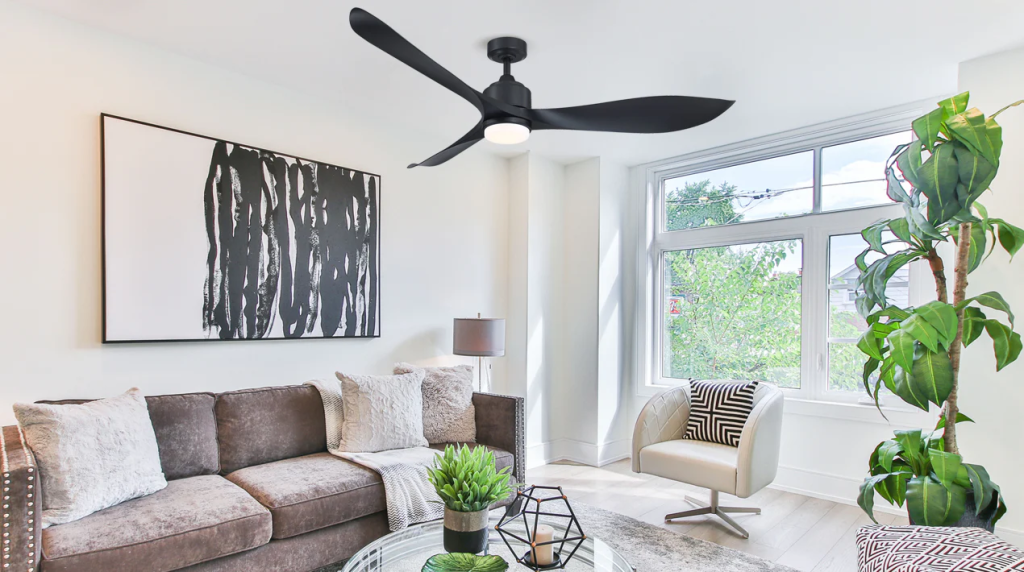
2. Aesthetic Appeal
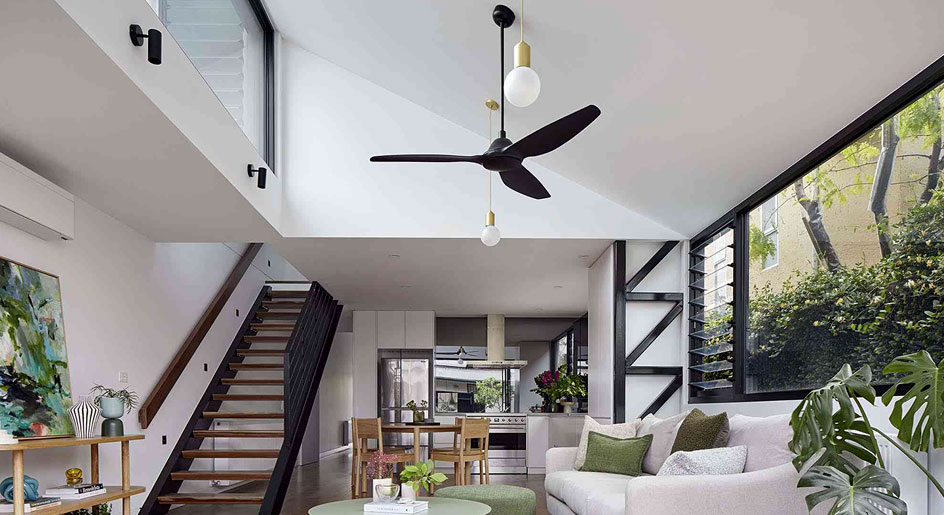
A properly chosen ceiling fan can enhance the overall look of your room. With options available in various colors, finishes, and styles, you can find a fan that matches the decor of any room. Whether you’re looking for something sleek and modern or more traditional, ceiling fans for a low ceiling can complement your space without overpowering it. Additionally, choosing a fan that suits your room’s aesthetic can make a small space feel more stylish and inviting.
3. Energy Efficiency
Ceiling fans are energy-efficient compared to air conditioners. They consume less power while providing the same level of cooling and comfort. In rooms with low ceilings, these fans are particularly effective because they don’t need to work as hard to circulate the air. As a result, you can save money on energy bills while ensuring that the space is comfortable all year long.
4. Maximizing Limited Space
Rooms with low ceilings often feel cramped or stuffy due to the lack of airflow. Installing a ceiling fan can maximize the usable space by circulating air throughout the room without taking up valuable headroom. Modern ceiling fans for low ceilings are designed to be compact and unobtrusive, ensuring that the space still feels open and airy.
How to Choose the Best Ceiling Fans for Low Ceilings
When choosing a ceiling fan for a low ceiling, several factors need to be considered. Not all ceiling fans are the same, and selecting the right one can greatly affect both the performance and look of the room. Here are some essential considerations to keep in mind:
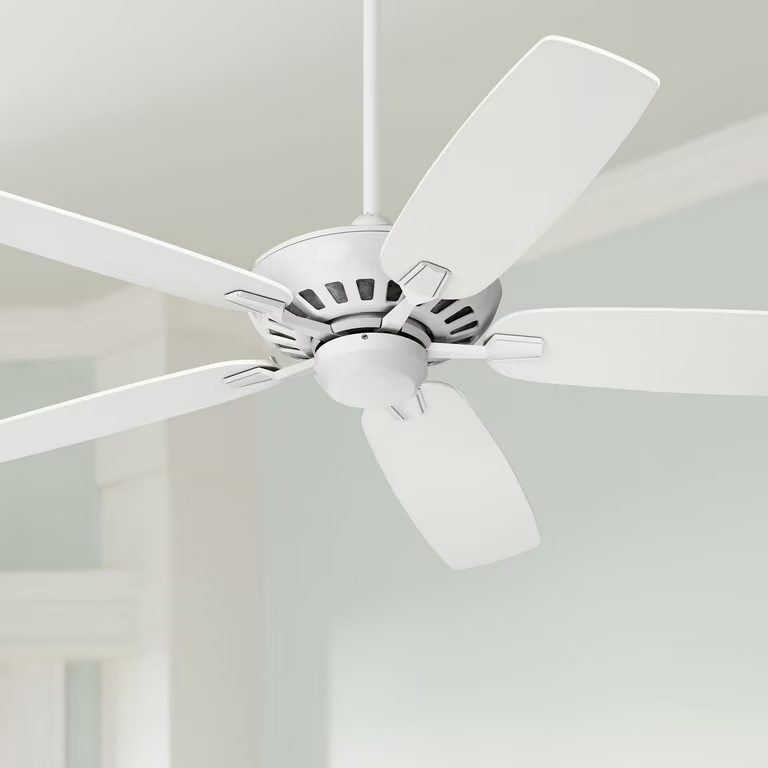
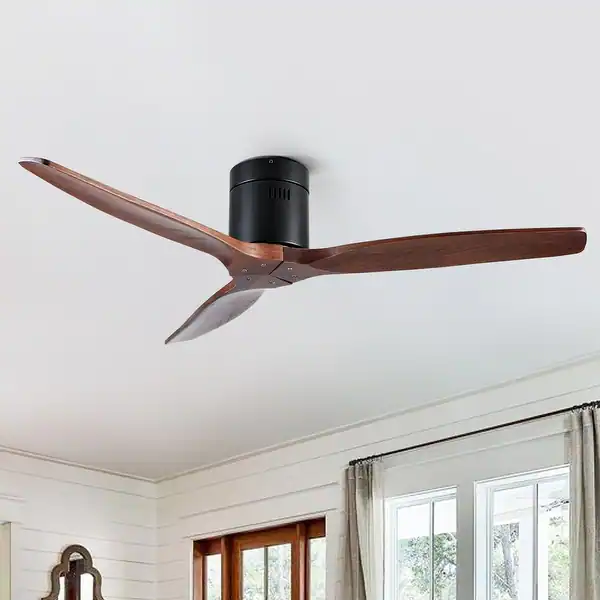
1. Low-Profile Design
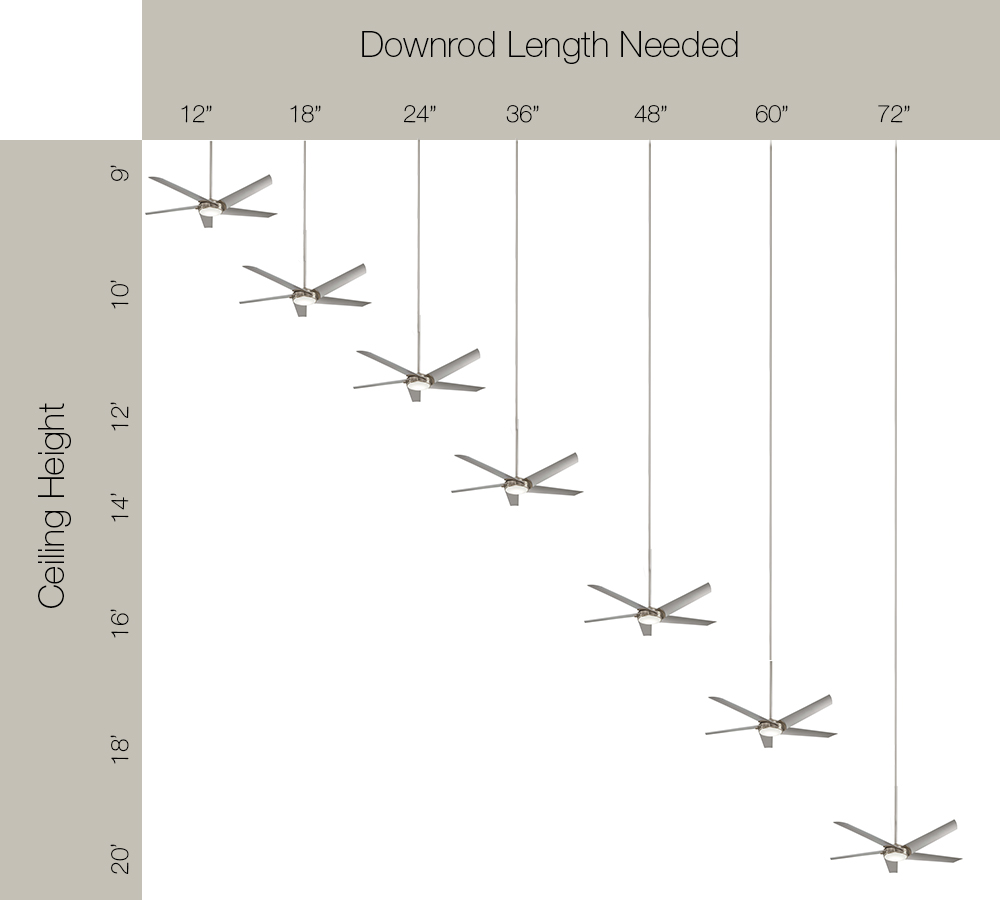
The key feature of ceiling fans for low ceilings is their low-profile design, which helps maximize headroom while still providing ample airflow. These fans are specifically designed to hug the ceiling and prevent any obstruction to movement in rooms with lower ceilings. Look for fans labeled “hugger” or “flush mount,” as they are perfect for spaces with ceilings lower than eight feet.
2. Blade Size and Number
The size of the blades affects the airflow in the room. For smaller rooms, a fan with a blade span of 42 inches is typically ideal. If the room is larger, you might want to consider a fan with a larger blade span. However, for rooms with low ceilings, it’s best to choose a fan with a blade span that doesn’t overwhelm the space.
The number of blades on a fan can also impact its performance. While most ceiling fans have three to five blades, fans with more blades tend to be quieter but may not circulate as much air. Choose a fan with the number of blades that suits both your airflow needs and your style preferences.
3. Motor Power
The motor is one of the most important components of a ceiling fan. A high-quality motor will ensure smooth operation and durability. For ceiling fans for low ceilings, look for fans with energy-efficient motors that can provide strong airflow without making a lot of noise. Ideally, the motor should be able to provide consistent airflow in smaller rooms without feeling overworked.
4. Lighting Options
Many ceiling fans come with integrated light kits, which can be a great option for rooms that need extra lighting. However, it’s important to ensure that the light doesn’t overpower the fan. Choose a fan with an adjustable light kit or a dimmer switch to provide versatile lighting options for your room.
5. Style and Finish
Since ceiling fans for low ceilings can become an integral part of a room’s design, the style and finish of the fan are crucial. You can choose from a range of finishes like brushed nickel, matte black, antique bronze, or white to match the decor of your room. You can also select from various blade materials, such as wood, metal, or plastic, to achieve a particular aesthetic.
Top Ceiling Fan Options for Low Ceilings
Now that we’ve covered the essential factors, let’s take a look at some of the best ceiling fans for low ceilings. These options are popular for their performance, design, and suitability for small spaces:
1. Hunter Fan Company Low-Profile Ceiling Fan
Hunter fans are known for their reliable performance and modern designs. The Hunter Low-Profile Ceiling Fan is designed to work in spaces with low ceilings, offering a sleek, flush mount option that doesn’t compromise on airflow. Available in various finishes, this fan can complement any room while providing consistent cooling.
2. Harbor Breeze Mazon Ceiling Fan
The Harbor Breeze Mazon Ceiling Fan is another excellent choice for low ceilings. Its modern, minimalist design features three blades that provide maximum airflow while maintaining a low profile. It also includes an integrated light kit, perfect for illuminating small rooms or spaces with limited light.
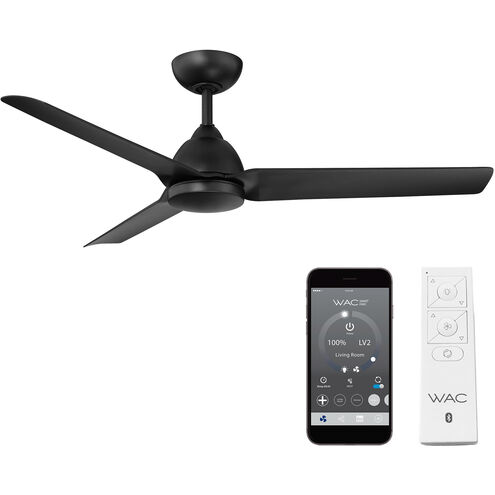
3. Westinghouse Lighting 7876400 Ceiling Fan
If you’re looking for a budget-friendly option that still delivers high-quality performance, the Westinghouse Lighting 7876400 Ceiling Fan is a great choice. Its compact design and energy-efficient motor make it ideal for low-ceiling rooms, and the fan comes with a remote control for added convenience.
4. Craftmade 44-Inch Low-Profile Ceiling Fan
Craftmade fans are designed with performance and style in mind. The 44-inch Low-Profile Ceiling Fan is perfect for smaller rooms with lower ceilings. It features a quiet motor, multiple speed settings, and a sleek, contemporary design that suits a variety of home styles.
How to Install a Ceiling Fan for a Low Ceiling
Installing a ceiling fan in a room with a low ceiling requires some special considerations. Here’s a step-by-step guide to help you install your ceiling fans for low ceilings:
1. Turn Off Power
Before starting, always ensure the power is turned off at the circuit breaker to avoid any electrical accidents.
2. Mount the Bracket
Begin by attaching the mounting bracket to the ceiling. Make sure it is secured tightly, as this will support the weight of the fan. For flush mount fans, ensure that the bracket is as close to the ceiling as possible.
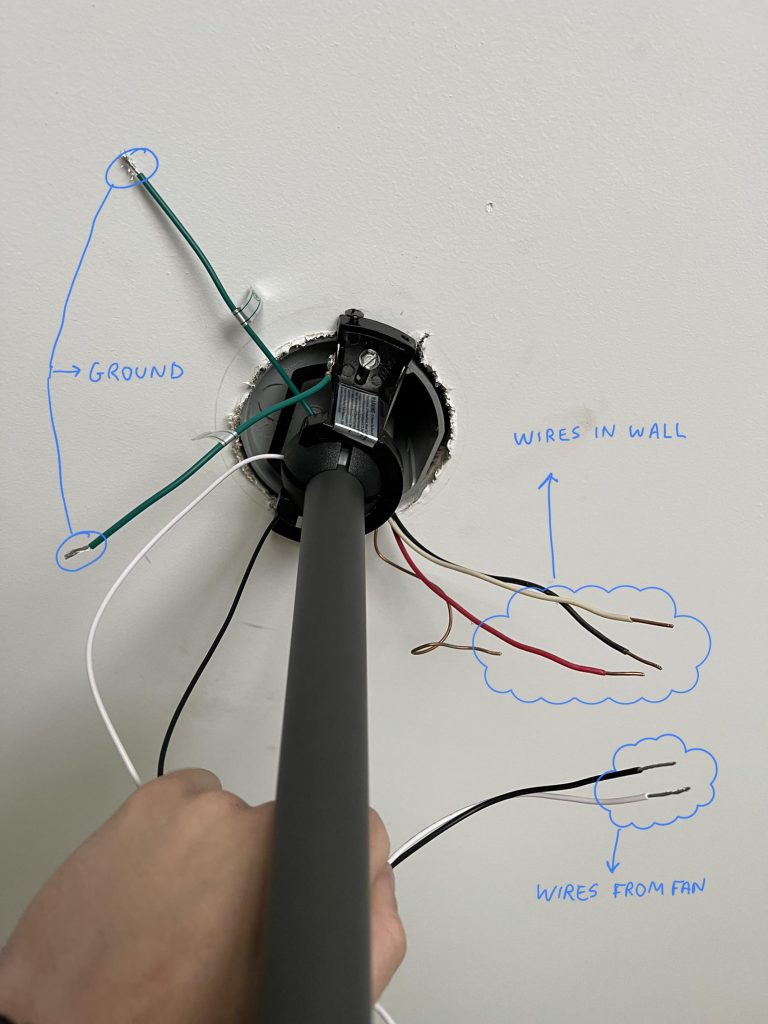
3. Connect the Wires
Once the bracket is in place, connect the electrical wires from the fan to the corresponding wires in your ceiling. If you’re not comfortable with electrical work, it’s always best to hire a professional to handle this step.
4. Install the Fan Blades
Once the fan motor is securely mounted, attach the fan blades according to the manufacturer’s instructions. Ensure that each blade is properly tightened and aligned.
5. Add the Light Kit (If Applicable)
If your fan includes a light kit, install the light bulbs and any additional parts as directed in the instruction manual. Be sure to choose light bulbs that are compatible with the fan.
6. Test the Fan
Once everything is installed, turn the power back on and test the fan. Ensure it operates smoothly, and that the airflow is adequate for your space.
Conclusion
Ceiling fans for low ceilings offer a practical and stylish solution for smaller rooms that need better airflow and lighting. By choosing the right fan with a low-profile design, adjustable lighting options, and powerful motor, you can enjoy a more comfortable and visually appealing space. Whether you’re upgrading an existing room or building a new one, a well-chosen ceiling fan can make all the difference in creating a cozy, functional environment.
With the information in this article, you are now ready to select and install the perfect ceiling fan for your low-ceiling space. Enjoy the comfort, energy savings, and style that come with the right ceiling fan choice!