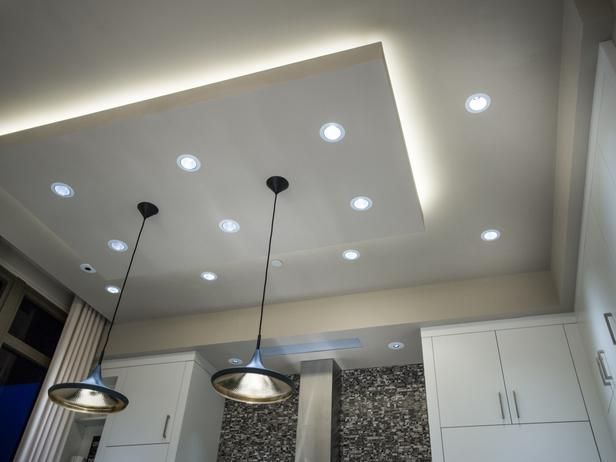
Drop Ceiling Black Grid Design: Transform Your Space with a Stylish

Drop ceilings, also known as suspended ceilings, have become a popular choice for modern interiors. They are practical, versatile, and capable of enhancing the aesthetic of any space. One standout option is the Drop Ceiling Black Grid, which adds a bold and contemporary touch to commercial and residential areas alike.

Drop Ceiling Black Grid

In this article, we’ll delve into the features, benefits, installation process, and design inspirations for a drop ceiling black grid, helping you determine if this option is right for your project.


What Is a Drop Ceiling Black Grid?

A drop ceilings black grid is a type of suspended ceiling where the grid system, typically used to support ceiling tiles, is finished in a sleek black color. The black grid creates a striking visual contrast against light-colored tiles or enhances a minimalist aesthetic with darker tones.

Read too: Shiplap Ceiling in Kitchen: A Timeless Trend for a Stylish and Cozy Space

Features of a Drop Ceiling Black Grid:

  • Material: Usually made of durable metal or high-quality plastic.
  • Finish: Powder-coated or painted in black for a smooth, matte, or glossy finish.
  • Size Options: Grids come in standard sizes to fit common tile dimensions, such as 2×2 feet or 2×4 feet.

Benefits of a Drop Ceiling Black Grid

1. Aesthetic Appeal

The black grid brings a contemporary and industrial look to interiors, making it ideal for offices, retail stores, restaurants, and modern homes.

2. Enhanced Depth

A black grid contrasts beautifully with lighter tiles, creating an illusion of depth and dimension in the room.

3. Versatility

It complements a variety of design themes, from industrial chic to minimalist and even urban modern.

4. Conceals Imperfections

Like all drop ceilings, it hides electrical wiring, ductwork, and other structural elements while still providing easy access for maintenance.

5. Improved Acoustics

Paired with acoustic tiles, a drop ceiling black grid can significantly reduce noise levels, enhancing comfort in busy spaces.

6. Customizable Options

Black grids can be paired with different tile designs, from sleek plain tiles to decorative patterns, for a personalized touch.


Where to Use a Drop Ceiling Black Grid

1. Commercial Spaces

Black grids are often seen in offices, restaurants, and retail stores, creating a modern and professional atmosphere.

2. Basements

In residential homes, a drop ceiling black grid can elevate basement spaces, making them functional and stylish.

3. Theaters and Entertainment Areas

The dark grid reduces light reflection, making it ideal for home theaters or performance venues.

4. Industrial-Style Homes

A black grid complements exposed brick walls, metal accents, and other industrial design elements.


Installation of a Drop Ceiling Black Grid

Step 1: Measure the Space

Determine the dimensions of the area where the grid will be installed.

Step 2: Choose the Right Materials

Select a black grid system that matches your tile size and weight requirements.

Step 3: Prepare the Ceiling

Clear the area, ensure proper ventilation, and mark the layout for the grid system.

Step 4: Install the Grid System

  • Attach wall angles along the perimeter of the room.
  • Hang main runners and cross tees using wires anchored to the ceiling joists.
  • Ensure the grid is level and secure.

Step 5: Insert Ceiling Tiles

Place tiles into the grid, ensuring a snug and even fit.

Step 6: Test the Setup

Check for stability and alignment. Make adjustments as needed.


Maintenance Tips for a Drop Ceiling Black Grid

  1. Regular Cleaning
    Dust and clean the grid with a microfiber cloth to maintain its appearance.
  2. Inspect for Damage
    Regularly check for loose tiles or grid sections and repair them promptly.
  3. Repaint If Necessary
    Over time, touch up scratches or discoloration with matching black paint.
  4. Keep It Dry
    Ensure no water leakage from above, as prolonged exposure can damage the tiles and grid.

Design Ideas for a Drop Ceiling Black Grid

1. Monochrome Theme

Pair the black grid with white or light gray tiles for a clean, high-contrast look.

2. Industrial Vibes

Combine the black grid with exposed pipes and metal lighting fixtures for an industrial feel.

3. Bold Accents

Use decorative tiles with metallic or patterned designs to add character.

4. Open Concept

In spaces with high ceilings, use a black grid with recessed lighting to create a sense of openness.


Why Choose a Drop Ceiling Black Grid?

If you’re aiming for a modern aesthetic while retaining functionality, a drop ceiling black grid is an excellent choice. It enhances the visual appeal of any room, offers practical benefits like soundproofing and easy maintenance, and works well with various interior styles.


Cost Considerations

The cost of a drop ceiling black grid depends on factors such as:

  • Material Quality: Metal grids are more expensive than plastic ones.
  • Tile Selection: Premium acoustic or decorative tiles add to the overall cost.
  • Installation: DIY installations are cost-effective, but hiring professionals ensures a polished finish.

FAQs

1. Can I install a black grid in a residential home?

Absolutely! Black grids work well in basements, home theaters, and modern living areas.

2. Are black grids more expensive than standard grids?

Typically, black grids may cost slightly more due to their unique finish and style.

3. How do I clean and maintain a black grid ceiling?

Use a microfiber cloth for regular cleaning, and avoid abrasive cleaners that may damage the finish.

4. What types of tiles work best with black grids?

White tiles, acoustic tiles, or tiles with metallic patterns pair beautifully with black grids.


Conclusion

A Drop Ceiling Black Grid offers a perfect blend of functionality and aesthetics for any space. Whether you’re designing an office, a retail store, or a stylish home interior, the sleek black grid creates a bold, contemporary look while maintaining practicality.

From installation to maintenance, this guide equips you with all the information needed to make an informed decision. Start exploring your options and transform your space with the modern elegance of a drop ceiling black grid.

Tin Ceiling Tiles For Drop Ceiling: Adding Elegance and Durability to Your Space

When it comes to drop ceilings, tin ceiling tiles offer a stylish, practical, and durable option. Whether you’re looking to revamp a commercial space, enhance a historic home, or add a unique touch to your modern interior, tin ceiling tiles bring both style and resilience to your design. Available in various patterns and finishes, these tiles can turn an ordinary ceiling into a standout feature of any room. In this article, we’ll explore the benefits, styles, installation tips, and care practices for tin ceiling tiles, giving you all the information you need to make the best choice for your space.

Tin Ceiling Tiles For Drop Ceiling

What Are Tin Ceiling Tiles for Drop Ceilings?

Tin ceiling tiles are metal tiles made from tin-plated steel or aluminum, often designed with ornate patterns that evoke a vintage aesthetic. Originally popular in the late 19th and early 20th centuries, tin ceiling tiles are now making a comeback in modern interior design due to their durability, visual appeal, and fire-resistant properties. When used for a drop ceiling—an easy-to-install secondary ceiling suspended below the main ceiling—these tiles add a layer of texture and elegance that elevates the room’s appearance.

Key Characteristics of Tin Ceiling Tiles for Drop Ceilings:

  1. Aesthetic Variety: Tin tiles are available in a range of patterns, from simple designs to intricate floral or geometric patterns.
  2. Durability: The metal construction makes these tiles resistant to cracking, warping, and sagging.
  3. Easy Maintenance: Tin tiles are easy to clean and maintain, making them suitable for high-traffic areas.
  4. Fire-Resistant: Metal tiles add an extra layer of fire protection, making them ideal for commercial or residential spaces.

Benefits of Using Tin Ceiling Tiles for Drop Ceilings

Tin ceiling tiles bring numerous benefits, making them a popular choice for both modern and vintage-inspired designs.

1. Stylish and Unique Design

One of the main reasons homeowners and designers choose tin ceiling tiles is their unique style. These tiles provide an attractive visual element that becomes a focal point in any room. Whether you prefer an antique look with traditional patterns or a sleek, contemporary style with minimalist designs, tin ceiling tiles offer a wide range of aesthetic options.

Read too: Kitchen Lighting For A Vaulted Ceiling: Illuminating Your Space with Style and Functionality

2. Long-Lasting Durability

Tin ceiling tiles are far more durable than standard drop ceiling tiles, which are often made from soft materials like gypsum or fiberglass. The metal construction of tin tiles makes them resistant to damage from moisture, pests, and impact. This durability means they’re a long-term investment for both homes and businesses, with a lifespan that far exceeds many other ceiling materials.

3. Easy Installation with Drop Ceiling Grid Systems

Most tin tiles are designed to fit within standard drop ceiling grid systems, making installation straightforward and manageable, even for DIYers. Drop ceilings allow easy access to plumbing, electrical work, and HVAC systems above the ceiling, which is a significant advantage in commercial or basement spaces.

4. Fire Resistance

Tin is inherently fire-resistant, providing an additional layer of protection in case of a fire. This makes tin tiles a smart choice for both commercial buildings and residential spaces where safety is a priority.

5. Reflective Qualities

The metallic surface of tin tiles reflects light, which can make a room feel brighter and more spacious. In spaces with limited natural light, this added reflectivity can help reduce the need for additional lighting.


Styles of Tin Ceiling Tiles for Drop Ceilings

Tin ceiling tiles are available in various styles, catering to different design aesthetics. Here are some of the most popular options:

1. Classic Victorian Patterns

Inspired by the opulent designs of the late 19th century, Victorian-style tin ceiling tiles feature intricate patterns and decorative flourishes. These tiles are ideal for historic homes, antique shops, or spaces where a vintage aesthetic is desired.

2. Modern Geometric Designs

For those who prefer a modern look, tin tiles with simple geometric patterns provide a contemporary twist. These designs often feature straight lines, repeating shapes, and a minimalist approach that works well in modern, industrial, or minimalist interiors.

3. Rustic and Faux Aged Finishes

Rustic tin tiles come in distressed or aged finishes that give them an antique appearance without the need for genuine vintage tiles. These tiles are great for spaces with a farmhouse, industrial, or eclectic design, adding warmth and character.

4. Art Deco and Mid-Century Styles

Art Deco-inspired tin tiles incorporate bold patterns and geometric shapes, reminiscent of the 1920s and 1930s design trends. These styles are ideal for spaces that embrace vintage glamor or mid-century decor.


Installation Guide: How to Install Tin Ceiling Tiles for Drop Ceilings

Installing tin ceiling tiles within a drop ceiling grid system is relatively straightforward, though it does require some planning and attention to detail.

1. Measure Your Space

Before purchasing your tin tiles, measure the ceiling area to ensure you order the correct number of tiles. Drop ceilings typically follow a grid system, so it’s essential to calculate the number of tiles needed based on the size of the grid squares.

2. Choose the Right Tile Size

Most drop ceilings use 2×2 or 2×4 foot tiles. Ensure the tin ceiling tiles you choose fit within your existing grid. Many tin tiles are specifically manufactured for compatibility with standard grid systems.

3. Prepare the Drop Ceiling Grid

If you’re working with an existing grid, make sure it’s clean and in good repair. If you’re installing a new grid system, follow the manufacturer’s instructions to ensure proper alignment and secure installation.

4. Install the Tin Tiles

To install the tiles, simply place each tile into the grid and ensure it’s properly aligned. Tin tiles are typically lightweight, making them easy to handle and fit into place.

5. Add Finishing Touches

Once the tiles are in place, check for any adjustments and make sure all tiles are securely positioned. For a professional finish, consider adding crown molding or trim around the perimeter of the ceiling.


Maintenance and Care for Tin Ceiling Tiles in Drop Ceilings

Proper maintenance can keep tin ceiling tiles looking new and extend their lifespan. Here are some maintenance tips:

1. Regular Dusting

Dusting the tiles regularly with a soft cloth or duster helps maintain their shine and prevents buildup.

2. Gentle Cleaning Solution

For occasional cleaning, use a mild soap and water solution to wipe down the tiles. Avoid using harsh chemicals, as they may damage the metal finish.

3. Avoid Moisture Exposure

Tin tiles are generally resistant to moisture but should still be protected from direct exposure to water. In humid areas, consider applying a protective coating to prevent rust.

4. Inspect for Damage

Periodically check for any signs of rust or damage, especially if the tiles are in a room with high humidity. Promptly address any issues to prevent further deterioration.


Where to Use Tin Ceiling Tiles for Drop Ceilings

Tin ceiling tiles are versatile and can be used in various settings to add visual interest and sophistication.

1. Kitchens and Dining Areas

Tin ceiling tiles work well in kitchens and dining areas, where they add a touch of vintage charm. The metallic surface reflects light, which is helpful in spaces with limited lighting.

2. Basements and Home Theaters

Due to their durability and fire resistance, tin ceiling tiles are ideal for basements and home theaters, where drop ceilings are commonly used.

3. Commercial Spaces

Tin ceiling tiles add character to restaurants, cafes, and retail stores, enhancing the atmosphere and contributing to the overall design. Their durability makes them ideal for high-traffic areas.

4. Entryways and Hallways

For an impressive entryway or hallway, tin ceiling tiles can create a welcoming, stylish impression. Their reflective properties help brighten these typically narrow spaces.


Conclusion

Tin ceiling tiles for drop ceilings offer a unique blend of style, durability, and functionality, making them an excellent choice for a variety of residential and commercial spaces. Whether you’re looking to enhance a historic home or add a touch of sophistication to a modern space, tin tiles provide the perfect solution. With various styles, easy installation, and low maintenance, they are a worthwhile investment that will enhance your ceiling’s appearance for years to come. With careful selection, installation, and upkeep, tin ceiling tiles can transform any drop ceiling into a statement piece that brings charm and elegance to your environment.

Track Lighting for Drop Ceiling: Illuminate Your Space

When it comes to enhancing the ambiance of your home or office, lighting plays a crucial role. One innovative solution that has gained popularity is Track Lighting for Drop Ceiling. This versatile lighting option not only provides ample illumination but also allows for customization and flexibility in design. Whether you’re looking to brighten up a workspace or create a cozy atmosphere in your living room, track lighting can cater to your specific needs. In this article, we’ll explore the benefits, types, installation process, and maintenance of track lighting for drop ceilings.

Track Lighting For Drop Ceiling

Understanding Track Lighting for Drop Ceilings

What is Track Lighting?

Track lighting consists of a system of lights mounted on a linear track, which can be adjusted and directed to highlight specific areas. This type of lighting is ideal for drop ceilings, where the track can be seamlessly integrated into the ceiling grid. The design allows for various light fixtures to be attached to the track, providing the flexibility to change the arrangement based on your lighting needs.

Why Choose Track Lighting for Drop Ceilings?

Using track lighting in drop ceilings offers numerous advantages:

  1. Flexibility: Track lighting is adjustable, enabling you to reposition the lights as needed. This is particularly useful in spaces with varying functions, such as conference rooms or multipurpose areas.
  2. Customizable Design: With a variety of light fixtures available, you can choose styles that match your décor. Whether you prefer sleek and modern or vintage and ornate, there’s a fixture to fit your taste.
  3. Enhanced Light Distribution: Track lighting allows you to direct light precisely where it’s needed, making it effective for highlighting artwork, architectural features, or workspaces.
  4. Easy Installation: Track lighting systems are relatively easy to install, especially in drop ceilings where the track can be mounted directly to the grid.
  5. Energy Efficiency: Many track lighting systems are compatible with LED bulbs, offering energy savings and a longer lifespan compared to traditional incandescent bulbs.

Read too: Discovering the Charm of Nautical Outdoor Ceiling Fans for Your Coastal Retreat: Sail into Style

Benefits of Track Lighting for Drop Ceilings

1. Versatility in Lighting Options

Track lighting offers a variety of bulb types, including halogen, incandescent, and LED. This versatility allows you to choose the best option for your needs, whether you want warm ambient lighting or bright task lighting. Additionally, track lighting fixtures come in different styles, such as spotlights, floodlights, and pendants, providing options for various lighting effects.

2. Increased Ceiling Height Illusion

In spaces with low ceilings, drop ceilings can sometimes make the room feel smaller. However, track lighting can help create an illusion of height. By positioning lights along the track, you can direct light upwards, reflecting off the ceiling and making the room feel more spacious and open.

3. Highlighting Architectural Features

One of the standout benefits of track lighting is its ability to highlight architectural features in a room. If you have beautiful molding, unique ceiling designs, or artwork, track lighting can be positioned to draw attention to these elements, enhancing the overall aesthetics of the space.

4. Improved Functionality

In workspaces, proper lighting is essential for productivity. Track lighting allows you to position lights directly over desks or work areas, providing focused illumination for tasks. This targeted lighting can help reduce eye strain and improve overall work efficiency.

5. Easy Adjustments

With traditional lighting fixtures, changing the direction or intensity of light can be cumbersome. Track lighting, however, allows for easy adjustments. You can move, rotate, and angle fixtures along the track to achieve the desired lighting effect without the need for tools or complicated setups.

Types of Track Lighting for Drop Ceilings

1. Fixed Track Lighting

Fixed track lighting features a single linear track with lights that cannot be moved. This type of lighting is often installed in straight lines and provides consistent illumination across a defined area. It’s suitable for spaces that require uniform lighting, such as hallways or retail displays.

2. Adjustable Track Lighting

Adjustable track lighting offers flexibility, as fixtures can be repositioned along the track. This is ideal for rooms where lighting needs may change, such as living rooms or art studios. You can easily reconfigure the layout to accommodate different activities or highlight various features.

3. Monorail Track Lighting

Monorail track lighting systems have a single rail with flexible curves, allowing for creative and unique lighting designs. This option is perfect for modern and artistic spaces, as it can be shaped to fit the room’s layout. Monorail systems also support a variety of fixtures, giving you the freedom to customize your lighting.

4. Linear Track Lighting

Linear track lighting consists of long, straight tracks that can be installed in a parallel or perpendicular arrangement. This type is excellent for larger spaces, such as commercial areas or open-plan offices, as it can provide even lighting coverage across the entire area.

Installation Process for Track Lighting in Drop Ceilings

Step 1: Gather Materials and Tools

Before starting the installation, ensure you have the necessary materials and tools. You will need:

  • Track lighting kit (track, fixtures, bulbs)
  • Ceiling grid clips or mounting brackets
  • A screwdriver
  • A measuring tape
  • A level
  • Electrical tape (if wiring is required)

Step 2: Plan the Layout

Determine where you want to position the track lighting. Consider the room’s layout and how you plan to use the space. Mark the desired locations for the track on the ceiling grid, ensuring they are evenly spaced and aligned.

Step 3: Prepare the Ceiling Grid

If your drop ceiling has existing tiles, you may need to remove a few tiles to install the track. Use a level to ensure the track will be installed straight and even. If necessary, reinforce the grid with additional support brackets for added stability.

Step 4: Install the Track

Follow the manufacturer’s instructions for attaching the track to the ceiling grid. Most systems will use clips or brackets to secure the track. Ensure the track is firmly attached and level before proceeding.

Step 5: Attach Fixtures

Once the track is securely in place, you can attach the light fixtures according to your design. If you’re using adjustable fixtures, position them to highlight specific areas or objects.

Step 6: Install Bulbs

Insert the appropriate bulbs into the fixtures, following the recommended wattage specifications. If using LED bulbs, ensure they are compatible with your track lighting system.

Step 7: Test the Lighting

Turn on the power to your track lighting and test the fixtures to ensure they are working correctly. Adjust the positioning of the fixtures as needed to achieve the desired lighting effect.

Maintenance Tips for Track Lighting in Drop Ceilings

To keep your track lighting in optimal condition, consider the following maintenance tips:

1. Regular Cleaning

Dust and dirt can accumulate on the fixtures and track, diminishing their brightness. Clean the fixtures and track periodically with a soft cloth or duster to remove debris. For more thorough cleaning, you can use a damp cloth, but ensure that the electrical components remain dry.

2. Inspect Bulbs

Check the bulbs regularly to ensure they are functioning correctly. Replace any burnt-out bulbs promptly to maintain consistent lighting levels.

3. Adjust Fixtures as Needed

Over time, you may need to adjust the positioning of the fixtures to ensure they continue to meet your lighting needs. Track lighting allows for easy adjustments, so take advantage of this flexibility.

4. Professional Inspections

If you notice any issues with wiring or the electrical system, consult a professional electrician to conduct a thorough inspection. Safety should always be a priority when working with electrical systems.

Conclusion

Track Lighting for Drop Ceilings is a stylish and versatile lighting solution that can enhance the functionality and aesthetics of any space. With its flexibility, energy efficiency, and customizable design options, track lighting has become a favored choice for homeowners and businesses alike. Whether you’re illuminating a workspace, showcasing artwork, or simply creating a warm and inviting atmosphere, track lighting can adapt to your specific needs.

With the proper installation and maintenance, track lighting will not only enhance the beauty of your space but also provide the light necessary for daily activities. Explore the various options available and find the perfect track lighting system to brighten up your drop ceiling today!

Exhaust Fan for Drop Ceiling: A Comprehensive Guide

In modern construction and renovations, exhaust fans for drop ceilings are gaining popularity, especially in commercial and residential settings. A drop ceiling not only offers a sleek aesthetic but also allows for the easy installation of various systems, including lighting and HVAC components. This article will delve into the significance of exhaust fans in drop ceilings, the types available, installation tips, and maintenance considerations, helping you make an informed decision for your space.

Exhaust Fan For Drop Ceiling

Understanding Drop Ceilings

Before discussing exhaust fans, it’s crucial to understand what a drop ceiling is. A drop ceiling, also known as a suspended ceiling, consists of a grid system that supports lightweight panels. This ceiling style is commonly used in basements, offices, and commercial spaces for several reasons:

  • Aesthetic Appeal: Drop ceilings can hide unsightly ductwork, plumbing, and electrical systems while providing a clean and finished look.
  • Sound Absorption: Many drop ceiling tiles are designed to absorb sound, making them ideal for offices and meeting rooms where noise reduction is desired.
  • Flexibility: The space above a drop ceiling can be easily accessed, allowing for modifications and maintenance without significant disruption.

Read too: Exploring the Efficiency of Radiant Ceiling Heater Electric: A Comprehensive Guide

Why Install an Exhaust Fan?

Installing an exhaust fan for drop ceiling is essential for several reasons:

  • Improved Air Quality: Exhaust fans help remove stale air, odors, and pollutants from a space, improving overall indoor air quality.
  • Moisture Control: In areas prone to humidity, such as kitchens or bathrooms, exhaust fans can help prevent moisture buildup, reducing the risk of mold and mildew.
  • Temperature Regulation: Exhaust fans can aid in regulating temperature by removing hot air, particularly in commercial kitchens or industrial settings where heat accumulates quickly.

Types of Exhaust Fans for Drop Ceilings

When selecting an exhaust fan for a drop ceiling, it’s essential to consider the different types available:

1. Inline Exhaust Fans

Inline exhaust fans are installed within the ductwork rather than directly in the ceiling. This design allows for quiet operation and can effectively ventilate larger areas. Inline fans are ideal for spaces with extensive duct systems, providing better airflow efficiency.

2. Ceiling-Mounted Exhaust Fans

As the name suggests, these fans are mounted directly on the drop ceiling tiles. They are easy to install and are commonly used in residential bathrooms and kitchens. Ceiling-mounted fans can vary in power and design, so it’s essential to choose one that suits your specific needs.

3. Wall-Mounted Exhaust Fans

While not specifically for drop ceilings, wall-mounted exhaust fans can be an alternative if the ceiling structure doesn’t accommodate a ceiling-mounted fan. These fans draw air out through an external wall, providing effective ventilation for various spaces.

4. Bathroom Exhaust Fans

Bathroom exhaust fans are specifically designed to remove moisture and odors from bathrooms. These fans often come with additional features like humidity sensors and timers, making them suitable for residential applications.

Choosing the Right Exhaust Fan for Your Space

Selecting the right exhaust fan for your drop ceiling involves several considerations:

1. Calculate CFM Requirements

CFM, or cubic feet per minute, measures the airflow of the exhaust fan. The required CFM depends on the size of the space and its intended use. As a general guideline:

  • Kitchens: A kitchen exhaust fan should typically provide between 100-400 CFM, depending on the size of the kitchen and cooking habits.
  • Bathrooms: For bathrooms, aim for at least 1 CFM per square foot of floor space. For example, a 100-square-foot bathroom would need a fan with at least 100 CFM.

2. Noise Level

Consider the noise level of the exhaust fan. Fans are rated by their sones, with lower sones indicating quieter operation. If noise is a concern, look for fans with a rating of 1-2 sones, as they operate quietly without sacrificing performance.

3. Energy Efficiency

Energy-efficient exhaust fans can save on energy costs over time. Look for models with the ENERGY STAR label, indicating they meet strict energy efficiency guidelines. Energy-efficient fans often use less power while providing the same or better airflow than standard models.

4. Installation Requirements

Ensure you understand the installation requirements for your chosen exhaust fan. Some fans may require professional installation, while others can be installed as DIY projects. If you’re not comfortable with electrical work or ducting, hiring a professional is advisable.

Installing Exhaust Fans for Drop Ceilings

Installing an exhaust fan for drop ceiling is a task that can often be handled by homeowners with some DIY experience. However, if you’re unsure, it’s always best to consult with a professional. Here’s a step-by-step guide to installing a ceiling-mounted exhaust fan:

Step 1: Gather Materials and Tools

You will need:

  • Exhaust fan unit
  • Ceiling tiles
  • Ductwork (if applicable)
  • Electrical wiring
  • Switch
  • Screwdriver
  • Drill
  • Utility knife
  • Level
  • Safety goggles

Step 2: Turn Off Power

Before starting the installation, turn off the power to the circuit that will supply the fan. This ensures safety during installation.

Step 3: Choose the Location

Select a suitable location for the exhaust fan in your drop ceiling. Ideally, it should be positioned where air will be most effectively removed. For bathrooms, place it near the shower or bathtub; for kitchens, position it above the stove or cooking area.

Step 4: Cut the Ceiling Tile

Use a utility knife to cut the ceiling tile to fit the exhaust fan. Make sure the opening is slightly smaller than the fan’s housing to ensure a snug fit.

Step 5: Install the Fan

Insert the exhaust fan into the opening, ensuring it is secure and level. Depending on the model, you may need to use screws to attach it to the grid system.

Step 6: Connect the Ductwork

If your fan requires ducting, connect the appropriate ductwork to the fan. Make sure the duct is sealed properly to avoid air leaks. If the exhaust fan is vented outside, ensure the duct runs are as short and straight as possible for optimal airflow.

Step 7: Wire the Fan

Follow the manufacturer’s wiring instructions to connect the exhaust fan to your home’s electrical system. This typically involves connecting the fan’s wires to the corresponding wires from the power source.

Step 8: Install the Switch

If your fan has a separate switch, install it in a convenient location, ensuring it is easily accessible.

Step 9: Test the Fan

Once everything is connected, turn the power back on and test the exhaust fan to ensure it operates correctly.

Maintaining Your Exhaust Fan

To keep your exhaust fan for drop ceiling functioning efficiently, regular maintenance is essential:

1. Clean the Fan

Dust and debris can accumulate on the fan blades, reducing performance. Clean the fan at least once a year by removing the cover and wiping down the blades with a damp cloth.

2. Check for Obstructions

Ensure that the ductwork is free from obstructions. This will maintain optimal airflow and efficiency.

3. Test the Fan

Periodically test the fan to ensure it is running properly. Listen for unusual noises, which may indicate a need for repair.

4. Replace Filters

If your exhaust fan has a filter, replace it regularly to maintain air quality and performance.

Conclusion

Installing an exhaust fan for drop ceiling is a practical solution for improving indoor air quality, moisture control, and overall comfort. By understanding the different types of exhaust fans available, the factors to consider when choosing one, and the installation process, you can make informed decisions to enhance your living or working environment. Regular maintenance will ensure that your exhaust fan continues to function effectively, providing the benefits of fresh air and improved ventilation for years to come.

Drop Ceiling LED Lighting: A Complete Guide

When it comes to modernizing your home or office, Drop Ceiling LED Lighting is an excellent choice that combines functionality, aesthetics, and energy efficiency. Whether you are upgrading an existing ceiling or designing a new space, understanding the benefits and applications of drop ceiling LED lighting can help you make informed decisions. In this article, we will explore everything you need to know about drop ceiling LED lighting, including its advantages, installation tips, design ideas, and maintenance.

Drop Ceiling Led Lighting

What is Drop Ceiling LED Lighting?

Drop Ceiling LED Lighting refers to lighting fixtures installed in a drop ceiling system, which consists of a framework that suspends a ceiling grid. This type of ceiling is commonly found in commercial buildings, schools, and modern residential spaces. The fixtures can be recessed, surface-mounted, or used in conjunction with panel lights, providing versatility and a sleek appearance.

Read too: Discovering the Charm of Nautical Outdoor Ceiling Fans for Your Coastal Retreat: Sail into Style

Advantages of Drop Ceiling LED Lighting

  1. Energy Efficiency: LED lights consume significantly less energy than traditional incandescent or fluorescent bulbs. They convert a higher percentage of energy into light, which results in lower electricity bills.
  2. Longevity: LED lights have a lifespan of 25,000 hours or more, making them a long-lasting option. This reduces the frequency of replacements and maintenance costs.
  3. Low Heat Emission: Unlike incandescent bulbs, LEDs emit very little heat, contributing to a cooler environment. This is particularly beneficial in commercial spaces where numerous lights are used.
  4. Design Flexibility: Drop ceiling LED lighting can be customized to fit various aesthetic needs. With a range of styles, colors, and brightness levels available, it can enhance the overall look of any room.
  5. Easy Installation: Installing drop ceiling LED lights is generally straightforward. Many fixtures are designed to fit seamlessly into existing drop ceiling grids, making them an ideal option for renovations.

Types of Drop Ceiling LED Lighting

1. LED Troffers

LED troffers are rectangular fixtures that fit into the grid of a drop ceiling. They provide even illumination and are perfect for large areas such as offices, classrooms, and retail spaces. Available in various sizes and lumen outputs, they can easily replace traditional fluorescent troffers.

2. LED Panels

LED panels offer a sleek, modern look and are often used in settings that require a minimalist aesthetic. These thin, flat panels provide a uniform light distribution and can be installed flush with the ceiling or in a recessed manner. They are ideal for conference rooms, lobbies, and open-plan offices.

3. Recessed LED Lights

Recessed LED lights are installed above the ceiling line, creating a clean look. They are versatile and can be used for general lighting or accent lighting, depending on the design and placement. These lights work well in residential settings, particularly in kitchens and living areas.

4. Surface-Mounted LED Fixtures

Surface-mounted fixtures are attached directly to the ceiling grid, making them a good option for spaces with a higher ceiling. They provide a stylish way to illuminate areas that might not suit recessed or panel lighting.

5. LED Strip Lighting

For a more creative approach, LED strip lights can be installed along the edges of a drop ceiling or in coves. They can create ambient lighting and highlight architectural features, adding a unique touch to any room.

Installation Tips for Drop Ceiling LED Lighting

Installing drop ceiling LED lighting can be a DIY project or handled by a professional electrician. Here are some tips to guide you through the installation process:

  1. Plan Your Layout: Before installation, map out where you want the lights to be placed. Consider the size of the room, the type of lighting needed, and how the fixtures will fit into the existing grid.
  2. Gather Necessary Tools: You’ll typically need a screwdriver, wire cutters, wire nuts, and a voltage tester. If you’re working with recessed lights, you may also require a hole saw for cutting the ceiling material.
  3. Turn Off Power: Ensure the power is turned off at the circuit breaker before starting any electrical work to avoid accidents.
  4. Install the Fixtures: For troffers and panels, simply lift them into the grid and secure them in place. For recessed fixtures, cut appropriate holes in the ceiling, run electrical wiring, and connect the fixture according to the manufacturer’s instructions.
  5. Make Electrical Connections: Connect the wires from the fixtures to the existing wiring in your ceiling. Typically, you’ll connect black to black (hot), white to white (neutral), and green or bare to ground.
  6. Test the Lights: Once everything is connected, restore power and test the lights to ensure they function correctly.

Design Ideas for Drop Ceiling LED Lighting

Incorporating Drop Ceiling LED Lighting into your design can create stunning visual effects and enhance the functionality of a space. Here are some design ideas to consider:

  1. Layered Lighting: Combine different types of LED fixtures to create layers of light. Use recessed lights for general illumination, LED strips for accent lighting, and pendant fixtures for task lighting.
  2. Color Temperature: Select LED lights with varying color temperatures to create different atmospheres. Cooler temperatures (5000K) are great for workspaces, while warmer temperatures (2700K) create a cozy feel for residential areas.
  3. Dimmer Switches: Installing dimmer switches allows you to adjust the brightness of your drop ceiling lights according to the time of day and activity, adding versatility to the lighting scheme.
  4. Highlight Features: Use drop ceiling LED lighting to highlight architectural elements like beams, columns, or artwork. Strategically placed lighting can draw attention to focal points in a room.
  5. Integrate with Smart Technology: Consider incorporating smart LED lights that can be controlled via smartphone apps. This allows you to adjust brightness, color, and even set schedules for your lights.

Maintenance of Drop Ceiling LED Lighting

One of the benefits of using LED lighting is the low maintenance required. However, it’s still essential to ensure your fixtures remain in good condition. Here are some maintenance tips:

  1. Regular Cleaning: Dust and debris can accumulate on light fixtures, reducing their brightness. Periodically clean your LED lights with a soft cloth to maintain optimal performance.
  2. Check for Flickering: If your LED lights start to flicker, it may indicate a problem with the fixture or wiring. Addressing this issue promptly can prevent more significant electrical problems.
  3. Replace Bulbs as Needed: While LED bulbs have long lifespans, they may still require replacement over time. Keep an eye on any that have dimmed significantly and replace them to maintain consistent lighting.
  4. Inspect Wiring: Regularly inspect the wiring and connections to ensure they are secure and free from damage. This is particularly important if you notice any flickering or inconsistent lighting.

Conclusion

Drop Ceiling LED Lighting is an efficient, stylish, and versatile solution for both residential and commercial spaces. With various types of fixtures available, installation ease, and low maintenance requirements, it’s an excellent choice for anyone looking to enhance their lighting design. By understanding the different types of drop ceiling LED lights, installation tips, and design ideas, you can transform your space into a well-lit, inviting environment that meets all your needs.

Lights For Drop Ceiling: Brighten Your Space Effectively

When it comes to creating a well-lit environment, especially in spaces with drop ceilings, choosing the right lighting is crucial. Lights For Drop Ceiling not only enhance the aesthetic appeal of a room but also improve functionality, safety, and comfort. Whether you’re outfitting a home, office, or commercial space, this guide will help you navigate the options available for illuminating drop ceilings effectively.

Lights For Drop Ceiling

Understanding Drop Ceilings

Drop ceilings, also known as suspended ceilings, consist of a grid system that holds lightweight panels. They are popular in commercial buildings, basements, and even modern homes due to their versatility and ease of installation. However, the height and layout of drop ceilings can create unique challenges when it comes to lighting.

Benefits of Drop Ceilings

  1. Aesthetic Flexibility: Drop ceilings allow for various design choices, making it easier to incorporate different lighting styles.
  2. Conceal Wiring and Ductwork: They provide a clean appearance by hiding unsightly electrical and HVAC components.
  3. Sound Absorption: Many drop ceiling panels are designed to reduce noise, creating a quieter environment.

Why Choosing the Right Lights For Drop Ceiling Matters

Selecting appropriate lighting for drop ceilings is essential for several reasons:

  1. Maximizing Space: Proper lighting can make a low ceiling feel higher and more open.
  2. Enhancing Functionality: Task-specific lighting ensures that areas like kitchens, offices, and workshops are adequately illuminated.
  3. Improving Safety: Well-lit spaces reduce accidents and improve visibility, especially in commercial environments.

Types of Lights For Drop Ceiling

When considering Lights For Drop Ceiling, there are several types of fixtures to explore. Here are some popular options:

1. Recessed Lighting

Recessed lights, also known as can lights or pot lights, are installed directly into the ceiling. They provide a sleek, unobtrusive look and are excellent for ambient lighting.

  • Advantages:
    • Space-saving design
    • Minimal visual clutter
    • Versatile applications for task and accent lighting

Read too: Kitchen Lighting For A Vaulted Ceiling: Illuminating Your Space with Style and Functionality

2. Drop Ceiling Panel Lights

Panel lights are specifically designed for drop ceilings and fit directly into the grid. They provide even, widespread illumination and are available in various sizes and styles.

  • Advantages:
    • Easy installation
    • Energy-efficient LED options
    • Uniform light distribution

3. Pendant Lights

Pendant lights hang from the ceiling and can serve as both functional and decorative fixtures. They work well above islands, dining areas, or as accent pieces.

  • Advantages:
    • Stylish design options
    • Adjustable heights for varying ceiling styles
    • Can serve as focal points in a room

4. Troffer Lights

Troffer lights are rectangular fixtures that fit into the drop ceiling grid. They are commonly used in commercial spaces for general lighting.

  • Advantages:
    • Highly efficient
    • Suitable for large areas
    • Often equipped with LED technology for energy savings

5. Surface Mount Fixtures

Surface mount lights are installed directly onto the ceiling rather than being recessed. They can provide strong illumination and are available in various styles.

  • Advantages:
    • Easy to install
    • Can be used where ceiling height is limited
    • Variety of styles available

Key Considerations When Choosing Lights For Drop Ceiling

1. Lumens and Brightness

Understanding lumens is crucial for determining the appropriate brightness for your space. The higher the lumens, the brighter the light. Consider the purpose of the room when selecting your lighting. For example, kitchens and workspaces typically require brighter lighting compared to living areas.

2. Color Temperature

The color temperature of lighting, measured in Kelvin (K), influences the mood of a space. Warmer tones (2700K-3000K) create a cozy ambiance, while cooler tones (4000K-5000K) provide a more vibrant and energetic atmosphere. Select a color temperature that aligns with the activities taking place in the room.

3. Energy Efficiency

LED lights are highly energy-efficient, lasting up to 25,000 hours or more. They consume less energy, making them an environmentally friendly choice. When choosing Lights For Drop Ceiling, consider LED options for long-term savings on your energy bill.

4. Installation and Maintenance

Evaluate the ease of installation and maintenance for the lighting fixtures you choose. Some fixtures, like panel lights, are designed specifically for drop ceilings, making installation straightforward. Additionally, consider how easy it will be to change bulbs or clean fixtures over time.

5. Style and Design

The style of your lighting should complement the overall aesthetic of the room. Whether you prefer modern, industrial, or traditional designs, there are lighting options that can enhance your space.


Installation Tips for Lights For Drop Ceiling

Installing Lights For Drop Ceiling can often be a DIY project if you have basic electrical knowledge. Here are some steps to guide you through the process:

1. Plan Your Layout

Before installation, plan the layout of your lights. Consider factors like room size, fixture placement, and the type of lighting needed (ambient, task, or accent).

2. Gather Necessary Tools

Ensure you have the right tools for the installation, including:

  • Screwdriver
  • Wire cutters/strippers
  • Voltage tester
  • Ladder
  • Electrical tape

3. Turn Off Power

Always turn off the power at the circuit breaker to avoid electrical shock.

4. Install the Fixtures

  • For Recessed Lights: Cut the appropriate holes in the ceiling tiles and secure the fixtures according to the manufacturer’s instructions.
  • For Panel Lights: Place the panel lights directly into the grid system, ensuring they fit securely.
  • For Pendant Lights: Mount the ceiling brackets, then hang the pendant lights at your desired height.

5. Connect the Wiring

Carefully connect the wiring according to the color coding (black to black, white to white, and green/bare to ground). Use wire nuts to secure connections and electrical tape for additional safety.

6. Test the Lights

Once everything is securely connected, turn the power back on and test the lights to ensure they function properly.


Maintenance for Lights In Drop Ceiling

To ensure your Lights For Drop Ceiling remain functional and attractive, follow these maintenance tips:

  1. Regular Cleaning: Dust and debris can accumulate on fixtures, diminishing brightness. Regularly wipe down surfaces with a soft cloth.
  2. Check Bulbs and Wiring: Periodically inspect all bulbs for burnout and wiring for any issues. Replace bulbs as needed to maintain consistent lighting.
  3. Professional Inspections: For complex electrical systems, consider having a professional electrician inspect your setup every few years.

Conclusion

Choosing the right Lights For Drop Ceiling is essential for creating a well-lit, functional, and inviting space. By understanding the types of lights available, considering key factors like lumens and energy efficiency, and following proper installation techniques, you can enhance any area with beautiful and effective lighting.

Investing time in selecting and installing the right fixtures will not only brighten your space but also add value and style to your environment.

LED Lighting for Drop Ceilings: Benefits, Installation, and Tips

In modern interior design, lighting plays a crucial role in creating ambiance and functionality. LED lighting for drop ceilings is an increasingly popular choice due to its efficiency, versatility, and aesthetic appeal. This guide explores the benefits, installation process, and practical tips for using LED lighting in drop ceilings, helping you make an informed decision for your space.

Led Lighting For Drop Ceilings

What is LED Lighting for Drop Ceilings?

LED lighting for drop ceilings involves installing LED fixtures or panels within a drop ceiling system. Drop ceilings, also known as suspended ceilings, are a popular choice in both commercial and residential settings due to their ease of installation and ability to conceal wiring and ductwork. LED lights are well-suited for these ceilings because they provide bright, efficient lighting while being slim and unobtrusive.

Key Features of LED Lighting for Drop Ceilings

  1. Energy Efficiency: LED lights consume significantly less energy compared to traditional incandescent or fluorescent lights, leading to lower electricity bills and reduced environmental impact.
  2. Long Lifespan: LEDs have a longer lifespan, often lasting up to 25,000 hours or more, which means fewer replacements and maintenance costs.
  3. Slim Profile: LED fixtures for drop ceilings are designed to be thin and compact, making them ideal for the shallow space between the ceiling tiles.
  4. Variety of Styles: LED lighting options include panels, recessed lights, and troffers, offering flexibility to suit different design preferences and lighting needs.

Read too: Kitchen Lighting For A Vaulted Ceiling: Illuminating Your Space with Style and Functionality

Benefits of Using LED Lighting for Drop Ceilings

1. Enhanced Energy Efficiency

One of the most significant advantages of LED lighting is its energy efficiency. LEDs use up to 80% less energy than traditional incandescent bulbs and up to 50% less than fluorescent lights. This not only helps reduce energy costs but also contributes to a smaller carbon footprint.

2. Improved Lighting Quality

LED lights provide high-quality, consistent illumination with no flicker, which is beneficial for tasks requiring precise lighting. They also offer a range of color temperatures, from warm to cool white, allowing you to create the desired atmosphere in any room.

3. Longer Lifespan

With a lifespan of 25,000 hours or more, LED lights require fewer replacements compared to traditional lighting options. This longevity reduces maintenance costs and the inconvenience of frequently changing bulbs.

4. Flexibility in Design

LED lighting for drop ceilings comes in various styles and configurations. Whether you prefer the clean lines of LED panels, the subtlety of recessed lights, or the efficiency of LED troffers, there is an option to match your design vision.

5. Low Heat Emission

LED lights emit very little heat compared to incandescent and halogen bulbs. This feature is particularly advantageous in drop ceiling installations where heat build-up can be a concern. Lower heat output also contributes to improved overall energy efficiency and reduces the need for additional cooling.

Types of LED Lighting for Drop Ceilings

1. LED Panels

LED panels are flat, rectangular lights designed to fit into standard drop ceiling grids. They provide even, diffuse light and are ideal for creating a uniform illumination across large areas. They are often used in offices, schools, and commercial spaces.

2. Recessed LED Lights

Recessed LED lights, also known as can lights or downlights, are installed into the ceiling so that the light fixture is flush with the ceiling surface. These lights are perfect for providing focused lighting and maintaining a clean, modern look. They are commonly used in residential settings and for accent lighting.

3. LED Troffers

LED troffers are rectangular fixtures that are designed to replace traditional fluorescent troffers in drop ceilings. They provide a similar light output and distribution but with the benefits of LED technology, including energy efficiency and longer lifespan. Troffers are commonly used in commercial and industrial environments.

4. LED Strip Lights

LED strip lights consist of a flexible strip with embedded LEDs. They can be installed along the edges of drop ceiling panels or used to create decorative effects. Strip lights are versatile and can be used for accent lighting or to highlight architectural features.

Installation Process for LED Lighting in Drop Ceilings

Proper installation is key to ensuring the optimal performance and longevity of LED lighting in drop ceilings. Here’s a step-by-step guide to the installation process:

1. Planning and Design

  • Assess the Space: Determine the layout of your drop ceiling and the areas where you want to install LED lighting. Consider the size of the room, the type of lighting needed, and the desired light distribution.
  • Choose Fixtures: Select the appropriate LED fixtures based on your lighting needs and design preferences. Ensure that the fixtures are compatible with your drop ceiling system.

2. Preparing the Installation

  • Turn Off Power: Before starting any electrical work, turn off the power to the lighting circuit at the breaker box to ensure safety.
  • Remove Ceiling Tiles: Carefully remove the ceiling tiles in the areas where you will be installing the LED fixtures. This will provide access to the ceiling grid and electrical connections.

3. Installing the Fixtures

  • Mounting LED Panels or Troffers: Place the LED panels or troffers into the ceiling grid, ensuring they are properly aligned and secured. Follow the manufacturer’s instructions for mounting.
  • Recessed Lights Installation: For recessed LED lights, cut holes in the ceiling tiles according to the fixture size. Install the light fixtures into the holes and secure them in place. Connect the wiring as per the instructions.
  • LED Strip Lights: Attach the LED strip lights to the desired locations using adhesive backing or mounting clips. Connect the strips to the power source and ensure they are functioning correctly.

4. Connecting the Electrical Wiring

  • Wire Connections: Connect the LED fixtures to the existing electrical wiring. Follow the wiring diagrams provided by the manufacturer and ensure all connections are secure.
  • Check Voltage: Verify that the voltage and wiring match the requirements of the LED fixtures. Incorrect wiring can cause malfunction or damage to the lights.

5. Testing and Final Touches

  • Power On: Turn the power back on and test the LED lights to ensure they are working correctly. Check for any flickering, dim spots, or uneven lighting.
  • Replace Ceiling Tiles: Once the installation is complete and the fixtures are functioning properly, replace the ceiling tiles around the installed fixtures.

Maintenance Tips for LED Lighting in Drop Ceilings

Maintaining LED lighting in drop ceilings is relatively straightforward, thanks to their durability and long lifespan. Here are some tips to keep your LED lights in optimal condition:

1. Regular Cleaning

  • Dust and Debris: Clean the surface of LED fixtures regularly to remove dust and debris. Use a soft, dry cloth or a vacuum cleaner with a brush attachment.
  • Avoid Harsh Chemicals: Avoid using harsh cleaning chemicals that can damage the fixtures. A mild soap solution and a damp cloth are usually sufficient.

2. Check for Malfunctions

  • Inspect Lights: Periodically check the LED lights for any signs of malfunction, such as flickering or dimming. If you notice any issues, address them promptly to prevent further problems.

3. Replace Faulty Fixtures

  • Replacement: If an LED fixture fails, replace it with a new one. Due to the long lifespan of LEDs, replacements should be infrequent. Ensure that the replacement fixture matches the specifications of the original one.

4. Verify Electrical Connections

  • Safety Check: Occasionally inspect the electrical connections to ensure they remain secure and free from damage. Loose or damaged connections can lead to performance issues or safety hazards.

Conclusion

LED lighting for drop ceilings offers a range of benefits, including energy efficiency, long lifespan, and modern aesthetics. By understanding the different types of LED fixtures, the installation process, and maintenance requirements, you can make an informed choice and enjoy the advantages of LED lighting in your space.

Whether you’re upgrading existing lighting or designing a new space, LED lighting for drop ceilings provides an effective and stylish solution for brightening your environment. With proper installation and care, these lights can enhance your space’s functionality and appearance for years to come.

Drop In Lights for Drop Ceilings: Enhance Your Space

Selecting the right drop in lights for drop ceilings can transform any space, from office buildings to homes, offering both functional and aesthetic benefits. Drop in lights, also known as recessed or lay-in lights, fit neatly into the grid of a drop ceiling, providing a sleek and professional look. In this comprehensive guide, we will delve into the various types of drop in lights, their benefits, installation tips, and maintenance, ensuring you make an informed decision for your lighting needs.

Drop In Lights For Drop Ceilings

Why Choose Drop In Lights for Drop Ceilings?

Drop in lights for drop ceilings are an excellent choice for many reasons:

  1. Sleek Design: These lights offer a clean and modern look, seamlessly blending into the ceiling grid. This helps to create a uniform and uncluttered appearance in any room.
  2. Energy Efficiency: Many drop in lights use LED technology, which is known for its energy efficiency. LEDs consume less power and have a longer lifespan compared to traditional lighting options.
  3. Versatility: Drop in lights are available in various sizes, shapes, and styles, making them suitable for different environments, from commercial offices to residential spaces.
  4. Ease of Installation: These lights are designed to fit directly into the ceiling grid, making installation straightforward and less time-consuming compared to other lighting solutions.

Types of Drop In Lights for Drop Ceilings

When it comes to drop in lights for drop ceilings, there are several options to consider, each with its unique features and benefits:

1. LED Panels

LED panels are one of the most popular choices for drop ceilings. They provide even and bright illumination, making them ideal for offices, schools, and retail spaces. LED panels are available in various sizes, typically 2×2 feet or 2×4 feet, and can be dimmable for added versatility.

2. Fluorescent Troffers

Fluorescent troffers are a traditional lighting option that has been used for many years. They are cost-effective and provide good illumination. However, they are gradually being replaced by more energy-efficient LED lights.

3. Recessed Lighting

Recessed lights, or can lights, are another option for drop ceilings. These lights are installed into the ceiling grid and are known for their focused, direct light. They are often used for task lighting or highlighting specific areas.

4. Grid Ceiling Lights

Grid ceiling lights are designed specifically for drop ceilings and are available in various styles and sizes. These lights are easy to install and offer a uniform look that complements the ceiling grid.

How to Choose the Right Drop In Lights for Drop Ceilings

Selecting the perfect drop in lights for drop ceilings involves considering several factors:

1. Light Output and Color Temperature

Consider the brightness and color temperature of the lights. LED lights typically offer a range of color temperatures, from warm (3000K) to cool (5000K). Choose a color temperature that suits the ambiance you want to create in your space.

2. Energy Efficiency

Look for energy-efficient options, such as LED lights, which consume less power and have a longer lifespan. Check the lumens per watt (LPW) rating to ensure you are getting the most efficient lighting solution.

3. Dimmability

If you need adjustable lighting, opt for dimmable drop in lights. Dimmable lights allow you to control the light intensity, creating the perfect atmosphere for any occasion.

4. Compatibility with Ceiling Grid

Ensure that the lights you choose are compatible with your ceiling grid. Standard sizes for drop in lights are 2×2 feet and 2×4 feet, but it’s essential to measure your grid to avoid any installation issues.

5. Installation and Maintenance

Consider how easy the lights are to install and maintain. LED lights typically require less maintenance than traditional fluorescent lights, saving you time and effort in the long run.

Installation Tips

Proper installation is crucial for ensuring the functionality and longevity of your drop in lights for drop ceilings. Here are some essential tips:

1. Plan Your Layout

Before starting the installation, plan the layout of your lights. Consider the room’s dimensions and the purpose of the lighting. Ensure that the lights are evenly spaced to provide uniform illumination.

2. Turn Off the Power

Safety first! Always turn off the power supply before starting the installation. Use a voltage tester to ensure there is no electrical current in the wires you will be working with.

3. Install the Grid Framework

If you are installing a new drop ceiling, set up the grid framework according to the manufacturer’s instructions. Ensure that the grid is level and securely fastened to the ceiling.

4. Connect the Wiring

Follow the wiring instructions provided with your lights. Typically, this involves connecting the fixture’s wires to the electrical supply wires. Use wire nuts to secure the connections and wrap them with electrical tape for added safety.

5. Place the Lights into the Grid

Once the wiring is connected, carefully place the lights into the ceiling grid. Ensure they fit snugly and are level with the ceiling tiles.

6. Test the Lights

After installation, turn the power back on and test the lights. Check for any flickering or uneven illumination, and make any necessary adjustments.

Maintenance of Drop In Lights for Drop Ceilings

Regular maintenance is essential to keep your drop in lights for drop ceilings in optimal condition. Here are some maintenance tips:

1. Clean the Fixtures

Dust and dirt can accumulate on the light fixtures, reducing their efficiency. Clean the fixtures regularly with a soft, damp cloth. Avoid using harsh chemicals that could damage the lights.

2. Replace Burnt-Out Bulbs

If you are using lights with replaceable bulbs, check them periodically and replace any that have burnt out. For LED panels, which have a longer lifespan, monitor for any signs of dimming and plan for replacement as needed.

3. Inspect Wiring and Connections

Regularly inspect the wiring and connections to ensure they are secure and in good condition. Look for any signs of wear or damage and address any issues promptly.

4. Check for Flickering or Dimming

Flickering or dimming lights can indicate a problem with the electrical supply or the light fixtures themselves. Investigate any issues and consult a professional electrician if necessary.

Benefits of Upgrading to LED Drop In Lights

If you are still using traditional lighting options, upgrading to LED drop in lights for drop ceilings can offer numerous benefits:

1. Energy Savings

LED lights are significantly more energy-efficient than fluorescent or incandescent lights, leading to lower electricity bills.

2. Longer Lifespan

LED lights have a much longer lifespan, often lasting up to 50,000 hours or more. This reduces the need for frequent replacements and maintenance.

3. Improved Light Quality

LED lights provide better light quality with higher color rendering index (CRI) values, ensuring that colors appear more natural and vibrant.

4. Environmental Benefits

LED lights are more environmentally friendly, as they consume less power and contain no hazardous materials like mercury.

Read too: Striped Schoolhouse Ceiling Light Fixtures: Unveiling the Timeless Charm

Conclusion

Choosing the right drop in lights for drop ceilings can significantly enhance the functionality and aesthetics of your space. By considering factors such as light output, energy efficiency, and installation ease, you can select the perfect lighting solution for your needs. Regular maintenance ensures that your lights remain in optimal condition, providing bright and even illumination for years to come. Whether you are upgrading an existing space or installing new lighting, drop in lights are a versatile and efficient choice that can transform any environment.

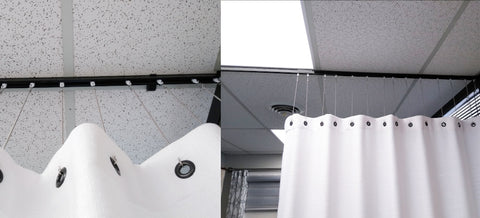
Curtain Track for Drop Ceiling: A Complete Guide

Curtain Track for Drop Ceiling. Curtain tracks are a great way to add privacy and style to your windows. They are especially well-suited for drop ceilings, where they can be installed without having to make any major changes to the ceiling.

Curtain Track For Drop Ceiling

There are a few different types of curtain tracks available, so you’re sure to find one that is perfect for your needs. Some of the most popular types of curtain tracks include:

  • Ceiling-mounted curtain tracks: Ceiling-mounted curtain tracks are the most common type of curtain track. They are installed directly into the ceiling and can be used with any type of curtain.
  • Wall-mounted curtain tracks: Wall-mounted curtain tracks are installed on the wall above the window. They are a good option for rooms with low ceilings or where you don’t want to drill holes in the ceiling.
  • Recessed curtain tracks: Recessed curtain tracks are installed inside the ceiling. They are a good option for rooms where you want to hide the curtain track.

Choosing the Right Curtain Track

When choosing a curtain track for a drop ceiling, there are a few factors to consider:

  • The weight of the curtains: The weight of the curtains will affect the type of curtain track you need. If you have heavy curtains, you’ll need a curtain track that is sturdy and can support the weight.
  • The style of the room: The style of the room will also affect the type of curtain track you choose. A traditional room will look best with a traditional curtain track, while a modern room will look best with a modern curtain track.
  • Your budget: Curtain tracks can range in price from a few dollars to several hundred dollars. It’s important to set a budget before you start shopping so that you don’t overspend.

Installing a Curtain Track

Installing a curtain track is a relatively easy task that can be done by a do-it-yourselfer. Here are the basic steps involved in installing a curtain track:

  1. Measure the width of the window: You’ll need to measure the width of the window to determine how long of a curtain track you need.
  2. Mark the location of the curtain track: Once you’ve determined the length of the curtain track, you’ll need to mark the location of the curtain track on the ceiling or wall.
  3. Drill holes for the curtain track: Once you’ve marked the location of the curtain track, you’ll need to drill holes for the screws or nails that will hold the curtain track in place.
  4. Attach the curtain track to the ceiling or wall: Once you’ve drilled the holes, you can attach the curtain track to the ceiling or wall using screws or nails.
  5. Install the curtains: Once the curtain track is in place, you can install the curtains.

Curtain Tracks for Drop Ceilings

Curtain tracks are a great way to add privacy and style to your windows with drop ceilings. By following the tips in this guide, you can choose the perfect curtain track for your needs and install it yourself.

Read too: Black Friday Genie Garage Door Openers Extravaganza for Smart Home Security: Unveiling Exclusive Deals