How to Paint Drop Ceiling Tiles for a Stunning Makeover? Transform Your Space

Revitalize your room with a fresh look by learning how to effectively paint drop ceiling tiles. Discover tips, techniques, and inspiration for this budget-friendly DIY project.
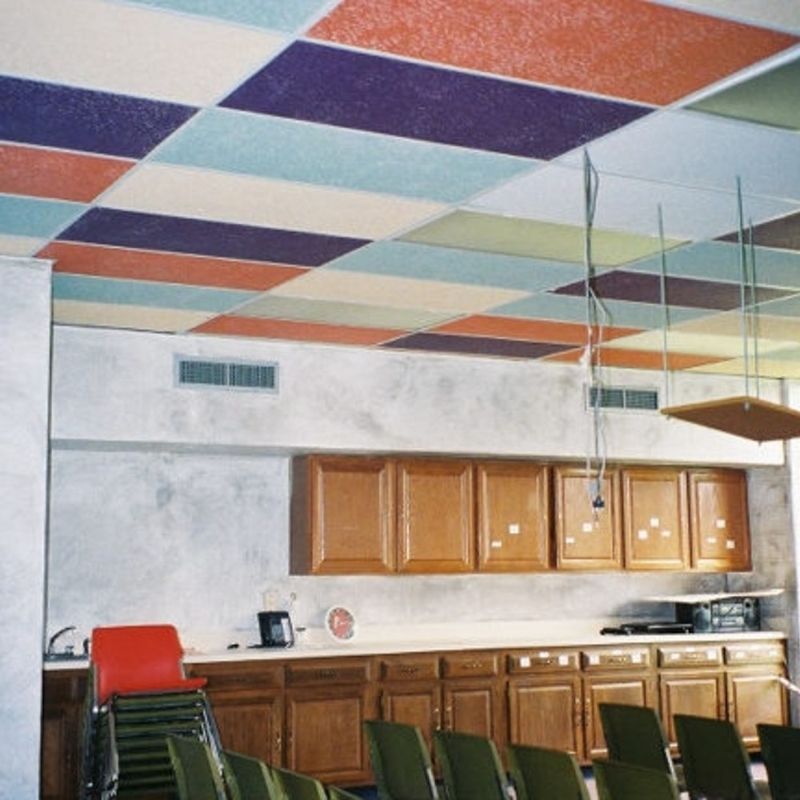
Paint Drop Ceiling Tiles

Paint Drop Ceiling Tiles: A Creative Approach to Room Transformation

Drop ceiling tiles, often overlooked, present a unique opportunity to enhance the aesthetic appeal of any room. By painting these tiles, you can achieve a custom look that matches your décor and style preferences.

Read too: Kitchen Lighting For A Vaulted Ceiling: Illuminating Your Space with Style and Functionality

Benefits of Painting Drop Ceiling Tiles

  1. Customization: Painting allows you to personalize your space by choosing colors that complement existing décor or create a new focal point in the room.
  2. Cost-Effective: Refreshing drop ceiling tiles with paint is a budget-friendly alternative to replacing them entirely, saving both time and money.
  3. Aesthetic Enhancement: Transform the look and feel of a room by updating outdated tiles or covering stains and discoloration with fresh paint.
  4. Versatility: With a wide range of paint colors and finishes available, you can achieve various effects from matte to glossy, depending on your desired aesthetic.

Planning Your Project: Steps to Paint Drop Ceiling Tiles

Before you begin painting, it’s essential to plan and prepare properly to ensure a successful outcome:

1. Gather Materials

  • Paint: Choose a high-quality latex or acrylic paint suitable for ceilings. Consider the color and finish that best suits your room’s décor.
  • Primer: Use a primer specifically formulated for use on ceiling tiles to ensure proper adhesion and durability.
  • Paint Roller and Brushes: Select rollers and brushes appropriate for the texture and size of your ceiling tiles.
  • Drop Cloths or Plastic Sheets: Protect surrounding areas from paint splatters and drips.
  • Painter’s Tape: Use tape to mask edges and prevent paint from getting on walls or trim.

2. Preparation

  • Clean the Tiles: Thoroughly clean ceiling tiles to remove dust, dirt, and grease. Use a mild detergent solution and allow tiles to dry completely before painting.
  • Repair Damage: Fill in any cracks or holes with spackle or joint compound. Sand the repaired areas smooth once dry.

3. Priming

  • Apply Primer: Use a roller or brush to apply primer evenly across the ceiling tiles. Primer helps paint adhere better and ensures uniform color and finish.

4. Painting

  • Choose Your Method: Decide whether to paint tiles in place or remove them for easier access. Painting in place requires careful taping and covering of nearby surfaces.
  • Apply Paint: Start painting with even strokes, working in small sections. Apply multiple coats as needed for complete coverage, allowing each coat to dry thoroughly between applications.
  • Finishing Touches: Once dry, inspect the tiles for any missed spots or uneven areas. Touch up as necessary before removing painter’s tape and allowing the paint to cure completely.

Tips for Success When Painting Drop Ceiling Tiles

  • Ventilation: Ensure adequate ventilation in the room while painting and drying to dissipate fumes and speed up the drying process.
  • Temperature and Humidity: Paint in moderate temperatures and humidity levels to achieve the best results. Extreme conditions can affect paint application and drying times.
  • Lighting Considerations: Assess how lighting affects the appearance of painted tiles. Different lighting conditions may alter the perceived color and finish of the paint.

Maintenance and Longevity

Properly painted drop ceiling tiles can maintain their appearance and durability with minimal maintenance:

  • Regular Cleaning: Dust tiles periodically to prevent buildup and maintain a fresh look.
  • Avoid Abrasive Cleaners: Use gentle cleaning methods to avoid damaging the painted surface.
  • Inspect for Wear: Periodically check for signs of wear or damage. Touch up paint as needed to keep your ceiling looking its best.

Conclusion

Painting drop ceiling tiles offers a practical and creative solution to update and enhance your interior spaces. By following these steps and tips, you can achieve professional-looking results while transforming the ambiance of any room. Whether you’re aiming for a subtle refresh or a bold new look, painting ceiling tiles allows for endless possibilities in home improvement.
How to Fix a Mobile Home Ceiling Like a Pro? Expert Guide

Mobile homes offer convenience and flexibility, but like any structure, they require maintenance and occasional repairs. Among the common issues homeowners may encounter is ceiling damage. Knowing how to fix a mobile home ceiling can save you time and money, ensuring your living space remains comfortable and safe. This comprehensive guide provides step-by-step instructions and expert tips for addressing ceiling problems in mobile homes effectively.

How To Fix A Mobile Home Ceiling

Introduction

The ceiling of a mobile home serves both functional and aesthetic purposes. It provides insulation, soundproofing, and support for fixtures while contributing to the overall look and feel of the interior. Over time, factors such as water leaks, structural movement, and wear and tear can lead to ceiling damage. Learning how to fix a mobile home ceiling empowers homeowners to tackle these issues promptly, preserving the integrity of their living space.

Identifying Common Ceiling Problems

Before diving into repairs, it’s essential to identify the specific issues affecting your mobile home ceiling. Common problems include:

  1. Water Damage: Leaks from the roof or plumbing fixtures can cause water stains, sagging, and mold growth on the ceiling.
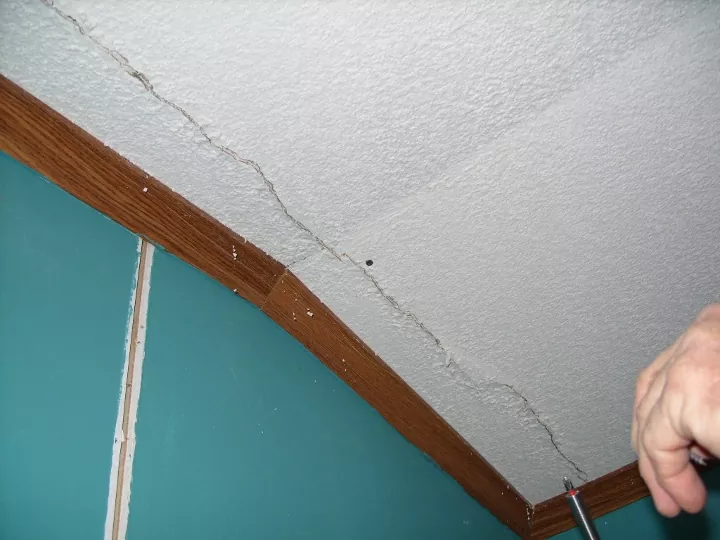
  2. Cracks and Holes: Structural settling or impact damage may result in cracks, holes, or bulges in the ceiling surface.
  3. Sagging Panels: Over time, ceiling panels may become loose or sag due to inadequate support or moisture absorption.
  4. Insulation Issues: Damage to insulation materials can compromise energy efficiency and indoor comfort.

How to Fix a Mobile Home Ceiling

  1. Assess the Damage: Begin by inspecting the ceiling carefully to determine the extent of the damage. Take note of any water stains, cracks, or sagging areas.
  2. Address Water Leaks: If water damage is present, identify and repair the source of the leak before proceeding with ceiling repairs. This may involve fixing roof leaks, sealing plumbing connections, or addressing condensation issues.
  3. Repair Cracks and Holes: Use a suitable patching compound to fill in cracks and holes in the ceiling. Smooth the surface with sandpaper once the compound has dried, then apply a coat of primer to ensure proper adhesion.
  4. Reinforce Sagging Panels: For sagging ceiling panels, install additional support beams or braces to provide structural reinforcement. Secure loose panels in place using construction adhesive or screws.
  5. Replace Damaged Panels: If ceiling panels are beyond repair, carefully remove them and replace them with new ones of the same size and style. Be sure to match the existing materials for a seamless finish.
  6. Insulate as Needed: Address any insulation issues by adding or replacing insulation materials above the ceiling panels. This helps improve energy efficiency and maintains a comfortable indoor environment.

Conclusion

In conclusion, knowing how to fix a mobile home ceiling empowers homeowners to address common issues and maintain the integrity of their living space. By identifying and addressing problems promptly, you can prevent further damage and ensure a comfortable and safe environment for you and your family.

Read too: Exploring the Efficiency of Radiant Ceiling Heater Electric: A Comprehensive Guide

Expert Guide to Popcorn Ceiling Removal in Portland: How to Safely and Effectively Upgrade Your Home

Popcorn ceilings, also known as acoustic ceilings or textured ceilings, were once a popular choice for homes due to their affordability and noise-reducing properties. However, their dated appearance and potential health hazards from asbestos content have led many homeowners in Portland to seek popcorn ceiling removal as part of home renovation projects. In this comprehensive guide, we’ll explore everything you need to know about popcorn ceiling removal in Portland, including techniques, costs, and safety considerations.

Popcorn Ceiling Removal Portland

Understanding Popcorn Ceiling Removal Portland

What Are Popcorn Ceilings?

Popcorn ceilings are textured ceilings characterized by a bumpy or stippled surface resembling popcorn. They were commonly installed in homes from the 1950s to the 1980s to mask imperfections and dampen sound. However, their popularity has waned due to aesthetic preferences and concerns over asbestos content in older installations.

Reasons for Popcorn Ceiling Removal

There are several reasons why homeowners in Portland may choose to remove popcorn ceilings:

  • Outdated Appearance: Popcorn ceilings can give homes a dated and unappealing look, detracting from their overall aesthetic appeal.
  • Health Concerns: Popcorn ceilings installed before the 1980s may contain asbestos, a hazardous material known to cause respiratory issues and other health problems.
  • Ease of Maintenance: Popcorn ceilings are notoriously difficult to clean and may trap dust and allergens, making them unsuitable for households with respiratory sensitivities.

Read too: Exploring Craftsman Style Ceiling Fans for Your Home: Embracing Timeless Elegance

Popcorn Ceiling Removal Portland: Techniques and Considerations

DIY vs. Professional Removal

  • DIY Removal: While DIY popcorn ceiling removal is possible, it can be labor-intensive, messy, and potentially hazardous, especially if asbestos is present.
  • Professional Removal: Hiring licensed professionals for popcorn ceiling removal in Portland ensures safe and efficient removal, proper disposal of hazardous materials, and compliance with local regulations.

Safety Precautions

  • Asbestos Testing: Before undertaking popcorn ceiling removal, it’s crucial to test for asbestos content, especially in homes built before the 1980s.
  • Personal Protective Equipment (PPE): Wear appropriate PPE, including masks, goggles, and coveralls, to minimize exposure to dust and debris during removal.

Removal Techniques

  • Wet Removal: Wetting the popcorn texture with a water or vinegar solution before scraping can help reduce dust and make removal easier.
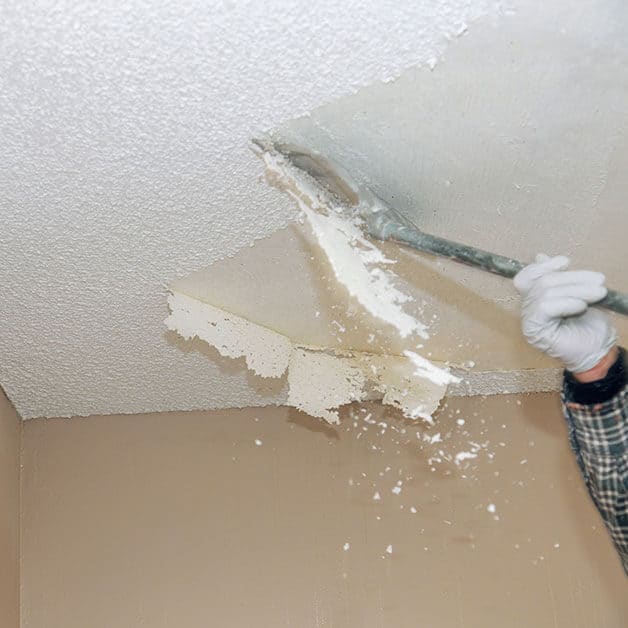
  • Scraping and Sanding: Use a putty knife or specialized ceiling scraper to gently remove the popcorn texture, taking care not to damage the underlying drywall.
  • Patch and Repair: After removing the popcorn texture, patch any imperfections in the ceiling and sand the surface smooth before applying a fresh coat of paint.

Cost of Popcorn Ceiling Removal in Portland

The cost of popcorn ceiling removal in Portland can vary depending on factors such as the size of the area, asbestos testing, and whether professional services are hired. On average, homeowners can expect to pay between $1 to $3 per square foot for professional removal services.

Conclusion

Popcorn ceilings removal in Portland is a popular home improvement project that can enhance the aesthetic appeal and safety of your home. Whether you choose to tackle the removal process yourself or enlist the help of professionals, prioritizing safety and proper disposal of materials is essential. By following the techniques and considerations outlined in this guide, you can safely and effectively upgrade your home by removing outdated popcorn ceilings.

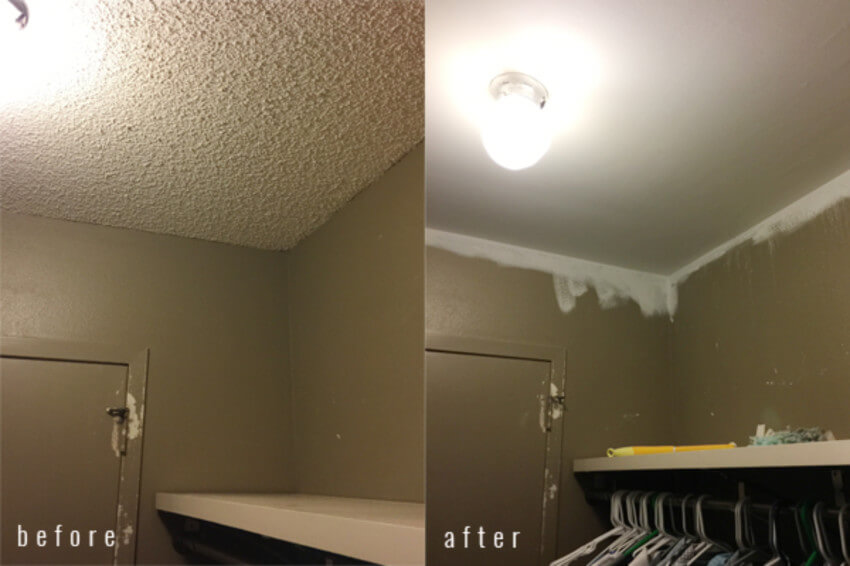
Transforming Your Home’s Elegance with a Smooth Ceiling After Popcorn Removal: Elevate Your Space

When it comes to home aesthetics, the ceiling holds immense potential. Discover the transformative journey of achieving a refined and modern look for your living space with “Ceiling After Popcorn Removal.”

Ceiling After Popcorn Removal

Ceiling After Popcorn Removal: A Fresh Start

Understanding the Popcorn Ceiling Legacy

Popcorn ceilings, once a popular choice for their acoustic properties, have become outdated. Their textured appearance, however, often poses challenges in terms of aesthetics and maintenance. The decision to remove popcorn ceilings opens the door to a new era of design possibilities.

The Process of Popcorn Removal

Professional vs. DIY Approaches

Deciding whether to hire professionals or embark on a DIY popcorn removal project depends on factors like budget, time constraints, and the complexity of the task. Professional services often ensure a smoother and more efficient process.

Preparation Steps

Preparing the space before popcorn removal is crucial. This involves furniture relocation, floor and wall protection, and, if needed, sealing off the room to minimize dust and debris spread.

Ceiling After Popcorn Removal: The Transformation

Smooth Finishing Options

Once the popcorn texture is removed, you are presented with a smooth canvas. Choose from various finishing options, including a classic smooth surface, subtle textures, or even the popular knockdown finish for a touch of modernity.

Color Choices and Paint Selection

Selecting the right color for your newly revealed ceiling is a pivotal decision. Lighter hues can enhance the perception of space, while bold colors can add drama. Ensure compatibility with your overall interior design.

Benefits of a Smooth Ceiling After Popcorn Removal

Enhanced Lighting and Ambiance

A smooth ceiling reflects light more evenly, brightening up the room and creating a welcoming ambiance. This is especially beneficial in areas with limited natural light.

Ease of Cleaning and Maintenance

Unlike popcorn ceilings, which can trap dust and cobwebs, a smooth ceiling simplifies cleaning. Regular maintenance becomes more straightforward, contributing to a healthier indoor environment.

DIY Tips for Achieving a Professional Look

Surface Preparation Techniques

For those opting for a DIY approach, proper surface preparation is key. Smooth out imperfections, fill in any gaps, and sand the surface meticulously for a professional finish.

Choosing the Right Tools and Materials

Investing in high-quality tools and materials, such as a good primer and paint, ensures a durable and visually appealing result. Research and select products suitable for your specific ceiling type.

Read too: Troubleshooting and Addressing a Water Bubble in Ceiling: Causes and Solutions Revealed

Conclusion: Elevating Your Home’s Aesthetic Appeal

In conclusion, the journey from a popcorn ceiling to a smooth, refined surface is not just a visual upgrade; it’s a transformation that enhances your home’s overall aesthetic appeal. Whether you choose professional services or embark on a DIY project, the results speak volumes about modern design trends and personalized home aesthetics.

So, bid farewell to the popcorn ceiling era and embrace the elegance of a smooth “Ceiling After Popcorn Removal.” Your home deserves a look that not only reflects contemporary style but also contributes to a brighter, more inviting living space.

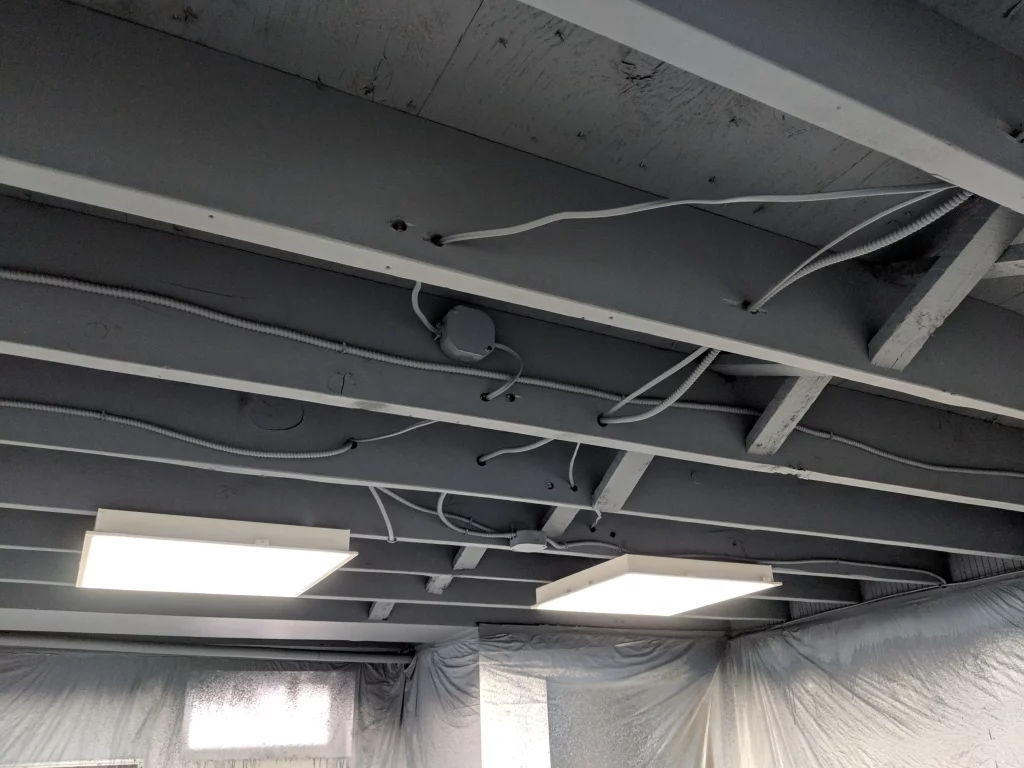
Painting an Unfinished Basement Ceiling to Elevate Your Space: Transformative Charm

Embark on a home improvement journey with “Painting an Unfinished Basement Ceiling” and unlock the secrets to turning a neglected space into a visually appealing and functional area. Discover the transformative power of paint and reimagine your unfinished basement with this comprehensive guide.

Painting An Unfinished Basement Ceiling

Introduction: The Power of Paint – Revitalizing Your Unfinished Basement Ceiling

Often overlooked, the basement holds untapped potential. In this guide, we delve into the world of “Painting an Unfinished Basement Ceiling,” exploring the reasons, benefits, and step-by-step process to breathe new life into your home’s lower level. Whether it’s a playroom, home office, or entertainment space, painting the ceiling can elevate the entire ambiance.

Step-by-Step Guide to Painting an Unfinished Basement Ceiling

*1. Preparation is Key: Cleaning and Inspection

Before picking up a paintbrush, ensure the ceiling is clean and free of dust or debris. Inspect for any signs of water damage, leaks, or structural issues that may need addressing before painting.

*2. Selecting the Right Paint for the Job

Choose a high-quality paint suitable for basement conditions. Consider factors like moisture resistance, mold resistance, and durability to ensure a long-lasting and visually appealing finish.

*3. Gather the Necessary Tools and Equipment

Prepare for the task by gathering essential tools, including a quality paintbrush, roller, painter’s tape, drop cloths, and any additional equipment required for your specific ceiling type.

*4. Applying Primer for Adhesion

Apply a primer to enhance paint adhesion and promote an even finish. This step is particularly crucial for unfinished basement ceilings, as it creates a solid foundation for the paint to adhere to.

*5. Choosing the Right Paint Technique

Explore various paint techniques, such as spraying, rolling, or brushing, to find the one that suits your ceiling’s texture and your desired aesthetic. Consider using a sprayer for efficiency on larger surfaces.

*6. Picking the Perfect Color Palette

Selecting the right color can significantly impact the atmosphere of your basement. Opt for lighter shades to create an open and inviting space, or go bold with contrasting colors for a more dramatic look.

*7. Executing the Painting Process

Follow a systematic approach to painting your unfinished basement ceiling. Start from one corner and work your way across the room, ensuring even coverage and addressing any drips or imperfections as you go.

*8. Drying and Curing Time

Allow sufficient drying and curing time between coats as per the paint manufacturer’s recommendations. This ensures a durable and professional-looking finish.

Benefits of Painting an Unfinished Basement Ceiling

  1. Enhanced Aesthetics: Painting transforms the raw, industrial look of an unfinished ceiling into a polished and cohesive space.
  2. Light Reflection: Light-colored paint can improve light reflection, making the basement feel brighter and more welcoming.
  3. Concealing Imperfections: Paint helps conceal minor imperfections and inconsistencies in the ceiling, providing a cleaner appearance.

Maintaining Your Painted Basement Ceiling

  1. Regular Cleaning: Keep your painted ceiling looking fresh by incorporating regular cleaning routines to remove dust or cobwebs.
  2. Addressing Issues Promptly: Promptly address any water leaks or damage to prevent paint deterioration. Regular inspections ensure early detection and swift action.

Read too: Discover the Allure of Hunter Douglas Wood Ceiling Designs: Enhancing Spaces with Elegance

Conclusion: Unleashing the Full Potential of Your Basement

In conclusion, “Painting an Unfinished Basement Ceiling” is a transformative project that can revitalize your home’s lower level. By following this guide, you can turn a neglected space into a vibrant and functional area that complements your overall home design. Unleash your creativity, pick up that paintbrush, and witness the remarkable difference it makes.

How To Paint Basement Ceiling for a Stylish and Inviting Atmosphere? Transform Your Space

Discover the art of enhancing your basement’s aesthetic appeal by learning how to paint basement ceiling creatively. Elevate your space with this step-by-step guide for a stylish and inviting atmosphere.

How To Paint Basement Ceiling

Unleashing Creativity – How To Paint Basement Ceiling

Uncover the secrets to transforming your basement into a stylish haven through the art of ceiling painting. Dive into the steps and tips on how to paint a basement ceiling to achieve a visually stunning and welcoming atmosphere.

Preparing Your Basement for Painting:

  1. Clean and Clear the Area:
    • Begin by clearing the basement of any furniture or items that may obstruct your painting efforts. Sweep and clean the area to ensure a dust-free surface.
  2. Inspect for Damage:
    • Conduct a thorough inspection of the ceiling for any signs of damage, leaks, or mold. Address these issues before proceeding with the painting process.
  3. Choose the Right Paint:
    • Select a high-quality paint suitable for ceilings. Consider light colors to brighten the space and make it feel more expansive.

Essential Tools and Materials:

  1. Paint Rollers and Brushes:
    • Invest in quality paint rollers and brushes for efficient and even application. Extension poles can be useful for reaching higher areas.
  2. Drop Cloths or Tarps:
    • Protect the floor and any remaining items in the basement with drop cloths or tarps to prevent paint splatters.
  3. Painter’s Tape:
    • Use painter’s tape to mask off areas you don’t want to paint, such as walls or light fixtures.
  4. Primer:
    • Apply a primer to the ceiling before painting to ensure better adhesion and a more even finish.

Read too: Is Bathroom Ceiling Mold Dangerous to Your Health and Home? Unveiling the Threat

Step-by-Step Guide on How To Paint Basement Ceiling:

  1. Prepare and Prime:
    • Clean the ceiling thoroughly and apply a coat of primer. Allow it to dry completely before proceeding.
  2. Cut In the Edges:
    • Use a brush to cut in around the edges of the ceiling, where the roller might not reach easily. This ensures a clean and precise finish.
  3. Roll the Ceiling:
    • Use a paint roller to cover the larger areas of the ceiling. Work in sections, and be mindful of even paint distribution.
  4. Apply Second Coat (if Necessary):
    • After the first coat has dried, assess the coverage. If needed, apply a second coat for a more vibrant and polished look.

Tips and Tricks for a Successful Basement Ceiling Paint Job:

  1. Use Light Colors:
    • Light-colored paint can help brighten the space and create a more open and airy feel in the basement.
  2. Consider Adding a Pop of Color:
    • If you’re feeling adventurous, consider adding a pop of color to create a focal point in the basement.
  3. Work in Well-Ventilated Spaces:
    • Ensure proper ventilation in the basement while painting. Open windows or use fans to disperse fumes.
  4. Take Breaks:
    • Painting a ceiling can be physically demanding. Take regular breaks to avoid strain and fatigue.

Finishing Touches and Clean-Up:

  1. Remove Painter’s Tape:
    • Once the paint has dried, carefully remove the painter’s tape from edges for a clean finish.
  2. Inspect for Touch-Ups:
    • Inspect the painted ceiling for any areas that may need touch-ups. Address these promptly for a flawless result.
  3. Clean Brushes and Rollers:
    • Clean your brushes and rollers thoroughly with soap and water. Properly store them for future use.

Conclusion: Elevate Your Basement’s Appeal with a Fresh Coat of Paint

In conclusion, mastering how to paint a basement ceiling allows you to transform a neglected space into a stylish and inviting area. With the right tools, materials, and a creative mindset, you can achieve a stunning result that enhances the overall aesthetics of your home.

Take the plunge into basement renovation, and elevate your living space with a fresh coat of paint on the ceiling.

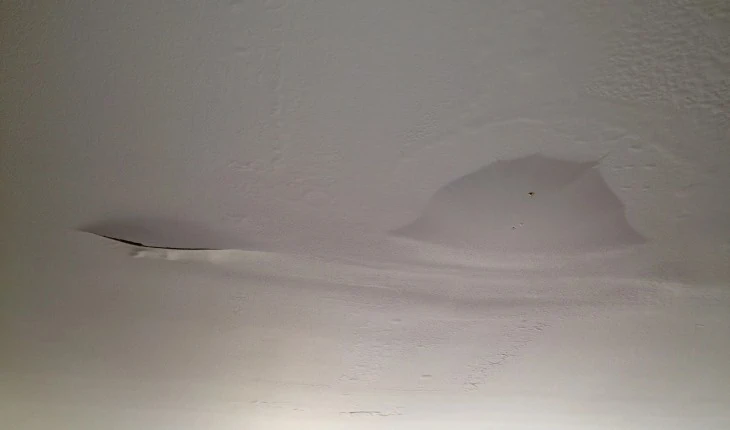
How To Fix Water Bubble In Ceiling – A DIY Guide

A water bubble in the ceiling can be an alarming sight. It not only compromises the aesthetics of your home but also indicates a potential water leak or damage that needs immediate attention. Fixing a water bubble in the ceiling can be a DIY project if the problem is caught early and the damage is not extensive. In this article, we’ll guide you through the steps to address this issue effectively, from identifying the root cause to repairing the damage. Let’s get started.

How To Fix Water Bubble In Ceiling

Identifying the Problem

Before you can fix a water bubble in your ceiling, you need to identify the root cause. Water bubbles occur when water accumulates between the paint or drywall and the ceiling surface. This can happen due to various reasons, including:

  1. Leaky Roof: One of the most common reasons for water bubbles in the ceiling is a leaky roof. When your roof is compromised, rainwater can seep into the attic and then make its way down to the ceiling.
  2. Plumbing Issues: Faulty plumbing, such as a burst pipe or a leaky connection, can also lead to water bubbles in the ceiling. In this case, the water might come from above or adjacent to the ceiling.
  3. Condensation: In some cases, condensation can accumulate and create bubbles in the ceiling. This is more common in high-humidity environments or bathrooms without proper ventilation.

Locating the Source of the Leak

To effectively fix the water bubble in your ceiling, you need to find the source of the leak. Here’s how you can do it:

  1. Inspect the Attic: If you suspect a leaky roof, start by inspecting your attic. Look for wet spots or signs of water infiltration on the attic floor or the rafters. This can help you pinpoint the area where the water is entering.
  2. Check Plumbing: If you suspect a plumbing issue, turn off the water supply to your home and check for any dampness or leaks near the plumbing fixtures. This can help you identify the source of the problem.
  3. Look for Stains: Water stains on your ceiling can also provide clues about the source of the leak. The stain will typically be located close to the water bubble.

Repairing the Water Bubble

Once you’ve identified the source of the leak, it’s time to fix the water bubble in your ceiling. Here’s a step-by-step guide to repairing the damage:

  1. Gather Your Supplies: You’ll need a utility knife, a bucket, a plastic drop cloth, a putty knife, sandpaper, primer, paint, and a paint roller. Make sure to wear safety goggles and gloves during the process.
  2. Protect the Area: Lay the plastic drop cloth on the floor beneath the water bubble. This will catch any falling debris and water, making cleanup easier.
  3. Drain the Water: Use the utility knife to puncture the water bubble gently. Allow the water to drain into the bucket. If the bubble is large, be prepared for a significant amount of water.
  4. Let it Dry: After draining the water, allow the area to dry completely. This might take a few hours or even a day, depending on the extent of the damage.
  5. Scrape and Sand: Once the area is dry, use the putty knife to scrape away any loose or damaged drywall or paint. Then, sand the area to create a smooth surface for repairs.
  6. Apply Primer: Apply a layer of primer to the damaged area. This will help seal the surface and prepare it for painting.
  7. Paint the Ceiling: After the primer has dried, use a paint roller to apply a matching paint color to the ceiling. Make sure to blend the new paint with the surrounding area to create a seamless finish.
  8. Inspect for Additional Leaks: After the repair is complete, closely monitor the area for signs of additional leaks. If the problem persists, it’s crucial to address the underlying issue.

Preventing Future Water Bubbles

To prevent future water bubbles in your ceiling, consider these preventative measures:

  1. Regular Roof Inspections: Schedule regular inspections of your roof to catch and fix any issues early.
  2. Maintain Plumbing: Check and maintain your plumbing regularly to prevent leaks.
  3. Improve Ventilation: If condensation is a recurring issue, consider improving ventilation in the affected area.

Read too: What Does Water Damage Look Like On Ceiling

Conclusion

Fixing a water bubble in your ceiling is a manageable DIY project if you act promptly and address the underlying issue. Identifying the source of the leak, repairing the damage, and taking preventative measures can help maintain the integrity and appearance of your ceiling. By following the steps outlined in this article, you can resolve the issue and ensure a dry and beautiful home.