Ceilings often go unnoticed in many homes, but they play a crucial role in the overall look and feel of a room. If you’re looking for a modern, durable, and low-maintenance solution to upgrade your ceiling, PVC tongue and groove ceiling planks might be the perfect choice. These planks combine the beauty of wood with the durability and easy maintenance of plastic, creating a sleek and functional ceiling for any room in your home. In this comprehensive guide, we’ll explore everything you need to know about PVC tongue and groove ceiling planks, including installation, benefits, and how they compare to other ceiling materials.
What Are PVC Tongue and Groove Ceiling Planks?
PVC tongue and groove ceiling planks are made from high-quality, durable polyvinyl chloride (PVC) plastic. These planks have a distinctive “tongue and groove” design, which means they interlock tightly together, creating a seamless and uniform appearance. The interlocking system not only provides structural integrity but also makes installation easier and faster.
- Tongue and Groove Design: This refers to the way the edges of the planks are designed to fit into one another. One side of the plank has a “tongue” (a small, protruding piece) that fits into the “groove” of the adjacent plank, ensuring that the planks stay in place and the joints are hidden for a smooth finish.
- PVC Material: PVC is a water-resistant, durable plastic, which is perfect for ceiling applications. Unlike wood or drywall, PVC won’t warp, crack, or rot, making it ideal for rooms with high humidity, such as bathrooms, kitchens, and basements.
Why Choose PVC Tongue and Groove Ceiling Planks?
PVC tongue and groove ceiling planks are becoming increasingly popular for several reasons. Below, we discuss some of the key advantages they offer:
1. Durability and Longevity
PVC is an incredibly durable material that can withstand wear and tear much better than other traditional ceiling materials, such as wood or drywall. These planks are resistant to:
- Moisture: Perfect for areas with high humidity, PVC won’t warp or rot when exposed to water.
- Impact: PVC is more resilient to physical impacts, such as dents or cracks, compared to wood.
- UV Rays: PVC does not fade or discolor easily when exposed to sunlight.
Read too: Discovering the Charm of Nautical Outdoor Ceiling Fans for Your Coastal Retreat: Sail into Style
2. Low Maintenance
One of the best things about PVC tongue and groove ceiling planks is their low maintenance needs. Unlike wooden ceilings that require frequent painting, staining, or sealing, PVC planks are easy to clean and don’t require much upkeep. A simple wipe-down with a damp cloth is usually enough to keep them looking new.
3. Easy Installation
Installing PVC tongue and groove ceiling planks is relatively straightforward, especially compared to traditional drywall or plaster. The tongue and groove system allows the planks to snap into place without the need for nails or screws. Many people choose to install them as a DIY project, saving both time and money.
4. Aesthetic Appeal
PVC planks can mimic the appearance of traditional wood or other materials, giving you the look of a high-end ceiling without the associated costs. They come in a wide variety of finishes and colors, so you can easily match them to the existing décor of your room.
5. Cost-Effective
PVC is typically more affordable than many other ceiling materials, such as wood or metal. Because of their durability, the need for long-term repairs is minimal, making them an economical choice over time.
6. Environmentally Friendly
Although PVC is a plastic material, many manufacturers produce it using environmentally friendly practices. Additionally, PVC tongue and groove ceiling planks are recyclable at the end of their life cycle, making them a more sustainable option compared to other ceiling materials like wood, which requires cutting down trees.
Installation Tips
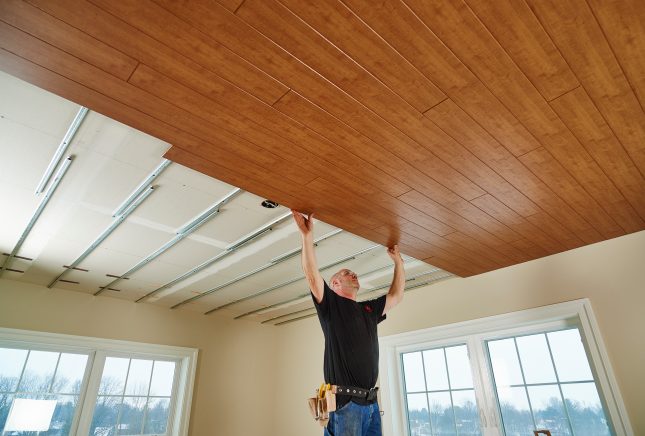
Installing PVC tongue and groove ceiling planks is a simple process, especially with the interlocking design. Here’s a step-by-step guide to help you through the installation:
1: Prepare the Ceiling
- Measure the Ceiling: Measure the length and width of your ceiling to determine how many planks you will need.
- Clean the Surface: Ensure the ceiling surface is clean and free of any debris. If you’re installing over an existing ceiling, make sure the surface is level and smooth.
2: Cut the Planks
- Measure and Cut: Use a saw (such as a circular or miter saw) to cut the PVC planks to the desired lengths. Be sure to measure twice and cut once to ensure accurate fits.
- Allow for Expansion: Leave a small gap (about 1/8 inch) between the edges of the planks and the walls to allow for expansion due to temperature changes.
3: Install the First Plank
- Start at the Edge: Begin installing the first plank in one corner of the ceiling. The tongue side of the plank should face the wall, and the groove should face out towards the next plank.
- Secure the Plank: Use screws or nails to secure the first plank to the ceiling joists. Ensure the plank is level and aligned properly.
4: Attach Additional Planks
- Snap Planks Together: Slide the tongue of each new plank into the groove of the previous one. The interlocking system will hold the planks in place without the need for additional nails or fasteners.
- Continue Installing: Keep adding planks until the ceiling is fully covered. Use a hammer and a block of wood to gently tap the planks into place if needed.
5: Trim the Final Plank
- Cut the Last Plank: If needed, measure and cut the final plank to fit the remaining space at the other side of the ceiling. Ensure that the gap between the plank and the wall is even.
- Secure the Final Plank: Nail or screw the final plank into place.
6: Finishing Touches
- Add Molding: To give your ceiling a finished look, add molding or trim along the edges where the planks meet the walls.
- Clean the Ceiling: Wipe down the new ceiling to remove any dust or debris from the installation process.
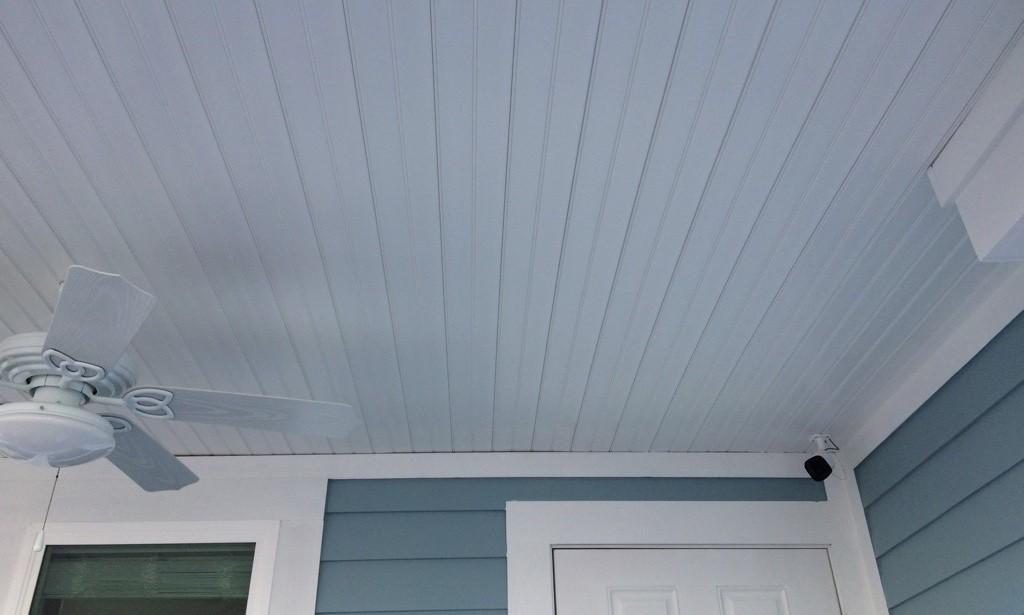
Where to Use PVC Tongue and Groove Ceiling Planks
PVC tongue and groove ceiling planks are versatile and can be used in various rooms in the home. Here are some common areas where these planks are ideal:
- Kitchens: Due to their moisture resistance, PVC planks are perfect for kitchens, where steam and humidity levels tend to be higher.
- Bathrooms: The water-resistant properties of PVC make it an excellent choice for bathroom ceilings.
- Basements: Basements are often damp and prone to moisture, so PVC planks are a great way to ensure your ceiling stays intact.
- Living Rooms and Bedrooms: PVC planks can be used in common living spaces for an elegant look that is easy to maintain.
- Garages: For a more durable ceiling in your garage, PVC planks provide a long-lasting and stylish solution.
Comparing PVC Tongue and Groove Ceiling Planks with Other Ceiling Materials
When choosing a ceiling material, it’s important to consider the pros and cons of each option. Here’s how PVC tongue and groove ceiling planks stack up against other popular ceiling materials:
- Wooden Planks: While wood offers a natural aesthetic, it is more susceptible to damage from moisture and requires more maintenance than PVC.
- Drywall: Drywall is more affordable but can be difficult to install and is prone to cracking, staining, and warping over time.
- Metal Ceilings: Metal ceilings are durable but can be cold and industrial in appearance. PVC, on the other hand, offers a more modern and aesthetically versatile option.
Conclusion
PVC tongue and groove ceiling planks are a fantastic choice for homeowners looking to upgrade their ceilings with a durable, low-maintenance, and visually appealing material. Whether you’re installing them in the bathroom, kitchen, or living room, PVC planks offer a perfect combination of functionality and style. With easy installation, a variety of designs, and a cost-effective price tag, these planks are an excellent investment for any home.