Pool Table Light with Ceiling Fan Combo: Elevate Your Game Room with a Stylish

Upgrade your game room experience with the perfect blend of style and functionality: a pool table light with a built-in ceiling fan.

Pool Table Light With Ceiling Fan

Introduction

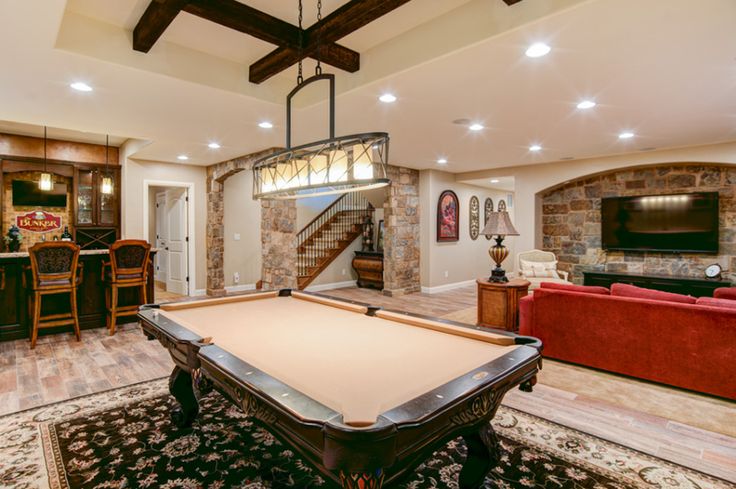
Creating the ultimate game room requires attention to detail and thoughtful design choices. While a pool table is a centerpiece of any game room, proper lighting and climate control are equally important for an enjoyable gaming experience. Enter the pool table light with ceiling fan combo, a versatile fixture that combines overhead lighting with cooling airflow. In this comprehensive guide, we’ll explore the benefits, features, and installation considerations of pool table lights with ceiling fans, helping you elevate your game room to new heights of comfort and style.


Understanding Pool Table Light with Ceiling Fan Combos

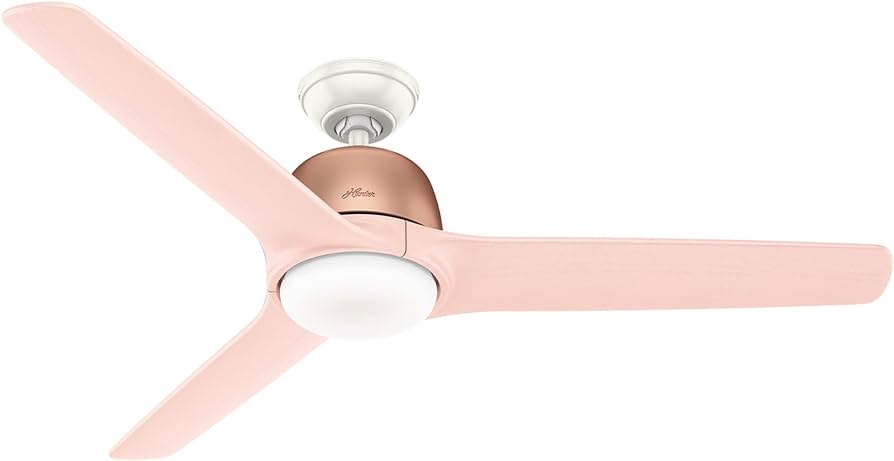
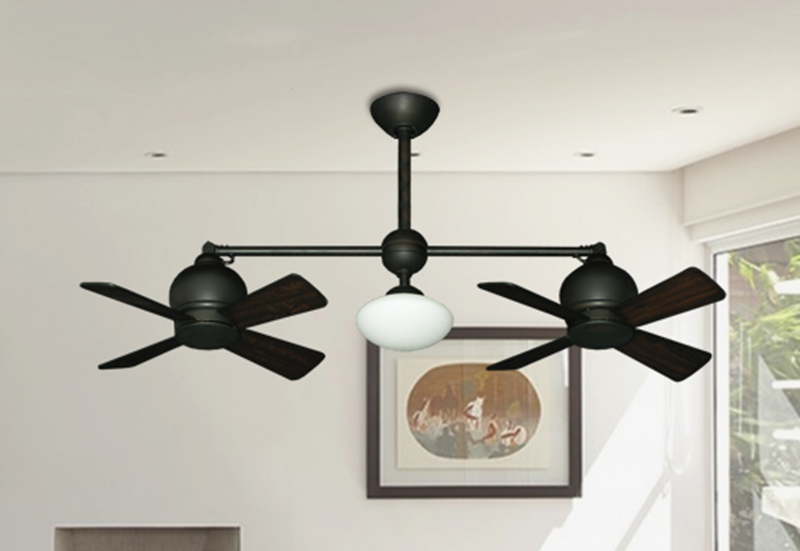
Pool table lights with ceiling fans are innovative fixtures designed to provide both illumination and air circulation in game rooms and recreational spaces. These fixtures typically feature a central lighting element suspended over the pool table, surrounded by fan blades that provide cooling airflow. With their dual functionality, pool table lights with ceiling fans offer a convenient and space-saving solution for game rooms, ensuring optimal lighting and comfort for players and spectators alike.


Common Features of Pool Table Lights with Ceiling Fans

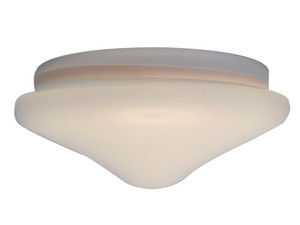
  1. Adjustable Lighting: Most pool table lights with ceiling fans feature adjustable lighting options, allowing you to customize the brightness and direction of the light to suit your preferences and gameplay needs.
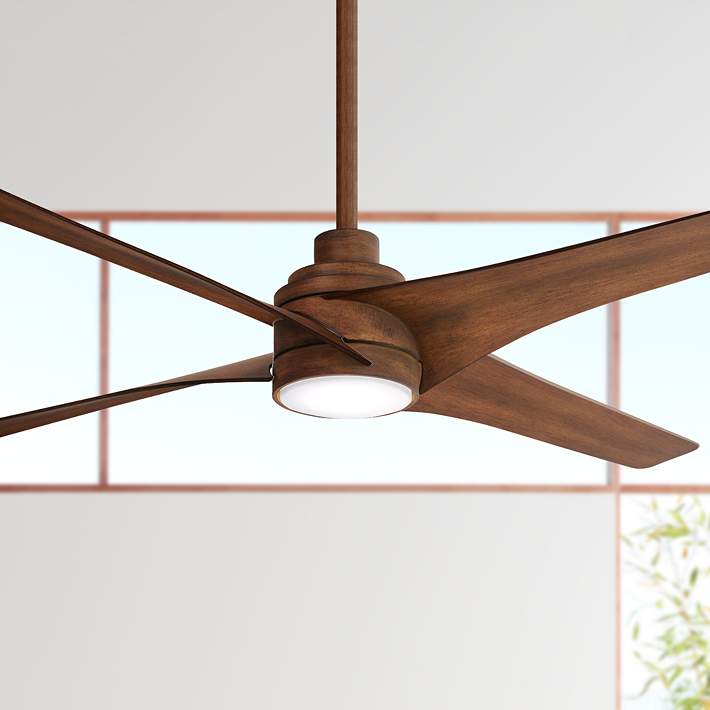
  2. Integrated Ceiling Fan: The built-in ceiling fan provides cooling airflow, helping to regulate the temperature and create a comfortable environment for extended gaming sessions.
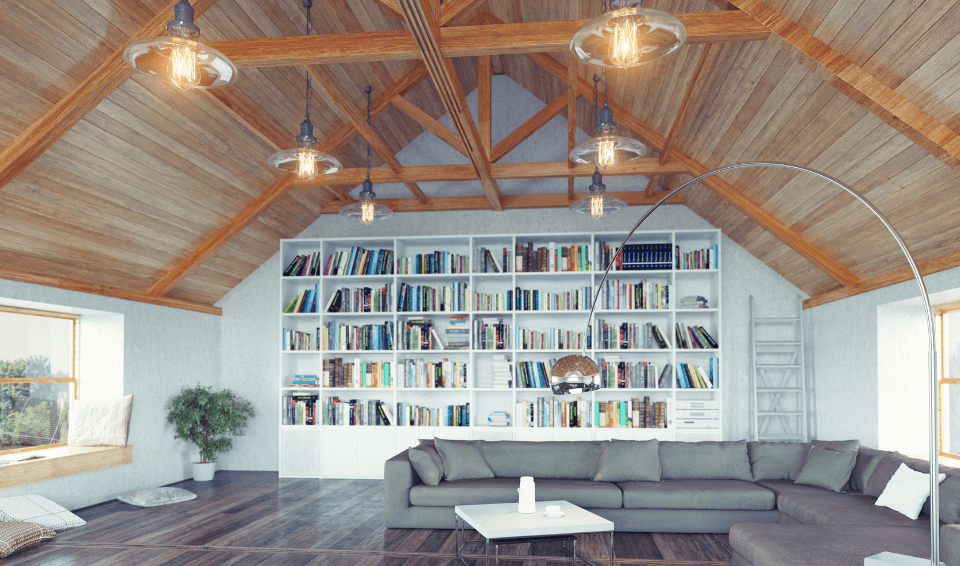
  3. Stylish Design: Pool table lights with ceiling fans come in a variety of styles and finishes to complement any game room decor. Whether you prefer a traditional billiard room aesthetic or a more modern look, there’s a fixture to suit your style.
  4. Remote Control: Many pool table lights with ceiling fans come with remote controls for easy operation of both the lighting and fan functions. This convenient feature allows you to adjust settings without leaving your seat, enhancing the gaming experience.

Choosing the Right Pool Table Light with Ceiling Fan

When selecting a pool table light with a ceiling fan for your game room, consider the following factors to ensure the perfect fit:

  1. Size: Choose a fixture that is proportionate to the size of your pool table and game room. The light should adequately illuminate the playing surface without overwhelming the space.
  2. Style: Select a design that complements your game room decor and personal aesthetic. Whether you prefer a classic Tiffany-style light or a sleek contemporary fixture, there are options to suit every taste.
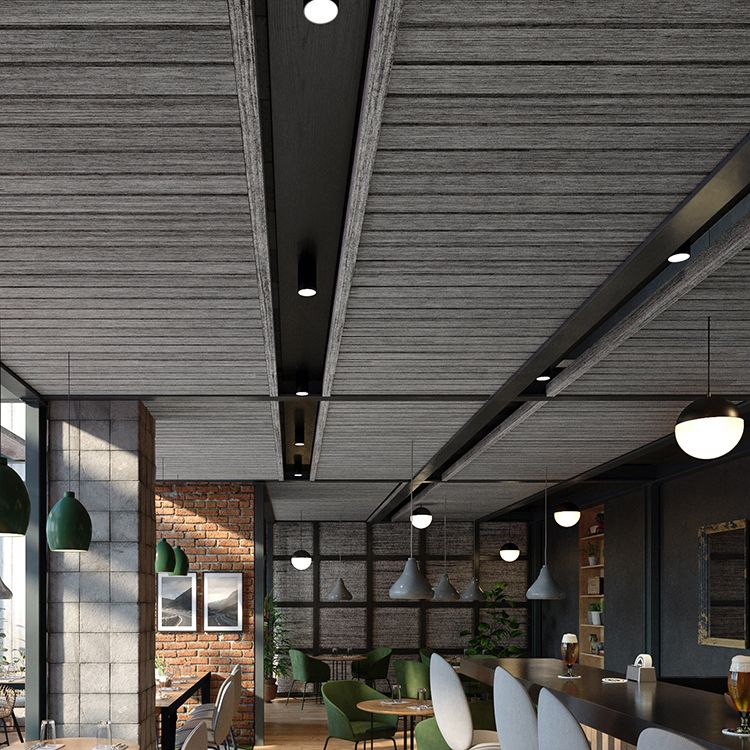
  3. Finish: Consider the finish of the fixture and how it will coordinate with other elements in the room, such as the pool table, furniture, and flooring. Choose a finish that complements the overall color scheme and style of your game room.
  4. Functionality: Ensure that the pool table light with ceiling fan meets your functional needs, including adequate lighting for gameplay and effective cooling airflow. Look for features such as adjustable brightness, fan speed settings, and remote control operation for added convenience.

Conclusion

A pool table light with a ceiling fans is a practical and stylish addition to any game room, providing both illumination and cooling airflow for an enhanced gaming experience. With their adjustable lighting, integrated ceiling fans, and stylish designs, these fixtures offer the perfect blend of form and function. Whether you’re a serious pool player or just enjoy casual games with friends, investing in a pool table light with a ceiling fan is sure to take your game room to the next level.

Read too: Discovering the Charm of Nautical Outdoor Ceiling Fans for Your Coastal Retreat: Sail into Style

Monte Carlo Ceiling Fan Light Cover Options: Enhance Your Space with Stylist

Upgrade the look and functionality of your ceiling fan with our guide to Monte Carlo ceiling fan light cover, adding both style and illumination to any room.

Monte Carlo Ceiling Fan Light Cover

Introduction

Ceiling fans are not only practical for keeping your space cool and comfortable, but they can also serve as stylish fixtures that enhance the overall aesthetic of your room. Monte Carlo ceiling fans are known for their quality craftsmanship and innovative designs, and their light covers are no exception. In this comprehensive guide, we’ll explore the world of Monte Carlo ceiling fan light covers, discussing their features, benefits, and how they can elevate the look of your home.


Understanding Monte Carlo Ceiling Fan Light Covers

Monte Carlo ceiling fan light covers complement the sleek and modern aesthetics of Monte Carlo ceiling fans while providing functional illumination to your space. These covers come in a variety of styles, finishes, and materials, allowing you to customize your fan to suit your personal taste and decor. Whether you prefer a minimalist look or something more ornate, there’s a Monte Carlo light cover to match your style.


Common Features of Monte Carlo Ceiling Fan Light Covers

  1. Sleek Design: Monte Carlo ceiling fan light covers are known for their sleek and modern design. They feature clean lines, smooth curves, and minimalist details that complement the overall aesthetic of the fan.
  2. Variety of Finishes: From brushed nickel to matte black, Monte Carlo offers a wide range of finishes for their ceiling fan light covers. Whether you prefer a classic metallic look or something more contemporary, there’s a finish to suit every style.
  3. Integrated Lighting: Many Monte Carlo ceiling fan light covers come with integrated lighting options, including LED bulbs or traditional incandescent bulbs. This allows you to customize the brightness and ambiance of your space to suit your needs.
  4. Easy Installation: Monte Carlo ceiling fan light covers are designed for easy installation, allowing you to upgrade your fan quickly and hassle-free. With simple instructions and all the necessary hardware included, you can enjoy your new light cover in no time.

Choosing the Right Monte Carlo Ceiling Fan Light Cover

When selecting a Monte Carlo ceiling fan light cover for your space, there are several factors to consider to ensure you find the perfect match.

  1. Style: Consider the overall style of your room and choose a light cover that complements your existing decor. Whether you prefer a contemporary look or something more traditional, there’s a Monte Carlo light cover to suit your taste.
  2. Size: Ensure that the light cover is the right size for your ceiling fan to ensure proper fit and functionality. Measure the diameter of your fan’s light kit to determine the appropriate size cover.
  3. Finish: Choose a finish that coordinates with the other finishes in your space, such as your fan blades, hardware, and other fixtures. Whether you prefer a matching finish or something contrasting, make sure it complements the overall aesthetic of your room.
  4. Functionality: Consider the lighting needs of your space and choose a light cover with the appropriate brightness and features. Whether you need bright task lighting for a workspace or soft ambient lighting for a bedroom, there’s a Monte Carlo light cover that meets your needs.

Conclusion

Monte Carlo ceiling fan light covers offer a stylish and functional solution for upgrading your ceiling fan and enhancing the look of your space. With their sleek design, variety of finishes, and integrated lighting options, these light covers allow you to customize your fan to suit your personal style and lighting needs. Whether you’re looking to add a modern touch to your living room or create a cozy ambiance in your bedroom, Monte Carlo ceiling fan light covers are sure to impress.

Read too: Discovering the Charm of Nautical Outdoor Ceiling Fans for Your Coastal Retreat: Sail into Style

Mid Century Modern Ceiling Tile: Elevate Your Space with Stylish

Transform your interior design with the timeless elegance of mid century modern ceiling tile, adding a touch of sophistication to any room.

Mid Century Modern Ceiling Tiles

Introduction

Ceilings are often overlooked when it comes to interior design, but they play a significant role in shaping the overall look and feel of a space. Mid century modern style, characterized by clean lines, organic shapes, and minimalist design, has experienced a resurgence in popularity in recent years. One way to incorporate this iconic aesthetic into your home is by installing mid century modern ceiling tiles. In this comprehensive guide, we’ll explore the world of mid century modern ceiling tiles, discussing their characteristics, benefits, and how to incorporate them into your interior design scheme.


Understanding Mid Century Modern Ceiling Tiles

Mid century modern ceiling tiles feature sleek, minimalist designs and geometric patterns, defining their characteristic style. Typically made from materials such as metal, fiberglass, or PVC, these tiles offer a variety of colors and finishes to complement any decor style. Whether you’re looking to add visual interest to a room or create a cohesive mid century modern aesthetic, these ceiling tiles offer a versatile and stylish solution.


Common Features of Mid Century Modern Ceiling Tiles

  1. Geometric Patterns: Mid century modern ceiling tiles often feature geometric patterns such as squares, rectangles, or triangles. These patterns create visual interest and add a sense of depth to the ceiling.
  2. Clean Lines: Clean lines are a hallmark of mid century modern design, and ceiling tiles in this style typically feature sleek, straight edges and minimal ornamentation.
  3. Organic Shapes: While mid century modern design is known for its clean lines and geometric forms, it also incorporates organic shapes inspired by nature. Some ceiling tiles may feature curves or asymmetrical patterns to add visual interest.
  4. Minimalist Design: Mid century modern ceiling tiles embrace the principles of minimalism, with a focus on simplicity and functionality. Designed to enhance the overall aesthetic of a space without overwhelming it, these tiles strike a perfect balance.

Incorporating Mid Century Modern Ceiling Tiles Into Your Home

Mid century modern ceiling tiles can be used in a variety of ways to enhance the style and functionality of your space.

  1. Living Room: Add a touch of mid century modern flair to your living room by installing ceiling tiles with geometric patterns or clean lines. These tiles can complement existing furniture and decor for a cohesive look.
  2. Kitchen: Create a sleek and stylish kitchen design by installing mid century modern ceiling tiles above the island or dining area. Opt for tiles in a neutral color palette to complement stainless steel appliances and minimalist cabinetry.
  3. Bedroom: Transform your bedroom into a tranquil retreat with mid century modern ceiling tiles in calming hues such as soft gray or pale blue. Choose tiles with subtle patterns or organic shapes to create a relaxing atmosphere.
  4. Home Office: Boost productivity and creativity in your home office by installing mid century modern ceiling tiles that inspire focus and concentration. Choose tiles in bold colors or graphic patterns to add visual interest to the space.

Read too: Discovering the Charm of Nautical Outdoor Ceiling Fans for Your Coastal Retreat: Sail into Style


Conclusion

Mid century modern ceiling tile offer a stylish and versatile solution for enhancing the aesthetic appeal of any room. With their clean lines, geometric patterns, and minimalist design, these tiles can transform your space into a sophisticated retreat reminiscent of the iconic design era. Whether you’re looking to add a touch of mid century modern flair to your living room, kitchen, bedroom, or home office, ceiling tiles in this style are sure to make a statement.

Essential Lighting Tips for Loft Ceilings: Illuminate Your Space

Discover how to effectively light up your loft ceilings with our expert advice on lighting for loft ceilings.

Lighting For Loft Ceilings

Introduction

Loft ceilings offer a unique architectural feature that can add character and charm to any space. However, effectively lighting these high ceilings can pose a challenge for many homeowners. Whether you’re looking to create a cozy ambiance or showcase the spaciousness of your loft, choosing the right lighting solutions is essential. In this comprehensive guide, we’ll explore the world of lighting for loft ceilings, providing valuable insights and practical tips to help you illuminate your space with style and functionality.


Understanding Lighting For Loft Ceilings

Lighting for loft ceilings requires careful consideration of both the height and layout of the space. From statement fixtures to strategic placement, there are various approaches to achieving the perfect lighting scheme for your loft. Whether you’re aiming for a modern minimalist look or a warm and inviting atmosphere, selecting the right lighting fixtures and techniques can transform your loft into a stunning showcase.


Common Lighting Techniques for Loft Ceilings

  1. Statement Pendant Lights: Make a bold statement in your loft space with oversized pendant lights. These eye-catching fixtures not only provide ample illumination but also serve as a focal point, adding visual interest to your ceiling.
  2. Recessed Lighting: Recessed lighting is an excellent choice for loft ceilings, as it helps to create a seamless and unobtrusive lighting scheme. Install recessed lights strategically to highlight specific areas of your loft while maintaining a clean and streamlined look.
  3. Track Lighting: Versatile and adjustable, track lighting allows you to direct light exactly where you need it. Install track lighting along the perimeter of your loft ceiling to illuminate the space evenly and highlight architectural features or artwork.
  4. Skylights: If your loft has access to natural light, consider installing skylights to maximize daylighting and create an airy, open feel. Skylights are a sustainable lighting solution that can enhance the aesthetic appeal of your loft while reducing the need for artificial lighting during the day.

Enhancing Your Loft with Lighting For Loft Ceilings

When it comes to lighting for loft ceilings, there are several key factors to consider to achieve the desired ambiance and functionality.

  1. Height and Scale: Take into account the height and scale of your loft space when selecting lighting fixtures. For higher ceilings, opt for fixtures with longer drop lengths to fill the vertical space effectively.
  2. Layered Lighting: Create depth and dimension in your loft by incorporating layered lighting techniques. Combine ambient, task, and accent lighting to provide versatility and flexibility in your lighting scheme.
  3. Dimmer Switches: Install dimmer switches to adjust the intensity of your loft lighting according to your needs and mood. Dimmer switches allow you to create different ambiance levels, from bright and energizing to soft and intimate.
  4. Energy Efficiency: Choose energy-efficient lighting solutions, such as LED bulbs, to reduce energy consumption and lower your utility bills. LED lights are long-lasting and environmentally friendly, making them an ideal choice for lighting for loft ceilings.

Read too: Discovering the Charm of Nautical Outdoor Ceiling Fans for Your Coastal Retreat: Sail into Style


Conclusion

Lighting for loft ceilings is an essential aspect of interior design that can greatly impact the look and feel of your space. By choosing the right lighting fixtures and techniques, you can enhance the beauty and functionality of your loft while creating a comfortable and inviting atmosphere. Experiment with different lighting options to find the perfect combination that suits your style and needs, and enjoy the transformative power of lighting in your loft.

Koa Ceiling Fan With Lights: Illuminate Your Space with Elegance

Ceiling fans are more than just functional fixtures; they can also serve as stunning focal points in any room. Among the many options available, a Koa ceiling fan with lights stands out for its combination of style, functionality, and craftsmanship. In this guide, we delve into the allure of a Koa ceiling fan with light, exploring its features, benefits, and why it’s the perfect addition to any home décor.

Koa Ceiling Fan With Light

Introduction

The right lighting and airflow can transform the ambiance of any space, whether it’s a cozy living room, a stylish bedroom, or a welcoming patio. A Koa ceiling fan with light offers the perfect solution, combining the cooling breeze of a fan with the illumination of a light fixture. But what sets a Koa ceiling fan apart? Let’s find out.

Read too: Exploring the Efficiency of Radiant Ceiling Heater Electric: A Comprehensive Guide

Unveiling the Beauty of a Koa Ceiling Fan With Light

A Koa ceiling fan is more than just a functional appliance; it’s a piece of art that adds warmth and sophistication to any room. Crafted from quality materials and designed with attention to detail, a Koa ceiling fan with light exudes elegance and style, making it a standout feature in your home.

Key Features of a Koa Ceiling Fan With Light

  1. Exquisite Koa Wood Blades: Koa wood is prized for its rich, honey-colored tones and distinctive grain patterns. A Koa ceiling fan with light showcases this natural beauty, with blades crafted from genuine Koa wood for a luxurious touch.
  2. Integrated Lighting Fixture: Illuminate your space with the integrated light fixture of a Koa ceiling fan. Whether you prefer soft, ambient lighting or bright task lighting, the adjustable light fixture offers versatility to suit your needs.
  3. Silent and Efficient Motor: Enjoy the gentle breeze of a Koa ceiling fan with light, powered by a silent and energy-efficient motor. Whisper-quiet operation ensures a peaceful environment, while efficient performance helps reduce energy costs.
  4. Remote Control Convenience: Control the fan speed, light intensity, and direction from the comfort of your couch or bed with the included remote control. Adjust settings with ease to create the perfect atmosphere for any occasion.

Enhancing Your Home Décor with a Koa Ceiling Fan With Light

A Koa ceiling fan with light isn’t just a functional appliance; it’s a statement piece that adds character and charm to your home décor. Whether your style is modern and minimalist or classic and traditional, a Koa ceiling fan with light complements a variety of interior design themes, creating a cohesive look that ties the room together.

Installation and Maintenance

Installing a Koa ceiling fan with light is a straightforward process, but it’s essential to follow the manufacturer’s instructions carefully for optimal performance. Regular maintenance, such as dusting the blades and checking for loose screws, helps ensure smooth operation and prolongs the lifespan of your fan.

Conclusion

In conclusion, a Koa ceiling fan with lights is more than just a functional appliance; it’s a beautiful addition to any home décor. With its exquisite craftsmanship, elegant design, and practical features, a Koa ceiling fan with light enhances the ambiance of any room while providing cooling comfort and illumination. Elevate your space with the timeless beauty of a Koa ceiling fan with light and enjoy both style and functionality for years to come.

Industrial Drop Ceiling Tile: Transform Your Space with Durable and Stylish

Industrial spaces demand practical solutions that can withstand the rigors of daily use while maintaining a visually appealing environment. When it comes to ceiling options, industrial drop ceiling tile offer the perfect combination of durability, versatility, and aesthetic appeal. In this comprehensive guide, we explore the benefits, applications, and installation considerations of industrial drop ceiling tiles, empowering you to elevate your space with confidence.

Industrial Drop Ceiling Tiles

Introduction

The ceiling is often an overlooked aspect of interior design in industrial settings. However, the right choice of ceiling materials can significantly impact the functionality and aesthetics of the space. Industrial drop ceiling tiles are engineered to meet the unique requirements of industrial environments, providing superior performance and design versatility.

Read too: Exploring the Efficiency of Radiant Ceiling Heater Electric: A Comprehensive Guide

Understanding Industrial Drop Ceiling Tiles

Industrial drop ceiling tiles, also known as suspended ceiling tiles or acoustic ceiling panels, are modular panels designed to fit into a grid system suspended from the ceiling structure. These tiles are typically made from durable materials such as fiberglass, metal, or mineral fiber, offering excellent resistance to moisture, fire, and impact.

Benefits of Industrial Drop Ceiling Tiles

  1. Durability: Industrial environments often face heavy foot traffic, humidity, and temperature fluctuations. Industrial drop ceiling tiles are engineered to withstand these challenges, maintaining their structural integrity and appearance over time.
  2. Acoustic Performance: Proper acoustics are essential in industrial settings to reduce noise levels and improve communication. Many industrial drop ceiling tiles are designed with acoustic properties to absorb sound, creating a more comfortable and productive work environment.
  3. Design Versatility: From sleek and modern to rugged and industrial, industrial drop ceiling tiles are available in a wide range of styles, colors, and textures to suit various design preferences and architectural themes.
  4. Easy Installation and Maintenance: The modular nature of industrial drop ceiling tiles simplifies installation, allowing for quick and hassle-free upgrades or repairs. Routine maintenance, such as cleaning or replacing damaged tiles, can be performed with minimal disruption to daily operations.

Applications of Industrial Drop Ceiling Tiles

Industrial drop ceiling tiles find applications in various industrial settings, including:

  • Manufacturing facilities
  • Warehouses and distribution centers
  • Laboratories and clean rooms
  • Retail and commercial spaces
  • Educational institutions

Installing Industrial Drop Ceiling Tiles

Installing industrial drop ceiling tiles involves the following steps:

  1. Prepare the Ceiling: Ensure that the ceiling structure is clean, level, and free from any obstructions.
  2. Install the Grid System: Suspended ceiling grids are installed according to manufacturer guidelines, providing support for the ceiling tiles.
  3. Cut and Install Tiles: Measure and cut tiles to fit around perimeter walls and fixtures. Insert tiles into the grid system, starting from one corner and working across the ceiling.
  4. Secure Tiles: Secure tiles in place using clips or adhesive as recommended by the manufacturer.
  5. Finish and Inspect: Once all tiles are installed, inspect the ceiling for any gaps or irregularities. Make any necessary adjustments or replacements to ensure a seamless finish.

Conclusion

In conclusion, industrial drop ceiling tile offer a versatile and practical solution for enhancing the functionality and design of industrial spaces. With their durability, acoustic performance, and design versatility, these tiles provide an ideal ceiling solution for a wide range of applications. Whether you’re looking to improve the aesthetics of your warehouse, manufacturing facility, or retail space, industrial drop ceiling tiles deliver both style and substance.

Hunter Norden Ceiling Fan: Discover the Superior Comfort and Style

Ceiling fans are essential fixtures in any home, offering both functional cooling and aesthetic appeal. Among the top choices in the market, the Hunter Norden Ceiling Fan stands out for its exceptional performance, innovative features, and timeless design. In this article, we explore the benefits and features of the Hunter Norden Ceiling Fan, providing insights into why it’s a must-have addition to any modern home.

Hunter Norden Ceiling Fan

Introduction

As temperatures rise, homeowners seek efficient and effective ways to keep their living spaces cool and comfortable. Ceiling fans provide a cost-effective solution, circulating air and creating a refreshing breeze throughout the room. The Hunter Norden Ceiling Fan takes this concept to the next level with its superior craftsmanship, advanced technology, and attention to detail.

Introducing the Hunter Norden Ceiling Fan

The Hunter Norden Ceiling Fan is a flagship product from Hunter Fan Company, a renowned name in the ceiling fan industry with a legacy of quality and innovation. Designed to complement a variety of interior styles, the Norden fan combines sleek aesthetics with powerful performance, making it a versatile choice for any room in your home.

Key Features of the Hunter Norden Ceiling Fan

  1. Whisper-Quiet Motor: The Norden fan is equipped with a high-performance motor that operates silently, ensuring a peaceful and comfortable environment without distracting noise.
  2. Reversible Blades: Choose between two blade finishes included with the fan to customize the look to suit your décor preferences. Whether you prefer a modern matte black or a classic wood grain finish, the Norden fan offers versatility to match any style.
  3. Integrated LED Light: Illuminate your space with the built-in LED light kit, providing energy-efficient lighting that enhances the ambiance of your room while saving on electricity costs.
  4. Remote Control Convenience: Control the fan speed, direction, and lighting with ease using the included remote control. Adjust settings from anywhere in the room for maximum convenience.
  5. Smart Home Compatibility: The Hunter Norden Ceiling Fans is compatible with popular smart home platforms, allowing you to integrate it seamlessly into your connected home ecosystem for added convenience and control.

Installing and Maintaining Your Hunter Norden Ceiling Fan

Installing a Hunter Norden Ceiling Fans is a straightforward process, thanks to the included step-by-step instructions and mounting hardware. However, for optimal performance and safety, it’s essential to follow the manufacturer’s guidelines carefully. Routine maintenance, such as dusting the blades and checking for loose screws, helps ensure smooth operation and prolongs the lifespan of your fan.

Conclusion

In conclusion, the Hunter Norden Ceiling Fans sets a new standard for comfort, style, and performance in home cooling solutions. With its innovative features, quiet operation, and elegant design, it’s no wonder that the Norden fan is a top choice among homeowners seeking the best in ceiling fan technology. Elevate your home cooling experience with the Hunter Norden Ceiling Fans and enjoy unparalleled comfort and style year-round.

How to Fix a Mobile Home Ceiling Like a Pro? Expert Guide

Mobile homes offer convenience and flexibility, but like any structure, they require maintenance and occasional repairs. Among the common issues homeowners may encounter is ceiling damage. Knowing how to fix a mobile home ceiling can save you time and money, ensuring your living space remains comfortable and safe. This comprehensive guide provides step-by-step instructions and expert tips for addressing ceiling problems in mobile homes effectively.

How To Fix A Mobile Home Ceiling

Introduction

The ceiling of a mobile home serves both functional and aesthetic purposes. It provides insulation, soundproofing, and support for fixtures while contributing to the overall look and feel of the interior. Over time, factors such as water leaks, structural movement, and wear and tear can lead to ceiling damage. Learning how to fix a mobile home ceiling empowers homeowners to tackle these issues promptly, preserving the integrity of their living space.

Identifying Common Ceiling Problems

Before diving into repairs, it’s essential to identify the specific issues affecting your mobile home ceiling. Common problems include:

  1. Water Damage: Leaks from the roof or plumbing fixtures can cause water stains, sagging, and mold growth on the ceiling.
  2. Cracks and Holes: Structural settling or impact damage may result in cracks, holes, or bulges in the ceiling surface.
  3. Sagging Panels: Over time, ceiling panels may become loose or sag due to inadequate support or moisture absorption.
  4. Insulation Issues: Damage to insulation materials can compromise energy efficiency and indoor comfort.

How to Fix a Mobile Home Ceiling

  1. Assess the Damage: Begin by inspecting the ceiling carefully to determine the extent of the damage. Take note of any water stains, cracks, or sagging areas.
  2. Address Water Leaks: If water damage is present, identify and repair the source of the leak before proceeding with ceiling repairs. This may involve fixing roof leaks, sealing plumbing connections, or addressing condensation issues.
  3. Repair Cracks and Holes: Use a suitable patching compound to fill in cracks and holes in the ceiling. Smooth the surface with sandpaper once the compound has dried, then apply a coat of primer to ensure proper adhesion.
  4. Reinforce Sagging Panels: For sagging ceiling panels, install additional support beams or braces to provide structural reinforcement. Secure loose panels in place using construction adhesive or screws.
  5. Replace Damaged Panels: If ceiling panels are beyond repair, carefully remove them and replace them with new ones of the same size and style. Be sure to match the existing materials for a seamless finish.
  6. Insulate as Needed: Address any insulation issues by adding or replacing insulation materials above the ceiling panels. This helps improve energy efficiency and maintains a comfortable indoor environment.

Conclusion

In conclusion, knowing how to fix a mobile home ceiling empowers homeowners to address common issues and maintain the integrity of their living space. By identifying and addressing problems promptly, you can prevent further damage and ensure a comfortable and safe environment for you and your family.

Read too: Exploring the Efficiency of Radiant Ceiling Heater Electric: A Comprehensive Guide

Fluorescent Drop Ceiling Light: Enhancing Ambiance and Efficiency

Fluorescent lighting has long been a staple in indoor illumination, offering a balance of efficiency and functionality. Among the diverse array of lighting options available, fluorescent drop ceiling light stand out for their versatility and aesthetic appeal. This comprehensive guide delves into the features, benefits, and installation considerations of fluorescent drop ceiling lights, providing valuable insights for those looking to enhance their interior lighting setup.

Fluorescent Drop Ceiling Lights

Introduction

Lighting plays a crucial role in shaping the ambiance and functionality of any indoor space. Whether it’s a residential, commercial, or institutional setting, the right lighting solution can transform the atmosphere and improve productivity. Fluorescent drop ceiling lights offer a practical and stylish lighting solution that caters to a wide range of applications, from offices and retail spaces to classrooms and healthcare facilities.

Understanding Fluorescent Drop Ceiling Lights

Fluorescent drop ceiling lights are fixtures designed to be installed into suspended ceiling systems, also known as drop ceilings or false ceilings. These fixtures typically consist of a fluorescent lamp housed within a decorative or utilitarian casing, suspended from the ceiling grid. The design allows for even distribution of light across the space, minimizing glare and shadows.

Benefits of Fluorescent Drop Ceiling Lights

  1. Energy Efficiency: One of the primary advantages of fluorescent drop ceiling lights is their energy efficiency. Compared to traditional incandescent bulbs, fluorescent lamps consume significantly less energy while producing the same amount of light, resulting in lower utility bills and reduced environmental impact.
  2. Uniform Illumination: The design of fluorescent drop ceiling lights ensures uniform illumination throughout the space, eliminating dark spots and creating a visually appealing environment conducive to productivity and comfort.
  3. Longevity: Fluorescent lamps have a longer lifespan compared to incandescent bulbs, reducing the frequency of replacements and maintenance costs. This durability makes fluorescent drop ceiling lights a cost-effective lighting solution in the long run.
  4. Versatility: From sleek and modern designs to traditional and decorative styles, fluorescent drop ceiling lights are available in a variety of options to suit different aesthetic preferences and architectural themes.

Installation Considerations

Proper installation is essential to maximize the performance and longevity of fluorescent drop ceiling lights. It’s crucial to ensure that the fixtures are compatible with the existing ceiling grid and electrical infrastructure. Additionally, attention should be paid to factors such as spacing, placement, and wiring to achieve optimal lighting results.

Read too: Exploring the Efficiency of Radiant Ceiling Heater Electric: A Comprehensive Guide

Conclusion

In conclusion, fluorescent drop ceiling light offer a winning combination of efficiency, functionality, and aesthetics for indoor lighting applications. Whether you’re looking to brighten up your workspace, retail store, or educational facility, these versatile fixtures provide an ideal solution. By investing in fluorescent drop ceiling lights, you can enhance the ambiance, improve energy efficiency, and elevate the overall visual appeal of your space.

Fire Extinguisher in Ceiling Systems: Ensuring Safety and Security

Fire safety is paramount in any building or facility. Among the various fire suppression systems available, the integration of fire extinguishers in ceiling has emerged as a highly effective and efficient method. This article explores the significance, functionality, and benefits of fire extinguisher in ceiling systems, providing insights into why they are essential components of modern fire protection strategies.

Fire Extinguisher In Ceiling

Introduction

In the event of a fire emergency, quick and effective response is critical to minimizing damage and ensuring the safety of occupants. Traditional fire extinguishers placed at ground level may not always be easily accessible, especially in cases of large or obstructed spaces. Here comes the significance of fire extinguishers in ceiling systems, which offer several advantages over conventional fire suppression methods.

Understanding Fire Extinguisher in Ceiling Systems

Fire extinguishers in ceiling systems are strategically installed within the ceiling infrastructure of a building, providing rapid and targeted fire suppression capabilities. These systems typically consist of specialized extinguishing agents stored in pressurized containers, connected to a network of piping and nozzles discreetly integrated into the ceiling.

Benefits of Fire Extinguisher in Ceiling Systems

  1. Space Optimization: By utilizing overhead space, fire extinguishers in ceiling systems free up floor space, allowing for better utilization of the area without compromising on fire safety.
  2. Rapid Response: With nozzles positioned strategically throughout the ceiling, these systems can swiftly detect and suppress fires, minimizing the spread of flames and smoke.
  3. Aesthetic Appeal: Unlike traditional fire extinguishers, which may be visually obtrusive, fire extinguishers in ceiling systems remain largely concealed, preserving the aesthetics of the surrounding environment.
  4. Comprehensive Coverage: The design of fire extinguisher in ceiling systems ensures comprehensive coverage, effectively safeguarding entire areas against fire hazards.

Installation and Maintenance

Proper installation and regular maintenance are essential for ensuring the optimal performance of fire extinguishers in ceiling systems. Qualified professionals should conduct installation procedures, adhering to relevant safety standards and guidelines. Additionally, routine inspections and servicing help identify any potential issues and ensure that the system remains in prime condition at all times.

Conclusion

In conclusion, the integration of fire extinguishers in ceiling systems represents a significant advancement in fire protection technology. These systems offer numerous advantages, including space optimization, rapid response capabilities, and aesthetic appeal, making them indispensable components of modern fire safety strategies. By investing in such systems, building owners and managers can enhance the safety and security of their premises, providing occupants with peace of mind knowing that effective fire suppression measures are in place.

Read too: Exploring the Efficiency of Radiant Ceiling Heater Electric: A Comprehensive Guide

Fiber Optic Panel Star Ceiling Installation: Transform Your Space with a Mesmerizing

Are you looking to add a touch of celestial wonder to your space? Look no further than a Fiber Optic Panel Star Ceiling! Imagine gazing up at a mesmerizing display of twinkling stars, all from the comfort of your own home. In this article, we’ll delve into the magic of Fiber Optic Panel Star Ceilings, exploring their installation process, benefits, and how they can elevate any room to new heights of enchantment.

Fiber Optic Panel Star Ceiling

Introduction:

In recent years, Fiber Optic Panel Star Ceilings have emerged as a popular choice for homeowners and businesses alike seeking to create a truly immersive and captivating environment. Gone are the days of static, uninspired ceilings – with Fiber Optic Panel Star Ceilings, you can bring the beauty of the night sky indoors, transforming any space into a celestial sanctuary.

What is a Fiber Optic Panel Star Ceiling?

A Fiber Optic Panel Star Ceiling is a specialized lighting installation that replicates the appearance of a starry night sky. Utilizing optical fibers, tiny points of light are embedded in panels that are installed overhead, creating a stunning visual effect reminiscent of a clear night under the stars.

The Installation Process:

Creating a Fiber Optic Panel Star Ceiling requires precision and expertise. The process typically begins with an assessment of the space to determine the desired layout and design. Once a plan is in place, specialized panels containing optical fibers are installed flush with the ceiling surface. These panels can be customized to fit any size or shape of the room, ensuring a seamless integration with the existing décor.

Benefits of Fiber Optic Panel Star Ceilings:

The allure of Fiber Optic Panel Star Ceilings extends far beyond their aesthetic appeal. Here are some of the key benefits:

  1. Enhanced Ambiance: Whether it’s a residential living room, a commercial spa, or a hotel lobby, Fiber Optic Panel Star Ceilings instantly elevate the ambiance of any space, creating a sense of tranquility and wonder.
  2. Energy Efficiency: Unlike traditional lighting fixtures, Fiber Optic Panel Star Ceilings consume minimal energy, making them an eco-friendly choice for sustainable design projects.
  3. Low Maintenance: Once installed, Fiber Optic Panel Star Ceilings require little to no maintenance, allowing you to enjoy their beauty without the hassle of frequent upkeep.
  4. Versatile Design Options: From twinkling constellations to shooting stars, the design possibilities with Fiber Optic Panel Star Ceilings are virtually endless. Whether you prefer a subtle glow or a dramatic display, you can tailor these installations to suit your unique vision.

Creating Your Own Fiber Optic Panel Star Ceiling:

Ready to embark on your journey to the stars? Here are some tips for creating your own Fiber Optic Panel Star Ceiling:

  1. Consultation: Begin by consulting with a reputable lighting designer or installation specialist to discuss your ideas and goals for the project.
  2. Customization: Explore different design options and customization features to tailor the Fiber Optic Panel Star Ceiling to your preferences.
  3. Professional Installation: Entrusting the installation process to experienced professionals ensures that they can install your Fiber Optic Panel Star Ceilings safely and securely.
  4. Enjoyment: Once installed, take time to bask in the celestial splendor of your new Fiber Optic Panel Star Ceilings. Whether you’re hosting a gathering or simply unwinding after a long day, let the magic of the stars illuminate your space.

Conclusion:

A Fiber Optic Panel Star Ceilings is more than just a lighting fixture – it’s a gateway to another world, where dreams and imagination converge. Whether you’re seeking to enhance the ambiance of your home, create a captivating focal point for your business, or simply marvel at the wonders of the universe, a Fiber Optic Panel Star Ceilings is sure to leave a lasting impression.

Read too: Exploring the Efficiency of Radiant Ceiling Heater Electric: A Comprehensive Guide

Exterior Suspended Ceiling Tile: Transforming Outdoor Spaces with Style

Exterior suspended ceiling tiles have emerged as a transformative element in outdoor design, offering both functionality and aesthetic appeal. As architectural trends evolve, the demand for innovative solutions to enhance outdoor spaces has led to the rise of exterior suspended ceiling tile. From commercial buildings to residential spaces, these tiles have become a go-to option for architects and designers looking to elevate the visual appeal of exteriors while maintaining practicality.

Exterior Suspended Ceiling Tiles

Introduction

In the realm of architectural design, every detail counts. From the layout of a space to the materials used, each element plays a crucial role in shaping the overall look and feel. When it comes to outdoor spaces, one often overlooked aspect is the ceiling. While ceilings traditionally associate with interior design, the concept of exterior suspended ceiling tiles has revolutionized how we approach outdoor aesthetics.

The Rise of Exterior Suspended Ceiling Tiles

Exterior suspended ceiling tiles have gained popularity in recent years due to their versatility and ability to add depth and dimension to outdoor environments. Typically, manufacturers craft these tiles from durable materials like metal, fiberglass, or PVC, rendering them suitable for outdoor applications. Unlike traditional ceilings, which are often flat and nondescript, exterior suspended ceiling tiles come in a variety of shapes, sizes, and textures, allowing for endless design possibilities.

Benefits of Exterior Suspended Ceiling Tiles

  1. Aesthetic Appeal: One of the primary benefits of exterior suspended ceiling tiles is their ability to enhance the visual appeal of outdoor spaces. Whether installed in a patio, terrace, or outdoor seating area, these tiles can instantly elevate the atmosphere and create a more polished look.
  2. Weather Resistance: Unlike traditional ceiling materials such as drywall or wood, exterior suspended ceiling tiles are designed to withstand the elements. From rain and wind to harsh sunlight and humidity, these tiles are built to last, making them ideal for outdoor applications.
  3. Ease of Installation: Another advantage of exterior suspended ceiling tiles is their ease of installation. Unlike traditional ceilings, which often require extensive labor and construction, these tiles can be installed quickly and efficiently, saving both time and money.
  4. Versatility: From modern to traditional designs, exterior suspended ceiling tiles come in a wide range of styles to suit any aesthetic preference. Whether you prefer a sleek and contemporary look or a more rustic vibe, there are options available to match your vision.

Transforming Outdoor Spaces with Exterior Suspended Ceiling Tiles

When it comes to outdoor design, attention to detail is key. By incorporating exterior suspended ceiling tiles into your project, you can transform an ordinary outdoor space into a stunning oasis. Whether you’re designing a restaurant patio, a rooftop lounge, or a residential backyard, these tiles offer endless possibilities for customization and creativity.

Conclusion

In conclusion, exterior suspended ceiling tile are a versatile and stylish option for enhancing outdoor spaces. From their aesthetic appeal to their durability and ease of installation, these tiles offer numerous benefits for architects, designers, and property owners alike. Whether you’re looking to create a cozy outdoor retreat or a chic urban oasis, exterior suspended ceiling tiles are sure to make a statement.

Read too: Exploring the Efficiency of Radiant Ceiling Heater Electric: A Comprehensive Guide

Electric Ceiling Panel Heaters: Efficient Heating Solutions

Discover the benefits and versatility of Electric Ceiling Panel Heaters for your home or office. Learn how these innovative heating solutions can provide efficient warmth while maximizing space and energy efficiency.

Electric Ceiling Panel Heaters

Understanding

Electric ceiling panel heaters are modern heating appliances designed to be mounted on the ceiling, offering discreet and efficient heating for various spaces. Unlike traditional heaters, which take up floor space, ceiling panel heaters are installed overhead, freeing up valuable floor space and providing uniform warmth throughout the room.

Benefits of Electric Ceiling Panel Heaters

  1. Space-Saving Design: By mounting the heater on the ceiling, electric panel heaters eliminate the need for floor space, making them ideal for rooms with limited space or layout restrictions.
  2. Energy Efficiency: Ceiling panel heaters distribute heat evenly throughout the room, minimizing heat loss and reducing energy consumption compared to traditional heaters.
  3. Discreet Appearance: Electric ceiling panel heaters blend seamlessly into the ceiling, providing a sleek and modern appearance without disrupting the room’s decor.
  4. Quiet Operation: Unlike some heating systems that produce noise during operation, electric panel heaters operate silently, providing discreet and comfortable warmth without any distractions.
  5. Versatility: Electric ceiling panel heaters are suitable for a wide range of applications, including residential, commercial, and industrial settings. They can be installed in living rooms, bedrooms, offices, conference rooms, and more.

Choosing the Right Electric Ceiling Panel Heater

When selecting an electric ceiling panel heater for your space, consider the following factors:

  1. Size and Heating Capacity: Determine the size and heating capacity required to effectively warm your space based on its square footage, ceiling height, insulation, and heating needs.
  2. Energy Efficiency: Look for heaters with high energy efficiency ratings and programmable thermostat settings to optimize energy savings and reduce heating costs.
  3. Installation Requirements: Consider the ease of installation and compatibility with your space’s electrical wiring and ceiling structure. Choose heaters that come with mounting brackets and hardware for easy installation.
  4. Safety Features: Select heaters with built-in safety features such as overheating protection, tip-over switches, and automatic shut-off functions to ensure safe operation.
  5. Warranty and Support: Choose heaters from reputable brands that offer reliable warranties and customer support to provide peace of mind and assistance in case of issues.

Maintaining Electric Ceiling Panel Heaters

To keep your electric ceiling panel heater operating efficiently, follow these maintenance tips:

  1. Regular Cleaning: Dust and debris can accumulate on the heater’s surface over time, affecting its performance. Clean the panel heater regularly with a soft brush or cloth to remove dirt and maintain optimal heating efficiency.
  2. Inspecting Components: Periodically inspect the heater’s components, including the heating element, thermostat, and wiring, for signs of wear or damage. Replace any worn or damaged parts promptly to ensure continued operation.
  3. Checking Mounting Hardware: Ensure secure fastening of mounting brackets and hardware to the ceiling to prevent the heater from becoming dislodged or falling.
  4. Testing Safety Features: Test the heater’s safety features, such as overheating protection and tip-over switches, to ensure they are functioning correctly and providing adequate protection.

Conclusion

Electric ceiling panel heaters offer efficient, space-saving heating solutions for a variety of residential and commercial applications. By understanding their benefits, choosing the right model, and performing regular maintenance, you can enjoy reliable warmth and comfort in any space.

Read too: Exploring the Efficiency of Radiant Ceiling Heater Electric: A Comprehensive Guide

Electric Ceiling Mount Heater: Efficient Heating Solutions for Any Space

Discover the convenience and efficiency of Electric Ceiling Mount Heater for your home or commercial space. Learn how these versatile heating solutions can provide warmth and comfort while maximizing floor space and energy efficiency.

Electric Ceiling Mount Heater

Understanding Electric Ceiling Mount Heaters

Electric ceiling mount heaters are innovative heating appliances designed to be mounted on the ceiling, providing targeted warmth to specific areas without taking up valuable floor space. These heaters are commonly used in garages, workshops, warehouses, and other commercial or industrial settings where space heating is needed.

Benefits of Electric Ceiling Mount Heaters

  1. Space-Saving Design: Mounting the heater on the ceiling frees up valuable floor space, making electric ceiling mount heaters ideal for areas with limited space.
  2. Efficient Heating: Electric ceiling mount heaters deliver warmth directly downward, minimizing heat loss and maximizing energy efficiency.
  3. Versatility: These heaters are suitable for various applications, including residential, commercial, and industrial settings. They can be installed in garages, workshops, warehouses, retail spaces, and more.
  4. Easy Installation: Electric ceiling mount heaters are typically straightforward to install, requiring minimal setup and wiring. Many models come with mounting brackets and hardware for easy installation.
  5. Customizable Settings: Some electric ceiling mount heaters feature adjustable thermostat settings, fan speeds, and directional airflow, allowing users to customize their heating experience according to their preferences.

Choosing the Right Electric Ceiling Mount Heater

When selecting an electric ceiling mount heater for your space, consider the following factors:

  1. Heating Capacity: Determine the heating capacity required to adequately warm your space based on its size, insulation, and heating needs.
  2. Safety Features: Look for heaters with built-in safety features such as overheat protection, tip-over switches, and automatic shut-off functions to ensure safe operation.
  3. Energy Efficiency: Choose energy-efficient models with high heating efficiency ratings to reduce energy consumption and lower heating costs.
  4. Installation Requirements: Consider the ease of installation and compatibility with your space’s electrical wiring and ceiling structure.
  5. Warranty and Support: Select heaters from reputable brands with reliable warranties and customer support to ensure peace of mind and assistance in case of issues.

Maintaining Electric Ceiling Mount Heaters

To keep your electric ceiling mount heater operating efficiently, follow these maintenance tips:

  1. Regular Cleaning: Dust and debris can accumulate on the heater’s surface and affect performance. Clean the unit regularly with a soft brush or cloth to remove dirt and maintain airflow.
  2. Inspecting Components: Periodically inspect the heater’s components, including the heating element, fan blades, and thermostat, for signs of wear or damage. Replace any worn or damaged parts promptly to ensure continued operation.
  3. Checking Mounting Hardware: Verify secure fastening of mounting brackets and hardware to the ceiling to prevent the heater from dislodging or falling.
  4. Testing Safety Features: Test the heater’s safety features, such as overheat protection and tip-over switches, to ensure they are functioning correctly and providing adequate protection.

Conclusion

Electric ceiling mount heaters offer efficient and space-saving heating solutions for a variety of residential, commercial, and industrial applications. Understanding benefits, selecting the right model, and maintaining regularly ensures reliable warmth and comfort in any space.

Read too: Exploring the Efficiency of Radiant Ceiling Heater Electric: A Comprehensive Guide

Dual Ceiling Fans Without Light: Enhance Your Space with Sleek and Functional

When it comes to cooling and illuminating your space, dual-purpose fixtures offer convenience and efficiency. Discover the versatility and style of Dual Ceiling Fans Without Light, perfect for rooms where lighting is not a priority.

Dual Ceiling Fans Without Lights

The Versatility of Dual Ceiling Fans Without Lights

Dual ceiling fans without lights offer the best of both worlds: efficient air circulation and minimalist design. Here’s why they’re a popular choice for modern homes:

  1. Streamlined Aesthetic: Without the added bulk of light fixtures, dual ceiling fans maintain a sleek and uncluttered look that complements contemporary decor styles.
  2. Focused Functionality: In spaces where lighting is provided by other fixtures or natural light sources, dual ceiling fans prioritize airflow and cooling without unnecessary extras.
  3. Space-Saving Design: Dual ceiling fans without lights are ideal for rooms with low ceilings or limited overhead space, as they eliminate the need for separate fan and light fixtures.
  4. Customizable Options: With a variety of blade finishes, motor styles, and control options available, dual ceiling fans without lights can be customized to suit any aesthetic or functional preferences.

Benefits of Dual Ceiling Fans Without Lights

Investing in dual ceiling fans without lights offers numerous benefits for homeowners:

  1. Energy Efficiency: Without the additional energy consumption of lighting elements, dual ceiling fans operate more efficiently, helping to lower utility bills.
  2. Improved Air Circulation: Dual ceiling fans without lights effectively circulate air, creating a more comfortable indoor environment and reducing the need for air conditioning.
  3. Quiet Operation: High-quality dual ceiling fans are designed to operate quietly, providing gentle, uninterrupted airflow without distracting noise.
  4. Year-Round Comfort: Dual ceiling fans without lights promote air circulation year-round with their reversible motor functions, making them suitable for both warm and cool seasons.

Choosing the Right Dual Ceiling Fans Without Lights

When selecting dual ceiling fans without lights for your space, consider the following factors:

  1. Size: Choose a fan size that is appropriate for the room’s square footage to ensure optimal airflow and performance.
  2. Blade Design: Select blades that complement your decor style and provide efficient air movement. Options include traditional, contemporary, and tropical blade designs.
  3. Motor Quality: Invest in a fan with a high-quality motor that is durable, efficient, and designed for quiet operation.
  4. Control Options: Consider control options such as remote controls, wall-mounted switches, or pull chains for convenient operation.

Installation and Maintenance

A qualified electrician should install dual ceiling fans without lights to ensure safety and proper functionality. Regular maintenance, including cleaning the blades and motor housing, is essential to keep the fan operating smoothly and efficiently.

Read too: Striped Schoolhouse Ceiling Light Fixtures: Unveiling the Timeless Charm

Conclusion

Dual Ceiling Fans Without Light offer a stylish and functional solution for cooling your space without sacrificing aesthetics. With their streamlined design, energy efficiency, and customizable options, they’re the perfect choice for modern homes seeking both comfort and style.

Curtains for Low Ceilings: Tips and Ideas

When it comes to interior design, every detail counts, especially when dealing with low ceilings. Discover how the right Curtains For Low Ceilings can enhance your space, add visual height, and create a stylish and inviting atmosphere.

Curtains For Low Ceilings

Understanding the Challenge of Low Ceilings

Low ceilings can make a space feel cramped and confined, but with the right design choices, you can create the illusion of height and openness. Curtains play a crucial role in this process, offering both functionality and aesthetic appeal.

Why Choose Curtains for Low Ceilings?

Curtains are a versatile and cost-effective solution for addressing the challenges posed by low ceilings:

  1. Vertical Emphasis: Floor-to-ceiling curtains draw the eye upward, creating the illusion of higher ceilings and making the space feel more expansive.
  2. Softening Effect: Curtains soften the transition between the walls and ceiling, creating a more visually pleasing environment.
  3. Customization Options: With a wide range of colors, patterns, and fabrics available, curtains allow you to express your personal style and complement the existing decor.
  4. Light Control: Curtains provide privacy and light control, allowing you to adjust the amount of natural light entering the space.

Choosing the Right Curtains for Low Ceilings

When selecting curtains for a space with low ceilings, consider the following factors:

  1. Length: Opt for curtains that are slightly longer than the height of the windows to create the illusion of height. Avoid curtains that puddle on the floor, as they can make the space feel cluttered.
  2. Color: Choose curtains in light, neutral colors to reflect more light and visually expand the space. Avoid heavy, dark colors, which can make the ceiling feel lower.
  3. Fabric: Select lightweight fabrics such as linen or cotton to create a breezy, airy feel. Avoid heavy, bulky fabrics that can overwhelm the space.
  4. Mounting: Install curtain rods as close to the ceiling as possible to maximize vertical space. This technique creates the illusion of higher ceilings and allows the curtains to hang freely without obstructing the windows.

Ideas for Stylish Curtains

  1. Sheer Panels: Sheer curtains in white or light colors allow natural light to filter through while adding softness and elegance to the space.
  2. Vertical Stripes: Vertical striped curtains draw the eye upward, creating the illusion of higher ceilings. Choose subtle, tonal stripes for a sophisticated look.
  3. Floor-to-Ceiling Drapes: Floor-to-ceiling curtains in a solid color elongate the walls and create a sense of grandeur. Choose a lightweight fabric for a flowing, ethereal effect.
  4. Layered Look: Layering curtains with blinds or shades adds depth and texture to the windows while providing versatility in light control and privacy.

Read too: Striped Schoolhouse Ceiling Light Fixtures: Unveiling the Timeless Charm

Conclusion

With the right Curtains For Low Ceilings, you can transform your space and overcome the challenges posed by limited vertical space. By focusing on vertical emphasis, softening effects, and customization options, you can create a stylish and inviting environment that feels open and airy.

Ceiling Mounted Smoke Eater: Improve Air Quality in Your Space with a High-Efficiency

In today’s environment-conscious world, ensuring clean and breathable air indoors is more important than ever. Discover the benefits of installing a Ceiling Mounted Smoke Eater and how it can significantly enhance air quality in your home or business.

Ceiling Mounted Smoke Eater

Understanding the Need for Air Purification

Indoor air pollution is a significant concern, with pollutants such as smoke, dust, allergens, and volatile organic compounds (VOCs) contributing to respiratory issues and overall health problems. In spaces where smoking is allowed or where there are industrial processes producing smoke, a dedicated air purification solution becomes essential.

Why Choose a Ceiling Mounted Smoke Eater?

A Ceiling Mounted Smoke Eater offers several advantages over traditional standalone air purifiers:

  1. Space-Saving Design: By mounting the smoke eater to the ceiling, valuable floor space is saved, allowing for more efficient use of the room.
  2. Enhanced Efficiency: Ceiling-mounted units can effectively capture smoke and other airborne contaminants at the source, ensuring cleaner air throughout the space.
  3. Discreet Installation: Ceiling-mounted smoke eaters are discreetly installed, blending seamlessly with the ceiling and providing unobtrusive air purification.
  4. Improved Air Circulation: The elevated position of the smoke eater allows for better air circulation and distribution, ensuring comprehensive filtration of the entire space.

Benefits of a Ceiling Mounted Smoke Eater

Investing in a ceiling-mounted smoke eater offers numerous benefits:

  1. Smoke Removal: Effectively removes smoke particles, odors, and other pollutants from the air, creating a healthier and more pleasant environment.
  2. Allergen Reduction: Filters out allergens such as pollen, dust mites, and pet dander, providing relief to allergy sufferers.
  3. Odor Neutralization: Eliminates unpleasant odors caused by smoke, cooking, pets, and other sources, leaving the air smelling fresh and clean.
  4. Health Protection: Helps reduce the risk of respiratory problems and other health issues associated with exposure to airborne pollutants.

Choosing the Right Ceiling Mounted Smoke Eater

When selecting a ceiling-mounted smoke eaters, consider the following factors:

  1. Air Purification Capacity: Choose a unit with sufficient airflow and filtration capacity to effectively handle the size of your space and the level of smoke or pollutants present.
  2. Filtration Technology: Look for advanced filtration technologies such as HEPA filters, activated carbon filters, and ionizers for optimal air purification.
  3. Noise Level: Consider the noise level of the unit, especially when installing it in a quiet or noise-sensitive environment.
  4. Ease of Maintenance: Select a smoke eater with easy-to-replace filters and minimal maintenance requirements for hassle-free operation.

Installation and Maintenance

Professionals should install a ceiling-mounted smoke eaters to ensure proper placement and functionality. Regular maintenance, including filter replacement and cleaning, is essential to ensure optimal performance and longevity of the unit.

Read too: Striped Schoolhouse Ceiling Light Fixtures: Unveiling the Timeless Charm

Conclusion

A Ceiling Mounted Smoke Eater is an effective and efficient solution for improving indoor air quality and creating a healthier environment for occupants. With its space-saving design, enhanced efficiency, and numerous benefits, it’s an investment worth considering for any home or business.

Ceiling Mounted Shop Fan: Improve Air Circulation in Your Workshop with a High-Quality

In any workshop or garage, proper ventilation is essential for creating a comfortable and safe working environment. Discover how a Ceiling Mounted Shop Fan can enhance air circulation, reduce humidity, and improve overall conditions in your workspace.

Ceiling Mounted Shop Fan

The Benefits of a Ceiling Mounted Shop Fan

When it comes to cooling and ventilating large spaces like workshops or garages, traditional floor or wall-mounted fans may not always be the most efficient option. Ceiling mounted fans offer several advantages:

  1. Optimal Air Circulation: By being mounted on the ceiling, these fans can distribute air evenly throughout the entire space, eliminating hot spots and improving overall comfort.
  2. Space-Saving Design: Ceiling mounted fans free up valuable floor space, allowing you to maximize the use of your workshop or garage without obstruction.
  3. Improved Safety: Unlike floor fans that can pose tripping hazards or obstruct workspace, ceiling mounted fans are safely out of the way, reducing the risk of accidents.
  4. Reduced Energy Costs: By circulating air more efficiently, ceiling mounted fans can help reduce the need for air conditioning or heating, leading to lower energy bills.

Choosing the Right Ceiling Mounted Shop Fan

When selecting a ceiling mounted fan for your workshop, there are several factors to consider:

  1. Size and Power: Choose a fan with the appropriate size and power output to effectively circulate air in your space. Consider factors such as ceiling height and square footage.
  2. Durability: Look for a fan made from high-quality materials that can withstand the rigors of a workshop environment, including dust, debris, and occasional impacts.
  3. Adjustability: Opt for a fan with adjustable speed settings and directional airflow to customize your cooling needs based on the season or specific projects.
  4. Installation: Consider the ease of installation and whether you’ll need additional support or accessories, such as extension rods or mounting brackets, to ensure a secure and stable installation.

Installation Tips for Ceiling Mounted Fans

Installing a ceiling mounted shop fan may require some DIY skills, but with the right tools and instructions, it can be a straightforward process. Here are some tips to help you get started:

  1. Choose the Right Location: Identify the optimal location for your fan based on airflow needs and ceiling structure. Ensure there are no obstructions or obstacles in the way.
  2. Secure Mounting: Use sturdy mounting hardware and follow manufacturer instructions for securely attaching the fan to the ceiling joists or beams.
  3. Check Balance: Use a level to ensure the fan is mounted evenly and securely. Make any necessary adjustments to ensure smooth operation.
  4. Test Operation: Once installed, test the fan to ensure it operates smoothly and effectively. Make any adjustments to speed or direction as needed.

Conclusion

A Ceiling Mounted Shop Fan is a versatile and efficient solution for improving air circulation and comfort in your workshop or garage. With its space-saving design and powerful performance, it’s a valuable addition to any workspace.

Read too: Striped Schoolhouse Ceiling Light Fixtures: Unveiling the Timeless Charm

Ceiling Mount for Computer Monitor Setup: Enhance Your Workspace with a Convenient

In today’s modern workspace, maximizing efficiency and comfort is key. One way to achieve this is by utilizing a Ceiling Mount for Computer Monitor. Discover how this innovative solution can transform your workstation and elevate your productivity.

Ceiling Mount For Computer Monitor

Why Choose a Ceiling Mount for Your Computer Monitor?

When it comes to optimizing your workspace, the placement of your computer monitor plays a crucial role. While traditional desk mounts offer some flexibility, they can still take up valuable desk space and limit your viewing options. A ceiling mount, on the other hand, frees up desk space and provides greater flexibility in positioning your monitor for optimal viewing angles.

Benefits of Using a Ceiling Mount

  1. Space-Saving Design: By mounting your monitor to the ceiling, you can free up valuable desk space for other essentials, such as keyboards, mice, and paperwork.
  2. Improved Ergonomics: A ceiling mount allows you to adjust the height and angle of your monitor to reduce strain on your neck and eyes, promoting better ergonomics and comfort.
  3. Enhanced Flexibility: With a ceiling mount, you can easily adjust the position of your monitor to accommodate different tasks or preferences, whether you’re standing, sitting, or collaborating with colleagues.
  4. Clean Aesthetic: Eliminate clutter and achieve a sleek, minimalist look in your workspace by removing bulky monitor stands from your desk.

Choosing the Right Ceiling Mount

When selecting a ceiling mount for your computer monitor, there are several factors to consider:

  1. Compatibility: Ensure that the ceiling mount is compatible with your monitor’s size and weight specifications.
  2. Adjustability: Look for a mount that offers a wide range of tilt, swivel, and height adjustment options to customize your viewing experience.
  3. Installation: Consider the ease of installation and whether you’ll need additional tools or assistance to mount your monitor securely.
  4. Durability: Invest in a high-quality ceiling mount that is built to last and can support your monitor safely for years to come.

Installation Tips

While installing a ceiling mount for your computer monitor may seem daunting, it can be relatively straightforward with the right tools and instructions. Here are some tips to help you get started:

  1. Locate Studs: Use a stud finder to locate ceiling studs or joists for secure mounting. Avoid mounting the mount directly to drywall or plaster, as it may not provide sufficient support.
  2. Follow Instructions: Carefully read and follow the manufacturer’s installation instructions to ensure proper securing of all hardware.
  3. Use a Level: Use a level to ensure that the mount is installed evenly and your monitor will be level once mounted.
  4. Test Stability: Once installed, test the stability of the mount by gently adjusting the position of the monitor and ensuring that it remains securely in place.

Read too: Striped Schoolhouse Ceiling Light Fixtures: Unveiling the Timeless Charm

Conclusion

A Ceiling Mount for Computer Monitor offers a convenient and space-saving solution for optimizing your workspace and enhancing your productivity. With its adjustable design and ergonomic benefits, it’s a worthwhile investment for any modern workstation.

Ceilings Hung Glass Shelves: Elevate Your Space with Stylish and Functional

When it comes to maximizing storage space and adding a touch of sophistication to your home, ceiling hung glass shelves offer a perfect solution. These versatile shelving units not only provide ample storage for your belongings but also create an illusion of floating elegance, enhancing the aesthetic appeal of any room. In this comprehensive guide, we’ll delve into everything you need to know about ceilings hung glass shelves, from their installation process and benefits to creative ways to incorporate them into your home decor.

Ceiling Hung Glass Shelves

Understanding Ceiling Hung Glass Shelves

Ceiling hung glass shelves are a contemporary storage solution that adds both functionality and style to any space. Unlike traditional shelving units that rely on brackets or supports attached to the walls, these shelves are suspended from the ceiling, giving them a sleek and modern look. Made from tempered glass, they offer durability and strength while allowing light to pass through, making them perfect for displaying decorative items, books, or personal belongings.

Read too: How To Extend Kitchen Cabinets To The Ceiling: A Complete Guide for Maximizing Space and Style

Key Features of Ceiling Hung Glass Shelves

  1. Sleek Design: The minimalist design of ceiling hung glass shelves creates a clean and uncluttered appearance, making them ideal for modern and minimalist interiors.
  2. Versatility: These shelves come in various shapes, sizes, and configurations, allowing you to customize them to suit your specific storage needs and aesthetic preferences.
  3. Durability: Made from tempered glass, ceiling hung glass shelves are highly durable and resistant to scratches, chips, and breakage, ensuring long-lasting performance and safety.
  4. Easy Maintenance: Glass shelves are easy to clean and maintain, requiring only regular dusting or wiping with a damp cloth to keep them looking like new.
  5. Space-Saving: By utilizing vertical space and hanging from the ceiling, these shelves help maximize floor space and create a sense of openness and airiness in any room.

Installation Process of Ceiling Hung Glass Shelves

Installing ceiling hung glass shelves requires careful planning and precision to ensure proper support and stability. Here’s an overview of the installation process:

  1. Determine Placement: Decide where you want to install the shelves and mark the location on the ceiling, taking into account factors such as ceiling joists, lighting fixtures, and room layout.
  2. Locate Ceiling Joists: Use a stud finder to locate ceiling joists or other structural supports in the ceiling where you plan to mount the shelves.
  3. Install Mounting Hardware: Securely attach the mounting hardware, such as ceiling anchors or brackets, to the ceiling joists using screws or bolts, ensuring they are level and properly aligned.
  4. Attach Shelves: Carefully place the glass shelves onto the mounting hardware, ensuring they are evenly spaced and securely supported.
  5. Test Stability: Once the shelves are installed, test their stability by gently placing weight on them and ensuring they can support the intended load without sagging or wobbling.

Benefits of Ceiling Hung Glass Shelves

  1. Enhanced Aesthetics: Ceiling hung glass shelves add a touch of elegance and sophistication to any room, creating a visually stunning display for your belongings.
  2. Space Optimization: By utilizing vertical space and hanging from the ceiling, these shelves help maximize storage space and keep floors clear, making rooms feel more spacious and organized.
  3. Light Reflection: Glass shelves reflect light and create a sense of openness, making rooms appear brighter and more inviting.
  4. Versatile Display: Whether used to showcase collectibles, artwork, or personal mementos, ceiling hung glass shelves offer endless possibilities for creative display and decor.

Creative Ways to Use Ceiling Hung Glass Shelves

  1. Kitchen Storage: Install glass shelves in the kitchen to store glassware, dishes, or cookbooks, creating an open and airy feel while keeping essentials within easy reach.
  2. Bathroom Organization: Use glass shelves in the bathroom to display toiletries, towels, or decorative accents, adding a touch of spa-like luxury to the space.
  3. Living Room Display: Create a focal point in the living room by installing glass shelves to showcase artwork, photo frames, or treasured keepsakes, turning an empty wall into a stylish gallery.
  4. Home Office Functionality: Install glass shelves in the home office to store books, files, or office supplies, keeping your workspace organized and clutter-free while adding a modern touch to the decor.

Conclusion

Ceilings hung glass shelves offer a stylish and practical storage solution for modern homes, adding both functionality and elegance to any room. With their sleek design, durability, and versatility, these shelves are sure to enhance your home decor while providing ample storage space for your belongings.