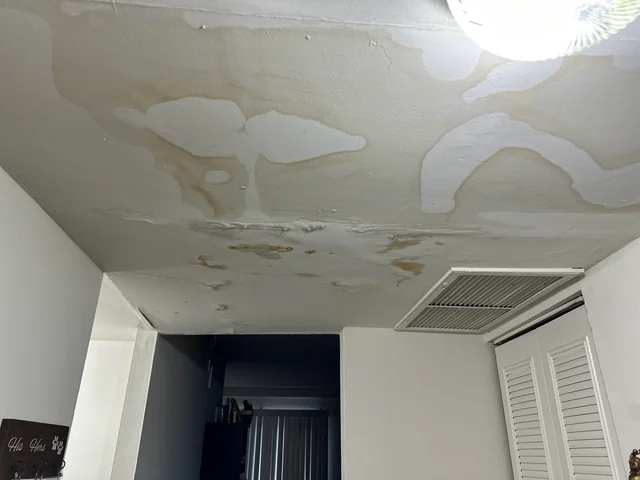
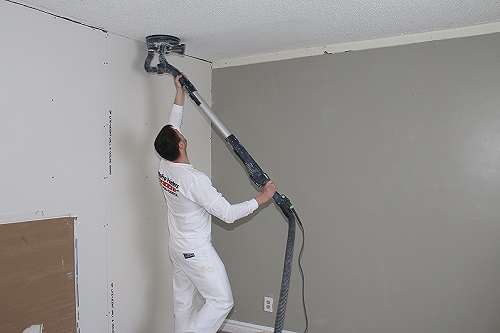
Water Spot On Ceiling Below Bathroom: Causes, Solutions, and Prevention Tips

A water spot on the ceiling below a bathroom can be more than just an unsightly blemish—it’s often a sign of underlying issues that need to be addressed promptly. Water spots indicate that water is leaking from somewhere above, and if left unresolved, these leaks can lead to significant damage and costly repairs. This article will delve into the causes of water spots, how to address them, and preventative measures to avoid future problems.

Water Spot On Ceiling Below Bathroom

Understanding the Causes of Water Spots on the Ceiling

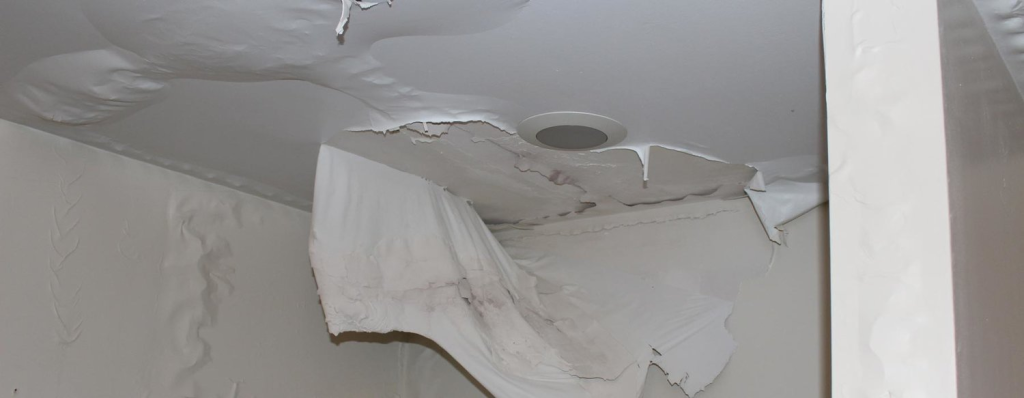
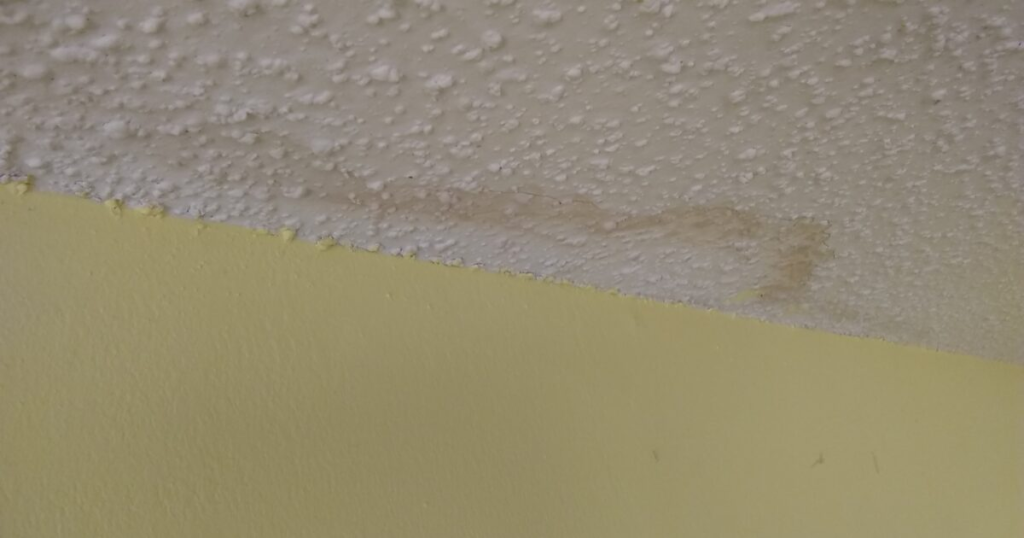
A water spot on the ceiling below a bathroom typically results from water leakage or condensation. Understanding the common causes can help you diagnose the issue and determine the best course of action.

1. Leaking Pipes

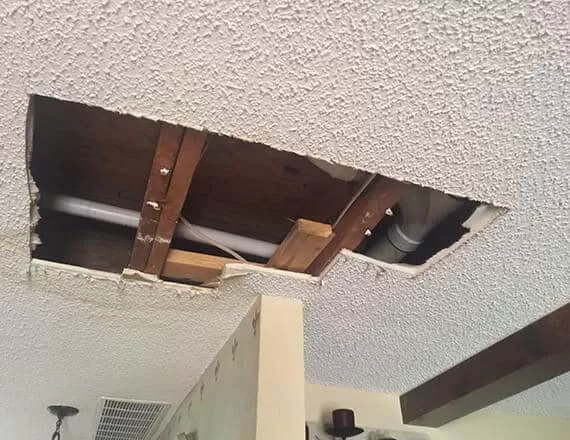
One of the most common causes of a water spot is leaking pipes. Bathrooms often have numerous pipes running through the walls and ceiling, including those for sinks, showers, and toilets. If any of these pipes develop a leak, water can drip down onto the ceiling below, causing spots and stains.

2. Faulty Bathroom Fixtures

Bathroom fixtures such as toilets, sinks, and showers can sometimes fail or become damaged. For example, a worn-out wax seal around the base of a toilet can allow water to leak out, while a cracked sink or shower pan can lead to water seeping through.

Read too: Discovering the Charm of Nautical Outdoor Ceiling Fans for Your Coastal Retreat: Sail into Style

3. Roof Leaks

If the bathroom is located directly under the roof, a leak in the roof can also cause water spots on the ceiling below. Roof leaks might be due to damaged shingles, poor flashing, or clogged gutters.

4. Condensation Issues

High humidity levels in the bathroom can lead to condensation, especially if the bathroom lacks proper ventilation. This condensation can sometimes accumulate and cause water spots on the ceiling below if not managed properly.

5. Poorly Installed or Damaged Flashing

Flashing is used to direct water away from areas where the roof meets vertical surfaces. If flashing around vents, skylights, or chimneys is improperly installed or damaged, it can lead to leaks and water spots on the ceiling below.

Identifying the Source of the Leak

To effectively address a water spot on the ceiling below a bathroom, it’s crucial to identify the exact source of the leak. Here’s a step-by-step guide to help you find the source:

1. Inspect the Bathroom Fixtures

Start by examining the bathroom fixtures for any signs of damage or leakage. Check the toilet, sink, and shower for any leaks or drips. Ensure that the wax seal around the toilet is intact and that there are no visible cracks or damage to the fixtures.

2. Check the Pipes

Look at the visible pipes in the bathroom, including those under the sink and around the shower or bathtub. If you notice any wet spots, drips, or corrosion, it could indicate a leak.

3. Examine the Roof and Attic

If you suspect the leak might be coming from the roof, inspect the attic for any signs of water infiltration. Look for wet insulation, water stains on the rafters, or mold growth, which can indicate roof leaks.

4. Assess Ventilation

Ensure that the bathroom has adequate ventilation to prevent excessive humidity and condensation. Check if the exhaust fan is functioning properly and that there are no obstructions in the vents.

How to Fix a Water Spot on the Ceiling

Once you’ve identified the source of the leak, you can take steps to fix the water spot on the ceiling below a bathroom. Here’s a general guide on how to address the issue:

1. Repair Leaking Pipes

If a leaking pipe is the cause, you’ll need to repair or replace the damaged pipe. This might involve tightening connections, replacing sections of the pipe, or using pipe sealant. If you’re not comfortable with plumbing repairs, consider hiring a professional plumber.

2. Fix Bathroom Fixtures

For issues with bathroom fixtures, you may need to replace damaged components or re-seal areas around the toilet or sink. For instance, you might need to install a new wax ring for the toilet or reseal the edges of the sink.

3. Address Roof Leaks

If the problem is related to roof leaks, you’ll need to repair the roof or replace damaged shingles or flashing. This may involve patching up leaks or replacing sections of roofing material. Roof repairs can be complex, so it’s often best to consult a roofing professional.

4. Improve Ventilation

To manage condensation issues, improve bathroom ventilation by installing or upgrading an exhaust fan. Ensure the fan is appropriately sized for the room and that it vents outside rather than into the attic.

5. Repaint the Ceiling

After addressing the leak, you’ll need to repair the ceiling where the water spot has occurred. This involves cleaning the area, applying a primer to seal any stains, and repainting the ceiling to restore its appearance.

Preventing Future Water Spots

Preventing water spots from recurring involves addressing the underlying issues and implementing measures to reduce the risk of leaks and damage. Here are some tips to help you keep your bathroom and ceiling in good condition:

1. Regular Maintenance

Perform regular maintenance on your plumbing fixtures, pipes, and roof to catch and address potential issues before they become major problems. Check for signs of wear and tear and address any issues promptly.

2. Proper Ventilation

Ensure that your bathroom is well-ventilated to prevent excessive humidity and condensation. Install or upgrade exhaust fans and make sure they are functioning properly.

3. Inspect Roof and Flashing

Regularly inspect your roof and flashing for signs of damage or wear. Replace damaged shingles, and repair or replace flashing as needed to prevent leaks.

4. Address Leaks Promptly

If you notice any signs of leaks or water spots, address them promptly to prevent further damage. Early intervention can help minimize repair costs and prevent more significant issues.

Conclusion

A water spot on the ceiling below a bathroom is more than just a cosmetic issue—it often signals underlying problems that need to be addressed. By understanding the common causes of water spots, identifying the source of the leak, and taking appropriate steps to fix and prevent future issues, you can protect your home from water damage and maintain a safe and comfortable living environment. Regular maintenance, proper ventilation, and prompt repairs are key to keeping your bathroom and ceiling in top condition.

Toilet Leaked Through Ceiling: Causes, Solutions, and Prevention Tips

Experiencing a toilet leaked through ceiling can be a stressful and damaging situation for homeowners. Not only can it lead to unsightly stains and potential structural damage, but it can also signal deeper plumbing issues that need immediate attention. In this comprehensive guide, we will explore the causes of toilet leaks, the steps to address and repair the damage, and tips to prevent future leaks from occurring.

Toilet Leaked Through Ceiling

Understanding Toilet Leaks: Causes and Consequences

Causes of Toilet Leaks

1. Faulty Wax Ring

One of the most common causes of a toilet leak is a faulty wax ring. The wax ring, located between the base of the toilet and the floor, creates a seal to prevent water from leaking out. Over time, this wax ring can degrade or become damaged, leading to leaks that can eventually make their way through the ceiling below.

Signs of a Faulty Wax Ring:

  • Water pooling around the base of the toilet
  • A musty odor near the toilet
  • Visible signs of water damage on the floor

Read too: Discovering the Charm of Nautical Outdoor Ceiling Fans for Your Coastal Retreat: Sail into Style

2. Broken or Loose Flange

The flange is the part of the toilet that connects it to the drain pipe. If the flange becomes broken or loose, it can cause the toilet to shift, breaking the wax seal and leading to leaks. This type of issue can often be identified by wobbly toilet movement or water damage around the base.

Signs of a Broken Flange:

  • Wobbling or rocking toilet
  • Water leaks around the base
  • Visible damage to the flange area

3. Cracked Toilet Bowl or Tank

A crack in the toilet bowl or tank can cause significant leaks. These cracks may be small and difficult to see, but even minor damage can result in water escaping and dripping through the ceiling.

Signs of a Cracked Toilet:

  • Water pooling around the base or under the tank
  • Cracks or visible damage on the toilet surface
  • Persistent leaks despite attempting repairs

4. Clogged or Backed-Up Pipes

Clogged or backed-up pipes can lead to overflows and leaks. If the pipes connected to the toilet become blocked, the water has nowhere to go, leading to potential leaks and water damage. This situation often requires professional plumbing assistance to resolve.

Signs of Clogged Pipes:

  • Slow draining or standing water in the toilet
  • Unpleasant odors from the toilet or pipes
  • Frequent clogs and backups

Consequences of a Toilet Leaked Through the Ceiling

1. Water Damage

Water leaking through the ceiling can cause significant damage to the structure of your home. This includes damage to the ceiling material, walls, insulation, and even electrical wiring. Prolonged exposure to moisture can also lead to mold growth, which can be harmful to your health.

Common Signs of Water Damage:

  • Stains or discoloration on the ceiling
  • Peeling or bubbling paint and wallpaper
  • Soft or sagging ceiling material

2. Structural Damage

If left unaddressed, a persistent leak can lead to more severe structural damage. This can include weakened floor joists, damaged drywall, and compromised ceiling supports. Repairing structural damage often requires more extensive work and can be costly.

3. Health Risks

Mold and mildew growth as a result of water damage can pose health risks to occupants. Mold spores can trigger respiratory issues, allergies, and other health problems, making it important to address leaks and water damage promptly.

How to Address and Repair a Toilet Leaked Through the Ceiling

1. Identify the Source of the Leak

Before you can effectively repair the damage, it’s crucial to identify the source of the leak. Inspect the toilet, check for any visible signs of damage, and look for pooling water around the base. If necessary, consult a professional plumber to help diagnose and address the issue.

2. Shut Off the Water Supply

To prevent further water damage, turn off the water supply to the toilet. This will stop the flow of water and allow you to make necessary repairs without additional leaks.

3. Repair or Replace the Faulty Components

Depending on the source of the leak, you may need to repair or replace various components of the toilet:

  • Wax Ring: Remove the toilet, replace the old wax ring with a new one, and reinstall the toilet securely.
  • Flange: If the flange is broken or loose, it may need to be repaired or replaced. This may involve removing the toilet and adjusting or replacing the flange.
  • Cracks: If you find cracks in the toilet bowl or tank, you may need to replace the entire unit. Minor cracks can sometimes be repaired with specialized sealants.
  • Pipes: For clogged or backed-up pipes, use a plunger or drain snake to clear the blockage. If the issue persists, consult a professional plumber.

4. Repair the Ceiling Damage

Once the leak has been addressed, it’s time to repair the ceiling damage:

  • Dry the Area: Ensure the affected area is completely dry before beginning repairs. Use fans or dehumidifiers to speed up the drying process.
  • Replace Damaged Materials: Remove and replace any damaged ceiling tiles, drywall, or insulation. Ensure that the area is properly patched and painted to restore its appearance.
  • Inspect for Mold: Check for any signs of mold growth and address it promptly. Use mold-killing products and consider consulting a professional if mold is widespread.

5. Prevent Future Leaks

To prevent future leaks and damage:

  • Regular Maintenance: Perform regular inspections and maintenance on your toilet and plumbing system to identify and address potential issues early.
  • Proper Installation: Ensure that the toilet is installed correctly with a properly sealed wax ring and secure flange.
  • Professional Assistance: If you’re unsure about handling repairs or maintenance, consult a professional plumber to ensure that the work is done correctly.

Conclusion

Toilet leaked through the ceiling can be a serious issue that requires prompt attention to prevent extensive damage to your home. By understanding the common causes of leaks, addressing and repairing the damage, and taking preventive measures, you can protect your home from water damage and ensure the longevity of your plumbing system. If you’re experiencing persistent issues or need professional assistance, don’t hesitate to contact a qualified plumber to help resolve the problem.

Popcorn Ceiling Removal San Diego: Tips and Considerations

Discover everything you need to know about popcorn ceiling removal in San Diego, from reasons to remove it to the best practices and professionals for the job.

Popcorn Ceiling Removal San Diego

Popcorn Ceiling Removal San Diego: Why Consider It?

Understanding Popcorn Ceiling Removal

Popcorn ceilings, also known as acoustic or textured ceilings, were popular in the mid-20th century for their ability to hide imperfections and dampen sound. However, they have fallen out of favor due to their dated appearance and potential health risks associated with asbestos in older installations.

Benefits of Popcorn Ceiling Removal

  • Modern Aesthetic: Removing popcorn ceilings can instantly update the look of a room, giving it a more contemporary and spacious feel.
  • Increased Property Value: Homes with smooth ceilings tend to appeal more to buyers, potentially increasing resale value.
  • Health and Safety: Popcorn ceilings installed before 1980 may contain asbestos, a known carcinogen. Removal is essential to mitigate health risks, especially during renovations or repairs.

Popcorn Ceiling Removal Process

1. Inspection and Testing

Before removal, it’s crucial to determine if the popcorn ceiling contains asbestos. Professional testing can identify asbestos fibers, ensuring safe handling and disposal practices if necessary.

Read too: Kitchen Lighting For A Vaulted Ceiling: Illuminating Your Space with Style and Functionality

2. Preparation

Prepare the room by removing furniture, covering floors and walls with protective materials, and ensuring adequate ventilation. This minimizes dust and debris from spreading throughout the house.

3. Removal Techniques

  • Wet Scrape Method: The ceiling is lightly sprayed with water to loosen the texture, making it easier to scrape off without creating airborne dust.
  • Dry Scrape Method: In some cases, a dry scrape method may be used with careful containment to minimize dust and debris.

4. Repair and Refinishing

After removal, the ceiling may require patching, sanding, and refinishing to achieve a smooth surface. This stage may also involve applying primer and fresh paint for a polished look.

Hiring Professionals in San Diego

Choosing the Right Contractor

  • Experience: Look for contractors with experience in popcorn ceiling removal and asbestos abatement if needed.
  • Certification: Ensure the contractor is licensed and certified to handle asbestos removal if applicable, adhering to local regulations.
  • References: Check reviews and ask for references to gauge the contractor’s reliability and quality of workmanship.

Cost Considerations

Factors Influencing Cost

  • Ceiling Size: Larger rooms typically incur higher removal costs due to more labor and materials.
  • Asbestos Abatement: If asbestos is present, additional costs for testing, containment, and safe disposal will apply.
  • Complexity: Ceilings with intricate designs or in hard-to-reach areas may require more labor and specialized equipment.

Benefits of Professional Removal

1. Safety Compliance

Professional contractors follow safety protocols to minimize exposure to asbestos fibers and ensure proper disposal, protecting both occupants and the environment.

2. Efficiency

Experienced professionals can complete the removal process efficiently, minimizing disruption to your daily routine and ensuring thorough cleanup afterward.

3. Quality Results

Professional removal and refinishing result in a smooth, flawless ceiling finish that enhances the overall appearance and value of your home.

Conclusion

Popcorn ceiling removal in San Diego is a transformative home improvement project that enhances aesthetics, improves indoor air quality, and may increase property value. Whether motivated by modernizing your home or addressing health concerns, hiring a qualified professional ensures the job is done safely and effectively. By understanding the process, costs, and benefits associated with popcorn ceiling removal, homeowners can make informed decisions to achieve a refreshed and inviting living space.

Bathroom Flooded Through the Ceiling: A Comprehensive Guide

Discovering that your bathroom is flooded through the ceiling is a homeowner’s nightmare. Water damage can be extensive and costly if not addressed quickly. In this article, we’ll explore the causes of ceiling floods, immediate actions to take, steps for damage control, and preventive measures to avoid future incidents.

Bathroom Flooded Through Ceiling

Understanding the Causes of a Bathroom Flooded Through the Ceiling

Ceiling floods in bathrooms often result from several common issues:

1. Pipe Leaks

Leaky pipes, whether from aging infrastructure or accidental damage, are a frequent cause of water damage. Even a small, slow leak can lead to significant flooding over time.

2. Faulty Plumbing Fixtures

Malfunctioning toilets, sinks, or bathtubs can cause water to overflow and seep through the ceiling. Faulty plumbing fixtures are often due to wear and tear or improper installation.

3. Roof Leaks

In some cases, a roof leak can be the culprit. Water can travel along beams and walls, eventually making its way to the bathroom ceiling.

Read too: Kitchen Lighting For A Vaulted Ceiling: Illuminating Your Space with Style and Functionality

4. Clogged Drains

Clogged drains in bathtubs, sinks, or showers can cause water to back up and overflow, leading to ceiling damage.

Immediate Actions to Take When Your Bathroom Flooded Through Ceiling

1. Shut Off the Water Supply

The first step is to turn off the main water supply to prevent further flooding. Locate the shut-off valve, typically found in the basement or near the water meter, and turn it off.

2. Turn Off Electricity

Water and electricity are a dangerous combination. Turn off the power supply to the affected area to avoid electrical hazards. If you’re unsure how to do this safely, call a professional.

3. Document the Damage

Take photos and videos of the damage for insurance purposes. Documenting the extent of the flooding will be useful when filing a claim with your insurance company.

4. Remove Standing Water

Use a wet/dry vacuum, mop, or towels to remove as much standing water as possible. Quick removal helps minimize water damage and mold growth.

5. Ventilate the Area

Open windows and doors to allow air circulation. Use fans and dehumidifiers to dry out the affected area. Proper ventilation helps prevent mold and mildew.

Steps for Damage Control and Repair

1. Assess the Damage

Once the immediate crisis is managed, thoroughly assess the extent of the damage. Check for structural damage, weakened drywall, and any signs of mold.

2. Remove Damaged Materials

Remove any water-damaged materials, such as soaked drywall, insulation, and flooring. These materials can harbor mold and compromise the structural integrity of your home.

3. Inspect for Mold

Mold can start growing within 24 to 48 hours after a flood. Inspect the affected area for signs of mold and take necessary precautions to remove it safely. If mold is extensive, consider hiring a professional mold remediation service.

4. Repair Plumbing Issues

Identify and repair the source of the leak. This may involve replacing faulty pipes, fixtures, or even parts of the roof. Ensure that all plumbing work is done by a licensed professional to prevent future issues.

5. Restore and Rebuild

Once the area is dry and mold-free, begin the restoration process. This includes replacing drywall, insulation, flooring, and repainting. Ensure that all materials used are mold-resistant to prevent future problems.

Preventive Measures to Avoid Future Ceiling Floods

Regular Inspections

Conduct regular inspections of your plumbing system, including pipes, fixtures, and the roof. Early detection of potential issues can prevent major water damage.

Install Water Alarms

Water alarms can detect leaks early and alert you to potential flooding. Install these alarms near plumbing fixtures and in areas prone to water damage.

Maintain Your Roof

Ensure your roof is in good condition and free from leaks. Regularly clean gutters and downspouts to prevent water buildup.

Upgrade Plumbing Fixtures

Consider upgrading to modern, water-efficient fixtures that are less prone to leaks. Regular maintenance and prompt repairs can also help keep your plumbing system in good condition.

Insulate Pipes

Insulate pipes in colder areas of your home to prevent freezing and bursting. Frozen pipes can cause significant water damage when they thaw and leak.

The Role of Insurance in Ceiling Floods

Homeowners insurance typically covers water damage caused by sudden and accidental incidents, such as burst pipes or roof leaks. However, it may not cover damage due to neglect or poor maintenance. It’s essential to:

Understand Your Policy

Review your homeowners insurance policy to understand what is covered. Some policies may exclude certain types of water damage, so be sure to clarify with your insurance provider.

File a Claim

If your policy covers the damage, file a claim as soon as possible. Provide documentation, such as photos and videos, and a detailed account of the incident. An adjuster will assess the damage and determine the payout for repairs.

Work with Professionals

Insurance companies often have a list of preferred contractors for repairs. Working with these professionals can expedite the claims process and ensure quality repairs.

Conclusion

Dealing with a bathroom flooded through the ceiling can be overwhelming, but taking immediate action and following the right steps can mitigate damage and prevent future incidents. Regular maintenance, prompt repairs, and understanding your insurance coverage are crucial in protecting your home from water damage. Remember, when in doubt, always consult with professionals to ensure the safety and integrity of your home.

Water Damage on Popcorn Ceiling: Causes, Remediation, and Prevention

Water damage on popcorn ceiling can be a troubling issue for homeowners, leading to unsightly stains, structural issues, and potentially hazardous mold growth. In this comprehensive guide, we delve into the causes of water damage on popcorn ceilings, effective remediation strategies, and essential tips for prevention.

Water Damage Popcorn Ceiling

What is Water Damage on Popcorn Ceilings?

Water damage on popcorn ceilings refers to any form of moisture infiltration that compromises the integrity and appearance of the textured surface. Popcorn ceilings, also known as acoustic or stipple ceilings, are characterized by their rough, bumpy texture, which can absorb and retain moisture when exposed to water leaks or high humidity levels.

Causes of Water Damage on Popcorn Ceilings

Plumbing Leaks

One of the most common causes of water damage on popcorn ceilings is plumbing leaks. Leaky pipes, whether from supply lines or drain lines, can release water into ceiling cavities, gradually saturating the popcorn texture and causing it to sag, discolor, or even collapse in severe cases.

Roof Leaks

Roof leaks are another frequent culprit behind water damage on popcorn ceilings. Damaged shingles, improper flashing, or clogged gutters can allow rainwater to seep into the attic space and eventually penetrate through to the ceiling below, compromising the popcorn texture and underlying materials.

Read too: Kitchen Lighting For A Vaulted Ceiling: Illuminating Your Space with Style and Functionality

Condensation

Excessive condensation due to poor ventilation or high humidity levels can also contribute to water damage on popcorn ceilings. When warm, moist air comes into contact with cooler ceiling surfaces, condensation forms, leading to damp spots, staining, and deterioration of the popcorn texture over time.

Bathroom Moisture

In bathrooms, inadequate ventilation during showers or baths can cause moisture to accumulate on popcorn ceilings. This moisture can gradually degrade the texture and create an environment conducive to mold growth, posing health risks and further compromising the ceiling’s structural integrity.

Signs of Water Damage on Popcorn Ceilings

Recognizing the signs of water damage early can help prevent extensive repairs and mitigate potential health hazards. Common indicators include:

  • Staining: Discoloration or yellowing spots on the ceiling surface.
  • Sagging: Visible bulging or softening of the popcorn texture.
  • Peeling or Bubbling: Texture that appears to peel away or form bubbles.
  • Musty Odor: Mold or mildew growth often accompanies water damage and emits a distinct musty smell.

Remediation and Repair Options

Assessing the Extent of Damage

Before proceeding with repairs, assess the extent of water damage on your popcorn ceiling. Determine whether the damage is localized or widespread, and identify the source of the water intrusion to prevent future issues.

Repairing Small Areas of Damage

For minor water stains or small areas of popcorn texture damage, consider spot cleaning and patching techniques. Use a stain-blocking primer to cover water stains, and carefully apply new popcorn texture to blend with the existing ceiling.

Removing and Replacing Damaged Areas

In cases of extensive water damage or significant mold growth, it may be necessary to remove and replace sections of the popcorn ceiling. Hire a professional contractor experienced in handling textured ceiling repairs to ensure safe removal and proper installation of new materials.

Addressing Underlying Issues

Address the underlying causes of water damage to prevent future incidents. Repair leaking pipes, fix roof issues, improve ventilation in bathrooms, and consider installing dehumidifiers or exhaust fans to reduce moisture levels.

Prevention Tips for Water Damage on Popcorn Ceilings

Regular Maintenance

Perform routine inspections of your home’s plumbing and roofing systems to detect and repair leaks promptly. Check for signs of water stains or mold growth on ceilings and walls, as these can indicate hidden water damage.

Roof Maintenance

Inspect your roof regularly for damaged or missing shingles, deteriorated flashing, and clogged gutters. Clean gutters and downspouts to ensure proper drainage and prevent water from seeping into the attic and ceilings.

Ventilation Improvement

Improve ventilation in bathrooms, kitchens, and attics to reduce humidity levels and minimize condensation on ceilings. Use exhaust fans during showers or cooking, and consider installing roof vents or ridge vents to promote airflow.

Professional Inspections

Schedule annual inspections with qualified professionals to assess the condition of your home’s plumbing, roofing, and HVAC systems. Address any issues promptly to prevent costly repairs and potential water damage to ceilings and other structural components.

Conclusion

Water damage on popcorn ceilings can compromise the aesthetic appeal, structural integrity, and indoor air quality of your home. By understanding the causes of water damage, recognizing early signs of moisture infiltration, and implementing effective prevention and remediation strategies, you can protect your popcorn ceilings and maintain a safe and comfortable living environment.

Whether you’re dealing with a minor water stain or significant ceiling damage, taking proactive measures and seeking professional assistance when needed will help preserve the beauty and value of your home for years to come.

Ceiling Repair Charlotte NC: Everything You Need to Know

Learn about professional ceiling repair services in Charlotte NC and how to address common issues effectively. Whether you’re dealing with water damage, cracks, or sagging ceilings, understanding the repair process is essential for maintaining your home’s structural integrity and aesthetics. This guide covers important considerations, techniques, and expert tips to ensure your ceiling is restored to its original condition.

Ceiling Repair Charlotte Nc

Understanding Ceiling Repair Charlotte NC

Ceiling repair services in Charlotte NC encompass a range of solutions aimed at fixing damage and restoring the structural integrity of residential and commercial ceilings. Key aspects of ceiling repair include:

  • Water Damage Restoration: Addressing leaks and moisture issues that can lead to stains, mold growth, and structural damage.
  • Crack Repair: Fixing cracks caused by settling, temperature fluctuations, or structural movement.
  • Drywall Replacement: Replacing damaged drywall sections to eliminate unsightly blemishes and ensure a smooth ceiling surface.
  • Texture Matching: Blending repaired areas with existing textures to maintain uniformity throughout the ceiling.

Common Causes of Ceiling Damage

Identifying the root cause of ceiling damage helps in determining the appropriate repair method. Common causes include:

  • Water Leaks: From plumbing issues, roof leaks, or condensation buildup, leading to stains and structural weakness.
  • Poor Ventilation: Inadequate airflow can result in moisture buildup, contributing to mold growth and deterioration.
  • Age and Settlement: Older homes may experience settling over time, causing cracks and uneven surfaces.
  • Impact Damage: Accidental impacts or heavy objects falling on the ceiling can cause cracks or even structural damage.

Types of Ceiling Repair Techniques

Ceiling repair techniques vary depending on the extent and type of damage. Professional contractors use specialized methods to ensure effective repairs:

  • Patch and Paint: For minor cracks and holes, patching with joint compound followed by painting can restore the ceiling’s appearance.
  • Drywall Replacement: Sections of damaged drywall are cut out and replaced, followed by finishing with joint compound and texture matching.
  • Water Damage Restoration: Addressing the source of water intrusion, drying the affected area, and replacing damaged materials as necessary.
  • Structural Repair: Addressing more serious issues such as sagging ceilings or structural instability, which may require additional support or reinforcement.

Hiring a Professional Ceiling Repair Service in Charlotte NC

When selecting a contractor for ceiling repair, consider the following factors to ensure quality service and results:

  • Experience and Expertise: Look for contractors with a proven track record in ceiling repair, especially in handling specific issues like water damage or textured ceilings.
  • Licensing and Insurance: Verify that the contractor is licensed to operate in North Carolina and carries adequate insurance coverage.
  • References and Reviews: Check online reviews and ask for references from past clients to gauge the contractor’s reputation and reliability.
  • Cost Estimates: Obtain detailed cost estimates that outline the scope of work, materials, and labor involved in the repair process.

DIY vs. Professional Ceiling Repair

While minor repairs like patching small holes may be tackled as DIY projects, more extensive damage or structural issues should be left to professionals. Benefits of hiring a professional include:

  • Expertise and Equipment: Professionals have the knowledge, tools, and materials to perform repairs effectively and efficiently.
  • Time Savings: Professional contractors can complete repairs in a timely manner, minimizing disruption to your daily routine.
  • Quality Assurance: Professionals ensure that repairs are done correctly, addressing underlying issues to prevent future damage.

Maintaining Your Repaired Ceiling

After repairs are completed, follow these tips to maintain your ceiling’s condition:

  • Monitor for Signs of Damage: Regularly inspect your ceiling for new cracks, stains, or changes in texture that may indicate ongoing issues.
  • Address Leaks Promptly: If you notice signs of water intrusion, such as stains or dripping water, investigate and address the source immediately.
  • Maintain Proper Ventilation: Ensure adequate airflow in your home to prevent moisture buildup, which can lead to mold growth and damage.
  • Schedule Inspections: Consider scheduling periodic inspections with a professional to assess your ceiling’s condition and address any emerging issues early.

Read too: Elevate Your Home Décor with Exquisite Japanese Style Ceiling Lamp Designs

Conclusion

Ceiling repair in Charlotte NC requires careful assessment and expert execution to restore your home’s ceilings to their original condition. By understanding the causes of damage, selecting the right repair techniques, and hiring qualified professionals, you can ensure a safe and aesthetically pleasing environment for years to come.

Bay Window Ceiling Leak: How to Fix and Prevent

Bay windows are a beautiful addition to any home, offering expansive views, increased natural light, and added architectural interest. However, they can sometimes present challenges, particularly when it comes to leaks. If you’re dealing with a bay window ceiling leak, this guide will help you understand the causes, solutions, and preventive measures to keep your home dry and damage-free.

Bay Window Ceiling Leak

Understanding Bay Window Ceiling Leaks

A bay window ceiling leak can cause significant damage to your home if not addressed promptly. Leaks can lead to water stains, mold growth, structural damage, and even compromise the integrity of your home. Understanding the common causes of these leaks is the first step in effectively addressing them.

Common Causes of Bay Window Ceiling Leaks

1. Poor Installation

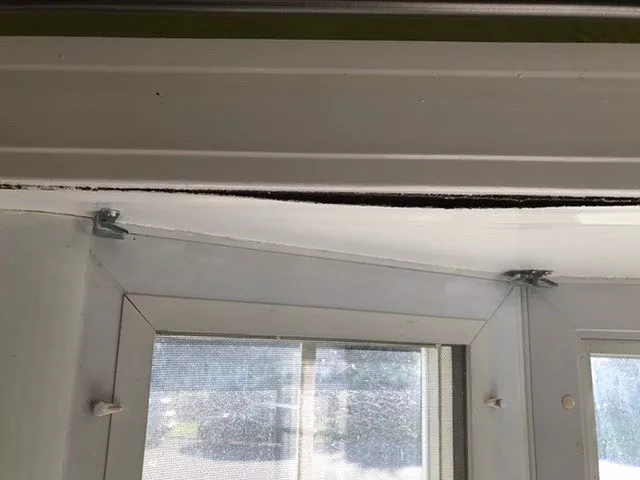
Improper installation is one of the leading causes of bay window ceiling leaks. If the window or its surrounding structures were not installed correctly, gaps and weaknesses can allow water to seep in. This is especially problematic during heavy rain or snow.

2. Damaged or Worn Flashing

Flashing is the material used to seal joints and seams around the window to prevent water from penetrating. Over time, flashing can become damaged or worn, leading to leaks. This is particularly common in older homes where the flashing has not been regularly inspected or maintained.

3. Roof Issues

Problems with the roof above the bay window can also cause leaks. Missing or damaged shingles, clogged gutters, and ice dams can all contribute to water infiltration. Ensuring that your roof is in good condition is essential to preventing leaks around bay windows.

4. Sealant Failure

The sealant around the bay window can degrade over time due to exposure to the elements. Cracks or gaps in the sealant can allow water to enter, leading to leaks. Regularly inspecting and maintaining the sealant is crucial to preventing leaks.

5. Structural Shifts

Homes naturally settle over time, and this can lead to shifts in the structure around the bay window. These shifts can create gaps and cracks that allow water to penetrate. Monitoring your home for signs of structural shifts can help you catch potential problems early.

Addressing a Bay Window Ceiling Leak

If you’ve identified a bay window ceiling leak, it’s important to address it promptly to prevent further damage. Here are the steps you should take:

Step 1: Identify the Source

The first step in addressing a bay window ceiling leak is to identify the source of the leak. This may require a thorough inspection of the window, roof, and surrounding areas. Look for obvious signs of damage, such as cracked or missing shingles, damaged flashing, or gaps in the sealant.

Step 2: Repair or Replace Damaged Materials

Once you’ve identified the source of the leak, repair or replace any damaged materials. This may include replacing worn or damaged flashing, repairing the roof, or reapplying sealant. If the leak is due to poor installation, you may need to have the window reinstalled by a professional.

Step 3: Dry and Repair the Ceiling

After addressing the source of the leak, it’s important to dry and repair any water damage to the ceiling. Use fans and dehumidifiers to dry the area thoroughly. Once dry, repair any damaged drywall or plaster and repaint as necessary.

Step 4: Prevent Future Leaks

Preventing future leaks involves regular maintenance and inspections. Check the flashing and sealant around your bay window periodically and address any issues promptly. Ensure your roof is in good condition and clean your gutters regularly to prevent water buildup.

Preventing Bay Window Ceiling Leaks

Prevention is always better than cure. Here are some tips to help you prevent bay window ceiling leaks:

Regular Inspections

Regularly inspect your bay window, roof, and gutters for signs of damage or wear. Address any issues promptly to prevent leaks from developing.

Proper Installation

If you’re installing a new bay window, ensure it is done by a professional with experience in proper installation techniques. This can help prevent leaks from occurring due to poor installation.

Maintain Flashing and Sealant

Check the flashing and sealant around your bay window periodically. Replace or repair any damaged or worn materials to maintain a watertight seal.

Roof Maintenance

Keep your roof in good condition by replacing missing or damaged shingles and ensuring proper drainage. Clean your gutters regularly to prevent water buildup that can lead to leaks.

Address Structural Shifts

Monitor your home for signs of structural shifts, such as cracks in the walls or ceiling. Address any issues promptly to prevent gaps and cracks that can lead to leaks.

Choosing the Right Professionals for Bay Window Ceiling Leak Repairs

When dealing with a bay window ceiling leak, it’s often best to hire a professional to ensure the repair is done correctly. Here are some tips for choosing the right professional for the job:

Check Credentials

Ensure the professional you hire is licensed, insured, and experienced in dealing with bay window repairs. Ask for references and check online reviews to ensure they have a good reputation.

Get Multiple Quotes

Don’t settle for the first quote you receive. Get multiple quotes to compare prices and services. This can help you find the best value for your money.

Ask About Warranties

A reputable professional should offer a warranty on their work. This provides peace of mind that the repair will be done correctly and that any future issues will be addressed.

Read too: A Comprehensive Mr Cool Ceiling Cassette Review: Unveiling Excellence

Conclusion

A bay window ceiling leak can cause significant damage to your home if not addressed promptly. Understanding the common causes of leaks, how to address them, and how to prevent future leaks can help you keep your home dry and damage-free. Regular inspections, proper installation, and maintenance are key to preventing leaks and ensuring the longevity of your bay windows. If you’re dealing with a leak, hiring a professional can ensure the repair is done correctly and prevent further damage.

LED Ceiling Light Panel Replacement: A Step-by-Step Process

When it comes to modern lighting solutions, LED ceiling light panels have become a popular choice due to their energy efficiency, long lifespan, and superior illumination. However, like all electrical components, they can eventually wear out or become outdated, necessitating a replacement. This comprehensive guide will walk you through everything you need to know about LED ceiling light panel replacement, from identifying the need for a replacement to the step-by-step process of installation.

Led Ceiling Light Panel Replacement

Why You Might Need an LED Ceiling Light Panel Replacement

There are several reasons why you might consider replacing your LED ceiling light panel:

  1. Diminished Brightness: Over time, LED panels can lose their brightness, making your space less illuminated.
  2. Flickering Issues: If your LED panel starts to flicker, it could indicate a problem with the panel itself or the wiring.
  3. Outdated Design: Newer LED panels offer better designs and features, making an upgrade appealing for aesthetic or functional reasons.
  4. Energy Efficiency: Older panels might not be as energy-efficient as newer models, leading to higher electricity bills.

Tools and Materials Needed for LED Ceiling Light Panel Replacement

Before starting the replacement process, ensure you have the following tools and materials:

  • New LED ceiling light panel
  • Screwdriver
  • Ladder
  • Voltage tester
  • Wire connectors
  • Safety gloves
  • Safety glasses

Steps to Replace an LED Ceiling Light Panel

1. Turn Off the Power

Safety should always be your first priority. Turn off the power supply to the room where you will be replacing the LED ceiling light panel. Use a voltage tester to ensure that the power is completely off before proceeding.

2. Remove the Old Panel

Carefully remove the old LED panel. If it’s screwed into place, use a screwdriver to unscrew it. If it’s mounted in a different way, follow the manufacturer’s instructions for removal. Be gentle to avoid damaging the ceiling or the existing wiring.

3. Disconnect the Wiring

Once the old panel is removed, you will need to disconnect the wiring. Make sure to note how the wires are connected, as this will help when connecting the new panel. Typically, you will see three wires: live (brown or black), neutral (blue), and ground (green or yellow-green).

4. Connect the New LED Panel

Connect the new LED panel to the existing wiring. Match the wires from the panel to the corresponding wires in the ceiling: live to live, neutral to neutral, and ground to ground. Use wire connectors to secure the connections. Ensure all connections are tight and secure to prevent any electrical issues.

5. Secure the New Panel

Mount the new LED panel to the ceiling. Follow the manufacturer’s instructions for the specific mounting method. This may involve screwing the panel into place or using other mounting hardware. Make sure the panel is securely attached to prevent it from falling.

6. Test the New Panel

Once the new panel is installed, turn the power back on and test the panel to ensure it is working correctly. If the light does not turn on or if it flickers, turn off the power and check your connections again.

Tips for Choosing the Right LED Ceiling Light Panel Replacement

When selecting a new LED ceiling light panel, consider the following factors:

Brightness

The brightness of the panel is measured in lumens. Choose a panel that provides adequate lighting for your space. For general lighting, a panel with around 4,000 lumens is typically sufficient for a standard room.

Color Temperature

LED panels come in various color temperatures, ranging from warm white (2700K) to daylight (6500K). Choose a color temperature that suits the ambiance you want to create in your space.

Energy Efficiency

Look for panels with high energy efficiency ratings. LED panels with the ENERGY STAR label are a good choice as they meet strict energy efficiency guidelines set by the U.S. Environmental Protection Agency.

Size and Design

Ensure that the new panel fits the dimensions of your existing fixture. Additionally, choose a design that complements the aesthetics of your room.

Dimming Capabilities

If you prefer adjustable lighting, opt for an LED panel with dimming capabilities. This allows you to control the brightness to suit different activities and moods.

Maintaining Your LED Ceiling Light Panel

To extend the lifespan of your new LED ceiling light panel and ensure it operates efficiently, follow these maintenance tips:

  • Regular Cleaning: Dust and dirt can accumulate on the panel, reducing its brightness. Clean the panel regularly with a soft, dry cloth.
  • Avoid Overloading: Ensure that the electrical circuit is not overloaded, as this can cause the panel to malfunction.
  • Check Connections: Periodically check the wiring connections to ensure they remain tight and secure.

Benefits of Replacing Your LED Ceiling Light Panel

Enhanced Energy Efficiency

Newer LED panels are designed to be more energy-efficient than older models. This means you can enjoy the same level of brightness while using less electricity, leading to lower energy bills.

Improved Lighting Quality

Advancements in LED technology have led to better lighting quality. New panels offer more uniform light distribution and reduced glare, creating a more comfortable and visually appealing environment.

Longer Lifespan

Modern LED panels have a longer lifespan compared to older models. This means fewer replacements over time, saving you money and reducing environmental waste.

Better Aesthetic Appeal

Upgrading to a new LED panel can enhance the aesthetic appeal of your space. Newer panels come in sleek designs and can be integrated seamlessly into various interior styles.

Troubleshooting Common Issues After Replacement

Light Doesn’t Turn On

If your new LED panel doesn’t turn on, check the following:

  • Ensure the power supply is turned on.
  • Verify that all wire connections are secure.
  • Test the panel with a different power source to rule out a faulty panel.

Flickering Light

Flickering can be caused by several issues:

  • Loose wiring connections: Check and tighten all connections.
  • Incompatible dimmer switch: Ensure the dimmer switch is compatible with LED lighting.
  • Voltage fluctuations: Consult an electrician if you suspect voltage issues.

Uneven Lighting

If the light output appears uneven, ensure that the panel is mounted correctly and that there are no obstructions blocking the light.

Read too: Striped Schoolhouse Ceiling Light Fixtures: Unveiling the Timeless Charm

Conclusion

Replacing an LED ceiling light panel is a straightforward process that can significantly improve the lighting quality and energy efficiency of your space. By following the steps outlined in this guide, you can safely and effectively replace your old LED panel with a new, more efficient model. Remember to choose a panel that suits your needs in terms of brightness, color temperature, and design. Regular maintenance will ensure your new panel lasts for many years, providing you with reliable and high-quality lighting.

Upstairs Toilet Overflowed And Leaked Through Ceiling: What You Need to Know

Discovering that your upstairs toilet has overflowed and leaked through the ceiling can be a homeowner’s worst nightmare. Learn how to handle this situation effectively and prevent further damage.

Upstairs Toilet Overflowed And Leaked Through Ceiling

Upstairs Toilet Overflowed And Leaked Through Ceiling: Causes and Immediate Actions

When an upstairs toilet overflows, it can quickly lead to water seeping through the ceiling below. This often happens due to:

  • Clogs: A common cause is a clogged toilet drain, which prevents water from flushing down properly.
  • Faulty Fill Valve: If the fill valve malfunctions, it can cause the toilet bowl to overflow.
  • Sewer Line Issues: Problems with the sewer line can also lead to toilet backups.
  • Excessive Flushing: Using too much toilet paper or flushing non-flushable items can overwhelm the toilet’s drainage capacity.

Immediate Steps to Take When Your Toilet Overflows

  1. Turn Off the Water: Locate the shut-off valve near the toilet and turn it off to stop water flow to the toilet.
  2. Contain the Water: Use towels or a mop to soak up standing water around the toilet to prevent further spreading.
  3. Inspect the Ceiling: Check the ceiling below the affected area for signs of water damage or bulging. If the ceiling is bulging, puncture it with a screwdriver to release the water and prevent the ceiling from collapsing.

Assessing the Damage

Water Damage to the Ceiling

  • Water from an upstairs toilet can cause stains, sagging, or even collapse of the ceiling below.
  • Mold and mildew growth may occur if the area is not properly dried and treated.

Flooring and Wall Damage

  • Water can seep into flooring and walls, causing warping, stains, and potential structural damage.

Repairing the Damage

Ceiling Repair

  • Remove Damaged Materials: Cut away any damaged ceiling materials such as drywall or plaster.
  • Dry Out the Area: Use fans and dehumidifiers to dry out the affected area thoroughly.
  • Replace Materials: Replace damaged drywall or plaster and repaint as necessary.

Addressing Flooring and Wall Damage

  • Dry and Clean: Ensure that floors and walls are completely dried and cleaned to prevent mold growth.
  • Repair or Replace: Repair or replace damaged flooring or wall materials as needed.

Preventing Future Incidents

Toilet Maintenance

  • Regular Inspections: Check toilets for leaks, clogs, or signs of wear regularly.
  • Proper Use: Educate household members on what can and cannot be flushed down the toilet.
  • Routine Maintenance: Schedule routine maintenance with a plumber to keep your toilet and plumbing in good condition.

Insurance Coverage

  • Review your homeowner’s insurance policy to understand coverage for water damage from plumbing incidents.

Conclusion

Dealing with an upstairs toilet that has overflowed and leaked through the ceiling requires prompt action to mitigate damage and ensure the safety of your home. By understanding the causes, taking immediate steps, and addressing the damage effectively, you can minimize the impact of such incidents.

Read too: Striped Schoolhouse Ceiling Light Fixtures: Unveiling the Timeless Charm

Concerned about an overflowed toilet? Contact a professional plumber immediately to assess the situation and provide necessary repairs.

Popcorn Ceiling Removal Services in Colorado Springs: Transform Your Space Today

Are you tired of the outdated popcorn ceilings in your Colorado Springs home? Say goodbye to the textured eyesore and hello to smooth, modern ceilings with professional popcorn ceiling removal services. In this comprehensive guide, we’ll explore everything you need to know about popcorn ceiling removal in Colorado Springs, from the process and benefits to finding the right professionals for the job.

Popcorn Ceiling Removal Colorado Springs

Understanding

Popcorn Ceiling Removal Colorado Springs: A Solution for Outdated Ceilings

Popcorn ceilings, also known as acoustic or textured ceilings, were once popular for their sound-absorbing properties and affordability. However, they have fallen out of favor in recent years due to their outdated appearance and potential health hazards associated with asbestos-containing materials in older homes. Popcorn ceiling removal in Colorado Springs offers homeowners the opportunity to update their interiors and enhance the value and appeal of their properties.

The Process of Popcorn Ceiling Removal in Colorado Springs

  1. Assessment: The first step in popcorn ceiling removal is to assess the condition of the ceiling and determine if asbestos testing is necessary, especially in homes built before 1980.
  2. Preparation: Before removal begins, the area surrounding the ceiling is carefully protected with plastic sheeting to contain dust and debris. Furniture and fixtures are covered or removed from the room to prevent damage.
  3. Moistening: To facilitate removal, the popcorn texture is sprayed with water to soften it and make it easier to scrape off.
  4. Scraping: Using specialized tools, the popcorn texture is carefully scraped away from the ceiling surface, taking care not to damage the underlying drywall.
  5. Finishing: Once the popcorn texture is removed, the ceiling is inspected for any imperfections or damage. Repairs are made as needed, and the ceiling is sanded smooth to prepare it for painting or other finishes.

Benefits of Popcorn Ceiling Removal in Colorado Springs

  1. Modern Aesthetic: Removing popcorn ceilings instantly modernizes the look of a home, creating a clean and contemporary appearance that enhances the overall decor.
  2. Improved Air Quality: Popcorn ceilings can trap dust, allergens, and other particles over time, contributing to poor indoor air quality. Removing them can help improve air circulation and create a healthier living environment.
  3. Increased Home Value: Homes with smooth ceilings are more attractive to potential buyers and may command a higher resale value compared to those with outdated popcorn ceilings.
  4. Easier Maintenance: Smooth ceilings are easier to clean and maintain than textured ceilings, as they do not collect dust and debris as readily.

Finding Popcorn Ceiling Removal Professionals in Colorado Springs

When hiring professionals for popcorn ceilings removal in Colorado Springs, consider the following factors:

  1. Experience: Look for contractors with extensive experience in popcorn ceiling removal and a proven track record of satisfied customers.
  2. Licensing and Insurance: Ensure that the contractor is properly licensed and insured to perform the work in your area and has the necessary permits if required.
  3. References: Ask for references from past clients and take the time to research online reviews and testimonials to gauge the contractor’s reputation and reliability.

Conclusion

Popcorn ceilings removal in Colorado Springs is a worthwhile investment that can transform the look and feel of your home. Whether you’re preparing to sell your property or simply want to update your interiors, professional popcorn ceiling removal services can help you achieve smooth, modern ceilings that enhance the beauty and value of your home.

Read too: Striped Schoolhouse Ceiling Light Fixtures: Unveiling the Timeless Charm

Leak in Bay Window Ceiling: How to Fix It?

Bay windows add charm and character to any home, offering panoramic views and inviting natural light. However, along with their aesthetic appeal, they can also present challenges, one of which is a leak in the bay window ceiling. In this comprehensive guide, we’ll delve into the causes behind this issue and provide practical solutions to address it effectively.

Leak In Bay Window Ceiling

Understanding the Problem

A leak in the bay window ceiling can stem from various sources, ranging from structural issues to poor installation or maintenance neglect. Identifying the root cause is crucial for implementing the appropriate fix and preventing further damage to your home.

Common Causes of a Leak in Bay Window Ceiling

  1. Faulty Sealing: Improper sealing around the bay window frame or between the glass panes can allow water infiltration, leading to leaks during rainstorms or snow melts.
  2. Roof Damage: Damaged or missing shingles, deteriorated flashing, or clogged gutters can divert water towards the bay window area, resulting in leaks.
  3. Condensation Buildup: Excessive condensation on the interior surfaces of the bay window can accumulate and seep into the ceiling, especially if there’s inadequate ventilation.
  4. Structural Settlement: Over time, the settling of the house foundation or shifting of the bay window structure can create gaps or cracks, providing entry points for water.

Diagnosing the Issue

To pinpoint the exact cause of the leak in your bay window ceiling, it’s essential to conduct a thorough inspection both indoors and outdoors. Look for signs of water stains, mold growth, or bubbling paint on the ceiling, as well as any visible cracks or gaps around the window frame and adjacent walls.

Read too: Striped Schoolhouse Ceiling Light Fixtures: Unveiling the Timeless Charm

Addressing the Leak

Once you’ve identified the source of the problem, it’s time to take action. Here are some steps you can take to fix a leak in your bay window ceiling:

  • Re-Sealing the Window: Apply fresh caulking or weatherstripping around the window frame to create a watertight seal and prevent moisture intrusion.
  • Repairing Roof Damage: If the leak originates from the roof, hire a professional roofer to inspect and repair any damaged shingles, flashing, or gutter systems.
  • Improving Ventilation: Enhance ventilation in the bay window area by installing exhaust fans or opening windows periodically to reduce condensation buildup.
  • Reinforcing Structural Integrity: Address any structural issues contributing to the leak, such as foundation settlement or window frame misalignment, by consulting with a qualified contractor.

Preventive Maintenance Tips

To avoid future leaks in your bay window ceiling, consider implementing the following preventive maintenance measures:

  • Regularly inspect the window seals and caulking for signs of wear or damage, and reapply as needed.
  • Keep gutters clean and free of debris to ensure proper water drainage away from the house.
  • Trim nearby trees and foliage to prevent branches from rubbing against the roof or obstructing the bay window.
  • Monitor indoor humidity levels and use dehumidifiers if necessary to control moisture.

Conclusion

A leak in the bay window ceiling can be a nuisance, but with proper diagnosis and timely repairs, you can restore the integrity of your home’s structure and enjoy your bay window for years to come. By understanding the common causes and implementing preventive maintenance strategies, you can safeguard your home against water damage and preserve its beauty and value.

How to Fix a Mobile Home Ceiling Like a Pro? Expert Guide

Mobile homes offer convenience and flexibility, but like any structure, they require maintenance and occasional repairs. Among the common issues homeowners may encounter is ceiling damage. Knowing how to fix a mobile home ceiling can save you time and money, ensuring your living space remains comfortable and safe. This comprehensive guide provides step-by-step instructions and expert tips for addressing ceiling problems in mobile homes effectively.

How To Fix A Mobile Home Ceiling

Introduction

The ceiling of a mobile home serves both functional and aesthetic purposes. It provides insulation, soundproofing, and support for fixtures while contributing to the overall look and feel of the interior. Over time, factors such as water leaks, structural movement, and wear and tear can lead to ceiling damage. Learning how to fix a mobile home ceiling empowers homeowners to tackle these issues promptly, preserving the integrity of their living space.

Identifying Common Ceiling Problems

Before diving into repairs, it’s essential to identify the specific issues affecting your mobile home ceiling. Common problems include:

  1. Water Damage: Leaks from the roof or plumbing fixtures can cause water stains, sagging, and mold growth on the ceiling.
  2. Cracks and Holes: Structural settling or impact damage may result in cracks, holes, or bulges in the ceiling surface.
  3. Sagging Panels: Over time, ceiling panels may become loose or sag due to inadequate support or moisture absorption.
  4. Insulation Issues: Damage to insulation materials can compromise energy efficiency and indoor comfort.

How to Fix a Mobile Home Ceiling

  1. Assess the Damage: Begin by inspecting the ceiling carefully to determine the extent of the damage. Take note of any water stains, cracks, or sagging areas.
  2. Address Water Leaks: If water damage is present, identify and repair the source of the leak before proceeding with ceiling repairs. This may involve fixing roof leaks, sealing plumbing connections, or addressing condensation issues.
  3. Repair Cracks and Holes: Use a suitable patching compound to fill in cracks and holes in the ceiling. Smooth the surface with sandpaper once the compound has dried, then apply a coat of primer to ensure proper adhesion.
  4. Reinforce Sagging Panels: For sagging ceiling panels, install additional support beams or braces to provide structural reinforcement. Secure loose panels in place using construction adhesive or screws.
  5. Replace Damaged Panels: If ceiling panels are beyond repair, carefully remove them and replace them with new ones of the same size and style. Be sure to match the existing materials for a seamless finish.
  6. Insulate as Needed: Address any insulation issues by adding or replacing insulation materials above the ceiling panels. This helps improve energy efficiency and maintains a comfortable indoor environment.

Conclusion

In conclusion, knowing how to fix a mobile home ceiling empowers homeowners to address common issues and maintain the integrity of their living space. By identifying and addressing problems promptly, you can prevent further damage and ensure a comfortable and safe environment for you and your family.

Read too: Exploring the Efficiency of Radiant Ceiling Heater Electric: A Comprehensive Guide

Dealing with Pesky Ants on My Ceiling: Effective Solutions and Prevention Tips

Are you noticing a trail of tiny invaders marching across your ceiling? Dealing with ants on my ceiling can be a frustrating and unsightly issue for homeowners. In this guide, we’ll explore effective solutions and prevention tips to address this common household problem and maintain a pest-free environment.

Ants On My Ceiling

Understanding the Presence of Ants on My Ceiling

Ants are social insects known for their ability to infiltrate homes in search of food, water, and shelter. While they typically nest outdoors, certain species may find their way indoors, including onto ceilings, attracted by crumbs, spills, or moisture. Common species that may invade ceilings include carpenter ants, odorous house ants, and pavement ants.

Identifying Ants on My Ceiling

Before implementing any control measures, it’s essential to confirm that the insects on your ceiling are indeed ants. Look for the following characteristics to identify ants:

  1. Body Shape: Ants have three distinct body segments: head, thorax, and abdomen, with a narrow waist between the thorax and abdomen.
  2. Antennae: Ants have elbowed antennae, which may be bent or curved.
  3. Legs: Ants have six legs attached to their thorax.
  4. Color: Ants come in various colors, including black, brown, red, or a combination thereof.

If you’re unsure whether the insects on your ceiling are ants, consider contacting a pest control professional for identification and assistance.

Read too: How To Extend Kitchen Cabinets To The Ceiling: A Complete Guide for Maximizing Space and Style

Causes of Ant Infestation on My Ceiling

Several factors can contribute to ants finding their way onto your ceiling:

  1. Food Sources: Crumbs, spills, and food residue left unattended can attract ants searching for sustenance.
  2. Moisture: Leaks, condensation, or damp areas in the ceiling provide ants with a water source, making them more likely to inhabit the area.
  3. Access Points: Gaps, cracks, or openings in walls, ceilings, or windows serve as entry points for ants to infiltrate your home.
  4. Nesting Sites: Certain species of ants, such as carpenter ants, may establish satellite colonies within the structure of your home, including ceilings and walls.

Effective Solutions for Ants on My Ceiling

Once you’ve confirmed the presence of ants on your ceiling, it’s essential to take prompt action to address the infestation. Here are some effective solutions:

  1. Cleanliness: Maintain a clean and tidy home by promptly wiping up spills, storing food in airtight containers, and regularly vacuuming or sweeping to eliminate crumbs and food residue.
  2. Seal Entry Points: Inspect your home for gaps, cracks, or openings that may serve as entry points for ants, especially around windows, doors, pipes, and utility lines. Seal any openings with caulk or weatherstripping to prevent ants from gaining access.
  3. Eliminate Moisture: Repair any leaks, fix plumbing issues, and reduce humidity levels in your home to eliminate moisture sources that attract ants. Ensure proper ventilation in bathrooms, kitchens, and basements to discourage ant infestations.
  4. Use Ant Baits: Place ant baits or traps near areas where ants are active, such as along baseboards, near entry points, or on countertops. Ant baits contain slow-acting insecticides that ants carry back to the colony, effectively eliminating the entire nest.

Preventing Ant Infestations on My Ceiling

Taking proactive measures to prevent ant infestations can help safeguard your home against future invasions. Here are some prevention tips:

  1. Regular Maintenance: Conduct routine inspections of your home’s exterior and interior to identify and address potential entry points, moisture issues, and nesting sites.
  2. Landscaping: Keep vegetation trimmed and away from the perimeter of your home to prevent ants from using branches or foliage as a bridge to access your property.
  3. Storage: Store firewood, mulch, and organic debris away from the foundation of your home to reduce harborage areas for ants and other pests.
  4. Professional Pest Control: Consider scheduling regular pest control treatments with a licensed exterminator to proactively manage ant populations and prevent infestations.

Conclusion

Dealing with ants on your ceiling can be a challenging task, but with the right strategies and preventative measures, you can effectively eliminate these pesky invaders and keep your home pest-free. By maintaining cleanliness, sealing entry points, using ant baits, and implementing preventive measures, you can enjoy a comfortable and ant-free living environment.

What to Do in Case of a Ceiling Collapse: Who to Call and How to Stay Safe

Ceiling collapses can be sudden and alarming events, posing significant risks to occupants and property. Whether caused by structural damage, water leaks, or other factors, a ceiling collapse requires immediate attention to ensure safety and prevent further damage. In this guide, we’ll explore what to do in the event of a ceiling collapse, who to call for assistance, and essential safety measures to take.

Ceiling Collapse Who To Call

Understanding Ceiling Collapse

A ceiling collapse occurs when the structural integrity of a ceiling is compromised, leading to its sudden failure and collapse. Common causes of ceiling collapses include:

  • Water Damage: Leaking pipes, roof leaks, or flooding can weaken ceiling materials over time, leading to structural failure.
  • Structural Defects: Poor construction, age-related deterioration, or inadequate support can contribute to ceiling collapses.
  • Natural Disasters: Severe weather events such as earthquakes, hurricanes, or heavy snowfall can cause ceilings to collapse.

Read too: Exploring the Benefits and How-Tos of DIY Ceiling Cassette Mini Split Installation: Revolutionizing Comfort

Signs of a Potential Ceiling Collapse

It’s essential to be vigilant for warning signs that may indicate a ceiling is at risk of collapsing. Signs of potential ceiling collapse include:

  • Cracks or Sagging: Visible cracks, bulges, or sagging areas in the ceiling may indicate structural damage.
  • Water Stains: Water stains or discoloration on the ceiling could be a sign of water damage and weakening of materials.
  • Strange Sounds: Unusual noises such as creaking, popping, or shifting sounds coming from the ceiling should be investigated promptly.

What to Do in Case of a Ceiling Collapse

In the event of a ceiling collapse, follow these steps to ensure safety and mitigate risks:

  1. Evacuate Immediately: If a ceiling collapse occurs, evacuate the area immediately to a safe location outside the building.
  2. Assess the Situation: Once outside, assess the extent of the damage and ensure that everyone is accounted for.
  3. Contact Emergency Services: Call emergency services (such as 911) to report the incident and request assistance from firefighters and paramedics if needed.
  4. Document the Damage: Take photos or videos of the collapsed ceiling and any associated damage for insurance purposes.
  5. Secure the Area: Block off the affected area to prevent access and potential injuries from falling debris.
  6. Contact a Professional: After ensuring everyone’s safety, contact a licensed contractor or structural engineer to assess the damage and recommend repairs.

Who to Call for Assistance

In the event of a ceiling collapse, it’s essential to contact the following parties for assistance:

  1. Emergency Services: Call 911 or your local emergency number to report the incident and request immediate assistance.
  2. Building Management: If the ceiling collapse occurs in a commercial or residential building, notify the building management or landlord.
  3. Insurance Provider: Contact your insurance provider to report the incident and initiate the claims process for property damage.

Safety Tips for Ceiling Collapse Prevention

To reduce the risk of a ceiling collapse, consider the following safety tips:

  • Regular Inspections: Schedule regular inspections of your property’s ceilings to identify and address any signs of damage or deterioration.
  • Address Water Damage: Promptly repair any water leaks or damage to prevent moisture buildup and structural damage.
  • Avoid Overloading Ceilings: Avoid hanging heavy objects or equipment from ceilings, as this can strain the structural integrity.
  • Monitor Weather Conditions: Stay informed about severe weather warnings and take precautions to protect your property from potential damage.

Conclusion

A ceiling collapse can be a frightening and dangerous situation, but knowing what to do and who to call can help mitigate risks and ensure a prompt response. By following the steps outlined in this guide and prioritizing safety, you can protect yourself, your loved ones, and your property in the event of a ceiling collapse emergency.

Popcorn Ceiling Removal in Tucson: Transform Your Home Today!

Are you tired of the outdated popcorn ceilings in your Tucson home? Popcorn ceilings, also known as acoustic ceilings or textured ceilings, were once popular but are now considered unattractive and outdated. If you’re ready to give your home a fresh, modern look, popcorn ceiling removal is the way to go. In this comprehensive guide, we’ll provide expert tips and advice for popcorn ceiling removal in Tucson.

Popcorn Ceiling Removal Tucson

Popcorn Ceiling Removal Tucson: A Step-by-Step Guide

1. Assessment and Preparation

Before starting the popcorn ceiling removal process, assess the condition of the ceiling and prepare the room accordingly. Cover floors and furniture with plastic sheeting to protect them from dust and debris. Additionally, ensure proper ventilation by opening windows and using fans to minimize dust buildup.

2. Moistening the Ceiling

To make the popcorn texture easier to remove, moisten the ceiling with water before scraping. Use a garden sprayer or spray bottle to apply water evenly across the surface, allowing it to soak in for several minutes. This helps soften the texture and reduces the risk of releasing harmful particles into the air.

3. Scraping the Texture

Once the ceiling is adequately moistened, use a wide putty knife or specialized popcorn ceiling scraper to gently remove the texture. Work in small sections, taking care not to damage the underlying surface. If stubborn areas remain, apply additional water and allow it to soak before scraping again.

Read too: Discovering the Charm of Nautical Outdoor Ceiling Fans for Your Coastal Retreat: Sail into Style

4. Finishing Touches

After removing the popcorn texture, inspect the ceiling for any imperfections or rough patches. Use a drywall compound or joint compound to fill in gaps or holes, then sand the surface smooth once the compound has dried. Finally, prime the ceiling with a quality primer before applying your desired finish, such as paint or a new texture.

Benefits of Popcorn Ceiling Removal

  • Enhanced Aesthetic: Removing popcorn ceilings instantly modernizes the look of your home, creating a cleaner and more contemporary space.
  • Improved Lighting: Smooth ceilings reflect light more effectively than textured ceilings, brightening up the room and making it feel more spacious.
  • Healthier Indoor Environment: Popcorn ceilings can trap dust, allergens, and other pollutants, contributing to poor indoor air quality. Removing them can help create a healthier living environment for you and your family.

Cost Considerations

The cost of popcorn ceiling removal in Tucson can vary depending on factors such as the size of the room, the condition of the ceiling, and the extent of preparation and finishing work required. On average, homeowners can expect to pay between $1 and $3 per square foot for professional popcorn ceiling removal services.

Conclusion

Popcorn ceiling removal is a worthwhile investment that can significantly improve the look and feel of your Tucson home. By following our expert tips and best practices, you can tackle this renovation project with confidence and achieve stunning results that you’ll enjoy for years to come.

Popcorn Ceiling Removal in Dallas: Expert Tips

Are you considering removing the popcorn ceiling in your Dallas home? Popcorn ceilings, also known as acoustic ceilings or textured ceilings, were popular in the past but have fallen out of favor in recent years due to their outdated appearance and potential health hazards. If you’re ready to update your space and enhance its aesthetic appeal, popcorn ceiling removal is a great place to start. In this comprehensive guide, we’ll provide expert tips and advice for popcorn ceiling removal in Dallas.

Popcorn Ceiling Removal Dallas

Popcorn Ceiling Removal Dallas: Understanding the Process

1. Assessment and Preparation

Before beginning the popcorn ceiling removal process, it’s essential to assess the condition of the ceiling and prepare the area accordingly. This involves covering floors and furniture with plastic sheeting to protect them from dust and debris. Additionally, ensure that the room is well-ventilated by opening windows and using fans to minimize dust accumulation.

2. Moistening the Ceiling

To make the popcorn texture easier to remove, it’s recommended to moisten the ceiling with water before scraping. Use a garden sprayer or a spray bottle to apply water evenly to the surface, allowing it to soak in for several minutes. This helps soften the texture and reduces the risk of releasing asbestos fibers into the air.

Read too: Discovering the Charm of Nautical Outdoor Ceiling Fans for Your Coastal Retreat: Sail into Style

3. Scraping the Texture

Once the ceiling is adequately moistened, use a wide putty knife or a specialized popcorn ceiling scraper to gently scrape away the texture. Work in small sections, being careful not to damage the underlying drywall or plaster. If you encounter stubborn areas, apply additional water and let it soak in before attempting to scrape again.

4. Finishing Touches

After removing the popcorn texture, inspect the ceiling for any remaining imperfections or rough patches. Use a drywall compound or joint compound to fill in any gaps or holes, then sand the surface smooth once the compound has dried. Finally, prime the ceiling with a quality primer before applying your desired finish, such as paint or a new texture.

Benefits of Popcorn Ceiling Removal

  • Modernization: Removing popcorn ceilings can instantly modernize the look of your home, giving it a cleaner and more updated appearance.
  • Increased Property Value: Homes with smooth ceilings are more attractive to buyers and may command a higher resale value than those with popcorn ceilings.
  • Improved Air Quality: Popcorn ceilings can trap dust, allergens, and other pollutants, contributing to poor indoor air quality. Removing them can help create a healthier living environment for you and your family.

Cost Considerations

The cost of popcorn ceiling removal in Dallas can vary depending on factors such as the size of the room, the condition of the ceiling, and the extent of preparation and finishing work required. On average, homeowners can expect to pay between $1 and $3 per square foot for professional popcorn ceiling removal services.

Conclusion

Popcorn ceiling removal is a worthwhile investment that can enhance the beauty, value, and overall livability of your Dallas home. By following expert tips and best practices, you can tackle this home improvement project with confidence and achieve stunning results that you’ll enjoy for years to come.

Popcorn Ceiling Removal in Seattle: Say Goodbye to Popcorn Ceilings

Popcorn ceilings, also known as textured or acoustic ceilings, were once a popular choice in home construction due to their affordability and ability to hide imperfections. However, many homeowners in Seattle are now opting to remove popcorn ceilings to update their homes and create a more modern and streamlined look. If you’re considering popcorn ceiling removal in Seattle, you’re in the right place. In this guide, we’ll explore the process of popcorn ceiling removal, its benefits, and why hiring professionals in Seattle is the best choice for achieving a flawless finish.

Popcorn Ceiling Removal Seattle

Understanding

Popcorn ceiling removal involves eliminating the textured coating to reveal a smooth finish. While some homeowners may try it themselves, it’s often challenging and messy, yielding unsatisfactory results. Hiring professionals in Seattle who specialize in popcorn ceiling removal ensures a smooth and efficient process from start to finish.

Read too: How To Extend Kitchen Cabinets To The Ceiling: A Complete Guide for Maximizing Space and Style

The Process of Popcorn Ceiling Removal Seattle

  1. Preparation: Before popcorn ceiling removal begins, the room must be properly prepared to minimize mess and damage to surrounding surfaces. Furniture should be covered or removed, and floors should be protected with drop cloths or plastic sheeting.
  2. Moistening the Ceiling: In Seattle, where popcorn ceilings may have been painted over, professionals use a water-based solution to moisten the ceiling, softening the texture and making it easier to scrape off.
  3. Scraping: Once the texture has been moistened, professionals use specialized scraping tools to gently remove the popcorn coating from the ceiling surface. Care must be taken to avoid damaging the underlying drywall or plaster.
  4. Smoothing: After removing the popcorn texture, any imperfections on the ceiling surface are smoothed out using joint compound or plaster. This ensures a seamless finish once the ceiling is painted or refinished.
  5. Cleanup: Once the popcorn ceiling removal process is complete, professionals thoroughly clean up the work area, removing debris and dust to leave the space clean and tidy.

Benefits of Professional Popcorn Ceiling Removal in Seattle

  1. Quality Results: Professionals in Seattle have the knowledge, skills, and experience to ensure that popcorn ceiling removal is performed correctly, resulting in a smooth and flawless finish.
  2. Time Savings: Attempting to remove popcorn ceilings yourself can be a time-consuming and labor-intensive task. Hiring professionals allows you to save time and effort while achieving superior results.
  3. Minimized Mess: Popcorn ceiling removal can create a significant amount of dust and debris. Professionals use specialized equipment and techniques to minimize mess and ensure a clean and tidy work area.
  4. Enhanced Property Value: Removing popcorn ceilings and updating to a smooth finish can enhance the aesthetic appeal and market value of your home, making it more attractive to potential buyers.

Why Choose Popcorn Ceiling Removal in Seattle

Seattle homeowners choose popcorn ceiling removal for several reasons:

  • Modernization: Popcorn ceilings are outdated and can make a home feel dated. Removing them and opting for a smooth finish can modernize the space and increase its appeal.
  • Health Concerns: Popcorn ceilings installed before the 1980s may contain asbestos, a known carcinogen. Removing these ceilings eliminates the risk of asbestos exposure and improves indoor air quality.
  • Personal Preference: Many homeowners simply prefer the look of a smooth ceiling over a textured one. Removing popcorn ceilings allows them to customize their home to suit their personal taste and style.

Conclusion

In Seattle, removing popcorn ceilings allows homeowners to modernize their homes, improve indoor air quality, and boost property value. Hiring professionals specializing in this service ensures quality results, saves time, and provides peace of mind. Say farewell to popcorn ceilings and welcome a fresh, modern appearance to your Seattle home.

Water Leaking From Vent In Ceiling During Rain: Troubleshooting Guide

Are you experiencing the frustrating problem of water leaking from the vent in your ceiling during rainstorms? This unexpected issue can lead to water damage, mold growth, and other costly repairs if not addressed promptly. In this comprehensive troubleshooting guide, we’ll delve into the possible causes of water leaks from ceiling vent during rain weather and provide practical solutions to help you resolve the problem effectively.

Water Leaking From Vent In Ceiling During Rain

Understanding Water Leaking From Vent In Ceiling During Rain

Common Causes of Ceiling Vent Leakage

Water leaks from ceiling vents during rainstorms can be caused by various factors, including:

  • Damaged Roofing: Cracked or missing shingles, deteriorated flashing, or roof damage can allow water to infiltrate the attic space and leak through the vents into the ceiling below.
  • Clogged Gutters: Blocked or overflowing gutters can cause water to back up and seep into the roof structure, eventually finding its way into the ceiling vents during heavy rainfall.

Read too: How To Extend Kitchen Cabinets To The Ceiling: A Complete Guide for Maximizing Space and Style

Water Leaking From Vent In Ceiling During Rain: Identification and Diagnosis

Signs of Ceiling Vent Leakage

If you suspect water is leaking from the vent in your ceiling during rainstorms, watch out for the following signs:

  • Water Stains: Discoloration or water stains on the ceiling or walls near the vents indicate water intrusion and potential leakage.
  • Dampness or Mold Growth: Moisture buildup or mold growth around the vents can signal ongoing water leaks and the risk of structural damage.

Addressing Water Leaks From Vent In Ceiling During Rain

Effective Solutions and Prevention Techniques

To address water leaks from ceiling vents during rainstorms, consider the following steps:

  1. Inspect and Repair Roof: Conduct a thorough inspection of your roof to identify any damage or vulnerabilities. Repair or replace damaged shingles, flashing, or roof vents as needed to prevent water infiltration.
  2. Clear Gutters and Downspouts: Regularly clean and maintain gutters and downspouts to ensure proper drainage and prevent water backup onto the roof.
  3. Seal Vent Openings: Apply weatherproof sealant or flashing around the base of ceiling vents to create a watertight seal and prevent water intrusion during heavy rain.

Expert Recommendations

Professional Inspection and Repair

If you’re unable to identify or address the source of the water leaks, consider hiring a qualified roofing contractor or water damage restoration specialist to conduct a thorough inspection and provide professional repairs.

Conclusion

Don’t let water leaks from ceiling vents during rainstorms dampen your spirits or damage your home. By identifying the causes of the leaks and taking proactive measures to address them, you can safeguard your home against water damage and maintain a dry, comfortable living environment. Follow the troubleshooting tips and expert recommendations outlined in this guide to resolve the issue of water leaking from the vent in your ceiling during rainy weather effectively.

Expert Guide to Popcorn Ceiling Removal in Miami, FL: Transform Your Space

Popcorn ceilings, once a popular choice in home construction, have fallen out of favor in recent years due to their outdated appearance and potential health hazards. If you’re a homeowner in Miami, FL, looking to update your space and remove the popcorn ceiling, you’ve come to the right place. In this comprehensive guide, we’ll explore everything you need to know about popcorn ceiling removal in Miami, FL, from the process itself to the benefits and expert tips for a successful renovation.

Popcorn Ceiling Removal Miami Fl

Understanding the Importance of Popcorn Ceiling Removal in Miami, FL

Enhancing Aesthetics and Property Value

Popcorn ceiling removal can instantly modernize your home’s interior, giving it a fresh and contemporary look. In Miami, FL, where coastal aesthetics and modern design are highly sought after, eliminating popcorn ceilings can significantly enhance the overall appeal and value of your property.

The Process of Popcorn Ceiling Removal Miami Fl

Step-by-Step Guide

Follow these steps for successful popcorn ceiling removal in Miami, FL:

  1. Preparation: Begin by preparing the room for the removal process. This includes moving furniture, covering floors and walls with protective sheeting, and ensuring proper ventilation.
  2. Moistening the Ceiling: Use a garden sprayer or a paint roller to moisten the popcorn texture with water. This helps loosen the texture and makes it easier to scrape off.
  3. Scraping: Using a wide putty knife or a popcorn ceiling scraper, gently scrape away the softened texture from the ceiling. Work in small sections to ensure thorough removal.
  4. Smoothing and Repairing: Once the popcorn texture is removed, inspect the ceiling for any imperfections or damage. Fill in any cracks or holes with joint compound, and sand the surface smooth for a seamless finish.
  5. Finishing Touches: After the ceiling has been smoothed and repaired, apply a fresh coat of paint to complete the transformation.

Read too: How To Extend Kitchen Cabinets To The Ceiling: A Complete Guide for Maximizing Space and Style

Benefits of Popcorn Ceiling Removal Miami Fl

Improved Indoor Air Quality

Popcorn ceilings are notorious for trapping dust, dirt, and allergens, which can degrade indoor air quality over time. By removing the textured surface, you can create a cleaner and healthier environment for you and your family to enjoy.

Expert Tips

Hiring Professional Services

While you can tackle popcorn ceiling removal as a DIY project, hiring professional services in Miami, FL, ensures a faster, safer, and more efficient process. Professional contractors have the necessary expertise, equipment, and experience to handle the job with precision and care.

Conclusion

Say goodbye to outdated popcorn ceilings and hello to a fresh, modern space with popcorn ceiling removal in Miam. By following the expert advice and tips outlined in this guide, you can transform your home’s interior and create a more comfortable and visually appealing environment. Whether you choose to tackle the project yourself or enlist the help of professionals, popcorn ceiling removal is a worthwhile investment that can enhance the beauty and value of your Miami, home.

Leaking Pipe in Basement Ceiling: Understanding and Addressing the Challenges

Dealing with a leaking pipe in the basement ceiling can be a homeowner’s worst nightmare. Not only does it pose immediate risks of water damage and mold growth, but it also indicates underlying plumbing issues that require urgent attention. In this comprehensive guide, we’ll delve into the common causes of leaking pipes in basement ceilings, how to identify the problem, and the best strategies for effective repair and prevention.

Leaking Pipe In Basement Ceiling

Understanding Leaking Pipe in Basement Ceiling

A leaking pipe in the basement ceiling can stem from various sources, including:

  • Burst or Cracked Pipes: Extreme temperatures, corrosion, or physical damage can cause pipes to burst or develop cracks, leading to water leakage.
  • Faulty Joints: Poorly sealed pipe joints or fittings can result in water seepage at connection points.
  • High Water Pressure: Excessive water pressure can put strain on pipes, causing them to leak or rupture.
  • Clogged Drains: Blocked drains can cause water to back up and overflow, putting pressure on pipes and causing leaks.
  • Foundation Settlement: Shifting or settling of the foundation can cause pipes to become misaligned or damaged, resulting in leaks.

Read too: How To Extend Kitchen Cabinets To The Ceiling: A Complete Guide for Maximizing Space and Style

Signs of a Leaking Pipe in Basement Ceiling

Identifying a leaking pipe in the basement ceiling early is crucial to prevent extensive water damage. Look out for the following signs:

  • Water Stains: Discoloration or water stains on the ceiling or walls may indicate water leakage from above.
  • Dripping Water: If you notice water dripping from the ceiling or pooling on the floor below, it’s a clear sign of a leak.
  • Mold or Mildew: The presence of mold or mildew on the ceiling or walls, accompanied by a musty odor, suggests excess moisture from a leak.
  • Decreased Water Pressure: A sudden drop in water pressure throughout the house may indicate a leak in the plumbing system.
  • Visible Damage: Bulging or sagging areas of the ceiling, peeling paint or wallpaper, or warped flooring are all signs of water damage caused by a leak.

Steps to Address a Leaking Pipe in Basement Ceiling

1. Shut Off Water Supply

As soon as you notice signs of a leaking pipe, turn off the main water supply to prevent further damage and flooding.

2. Identify the Source

Carefully inspect the basement ceiling for the source of the leak. Look for dripping water, wet spots, or signs of moisture along pipes or fittings.

3. Repair or Replace Pipe

Depending on the severity of the damage, you may need to repair or replace the leaking section of the pipe. If you’re not comfortable with DIY plumbing repairs, it’s best to hire a licensed plumber for professional assistance.

4. Dry Out the Area

Thoroughly dry out the affected area using fans, dehumidifiers, or a wet/dry vacuum to prevent mold growth and further damage to building materials.

5. Repair Water Damage

Once the leak has been addressed, repair any water damage to the ceiling, walls, or flooring. This may involve patching drywall, repainting, or replacing damaged materials.

Preventive Measures

To prevent future leaks in the basement ceiling, consider the following preventive measures:

  • Regular Maintenance: Inspect plumbing pipes and fittings for signs of corrosion, wear, or damage, and address any issues promptly.
  • Insulation: Properly insulate pipes to protect them from freezing and bursting during cold weather.
  • Pressure Regulation: Install a pressure regulator to control water pressure and prevent strain on pipes.
  • Drain Maintenance: Keep drains clear of debris and regularly clean gutters to prevent water backup and overflow.

Conclusion

A leaking pipe in the basement ceiling is a serious issue that requires immediate attention to prevent water damage and mold growth. By understanding the common causes, signs, and steps for addressing a leak, homeowners can take proactive measures to protect their property and ensure the integrity of their plumbing system.