Air Vent For Drop Ceiling: The Ultimate Guide to Proper Ventilation

When designing or renovating a space with a drop ceiling, it is crucial to consider the air ventilation system to maintain air quality and comfort. One of the most effective ways to achieve this is by installing the right air vent for drop ceiling. These vents help to regulate airflow, prevent humidity buildup, and ensure the space remains comfortable and well-ventilated.

Air Vent For Drop Ceiling

In this guide, we will explore everything you need to know about air vents for drop ceilings, including their importance, types, installation tips, and how to select the right one for your space. Whether you’re working on a home, office, or commercial building, understanding how to incorporate these vents into your ceiling will ensure better air circulation and enhance the overall indoor environment.


What is an Air Vent for Drop Ceiling?

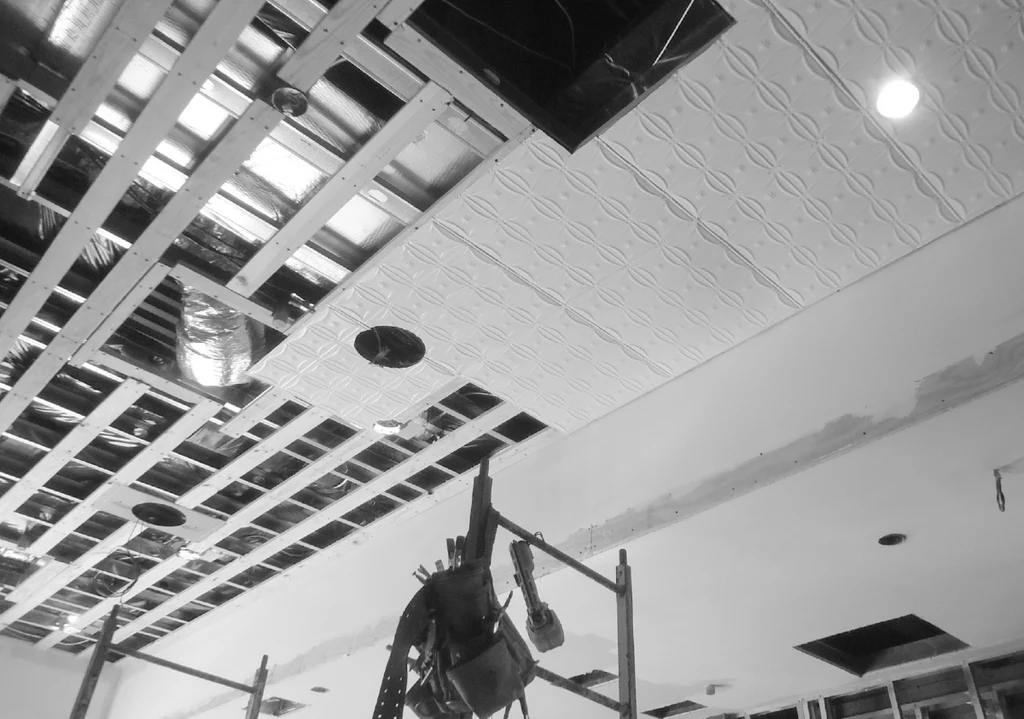
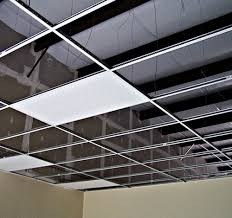
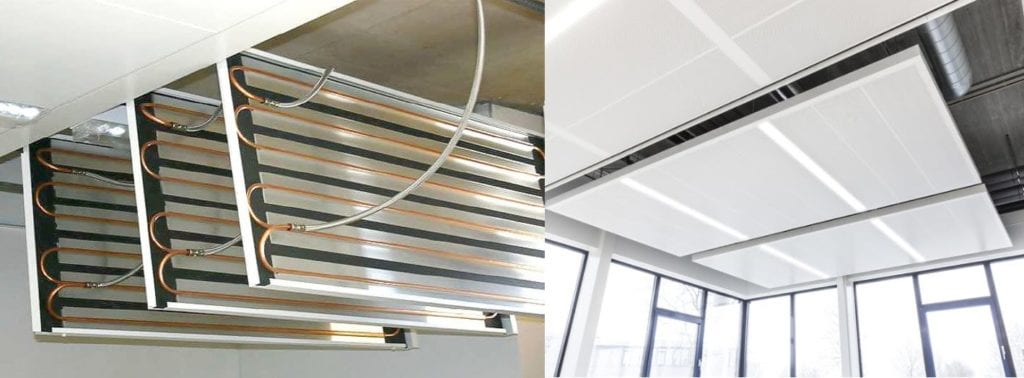
An air vent for drop ceiling is a ventilation system specifically designed to fit into the grid of a drop ceiling (also known as a suspended ceiling). Drop ceilings are commonly used in commercial spaces, offices, basements, and homes, where they provide a sleek, modern look while concealing wires, pipes, and HVAC systems.

The air vents installed in these ceilings are part of the HVAC (heating, ventilation, and air conditioning) system and are responsible for distributing air throughout the space. Properly placed air vents ensure that the air circulates evenly, reducing the buildup of stale air and preventing the growth of mold and mildew due to excess moisture.

Read too: Bathroom Flooded Through the Ceiling: A Comprehensive Guide


Why Are Air Vents for Drop Ceilings Important?

Air vents are essential components of any ventilation system, but they are especially important in rooms with drop ceilings for several reasons:

1. Improved Air Circulation

The most obvious benefit of an air vent for drop ceiling is the improvement in air circulation. A well-placed vent helps regulate airflow in the room, ensuring that air is evenly distributed, thus preventing hot or cold spots and reducing energy costs.

2. Humidity Control

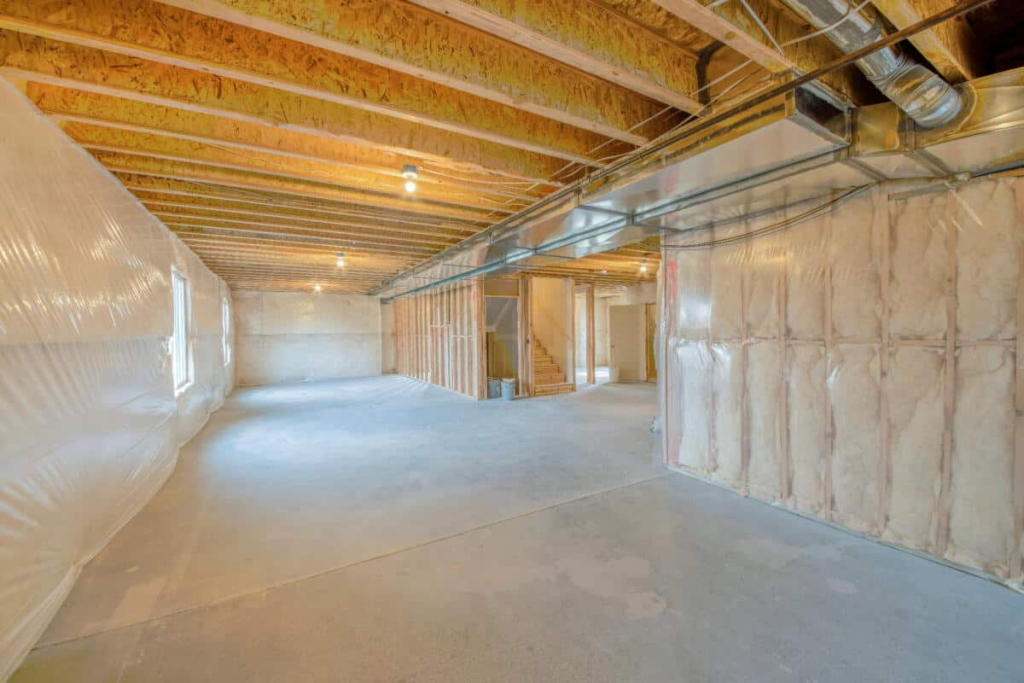
In areas like basements or rooms with high moisture levels, proper ventilation is crucial. A drop ceiling vent helps manage humidity levels by allowing excess moisture to escape, which can prevent mold, mildew, and musty odors from forming.

3. Increased Comfort

A good air vent system ensures that the air temperature remains consistent throughout the room. This enhances comfort by preventing the room from becoming stuffy or too cold.

4. Energy Efficiency

Air vents in drop ceilings can significantly improve the energy efficiency of your space. By optimizing the airflow, your heating and cooling systems can work more effectively, reducing energy consumption and lowering utility bills.


Types of Air Vents for Drop Ceilings

There are several types of air vents for drop ceilings available, and choosing the right one depends on your space’s specific needs. Below are the most common types:
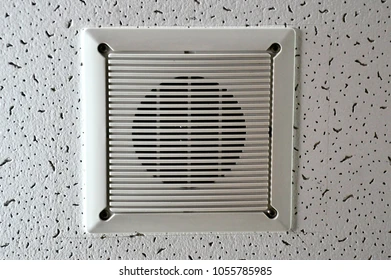
1. Grille Vents

Grille vents are the simplest and most basic type of air vent. These vents consist of a series of horizontal or vertical slats and are typically used for air supply or exhaust. Grilles are often used in places where a minimalistic appearance is desired.
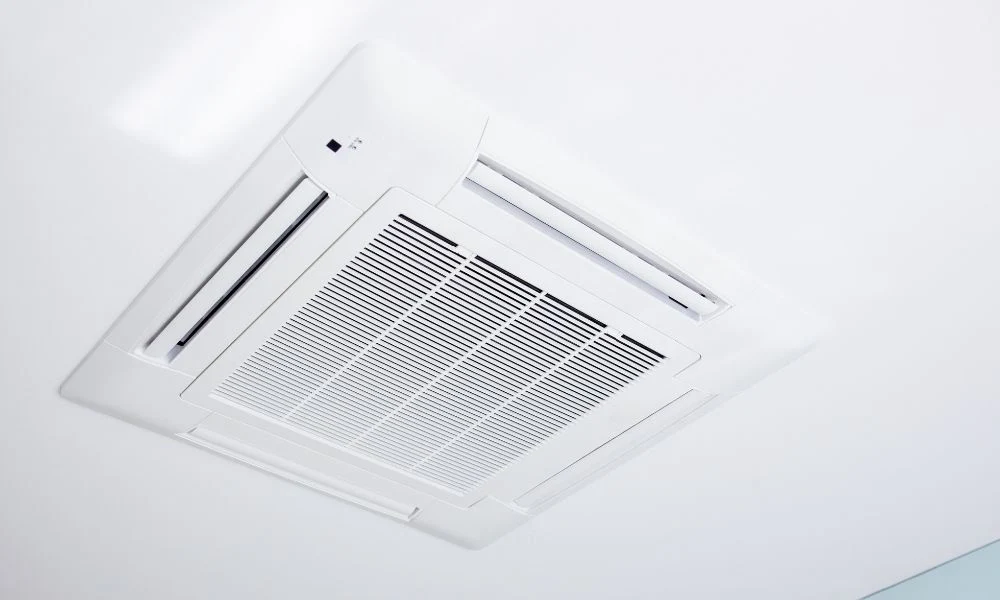
2. Diffuser Vents

Diffuser vents are more complex and often used in larger spaces. These vents disperse air evenly over a larger area, making them ideal for drop ceilings in offices, warehouses, or conference rooms. They often have adjustable blades to control airflow direction.

3. Return Air Vents

Return air vents are used to suck the air back into the HVAC system for recirculation. These vents are crucial for creating a balanced airflow and ensuring that air is properly circulated throughout the room. Return air vents are typically placed on the ceiling but may also be located on walls or floors.

4. Combination Vents

Some vents are a combination of both supply and return air vents, which means they can both push air into the room and pull it back into the system. These versatile vents help streamline the ventilation process and are often used in larger rooms or commercial spaces.


How to Choose the Right Air Vent for Drop Ceiling

Choosing the correct air vent for drop ceiling involves considering several factors to ensure you get the best ventilation solution for your space. Here are the key elements to keep in mind:

1. Room Size

The size of the room will affect the type and number of air vents needed. Larger spaces typically require more vents or larger diffusers to ensure adequate airflow. For smaller rooms, a simple grille vent or a small diffuser may be sufficient.

2. Airflow Requirements

Determine how much air your space needs based on the number of occupants and the type of activities that take place. For instance, kitchens or bathrooms might require higher airflow to manage odors and moisture, while offices or bedrooms may require less.

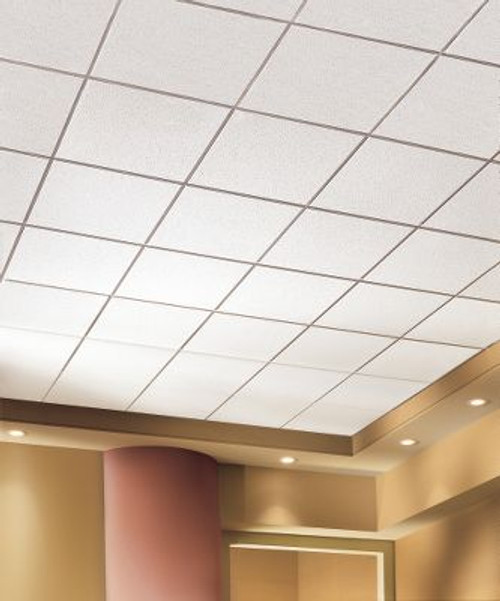
3. Aesthetic Preferences

Consider the aesthetic of your space when choosing air vents. Vents come in various finishes and styles, such as white, silver, or black, and can be flush or recessed. Choose a style that blends well with your ceiling tiles and complements the overall design of the room.

4. Ease of Installation

Some air vents for drop ceilings are easier to install than others. If you plan to install the vents yourself, choose models that are designed for DIY installation. Ensure you have all the necessary tools and that the vents fit your drop ceiling grid properly.

5. Noise Levels

While air vents are primarily designed to circulate air, some models can produce noise. This may not be a concern in a large, industrial space, but for residential areas or offices, you may want to look for vents designed for quiet operation.


How to Install Air Vents for Drop Ceilings

Installing an air vent for drop ceiling is a straightforward process, but there are some important steps to follow to ensure a proper and secure installation. Here is a step-by-step guide to help you get started:

1. Turn Off the HVAC System

Before beginning any work, ensure the HVAC system is turned off to avoid any potential accidents during installation.

2. Measure and Mark the Vent Location

Use a tape measure to determine where the air vent should be installed in the drop ceiling. It’s important to place the vent in an area that ensures optimal airflow and does not obstruct other ceiling components.

3. Cut a Hole in the Ceiling

Use a drywall saw or utility knife to cut a hole in the ceiling tile, ensuring that the hole matches the dimensions of the vent. Be sure to cut carefully to avoid damaging surrounding tiles.

4. Install the Vent Frame

Once the hole is cut, install the vent frame into the hole. Some vents have clips or brackets that need to be attached to the drop ceiling grid for a secure fit.

5. Attach the Ductwork

Connect the vent to the ductwork, ensuring that the seal is tight to prevent air leakage. You may need to use duct tape or a clamp to secure the connection.

6. Install the Grille or Diffuser

Finally, attach the grille, diffuser, or cover to the vent frame. Ensure it is securely in place and check for proper airflow by turning the HVAC system back on.


Maintenance Tips for Air Vents in Drop Ceilings

To ensure your air vent for drop ceiling continues to perform effectively, regular maintenance is essential. Here are a few maintenance tips:

1. Clean the Vents Regularly

Dust and debris can accumulate in the vent grilles, affecting airflow. Clean the vents periodically with a vacuum cleaner or a soft cloth to remove any buildup.

2. Check for Obstructions

Inspect the ductwork and vent openings for any blockages, such as dust, dirt, or objects that may have fallen into the vents. Remove any obstructions to keep airflow smooth.

3. Inspect the Seal

Ensure that the vent’s seal is intact to prevent air leakage. If you notice gaps or cracks, re-seal the vent to maintain optimal performance.


Conclusion

Installing an air vent for drop ceiling is a great way to enhance the ventilation in your space while maintaining a sleek, modern appearance. By choosing the right vent type and following the proper installation and maintenance procedures, you can enjoy better air circulation, reduced humidity, and improved comfort in your home or office. Whether you’re upgrading your existing ventilation system or planning a new installation, the right air vent for drop ceiling will ensure that your space remains well-ventilated and healthy.

Mini Split Ceiling Cassette Dimensions: A Complete Guide to Choosing the Right Unit for Your Space

When it comes to cooling or heating a room, mini split systems are an efficient and popular choice. These systems are known for their flexibility, energy efficiency, and ability to provide precise control over indoor climates. One of the key components of a mini split system is the ceiling cassette, which is often installed in the ceiling to provide unobtrusive yet effective air distribution. However, understanding the correct Mini Split Ceiling Cassette Dimensions is crucial to ensuring that the system fits your space and operates at optimal efficiency.

Mini Split Ceiling Cassette Dimensions

In this article, we will explore the importance of Mini Split Ceiling Cassette Dimensions, how to choose the right size, and what factors to consider when selecting a unit. Whether you’re a homeowner, contractor, or business owner, this guide will provide you with all the information you need to make an informed decision.


What Are Mini Split Ceiling Cassette Units?

A mini split ceiling cassette is a type of air conditioning unit designed to be mounted on the ceiling, providing a discreet and efficient way to cool or heat a room. Unlike traditional HVAC systems, which require extensive ductwork, mini split systems are ductless. This means that the air handler (the ceiling cassette) is connected directly to an outdoor compressor unit, providing controlled air distribution without the need for bulky ducts.

The ceiling cassette is installed in the ceiling space, leaving only the grille exposed, which allows for a clean and modern look. This type of system is ideal for rooms with limited wall space, as it allows for the effective use of ceiling space to maintain comfort in the room.


Why Are Mini Split Ceiling Cassette Dimensions Important?

When choosing a mini split system for your space, it is essential to ensure that the Mini Split Ceiling Cassette Dimensions are suitable for the room’s size and layout. Incorrectly sized units can lead to inefficient operation, which may result in poor air distribution, higher energy costs, and frequent maintenance issues.

Read too: Discovering the Charm of Nautical Outdoor Ceiling Fans for Your Coastal Retreat: Sail into Style

Here are a few reasons why choosing the right dimensions is crucial:

1. Proper Air Distribution

A unit that is too small for the room will struggle to cool or heat the space adequately. On the other hand, a unit that is too large will cycle on and off too frequently, leading to inconsistent temperatures and unnecessary energy consumption. Correctly sizing the ceiling cassette ensures even air distribution throughout the room.

2. Energy Efficiency

By selecting the right Mini Split Ceiling Cassette Dimensions, you will be optimizing the system’s energy efficiency. A properly sized unit uses less energy to maintain the desired temperature, helping you save on utility bills while minimizing the environmental impact.

3. Comfort and Performance

Choosing the right size ensures that the mini split system will perform at its best, delivering consistent and comfortable temperatures. A unit that is too large or small may result in hot spots or cold drafts, making it difficult to maintain comfort in the room.


Key Factors to Consider for Mini Split Ceiling Cassette Dimensions

When selecting the correct Mini Split Ceiling Cassette Dimensions for your space, there are several important factors to consider. These factors will help ensure that the unit fits your room’s layout and delivers optimal performance.

1. Room Size and Layout

The size of the room you are trying to cool or heat is one of the most critical factors in choosing the right mini split ceiling cassette dimensions. Larger rooms will require larger units to effectively manage the temperature, while smaller rooms will require less powerful units.

You can calculate the necessary cooling or heating capacity in British Thermal Units (BTUs). As a general rule of thumb, for each 100 square feet of space, you will need approximately 20-30 BTUs. For example, if your room is 400 square feet, you would need a unit that can provide around 8,000-12,000 BTUs. Be sure to consult with a professional to ensure accurate sizing based on the specific characteristics of your room.

2. Ceiling Height

The height of the ceiling also plays an important role in determining the size of the mini split ceiling cassette. If your ceilings are particularly high, you may need a larger or more powerful unit to distribute the air evenly. High ceilings require units that can effectively push air throughout the space and reach the corners of the room without leaving areas underlit or uncomfortable.

3. Insulation and Windows

Rooms with better insulation and fewer windows may require smaller units because they retain temperature more effectively. Conversely, rooms with large windows that let in a lot of heat or cold may need larger systems to compensate for the energy loss. Additionally, the amount of sunlight the room receives and whether the room faces north, south, or west can influence the required cooling or heating capacity.

4. Room Functionality

The purpose of the room also affects the size of the unit you need. For instance, a kitchen or living room with high heat output may require a more powerful unit to maintain a comfortable temperature. In contrast, bedrooms or smaller spaces may need less cooling or heating power.


Standard Mini Split Ceiling Cassette Dimensions

Mini split ceiling cassette units come in various sizes, and their dimensions can vary based on the manufacturer and model. However, most mini split ceiling cassette dimensions fall within a few general ranges. Here’s a quick overview of what you might expect for the most common sizes:

1. Small Units (For Small to Medium Rooms)

  • Dimensions: 29-33 inches (W) x 29-33 inches (L) x 10-12 inches (H)
  • Cooling Capacity: 9,000-12,000 BTUs
  • Ideal For: Small to medium-sized rooms, such as bedrooms or home offices.

2. Medium Units (For Medium to Large Rooms)

  • Dimensions: 33-39 inches (W) x 33-39 inches (L) x 10-12 inches (H)
  • Cooling Capacity: 12,000-18,000 BTUs
  • Ideal For: Larger living rooms, kitchens, or commercial spaces.

3. Large Units (For Large Spaces)

  • Dimensions: 39-47 inches (W) x 39-47 inches (L) x 12-15 inches (H)
  • Cooling Capacity: 18,000-24,000 BTUs
  • Ideal For: Large open spaces, office buildings, or multi-room areas.

How to Choose the Right Mini Split Ceiling Cassette Size

Selecting the correct size for your mini split system involves more than just looking at the physical dimensions of the unit. Here’s a quick guide to help you make the right choice:

1. Conduct a Load Calculation

A load calculation takes into account the size of your room, ceiling height, insulation, window size, and room orientation. This is the most accurate way to determine the required BTU output and the appropriate Mini Split Ceiling Cassette Dimensions.

2. Consult with a Professional

Hiring a professional HVAC contractor is the best way to ensure the system is correctly sized for your space. They can provide precise calculations and offer advice on unit placement, ensuring optimal air distribution and energy efficiency.

3. Consider System Features

Different mini split units offer various features such as inverter technology, which helps maintain a consistent temperature and improves energy efficiency. Some systems also have multi-zone capabilities, allowing you to control the temperature in multiple rooms with a single outdoor unit.


Conclusion

When selecting a mini split ceiling cassette, understanding the Mini Split Ceiling Cassette Dimensions is crucial for ensuring that the system fits your space and performs efficiently. Factors such as room size, ceiling height, insulation, and room function all influence the sizing decision. By carefully considering these factors and consulting with professionals, you can choose the perfect unit that will provide consistent comfort and energy savings for years to come.

Whether you’re installing a mini split system in your home or business, proper sizing is key to optimizing performance and avoiding unnecessary energy waste. So, make sure to consider all the variables before making your purchase and enjoy the benefits of an efficiently cooled or heated space.

Mid Century Modern Ceiling Fan: Style, Function, and Installation Tips

The mid century modern style, known for its clean lines, organic curves, and minimalistic design, has regained popularity and become a staple in contemporary interiors. If you’re looking to incorporate this aesthetic into your space, a mid century modern ceiling fan can be the ideal addition. Not only do these fans add functionality, providing circulation and comfort, but they also act as stylish decor pieces that can enhance the character of your home. In this guide, we’ll explore everything you need to know about choosing the perfect mid century modern ceiling fan, including style options, installation tips, and the features you should look for.

Mid Century Modern Ceiling Fan

Why Choose a Mid Century Modern Ceiling Fan?

Ceiling fans are a classic feature that blend form and function, and with mid century modern designs, they can elevate the aesthetic appeal of your space. Here’s why you might consider a mid century modern ceiling fan:

  1. Timeless Style
    The mid century modern design is celebrated for its timeless appeal, inspired by the 1940s–1960s era. A ceiling fan in this style is a smart choice for homeowners who want to combine practicality with a touch of vintage elegance.
  2. Functional Efficiency
    Ceiling fans help regulate the temperature in your home by circulating air. During summer, they can create a cooling effect, while in winter, they help distribute warm air more evenly. Many modern mid century ceiling fans come with reversible motors, which allows you to switch the blade direction depending on the season.
  3. Wide Range of Choices
    From wood-grain finishes to metal and brass accents, mid century modern ceiling fans come in a variety of materials and styles. Whether your room has warm tones, natural wood, or metallic finishes, you can find a fan that fits perfectly with your decor.
  4. Sustainable and Energy-Efficient
    Many mid century modern ceiling fans are designed with energy efficiency in mind, consuming less power and helping reduce your overall electricity usage. This eco-friendly aspect is perfect for homeowners looking to make sustainable choices without compromising on style.

Read too: Kitchen Lighting For A Vaulted Ceiling: Illuminating Your Space with Style and Functionality


Key Features to Look For in a Mid Century Modern Ceiling Fan

When selecting the best mid century modern ceiling fan, it’s essential to focus on more than just the aesthetics. Here are some key features to consider:

1. Material and Finish

Mid century fans often incorporate materials like wood, metal, and brass. Fans with wood-grain finishes, for example, can add warmth to your room, while metal or brass elements lend an industrial touch. Choose a finish that complements the rest of your decor, whether that’s warm wood tones or polished metallics.

2. Blade Count and Design

Mid century modern ceiling fans typically feature three to five blades, with minimalist, aerodynamic designs. The fewer the blades, the sleeker the look, but performance is just as efficient with three or five blades. Curved, elongated blades can give a retro feel, while straight, flat blades often enhance a modern look.

3. Lighting Options

Many mid century modern ceiling fans come with built-in lighting fixtures. Fans with integrated LED lights are popular choices as they are energy-efficient and long-lasting. Consider fans with dimmable lights, which allow you to adjust the ambiance of your room according to your needs.

4. Remote or Wall Control

Modern fans often come with remote controls or wall-mounted switches, making it easy to adjust speed and lighting without needing to pull chains. Some fans can even connect to smart home systems, allowing you to control them from your smartphone.

5. Motor Quality and Noise Level

A high-quality motor is essential for a ceiling fan to operate efficiently and quietly. Look for fans with a DC motor, which is more energy-efficient and quieter compared to AC motors. A quiet fan is especially important for bedrooms and living spaces, where noise can be distracting.


Top Mid Century Modern Ceiling Fan Styles to Consider

When it comes to mid century modern ceiling fans, there are several styles to suit different aesthetics. Here’s a look at some popular types:

Minimalist Wooden Blade Fans

Fans with wooden blades and minimalistic designs bring a warm, organic feel to a room. Often featuring three broad blades, these fans come in natural wood tones, like walnut or oak, and blend well with mid century furniture.

Metal and Brass Accents

For a sleek, sophisticated look, consider fans with metal or brass finishes. These fans often feature streamlined designs with metallic accents, making them perfect for spaces that require a subtle touch of glamour. Brass fans especially look stunning against warm-toned walls or wood paneling.

Retro-Inspired Globe Lighting

Fans with globe-style lighting are a classic nod to mid century design. These fans often feature a round, central light fixture and either wooden or metal blades. The globe lighting not only adds a retro touch but also provides ample illumination, making these fans a great choice for main living areas.

Dual-Motor Fans

Dual-motor fans are both functional and eye-catching, with two fan heads that operate independently. This unique design is reminiscent of vintage industrial style, yet still aligns with mid century aesthetics due to its sleek, modern appeal.


How to Install a Mid Century Modern Ceiling Fan

Installing a ceiling fan might seem challenging, but with careful planning, it’s a manageable DIY project. Here are some tips to help you get started:

1. Choose the Right Location

Select a spot in the center of the room for the fan, ensuring there’s enough clearance between the fan blades and surrounding walls. The recommended height for ceiling fans is around 8-9 feet from the floor, so consider a fan with a downrod if your ceiling is high.

2. Turn Off Power to the Area

Before installing the fan, turn off the power at your circuit breaker to avoid any electrical hazards. Double-check that there’s no power flowing to the wires before you begin.

3. Install the Mounting Bracket

Secure the mounting bracket to your ceiling joist, as this provides the stability needed to hold the weight of the fan. If your ceiling doesn’t have a joist, you may need to install a ceiling fan brace.

4. Connect the Wiring

Follow the instructions for wiring the fan, typically involving connecting the fan’s wires to your home’s electrical system. If your fan has a light, connect the wires for both the fan motor and light fixture.

5. Attach the Fan Blades and Light Kit

Once the fan motor is securely installed, attach the fan blades, following the manufacturer’s instructions. If your fan includes a light fixture, install it as well, making sure the bulbs are correctly fitted.

6. Test Your Fan

Turn the power back on and test the fan at all speed settings to ensure it’s operating smoothly. If you hear any noise or wobbling, adjust the screws and balance the blades as necessary.


Tips for Maintaining Your Mid Century Modern Ceiling Fan

To keep your fan in peak condition, here are some maintenance tips:

  1. Clean Regularly
    Dust the blades every few weeks to prevent dust buildup. Use a damp cloth or a gentle cleaner to keep the blades and motor casing looking new.
  2. Balance the Blades
    If you notice wobbling, it may be due to uneven blades. Most fans come with balancing kits, which allow you to adjust blade weight and stabilize the fan.
  3. Lubricate the Motor
    Some fan motors may require occasional lubrication to stay quiet and functional. Check your fan’s manual to see if it needs oiling.
  4. Switch Blade Direction Seasonally
    Changing blade direction depending on the season ensures optimal performance and efficiency. Use the counterclockwise setting in summer for a cooling effect, and switch to clockwise in winter to circulate warm air.

Conclusion

Adding a mid century modern ceiling fan to your space is an excellent way to enhance comfort and style simultaneously. With a variety of designs, materials, and functional features available, there’s a mid century fan to suit any room. By focusing on the right materials, finishes, and installation tips, you can select a fan that not only complements your decor but also provides years of effective temperature control.

With regular maintenance and smart usage, your mid century modern ceiling fan will remain a stylish and functional addition to your home. From wooden accents to brass finishes, these fans are more than just functional—they’re a beautiful blend of retro charm and modern efficiency.

Install Chandelier on High Ceilings: A Complete Guide for Homeowners

Install Chandelier On High Ceiling. Installing a chandelier can transform any room, adding elegance and ambiance. However, installing a chandelier on high ceilings presents unique challenges that require careful planning and execution. In this comprehensive guide, we will cover everything you need to know about installing a chandelier on high ceilings, from selecting the right chandelier to safety considerations and installation techniques.

Install Chandelier On High Ceiling

Why Choose a Chandelier for High Ceilings?

Chandeliers are often the focal point of a room, drawing the eye and enhancing the overall aesthetic. When you have high ceilings, a chandelier can help fill the vertical space, making the room feel more balanced and inviting. Here are some reasons why you should consider installing a chandelier in a room with high ceilings:

  1. Aesthetic Appeal: Chandeliers come in various styles, from traditional to modern, and can significantly enhance the decor of your space.
  2. Improved Lighting: A chandelier can provide both ambient and task lighting, making the room feel brighter and more inviting.
  3. Increased Property Value: A well-placed chandelier can add to the value of your home, appealing to potential buyers who appreciate elegant lighting fixtures.
  4. Personalization: Choosing a chandelier that reflects your style can help personalize your space, making it uniquely yours.

Preparing to Install a Chandelier on High Ceilings

Before you begin the installation process, there are several important factors to consider:

1. Selecting the Right Chandelier

When selecting a chandelier for a high ceiling, consider the following:

  • Size: The size of the chandelier should be proportionate to the room. A general rule of thumb is to add the room’s dimensions (in feet) and convert that number to inches. For example, a room that is 15 feet by 20 feet would need a chandelier that is approximately 35 inches wide.
  • Height: The height of the chandelier should be appropriate for the ceiling height. Ideally, the bottom of the chandelier should be 30 to 36 inches above a table if it’s being hung above one.
  • Style: Choose a style that complements the room’s decor. Whether you prefer traditional, modern, or eclectic styles, there are countless options available.

Read too: Shiplap Ceiling in Kitchen: A Timeless Trend for a Stylish and Cozy Space

2. Tools and Materials Needed

Before starting the installation, gather the necessary tools and materials:

  • Ladder (preferably adjustable for different heights)
  • Drill and drill bits
  • Screwdriver
  • Wire cutters/strippers
  • Electrical tape
  • A helper (recommended for safety)

3. Safety Considerations

Safety should always be your top priority when installing a chandelier. Consider the following safety tips:

  • Turn Off the Power: Always turn off the power to the existing light fixture at the circuit breaker to avoid any electrical hazards.
  • Use a Stable Ladder: Ensure your ladder is stable and positioned on a flat surface. If necessary, have someone hold the ladder while you work.
  • Use Proper Safety Gear: Consider wearing safety goggles and gloves to protect yourself during the installation process.

Steps to Install a Chandelier on High Ceilings

Once you’ve gathered your tools and selected your chandelier, follow these steps to successfully install it:

Step 1: Remove the Existing Fixture

If you are replacing an existing light fixture, you’ll need to remove it first:

  1. Turn Off the Power: Go to the circuit breaker and turn off the power to the room.
  2. Remove the Old Fixture: Unscrew the old fixture from the ceiling and carefully disconnect the wiring. Make a note of how the wires are connected, as you’ll need to replicate this with the new chandelier.

Step 2: Prepare the Chandelier

Before hanging the chandelier, prepare it for installation:

  1. Assemble the Chandelier: If your chandelier requires assembly, do this according to the manufacturer’s instructions.
  2. Check the Wiring: Ensure that all wiring is intact and that there are no damaged parts.

Step 3: Attach the Mounting Bracket

The next step is to attach the mounting bracket that will hold the chandelier:

  1. Position the Bracket: Align the mounting bracket with the electrical box in the ceiling.
  2. Secure the Bracket: Use screws to secure the mounting bracket in place, ensuring it is tight and secure.

Step 4: Hang the Chandelier

Now that the bracket is in place, it’s time to hang the chandelier:

  1. Lift the Chandelier: This step may require a helper, as chandeliers can be heavy. Lift the chandelier and align it with the mounting bracket.
  2. Connect the Wires: Following the notes you made earlier, connect the chandelier wires to the electrical wires in the ceiling. Typically, you will connect:
    • Black (or red) wire from the chandelier to the black wire in the ceiling (hot).
    • White wire from the chandelier to the white wire in the ceiling (neutral).
    • Green or bare wire to the grounding wire in the ceiling.
  3. Secure the Connections: Use wire nuts to secure the connections, and wrap them with electrical tape for extra safety.
  4. Attach the Chandelier: Once the wiring is secure, carefully tuck the wires into the electrical box and attach the chandelier to the mounting bracket.

Step 5: Final Adjustments

After the chandelier is secured:

  1. Adjust the Height: If your chandelier has adjustable cables or chains, adjust them to your desired height.
  2. Check Stability: Ensure the chandelier is stable and securely attached to the ceiling.
  3. Install Light Bulbs: Insert the appropriate light bulbs into the chandelier.

Step 6: Restore Power and Test

Once everything is in place, it’s time to restore power:

  1. Turn On the Power: Go back to the circuit breaker and turn the power back on.
  2. Test the Chandelier: Turn on the switch to ensure the chandelier is functioning correctly. Check for any flickering lights or other issues.

Troubleshooting Common Issues

After installing a chandelier on a high ceiling, you may encounter some common issues. Here are a few troubleshooting tips:

1. Flickering Lights

If your chandelier flickers, it may indicate a loose connection or an incompatible bulb. Check the wiring connections and ensure you’re using the correct type of bulb.

2. Insufficient Light

If the chandelier doesn’t provide enough light, consider adding more bulbs or using higher wattage bulbs, provided they are compatible with the fixture.

3. Chandelier Sways or Moves

If your chandelier sways or feels loose, double-check that all connections are secure and that the mounting bracket is tightly fastened.

Maintenance Tips for Your Chandelier

Once your chandelier is installed, proper maintenance is key to keeping it looking its best:

  1. Regular Cleaning: Dust your chandelier regularly with a soft cloth. For crystal chandeliers, use a mixture of water and vinegar to clean the crystals without damaging them.
  2. Check the Bulbs: Periodically check the bulbs and replace any that are burnt out.
  3. Inspect Wiring: Every few months, inspect the wiring and connections to ensure everything remains secure.

When to Hire a Professional

While installing a chandelier can be a DIY project, there are times when it’s best to hire a professional:

  • Complex Installations: If your chandelier requires extensive electrical work or modifications to the existing wiring, hiring a licensed electrician is advisable.
  • Heavy Fixtures: For large and heavy chandeliers, it may be safer to have professionals handle the installation to avoid accidents.
  • Lack of Experience: If you are unsure about your skills, hiring a professional can ensure that the job is done safely and correctly.

Conclusion

Installing a chandelier on high ceilings can enhance the beauty and functionality of your space, but it requires careful planning and execution. By following the steps outlined in this guide, you can successfully install a chandelier that complements your decor and adds elegance to your home. Remember to prioritize safety and consider hiring a professional if the installation becomes too complex.

Insulating Garage Ceiling Below Living Space: A Comprehensive Guide to Comfort and Efficiency

When it comes to home insulation, many homeowners often overlook the garage, especially if it is situated below a living space. However, Insulating Garage Ceiling Below Living Space is essential for maintaining comfort, energy efficiency, and soundproofing in your home. This guide will explore the benefits, methods, and best practices for insulating your garage ceiling effectively.

Insulating Garage Ceiling Below Living Space

Understanding the Importance of Insulation

Insulation plays a critical role in regulating temperature and sound levels within a home. When it comes to garages located directly beneath living spaces, proper insulation becomes even more vital. Here are some reasons why:

1. Temperature Regulation

An uninsulated garage can lead to significant temperature fluctuations. During summer, heat from the garage can seep into the living space above, making it uncomfortable. Conversely, during winter, cold air can enter the home, increasing heating costs and affecting indoor comfort. Insulating Garage Ceiling Below Living Space helps maintain a consistent temperature throughout your home, reducing energy costs.

2. Energy Efficiency

Proper insulation can significantly enhance your home’s energy efficiency. By reducing the amount of heat transfer between your garage and living space, you can lower heating and cooling costs, resulting in long-term savings on your energy bills.

Read too: Shiplap Ceiling in Kitchen: A Timeless Trend for a Stylish and Cozy Space

3. Noise Reduction

Garages can be noisy places, with sounds from machinery, cars, and general activity. Insulating the garage ceiling can help minimize sound transmission to the living space above, providing a more peaceful and quiet environment in your home.

4. Increased Home Value

Upgrading your home’s insulation, including the garage ceiling, can increase its market value. Potential buyers often look for homes with energy-efficient features, and a well-insulated garage can be an attractive selling point.

Methods for Insulating Garage Ceiling Below Living Space

1. Fiberglass Batts

One of the most common insulation materials, fiberglass batts, consists of fibrous glass, which traps air and provides excellent thermal resistance. Here’s how to install fiberglass batts in your garage ceiling:

  • Measure and Cut: Measure the spaces between your garage joists and cut the batts to fit.
  • Install: Place the batts between the joists, ensuring they fit snugly without compressing. Leave the paper or foil vapor barrier facing the living space to prevent moisture accumulation.

2. Spray Foam Insulation

Spray foam insulation offers superior performance compared to traditional batts. It expands upon application, filling gaps and cracks that may allow air leakage. Here’s how to use spray foam insulation:

  • Preparation: Ensure the garage is clean and dry. Wear appropriate protective gear, including gloves and a mask.
  • Application: Use a spray foam kit, following the manufacturer’s instructions to apply the foam to the garage ceiling. Allow the foam to cure as recommended.

3. Rigid Foam Board

Rigid foam boards provide excellent insulation and can be installed directly beneath the ceiling. They are particularly effective for areas with limited space. To install rigid foam board:

  • Cut Boards: Measure and cut the foam boards to fit between the joists.
  • Install: Attach the boards to the garage ceiling using adhesive or mechanical fasteners, ensuring there are no gaps.

4. Cellulose Insulation

Cellulose insulation is an eco-friendly option made from recycled paper products. It is blown into place, making it an effective solution for insulating garage ceilings. Here’s how to use cellulose insulation:

  • Preparation: Seal any gaps in the garage ceiling before applying cellulose.
  • Blowing In: Use a cellulose blowing machine to fill the ceiling cavity. This method allows for a dense and uniform insulation layer.

Factors to Consider When Insulating Garage Ceiling Below Living Space

1. Ventilation

Proper ventilation is crucial in garages to prevent moisture buildup. Before insulating, assess the existing ventilation system. You may need to install vents or exhaust fans to ensure airflow, especially if you plan to use the garage for activities that generate moisture, such as laundry or woodworking.

2. Moisture Barriers

In areas with high humidity, installing a vapor barrier is essential to prevent moisture from penetrating the insulation and causing mold or rot. Consider using a plastic sheet as a vapor barrier before installing insulation materials.

3. Local Building Codes

Before undertaking any insulation project, check your local building codes and regulations. Some areas may have specific requirements regarding insulation materials, R-values (a measure of insulation effectiveness), and fire safety.

4. Cost Considerations

The cost of insulating your garage ceiling can vary based on the materials used and the size of the garage. While fiberglass batts are typically the most cost-effective option, investing in spray foam or rigid foam can offer better long-term benefits in terms of energy savings.

Steps to Insulate Your Garage Ceiling

Step 1: Gather Materials and Tools

Before starting your insulation project, gather all necessary materials and tools, including:

  • Insulation material (fiberglass batts, spray foam, rigid foam boards, or cellulose)
  • Utility knife
  • Measuring tape
  • Safety gear (gloves, mask, goggles)
  • Vapor barrier (if needed)
  • Adhesive or fasteners (if using rigid foam)

Step 2: Prepare the Garage

Ensure your garage is clean and dry. Remove any items that may obstruct your work area. If necessary, repair any cracks or gaps in the ceiling to ensure a smooth insulation process.

Step 3: Install Vapor Barrier (if needed)

If your garage is prone to moisture, install a vapor barrier before adding insulation. This step helps prevent moisture from damaging your insulation over time.

Step 4: Install Insulation

Follow the instructions specific to the type of insulation you are using. Be diligent about ensuring there are no gaps or compression in the insulation, as this can reduce its effectiveness.

Step 5: Seal Gaps

Once the insulation is installed, seal any gaps or cracks in the garage ceiling. Use caulk or expanding foam to fill in any voids, preventing air leakage.

Step 6: Inspect and Finish

Conduct a final inspection to ensure the insulation is properly installed and there are no exposed areas. If necessary, finish the ceiling with drywall or another material for aesthetics and added protection.

Maintaining Your Insulated Garage Ceiling

Once you’ve successfully insulated your garage ceiling, regular maintenance will help ensure its longevity and effectiveness. Here are some tips:

1. Regular Inspections

Conduct annual inspections of your garage ceiling insulation. Look for signs of moisture, mold, or damage, and address any issues promptly.

2. Monitor Ventilation

Ensure that your garage’s ventilation system is functioning correctly. Adjust as needed to maintain proper airflow and prevent moisture buildup.

3. Maintain the Garage Environment

If you use your garage for activities that generate moisture, such as washing cars or drying laundry, consider using dehumidifiers to maintain optimal humidity levels.

Conclusion

Insulating Garage Ceiling Below Living Space is a crucial step toward improving your home’s comfort, energy efficiency, and overall value. With various insulation options available, it’s essential to choose the right method for your needs and follow proper installation techniques. By investing in your garage ceiling insulation, you’ll create a more pleasant living environment while reducing energy costs and enhancing the functionality of your home.

Take the first step toward a more comfortable living space by considering insulation for your garage ceiling today!

How to Change Chandelier in High Ceilings: A Step-by-Step Guide for Homeowners

Changing a chandelier can dramatically enhance the ambiance of any room, especially if you have high ceilings that call for a beautiful, eye-catching lighting fixture. However, while chandeliers can add elegance and charm, changing them—especially in rooms with high ceilings—can seem like a daunting task. If you’re wondering how to change a chandelier in high ceilings, you’ve come to the right place.

How To Change Chandelier In High Ceilings

In this article, we’ll walk you through the entire process, from preparing the space to safely installing the new fixture. Whether you’re an experienced DIY enthusiast or someone trying it for the first time, this guide will give you the essential tips and steps needed to tackle this project confidently.

Read too: Shiplap Ceiling in Kitchen: A Timeless Trend for a Stylish and Cozy Space

Why Changing a Chandelier in High Ceilings Can Be Challenging

Before diving into the step-by-step process, it’s helpful to understand why changing a chandelier in high ceilings poses unique challenges.

  1. Height and Accessibility: High ceilings often mean the fixture is located well out of reach, requiring additional equipment like a tall ladder or even scaffolding to reach it safely.
  2. Weight of the Chandelier: Many chandeliers, particularly those with intricate designs or made of materials like crystal, can be quite heavy. This can make installation a two-person job, requiring care and attention to detail.
  3. Electrical Considerations: Even though changing a chandelier may seem straightforward, it involves working with electrical wiring, which requires knowledge of safety protocols and possibly even an electrician.

Understanding these challenges will prepare you better for the task ahead and help you ensure a safe and successful chandelier replacement.

How to Change Chandelier in High Ceilings: A Step-by-Step Guide

Here’s how to safely and efficiently change a chandelier in high ceilings:

Step 1: Gather the Necessary Tools and Equipment

Before starting, make sure you have all the tools and equipment you’ll need. Here’s a checklist of what you might require:

  • Tall, sturdy ladder: Depending on the height of your ceiling, you may need a ladder that reaches up to 15 feet or more. A two-sided or extension ladder is ideal for this task.
  • Scaffolding (optional): If your ceiling is particularly high or you feel unsafe using a ladder, scaffolding may be a better choice.
  • Screwdriver and pliers: These will help with removing the old chandelier and securing the new one.
  • Voltage tester: This is essential to ensure there’s no electrical current running through the wiring before you start working.
  • Wire nuts and electrical tape: These are useful for connecting and securing the wires.
  • Assistant: It’s highly recommended to have someone assist you, especially when handling heavier chandeliers or tall ladders.
  • Safety harness: If you’re working on very high ceilings or scaffolding, a safety harness is crucial to avoid accidents.

Step 2: Turn Off the Power

Safety should always be the top priority when working with electrical fixtures. Before starting, make sure to:

  • Go to the circuit breaker and switch off the power to the room where the chandelier is located.
  • Use a voltage tester on the wires of the existing chandelier to confirm there’s no electrical current running through them.

This simple step will prevent any accidents or electrical shocks.

Step 3: Set Up Your Ladder or Scaffolding

For high ceilings, setting up the ladder or scaffolding properly is critical to ensure your safety. Position the ladder securely under the chandelier, or set up the scaffolding if the ceiling height exceeds what a ladder can safely reach. Make sure:

  • The ladder is on a stable surface and fully extended to reach the chandelier.
  • If you’re using scaffolding, ensure it’s properly assembled and safe to use.

Step 4: Remove the Existing Chandelier

Now that everything is set up, it’s time to remove the old chandelier. Here’s how:

  • Climb the ladder carefully and locate the screws or mounting bracket that holds the chandelier in place.
  • Use a screwdriver to unscrew the fixture from the ceiling.
  • Once it’s unscrewed, carefully disconnect the chandelier from the electrical wiring. The wires will likely be connected using wire nuts, so unscrew those and detach the wires.
  • If the chandelier is heavy, have your assistant hold the fixture steady while you disconnect the wiring.
  • Slowly lower the old chandelier down the ladder (or scaffolding) with the help of your assistant.

Step 5: Prepare the New Chandelier for Installation

Before installing the new chandelier, make sure it’s ready for installation by:

  • Assembling the chandelier according to the manufacturer’s instructions, if needed.
  • Ensuring the wires on the new chandelier are properly stripped and prepared for connecting to the electrical box in the ceiling.
  • Double-checking the weight of the chandelier. If it’s particularly heavy, confirm that the ceiling’s mounting box is capable of supporting it.

Step 6: Install the New Chandelier

With everything in place, you’re ready to install the new chandelier. Follow these steps:

  1. Connect the Wiring: Use your ladder or scaffolding to reach the ceiling. Attach the wires from the chandelier to the corresponding wires in the ceiling (black to black, white to white, and ground wire to ground). Secure them using wire nuts, and cover the connections with electrical tape for extra security.
  2. Mount the Chandelier: Once the wiring is connected, attach the chandelier to the mounting bracket on the ceiling. Use screws or any other provided hardware to ensure it’s securely fastened.
  3. Test the Fixture: After the chandelier is mounted, carefully climb down from the ladder or scaffolding. Go to your circuit breaker and turn the power back on. Use the light switch to ensure the chandelier is functioning properly.
  4. Finishing Touches: Once the chandelier is operational, you can adjust its height (if it’s an adjustable model) and ensure all the bulbs are securely in place. Make sure everything looks aligned and balanced.

Step 7: Clean Up and Enjoy

After installation, clean up your work area and remove any tools, ladder, or scaffolding. Finally, step back and admire your new chandelier! You’ve successfully completed the process of how to change a chandelier in high ceilings.

Tips for Changing Chandeliers in High Ceilings Safely

Changing a chandelier on high ceilings can be a bit intimidating, but with proper planning, the process becomes manageable. Here are some safety tips to ensure everything goes smoothly:

1. Use the Right Ladder or Scaffolding

For very high ceilings, like those found in entryways or great rooms, scaffolding may be the safest option. Ladders, while useful, can become unstable at extreme heights, so always ensure you’re using equipment appropriate for the ceiling height.

2. Don’t Work Alone

It’s always better to have someone assisting you when working at heights, especially when you’re handling heavy or awkwardly shaped fixtures. An assistant can also help you manage tools and ensure your ladder remains stable.

3. Wear Protective Gear

If you’re working with a chandelier made from delicate materials like glass or crystal, it’s a good idea to wear safety glasses and gloves to prevent injury from falling debris.

4. Use a Safety Harness

If working on ceilings over 15 feet high, wearing a safety harness connected to a secure point can provide an extra layer of protection.

5. Consult a Professional for Complex Installations

If the chandelier is unusually heavy or if the electrical wiring seems complicated, it might be worth consulting an electrician or professional installer. Sometimes, investing in professional help can save time and ensure that the job is done safely and correctly.

Selecting the Right Chandelier for High Ceilings

Now that you know how to change a chandelier in high ceilings, you might be wondering what kind of chandelier works best in these spaces. Here are some options that suit tall ceilings:

1. Multi-Tier Chandeliers

Multi-tier chandeliers offer an elaborate design that works well in rooms with vaulted or extra-high ceilings. Their multiple layers add depth and create a stunning focal point.

2. Linear Chandeliers

For a modern look, linear chandeliers are ideal for long dining tables or kitchen islands. Their elongated shape suits open spaces and high ceilings.

3. Candle-Style Chandeliers

Candle-style chandeliers are perfect for more traditional or rustic spaces. These fixtures often come with numerous “candles” or lights, making them ideal for larger rooms that need extra lighting.

4. Globe Chandeliers

Globe chandeliers are versatile and work in both contemporary and traditional settings. Their spherical shape makes them a striking feature in rooms with high ceilings.

Conclusion: Updating Your Space with Confidence

Knowing how to change a chandelier in high ceilings can be incredibly rewarding, especially when you see the dramatic effect a new fixture can have on your room’s ambiance. With the right tools, careful planning, and proper safety measures, this project can be a successful DIY endeavor. Whether you’re swapping out an outdated chandelier for a modern design or simply updating the style, following the steps in this guide will help you achieve a safe and professional-looking installation.

Fire Rated Ceiling Tiles for Commercial Kitchen Safety

When it comes to designing and constructing a commercial kitchen, safety is paramount. One of the most crucial aspects of ensuring safety in such environments is the use of fire rated ceiling tiles for commercial kitchen applications. These specialized tiles are not only integral to the aesthetics of a kitchen but also play a vital role in fire prevention and safety compliance. In this article, we will explore what fire rated ceiling tiles are, their benefits, installation considerations, and how they contribute to creating a safe working environment in commercial kitchens.

Fire Rated Ceiling Tiles For Commercial Kitchen

Understanding Fire Rated Ceiling Tiles

What Are Fire Rated Ceiling Tiles?

Fire rated ceiling tiles for commercial kitchen use are designed to resist the spread of fire and provide a certain level of protection during a fire incident. These tiles are constructed from materials that can withstand high temperatures and are often tested under specific standards to ensure their effectiveness.

Read too: Bathroom Flooded Through the Ceiling: A Comprehensive Guide

The fire rating of ceiling tiles is typically measured in terms of minutes, which indicates how long the tiles can withstand exposure to flames without compromising the ceiling’s structural integrity. Common fire ratings for ceiling tiles include 1-hour, 2-hour, and 4-hour ratings, with higher ratings providing better protection.

Why Are Fire Rated Ceiling Tiles Important in Commercial Kitchens?

In a commercial kitchen, the risk of fire is significantly higher due to the presence of cooking equipment, flammable materials, and high heat. Here are a few reasons why fire rated ceiling tiles are essential in these environments:

  1. Fire Safety Compliance: Many local building codes and regulations require commercial kitchens to use fire rated materials, including ceiling tiles. Compliance helps ensure that the kitchen meets safety standards and reduces liability.
  2. Protection Against Smoke and Flames: Fire rated ceiling tiles help contain flames and smoke, providing more time for occupants to evacuate safely in the event of a fire. This containment can also protect the rest of the building from fire damage.
  3. Insurance Benefits: Utilizing fire rated materials can potentially lower insurance premiums for commercial kitchen operators. Insurance companies often offer discounts for businesses that take proactive measures to enhance safety.
  4. Enhanced Aesthetics: Modern fire rated ceiling tiles come in various styles and finishes, allowing for a visually appealing kitchen design without compromising safety.

Features of Fire Rated Ceiling Tiles for Commercial Kitchen

When selecting fire rated ceiling tiles for commercial kitchen use, it’s essential to consider several features that will enhance safety, durability, and aesthetics:

1. Fire Resistance Ratings

As mentioned earlier, fire resistance ratings are crucial. Choose tiles with a fire rating that meets or exceeds local building codes. A rating of at least 1-hour is often recommended for commercial kitchens.

2. Material Composition

The materials used in fire rated ceiling tiles significantly influence their performance. Common materials include:

  • Mineral Fiber: Often treated to be fire resistant, mineral fiber tiles are popular for commercial kitchens due to their acoustic properties and ease of installation.
  • Gypsum Board: This material has inherent fire-resistant properties and is often used in ceiling systems that require additional support.
  • Metal: Metal ceiling tiles are not only fire resistant but also provide a modern look and excellent durability.

3. Aesthetic Options

Fire rated ceiling tiles are available in various styles, colors, and textures, enabling you to choose options that complement your kitchen’s overall design. Consider tiles that match the style of the kitchen while adhering to safety standards.

4. Sound Absorption

Commercial kitchens can be noisy environments, and choosing fire rated ceiling tiles with sound-absorbing properties can help reduce noise levels. Look for tiles with acoustic ratings to improve the overall work environment.

5. Ease of Maintenance

Choose fire rated ceiling tiles that are easy to clean and maintain, as commercial kitchens are subject to grease and stains. Tiles with a smooth finish are often easier to wipe down and keep looking clean.

Benefits of Using Fire Rated Ceiling Tiles in Commercial Kitchens

Incorporating fire rated ceiling tiles for commercial kitchen environments offers several benefits beyond mere compliance with safety regulations:

1. Enhanced Safety

The primary benefit of fire rated ceiling tiles is the increased safety they provide. In the event of a fire, these tiles can delay the spread of flames and smoke, giving kitchen staff precious minutes to evacuate and alert others.

2. Improved Fire Control

Fire rated tiles can help contain a fire, allowing fire suppression systems to operate effectively. This containment reduces the risk of a small kitchen fire spreading to other areas of the building.

3. Lower Insurance Costs

As mentioned previously, utilizing fire rated materials can potentially lead to lower insurance premiums. Insurance companies recognize the reduced risk associated with commercial kitchens that implement safety measures.

4. Versatile Design Options

With advancements in design, fire rated ceiling tiles are now available in a range of styles and finishes. This versatility allows kitchen operators to maintain a professional appearance while ensuring safety.

5. Compliance with Health Codes

In many jurisdictions, fire rated ceiling tiles are required to meet health and safety codes. Using these tiles ensures that your kitchen adheres to regulations, minimizing the risk of penalties or closures.

Installation Considerations for Fire Rated Ceiling Tiles

When installing fire rated ceiling tiles for commercial kitchen applications, certain factors must be considered to ensure proper performance and compliance:

1. Professional Installation

While some ceiling tiles may be suitable for DIY installation, it’s often best to hire professionals experienced in commercial kitchen installations. They can ensure that the tiles are installed correctly and meet local fire safety codes.

2. Proper Support Structure

Ensure that the ceiling’s structural framework can support the weight of fire rated tiles. Some heavier tiles may require additional support or specific installation methods.

3. Sealing and Gaps

All seams and gaps between tiles should be sealed appropriately to prevent the spread of smoke and flames. Use fire-rated caulking or other materials to fill any voids, ensuring a complete barrier.

4. Compatibility with Existing Systems

If you are retrofitting fire rated ceiling tiles into an existing kitchen, ensure they are compatible with other systems such as lighting and ventilation. Consult with a professional if you’re uncertain about compatibility.

5. Regular Inspection and Maintenance

Once installed, regular inspections are necessary to ensure that the tiles remain in good condition. Look for any signs of damage or wear and address issues promptly to maintain safety standards.

Top Brands of Fire Rated Ceiling Tiles for Commercial Kitchen

There are several reputable manufacturers that specialize in producing fire rated ceiling tiles for commercial kitchens. Here are a few of the most recognized brands:

1. Armstrong Ceilings

Armstrong is a well-known name in the ceiling tile industry, offering a wide range of fire rated ceiling tiles designed for commercial kitchens. Their products combine aesthetics with safety, making them a popular choice among kitchen designers.

2. USG Corporation

USG provides a variety of fire rated ceiling systems that are specifically engineered for commercial kitchen applications. Their tiles are known for their durability and performance, ensuring compliance with fire safety codes.

3. CertainTeed

CertainTeed offers fire rated ceiling tiles that combine functionality with design. Their products include various materials and finishes, catering to diverse aesthetic preferences while maintaining safety standards.

4. Ceilings Plus

Ceilings Plus specializes in custom ceiling solutions, including fire rated tiles suitable for commercial kitchens. They focus on innovation and quality, making them a reliable choice for unique kitchen designs.

Conclusion

In conclusion, selecting fire rated ceiling tiles for commercial kitchen use is an essential aspect of creating a safe and compliant cooking environment. These tiles not only enhance safety by containing potential fires but also provide aesthetic benefits and sound absorption properties. When choosing the right tiles for your commercial kitchen, consider factors such as fire ratings, materials, aesthetics, and ease of maintenance. By investing in high-quality fire rated ceiling tiles and ensuring proper installation, you can create a safer workplace that meets local regulations and enhances the overall design of your kitchen.

Commercial Warehouse Ceiling Insulation: A Comprehensive Guide

When it comes to operating a successful business, maintaining an optimal environment within a commercial warehouse is crucial. One significant factor that can impact both energy efficiency and employee comfort is the Commercial Warehouse Ceiling Insulation. Proper insulation not only regulates temperatures but also contributes to energy savings, noise reduction, and overall building integrity. In this article, we will delve into the importance of ceiling insulation, the various types available, installation methods, and the benefits it brings to commercial warehouses.

Commercial Warehouse Ceiling Insulation

Understanding the Importance of Commercial Warehouse Ceiling Insulation

What is Commercial Warehouse Ceiling Insulation?

Commercial Warehouse Ceiling Insulation refers to the materials and techniques used to insulate the ceilings of large warehouse spaces. This type of insulation helps to minimize heat transfer between the interior of the building and the outside environment. In simpler terms, it keeps the warehouse warm in the winter and cool in the summer, thus enhancing energy efficiency and comfort.

Why is Insulation Necessary?

Insulation is essential for several reasons:

  1. Energy Efficiency: Proper insulation reduces the amount of energy required for heating and cooling. This translates to lower utility bills and a smaller carbon footprint.
  2. Comfort: Insulated warehouses maintain a more consistent temperature, which is vital for employee comfort and productivity.
  3. Noise Reduction: Insulation can dampen sound transmission, making the workspace quieter, which is especially important in environments with heavy machinery or high noise levels.
  4. Moisture Control: Insulation helps control moisture levels, preventing mold and mildew growth, which can be harmful to both employees and stored products.
  5. Building Longevity: Proper insulation protects the building’s structural integrity by preventing temperature fluctuations that can cause materials to expand and contract.

Read too: Shiplap Ceiling in Kitchen: A Timeless Trend for a Stylish and Cozy Space

Types of Commercial Warehouse Ceiling Insulation

When considering Commercial Warehouse Ceiling Insulation, it’s important to choose the right type for your specific needs. Here are some common types of insulation used in commercial warehouses:

1. Fiberglass Insulation

Fiberglass insulation is one of the most popular choices for commercial applications. It consists of fine glass fibers that trap air, providing excellent thermal resistance.

  • Pros: Cost-effective, widely available, and easy to install.
  • Cons: Can be less effective in moist environments, and installation requires protective gear to avoid skin irritation.

2. Spray Foam Insulation

Spray foam insulation expands upon application, filling gaps and creating an airtight seal. It offers excellent thermal resistance and moisture control.

  • Pros: Provides superior insulation, fills gaps and cracks, and acts as a vapor barrier.
  • Cons: More expensive than other options, and installation requires professional expertise.

3. Rigid Foam Board Insulation

Rigid foam board insulation consists of solid foam boards that provide high insulating values with minimal thickness.

  • Pros: Lightweight, easy to handle, and offers good moisture resistance.
  • Cons: Can be more expensive than fiberglass and may require additional framing support.

4. Mineral Wool Insulation

Mineral wool, also known as rock wool, is made from natural stone and offers excellent fire resistance and soundproofing qualities.

  • Pros: Fire-resistant, water-repellent, and provides sound insulation.
  • Cons: Heavier and can be more expensive than fiberglass.

5. Cellulose Insulation

Made from recycled paper products, cellulose insulation is a green option that provides effective thermal performance.

  • Pros: Environmentally friendly, effective at controlling air leakage, and good soundproofing properties.
  • Cons: Can settle over time, reducing its effectiveness, and may require a vapor barrier.

How to Install Commercial Warehouse Ceiling Insulation

1. Preparing for Installation

Before starting the installation of Commercial Warehouse Ceiling Insulation, it’s important to prepare the space:

  • Clear the Area: Remove any items stored in the ceiling space to allow easy access.
  • Inspect for Damage: Check the ceiling structure for any signs of water damage or mold. Repair any issues before insulation installation.
  • Gather Materials: Choose the insulation type and gather necessary tools, such as safety goggles, gloves, a utility knife, and a measuring tape.

2. Choosing the Right R-Value

The R-value measures the insulation’s effectiveness in resisting heat flow. The higher the R-value, the better the insulation performance. For commercial warehouses, an R-value of 25 to 38 is typically recommended, depending on the local climate and building codes.

3. Installation Methods

Fiberglass Insulation Installation

  1. Measure and Cut: Cut fiberglass batts to fit snugly between the ceiling joists.
  2. Insert Batts: Place the batts between the joists, ensuring they fit tightly without compressing the material.
  3. Seal Gaps: Use foil tape or caulk to seal any gaps between the batts and the ceiling.

Spray Foam Insulation Installation

  1. Prepare the Area: Ensure the area is well-ventilated and the temperature is appropriate for application.
  2. Apply Foam: Using a professional spray foam applicator, spray the foam evenly across the ceiling, filling all gaps.
  3. Allow to Cure: Let the foam cure as per manufacturer instructions before applying any finishing materials.

Rigid Foam Board Installation

  1. Cut Boards: Measure and cut foam boards to fit the ceiling.
  2. Attach Boards: Use construction adhesive or screws to attach the boards to the ceiling joists.
  3. Seal Edges: Use foam sealant to fill any gaps between the boards.

Benefits of Commercial Warehouse Ceiling Insulation

1. Energy Savings

By preventing heat transfer, insulated ceilings significantly reduce the energy required for heating and cooling, leading to substantial cost savings on utility bills.

2. Enhanced Comfort

A comfortable temperature in a commercial warehouse is crucial for maintaining employee morale and productivity. Insulation helps create a stable environment throughout the year.

3. Improved Air Quality

Insulation can help control humidity and reduce moisture build-up, which in turn minimizes the risk of mold and mildew. This contributes to a healthier workspace.

4. Sound Dampening

Insulated ceilings reduce sound transmission, which is particularly beneficial in warehouses where machinery operates or multiple activities occur simultaneously.

5. Increased Property Value

Proper insulation not only improves energy efficiency but can also enhance the overall value of the property. Insulated buildings are more attractive to potential buyers or renters.

Conclusion

Investing in Commercial Warehouse Ceiling Insulation is a smart move for any business looking to improve energy efficiency, comfort, and overall productivity. With various insulation types available, businesses can choose the most suitable option based on their specific needs and budget. Proper installation and maintenance of insulation will ensure long-term benefits, from reduced energy costs to enhanced employee satisfaction. By prioritizing insulation, you create a healthier, more efficient workspace that supports both your business goals and the well-being of your employees.

American Tin Ceilings Installation: Transform Your Space with Timeless Elegance

American tin ceilings have made a remarkable comeback in modern interior design, offering a blend of vintage charm and contemporary aesthetics. The intricate patterns, reflective surfaces, and variety of finishes make tin ceilings a popular choice for homeowners looking to add character and elegance to their spaces. This article will provide you with a detailed guide to American tin ceilings installation, covering everything from the materials needed to the installation process itself.

American Tin Ceilings Installation

Understanding American Tin Ceilings

What Are Tin Ceilings?

Tin ceilings are decorative ceiling panels made from thin sheets of metal, traditionally tin. They became popular in the 19th century in the United States, often used in commercial spaces, restaurants, and homes. These ceilings were originally designed to mimic the look of more expensive materials like plaster or wood, but they offered a more affordable and durable alternative.

Today, American tin ceilings are available in a variety of designs, including floral patterns, geometric shapes, and intricate motifs. They can be painted, left in their natural metallic finish, or treated to achieve a vintage look. This versatility allows homeowners to customize their ceilings to fit their design vision perfectly.

Benefits of Tin Ceilings

  1. Aesthetic Appeal: Tin ceilings add an element of sophistication and elegance to any room. Their reflective surfaces can also help to brighten a space by bouncing light around the room.
  2. Durability: Made from metal, tin ceilings are resistant to moisture, mold, and mildew. This makes them an excellent choice for areas prone to humidity, such as kitchens and bathrooms.
  3. Easy Maintenance: Tin ceilings require minimal upkeep. Regular dusting and the occasional wipe with a damp cloth are usually all that’s needed to keep them looking their best.
  4. Sound Absorption: Tin ceilings can help absorb sound, making them a great option for reducing noise in busy households or commercial settings.
  5. Eco-Friendly Option: Many manufacturers now produce tin ceiling tiles from recycled materials, making them an environmentally friendly choice for eco-conscious homeowners.

Read too: Shiplap Ceiling in Kitchen: A Timeless Trend for a Stylish and Cozy Space

Preparing for American Tin Ceilings Installation

Step 1: Gather Materials and Tools

Before beginning your installation, it’s essential to gather all necessary materials and tools. Here’s a list to get you started:

  • Tin ceiling tiles: Measure your ceiling space to determine how many tiles you’ll need.
  • Adhesive: Use construction adhesive or a specific adhesive for tin ceilings.
  • Measuring tape: Accurate measurements are crucial for a successful installation.
  • Level: To ensure your tiles are straight and even.
  • Utility knife: For cutting tiles to fit around edges or obstacles.
  • Caulk: For sealing gaps and providing a clean finish.
  • Safety goggles: Protect your eyes during installation.

Step 2: Prepare the Ceiling

Before installing your tin ceiling tiles, make sure the surface is clean, dry, and free of any debris. If your ceiling is uneven or has bumps, consider using drywall to create a smoother surface. If you’re covering an existing ceiling, ensure that it’s structurally sound and suitable for installation.

Step 3: Measure and Plan

Accurate measurements are crucial for a successful installation. Use a measuring tape to determine the length and width of your ceiling. Divide these measurements by the dimensions of your tin tiles to calculate how many tiles you will need.

Plan the layout of your tiles to ensure that any cut tiles will be placed around the edges, creating a balanced look. It’s often best to start in the center of the room and work your way out to avoid odd-shaped pieces at the edges.

American Tin Ceilings Installation Process

Step 1: Mark the Center

Use a chalk line or a straight edge to mark the center of your ceiling. This will be your starting point for installation.

Step 2: Apply Adhesive

Following the manufacturer’s instructions, apply adhesive to the back of the first tile. Be generous, but avoid excessive amounts that could ooze out during installation.

Step 3: Position the First Tile

Carefully position the tile against the ceiling, aligning it with your center mark. Use a level to ensure it’s straight. Press firmly to adhere the tile to the ceiling.

Step 4: Continue Installing Tiles

Repeat the adhesive application and installation process for the remaining tiles. Work your way outwards from the center, checking for alignment and levelness as you go. If necessary, cut tiles to fit around light fixtures, vents, or edges using a utility knife.

Step 5: Fill in Gaps

Once all tiles are installed, inspect the edges for any gaps. Use caulk to fill these spaces for a polished look. This will also help create a seamless appearance.

Step 6: Final Touches

After the installation, allow the adhesive to cure as per the manufacturer’s guidelines. Once cured, you can paint your tin tiles if desired or leave them in their natural finish.


Maintenance of American Tin Ceilings

Maintaining your tin ceiling is straightforward. Here are some tips to keep your ceiling looking beautiful for years to come:

  1. Regular Dusting: Use a soft cloth or microfiber duster to remove dust and cobwebs regularly.
  2. Cleaning: For deeper cleaning, use a damp cloth with mild soap. Avoid abrasive cleaners that could scratch the surface.
  3. Inspection: Periodically check for any signs of rust or damage, especially if you live in a humid climate. If rust appears, treat it immediately with a rust-inhibiting primer.
  4. Repainting: If you’ve painted your tiles and they begin to look dull, you can repaint them. Make sure to use a paint that is suitable for metal surfaces.

Conclusion

Installing American tin ceilings can transform your home, adding elegance and character while providing practical benefits. With the right preparation and installation techniques, you can achieve a stunning result that enhances your living space. Whether you’re undertaking a DIY project or hiring a professional, understanding the installation process will help ensure your success.

With their timeless beauty, durability, and low maintenance, tin ceilings are an excellent investment for any home. Embrace the charm of yesteryear while enjoying the benefits of modern design with American tin ceilings installation.

Metal Ceiling Panels For Garage: A Durable and Stylish Solution for Your Space

When it comes to enhancing the look and functionality of your garage, the ceiling is often overlooked. However, choosing the right material for your garage ceiling can greatly impact both the aesthetic and practical aspects of the space. One of the best options available today is Metal Ceiling Panels For Garage. These panels offer a perfect combination of durability, style, and ease of installation, making them an increasingly popular choice among homeowners.

Metal Ceiling Panels For Garage

In this comprehensive guide, we’ll explore the benefits of using metal ceiling panels in your garage, discuss the different types available, and provide installation tips to help you transform your garage into a more polished and functional space.

Why Choose Metal Ceiling Panels For Garage?

Before diving into the different types and installation tips, it’s important to understand why metal ceiling panels for garages have gained popularity. Garages are often subjected to harsh conditions, from temperature fluctuations to moisture buildup, making it essential to choose a ceiling material that can withstand these challenges.

Here are some of the top reasons why metal ceiling panels are an excellent option for garages:

1. Durability and Longevity

One of the biggest advantages of metal ceiling panels is their durability. Unlike traditional materials such as drywall or wood, metal panels are highly resistant to moisture, rust, and warping. This makes them ideal for garages, which are often exposed to varying temperatures, humidity, and even occasional leaks.

Read too: Shiplap Ceiling in Kitchen: A Timeless Trend for a Stylish and Cozy Space

Galvanized steel panels, in particular, are corrosion-resistant, ensuring that your ceiling will maintain its structural integrity for many years to come. The longevity of metal panels also means less frequent maintenance or replacement, saving you time and money in the long run.

2. Resistance to Moisture and Mold

Garages are prone to moisture, whether from leaks, condensation, or simply the outdoor environment. Using metal ceiling panels provides a layer of protection against these elements. The non-porous nature of metal ensures that moisture cannot seep into the panels, preventing the growth of mold and mildew. This is a significant advantage over materials like wood or drywall, which can easily absorb moisture and deteriorate over time.

This moisture resistance not only keeps your garage looking fresh but also ensures that the ceiling panels maintain their functionality even in challenging conditions.

3. Fire Resistance

Safety is always a priority when considering building materials, especially in a garage where various tools, chemicals, and flammable materials may be stored. Metal ceiling panels are naturally fire-resistant, providing an extra layer of protection for your home. This makes them a safer option compared to other materials like wood or vinyl, which are more susceptible to fire damage.

4. Easy Installation and Low Maintenance

Another benefit of metal ceiling panels is their ease of installation. Many panels are designed with interlocking edges, allowing them to be easily fitted together without the need for complex tools or processes. Homeowners can often complete the installation themselves or with minimal professional assistance.

Once installed, metal ceiling panels require little to no maintenance. Unlike drywall, which can crack, or wood, which needs regular staining or sealing, metal panels can simply be wiped clean with a damp cloth to remove dirt or dust. Their durability ensures that they maintain their appearance and performance with minimal effort on your part.

5. Aesthetic Appeal

In addition to their practical benefits, metal ceiling panels can also enhance the visual appeal of your garage. Available in various finishes such as galvanized, painted, or even embossed designs, these panels can give your garage a sleek, modern look. Whether you prefer a shiny, industrial appearance or a more muted, matte finish, there are metal panels to suit your personal style.

Types of Metal Ceiling Panels for Garage

When selecting metal ceiling panels for your garage, it’s important to understand the different types of materials and finishes available. Each type has its unique advantages, depending on your specific needs and preferences.

1. Galvanized Steel Panels

Galvanized steel is one of the most popular choices for metal ceiling panels in garages due to its excellent corrosion resistance. These panels are coated with a layer of zinc, which helps to protect the steel from rust and damage caused by moisture. This makes galvanized steel panels perfect for garages in areas with high humidity or frequent temperature changes.

Additionally, galvanized steel panels are often available in both smooth and corrugated designs, allowing you to choose the style that best fits your garage.

2. Aluminum Panels

Another popular option is aluminum, known for being lightweight and resistant to rust. Aluminum panels are easy to install because of their low weight, which also makes them a great option if you are handling the installation process yourself. Though aluminum is not as strong as steel, its natural corrosion resistance makes it a solid choice for garage ceilings, especially in coastal or humid environments.

Aluminum panels can also be anodized, which adds an extra layer of protection and enhances their appearance.

3. Tin Panels

Tin ceiling panels offer a unique aesthetic appeal and are often used to create a vintage or industrial look in garages. While not as durable as steel or aluminum, tin panels are lightweight and can be painted to match the desired color scheme of your garage. Tin panels are typically more decorative and may not provide the same level of moisture or fire resistance as steel, but they are an attractive option for those looking to make a design statement.

4. Stainless Steel Panels

Stainless steel ceiling panels are the ultimate in durability and resistance to corrosion. These panels are often used in high-end garage designs due to their sleek, polished look and long-lasting performance. Although stainless steel can be more expensive than other metal options, it offers unparalleled longevity and requires virtually no maintenance.

5. Embossed Metal Panels

For homeowners looking to add an artistic touch to their garage, embossed metal panels are an excellent choice. These panels feature intricate patterns and textures, providing a decorative element to the space. While they offer the same durability and resistance as other metal panels, the embossed design adds a layer of style, making your garage ceiling a standout feature.

Installation Tips for Metal Ceiling Panels For Garage

Installing metal ceiling panels in your garage may seem like a complex task, but with the right tools and preparation, it can be a straightforward process. Here are some tips to ensure a successful installation:

1. Measure Your Space

Before purchasing your metal panels, measure the dimensions of your garage ceiling carefully. This will help you determine how many panels you need and whether you will need to cut any of them to fit the space.

2. Prepare the Ceiling

Make sure the surface where the panels will be installed is clean and free from debris. If your garage ceiling is uneven, you may need to install furring strips to create a flat, level surface for the panels.

3. Use the Right Tools

To install metal panels, you will need tools such as a drill, screws, a metal-cutting saw (if necessary), and safety equipment like gloves and goggles. Be sure to follow the manufacturer’s instructions for both the panels and any mounting hardware.

4. Secure the Panels

Start at one corner of the garage and work your way across the ceiling, securing each panel with screws into the ceiling joists or furring strips. Make sure the panels are level and snugly fit together to avoid gaps or sagging.

5. Check for Proper Ventilation

If your garage has attic access or ventilation, be sure not to block any vents or airflow when installing the ceiling panels. Proper ventilation is important to prevent moisture buildup and to maintain a comfortable temperature inside the garage.

Enhancing Your Garage With Metal Ceiling Panels

In conclusion, metal ceiling panels for garages offer a durable, low-maintenance, and aesthetically pleasing solution for upgrading your garage space. Whether you choose galvanized steel for its rust resistance or aluminum for its lightweight properties, metal ceiling panels can withstand the challenges of moisture, temperature changes, and heavy usage.

Their easy installation and long-lasting benefits make them an excellent investment for any homeowner looking to improve their garage’s functionality and appearance. Additionally, the variety of styles and finishes available ensures that you can find the perfect panels to complement your design preferences.

Chandelier on a Slanted Ceiling: How to Install and Style

When it comes to home décor, lighting plays a pivotal role in enhancing the aesthetic appeal and ambiance of a room. A Chandelier on Slanted Ceiling not only serves as a stunning focal point but also adds elegance and sophistication to your space. However, hanging a chandelier in a room with a slanted ceiling can pose some unique challenges. In this comprehensive guide, we will explore the best ways to install a chandelier on a slanted ceiling, discuss different styles, and provide tips on choosing the right chandelier for your home.

Chandelier On Slanted Ceiling

Why Choose a Chandelier for Your Slanted Ceiling?

1. Aesthetic Appeal

Chandeliers are synonymous with luxury and style. They can transform an ordinary room into a breathtaking space. When hung from a slanted ceiling, a chandelier can add depth and dimension, creating an eye-catching centerpiece that draws attention.

Read too: Shiplap Ceiling in Kitchen: A Timeless Trend for a Stylish and Cozy Space

2. Versatile Design

Available in various designs, sizes, and materials, chandeliers can suit any style—from modern and minimalist to traditional and ornate. A well-chosen chandelier can complement your existing décor, enhancing the overall ambiance of the room.

3. Increased Lighting

A chandelier provides abundant illumination, making it ideal for areas that require bright lighting, such as dining rooms, entryways, or living rooms. With multiple light bulbs, a chandelier can effectively brighten even the darkest corners of a room.

4. Space Definition

In open floor plans or large rooms with slanted ceilings, a chandelier can help define the space, creating a cozy atmosphere. By hanging a chandelier, you can create a distinct area for dining, relaxing, or entertaining.


Understanding Slanted Ceilings

1. What is a Slanted Ceiling?

A slanted ceiling, also known as a pitched or sloped ceiling, is characterized by an angle that varies from the standard flat ceiling. These ceilings can create a unique architectural feature in a room, adding character and charm. They are commonly found in attics, lofts, and rooms with vaulted designs.

2. Challenges of Installing a Chandelier

While slanted ceilings can be visually appealing, they also present challenges for hanging fixtures like chandeliers. The angle of the ceiling affects the height and placement of the chandelier, making it essential to carefully consider the installation process. Here are some common challenges:

  • Height Limitations: The height of the chandelier must be adjusted to accommodate the slant of the ceiling, ensuring that it hangs at an appropriate height for both aesthetics and safety.
  • Wiring Issues: The existing electrical wiring may need adjustments to accommodate the slant, especially if the chandelier is heavy or requires specific support.
  • Alignment: Ensuring the chandelier is level and centered can be tricky with slanted ceilings, requiring additional tools and techniques for proper installation.

Tips for Installing a Chandelier on Slanted Ceiling

1. Choose the Right Chandelier

When selecting a chandelier for a slanted ceiling, consider the following factors:

  • Style and Size: Choose a chandelier that fits the proportions of your room. A large chandelier can overwhelm a small space, while a small chandelier may look lost in a larger room.
  • Adjustability: Opt for adjustable or angled chandeliers designed specifically for slanted ceilings. These chandeliers often come with longer downrods or special mounting kits that accommodate the angle.

2. Determine the Ideal Height

Proper chandelier height is crucial, especially in rooms with slanted ceilings. Here are some guidelines:

  • General Rule: The bottom of the chandelier should be at least 30 inches above the dining table or any surface beneath it.
  • Adjust for Slant: Measure the angle of the slant to determine how low the chandelier needs to hang to maintain an appropriate height.

3. Use a Sloped Ceiling Adapter

A sloped ceiling adapter is an essential tool for hanging a chandelier on a slanted ceiling. This adapter allows the chandelier to hang level, regardless of the angle of the ceiling. When purchasing a chandelier, check if it includes an adapter or if you need to buy one separately.

4. Leveling the Chandelier

To ensure your chandelier hangs straight, use a level during installation. This will help you adjust the angle of the chandelier so that it looks aesthetically pleasing and functions correctly. If using a long downrod, ensure it’s securely fastened to the ceiling.

5. Adjust the Wiring

Depending on the height and angle of the slant, you may need to extend or adjust the electrical wiring. If you’re not comfortable doing this yourself, hiring a qualified electrician is advisable.


Styling Your Chandelier on Slanted Ceilings

1. Choosing the Right Location

When installing a Chandelier on Slanted Ceiling, the location is as important as the design. Consider the following:

  • Focal Points: Position the chandelier above key areas, such as a dining table, coffee table, or entryway, to create a focal point in the room.
  • Room Layout: Ensure the chandelier does not obstruct pathways or become a hazard for taller individuals.

2. Pairing with Other Light Sources

To create a layered lighting effect, pair your chandelier with other light sources:

  • Wall Sconces: Install wall sconces at different heights to complement the chandelier, adding depth to your lighting scheme.
  • Table Lamps: Use table or floor lamps to provide additional lighting and enhance the overall ambiance of the room.

3. Color and Material Coordination

To create a cohesive look, ensure that the chandelier’s color and material complement the existing décor:

  • Matching Finishes: Choose a chandelier that matches other fixtures, such as cabinet hardware or door knobs, to create a unified design.
  • Material Harmony: If your furniture features wood, metal, or glass, select a chandelier that incorporates these materials for a harmonious aesthetic.

4. Adding Decorative Elements

Enhance the beauty of your chandelier by incorporating decorative elements:

  • Drapes and Fabrics: Pair the chandelier with soft drapery or textiles that add warmth and texture to the room.
  • Artwork and Accessories: Hang artwork or display decorative accessories nearby to draw attention to the chandelier and create a well-rounded design.

Common Styles of Chandeliers for Slanted Ceilings

When selecting a Chandelier on Slanted Ceiling, consider the various styles available to find the perfect match for your interior design:

1. Traditional Chandeliers

Traditional chandeliers often feature intricate designs with crystal accents and ornate details. They can add a classic touch to any room, making them perfect for formal dining areas or grand entryways.

2. Modern Chandeliers

Modern chandeliers embrace clean lines, geometric shapes, and minimalistic designs. They work well in contemporary spaces and can serve as striking focal points that exude elegance and sophistication.

3. Rustic Chandeliers

Rustic chandeliers typically incorporate natural materials such as wood and wrought iron, providing a warm and inviting atmosphere. These chandeliers are ideal for country-style or farmhouse interiors.

4. Industrial Chandeliers

Industrial chandeliers combine raw materials like metal and glass, offering an edgy and urban feel. They can complement modern lofts or spaces with an industrial aesthetic.

5. Crystal Chandeliers

Crystal chandeliers add glamour and luxury to any space. They can reflect light beautifully and are suitable for both formal and casual settings.


Conclusion

Installing a Chandelier on Slanted Ceiling can enhance the aesthetic appeal and functionality of your space. By following the tips outlined in this guide, you can choose the perfect chandelier, ensure proper installation, and style it to create a stunning focal point in your home. With careful consideration and planning, your chandelier will not only provide ample lighting but also elevate the overall ambiance of your room.

2X4 Tin Ceiling Tiles: A Comprehensive Guide

Are you looking to add a touch of elegance and sophistication to your home or commercial space? 2X4 tin ceiling tiles offer a unique solution that combines classic aesthetics with modern versatility. These tiles can elevate any room, providing a vintage charm that can seamlessly integrate with contemporary or traditional decor. In this article, we will delve into the benefits, installation, maintenance, and design possibilities of 2X4 tin ceiling tiles, ensuring you have all the information you need to make an informed decision.

2X4 Tin Ceiling Tiles

What Are 2X4 Tin Ceiling Tiles?

2X4 tin ceiling tiles are decorative panels made from metal, usually tin or aluminum, that measure 2 feet by 4 feet. These tiles are designed to be installed on ceilings, creating intricate patterns and textures that enhance the visual appeal of a space. Historically, tin ceilings were popular in the late 19th and early 20th centuries, often found in dining rooms, parlors, and public buildings. Today, they are enjoying a resurgence in popularity due to their versatility and unique aesthetic.

Benefits of 2X4 Tin Ceiling Tiles

  1. Aesthetic Appeal: The intricate designs of tin ceiling tiles add a stunning visual element to any room. They can serve as a focal point or complement other design elements in your space.
  2. Versatility: Available in various patterns, finishes, and colors, 2X4 tin ceiling tiles can be adapted to fit any decor style, from rustic to modern.
  3. Durability: Made from metal, these tiles are resistant to wear and tear. They are less prone to damage compared to traditional drywall ceilings.
  4. Easy Installation: Many homeowners appreciate that 2X4 tin ceiling tiles can be installed over existing ceilings, making them a great option for renovations.
  5. Maintenance: Metal tiles are relatively easy to clean and maintain, requiring only occasional dusting or wiping down to keep them looking fresh.
  6. Sound Insulation: Some tin ceiling tiles come with sound-dampening properties, helping to reduce noise levels in a room.

Popular Designs for 2X4 Tin Ceiling Tiles

When it comes to 2X4 tin ceiling tiles, the design options are virtually limitless. Here are some popular patterns to consider:

1. Victorian Patterns

Victorian-style tin tiles often feature ornate, intricate designs that evoke a sense of history and elegance. These patterns can be perfect for dining rooms or areas where you want to create a formal ambiance.

2. Geometric Designs

Geometric tin ceiling tiles incorporate modern patterns that lend a contemporary feel to a space. They are ideal for minimalist interiors and can create a striking visual effect.

3. Floral Motifs

Tiles with floral designs can add a touch of nature and softness to your decor. These patterns are often used in kitchens and living rooms to create a welcoming atmosphere.

4. Classic and Rustic Styles

For those looking to achieve a farmhouse or rustic aesthetic, classic tin tiles with distressed finishes are an excellent choice. They provide a warm, inviting look that complements wood and other natural materials.


Installation Process for 2X4 Tin Ceiling Tiles

Installing 2X4 tin ceiling tiles can be a straightforward DIY project, especially if you have basic handyman skills. However, if you’re unsure about your abilities, hiring a professional is always a safe choice. Here’s a step-by-step guide to help you through the installation process:

Tools and Materials Needed

  • 2X4 tin ceiling tiles
  • Adhesive (or nails/screws, depending on your preference)
  • Measuring tape
  • Level
  • Utility knife
  • Caulk gun (if using adhesive)
  • Safety goggles
  • Ladder

Step-by-Step Instructions

  1. Prepare the Ceiling: Ensure the existing ceiling is clean, dry, and free of any debris. If necessary, patch any holes or imperfections.
  2. Measure and Plan: Measure the dimensions of your ceiling to determine how many tiles you will need. Create a layout plan, starting from the center of the room and working your way out.
  3. Cut the Tiles: If you need to fit tiles around the edges of the room, use a utility knife to cut them to size. Be sure to wear safety goggles while cutting.
  4. Apply Adhesive: If using adhesive, apply it to the back of the tile in a zigzag pattern. For tiles that will be nailed or screwed, position the fasteners as indicated by the manufacturer.
  5. Place the Tiles: Starting from the center, press the tile firmly against the ceiling. Use a level to ensure it is straight. Continue placing tiles, working outward towards the edges of the room.
  6. Finishing Touches: Once all tiles are in place, inspect for gaps or imperfections. You can use caulk to fill in any spaces or to create a finished edge where the tiles meet the wall.
  7. Clean Up: Remove any excess adhesive or debris from the installation process. Stand back and admire your work!

Maintenance Tips for 2X4 Tin Ceiling Tiles

Maintaining your 2X4 tin ceiling tiles is relatively simple. Here are some tips to keep them looking their best:

  1. Regular Cleaning: Dust your tiles regularly to prevent buildup. Use a soft cloth or feather duster for light cleaning.
  2. Deep Cleaning: For deeper cleaning, use a damp cloth and a mild detergent. Avoid abrasive cleaners, which can scratch the surface.
  3. Inspect for Damage: Periodically check for any signs of rust or wear. If you notice any issues, address them promptly to prevent further damage.
  4. Repainting or Refinishing: If your tiles start to look dull or damaged, consider repainting or refinishing them to restore their beauty. Use paint specifically designed for metal surfaces for the best results.

Read too: Shiplap Ceiling in Kitchen: A Timeless Trend for a Stylish and Cozy Space


Design Inspirations with 2X4 Tin Ceiling Tiles

Incorporating 2X4 tin ceiling tile into your decor can transform the look and feel of your space. Here are some design inspirations to spark your creativity:

1. Kitchen Renovations

Install 2X4 tin ceiling tiles in your kitchen to create a vintage-inspired look. Pair them with farmhouse-style cabinetry and rustic wood accents for a cozy, inviting atmosphere.

2. Dining Areas

Elevate your dining area with decorative tin tiles. Choose intricate patterns in metallic finishes for an elegant touch that’s perfect for dinner parties and family gatherings.

3. Home Offices

Create a stimulating workspace with geometric tin tiles in a contemporary color palette. The visual interest of the ceiling can enhance creativity and focus.

4. Retail and Commercial Spaces

For business owners, 2X4 tin ceiling tiles can provide a stylish backdrop for retail or restaurant environments. Choose designs that align with your brand aesthetic to create a cohesive look.


Conclusion

2X4 tin ceiling tile are a versatile and stylish solution for enhancing the beauty of your home or commercial space. With their rich history, aesthetic appeal, and ease of installation, they are a fantastic choice for anyone looking to make a design statement. Whether you opt for intricate Victorian patterns or sleek geometric designs, these tiles can transform any room into a stunning showcase of style and elegance.

By understanding the benefits, installation process, and maintenance requirements, you are well-equipped to make the most of your 2X4 tin ceiling tile. Start your transformation today and enjoy the timeless beauty that these tiles bring to your space.

Basement Ceiling Insulation Code: Everything You Need to Know for Proper Insulation

Insulating your basement ceiling is essential for maintaining energy efficiency, improving comfort, and adhering to building regulations. However, it’s crucial to be aware of the basement ceiling insulation code requirements to ensure that your home stays compliant with local building standards. These codes are in place to ensure the safety, performance, and energy efficiency of your home’s insulation system, especially in colder climates where heat loss can be a significant issue.

Basement Ceiling Insulation Code

In this article, we’ll provide a comprehensive guide to the basement ceiling insulation code, including its importance, relevant standards, and factors to consider when insulating your basement ceiling. Whether you’re a homeowner, contractor, or DIY enthusiast, understanding these codes is critical for achieving the best results in terms of comfort, energy savings, and safety.

Read too: Exploring the Innovation and Efficiency of Ceiling Mounted Surgical Light Solutions: Illuminating Precision

Why Basement Ceiling Insulation Matters

Before diving into specific code requirements, it’s important to understand why basement ceiling insulation is essential. Basements often suffer from poor insulation, leading to several issues:

  1. Heat Loss: Without adequate insulation, basements can become cold during winter, causing the rooms above them to lose heat. This increases energy consumption as heating systems have to work harder.
  2. Moisture Control: Insulation also helps in controlling moisture, which is crucial in basements that are prone to dampness and condensation. Proper insulation prevents mold growth and protects the structural integrity of your home.
  3. Soundproofing: Insulating the basement ceiling can reduce noise transfer between floors, making the home more comfortable, particularly in houses with entertainment or utility rooms in the basement.
  4. Energy Efficiency: Proper insulation ensures energy efficiency, lowering heating and cooling costs throughout the year.

Given these benefits, many building codes outline strict insulation requirements to help homeowners protect their investment and ensure a safe living environment.

Understanding Basement Ceiling Insulation Code

The basement ceiling insulation code is a set of standards and regulations provided by local building authorities, as well as national codes like the International Residential Code (IRC) and the International Energy Conservation Code (IECC). These codes establish the minimum R-value (thermal resistance) needed for different parts of a home, including basements.

What Is an R-Value?

The R-value of insulation refers to its ability to resist heat flow. The higher the R-value, the better the insulation’s performance. Different areas of the home, such as walls, attics, and basements, have specific R-value requirements based on the local climate zone.

For basements, the R-value for ceiling insulation can vary, but it typically ranges between R-19 and R-30. This ensures that the basement stays insulated against temperature fluctuations, especially in colder regions.

The Basement Ceiling Insulation Code Requirements

In many regions, basement insulation requirements are detailed by both local and national building codes. Here’s a breakdown of what you need to know about basement ceiling insulation code standards:

1. International Residential Code (IRC)

The IRC is one of the most widely used building codes in the United States and provides guidance on insulation for various parts of a home, including basements. According to IRC, basement ceilings that are adjacent to conditioned spaces should have insulation that meets the minimum R-value specified for the climate zone.

  • Climate Zone 1-2: R-13 to R-15
  • Climate Zone 3-4: R-19
  • Climate Zone 5-8: R-30

These climate zones represent different geographical regions, where higher numbers indicate colder climates that require better insulation.

2. International Energy Conservation Code (IECC)

The IECC also sets insulation standards for energy efficiency, helping to reduce energy consumption in homes. Like the IRC, the IECC’s insulation requirements are broken down by climate zone. The specific R-value requirements for basement ceilings depend on whether the space above the basement is conditioned or unconditioned.

For instance:

  • If the basement is unconditioned and the ceiling separates it from a conditioned living space, the R-value needs to comply with the standard requirements for floor insulation based on the climate zone.
  • For conditioned basements, the walls should meet the code-specified R-value.

3. Local Building Codes

In addition to national codes, local municipalities may have their own specific insulation requirements. It is important to check with your local building authority before beginning any insulation project to ensure compliance with any additional regulations.

Some local codes may also specify whether a vapor barrier is required in basement insulation to prevent moisture issues. This can be particularly important in areas with high humidity or prone to water leaks.

4. Fire Safety Codes

In many regions, fire safety regulations play a role in how insulation is installed in basements. For example, building codes may require certain types of insulation, such as those with fire-resistant properties, or the installation of fire-blocking materials in specific areas.

Insulation in basement ceilings should comply with fire safety codes, especially if there are electrical wires or pipes running through the ceiling. Fiberglass and mineral wool are often recommended for their fire-retardant qualities.

Factors to Consider When Insulating a Basement Ceiling

To successfully meet the basement ceiling insulation code and achieve the best results, several key factors must be considered during the insulation process. These factors will help determine the right type of insulation and installation techniques for your home.

1. Climate Zone

As mentioned, your local climate zone will heavily influence the required R-value for basement ceiling insulation. Homes in colder climates will need insulation with a higher R-value to ensure the basement remains warm during winter months, while homes in warmer areas can use lower R-value insulation.

2. Unconditioned vs. Conditioned Basements

The type of basement you’re insulating also impacts your choice of insulation and how much you need. In an unconditioned basement (where the basement itself is not heated or cooled), it’s crucial to insulate the ceiling to maintain the energy efficiency of the home. For conditioned basements, the walls might require insulation more than the ceiling, depending on local codes.

3. Moisture Control

Since basements are prone to moisture issues, especially in regions with high humidity or heavy rainfall, moisture control is vital during insulation. If moisture builds up in the insulation, it can lead to mold growth, structural damage, and reduced insulation effectiveness.

Installing a vapor barrier can help prevent moisture from penetrating the insulation. This is especially important if you’re using materials like fiberglass, which can absorb water and lose effectiveness.

4. Soundproofing

In addition to thermal insulation, basement ceiling insulation can also be used to reduce noise transmission between floors. Insulation materials like cellulose or mineral wool can offer soundproofing benefits, making them a good choice if you’re using the basement as a living area, home office, or entertainment space.

5. Cost and Materials

The type of insulation material you choose will affect the cost and performance of the insulation. Common insulation materials for basement ceilings include:

  • Fiberglass Batts: A cost-effective option with good thermal performance. Fiberglass is easy to install and widely used in basement insulation projects.
  • Spray Foam Insulation: This option provides excellent thermal resistance and acts as both insulation and a vapor barrier. However, it can be more expensive than other materials.
  • Mineral Wool: This material offers both thermal and soundproofing benefits, as well as fire resistance, making it an excellent choice for basements.

Installation Tips for Meeting Basement Ceiling Insulation Code

Once you’ve selected the right insulation material and determined the required R-value based on your climate zone and local code, it’s time to install the insulation. Here are some tips to ensure your installation meets code and provides the desired benefits:

1. Seal Gaps and Cracks

Before installing insulation, make sure to seal any gaps, cracks, or holes in the ceiling or walls. This will prevent air leakage and moisture infiltration, ensuring your insulation performs at its best.

2. Install Vapor Barriers

In basements with high humidity levels, a vapor barrier should be installed to prevent moisture from damaging the insulation. This is especially important when using materials like fiberglass, which can lose effectiveness when wet.

3. Use the Right Tools

Proper insulation installation requires specific tools, such as insulation knives, staplers, and protective gear. Make sure to follow the manufacturer’s instructions for both the insulation material and any vapor barrier.

4. Follow Local Code Guidelines

Always refer to your local building codes before starting your insulation project. Codes may differ depending on your location, and it’s essential to stay compliant with these regulations to avoid potential fines or complications during future home inspections.

Conclusion

Meeting the basement ceiling insulation code is crucial for maintaining energy efficiency, improving comfort, and protecting your home from potential moisture issues. By understanding the specific insulation requirements for your climate zone and local codes, you can make informed decisions about the type of insulation to use and how to install it properly.

When properly insulated, a basement can become a more comfortable and usable space, whether for storage, living, or entertainment. Investing in the right insulation materials and techniques will pay off in the form of lower energy bills, better soundproofing, and a more comfortable home.

Ceilings Grid Hanger Wire: Features, Uses, and Installation Tips

When it comes to constructing or renovating a space, the ceilings grid hanger wire is an essential component often overlooked. Whether you’re working on a residential, commercial, or industrial project, understanding the role and functionality of ceiling grid hanger wires is crucial. This article will provide a comprehensive overview of ceiling grid hanger wire, including its features, benefits, installation methods, and tips for ensuring optimal performance.

Ceiling Grid Hanger Wire

What is Ceiling Grid Hanger Wire?

Ceiling grid hanger wire is a crucial element used to support and stabilize suspended ceiling systems. Typically made of galvanized steel or stainless steel, this wire is designed to carry the weight of ceiling panels, lights, HVAC systems, and other components that may be installed in a suspended ceiling grid system. The use of ceiling grid hanger wire helps ensure that these elements remain secure, providing a safe and aesthetically pleasing ceiling installation.

Key Features of Ceiling Grid Hanger Wire

  1. Material Composition:
    • Ceiling grid hanger wires are commonly made from high-strength materials, primarily galvanized or stainless steel. Galvanization offers corrosion resistance, making the wire suitable for various environments, including those with high humidity or exposure to moisture.
  2. Different Gauge Options:
    • These wires come in various gauges, which determine their strength and load-bearing capacity. Typically, a thicker gauge (lower number) can support more weight. It’s important to choose the appropriate gauge based on the specific requirements of your project.
  3. Flexible and Adjustable:
    • Ceiling grid hanger wire is designed to be flexible, allowing for easy adjustment during installation. This flexibility enables installers to make precise adjustments to the height and level of the suspended ceiling system.
  4. Easy Installation:
    • Installing ceiling grid hanger wires is generally straightforward, often requiring minimal tools and equipment. They can be cut to length and secured to the building structure using specialized fasteners, making them a convenient choice for contractors and DIY enthusiasts alike.
  5. Compatibility with Various Systems:
    • Ceiling grid hanger wires are compatible with different ceiling grid systems, including T-bar grids, drywall ceilings, and acoustic ceiling tiles. This versatility makes them a go-to solution for various applications.

Read too: Discovering the Charm of Nautical Outdoor Ceiling Fans for Your Coastal Retreat: Sail into Style

Benefits of Using Ceiling Grid Hanger Wire

1. Enhanced Stability and Safety

One of the primary benefits of using ceiling grid hanger wire is the enhanced stability it provides to suspended ceiling systems. By securing the ceiling panels and other elements, the wire helps prevent sagging, shifting, or collapse, ensuring safety in the workspace.

2. Cost-Effective Solution

Compared to other ceiling support systems, using ceiling grid hanger wire can be a cost-effective solution. The materials are generally inexpensive, and the ease of installation can save both time and labor costs during construction or renovation.

3. Versatile Applications

Ceiling grid hanger wire can be used in a wide variety of settings, from commercial offices to industrial warehouses. This versatility allows contractors to utilize the same product across different projects, simplifying inventory and reducing costs.

4. Aesthetic Appeal

A well-installed suspended ceiling can enhance the aesthetic appeal of a space. Ceiling grid hanger wire contributes to a clean, professional look, helping to create a polished finish in any environment.

5. Fire Safety Compliance

Many ceiling grid systems are designed to meet fire safety codes. Using quality ceiling grid hanger wire helps ensure that the entire ceiling assembly complies with relevant regulations, providing peace of mind for building owners and occupants.

Installation Process for Ceiling Grid Hanger Wire

Tools and Materials Needed

Before starting the installation, gather the necessary tools and materials:

  • Ceiling grid hanger wire (appropriate gauge)
  • Wire cutters
  • Pliers
  • Measuring tape
  • Level
  • Ceiling anchors or fasteners
  • Drill (if needed for anchors)

Step-by-Step Installation Guide

Step 1: Plan the Layout

Begin by planning the layout of your ceiling grid system. Measure the dimensions of the room and mark the locations for the main runners, cross tees, and any other components you’ll be installing.

Step 2: Determine Hanger Wire Spacing

Ceiling grid hanger wires should typically be spaced no more than 4 feet apart, but local building codes may vary. Check your local codes for specific requirements and adjust your plan accordingly.

Step 3: Attach Hanger Wires to the Structure

Using a drill or hammer, attach the ceiling grid hanger wires to the overhead structure. This may involve securing them to ceiling joists, beams, or existing structural elements. Ensure that the hangers are securely fastened and can support the weight of the ceiling grid.

Step 4: Cut and Install the Hanger Wire

Using wire cutters, cut the hanger wire to the desired length. Make sure to leave some extra length for adjustments. Attach one end of the wire to the ceiling grid, ensuring it’s secure.

Step 5: Adjust Height and Level

Once the wires are attached, adjust the height of the ceiling grid by pulling on the hanger wires as needed. Use a level to ensure that the grid is perfectly horizontal.

Step 6: Secure the Grid System

After leveling the grid, secure all components, including main runners and cross tees, to the hanger wires. Ensure all connections are tight and stable.

Safety Precautions

  • Always wear safety goggles when cutting or working with wire to protect your eyes from flying debris.
  • Ensure the workspace is clear of obstacles to prevent tripping or falling.
  • Double-check all connections and fasteners to ensure everything is secure before adding any load to the ceiling grid system.

Maintenance Tips for Ceiling Grid Hanger Wire

Proper maintenance of your ceiling grid hanger wire system will ensure its longevity and performance. Here are some essential maintenance tips:

1. Regular Inspections

Periodically inspect the ceiling grid and hanger wire for any signs of wear, corrosion, or damage. Check for loose connections and re-secure any components as necessary.

2. Keep it Clean

Dust and debris can accumulate on ceiling grids, affecting their appearance and functionality. Regularly clean the ceiling and surrounding areas to maintain a tidy space.

3. Monitor Load Capacity

Be mindful of the load capacity of your ceiling grid system. Avoid placing heavy objects on or above the ceiling grid that exceed the weight limit, as this can strain the hanger wire and other components.

4. Reinforce as Needed

If you notice sagging or instability in the ceiling grid, consider adding additional hanger wires or reinforcing existing ones to provide extra support.

Common Applications for Ceiling Grid Hanger Wire

1. Commercial Spaces

In offices, retail stores, and other commercial spaces, ceiling grid hanger wire is commonly used to create suspended ceilings. This allows for easy access to plumbing, electrical wiring, and HVAC systems while maintaining a professional appearance.

2. Educational Institutions

Schools and universities often utilize ceiling grid systems in classrooms, hallways, and auditoriums. The use of hanger wire helps ensure that ceiling tiles are securely in place, contributing to a safe and comfortable learning environment.

3. Industrial Facilities

In industrial settings, suspended ceilings are frequently used to conceal mechanical systems and provide a clean look. Ceiling grid hanger wire is essential in these applications to support heavy lighting fixtures and HVAC equipment.

4. Residential Homes

Many homeowners opt for suspended ceilings in basements, living rooms, and other areas to improve aesthetics and functionality. Ceiling grid hanger wire plays a vital role in ensuring the stability and safety of these installations.

Conclusion

Understanding the importance of ceilings grid hanger wire is crucial for anyone involved in construction or renovation projects. From its ability to provide enhanced stability and safety to its cost-effectiveness and versatility, this seemingly simple component plays a significant role in creating functional and attractive ceiling systems. By following proper installation techniques and maintenance practices, you can ensure that your suspended ceiling remains secure and visually appealing for years to come. Whether you are a contractor, DIY enthusiast, or homeowner, investing in quality ceiling grid hanger wire is a decision that will pay off in the long run.

Insulating Pole Barn Ceiling: Enhance Comfort and Energy Efficiency

When it comes to constructing or renovating a pole barn, many homeowners and builders overlook the importance of ceiling insulation. However, insulating the pole barn ceiling is a crucial step that can significantly improve the comfort of the space and enhance energy efficiency. In this comprehensive guide, we will explore the benefits of insulating a pole barn ceiling, the various insulation materials available, installation techniques, and maintenance tips. Whether you’re using your pole barn for storage, workshops, or livestock, proper insulation will make a world of difference.

Insulating Pole Barn Ceiling

What is a Pole Barn?

Understanding the Basics

A pole barn is a type of structure typically characterized by a framework of wooden posts (or poles) set in concrete. This construction method is often used for agricultural purposes but has gained popularity for residential, commercial, and recreational uses due to its cost-effectiveness and ease of construction. Pole barns can be customized in size and shape, making them suitable for a variety of functions.

Why Insulate a Pole Barn Ceiling?

Benefits of Insulating Pole Barn Ceilings

  1. Energy Efficiency: Insulating your pole barn ceiling can significantly reduce heating and cooling costs. A well-insulated space prevents heat from escaping in the winter and keeps it cooler during the summer, leading to lower energy bills.
  2. Comfort: Insulation helps maintain a consistent temperature within the pole barn, creating a more comfortable environment for both people and animals. This is particularly important in barns used for livestock or as workshops.
  3. Noise Reduction: Insulation materials can also help reduce noise transmission. This is beneficial if your pole barn is located near residential areas or if you’re using loud machinery inside.
  4. Condensation Control: Insulation helps prevent condensation build-up in the ceiling, which can lead to mold and mildew. Proper insulation maintains the temperature of the ceiling surface, minimizing the chances of moisture problems.
  5. Increased Property Value: An insulated pole barn is often more attractive to potential buyers, enhancing the overall value of your property.

Read too: Kitchen Lighting For A Vaulted Ceiling: Illuminating Your Space with Style and Functionality

Types of Insulation for Pole Barn Ceilings

Choosing the Right Insulation for Your Pole Barn Ceiling

When it comes to insulating your pole barn ceiling, several insulation materials are available, each with its unique properties and benefits. Below, we discuss some of the most common types of insulation:

1. Fiberglass Insulation

Fiberglass insulation is one of the most widely used types for ceilings and walls. It consists of fine glass fibers that trap air, providing excellent thermal insulation.

  • Pros:
    • Affordable and easy to install.
    • Non-combustible and resistant to moisture.
    • Available in batts or loose-fill options.
  • Cons:
    • Can irritate skin and lungs during installation.
    • Requires a vapor barrier to prevent moisture accumulation.

2. Spray Foam Insulation

Spray foam insulation is a versatile and highly effective insulation material. It is sprayed into place and expands to fill gaps, providing excellent air sealing and insulation.

  • Pros:
    • Superior thermal performance and air sealing capabilities.
    • Reduces noise transmission.
    • Acts as a vapor barrier, preventing moisture buildup.
  • Cons:
    • More expensive than fiberglass.
    • Requires professional installation for optimal results.

3. Cellulose Insulation

Cellulose insulation is made from recycled paper products treated with fire retardants. It is typically blown into place, filling gaps and voids effectively.

  • Pros:
    • Eco-friendly and made from recycled materials.
    • Good soundproofing qualities.
    • Effective at reducing air leaks.
  • Cons:
    • Can settle over time, reducing its effectiveness.
    • Requires proper installation to avoid moisture issues.

4. Mineral Wool (Rock Wool) Insulation

Mineral wool insulation is made from natural or recycled materials, providing excellent thermal and acoustic insulation.

  • Pros:
    • Fire-resistant and water-repellent.
    • Excellent soundproofing qualities.
    • Does not promote mold growth.
  • Cons:
    • More expensive than fiberglass.
    • Heavier and may require additional support during installation.

5. Reflective or Radiant Barrier Insulation

Reflective insulation consists of a reflective material (like aluminum foil) that reflects radiant heat away from the ceiling.

  • Pros:
    • Reduces heat gain in hot climates.
    • Lightweight and easy to install.
  • Cons:
    • Less effective in cold climates.
    • Typically used in conjunction with other insulation types for optimal performance.

Installation of Insulating Pole Barn Ceilings

A Step-by-Step Guide to Installing Insulation

Proper installation is key to maximizing the benefits of your chosen insulation material. Here’s a step-by-step guide to insulating your pole barn ceiling effectively:

1. Preparation

Before you begin, gather all necessary materials and tools, including:

  • Insulation material (fiberglass, spray foam, cellulose, etc.)
  • Vapor barrier (if required)
  • Measuring tape
  • Utility knife
  • Stapler or adhesive (for batts)
  • Protective gear (gloves, mask, goggles)

2. Measure and Cut

  • Measure the area of the ceiling to determine how much insulation you will need.
  • If using batts or rolls, cut them to fit the spaces between the ceiling joists.

3. Install Vapor Barrier (If Needed)

  • If your insulation requires a vapor barrier, install it on the warm side of the insulation (the side facing the living space). This barrier helps prevent moisture from penetrating the insulation.

4. Install Insulation

  • For Batts: Place the batts snugly between the ceiling joists. Avoid compressing the insulation, as this can reduce its effectiveness.
  • For Spray Foam: Hire a professional to apply the spray foam insulation. Ensure that it expands to fill all gaps.
  • For Cellulose: Use a blower to distribute cellulose evenly across the ceiling area.

5. Seal Any Gaps

  • After the insulation is installed, check for gaps and cracks. Use caulk or spray foam to seal any openings that could allow air leaks.

6. Finish the Ceiling

  • If desired, cover the insulation with a ceiling material such as plywood, drywall, or metal sheeting for a finished look. This also adds an extra layer of protection.

Maintenance Tips for Insulated Pole Barn Ceilings

Keeping Your Insulation in Top Condition

Maintaining your insulated pole barn ceiling is crucial for ensuring its longevity and effectiveness. Here are some tips to help you keep it in optimal condition:

  1. Regular Inspections: Periodically check your insulation for signs of moisture damage, mold, or pest infestations. Early detection can prevent larger issues down the line.
  2. Clean Gutters and Downspouts: Keep gutters and downspouts clear of debris to prevent water from pooling around your pole barn, which can lead to moisture problems in the ceiling.
  3. Maintain Ventilation: Proper ventilation is crucial for preventing moisture buildup. Ensure that your pole barn has adequate ventilation to allow for air circulation.
  4. Address Issues Promptly: If you notice leaks, condensation, or any signs of damage, address them immediately to prevent further damage to your insulation and structure.

Conclusion

In summary, insulating your pole barn ceiling is a vital step that enhances comfort, energy efficiency, and overall functionality. With various insulation options available, you can choose the material that best fits your needs and budget. Whether you opt for traditional fiberglass, advanced spray foam, or eco-friendly cellulose, proper installation and maintenance will ensure that your insulation performs effectively for years to come. Investing in an insulating pole barn ceiling is not just about comfort; it’s also a smart financial decision that can save you money on energy bills and increase the overall value of your property.

Armstrong Ultima Ceiling Tile: A Guide to Superior Acoustic Solutions

When it comes to creating a polished and professional interior, ceiling design plays a pivotal role. One of the most reliable and aesthetically pleasing options available on the market is the Armstrong Ultima Ceiling Tile. Known for its excellent acoustical performance, durability, and sleek appearance, Armstrong Ultima Ceiling Tiles are widely used in commercial spaces such as offices, hospitals, schools, and retail environments.

Armstrong Ultima Ceiling Tile

This article will explore the benefits, features, and installation options of Armstrong Ultima Ceiling Tiles, along with helpful tips for selecting the right type for your space.

What is Armstrong Ultima Ceiling Tile?

The Armstrong Ultima Ceiling Tile is a high-performance ceiling solution, designed for both aesthetics and functionality. Manufactured by Armstrong World Industries, a leader in ceiling and wall solutions, Ultima ceiling tiles are specifically crafted to offer superior sound absorption, noise reduction, and durability. These tiles are made from mineral fiber, which gives them exceptional acoustic properties, while their textured, high-white finish enhances the overall look of any room.

Available in various sizes and styles, Ultima ceiling tiles are a top choice for environments that require noise control and visual appeal, such as offices, conference rooms, healthcare facilities, and educational settings.

Benefits of Armstrong Ultima Ceiling Tile

Choosing Armstrong Ultima Ceiling Tiles for your project comes with a wide range of benefits that make them stand out from other ceiling options.

Read too: Kitchen Lighting For A Vaulted Ceiling: Illuminating Your Space with Style and Functionality

1. Superior Acoustic Performance

One of the key features of Armstrong Ultima Ceiling Tiles is their exceptional acoustic control. They are designed to reduce noise levels within a room by absorbing sound, making them an ideal choice for spaces where speech clarity is important. Whether you’re outfitting an office where clear communication is essential, or a classroom where concentration is key, the sound absorption capabilities of Ultima tiles help create a more productive and comfortable environment.

The tiles offer both high Noise Reduction Coefficient (NRC) and Ceiling Attenuation Class (CAC) ratings, which means they effectively absorb sound within the room while also preventing noise from traveling between spaces.

2. Clean and Modern Aesthetic

In addition to their acoustic benefits, Armstrong Ultima Ceiling Tiles provide a clean and sophisticated appearance. Their bright, white finish helps reflect light and make spaces feel more open and airy. The fine-textured surface gives them a modern, sleek look, perfect for a wide range of design schemes, from minimalist to contemporary interiors.

These tiles are also available in different edge profiles, including square edge and beveled edge, allowing you to customize the appearance to suit your design needs.

3. Durability and Low Maintenance

Ultima tiles are highly durable and resistant to scratches, stains, and impacts, making them a long-lasting choice for high-traffic areas. Their high level of durability also makes them an ideal choice for environments that require regular cleaning or may face more wear and tear, such as healthcare settings or commercial buildings.

These tiles are easy to maintain, requiring minimal cleaning to keep them looking fresh and new. They are made with a washable surface that resists mold, mildew, and bacteria, contributing to a healthier and cleaner indoor environment.

4. Sustainability

Armstrong demonstrates its commitment to sustainability with the Ultima Ceiling Tile. This product contains a high percentage of recycled materials and is fully recyclable at the end of its lifecycle. By choosing Ultima tiles, you’re making an environmentally conscious choice that supports Armstrong’s goal of reducing waste and promoting sustainable building practices.

The tiles also contribute to LEED (Leadership in Energy and Environmental Design) certification, a popular rating system for green buildings. Using these tiles can help your project achieve LEED points for materials and resources.

Key Features of Armstrong Ultima Ceiling Tile

The Armstrong Ultima Ceiling Tile line comes with a variety of features designed to enhance the performance and appeal of your ceiling installation. Here are some key features to consider when selecting Ultima tiles:

1. High Light Reflectance

With a light reflectance (LR) value of 0.90, Ultima tiles help reflect more natural and artificial light, reducing the need for excessive lighting fixtures and cutting down on energy consumption. This makes them ideal for spaces where energy efficiency is a priority, such as offices and schools. The tiles’ ability to enhance lighting can create a brighter and more welcoming atmosphere, boosting productivity and improving the overall ambiance of the space.

2. BioBlock Technology

Armstrong Ultima Ceiling Tiles are equipped with BioBlock technology, a feature that prevents the growth of mold, mildew, and bacteria on the tile surface. This makes them an excellent choice for healthcare environments and any setting where hygiene is a top concern. BioBlock ensures that your ceiling tiles will remain cleaner and more sanitary over time, contributing to a healthier indoor environment.

3. Total Acoustics Performance

As part of Armstrong’s Total Acoustics collection, Ultima tiles combine sound absorption and sound blocking capabilities. With an NRC rating of 0.70 to 0.90, these tiles absorb unwanted sound within a room, while the CAC rating of 35 to 40 helps prevent sound from traveling between rooms. This makes them an ideal solution for open offices, private meeting rooms, and classrooms where controlling sound is essential.

4. Variety of Sizes and Shapes

Ultima tiles are available in multiple sizes and shapes, including standard 24″x24″ and 24″x48″ tiles. These options allow you to choose the size that best fits your ceiling grid system and design preferences. Some models even come in custom sizes or non-standard shapes, giving you more creative flexibility when designing your space.

5. Fire Performance

Ultima ceiling tiles are Class A fire-rated, meaning they meet the highest standards for fire safety. This makes them a safe option for public spaces and commercial environments where fire resistance is a critical concern.

How to Install Armstrong Ultima Ceiling Tile

Professional contractors or experienced DIY enthusiasts can easily install Armstrong Ultima Ceiling Tiles, depending on the project’s size and complexity. Here’s a basic guide on how to approach the installation:

1. Prepare the Space

Before installing the ceiling tiles, it’s important to ensure the space is properly prepared. This includes removing any old ceiling materials, checking for structural issues, and making sure the ceiling grid is securely in place. If you’re installing in a commercial space, be sure to check local building codes and regulations for specific requirements.

2. Install the Grid System

If you don’t already have a ceiling grid system in place, you’ll need to install one before adding the tiles. Armstrong offers a variety of grid systems, including Prelude and Suprafine, which are compatible with Ultima ceiling tiles. Measure and install the grid carefully according to your room’s layout, paying particular attention to corners and edges.

3. Install the Tiles

Once the grid is installed, you can begin placing the tiles. Start at one corner of the room and work your way across, making sure each tile fits snugly into the grid. Armstrong Ultima tiles are lightweight, making them easy to handle and position during installation. If you need to cut tiles to fit around fixtures or in tight spaces, use a sharp utility knife to create clean, precise cuts.

4. Finishing Touches

After all the tiles are in place, take a moment to ensure they are properly aligned and seated in the grid. If you’ve installed tiles with integrated lighting or vents, make sure these elements are securely in place and functioning properly. Finally, clean up any debris and wipe down the surface of the tiles to remove dust or fingerprints.

Conclusion: Why Armstrong Ultima Ceiling Tile is a Top Choice

The Armstrong Ultima Ceiling Tile is a versatile, high-performance solution for any space that requires both aesthetic appeal and acoustic control. With their superior sound absorption, clean modern design, and sustainable features, Ultima tiles are an excellent choice for commercial spaces like offices, hospitals, and schools.

Whether you’re installing them in a conference room to improve speech clarity, or in a healthcare setting to maintain a clean, sterile environment, Ultima ceiling tiles provide long-lasting durability and functionality.

Ceiling Fan Height from Floor: A Comprehensive Guide

Ceiling fans are essential for maintaining comfort in your home. They provide a refreshing breeze during hot months and can even help distribute warm air in winter. However, to maximize their effectiveness and safety, it’s crucial to consider the optimal ceiling fan height from floor. This article will delve into the importance of proper ceiling fan height, guidelines for installation, and tips to ensure you achieve the best results.

Ceiling Fan Height From Floor

Why Ceiling Fan Height Matters

The height at which you install your ceiling fan affects its performance, aesthetic appeal, and safety. An incorrectly positioned fan can lead to inadequate airflow, create noise, or pose a safety hazard. Understanding the correct ceiling fan height from floor can help you enjoy the benefits of your fan while minimizing potential issues.

Benefits of Proper Installation Height

  1. Optimal Airflow: Fans are designed to circulate air effectively. If a fan is installed too high or too low, its airflow can be compromised, leading to discomfort.
  2. Safety: A fan installed too low can be a hazard for taller individuals or in areas with heavy foot traffic. Ensuring a proper height helps prevent accidents.
  3. Aesthetics: A well-placed fan complements the room’s design. Installing it at the right height enhances visual appeal.
  4. Energy Efficiency: Correct placement allows the fan to work efficiently, which can reduce energy costs.

Read too: Bathroom Flooded Through the Ceiling: A Comprehensive Guide

Recommended Ceiling Fan Heights

Standard Installation Height

The general recommendation for ceiling fan height from floor is between 7 to 9 feet. This range ensures optimal airflow while minimizing safety risks. Here are some specific guidelines based on ceiling height:

  • Ceilings 8 Feet High: Install the fan 7 to 8 feet above the floor.
  • Ceilings 9 Feet High: Place the fan 8 to 9 feet above the floor.
  • Ceilings Over 10 Feet: Consider using a downrod to adjust the fan’s height to keep it within the recommended range.

Using Downrods

For ceilings taller than 10 feet, downrods are essential. They allow you to lower the fan to the optimal height. When selecting a downrod, consider the following:

  • Downrod Length: Choose a length that maintains the fan’s position within the 7 to 9 feet range from the floor.
  • Style: Ensure that the downrod complements the fan’s design for a cohesive look.

Factors to Consider When Determining Height

Ceiling Height

The most significant factor influencing ceiling fan height from floor is the ceiling’s height. Measure the distance from the floor to the ceiling to determine how high to install the fan.

Room Size and Shape

Larger rooms may benefit from larger fans or multiple fans to ensure adequate airflow. For expansive spaces, ensure the fans are installed at the recommended height for effective air circulation.

Blade Size

Larger fans with wider blade spans may require different height considerations. Generally, larger fans can be installed slightly higher than smaller ones.

Type of Room

Different rooms have varying needs:

  • Living Rooms: Typically, the fan should be centered and installed 8 to 9 feet above the floor.
  • Bedrooms: Aim for a height of 7 to 8 feet to create a comfortable sleeping environment.
  • Kitchens: Depending on ceiling height, install the fan where it won’t obstruct movement, ideally 7 to 8 feet above the floor.

Measuring the Height Correctly

To ensure your ceiling fan is at the right height, follow these steps:

  1. Measure the Ceiling Height: Use a tape measure to determine the distance from the floor to the ceiling.
  2. Determine Fan Height: Subtract 7 to 9 feet (depending on your ceiling height) from the total ceiling height.
  3. Install the Fan: Use the measurements to guide your installation, making any necessary adjustments with downrods if required.

Safety Considerations

Avoiding Hazards

When determining ceiling fan height from floor, it’s essential to avoid potential hazards:

  • Clearance: Ensure the fan has enough clearance from furniture and other fixtures. It should not be obstructed by tall furniture or curtains.
  • Movement Space: In high-traffic areas, ensure the fan is positioned high enough to avoid accidental contact.

Electrical Safety

Always ensure that the installation is carried out according to safety guidelines. If you are unsure about the electrical work, hire a professional electrician.

Enhancing Performance with Proper Height

Once your fan is installed at the correct height, there are additional tips to enhance performance:

Adjust Fan Direction

Ceiling fans should rotate counterclockwise during summer months to create a cooling breeze. In winter, switch to clockwise to circulate warm air trapped near the ceiling.

Regular Maintenance

To keep your fan functioning optimally:

  • Clean the Blades: Dust and debris can accumulate, hindering performance. Clean the blades regularly to ensure efficient airflow.
  • Check for Wobbling: If the fan wobbles, it may need balancing. Most ceiling fans come with balancing kits for this purpose.

Conclusion

Understanding the correct ceiling fan height from floor is crucial for maximizing comfort, efficiency, and safety in your home. By following the recommended height guidelines and considering factors like room size and ceiling height, you can ensure your ceiling fan operates effectively. Proper installation and maintenance will enhance the lifespan of your ceiling fan while providing you with the comfort you desire.


Ceiling Mounted Mini Split: A Comprehensive Guide to Efficient Cooling and Heating

The modern world of home climate control offers a wide array of options, but one system that has gained significant popularity in recent years is the ceiling mounted mini split. Known for their energy efficiency, versatility, and ease of installation, ceiling-mounted mini-splits have become a go-to solution for homeowners looking for efficient cooling and heating without the need for extensive ductwork.

Ceiling Mounted Mini Split

In this comprehensive guide, we’ll explore everything you need to know about ceiling mounted mini split systems. We’ll dive into how they work, their benefits, how to choose the right model, and installation considerations. Whether you’re looking to upgrade your current HVAC system or are considering a new installation, this guide will provide valuable insights to help you make an informed decision.

What Is a Ceiling Mounted Mini Split System?

A ceiling mounted mini split is a type of ductless air conditioning and heating system that consists of two main components: an indoor air-handling unit and an outdoor compressor. The indoor unit is typically installed on the ceiling and connected to the outdoor unit via a conduit, which houses the refrigerant lines, power cables, and drainage tubes.

Unlike traditional HVAC systems that require extensive ductwork to distribute air, mini-splits deliver air directly into the room, making them ideal for homes, apartments, or commercial spaces where installing ducts may not be feasible or desirable.

Read too: Discovering the Charm of Nautical Outdoor Ceiling Fans for Your Coastal Retreat: Sail into Style

The term “mini-split” refers to the fact that the system splits the cooling or heating process between the indoor and outdoor units, while “ceiling mounted” describes the location of the indoor unit. Ceiling-mounted mini splits are often preferred in rooms with limited wall space or for homeowners who want a more discreet appearance.

How Does a Ceiling Mounted Mini Split Work?

A ceiling mounted mini split operates similarly to a standard split-system air conditioner, but without the need for ductwork. The outdoor unit houses the compressor, which cools or heats the refrigerant. This refrigerant is then circulated to the indoor unit, where it either absorbs heat from the room (in cooling mode) or releases heat into the room (in heating mode). The cooled or heated air is distributed directly into the room, providing efficient climate control.

One of the key features of a mini split system is its ability to operate in a zoned capacity. This means you can install multiple indoor units, each controlling the temperature of a specific room or zone. This zoned system offers superior efficiency compared to central HVAC systems, as you only cool or heat the rooms that are in use, avoiding wasted energy.

Benefits of Ceiling Mounted Mini Split Systems

Installing a ceiling mounted mini split system comes with a variety of advantages, making it an appealing choice for both residential and commercial applications. Here are some of the top benefits:

1. Energy Efficiency

One of the most significant advantages of a ceiling mounted mini split system is its energy efficiency. Since these systems are ductless, they avoid the energy losses associated with ductwork in traditional central HVAC systems, which can account for up to 30% of energy consumption. By delivering conditioned air directly into the room, mini-splits minimize waste and provide precise control over your home’s climate.

Additionally, many mini-split systems come with inverter technology, which allows the compressor to adjust its speed based on the cooling or heating demand. This leads to greater energy savings compared to systems that constantly turn on and off.

2. Zoned Comfort Control

With a ceiling mounted mini split, you can create individual zones for specific rooms or areas in your home. Each indoor unit has its own thermostat, allowing you to customize the temperature in each room according to your preferences. This feature is particularly beneficial in larger homes or buildings with varying comfort needs across different spaces.

For instance, you may want to keep your living room cool during the day but raise the temperature in unused bedrooms to save energy. This zoning flexibility also prevents arguments over the thermostat setting, as each family member can adjust the temperature in their own space.

3. Compact Design

Ceiling-mounted mini-splits have a sleek, unobtrusive design that blends seamlessly with most interior styles. Since the indoor unit is mounted on the ceiling, it doesn’t take up valuable wall or floor space, making it ideal for smaller rooms or areas where wall-mounted units may not be practical.

The compact design also contributes to the system’s quiet operation. Ceiling-mounted units often operate more quietly than traditional HVAC systems or window air conditioners, creating a more comfortable environment with minimal noise disturbance.

4. Easy Installation

Installing a ceiling mounted mini split is relatively straightforward, especially compared to central air systems that require extensive ductwork. The indoor unit can be easily mounted on the ceiling, while the outdoor unit is placed outside the building. The two units are connected by a small conduit that requires only a small hole in the wall for installation.

For existing homes without ductwork, this can be a major advantage, as it reduces installation time and avoids the need for costly renovations. Additionally, mini-split systems are often more affordable to install in homes where retrofitting ductwork would be prohibitively expensive.

5. Heating and Cooling in One System

Another key benefit of a ceiling mounted mini split is its ability to both heat and cool. Many mini-split systems are heat pumps, meaning they can reverse the cooling process to provide warmth in the winter months. This makes them a versatile option for year-round climate control.

Heat pumps are also highly efficient, as they transfer heat rather than generate it, leading to lower energy costs during colder months compared to electric or gas furnaces.

Choosing the Right Ceiling Mounted Mini Split System

When selecting a ceiling mounted mini split system, several factors come into play to ensure you choose the best unit for your space. Here’s what to consider:

1. Room Size

The size of the room or area you intend to cool or heat will determine the capacity of the mini-split system you need. Mini-splits are measured in BTUs (British Thermal Units), which indicate the cooling or heating power of the unit. Choosing the right BTU rating is crucial for efficient operation. Too small a unit will struggle to maintain the desired temperature, while an oversized unit may short-cycle, leading to inefficient operation and premature wear.

Here’s a general guide for BTU requirements based on room size:

  • 150 to 350 square feet: 9,000 BTU
  • 350 to 500 square feet: 12,000 BTU
  • 500 to 800 square feet: 18,000 BTU
  • 800 to 1,200 square feet: 24,000 BTU

It’s always a good idea to consult with a professional HVAC technician to determine the right size for your space.

2. Number of Zones

If you’re planning to cool or heat multiple rooms, you’ll need a multi-zone mini-split system. Multi-zone systems allow you to connect multiple indoor units to a single outdoor unit, each providing individual climate control. Consider the layout of your home and which areas need the most attention when determining the number of zones required.

3. Energy Efficiency Rating

To maximize energy savings, look for a ceiling mounted mini split with a high SEER (Seasonal Energy Efficiency Ratio) and HSPF (Heating Seasonal Performance Factor) rating. The higher these ratings, the more efficient the unit will be, leading to lower energy bills. Mini-splits with inverter technology and ENERGY STAR certification are generally the most energy-efficient options.

4. Features and Functionality

Modern mini-split systems come with a range of features that enhance comfort and convenience. Some models include:

  • Wi-Fi Connectivity: Allowing you to control your system remotely through a smartphone app.
  • Smart Thermostats: To provide even more precise temperature control.
  • Air Purification: Some mini-split systems include advanced filters that remove dust, allergens, and other airborne particles, improving indoor air quality.

Make sure to consider the features that will best suit your needs and lifestyle.

Installation Considerations for Ceiling Mounted Mini Splits

While installing a ceiling mounted mini split is less invasive than traditional HVAC systems, there are still important factors to keep in mind.

1. Proper Placement

The location of the indoor unit is critical for optimal performance. The ceiling-mounted unit should be placed where it can distribute air evenly throughout the room without obstruction. Avoid placing the unit too close to doors, windows, or high-traffic areas, as this may affect airflow and efficiency.

2. Outdoor Unit Location

The outdoor unit should be installed in a well-ventilated area, away from direct sunlight or other heat sources. It should also be placed on a stable surface to prevent vibrations and noise from affecting the indoor unit.

3. Professional Installation

While mini-splits are relatively easy to install, it’s still recommended to hire a licensed HVAC technician to handle the installation. They will ensure that the refrigerant lines, electrical connections, and drainage systems are correctly set up to prevent leaks, malfunctions, or damage to the unit.

Conclusion

A ceiling mounted mini split system is an excellent solution for homeowners and businesses looking for an energy-efficient, flexible, and stylish option for cooling and heating. With its ease of installation, zoned climate control, and year-round functionality, a ceiling mounted mini split can provide enhanced comfort while reducing energy costs.

Whether you’re retrofitting an older home or building new, this system offers a modern, ductless alternative to traditional HVAC setups, giving you both control and efficiency without the hassle of bulky ductwork.

Chandeliers for High Ceilings: How to Choose the Perfect Statement Piece

When it comes to enhancing the beauty and sophistication of a room with high ceilings, chandeliers for high ceilings offer an exceptional solution. These statement lighting pieces not only provide illumination but also become the focal point of a space, transforming its ambiance from ordinary to extraordinary. High ceilings are a luxury many homes are designed with, but they also pose unique design challenges. Choosing the right chandelier ensures your space remains balanced, functional, and stylish.

Chandeliers For High Ceilings

In this guide, we’ll explore how to choose the best chandeliers for high ceilings, the different types available, factors to consider before making a purchase, and how chandeliers can enhance the aesthetic of your room.

Why Choose Chandeliers for High Ceilings?

Chandeliers have long been associated with luxury and elegance, and for good reason. Chandeliers for high ceilings are the perfect match as they fill vertical space that might otherwise feel empty, creating a well-proportioned and aesthetically pleasing environment. Here are some key reasons to choose a chandelier for your high-ceilinged room:

1. Maximize Vertical Space

High ceilings offer a dramatic space that can feel either expansive or cold without the proper design elements. Chandeliers bridge that gap, drawing the eye upward and creating balance within the room’s height.

Read too: Discovering the Charm of Nautical Outdoor Ceiling Fans for Your Coastal Retreat: Sail into Style

2. Add a Statement Piece

A chandelier, especially in rooms with high ceilings, serves as a centerpiece that enhances the overall aesthetic. Whether it’s a modern, minimalist design or an ornate crystal chandelier, these lighting fixtures become conversation starters and enhance the room’s style.

3. Improved Illumination

Rooms with high ceilings often require more substantial lighting to ensure proper illumination. Chandeliers for high ceilings offer multiple bulbs and layered lighting to brighten the entire room evenly, eliminating dark corners or dim spaces.

Types of Chandeliers for High Ceilings

When selecting a chandelier for a room with high ceilings, it’s important to choose a style and design that complements the architecture of your space. Here are some of the most popular types of chandeliers for high ceilings:

1. Traditional Crystal Chandeliers

Crystal chandeliers are the epitome of classic elegance. These chandeliers feature multiple tiers of glass or crystal drops that reflect light beautifully across the room. They are perfect for formal dining rooms, foyers, or grand living rooms with high ceilings. The sparkle and shine of a crystal chandelier elevate any space into a luxurious setting.

2. Modern Minimalist Chandeliers

For those seeking a more contemporary feel, modern chandeliers offer sleek lines, geometric shapes, and minimalist designs. These chandeliers are often made with metal, glass, or unique materials like wood and feature fewer embellishments. The clean, simple designs are ideal for industrial lofts, modern living rooms, or kitchens with high ceilings.

3. Tiered Chandeliers

Tiered chandeliers are specifically designed for spaces with significant height. With multiple layers of lights, these chandeliers create a cascading effect that fills the vertical space beautifully. They work particularly well in grand entryways, hotel lobbies, or living rooms where you want to emphasize the room’s impressive height.

4. Drum Chandeliers

A drum chandelier features a cylindrical shade, typically made of fabric or metal, that surrounds the light source. While these chandeliers can be simple, they offer an excellent way to introduce a soft, diffused light in rooms with high ceilings. They are often used in bedrooms, dining rooms, or even bathrooms where softer lighting is needed.

5. Candle-Style Chandeliers

These chandeliers mimic the traditional look of candle holders, offering a vintage or rustic aesthetic. They are usually made of wrought iron or wood and have a timeless appeal. Candle-style chandeliers work particularly well in rustic, farmhouse, or Mediterranean-style homes.

How to Choose the Perfect Chandelier for High Ceilings

When choosing chandeliers for high ceilings, several factors need to be considered to ensure that the fixture is not only beautiful but also functional. Here’s what to keep in mind:

1. Consider the Size of the Room

The size of the chandelier should be proportionate to the size of the room. In general, larger rooms can accommodate bigger, more dramatic chandeliers. Measure the width and length of the room in feet, and then add those numbers together. The result gives you the ideal diameter (in inches) for your chandelier. For example, if your room is 20 feet long by 15 feet wide, a chandelier with a diameter of around 35 inches would be appropriate.

2. Choose the Right Height

Chandeliers need to hang at the right height to look appropriate in rooms with high ceilings. As a general rule, the chandelier should hang at least 7 feet from the floor to avoid feeling too low. For grand entryways or stairwells, chandeliers can hang even higher to create a dramatic effect.

If you have a dining room with high ceilings, the chandelier should hang approximately 30 to 36 inches above the table surface to ensure it illuminates the dining area properly without overwhelming the space.

3. Lighting Needs and Wattage

High ceilings often mean the room requires more illumination than standard spaces. Pay attention to the number of bulbs the chandelier supports and the maximum wattage for each bulb. Opt for a chandelier that provides ample light coverage for the room’s size. You can also consider installing dimmers to control the light intensity based on the room’s mood or time of day.

4. Design and Style

The style of the chandelier should complement the overall décor of the room. A modern chandelier with clean lines works best in contemporary or minimalist settings, while an ornate crystal chandelier might be perfect for a more traditional or luxurious space. Choose a fixture that enhances your home’s design rather than competing with it.

5. Material and Finish

The material and finish of the chandelier also play an important role in its overall appearance. Metal, glass, crystal, and wood are popular materials, each lending a distinct look to the chandelier. Additionally, consider the color and finish, whether it’s matte black, polished chrome, or antique bronze, to ensure it fits seamlessly with the room’s color palette and furnishings.

How to Install Chandeliers for High Ceilings Safely

Installing chandeliers in rooms with high ceilings can be a challenging task, often requiring professional help. Here’s what you need to know:

1. Hiring a Professional

In many cases, installing a chandelier for a high ceiling involves working on a tall ladder or scaffolding. For safety reasons and to ensure the installation is done correctly, hiring a licensed electrician is often the best option. They will have the experience and tools needed to install the chandelier safely and securely.

2. Check Ceiling Support

Chandeliers are often heavier than standard light fixtures, particularly those made of metal or crystal. Make sure your ceiling can support the weight of the chandelier by having it properly inspected. If necessary, reinforce the ceiling with additional support beams or bracing.

3. Wiring and Electrical Considerations

High ceilings mean that the chandelier will likely need extended wiring to reach the power source. A professional electrician can ensure that all electrical work is up to code and safely installed. They can also add a dimmer switch to give you greater control over the chandelier’s brightness.

The Impact of Chandeliers for High Ceilings on Your Home’s Value

Adding chandeliers for high ceilings can increase the value of your home by enhancing its aesthetic appeal and functionality. Potential buyers are often drawn to homes with thoughtfully designed lighting, especially in grand spaces like entryways or dining rooms. Chandeliers, especially those that are carefully chosen and professionally installed, can leave a lasting impression and elevate the overall elegance of a home.

Energy Efficiency and Modern Lighting

With the advent of LED bulbs and other energy-efficient lighting options, chandeliers are no longer the energy guzzlers they once were. Today’s modern chandeliers offer excellent energy efficiency without sacrificing style. This is another attractive feature for homeowners looking to reduce energy costs while maintaining a luxurious look.

Final Thoughts on Chandeliers for High Ceilings

Chandeliers for high ceilings are a fantastic way to make a bold statement while also ensuring your space is well-lit and balanced. Whether you’re looking for a modern piece to complement your contemporary home or an ornate crystal chandelier for a touch of glamour, the options are endless. By considering factors such as size, height, design, and material, you’ll be able to find the perfect chandelier to enhance your high-ceilinged room.

Radiant Ceiling Panels Hydronic: Benefits, Installation, and Efficiency

When it comes to effective and energy-efficient heating solutions, Radiant Ceiling Panels Hydronic offer an innovative and comfortable alternative. This article will delve into what radiant ceiling panels hydronic are, their benefits, installation processes, and maintenance tips to help you make an informed decision for your home or business.

Radiant Ceiling Panels Hydronic

What Are Radiant Ceiling Panels Hydronic?

Radiant Ceiling Panels Hydronic are a type of heating system designed to provide comfortable and efficient heat by utilizing water-filled panels mounted on the ceiling. The system works by circulating hot water through pipes embedded in or attached to the ceiling panels. As the water heats up, it warms the panels, which then radiate heat downward into the living space.

This system contrasts with traditional heating methods like forced air, which relies on blowing heated air through ducts. Radiant ceiling panels offer a more direct and even heat distribution, contributing to a more comfortable indoor environment.

Benefits of Radiant Ceiling Panels Hydronic

1. Even Heat Distribution

One of the primary benefits of Radiant Ceiling Panels Hydronic is their ability to provide even heat distribution. Since the panels are mounted on the ceiling, heat is radiated directly downward, reducing cold spots and creating a consistent temperature throughout the room.

2. Energy Efficiency

Hydronic systems are known for their energy efficiency. By using water as the heat transfer medium, radiant ceiling panels can operate at lower temperatures compared to traditional heating systems. This efficiency translates into reduced energy consumption and lower utility bills.

Read too: Bathroom Flooded Through the Ceiling: A Comprehensive Guide

3. Improved Air Quality

Unlike forced air systems that can stir up dust and allergens, radiant ceiling panels do not affect indoor air quality. The absence of air movement means fewer particles are disturbed, creating a cleaner and healthier living environment.

4. Quiet Operation

Radiant Ceiling Panels Hydronic operate silently since there are no moving parts like fans or blowers. This quiet operation contributes to a more peaceful and serene indoor atmosphere.

5. Design Flexibility

The panels can be integrated seamlessly into various architectural designs. They are typically installed flush with the ceiling, allowing for a clean and unobtrusive appearance that can be easily incorporated into any interior design.

Installation of Radiant Ceiling Panels Hydronic

1. Planning and Design

Before installing Radiant Ceiling Panels Hydronic, a detailed planning and design phase is crucial. This involves determining the heating needs of the space, selecting the appropriate panel size and placement, and designing the layout of the piping system.

2. Professional Installation

While DIY installations are possible, it’s often recommended to hire a professional for the installation of radiant ceiling panels. Professionals have the expertise to ensure proper placement, alignment, and connection of the panels and piping. They can also handle the integration with your existing heating system if necessary.

3. Ceiling Preparation

The ceiling must be prepared to accommodate the panels and piping. This may involve removing existing ceiling materials, ensuring structural integrity, and installing support brackets or mounts for the panels.

4. Panel and Pipe Installation

Once the ceiling is prepared, the panels and pipes are installed. The panels are mounted to the ceiling, and the pipes are connected to the panels and the central heating system. The system is then filled with water, and the heating process is tested.

5. System Testing

After installation, the system must be tested to ensure it operates correctly. This includes checking for leaks, verifying temperature control, and ensuring that the heat distribution is even throughout the room.

Maintenance of Radiant Ceiling Panels Hydronic

1. Regular Inspections

Regular inspections are important to maintain the efficiency and longevity of your Radiant Ceiling Panels Hydronic system. Inspect the panels and pipes for any signs of leaks or damage. Ensure that the system is operating correctly and efficiently.

2. System Flush

Over time, sediment can build up in the system, affecting performance. A periodic system flush helps remove any buildup and ensures smooth operation. Consult with a professional for guidance on how often to perform this maintenance task.

3. Check for Leaks

Leaks in the piping system can lead to reduced efficiency and potential damage. Regularly check for any signs of leaks and address them promptly to prevent further issues.

4. Professional Servicing

Annual servicing by a professional can help identify and resolve any potential issues before they become major problems. Professionals can also perform more in-depth maintenance tasks, such as checking the integrity of the piping system and ensuring optimal performance.

Comparing Radiant Ceiling Panels Hydronic with Other Heating Systems

1. Radiant Floor Heating

Both radiant ceiling panels and radiant floor heating provide efficient and comfortable heat. However, ceiling panels are less intrusive and do not require floor space. Radiant floor heating, on the other hand, can be more effective in spaces with high ceilings where heat distribution from the ceiling may be less efficient.

2. Forced Air Heating

Forced air heating systems use ducts to distribute warm air throughout the space. While effective, they can create uneven temperatures and stir up dust. Radiant Ceiling Panels Hydronic offer a more even heat distribution and improved air quality by eliminating air movement.

3. Baseboard Heating

Baseboard heating systems are installed along the baseboards of a room and can be less aesthetically pleasing compared to ceiling-mounted panels. Radiant ceiling panels offer a more discreet installation and even heat distribution without taking up wall space.

Conclusion

Radiant Ceiling Panels Hydronic offer an innovative and efficient solution for heating residential and commercial spaces. With their even heat distribution, energy efficiency, and quiet operation, they provide a comfortable and effective heating option. By understanding the benefits, installation process, and maintenance requirements, you can make an informed decision about incorporating radiant ceiling panels into your heating system.