In any building, safety and clear navigation are crucial. One of the key elements to ensuring safety during emergencies is having visible and reliable exit signs. Ceiling mount exit sign have emerged as a popular solution for ensuring that exit routes are clearly marked and easy to find. This comprehensive guide will cover everything you need to know about ceiling mount exit signs, including their benefits, installation tips, and maintenance practices.
What is a Ceiling Mount Exit Sign?
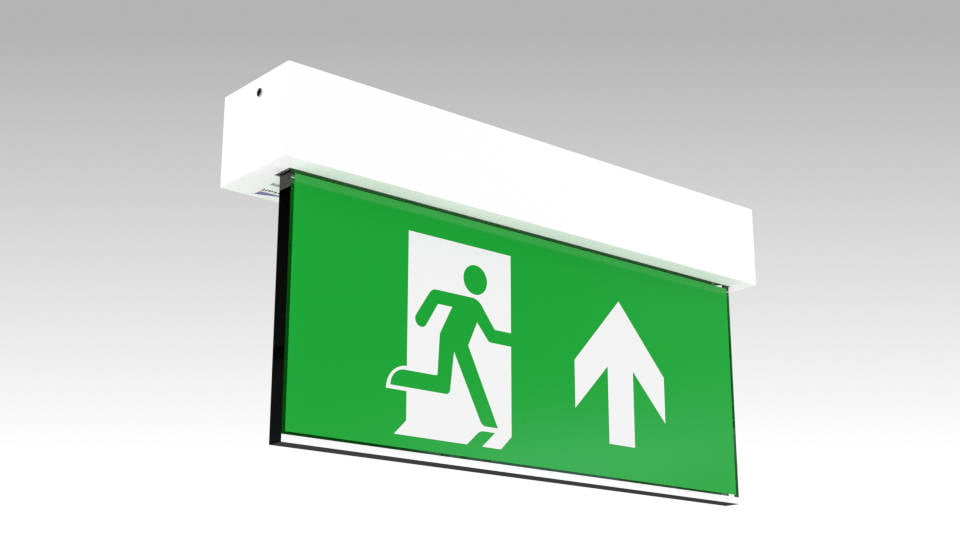
A ceiling mount exit sign is a type of exit signage that is installed on the ceiling of a building to indicate the location of exits. Unlike traditional wall-mounted exit signs, ceiling mount exit signs are designed to be visible from multiple angles, especially in areas where wall space is limited or where visibility needs to be maximized.
Key Features of Ceiling Mount Exit Signs
- Visibility: Ceiling mount exit signs are strategically positioned to ensure they are visible from various points in a room, especially in large open spaces.
- Design: These signs often come in compact and streamlined designs to blend seamlessly with the ceiling and surrounding decor.
- Power Source: Ceiling mount exit signs can be powered by electricity or batteries, with many models featuring built-in backup batteries to ensure they remain lit during power outages.
- Material: They are typically made from durable materials such as acrylic or aluminum to withstand wear and tear.
Why Choose a Ceiling Mount Exit Sign?
Ceiling mount exit signs offer several advantages over their wall-mounted counterparts. Here are some reasons why they might be the best choice for your building:
1. Improved Visibility
In large or open spaces, traditional wall-mounted exit signs may be obscured or difficult to see from certain angles. Ceiling mount exit signs are positioned directly above, making them highly visible from almost any direction. This ensures that occupants can quickly locate the nearest exit in an emergency.
2. Space Efficiency
In areas where wall space is limited or cluttered with other signage or equipment, ceiling mount exit signs provide an effective solution. By utilizing ceiling space, these signs do not interfere with other elements and help maintain a clean and organized appearance.
3. Aesthetic Integration
Ceiling mount exit signs are often designed with aesthetics in mind, featuring sleek and modern designs that blend with the ceiling and overall decor. This integration helps maintain the visual appeal of a space while providing necessary safety features.
4. Flexibility in Installation
Ceiling mount exit signs can be installed in various settings, including corridors, hallways, and large open areas. This flexibility makes them suitable for a wide range of commercial, industrial, and residential applications.
Installation of Ceiling Mount Exit Signs
Proper installation is crucial to ensure that ceiling mount exit signs are effective and compliant with safety regulations. Here are some key steps and considerations for installing these signs:
1. Choose the Right Location
Select a location that provides maximum visibility. The sign should be positioned where it is easily seen from all areas of the room or corridor. Avoid placing signs where they may be obstructed by fixtures or decorations.
2. Measure and Mark
Before installation, measure and mark the exact location on the ceiling where the sign will be mounted. Ensure that the sign will be level and aligned with other elements in the room.
3. Secure Mounting Bracket
Most ceiling mount exit signs come with a mounting bracket that needs to be secured to the ceiling. Use appropriate anchors and screws to ensure that the bracket is firmly attached.
4. Connect Power Supply
If the exit sign is electrically powered, connect it to the building’s power supply according to the manufacturer’s instructions. For battery-operated models, install the batteries as directed.
5. Test the Sign
Once installed, test the exit sign to ensure it is functioning correctly. Check that it is properly illuminated and visible from all required angles. Verify that backup batteries are working if applicable.
6. Comply with Regulations
Ensure that the installation complies with local building codes and safety regulations. This may include specific requirements for the placement, illumination, and signage standards.
Maintenance and Care
To ensure that ceiling mount exit signs remain effective and reliable, regular maintenance is essential. Here are some maintenance tips:
1. Regular Cleaning
Keep the exit sign clean and free of dust and debris. Wipe the sign and its cover with a soft, damp cloth to maintain clarity and visibility.
2. Check Battery Life
For battery-operated signs, regularly check the battery life and replace batteries as needed. Many models have indicators to show when the batteries are low.
3. Test Functionality
Periodically test the functionality of the exit sign, including its illumination and backup power features. Conduct monthly tests to ensure the sign operates correctly during emergencies.
4. Inspect for Damage
Regularly inspect the exit sign for any signs of damage or wear. Replace any damaged parts immediately to ensure the sign remains fully operational.
Types of Ceiling Mount Exit Signs
Ceiling mount exit signs come in various styles and types to suit different needs and preferences. Here are some common types:
1. LED Exit Signs
LED exit signs are energy-efficient and have a long lifespan. They provide bright, clear illumination and are available in various designs and sizes.
2. Photoluminescent Exit Signs
Photoluminescent exit signs use materials that absorb and emit light, providing visibility even in complete darkness. These signs are particularly useful in environments where power outages are a concern.
3. Combination Exit Signs
Combination exit signs integrate emergency lighting with the exit sign, providing both directional guidance and illumination in case of power failure.
4. Custom Exit Signs
For unique needs or specific design requirements, custom exit signs can be created to match the aesthetic and functional needs of a building.
Conclusion
Ceiling mount exit signs are a vital component of building safety, ensuring that exits are clearly marked and easily visible from multiple angles. Their advantages include improved visibility, space efficiency, and aesthetic integration. Proper installation and regular maintenance are crucial to ensure these signs remain effective and compliant with safety regulations. By understanding the different types of ceiling mount exit signs and their benefits, you can make informed decisions to enhance the safety and functionality of your building.