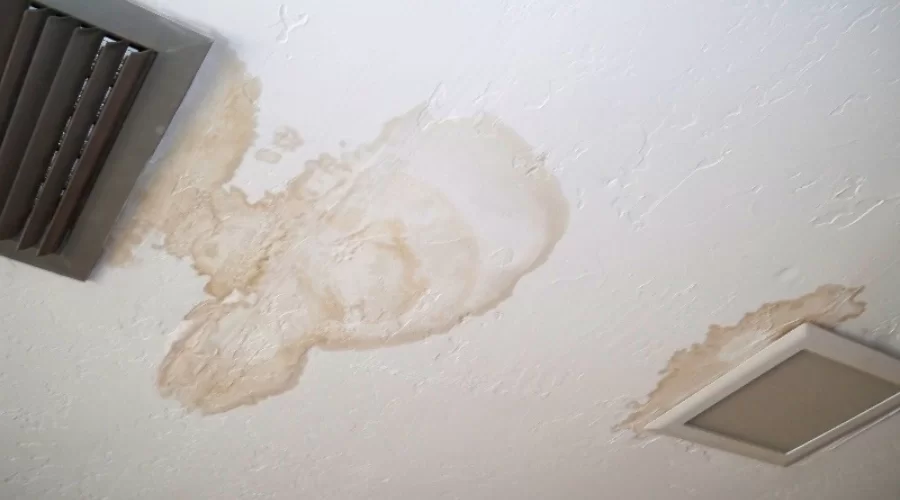
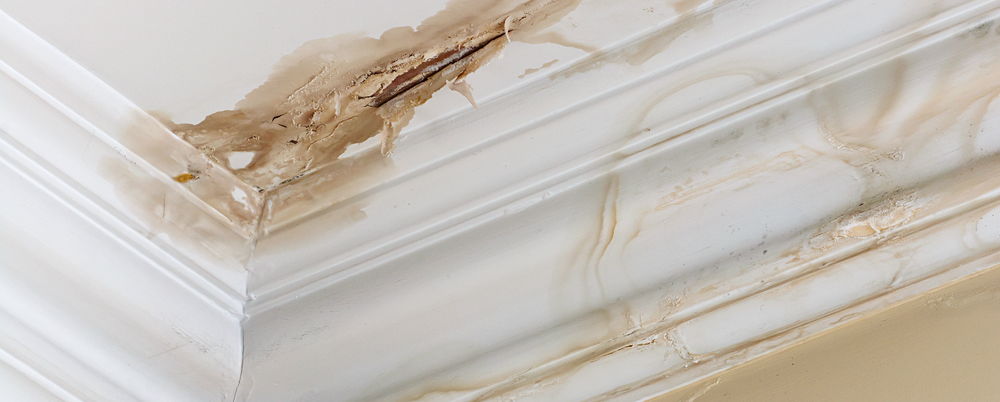
Understanding and Resolving a Leak Through Ceiling Light: Shedding Light on the Dilemma

Experiencing a leak through the ceiling light can be a perplexing and concerning situation for homeowners. In this comprehensive guide, we will delve into the causes, consequences, and effective solutions for a leak through the ceiling light, shedding light on this unexpected issue.
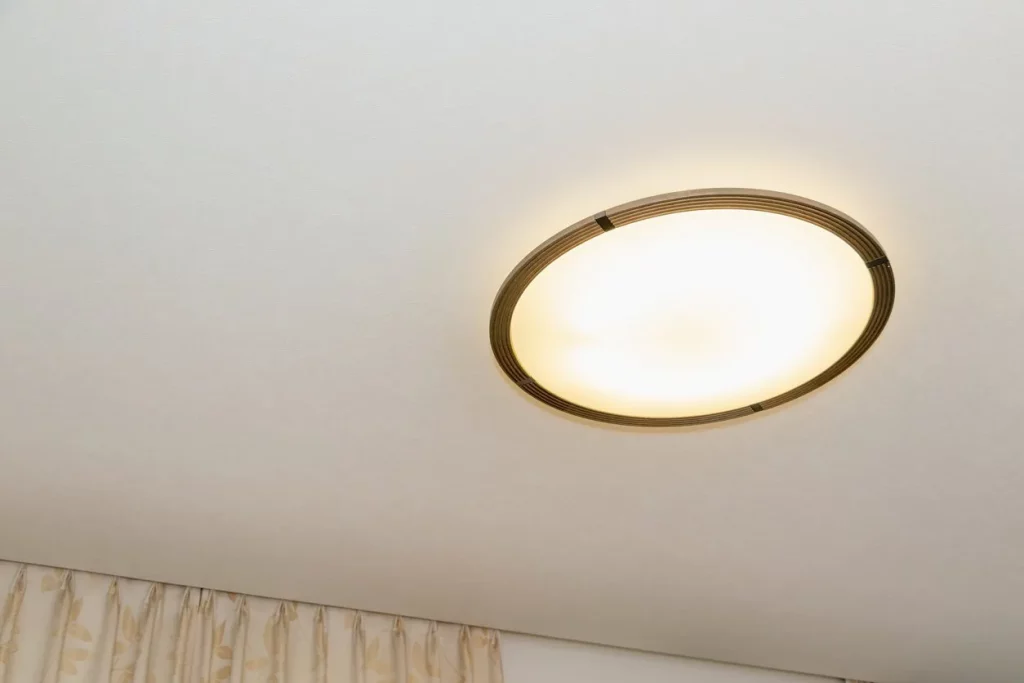
Leak Through Ceiling Light

Understanding the Phenomenon: Leak Through Ceiling Light

A leak through the ceiling light is more than just an inconvenience—it’s a potential indicator of underlying problems within your home. Let’s explore the various factors that could contribute to this issue and how to address them.

Investigating the Causes of Leak Through Ceiling Light

Identifying the root cause of a leak is crucial for effective resolution. Below are common culprits behind this phenomenon:

  1. Roof Leaks: Damaged or aging roofing materials can lead to water infiltration, causing leaks that may find their way into the ceiling light fixtures.
  2. Plumbing Issues: Leaky pipes, burst plumbing fixtures, or faulty connections within the home’s plumbing system can result in water seepage, leading to leaks through the ceiling light.
  3. Condensation Concerns: In some instances, condensation may form within the ceiling and light fixtures, mimicking a leak. Poor ventilation and insulation can contribute to this issue.

Consequences of Ignoring Leak: Beyond Aesthetics

Neglecting a leak can have severe consequences, extending beyond the cosmetic impact. Mold growth, electrical hazards, and compromised structural integrity are potential outcomes of overlooking this issue.

Addressing the Issue: Strategies for Resolving Leak

  1. Immediate Action: When you notice a leak, take immediate action to turn off the power in the affected area. This helps prevent electrical hazards and potential damage to the light fixture.
  2. Identifying the Source: Thoroughly inspect the area to determine the source of the leak. Is it stemming from the roof, plumbing, or is it a result of condensation? Identifying the origin is essential for effective resolution.
  3. Roof Repairs: If the leak is traced back to the roof, prompt repairs or roof replacement may be necessary. Addressing damaged shingles, flashing, or other roofing components is crucial.

Preventive Measures to Safeguard Against

Preventing future occurrences of a leak involves implementing strategic preventive measures. Consider the following:

  1. Regular Roof Maintenance: Schedule regular inspections and maintenance for your roof to identify and address potential issues before they lead to leaks.
  2. Plumbing Inspections: Routinely inspect and maintain your home’s plumbing system. Promptly address any leaks or plumbing concerns to prevent water damage and ceiling light leaks.
  3. Enhance Ventilation: Improve ventilation within your home to mitigate condensation-related issues. Proper airflow helps prevent moisture buildup within the ceiling and light fixtures.

Read too: Understanding and Addressing a Condensation Leak in the Ceiling: Decoding the Drip

Conclusion: Illuminating Solutions for a Leak-Free Ceiling Light

In conclusion, a leak is a multifaceted issue that demands prompt attention and strategic resolution. By understanding the causes, consequences, and implementing preventive measures, homeowners can safeguard their homes from the challenges posed by a ceiling light leak.

Don’t let a leak cast a shadow on the safety and comfort of your home. Take proactive steps, address the root causes, and enjoy a well-illuminated, leak-free living space for years to come.
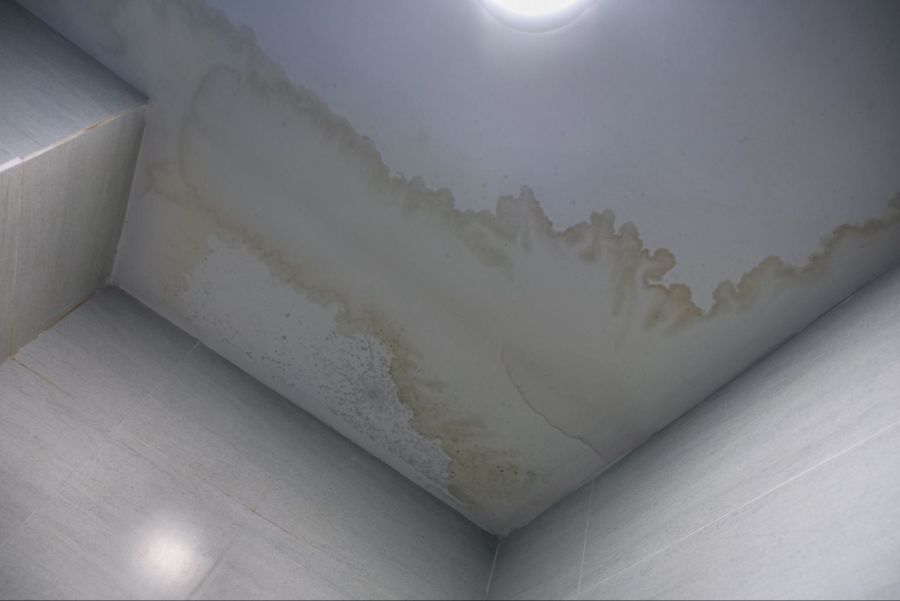
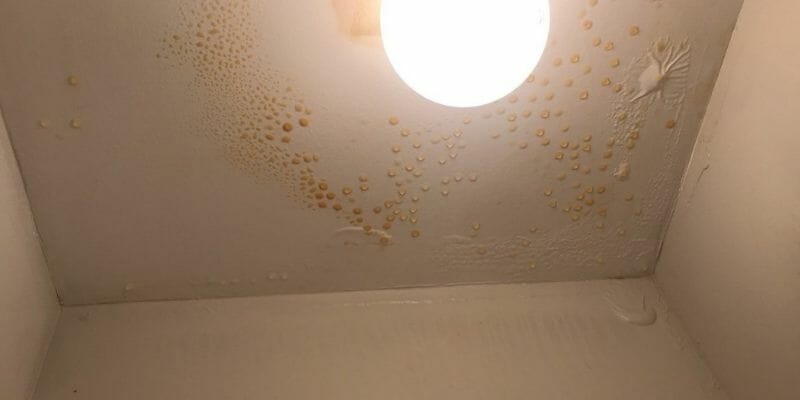
Troubleshooting Woes: What to Do When You See Water Dripping Through Ceiling Light Fixtures

Experiencing water dripping through your ceiling light can be alarming. In this comprehensive guide, we’ll explore the causes, implications, and effective solutions for addressing the perplexing issue of “Water Dripping Through Ceiling Light.”

Water Dripping Through Ceiling Light

Unveiling the Issue: Understanding Water Dripping Through Ceiling Light Fixtures

Before we delve into solutions, let’s unravel the mystery behind water making its way through your ceiling light fixtures. Recognizing the causes is the first step toward effective resolution.

Investigating the Culprit: Water Dripping Through Ceiling Light Fixtures

When water infiltrates your ceiling light fixtures, pinpointing the root cause is crucial for preventing further damage and ensuring the safety of your home.

Potential Causes of Water Dripping Through Ceiling Light Fixtures

  1. Roof Leaks: Damaged or deteriorating roofs can allow water to seep through, finding its way to your light fixtures. Inspect your roof for missing shingles, cracks, or compromised flashing.
  2. Condensation Issues: In areas with high humidity, condensation can form inside light fixtures. Insufficient ventilation or insulation may contribute to this problem.
  3. Plumbing Leaks: Leaking pipes or plumbing fixtures in the ceiling can be a common source of water infiltration. Check for dampness around pipes, especially those running above light fixtures.
  4. Attic Condensation: Improper attic ventilation can lead to condensation buildup, causing water to drip onto ceiling light fixtures. Adequate insulation and ventilation are essential.

Diagnosing and Confirming

Once you’ve identified potential causes, confirming the source of the water is vital to implement the most appropriate solution.

Steps to Diagnose and Confirm the Source

  1. Visual Inspection: Carefully examine the area around the ceiling light fixture for visible signs of leaks, discoloration, or dampness.
  2. Use of Instruments: Moisture meters and infrared thermography can aid in identifying hidden sources of water. These tools help detect moisture levels and temperature variations in building materials.
  3. Professional Assessment: If the source remains elusive or if the issue persists, consult a professional. Experienced technicians can conduct a thorough inspection using specialized equipment.

Addressing the Issue: Solutions for Water Dripping Through Ceiling Light Fixtures

Once the source is confirmed, taking prompt and effective action is crucial to prevent further damage and ensure the safety of your home.

Strategies for Addressing Water Dripping

  1. Roof Repairs: If the water source is a leaky roof, address the issue promptly. Repair or replace damaged shingles, flashing, or seals to prevent further water intrusion.
  2. Plumbing Repairs: Fix any leaking pipes or plumbing fixtures in the ceiling. Tighten connections, replace faulty components, and ensure proper drainage.
  3. Improved Ventilation: Enhance ventilation in the affected area to reduce condensation. Install exhaust fans, use dehumidifiers, and consider insulating the ceiling to minimize temperature variations.
  4. Fixture Replacement: If the light fixture is damaged, consider replacing it to prevent electrical hazards. Ensure that replacements are installed with proper sealing to prevent future leaks.

Conclusion: Ensuring a Dry and Safe Home

In conclusion, witnessing water dripping through your ceiling light fixtures is a cause for immediate attention. By understanding the potential causes, confirming the source, and implementing effective solutions, homeowners can safeguard their homes from further damage. Timely interventions not only protect the structural integrity of the property but also contribute to a safer living environment. Remember, addressing water infiltration promptly can save you from more extensive and costly repairs down the line.

Troubleshooting Woes: What to Do When You See Water Coming From Ceiling Light Fixtures

Experiencing water coming from your ceiling light can be alarming. In this comprehensive guide, we’ll explore the causes, implications, and effective solutions to address the perplexing issue of “Water Coming From Ceiling Light.”

Water Coming From Ceiling Light

Unveiling the Issue: Understanding Water Coming From Ceiling Light Fixtures

Before we delve into solutions, let’s unravel the mystery behind water making its way through your ceiling light fixtures. Recognizing the causes is the first step toward effective resolution.

Investigating the Culprit

When water infiltrates your ceiling light fixtures, pinpointing the root cause is crucial for preventing further damage and ensuring the safety of your home.

Potential Causes of Water Coming From Ceiling Light Fixtures

  1. Roof Leaks: Damaged or deteriorating roofs can allow water to seep through, finding its way to your light fixtures. Inspect your roof for missing shingles, cracks, or compromised flashing.
  2. Condensation Issues: In areas with high humidity, condensation can form inside light fixtures. Insufficient ventilation or insulation may contribute to this problem.
  3. Plumbing Leaks: Leaking pipes or plumbing fixtures in the ceiling can be a common source of water infiltration. Check for dampness around pipes, especially those running above light fixtures.
  4. Attic Condensation: Improper attic ventilation can lead to condensation buildup, causing water to drip onto ceiling light fixtures. Adequate insulation and ventilation are essential.

Diagnosing and Confirming

Once you’ve identified potential causes, confirming the source of the water is vital to implement the most appropriate solution.

Steps to Diagnose and Confirm the Source

  1. Visual Inspection: Carefully examine the area around the ceiling light fixture for visible signs of leaks, discoloration, or dampness.
  2. Use of Instruments: Moisture meters and infrared thermography can aid in identifying hidden sources of water. These tools help detect moisture levels and temperature variations in building materials.
  3. Professional Assessment: If the source remains elusive or if the issue persists, consult a professional. Experienced technicians can conduct a thorough inspection using specialized equipment.

Read too: Cost To Skim Coat Ceiling

Addressing the Issue: Solutions for Water Coming From Ceiling Light Fixtures

Once the source is confirmed, taking prompt and effective action is crucial to prevent further damage and ensure the safety of your home.

Strategies for Addressing Water Coming From Ceiling Fixtures

  1. Roof Repairs: If the water source is a leaky roof, address the issue promptly. Repair or replace damaged shingles, flashing, or seals to prevent further water intrusion.
  2. Plumbing Repairs: Fix any leaking pipes or plumbing fixtures in the ceiling. Tighten connections, replace faulty components, and ensure proper drainage.
  3. Improved Ventilation: Enhance ventilation in the affected area to reduce condensation. Install exhaust fans, use dehumidifiers, and consider insulating the ceiling to minimize temperature variations.
  4. Fixture Replacement: If the light fixture is damaged, consider replacing it to prevent electrical hazards. Ensure that replacements are installed with proper sealing to prevent future leaks.

Conclusion: Ensuring a Dry and Safe Home

In conclusion, witnessing water coming from your ceiling light fixtures is a cause for immediate attention. By understanding the potential causes, confirming the source, and implementing effective solutions, homeowners can safeguard their homes from further damage. Timely interventions not only protect the structural integrity of the property but also contribute to a safer living environment. Remember, addressing water infiltration promptly can save you from more extensive and costly repairs down the line.

Troubleshooting Water Coming Through Vent in Ceiling: Causes and Solutions

The last thing any homeowner wants to discover is water seeping through a vent in the ceiling. This unexpected issue can lead to significant damage and stress. In this article, we will delve into the problem of “Water Coming Through Vent in Ceiling” and provide essential insights to help you identify the causes and effective solutions to tackle this concerning situation.

Water Coming Through Vent In Ceiling

Understanding the Dilemma of Water Through Ceiling Vents

Experiencing water infiltrating your home through a ceiling vent is unsettling, to say the least. To resolve this issue effectively, let’s first explore the potential reasons behind it:

1. Roof Leaks

Roof leaks are one of the primary culprits when water makes its way into your home through a ceiling vent. Damaged roofing materials, such as missing or cracked shingles, deteriorated flashing, or poorly sealed roof vents, can lead to water infiltration.

2. Plumbing Issues

Leaky plumbing within the structure of your home can be another cause. Water supply lines, drain pipes, or even HVAC condensate lines can leak and send water into your ceiling.

3. Condensation

In some cases, condensation can accumulate within the vent and eventually drip down into your home. This is more common in areas with high humidity or when warm, moist air meets a cooler surface.

4. Blocked Vents

Blocked or clogged vents can also cause water to back up and enter your home. This blockage could be due to debris, leaves, or even bird nests in the vent.

Addressing Water Through Ceiling Vents

If you’re facing the issue of water seeping through a ceiling vent, it’s crucial to take action promptly. Here are the steps to help you address the problem:

1. Identify the Source

The first step is to identify the source of the issue. Is it a roof leak, plumbing problem, condensation, or blocked vents? Thoroughly inspect your ceiling and attic to pinpoint the problem’s origin.

2. Roof Repairs

If a roof leak is the culprit, it’s advisable to contact a professional roofer. They can assess the extent of the damage and recommend the necessary repairs, which may include fixing the damaged area, replacing shingles, or sealing roof vents.

3. Plumbing Repairs

For plumbing-related issues, a plumber can determine the source of the leak and repair the damaged pipes, connections, or fixtures accordingly.

4. Vent Maintenance

Proper maintenance of the vent is essential to prevent blockages and condensation issues. Regularly clean and inspect your vents to ensure they are free from obstructions.

Prevention is Key

Preventing water from infiltrating your home through ceiling vents is the best approach. Here are some proactive measures to minimize the risk:

  1. Regular Roof Inspections: Schedule routine roof inspections to catch and address any potential issues early.
  2. Plumbing Maintenance: Keep plumbing systems in good working order and promptly address any leaks or issues.
  3. Proper Vent Maintenance: Regularly clean and inspect vents to ensure they remain free from blockages or condensation.

Conclusion

“Water Coming Through Vent in Ceiling” is a distressing issue for homeowners. By understanding the potential causes and taking proactive measures, you can safeguard your home from this unexpected problem. If you find yourself facing this issue, acting promptly to identify and address the source of the problem is crucial to prevent further damage. Don’t let water through your ceiling vents disrupt your peace of mind; take action to keep your home dry and secure.

Can Clogged Gutters Cause Ceiling Leaks?

Can Clogged Gutters Cause Ceiling Leaks? When it comes to home maintenance, the condition of your gutters often plays a more significant role than you might think. Clogged gutters can lead to a cascade of issues, and one of the most concerning problems is ceiling leaks. In this article, we will explore the relationship between clogged gutters and ceiling leaks and provide insights into how you can prevent this common household headache.

Can Clogged Gutters Cause Ceiling Leaks

The Role of Gutters in Home Protection

Gutters are an integral part of your home’s drainage system. They serve to collect rainwater from your roof and direct it away from the foundation, preventing water from pooling around your home. While gutters may not be the most glamorous feature of your house, they play a vital role in safeguarding it against water damage.

How Clogged Gutters Cause Ceiling Leaks

Clogged gutters can result in several problems that, if left unaddressed, can lead to ceiling leaks. Here’s how it happens:

  1. Overflowing Gutters: When gutters are clogged with leaves, twigs, and debris, rainwater cannot flow through them as intended. Instead, it spills over the sides of the gutters and runs down the exterior walls.
  2. Water Infiltration: As rainwater cascades down your walls, it can find its way into the smallest cracks and gaps. Over time, water can penetrate your home’s exterior, including your attic and ceilings.
  3. Ceiling Stains: Once water makes its way into your attic and ceiling, it can lead to unsightly water stains. These stains are often the first visible sign that something is amiss.
  4. Structural Damage: Prolonged exposure to water can cause structural damage to your ceilings and roof. This damage can lead to costly repairs and pose safety risks.

Read too: How To Dry A Ceiling Quickly

Preventing Ceiling Leaks Caused by Clogged Gutters

Preventing ceiling leaks caused by clogged gutters is more straightforward than dealing with the aftermath. Here are some tips to keep your gutters clean and your ceilings dry:

  1. Regular Gutter Cleaning: The most effective way to prevent clogs and their associated problems is to clean your gutters regularly. Depending on your location and the surrounding trees, this may be a bi-annual or quarterly task.
  2. Gutter Guards: Consider installing gutter guards or leaf screens to keep debris out of your gutters while allowing water to flow freely. While not entirely maintenance-free, these systems can significantly reduce the frequency of cleaning.
  3. Professional Inspection: It’s a good idea to have a professional inspect your gutters and roofing system regularly. They can identify issues early and provide the necessary maintenance and repairs.
  4. Trim Overhanging Branches: Trees that overhang your roof are a common source of gutter clogs. Regularly trim branches to prevent leaves and twigs from falling into your gutters.
  5. Downspout Maintenance: Ensure your downspouts are directing water away from your home’s foundation. Extensions can be added to downspouts to carry water further from your home.
  6. Check for Roof Leaks: In addition to maintaining your gutters, regularly inspect your roof for missing shingles or other damage that can lead to leaks.

Addressing Ceiling Leaks

If you’ve already noticed water stains on your ceiling, it’s essential to take action promptly:

  1. Find the Source: Determine the source of the water infiltration by inspecting your roof, gutters, and attic. This will help you identify and address the underlying issue.
  2. Ceiling Repairs: Repair any damaged or weakened sections of your ceiling to prevent further leaks and structural damage.
  3. Professional Help: In some cases, it may be necessary to consult a professional to assess the extent of the damage and provide appropriate repairs.

Conclusion

Ceiling leaks caused by clogged gutters are preventable with proper maintenance and attention. By keeping your gutters clean and your home’s drainage system in good working order, you can avoid the headache of water stains on your ceilings and the costly repairs that can follow. Regular inspections and maintenance of your gutters and roofing system are key to keeping your home dry and your ceilings leak-free.