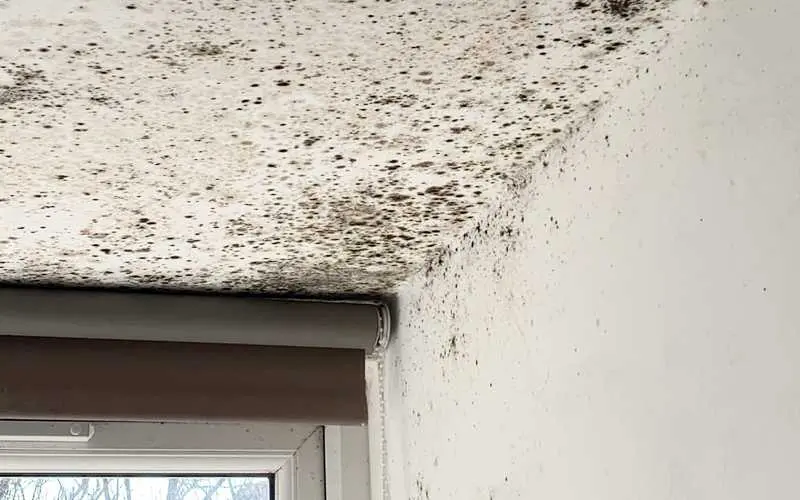
Commercial Ceiling Air Purifier: Enhance Air Quality and Employee Health

In today’s world, where air quality plays a crucial role in our overall health and productivity, businesses are increasingly investing in air purification solutions. One effective option that has gained popularity is the Commercial Ceiling Air Purifier. This innovative device not only improves indoor air quality but also seamlessly integrates into the workspace, providing an unobtrusive yet powerful solution for cleaner air. In this article, we will explore the benefits, features, installation, and maintenance of commercial ceiling air purifiers, helping you understand why they are essential for your business.

Commercial Ceiling Air Purifier

Understanding Commercial Ceiling Air Purifiers

What is a Commercial Ceiling Air Purifier?

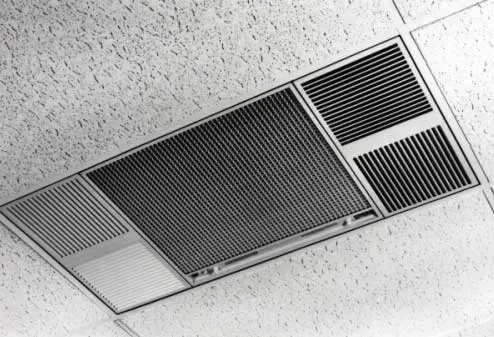
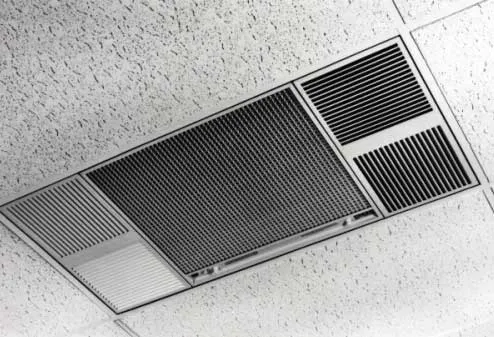
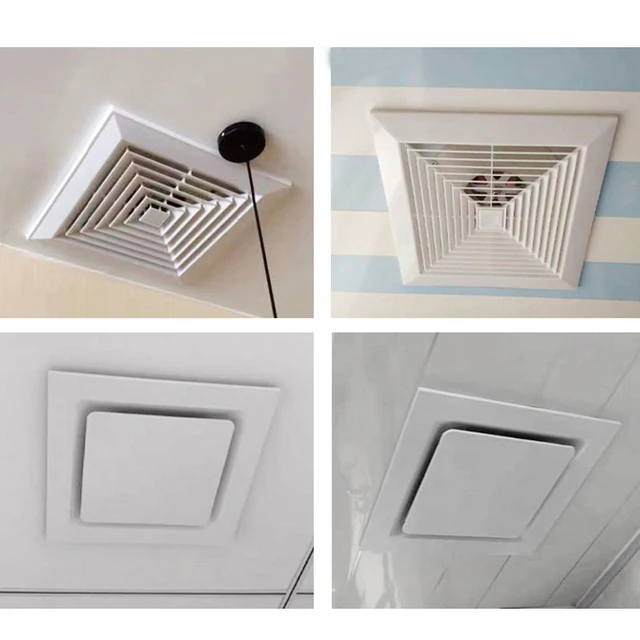
A Commercial Ceiling Air Purifier is a specialized air purification system designed to be installed in commercial spaces such as offices, restaurants, schools, and hospitals. Unlike traditional portable air purifiers, these units are mounted directly into the ceiling, making them a discreet option that doesn’t take up valuable floor space. They work by circulating and filtering the air in the environment to remove pollutants, allergens, and other harmful particles, thereby improving indoor air quality.

Read too: Shiplap Ceiling in Kitchen: A Timeless Trend for a Stylish and Cozy Space

How Do They Work?

Commercial ceiling air purifiers utilize advanced filtration technologies to purify the air. They often include:

  • HEPA Filters: These filters capture 99.97% of particles as small as 0.3 microns, including dust, pollen, mold spores, and pet dander.
  • Activated Carbon Filters: These filters absorb odors, volatile organic compounds (VOCs), and other gaseous pollutants, improving overall air quality.
  • UV-C Light Technology: Some models incorporate UV-C light to eliminate bacteria, viruses, and mold, ensuring a healthier environment.

The air purifier circulates the indoor air, forcing it through these filters to remove contaminants before releasing clean air back into the space.

Benefits of Using a Commercial Ceiling Air Purifier

Investing in a Commercial Ceiling Air Purifier offers numerous advantages for businesses, including:

1. Improved Indoor Air Quality

Poor indoor air quality can lead to a range of health issues, including allergies, asthma, and respiratory problems. By removing harmful pollutants, commercial ceiling air purifiers create a healthier environment for employees and customers.

2. Enhanced Employee Productivity

Clean air has been linked to improved cognitive function and productivity. Employees are less likely to experience fatigue and headaches in well-ventilated spaces, which can lead to increased efficiency and job satisfaction.

3. Discreet Design

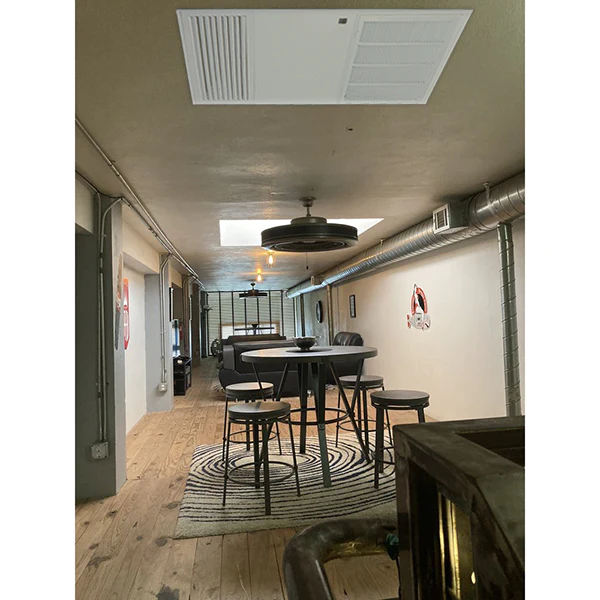
Unlike traditional air purifiers that take up floor space, ceiling-mounted models blend seamlessly into the ceiling, maintaining the aesthetics of your workspace while providing effective air purification.

4. Reduced Odors

Commercial spaces can accumulate unpleasant odors from cooking, cleaning, and daily activities. Air purifiers with activated carbon filters effectively neutralize these odors, ensuring a more pleasant atmosphere.

5. Cost-Effective Solution

While the initial investment may be higher than portable air purifiers, the long-term savings from reduced healthcare costs, increased productivity, and lower absenteeism make commercial ceiling air purifiers a wise choice.

Choosing the Right Commercial Ceiling Air Purifier

When selecting a commercial ceiling air purifier, consider the following factors:

1. Size of the Space

The effectiveness of an air purifier largely depends on its capacity to filter air in relation to the size of the room. Check the manufacturer’s specifications for the recommended coverage area.

2. Filtration Technology

Look for models that feature HEPA and activated carbon filters for comprehensive air purification. UV-C light technology is also beneficial for killing airborne pathogens.

3. Noise Level

Since these units will be installed in workspaces, consider the noise level. Look for models specifically designed for quiet operation, as excessive noise can be distracting.

4. Maintenance Requirements

Evaluate how easy it is to change filters and perform regular maintenance on the air purifier. Some models offer indicator lights that notify you when it’s time for a filter change, making maintenance hassle-free.

Installation of Commercial Ceiling Air Purifiers

Preparing for Installation

Before installing your Commercial Ceiling Air Purifier, follow these steps:

  1. Select the Location: Identify an optimal location in the ceiling for installation, ensuring the unit will be effective in circulating air throughout the space.
  2. Check Electrical Requirements: Ensure the location has the necessary electrical connections and that you have access to a power source.
  3. Review Local Building Codes: Familiarize yourself with local regulations regarding installation and electrical work to ensure compliance.

Installation Process

While installation may vary by model, here is a general guide:

  1. Turn Off Power: Before starting, turn off the power supply to the area where you will be working.
  2. Mount the Unit: Follow the manufacturer’s instructions for securely mounting the air purifier in the ceiling. This may involve using brackets or screws to attach the unit.
  3. Connect Power: Carefully connect the air purifier to the electrical supply, ensuring all connections are secure.
  4. Test the Unit: Once installed, turn the power back on and test the air purifier to ensure it operates correctly.

Professional Installation

For those who are unsure about the installation process or prefer a professional touch, hiring an HVAC technician is recommended. They can ensure proper installation, adherence to safety standards, and optimal placement for effective air purification.

Maintenance of Commercial Ceiling Air Purifiers

Regular maintenance is essential to keep your commercial ceiling air purifier functioning efficiently. Here are some maintenance tips:

1. Replace Filters Regularly

Check the manufacturer’s guidelines for recommended filter replacement intervals. Generally, HEPA filters should be replaced every 6 to 12 months, while activated carbon filters may need changing more frequently depending on usage.

2. Clean the Unit

Dust and debris can accumulate on the exterior and around the intake and exhaust vents. Use a soft cloth to wipe down the unit regularly.

3. Inspect Electrical Connections

Periodically check electrical connections to ensure they are secure and functioning properly. This can prevent potential issues that may arise from loose connections.

4. Schedule Professional Maintenance

Consider scheduling annual maintenance with an HVAC technician to ensure your air purifier operates at peak efficiency. They can perform a thorough inspection and address any potential issues.

Conclusion

Investing in a Commercial Ceiling Air Purifier is a proactive step towards enhancing the air quality of your business environment. By providing cleaner air, you promote the health and well-being of your employees and customers, ultimately leading to a more productive and pleasant atmosphere. With various models available, consider factors such as space size, filtration technology, and maintenance requirements when choosing the right unit for your needs. Regular maintenance will ensure your investment continues to deliver benefits for years to come.
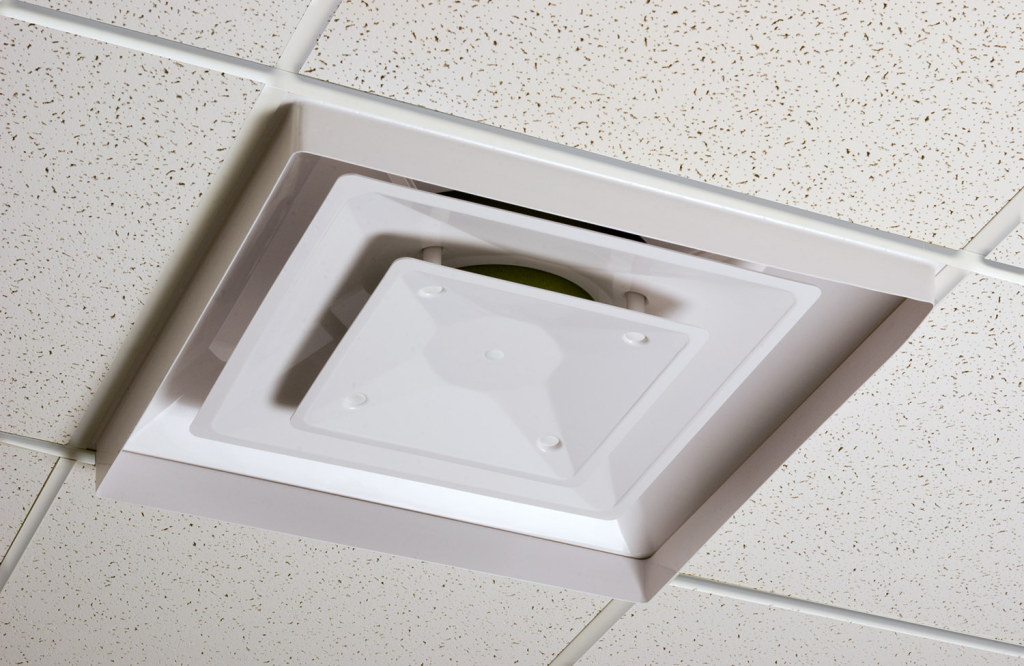
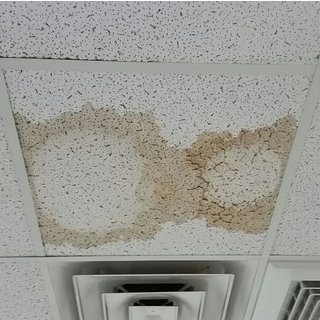
Drop Ceiling Air Diffuser: Enhance Indoor Air Quality

When it comes to creating a comfortable indoor environment, the importance of proper air distribution cannot be overstated. A drop ceiling air diffuser is a crucial component in modern HVAC systems, ensuring that air is evenly distributed throughout a room. This article explores the benefits, types, installation processes, and considerations for selecting the right drop ceiling air diffuser for your needs.

Drop Ceiling Air Diffuser

Why Choose a Drop Ceiling Air Diffuser?

Drop ceiling air diffusers are designed to integrate seamlessly with suspended ceiling systems. Here are several reasons why these diffusers are an excellent choice for maintaining optimal indoor air quality:

1. Efficient Air Distribution

A drop ceiling air diffuser ensures that air is evenly distributed across the entire room. This helps maintain consistent temperatures and prevents hot or cold spots, leading to improved comfort.

2. Improved Air Quality

By promoting better air circulation, diffusers help reduce the concentration of pollutants and allergens in the air. This is particularly important in environments such as offices, schools, and healthcare facilities.

Read too: Striped Schoolhouse Ceiling Light Fixtures: Unveiling the Timeless Charm

3. Aesthetic Integration

Drop ceiling air diffusers are designed to blend in with the ceiling, maintaining the aesthetic appeal of the room. They are available in various styles and finishes to match the ceiling tiles.

4. Energy Efficiency

Proper air distribution can enhance the efficiency of your HVAC system, reducing energy consumption and lowering utility bills. This is because the system doesn’t have to work as hard to maintain the desired temperature.

5. Noise Reduction

High-quality diffusers are designed to operate quietly, minimizing noise levels and creating a more pleasant indoor environment. This is particularly beneficial in settings where noise can be a distraction, such as offices and classrooms.

Types of Drop Ceiling Air Diffusers

When selecting a drop ceiling air diffuser, it’s important to consider the different types available and their specific applications. Here are some common types of diffusers:

1. Square Ceiling Diffusers

These are the most common type of diffusers used in drop ceilings. They are typically designed with multiple directional slots to distribute air evenly across the room.

2. Round Ceiling Diffusers

Round diffusers are often used in spaces where a more even and 360-degree air distribution is required. They are ideal for larger rooms and open-plan areas.

3. Linear Slot Diffusers

Linear slot diffusers are used to create a sleek, modern look while providing effective air distribution. They are often used in commercial spaces and can be integrated into the architectural design.

4. Plaque Diffusers

Plaque diffusers feature a central plaque that directs air flow outward, providing a high level of air mixing and uniform temperature distribution. They are commonly used in offices and retail spaces.

How to Install a Drop Ceiling Air Diffuser

Installing a drop ceiling air diffuser is a straightforward process, but it requires careful planning and execution to ensure optimal performance. Here are the basic steps to guide you through the installation:

1. Preparation

  • Choose the Right Diffuser: Select the type and size of diffuser that best fits your needs and the layout of the room.
  • Gather Tools and Materials: You’ll need a ladder, measuring tape, cutting tools, ductwork, and screws or mounting brackets.

2. Mark the Location

  • Locate the HVAC Duct: Identify the location of the HVAC duct in the ceiling.
  • Measure and Mark: Measure the dimensions of the diffuser and mark the corresponding location on the ceiling tile.

3. Cut the Ceiling Tile

  • Remove the Tile: Carefully remove the ceiling tile where the diffuser will be installed.
  • Cut the Opening: Using a cutting tool, cut an opening in the tile according to the measurements. Make sure the cut is clean and precise.

4. Install the Diffuser

  • Attach the Diffuser: Secure the diffuser to the HVAC duct using screws or mounting brackets. Ensure it is firmly attached and aligned with the opening in the ceiling tile.
  • Replace the Tile: Place the modified ceiling tile back into the grid, ensuring the diffuser fits snugly into the opening.

5. Check for Airflow

  • Test the System: Turn on the HVAC system and check the airflow from the diffuser. Make any necessary adjustments to ensure optimal performance.

Tips for Choosing the Right Drop Ceiling Air Diffuser

Selecting the right diffuser can make a significant difference in the effectiveness of your HVAC system. Here are some tips to help you make the best choice:

1. Consider the Room Size

The size of the room will determine the type and number of diffusers needed. Larger rooms may require multiple diffusers to ensure even air distribution.

2. Match the Decor

Choose a diffuser that complements the aesthetic of the room. Consider the style, color, and finish to ensure it blends seamlessly with the ceiling tiles.

3. Evaluate Airflow Requirements

Consider the airflow requirements of the room. High-traffic areas or rooms with specific ventilation needs may require specialized diffusers.

4. Check for Noise Levels

Select a diffuser designed to minimize noise. This is particularly important in environments where quiet operation is essential.

5. Energy Efficiency

Look for energy-efficient diffusers that can help reduce energy consumption and lower utility bills. Proper air distribution can significantly improve the efficiency of your HVAC system.

Maintaining Your Drop Ceiling Air Diffuser

Regular maintenance is crucial to ensure the longevity and performance of your air diffusers. Here are some maintenance tips:

1. Regular Cleaning

Dust and clean the diffusers regularly to prevent the buildup of dust and debris. This can be done using a soft cloth or vacuum cleaner attachment.

2. Inspect for Damage

Periodically inspect the diffusers for any signs of damage or wear. Replace any damaged components promptly to maintain optimal performance.

3. Check Airflow

Regularly check the airflow from the diffusers to ensure they are functioning correctly. If you notice any issues, such as reduced airflow or unusual noises, investigate and address the problem immediately.

4. Adjust as Needed

Adjust the direction and flow of air from the diffusers as needed to maintain a comfortable indoor environment. This can be particularly important in changing seasons or varying room usage.

Enhancing Indoor Comfort with Additional Solutions

In addition to installing drop ceiling air diffusers, consider these additional solutions to enhance indoor comfort:

1. Thermostats

Install programmable thermostats to better control the temperature and energy usage in your space. This allows for more precise adjustments based on occupancy and time of day.

2. Air Purifiers

Consider using air purifiers to improve indoor air quality further. These devices can help remove pollutants and allergens, creating a healthier environment.

3. Ceiling Fans

Ceiling fans can work in conjunction with air diffusers to improve air circulation and maintain a consistent temperature throughout the room.

4. Insulation

Ensure your space is well-insulated to prevent energy loss and maintain a comfortable indoor environment. Proper insulation can work hand-in-hand with your HVAC system to enhance efficiency.

Conclusion

A drop ceiling air diffuser is a vital component for maintaining optimal indoor air quality and comfort. By selecting the right type, ensuring proper installation, and performing regular maintenance, you can significantly improve the performance of your HVAC system. Whether you’re upgrading an office, school, or healthcare facility, these diffusers provide an efficient and aesthetically pleasing solution for air distribution.

Mold in Ceiling Tile: Causes, Prevention, and Remediation

Mold in ceiling tile can be a troubling issue for homeowners and property managers alike. Learn about the causes of mold growth, effective prevention strategies, and how to safely remediate mold-infested ceiling tiles to maintain a healthy indoor environment.

Mold In Ceiling Tiles

Causes of Mold in Ceiling Tiles

Mold growth in ceiling tiles is often triggered by several factors:

  • Moisture Accumulation: Leaking roofs, plumbing issues, or high humidity levels can lead to moisture buildup in ceiling spaces, creating ideal conditions for mold growth.
  • Poor Ventilation: Inadequate ventilation in bathrooms, kitchens, or basements can contribute to humidity levels that promote mold formation.
  • Water Damage: Previous water leaks or flooding incidents that were not properly dried and treated can result in hidden mold growth within ceiling materials.
  • Organic Matter: Ceiling tiles made of organic materials such as cellulose or mineral fibers can serve as food sources for mold when exposed to moisture.

Signs of Mold in Ceiling Tiles

Identifying mold in ceiling tiles early is crucial to prevent further spread and potential health hazards. Look out for these signs:

  • Discoloration: Dark spots or patches on the ceiling tiles, often green, black, or brown in color.
  • Musty Odor: A persistent musty smell, especially in enclosed spaces or rooms with poor ventilation.
  • Warped or Bulging Tiles: Moisture absorption can cause ceiling tiles to warp or bulge, indicating underlying mold growth.

Prevention of Mold in Ceiling Tiles

Preventing mold growth in ceiling tiles involves proactive measures to control moisture and improve ventilation:

  1. Address Water Intrusion Promptly: Repair leaks in the roof, plumbing fixtures, or windows to prevent moisture buildup.
  2. Monitor Indoor Humidity Levels: Use dehumidifiers in areas prone to humidity, such as basements and bathrooms, to maintain optimal moisture levels (ideally below 60%).
  3. Improve Ventilation: Ensure adequate ventilation in kitchens, bathrooms, and laundry rooms to reduce moisture accumulation.
  4. Choose Mold-Resistant Materials: Opt for ceiling tiles that are designed to resist mold growth, such as fiberglass or PVC options.

Remediation of Mold in Ceiling Tiles

If mold is already present in ceiling tiles, it’s essential to handle the remediation process safely and effectively:

  • Assessment: Conduct a thorough inspection to determine the extent of mold contamination and identify the source of moisture.
  • Containment: Isolate the affected area to prevent mold spores from spreading to other parts of the building during remediation.
  • Removal: Remove mold-infested ceiling tiles carefully, following proper safety protocols including wearing protective equipment.
  • Cleaning: Clean and disinfect non-porous surfaces adjacent to the moldy tiles to eliminate any residual mold spores.
  • Prevention Measures: Implement preventive measures to avoid future mold growth, such as improving ventilation and using mold-resistant materials.

Read too: Kitchen Lighting For A Vaulted Ceiling: Illuminating Your Space with Style and Functionality

Conclusion

Dealing with mold in ceiling tile requires prompt action to mitigate potential health risks and structural damage. By understanding the causes of mold growth, implementing preventive strategies, and following safe remediation practices, homeowners and property managers can maintain a mold-free environment and ensure the longevity of their ceiling structures.

Ceiling Mounted Smoke Eaters: Everything You Need to Know

In modern indoor environments, maintaining air quality is paramount. Ceiling mounted smoke eaters are crucial solutions for ensuring clean and safe air, especially in spaces prone to smoke or pollutants. This guide dives deep into the world of ceiling mounted smoke eaters, exploring their benefits, installation, maintenance, and more.

Ceiling Mounted Smoke Eaters

What are Ceiling Mounted Smoke Eaters?

Ceiling mounted smoke eater, also known as smoke filtration systems, are specialized devices designed to remove smoke particles, odors, and other airborne contaminants from indoor air. These units are typically mounted on ceilings to optimize airflow and efficiency.

Understanding How Ceiling Mounted Smoke Eaters Work

Ceiling mounted smoke eaters employ advanced filtration technologies to purify air. These systems draw in contaminated air, pass it through filters that capture smoke particles and odors, and then release clean air back into the room. Some models utilize electrostatic precipitators or HEPA filters for enhanced filtration performance.

Benefits of Installing Ceiling Mounted Smoke Eaters

Installing a ceiling mounted smoke eater offers numerous benefits:

  • Smoke Removal: Effectively removes smoke from cigarettes, cooking, wildfires, etc.
  • Improved Air Quality: Reduces airborne pollutants, allergens, and odors.
  • Health Benefits: Helps in maintaining a healthier indoor environment, especially for individuals with respiratory conditions.
  • Odor Control: Eliminates unpleasant odors, creating a more pleasant living or working space.

Choosing the Right Ceiling Mounted Smoke Eater

When selecting a smoke eater for your space, consider:

  • Room Size: Choose a unit that matches the size of the room for optimal performance.
  • Filtration Type: Decide between electrostatic precipitators, HEPA filters, or other filtration technologies based on your specific needs.
  • Maintenance Requirements: Check ease of filter replacement and overall maintenance needs.
  • Noise Levels: Consider noise output, especially in quiet environments.

Installation Process

Installing a ceiling mounted smoke eater involves:

  1. Location: Choose a central location on the ceiling for efficient air circulation.
  2. Power Supply: Ensure proximity to a power source.
  3. Mounting: Follow manufacturer guidelines for proper installation to maximize effectiveness.

Maintenance Tips

To keep your ceiling mounted smoke eater functioning effectively:

  • Regular Cleaning: Clean or replace filters as recommended by the manufacturer.
  • Inspect and Test: Periodically check the unit’s operation and air quality readings.
  • Professional Servicing: Schedule professional maintenance to ensure long-term efficiency.

Cost Considerations

The cost of ceiling mounted smoke eater varies based on factors like brand, size, and filtration technology. While initial costs may vary, consider long-term savings from improved air quality and reduced health risks.

Conclusion

Ceiling mounted smoke eater are essential investments for maintaining clean indoor air quality. By understanding their benefits, installation process, and maintenance requirements, you can effectively enhance the air quality in residential, commercial, or industrial spaces prone to smoke and pollutants.

Ceiling Mounted Smoke Eater: Improve Air Quality in Your Space with a High-Efficiency

In today’s environment-conscious world, ensuring clean and breathable air indoors is more important than ever. Discover the benefits of installing a Ceiling Mounted Smoke Eater and how it can significantly enhance air quality in your home or business.

Ceiling Mounted Smoke Eater

Understanding the Need for Air Purification

Indoor air pollution is a significant concern, with pollutants such as smoke, dust, allergens, and volatile organic compounds (VOCs) contributing to respiratory issues and overall health problems. In spaces where smoking is allowed or where there are industrial processes producing smoke, a dedicated air purification solution becomes essential.

Why Choose a Ceiling Mounted Smoke Eater?

A Ceiling Mounted Smoke Eater offers several advantages over traditional standalone air purifiers:

  1. Space-Saving Design: By mounting the smoke eater to the ceiling, valuable floor space is saved, allowing for more efficient use of the room.
  2. Enhanced Efficiency: Ceiling-mounted units can effectively capture smoke and other airborne contaminants at the source, ensuring cleaner air throughout the space.
  3. Discreet Installation: Ceiling-mounted smoke eaters are discreetly installed, blending seamlessly with the ceiling and providing unobtrusive air purification.
  4. Improved Air Circulation: The elevated position of the smoke eater allows for better air circulation and distribution, ensuring comprehensive filtration of the entire space.

Benefits of a Ceiling Mounted Smoke Eater

Investing in a ceiling-mounted smoke eater offers numerous benefits:

  1. Smoke Removal: Effectively removes smoke particles, odors, and other pollutants from the air, creating a healthier and more pleasant environment.
  2. Allergen Reduction: Filters out allergens such as pollen, dust mites, and pet dander, providing relief to allergy sufferers.
  3. Odor Neutralization: Eliminates unpleasant odors caused by smoke, cooking, pets, and other sources, leaving the air smelling fresh and clean.
  4. Health Protection: Helps reduce the risk of respiratory problems and other health issues associated with exposure to airborne pollutants.

Choosing the Right Ceiling Mounted Smoke Eater

When selecting a ceiling-mounted smoke eaters, consider the following factors:

  1. Air Purification Capacity: Choose a unit with sufficient airflow and filtration capacity to effectively handle the size of your space and the level of smoke or pollutants present.
  2. Filtration Technology: Look for advanced filtration technologies such as HEPA filters, activated carbon filters, and ionizers for optimal air purification.
  3. Noise Level: Consider the noise level of the unit, especially when installing it in a quiet or noise-sensitive environment.
  4. Ease of Maintenance: Select a smoke eater with easy-to-replace filters and minimal maintenance requirements for hassle-free operation.

Installation and Maintenance

Professionals should install a ceiling-mounted smoke eaters to ensure proper placement and functionality. Regular maintenance, including filter replacement and cleaning, is essential to ensure optimal performance and longevity of the unit.

Read too: Striped Schoolhouse Ceiling Light Fixtures: Unveiling the Timeless Charm

Conclusion

A Ceiling Mounted Smoke Eater is an effective and efficient solution for improving indoor air quality and creating a healthier environment for occupants. With its space-saving design, enhanced efficiency, and numerous benefits, it’s an investment worth considering for any home or business.

Drop Ceiling Return Grille: Enhance Your Space

Drop ceilings are a popular choice for commercial and residential spaces alike, offering a sleek and modern look while also providing practical benefits. One essential component of a drop ceiling system is the return grille, which plays a crucial role in maintaining air circulation and ventilation. In this article, we’ll explore everything you need to know about drop ceiling return grilles, from their functionality to their design options and installation process.

Drop Ceiling Return Grille

Understanding Drop Ceiling Return Grilles

What Is a Drop Ceiling Return Grille?

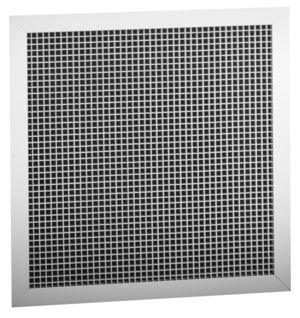
A drop ceiling return grille, also known as a ceiling air return, is a vent cover installed in the ceiling to allow air to flow back into the HVAC system. Unlike supply vents, which deliver conditioned air into a room, return grilles extract air from the room and return it to the heating or cooling system for reconditioning.

Functionality of Drop Ceiling Return Grilles

  • Air Circulation: Return grilles help maintain proper air circulation in a space by allowing air to flow freely between rooms and the HVAC system.
  • Ventilation: By extracting air from the room, return grilles help remove pollutants, odors, and excess moisture, contributing to better indoor air quality.
  • Temperature Control: Efficient air return systems aid in maintaining consistent temperatures throughout a building, enhancing comfort for occupants.

Types of Drop Ceiling Return Grilles

1. Standard Return Grilles

Standard return grilles feature a simple design with straight louvers or slats for airflow. They are available in various sizes to accommodate different airflow requirements and can be made from materials like aluminum, steel, or plastic.

2. Decorative Return Grilles

For spaces where aesthetics are a priority, decorative return grilles offer a stylish alternative. These grilles come in a wide range of designs, including intricate patterns, geometric shapes, and custom finishes, allowing them to blend seamlessly with the surrounding decor.

3. Filtered Return Grilles

Filtered return grilles feature built-in filters to capture dust, pollen, and other airborne particles before they enter the HVAC system. These grilles help improve indoor air quality and reduce the need for frequent duct cleaning and maintenance.

Installing Drop Ceiling Return Grilles

Installing a drop ceiling return grille is a relatively straightforward process that can be completed with basic tools and equipment. Here’s a general overview of the installation steps:

  1. Measure the Opening: Determine the size of the return grille opening in the drop ceiling.
  2. Choose the Grille: Select a return grille that matches the dimensions of the opening and suits your design preferences.
  3. Cut an Opening: If necessary, use a utility knife or saw to cut a hole in the ceiling tile for the grille.
  4. Attach the Grille: Place the grille over the opening and secure it in place using screws or clips.
  5. Connect to Ductwork: Ensure that the ductwork is properly connected to the back of the grille to facilitate air circulation.

Maintaining Drop Ceiling Return Grilles

To keep your drop ceiling return grilles functioning effectively, regular maintenance is essential. This includes:

  • Cleaning: Remove dust and debris from the grilles regularly to prevent airflow obstruction.
  • Replacing Filters: If your return grilles have built-in filters, replace them according to the manufacturer’s recommendations.
  • Inspecting for Damage: Periodically check the condition of the grilles for any signs of damage or corrosion and replace them if necessary.

Conclusion

Drop ceiling return grilles are indispensable components of HVAC systems, ensuring efficient air circulation and ventilation in commercial and residential spaces. By understanding their functionality, design options, and installation process, you can select the right return grilles to enhance both the aesthetic appeal and functionality of your drop ceiling system.

Read too: Exploring the Efficiency of Radiant Ceiling Heater Electric: A Comprehensive Guide

Exploring the Benefits of Installing a Ceiling Mount Smoke Eater in Your Home or Business

In today’s world, indoor air quality is more important than ever. Whether you’re at home, in the office, or in a public space, the air you breathe can have a significant impact on your health and well-being. One effective solution for improving indoor air quality is to install a ceiling mount smoke eater. In this comprehensive guide, we’ll explore the benefits of ceiling mount smoke eaters, how they work, and why they’re an essential addition to any indoor environment.

Ceiling Mount Smoke Eater

Understanding

A ceiling mount smoke eater, also known as a ceiling-mounted air purifier or smoke extractor, is a device designed to remove airborne contaminants such as smoke, dust, pollen, pet dander, and other pollutants from the air. These units are typically installed directly onto the ceiling, where they can effectively capture and filter out harmful particles, leaving behind clean, fresh air.

How Ceiling Mount Smoke Eaters Work

Ceiling mount smoke eaters operate using a combination of filtration technologies to remove airborne contaminants from the air. These technologies may include:

  1. HEPA Filtration: High-efficiency particulate air (HEPA) filters are capable of capturing particles as small as 0.3 microns in size, including smoke, dust, and pollen. HEPA filters are highly effective at removing a wide range of airborne pollutants, making them an essential component of any smoke eater system.
  2. Activated Carbon Filtration: Activated carbon filters actively adsorb and neutralize odors, gases, and volatile organic compounds (VOCs) present in the air. By trapping these contaminants within the porous structure of the carbon filter, activated carbon filtration helps eliminate unpleasant odors and improve indoor air quality.
  3. UV-C Light Sterilization: Some ceiling mount smoke eaters incorporate ultraviolet (UV) germicidal irradiation technology to disinfect and sterilize the air. UV-C light is capable of destroying bacteria, viruses, and other microorganisms, reducing the spread of airborne pathogens and promoting a healthier indoor environment.

Benefits of Ceiling Mount Smoke Eaters

  1. Improved Air Quality: By effectively removing smoke, dust, allergens, and other pollutants from the air, ceiling mount smoke eaters help create a cleaner and healthier indoor environment for occupants.
  2. Odor Elimination: Smoke eaters equipped with activated carbon filtration are highly effective at neutralizing odors from tobacco smoke, cooking fumes, pet odors, and more, leaving behind fresh, odor-free air.
  3. Reduced Health Risks: Poor indoor air quality can contribute to a variety of health problems, including respiratory issues, allergies, and asthma. By removing harmful airborne contaminants, ceiling mount smoke eaters can help reduce the risk of respiratory problems and other health issues associated with indoor air pollution.
  4. Enhanced Comfort: Clean, fresh air is essential for maintaining comfort and productivity in indoor environments. Ceiling mount smoke eaters help create a more comfortable and enjoyable space for occupants by ensuring optimal air quality at all times.

Choosing the Right Ceiling Mount Smoke Eater

When selecting a ceiling mount smoke eater for your home or business, consider the following factors:

  1. Airflow Capacity: Choose a smoke eater with sufficient airflow capacity to effectively clean the air in your space. Consider factors such as room size, ceiling height, and the number of occupants when determining the appropriate airflow capacity for your needs.
  2. Filtration Efficiency: Look for smoke eaters equipped with HEPA filtration and activated carbon filtration for maximum effectiveness in removing smoke, odors, and other airborne pollutants.
  3. Noise Level: Consider the noise level of the smoke eater, especially if it will be installed in a residential or commercial space where quiet operation is desired.
  4. Installation Options: Evaluate the installation requirements and options for ceiling mount smoke eaters to ensure compatibility with your space and existing HVAC system.

Conclusion

Ceiling mount smoke eaters offer an effective solution for improving indoor air quality and creating a healthier, more comfortable indoor environment. By removing smoke, odors, and other airborne contaminants, these devices help ensure clean, fresh air for occupants to breathe. Invest in a ceiling mount smoke eater today and enjoy the benefits of cleaner air in your home or business.

Read too: Exploring the Efficiency of Radiant Ceiling Heater Electric: A Comprehensive Guide

Choosing the Right Bathroom Exhaust Fan for Your Suspended Ceiling: A Comprehensive Guide

Are you planning to install a bathroom exhaust fan in a room with a suspended ceiling? Selecting the right fan for this type of ceiling is crucial for proper ventilation and optimal performance. In this guide, we’ll explore everything you need to know about choosing a bathroom exhaust fan for a suspended ceiling, from key features to installation tips.

Bathroom Exhaust Fan For Suspended Ceiling

Understanding Bathroom Exhaust Fans for Suspended Ceilings

Exploring the Benefits of a Bathroom Exhaust Fan for Suspended Ceilings

A bathroom exhaust fan plays a vital role in maintaining indoor air quality and preventing moisture-related issues in bathrooms. When it comes to suspended ceilings, there are specific considerations to keep in mind:

  1. Improved Ventilation: Suspended ceilings can sometimes restrict airflow, making proper ventilation even more essential. A well-chosen exhaust fan can help circulate air effectively, reducing the risk of mold, mildew, and odors.
  2. Space-Saving Design: Many bathroom exhaust fans designed for suspended ceilings feature a compact and low-profile design, making them ideal for rooms with limited space above the ceiling.
  3. Noise Reduction: Look for exhaust fans with quiet operation to ensure minimal disruption, especially in residential settings where noise levels can be a concern.

Key Features to Consider

Choosing the Right Bathroom Exhaust Fan for Your Suspended Ceiling

When selecting a bathroom exhaust fan for a suspended ceiling, consider the following key features:

  1. Airflow Capacity: Determine the size of the room and choose a fan with adequate airflow capacity to effectively remove moisture and odors.
  2. Installation Method: Look for a fan that is specifically designed for suspended ceilings and compatible with your ceiling grid system.
  3. Energy Efficiency: Opt for an energy-efficient model with features such as low-power consumption and automatic shut-off timers to save on energy costs.
  4. Noise Level: Consider the noise level of the fan, especially if the bathroom is located near bedrooms or other quiet areas.

Installation Tips Bathroom Exhaust Fan for Your Suspended Ceiling

Ensuring Proper Installation of Your Bathroom Exhaust Fan

Follow these tips for installing a bathroom exhaust fans in a suspended ceiling:

  1. Locate the Joists: Determine the location of the ceiling joists to ensure proper support for the fan.
  2. Cut an Opening: Carefully cut an opening in the ceiling tiles to accommodate the exhaust fan housing.
  3. Secure the Fan: Install the fan housing securely to the ceiling grid using appropriate hardware and brackets.
  4. Connect Ductwork: Connect the ductwork to the fan housing, ensuring a tight seal to prevent air leaks.

Conclusion

Choosing the right bathroom exhaust fans for a suspended ceiling is essential for maintaining proper ventilation and preventing moisture-related issues. By considering key features and following proper installation guidelines, you can ensure optimal performance and long-lasting durability for your bathroom exhaust fan.

Read too: Exploring the Efficiency of Radiant Ceiling Heater Electric: A Comprehensive Guide

Drop Ceilings Return Air Grille: Optimal Airflow Efficiency in Your Space

Drop Ceilings Return Air Grille plays a crucial role in maintaining optimal airflow efficiency and ventilation in both residential and commercial spaces. Learn everything you need to know about Drop Ceiling Return Air Grille, from its functions to installation tips and benefits.

Drop Ceiling Return Air Grille

Exploring Drop Ceiling Return Air Grille

Drop Ceiling Return Air Grille is an essential component of HVAC (Heating, Ventilation, and Air Conditioning) systems, designed to facilitate the return of air from the conditioned space back to the HVAC unit for recirculation or treatment. These grilles are typically installed in drop ceilings, providing a discreet and efficient solution for air return without compromising the aesthetics of the space.

Drop Ceiling Return Air Grilles come in various sizes, shapes, and materials to accommodate different airflow requirements and design preferences. Common materials include aluminum, steel, and plastic, with options for different finishes to match the surrounding decor. The design of the grille often features a series of slats or louvers to regulate airflow and prevent the ingress of debris or foreign objects.

The Functions of Drop Ceiling Return Air Grille

Drop Ceilings Return Air Grille serves several important functions in HVAC systems and indoor air quality management:

  1. Air Circulation: By allowing air to flow freely between the conditioned space and the HVAC unit, Drop Ceiling Return Air Grille helps maintain consistent airflow and temperature distribution throughout the building.
  2. Air Filtration: Some Drop Ceiling Return Air Grilles are equipped with filters to trap dust, allergens, and other airborne particles, improving indoor air quality and reducing the risk of respiratory issues.
  3. Pressure Equalization: Drop Ceiling Return Air Grilles help balance air pressure within the building, preventing air from becoming stagnant or trapped in confined spaces.
  4. Energy Efficiency: Properly sized and installed Drop Ceiling Return Air Grilles contribute to the overall energy efficiency of HVAC systems by ensuring optimal airflow and reducing the workload on heating and cooling equipment.

Benefits

Investing in Drop Ceiling Return Air Grille offers several benefits for building owners, occupants, and HVAC system performance:

  1. Improved Air Quality: With optional air filtration capabilities, Drop Ceiling Return Air Grilles help remove airborne contaminants and allergens, promoting healthier indoor air quality.
  2. Enhanced Comfort: By maintaining consistent airflow and temperature distribution, Drop Ceiling Return Air Grilles contribute to a more comfortable indoor environment for occupants.
  3. Aesthetic Appeal: Designed to blend seamlessly with drop ceilings, Drop Ceiling Return Air Grilles offer a discreet and visually appealing solution for air return without detracting from the overall design aesthetics.
  4. Energy Savings: Efficient airflow management facilitated by Drop Ceiling Return Air Grilles can lead to energy savings by reducing the need for excessive heating or cooling to maintain comfort levels.

Choosing and Installing

When selecting Drop Ceiling Return Air Grille for your space, consider the following factors to ensure optimal performance and compatibility:

  1. Size and Airflow Capacity: Choose a grille size and airflow capacity that matches the requirements of your HVAC system and the size of the conditioned space.
  2. Material and Finish: Select a material and finish that complements the design of your drop ceiling and the surrounding decor while meeting durability and maintenance requirements.
  3. Installation Considerations: Follow manufacturer guidelines and consult with HVAC professionals to ensure proper installation of Drop Ceiling Return Air Grille, including positioning, sealing, and integration with ductwork.
  4. Maintenance Requirements: Regularly inspect and clean Drop Ceiling Return Air Grilles to remove dust, debris, and accumulated pollutants, and replace filters as needed to maintain optimal performance and air quality.

Conclusion

Drop Ceiling Return Air Grille is a vital component of HVAC systems, providing essential functions for airflow management, air quality improvement, and energy efficiency. By understanding the importance of Drop Ceiling Return Air Grille and investing in the right product for your space, you can ensure optimal comfort, health, and performance for occupants while maximizing the lifespan and efficiency of your HVAC system.

Read too: Flush Mount Rustic Ceiling Lights: Illuminate Your Space with Stunning

Transform Your Space with Professional Ceiling Tile Cleaning Service Solutions

Discover the transformative power of professional Ceiling Tile Cleaning Service for your home or business. Say goodbye to dingy, discolored ceilings and hello to a fresh, revitalized space. Learn how expert cleaning services can restore the beauty and cleanliness of your ceiling tiles with ease.

Ceiling Tile Cleaning Service

Introduction to Ceiling Tile Cleaning Service

Ceiling tiles play a crucial role in the aesthetics and functionality of any indoor space. However, over time, they can accumulate dirt, dust, grime, and even mold, detracting from the overall appearance and air quality of the room. Regular cleaning and maintenance are essential to preserve the integrity and hygiene of ceiling tiles. That’s where professional Ceiling Tile Cleaning Service comes in.

Benefits of Professional Ceiling Tile Cleaning

  1. Improved Indoor Air Quality: Clean ceiling tiles contribute to better indoor air quality by removing allergens, dust, and pollutants that can accumulate over time. This is especially important for individuals with allergies or respiratory conditions.
  2. Enhanced Aesthetic Appeal: Dirty or stained ceiling tiles can make a space look outdated, neglected, and unappealing. Professional cleaning services can restore the original brightness and color of ceiling tiles, instantly revitalizing the entire room.
  3. Extended Lifespan: Regular cleaning and maintenance can prolong the lifespan of ceiling tiles by preventing premature deterioration and damage. By removing dirt and contaminants, professional cleaning helps protect the integrity of the tiles and prevents the need for costly replacements.
  4. Healthier Environment: Mold and mildew growth on ceiling tiles not only detract from the visual appeal but also pose health risks to occupants. Professional cleaning services can effectively remove mold spores and prevent their recurrence, creating a safer and healthier indoor environment.

The Process of Ceiling Tile Cleaning Service

Professional Ceiling Tile Cleaning Service providers employ advanced techniques and equipment to achieve optimal results:

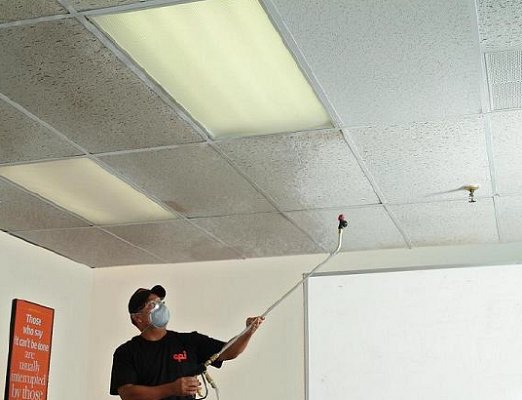
  1. Assessment: The cleaning process begins with a thorough assessment of the condition of the ceiling tiles, including the extent of dirt, stains, and damage. This allows the technicians to determine the most appropriate cleaning methods and products.
  2. Preparation: Before cleaning begins, the surrounding area is prepared to prevent any damage or contamination. Furniture and fixtures are covered or moved, and protective measures are taken to safeguard walls, floors, and other surfaces.
  3. Cleaning: Depending on the type of ceiling tiles and the severity of the stains, various cleaning methods may be employed, including dry cleaning, wet cleaning, steam cleaning, or chemical cleaning. Specialized cleaning solutions are used to dissolve and remove stubborn stains, grease, and mold.
  4. Rinse and Dry: After cleaning, the ceiling tiles are thoroughly rinsed to remove any remaining residue and cleaning agents. Proper drying techniques are then employed to ensure that the tiles are completely dry before reinstallation or use.
  5. Finishing Touches: Once the cleaning process is complete, any necessary repairs or touch-ups are performed to ensure that the ceiling tiles look pristine and uniform. This may include patching holes, replacing damaged tiles, or applying protective coatings for added durability.

Maintaining Clean Ceiling Tiles

To prolong the results of professional Ceiling Tile Cleaning Service, consider the following maintenance tips:

  1. Regular Dusting: Prevent dust buildup by dusting ceiling tiles regularly with a microfiber cloth or duster. This helps maintain cleanliness between professional cleanings and reduces the risk of staining.
  2. Prompt Stain Removal: Address spills, stains, and water damage promptly to prevent them from becoming permanent. Use mild detergent solutions or specialized stain removers recommended by professionals.
  3. Ventilation: Ensure proper ventilation in the room to minimize moisture buildup and inhibit mold growth on ceiling tiles. Use exhaust fans, dehumidifiers, or open windows as needed to promote air circulation.
  4. Scheduled Cleaning: Schedule periodic professional Ceiling Tile Cleaning Service to keep your ceiling tiles looking their best and maintain a healthy indoor environment for occupants.

Conclusion

Investing in professional Ceiling Tile Cleaning Service is a cost-effective way to rejuvenate your space and enhance its cleanliness, appearance, and longevity. Whether you’re a homeowner, business owner, or property manager, regular maintenance of ceiling tiles is essential to create a welcoming and hygienic environment for occupants. Trust the expertise of professional cleaners to deliver exceptional results and transform your space with pristine, sparkling ceiling tiles.

Read too: Black Friday Genie Garage Door Openers Extravaganza for Smart Home Security: Unveiling Exclusive Deals

Understanding and Eliminating Black Spots on the Ceiling: Dealing with Unsightly Intruders

Discover the causes, prevention, and remedies for those pesky black spots on the ceiling. Transform your living space by addressing this common issue effectively.

Black Spots On The Ceiling

Unmasking the Culprits – Black Spots On The Ceiling

Delve into the world of black spots on the ceiling, unraveling the mysteries behind their appearance and conquering the battle against these unwelcome intruders.

Identifying the Causes of Black Spots On The Ceiling:

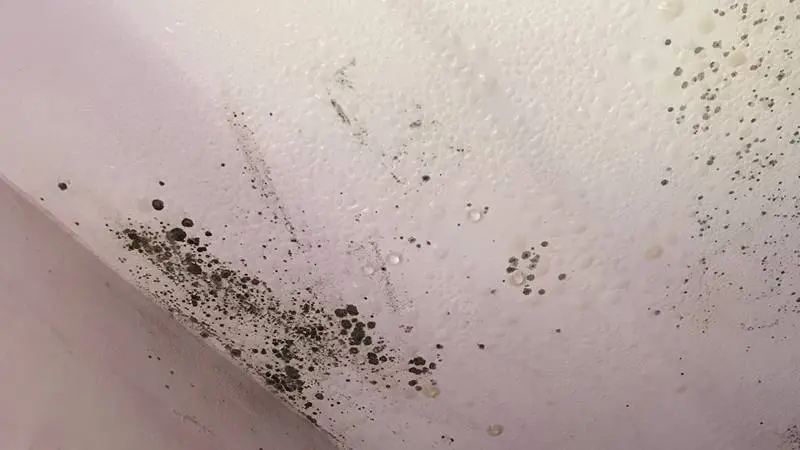
  1. Mold and Mildew:
    • Explore how mold and mildew can thrive in moist environments, leading to the formation of black spots.
  2. Water Leaks:
    • Understand the connection between water leaks and the development of black spots, signaling potential issues in your home’s infrastructure.
  3. Smoke Residue:
    • Delve into the impact of smoking indoors and its contribution to the formation of black spots on the ceiling.
  4. Inadequate Ventilation:
    • Learn how poor ventilation can create conditions conducive to the growth of mold and accumulation of airborne particles, resulting in black spots.

Addressing Black Spots On The Ceiling:

  1. Cleaning with Mold Removers:
    • Explore the use of mold removers and cleaning solutions to eliminate black spots caused by mold and mildew. Follow proper safety measures.
  2. Repairing Water Leaks:
    • Address water leaks promptly by identifying and repairing the source. This prevents further damage and the recurrence of black spots.
  3. Repainting:
    • Understand the importance of repainting affected areas after cleaning to restore the aesthetic appeal of the ceiling and prevent future issues.
  4. Improving Ventilation:
    • Implement strategies to enhance ventilation, such as using exhaust fans, opening windows, or installing a ventilation system to prevent black spots.

Preventing the Return of Black Spots On The Ceiling:

  1. Maintaining Optimal Humidity Levels:
    • Learn how to control indoor humidity levels to discourage the growth of mold and mildew.
  2. Regular Inspections:
    • Adopt a routine of inspecting ceilings and other susceptible areas for signs of water leaks, addressing any issues promptly.
  3. Avoiding Indoor Smoking:
    • Understand the impact of indoor smoking on air quality and how abstaining can contribute to a cleaner ceiling.
  4. Investing in Proper Ventilation Systems:
    • Consider investing in effective ventilation systems to ensure adequate air circulation throughout your living space.

Read too: Is Bathroom Ceiling Mold Dangerous to Your Health and Home? Unveiling the Threat

When to Seek Professional Assistance:

  1. Extensive Mold Growth:
    • If black spots are indicative of extensive mold growth, consult with professionals for a thorough assessment and remediation.
  2. Persistent Water Leaks:
    • Persistent water leaks may require the expertise of a plumber or contractor to identify and address the underlying issue.
  3. Complex Structural Problems:
    • In cases where black spots are symptoms of complex structural problems, enlist the assistance of structural engineers or specialists.

Conclusion: A Spotless Ceiling Awaits

In conclusion, conquering black spots on the ceiling involves understanding their causes and implementing effective prevention and remediation strategies. By taking proactive measures and addressing issues promptly, you can ensure a spotless and aesthetically pleasing ceiling in your home.

Transform your living space, bid farewell to black spots, and welcome a cleaner and healthier environment.

Causes of Mold on Ceiling and Effective Prevention Strategies: Unveiling the Culprits

Discover the factors behind the formation of mold on your ceiling and explore actionable strategies for prevention. Unravel the mysteries of “Causes of Mold on Ceiling” and safeguard your home from potential issues.

Causes Of Mold On Ceiling

Introduction

Mold growth on the ceiling can be a cause for concern, not only for the aesthetic appeal of your home but also for the potential health risks associated with mold exposure. In this comprehensive guide, we will delve into the various factors contributing to the formation of mold on ceilings. Gain valuable insights into the “Causes of Mold on Ceiling” and empower yourself with effective prevention measures.

Causes of Mold on Ceiling: Unraveling the Mysteries

*1. Excess Moisture: The Primary Culprit

One of the primary causes of mold on the ceiling is excess moisture. This can result from various sources, including roof leaks, plumbing issues, or high humidity levels within the home. Identifying and addressing the source of excess moisture is crucial for effective mold prevention.

*2. Leaky Roofs and Ceilings

Roof leaks are a common contributor to mold growth on ceilings. Damaged or missing shingles, deteriorated flashing, or compromised roof structures can allow water to infiltrate, leading to damp conditions conducive to mold development.

*3. Poor Ventilation

Inadequate ventilation can trap moisture indoors, providing an ideal environment for mold growth. Areas with poor air circulation, such as bathrooms, kitchens, or poorly ventilated attics, are susceptible to mold infestation on ceilings.

*4. Water Damage from Plumbing Issues

Leaking pipes, burst water pipes, or plumbing issues within the ceiling structure can introduce moisture, promoting mold growth. Regular inspection and prompt repair of plumbing systems can mitigate the risk of mold formation.

*5. Condensation Buildup

Condensation occurs when warm, moist air comes into contact with cool surfaces, leading to water droplet formation. Ceilings in poorly insulated or poorly ventilated spaces are prone to condensation, fostering an environment conducive to mold.

Identifying and Addressing the Causes of Mold on Ceiling

Explore each cause in detail and understand effective strategies for addressing and preventing mold growth on ceilings.

1. Excess Moisture: Managing Humidity Levels

Maintain optimal humidity levels within your home, typically between 30% and 50%. Use dehumidifiers in areas prone to moisture buildup and ensure proper ventilation to minimize condensation.

2. Leaky Roofs and Ceilings: Regular Roof Inspections

Schedule regular roof inspections to identify and address any damage promptly. Repair or replace damaged shingles, flashing, or roof structures to prevent water infiltration.

3. Poor Ventilation: Enhancing Air Circulation

Improve ventilation in problematic areas by installing exhaust fans, opening windows, or utilizing air purifiers. Ensure that air circulates freely to reduce the risk of mold growth.

4. Water Damage from Plumbing Issues: Routine Inspections

Regularly inspect plumbing systems for leaks, corrosion, or other issues. Promptly address any plumbing problems to prevent water damage and mold formation.

5. Condensation Buildup: Insulation and Ventilation Improvements

Improve insulation in areas prone to condensation buildup. Enhance ventilation by installing vents, fans, or air exchange systems to reduce the likelihood of condensation on ceilings.

Effective Prevention Strategies

*1. Regular Inspections and Maintenance

Conduct regular inspections of your home’s roof, plumbing, and ventilation systems. Address any issues promptly to prevent the development of conditions favorable to mold growth.

*2. Proactive Repairs

If you identify any signs of water damage, leaks, or mold growth, take immediate action. Proactive repairs can prevent further damage and mitigate the risk of mold proliferation.

*3. Educate and Encourage Good Habits

Educate household members about the importance of maintaining a dry environment. Encourage habits such as using exhaust fans, promptly fixing leaks, and practicing good ventilation practices.

Read too: Understanding the Causes and Solutions for a Crack Between Ceiling and Wall: Navigating Home Woes

Conclusion

Understanding the “Causes of Mold on Ceiling” is the first step toward effective prevention and maintenance of a healthy home environment. By addressing excess moisture, leaks, and ventilation issues, you can create conditions unfavorable to mold growth. Implement the strategies outlined in this guide to safeguard your home and promote a mold-free living space.