Ceiling Crown Molding With Lights: Elevate Your Home’s Elegance and Ambiance

Ceiling crown molding has long been a symbol of sophistication and architectural refinement. But when combined with lighting, it transforms a room into a stunning space with enhanced ambiance and depth. Ceiling Crown Molding With Lights is an excellent way to add elegance, improve mood lighting, and highlight architectural details in any home or office.

Ceiling Crown Molding With Lights

Whether you want to create a luxurious feel in your living room, add a soft glow to your bedroom, or improve the ambiance of your dining space, Ceiling Crown Molding With Lights is a stylish and functional upgrade. This article explores the benefits, design ideas, installation tips, and maintenance of this beautiful feature.

Read too: Exploring the Efficiency of Radiant Ceiling Heater Electric: A Comprehensive Guide


Why Choose Ceiling Crown Molding With Lights?

1. Enhances Aesthetic Appeal

One of the main reasons homeowners install Ceiling Crown Molding With Lights is to elevate their interior decor. The combination of crown molding and LED lighting adds depth and character to any space, creating a sophisticated and polished look.

2. Creates a Soft and Inviting Ambiance

Traditional ceiling lighting can sometimes feel too harsh. With integrated lighting in crown molding, you can achieve a soft, diffused glow that enhances relaxation and comfort. This is especially beneficial for bedrooms, living rooms, and home theaters where a cozy atmosphere is preferred.

3. Increases Home Value

Investing in Ceiling Crown Molding With Lights can boost your home’s resale value. Potential buyers appreciate well-thought-out design details that enhance aesthetics and functionality. This feature can make a home stand out in the market.

4. Versatile Lighting Options

With modern LED technology, you can customize the lighting effect to suit your style. Choose from warm white for a cozy feel, cool white for a modern touch, or color-changing LEDs to match different moods and occasions. Many LED systems even come with dimmable and smart control features for added convenience.

5. Hides Imperfections and Wiring

Crown molding serves a functional purpose beyond aesthetics—it helps conceal ceiling imperfections, uneven edges, and electrical wiring. This makes it an excellent solution for both new construction and renovation projects.


Popular Designs for Ceiling Crown Molding With Lights

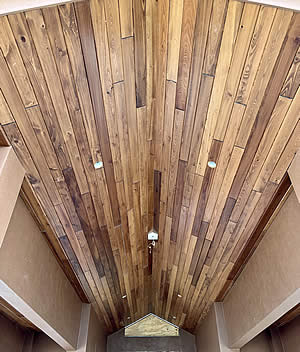
1. Traditional Crown Molding With LED Strip Lights

This classic design features elegant crown molding with hidden LED strip lighting. The soft glow enhances the ceiling lines, adding sophistication to traditional and transitional interiors.

2. Modern Minimalist Crown Molding

For a sleek and contemporary look, minimalist crown molding with integrated LED lighting creates a clean and streamlined effect. This works well in modern apartments and office spaces.

3. Multi-Layered Crown Molding With Indirect Lighting

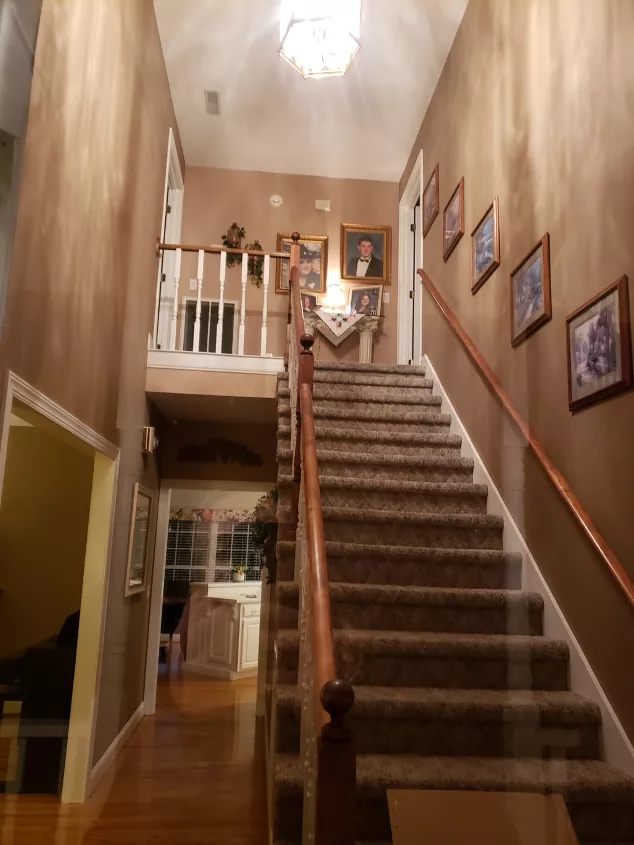
A multi-layered molding design creates depth and dimension. When paired with LED lighting, it produces a dramatic and luxurious effect, making it perfect for grand living rooms and entryways.

4. Floating Crown Molding With Recessed Lights

This style gives the illusion of a floating ceiling by installing recessed LED lights within the molding. It’s an excellent choice for those who want a futuristic and unique lighting design.

5. Color-Changing LED Crown Molding

For those who enjoy dynamic lighting, RGB LED strips within the crown molding allow for color customization. This is ideal for home theaters, gaming rooms, and entertainment spaces.


How to Choose the Right Ceiling Crown Molding With Lights

1. Consider Your Room’s Size and Style

  • In smaller rooms, opt for slim and subtle crown molding to prevent the space from feeling overwhelmed.
  • For larger spaces with high ceilings, a more elaborate molding design can create a grand and elegant look.

2. Choose the Right Type of Lighting

  • Warm white LEDs (2700K–3000K) create a cozy and inviting atmosphere.
  • Cool white LEDs (4000K–5000K) provide a brighter, more modern look.
  • RGB LEDs allow for customizable colors, ideal for entertainment areas.

3. Material Options for Crown Molding

  • Wood: Offers a classic and high-end finish but requires more maintenance.
  • MDF (Medium-Density Fiberboard): A cost-effective alternative with a smooth finish, ideal for painting.
  • Polyurethane: Lightweight, durable, and moisture-resistant, making it great for humid areas like bathrooms.
  • Plaster: Provides a luxurious and intricate design but is more expensive and requires professional installation.

4. Installation Considerations

  • If you’re comfortable with DIY projects, lightweight polyurethane or MDF molding can be installed with adhesive and finishing nails.
  • For complex designs or plaster molding, professional installation is recommended.
  • Ensure proper spacing between the molding and ceiling to allow for optimal light diffusion.

How to Install Ceiling Crown Molding With Lights

Step 1: Gather Your Tools and Materials

You’ll need:

  • Crown molding of your choice
  • LED strip lights
  • Adhesive or nails (depending on the molding type)
  • Power drill
  • Miter saw (for cutting corners precisely)
  • Measuring tape and level

Step 2: Measure and Cut the Molding

Measure the perimeter of the room and cut the molding pieces at a 45-degree angle for seamless corner joints.

Step 3: Attach the Molding to the Wall

Secure the molding using adhesive or nails, ensuring a small gap at the top for LED placement.

Step 4: Install the LED Strip Lights

Stick the LED strip lights inside the gap along the top of the molding. Ensure the power source is accessible for easy control.

Step 5: Test and Adjust the Lighting

Before finalizing the installation, test the lighting to ensure even brightness and proper function. Adjust as needed.


Maintenance Tips for Ceiling Crown Molding With Lights

1. Regular Cleaning

Dust the molding and LED strips regularly using a microfiber cloth or vacuum attachment to prevent buildup.

2. Check for Loose Molding

Over time, molding may loosen due to temperature changes. Reapply adhesive or reinforce with nails if necessary.

3. Replace LED Strips as Needed

LED lights are long-lasting, but if they start flickering or dimming, consider replacing them with new strips.

4. Avoid Excessive Moisture

If installed in bathrooms or kitchens, ensure proper ventilation to prevent mold or moisture damage to the molding.


Conclusion

Ceiling Crown Molding With Lights is a fantastic way to enhance your home’s beauty and functionality. Whether you prefer a classic, modern, or dynamic look, this lighting solution can transform your space with elegance and sophistication. With various designs, materials, and lighting options available, you can customize your ceiling crown molding to suit your style and needs.

By following the right installation and maintenance practices, you can enjoy the aesthetic and practical benefits of Ceiling Crown Molding With Lights for years to come. Upgrade your home’s lighting today and experience the perfect blend of luxury and ambiance!

Cypress Tongue and Groove Ceiling: A Stunning and Durable Choice for Your Home

A Cypress tongue and groove ceiling is a timeless and elegant addition to any home, offering natural beauty, durability, and a warm aesthetic that enhances both interior and exterior spaces. Whether you’re renovating your porch, upgrading your living room, or designing a rustic retreat, Cypress wood provides a long-lasting and visually appealing ceiling solution.

In this guide, we’ll explore the benefits, installation process, maintenance tips, and design ideas for a Cypress tongue and groove ceiling, helping you make an informed decision for your home improvement project.


Why Choose a Cypress Tongue and Groove Ceiling?

Cypress wood is a popular choice for tongue and groove ceilings due to its natural resistance to decay, moisture, and insects. Unlike other wood types, Cypress is highly durable, making it suitable for both indoor and outdoor applications.

Key Benefits of a Cypress Tongue and Groove Ceiling:

  • Natural Beauty – Cypress features rich grain patterns and comes in warm honey, amber, and reddish-brown hues.
  • Moisture Resistance – Ideal for porches, bathrooms, and kitchens, as Cypress naturally withstands humidity.
  • Durability – Resistant to warping, cracking, and rot, making it a long-term investment.
  • Versatile Design – Works well in rustic, farmhouse, modern, and coastal homes.
  • Pest Resistance – Contains natural oils that deter termites and other insects.

Read too: Mastering the Art of Adjusting a Chamberlain Garage Door Opener for Smooth Operation and Safety


Cypress Tongue and Groove Ceiling: Installation Guide

If you’re planning to install a Cypress tongue and groove ceiling, here’s a step-by-step guide to help you through the process.

1: Gather Materials and Tools

Before you begin, make sure you have the following:

  • Cypress tongue and groove boards (pre-measured and acclimated)
  • Nail gun or finishing nails
  • Wood glue (optional, for extra hold)
  • Level and measuring tape
  • Saw (miter or table saw)
  • Ladder or scaffolding
  • Wood stain or sealant (if finishing the wood)

2: Prepare the Ceiling Surface

  • Ensure the ceiling framework (joists or plywood base) is secure and level.
  • If you’re installing over drywall, use furring strips for better ventilation and support.
  • Allow the Cypress boards to acclimate for 48 hours before installation.

3: Start Installation

  1. Mark the Starting Point – Begin at one edge of the ceiling and use a level to ensure a straight line.
  2. Install the First Board – Place the first Cypress plank groove-side facing the wall and secure it with nails.
  3. Continue Installing Boards – Fit the tongue of each new board into the groove of the previous one.
  4. Cut Boards to Fit – Use a miter saw to trim boards at corners or edges.
  5. Secure the Final Row – The last board may need to be slightly trimmed to fit snugly.

4: Finishing Touches

  • Fill nail holes with wood putty (if needed).
  • Apply stain or sealant to enhance the natural beauty and protect the wood.
  • Allow the ceiling to dry before moving furniture or decorations into the space.

Design Ideas for Cypress Tongue and Groove Ceilings

A Cypress tongue and groove ceiling complements various design styles. Here are some creative ideas to inspire your project:

1. Rustic Farmhouse Charm

✔️ Pair with exposed wooden beams for a cozy, cabin-like feel.
✔️ Use a light stain to highlight the natural grain of the Cypress wood.

2. Modern Coastal Retreat

✔️ Opt for a whitewashed Cypress finish to create a breezy, beachy atmosphere.
✔️ Combine with light-colored furniture and soft blues or grays.

3. Outdoor Porch Elegance

✔️ A Cypress ceiling on a covered porch adds warmth and character.
✔️ Use a natural finish to enhance the wood’s organic beauty.

4. Luxurious Living Room Accent

✔️ Install Cypress planks with recessed lighting for a sleek, upscale look.
✔️ Consider a darker stain for a dramatic, high-end feel.

5. Cozy Bedroom Ambiance

✔️ A Cypress tongue and groove ceiling adds a warm, inviting atmosphere.
✔️ Pair with soft lighting and neutral-toned bedding for a relaxing vibe.


How to Maintain a Cypress Tongue and Groove Ceiling

To keep your Cypress tongue and groove ceiling looking beautiful for years, follow these maintenance tips:

  • Dust Regularly – Use a microfiber cloth or vacuum with a brush attachment.
  • Clean with a Damp Cloth – Avoid excessive moisture; use mild soap if needed.
  • Reapply Sealant Every Few Years – Protects the wood from humidity and aging.
  • Inspect for Damage – Check for signs of warping, cracks, or pests (though Cypress is naturally resistant).
  • Avoid Harsh Chemicals – Stick to wood-friendly cleaners to prevent discoloration.

Frequently Asked Questions (FAQs)

1. Is Cypress Good for a Tongue and Groove Ceiling?

Yes! Cypress is an excellent choice due to its durability, moisture resistance, and natural beauty.

2. Can I Install a Cypress Ceiling in a Bathroom?

Absolutely! Cypress is naturally resistant to humidity and mold, making it great for bathrooms and kitchens.

3. How Much Does a Cypress Tongue and Groove Ceiling Cost?

The price varies based on board thickness, grade, and finish, but expect to pay between $4 to $8 per square foot for high-quality Cypress planks.

4. Does Cypress Need to Be Sealed?

While not mandatory, applying a sealant or stain can enhance its longevity and appearance.

5. Can Cypress Be Painted?

Yes, but many homeowners prefer to stain or clear-coat Cypress to preserve its natural grain and color.


Final Thoughts

A Cypress tongue and groove ceiling is a stunning, durable, and versatile option that enhances any home’s aesthetic appeal. Whether you’re installing it in a living room, porch, or bedroom, Cypress wood offers beauty, longevity, and functionality.

By following this installation guide, design ideas, and maintenance tips, you can create a warm, inviting atmosphere that lasts for decades. If you’re considering an upgrade, a Cypress tongue and groove ceiling is a timeless investment that adds both value and charm to your space.

How To Hang A Chandelier From A 20 Foot Ceiling: Tips and Techniques for Elegant Lighting Solutions

How To Hang A Chandelier From A 20 Foot Ceiling? Hanging a chandelier in a room with a 20-foot ceiling requires careful planning and the right tools. Whether you’re renovating your home or decorating a new space, installing a chandelier can add a touch of elegance and sophistication. This guide will walk you through the steps and considerations necessary to properly install a chandelier at such a height, ensuring both safety and aesthetic appeal.

How To Hang A Chandelier From A 20 Foot Ceiling

Understanding Your Space

Before diving into the installation process, it’s crucial to assess your ceiling height and the type of chandelier you want to install. A 20-foot ceiling provides ample space for a striking centerpiece like a chandelier, but it also presents unique challenges compared to standard ceiling heights. Factors such as the weight of the chandelier, the stability of the ceiling structure, and the accessibility for maintenance should all be taken into account.

Choosing the Right Chandelier

Selecting the perfect chandelier is not just about its design and aesthetic compatibility with your space; it’s also about practicality and functionality. For a 20-foot ceiling, consider a chandelier that has a significant vertical presence without overwhelming the room. Opt for designs that complement your overall interior theme while ensuring that the chandelier’s size is proportionate to the room dimensions.

Necessary Tools and Materials

Gathering the right tools and materials is essential for a smooth installation process. Here are some items you may need:

  • Ladder or Scaffold: To safely reach and work at the ceiling height.
  • Ceiling Brace or Support: Ensures the chandelier’s weight is adequately supported.
  • Wire Cutters and Strippers: For handling electrical connections.
  • Voltage Tester: To ensure electrical safety during installation.
  • Chandelier Lift: Facilitates raising and lowering the chandelier during installation and maintenance.

Steps to Install a Chandelier

Step 1: Turn Off Power

Before you begin any work, turn off the electricity to the area where you’ll be working. This can usually be done at the circuit breaker panel.

Step 2: Determine the Hanging Height

For a 20-foot ceiling, the ideal height for hanging a chandelier is typically around 7 to 8 feet from the floor. This allows the chandelier to be visible and appreciated without being too close to eye level.

Step 3: Install the Ceiling Brace

If your ceiling does not have a suitable junction box or support for the chandelier, you’ll need to install a ceiling brace or support system. Follow manufacturer instructions carefully to ensure proper installation.

Step 4: Assemble the Chandelier

Assemble the chandelier according to the manufacturer’s instructions. This may involve attaching arms, bulbs, and crystals (if applicable).

Step 5: Wiring and Hanging

Carefully wire the chandelier according to the provided instructions, ensuring all connections are secure and safe. You may need assistance to safely lift and hang the chandelier from the ceiling brace.

Step 6: Test and Adjust

Once the chandelier is hung, restore power and test its functionality. Make any necessary adjustments to the height or positioning to achieve the desired aesthetic and lighting effect.

Safety Considerations

Installing a chandelier from a 20-foot ceiling requires adherence to safety protocols:

  • Use Proper Equipment: Ensure ladders or scaffolds are stable and appropriate for the height.
  • Secure Connections: Double-check all electrical connections to prevent accidents.
  • Professional Help: Consider consulting a professional if you are unsure about any aspect of the installation process.

Maintenance Tips

Maintaining a chandelier on a 20-foot ceiling may require periodic cleaning and bulb replacement. Consider using a chandelier lift for easier maintenance access.

Read too: Striped Schoolhouse Ceiling Light Fixtures: Unveiling the Timeless Charm

Conclusion

How To Hang A Chandelier From A 20 Foot Ceiling? Hanging a chandelier from a 20-foot ceiling is a rewarding project that can elevate the ambiance of any room. By following these steps and guidelines, you can achieve a stunning and safely installed lighting fixture that enhances your home’s interior. Remember to prioritize safety, choose the right chandelier, and enjoy the transformative impact of a beautifully illuminated space.

Ceiling Fan Mission Style: A Perfect Blend of Function and Design

Ceiling fans are not just functional fixtures; they are an essential part of your home’s decor. When it comes to combining aesthetic appeal with functionality, a Ceiling Fan Mission Style stands out. This article will explore the features, benefits, and best options available for mission-style ceiling fans, guiding you through everything you need to know to make an informed decision.

Ceiling Fan Mission Style

The Essence of Mission Style

What is Mission Style?

Mission style, also known as Craftsman style, originated in the late 19th and early 20th centuries as a response to the industrial revolution. This design aesthetic emphasizes simplicity, handcrafted quality, and natural materials. It often features straight lines, flat panels, and stained glass or metal accents.

Why Choose a Ceiling Fan Mission Style?

Choosing a mission-style ceiling fan can enhance the architectural integrity of your home. It adds a touch of timeless elegance and a handcrafted feel that aligns with both traditional and modern interiors. The combination of form and function makes these fans an excellent choice for those who appreciate both aesthetics and utility.

Features to Look for in a Ceiling Fan Mission Style

Design Elements

Mission-style ceiling fans typically incorporate natural wood finishes, bronze or iron metalwork, and glass elements. Look for fans that highlight these materials, as they are the hallmark of mission design.

Blade Size and Pitch

The blade size and pitch are crucial for optimal air circulation. Mission-style fans often feature medium to large blades with a pitch of around 12 to 14 degrees, which ensures efficient airflow.

Motor Quality

A high-quality motor is essential for quiet and efficient operation. Fans with DC motors are particularly advantageous because they are more energy-efficient and have variable speed settings.

Lighting Fixtures

Many mission-style ceiling fans come with integrated lighting that complements the overall design. Look for fixtures with stained glass or metal accents to maintain the mission aesthetic.

Top Picks: Ceiling Fan Mission Style

Hunter Mission Bronze Ceiling Fan

The Hunter Mission Bronze Ceiling Fan embodies the mission style with its bronze finish and stained glass light kit. It features a powerful motor for efficient air circulation and whisper-quiet performance. The fan also comes with a remote control for added convenience.

Minka-Aire Craftsman Ceiling Fan

Minka-Aire’s Craftsman Ceiling Fan is a perfect blend of form and function. It boasts a dark walnut finish, metal accents, and an energy-efficient DC motor. The integrated LED light provides ample illumination while maintaining the fan’s Craftsman appeal.

Casablanca Mission Indoor Ceiling Fan

The Casablanca Mission Indoor Ceiling Fan is a high-quality option that combines aesthetic appeal with powerful performance. It features a classic design with reversible blades and an integrated light kit. The fan’s motor is designed for quiet operation, making it suitable for any room in your home.

Ceiling Fan Mission Style in Different Rooms

Living Room

A mission-style ceiling fan can serve as a focal point in your living room. Its distinctive design and lighting can complement your furniture and decor, creating a cohesive and inviting space. Choose a fan with a larger blade span for optimal air circulation in bigger rooms.

Bedroom

In the bedroom, a mission-style ceiling fan provides both comfort and aesthetic appeal. Opt for a fan with a quiet motor and a dimmable light kit to create a serene and relaxing atmosphere. The handcrafted elements of the mission style add a touch of warmth and coziness to your private retreat.

Dining Room

A ceiling fan mission style can enhance the dining experience by providing gentle air circulation and ambient lighting. Look for a fan with adjustable speed settings and a reversible motor to accommodate different seasons and dining preferences.

Installation Tips for Ceiling Fan Mission Style

Proper Placement

Ensure that your ceiling fan is installed in the center of the room for even air distribution. For rooms with high ceilings, use an appropriate downrod to position the fan at the optimal height.

Secure Mounting

Mount the fan securely to a ceiling joist or a dedicated fan bracket. This prevents wobbling and ensures safe operation. Follow the manufacturer’s instructions carefully or hire a professional for installation if necessary.

Electrical Considerations

Make sure all electrical connections are properly insulated and secure. Use outdoor-rated wiring and fittings if the fan is installed in a damp or outdoor area. Consider installing a ground fault circuit interrupter (GFCI) for added safety.

Maintaining Your Ceiling Fan Mission Style

Regular Cleaning

Dust and dirt can accumulate on the fan blades and motor housing, affecting performance and appearance. Regularly clean the fan with a soft cloth and mild detergent to maintain its efficiency and aesthetic appeal.

Seasonal Adjustments

Many ceiling fans come with a reversible motor, allowing you to change the direction of the blades. During the summer, set the fan to rotate counterclockwise to create a cooling breeze. In the winter, set it to rotate clockwise to help distribute warm air.

Periodic Inspections

Check for any signs of wear or damage periodically. Tighten any loose screws or bolts and lubricate moving parts as needed. This ensures smooth operation and extends the lifespan of your fan.

The Benefits of a Ceiling Fan Mission Style

Aesthetic Enhancement

A mission-style ceiling fan adds a touch of elegance and craftsmanship to any room. Its distinctive design and quality materials make it a standout piece that enhances your home’s decor.

Improved Air Circulation

Ceiling fans improve air circulation, making your space more comfortable. They help distribute air evenly, reducing the need for additional heating or cooling.

Energy Efficiency

Using a ceiling fan can help reduce energy costs. By improving air circulation, ceiling fans allow you to set your thermostat higher in the summer and lower in the winter, reducing the load on your HVAC system.

Conclusion

A Ceiling Fans Mission Style is more than just a functional appliance; it is a statement piece that reflects a commitment to quality and craftsmanship. Whether you are looking to enhance the aesthetic appeal of your living room, bedroom, or dining room, a mission-style ceiling fan offers the perfect blend of form and function.

By choosing a fan that incorporates the key elements of mission design—natural materials, handcrafted details, and robust construction—you can enjoy the benefits of improved air circulation, energy efficiency, and timeless elegance. Consider top models like the Hunter Mission Bronze Ceiling Fan, Minka-Aire Craftsman Ceiling Fan, and Casablanca Mission Indoor Ceiling Fan to elevate your home’s interior.

With proper installation and maintenance, your mission-style ceiling fan will provide years of comfort and aesthetic pleasure, making it a worthy investment for any home.

Read too: Striped Schoolhouse Ceiling Light Fixtures: Unveiling the Timeless Charm