If you’re a stand-up paddleboarding (SUP) enthusiast, you know how important it is to store your board properly. A Stand Up Paddle Board Ceiling Rack is one of the best storage solutions to keep your SUP safe while maximizing space in your garage, boathouse, or home.

Storing your SUP incorrectly can lead to damage, warping, or even unnecessary wear and tear. That’s why investing in a quality ceiling rack is essential. In this article, we’ll explore:
✔️ Why you need a ceiling rack for your SUP
✔️ The best types of ceiling racks available
✔️ How to install a Stand Up Paddle Board Ceiling Rack
✔️ Top recommendations for SUP ceiling racks
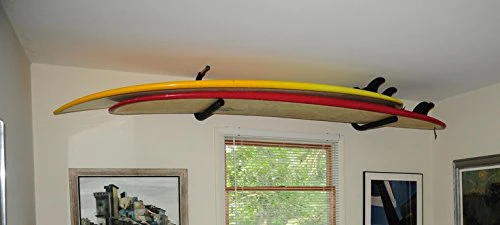
Why Choose a Stand Up Paddle Board Ceiling Rack?
A ceiling-mounted rack is an excellent storage option for paddleboards because it:
✅ Saves space – Keeps your board off the floor and walls, freeing up room.
✅ Protects your board – Prevents damage from accidental bumps, dirt, and moisture.
✅ Keeps your SUP secure – Reduces the risk of theft or accidental falls.
✅ Organizes your gear – Some ceiling racks include extra storage for paddles and accessories.
If you have limited storage space but still want to protect your investment, a Stand Up Paddle Board Ceiling Rack is the perfect solution.
Read too: Shiplap Ceiling in Kitchen: A Timeless Trend for a Stylish and Cozy Space
Types of Stand Up Paddle Board Ceiling Racks
There are several types of SUP ceiling racks, each catering to different needs. Here are the most popular options:
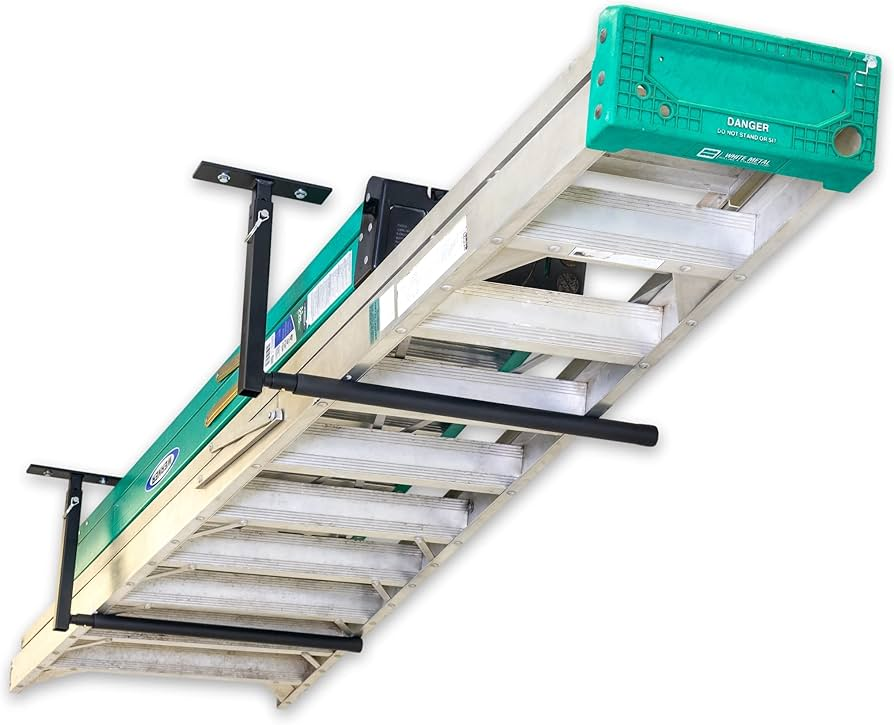
1. Fixed Ceiling Racks
A fixed ceiling rack is a permanent storage solution that securely holds your board overhead. It usually consists of metal or wooden brackets mounted directly to the ceiling.
✔️ Best for: Homeowners with dedicated storage space.
✔️ Pros: Sturdy, secure, and long-lasting.
✔️ Cons: Requires installation and cannot be adjusted.
2. Adjustable Ceiling Racks
These racks offer height and width adjustability, making them perfect for different board sizes and storage needs.
✔️ Best for: People who need flexibility in their storage space.
✔️ Pros: Versatile and adjustable for various board sizes.
✔️ Cons: May require more effort to install properly.
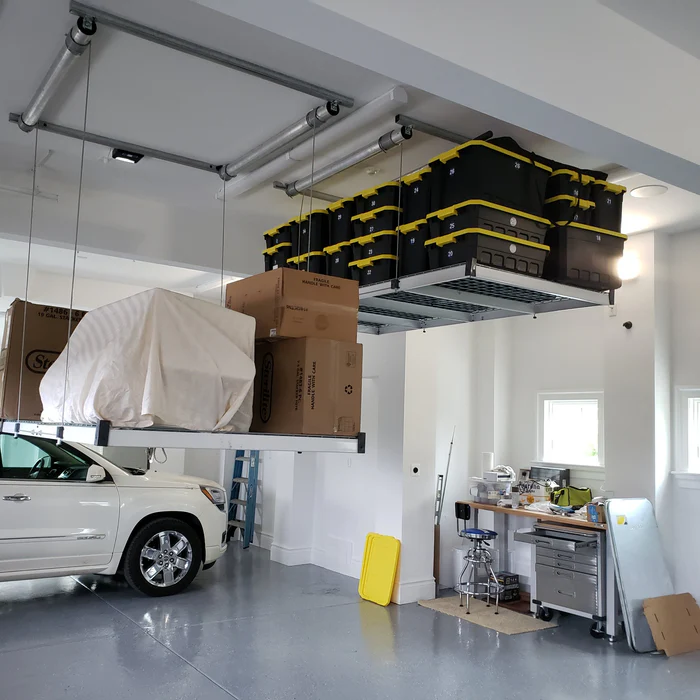
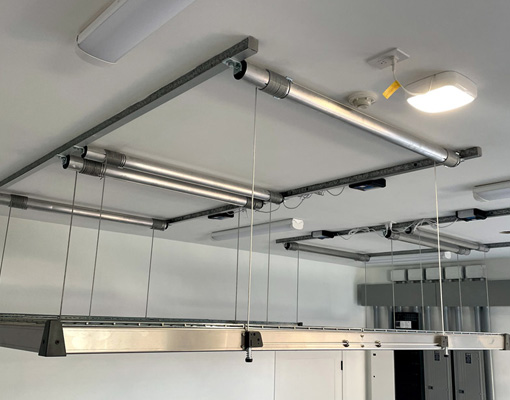
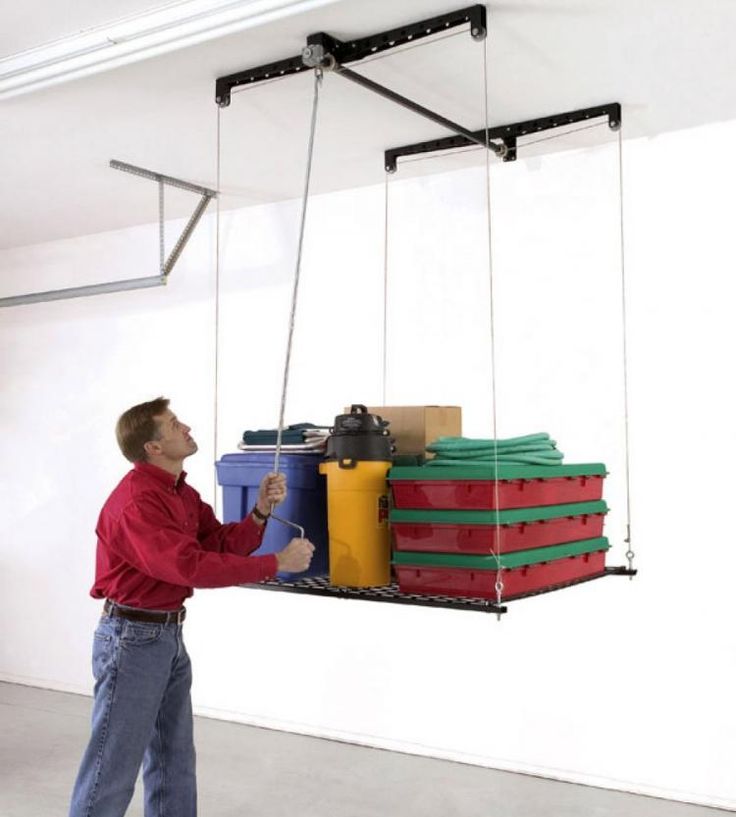
3. Pulley System Racks
A pulley-based SUP ceiling rack lets you raise and lower your board with ease, making it an excellent option for those who don’t want to lift heavy equipment manually.
✔️ Best for: Those with heavy boards or limited mobility.
✔️ Pros: Easy to use and great for high ceilings.
✔️ Cons: More expensive and requires installation.
4. Padded Suspension Straps
These hanging straps are an affordable and simple way to store your board overhead. They attach to the ceiling and cradle your SUP in soft, padded loops.
✔️ Best for: Budget-conscious paddleboarders.
✔️ Pros: Inexpensive, easy to install, and lightweight.
✔️ Cons: May not be as secure as fixed racks.
How to Install a Stand Up Paddle Board Ceiling Rack
Installing a SUP ceiling rack is easier than you might think. Here’s a simple step-by-step guide:
Step 1: Choose the Right Location
Find a spot where your board will be protected from direct sunlight, moisture, and extreme temperatures. Ideally, install the rack in:
🔹 A garage
🔹 A boathouse
🔹 A shed or indoor space
Step 2: Measure Your Board and Ceiling
✔️ Measure the length and width of your paddleboard.
✔️ Ensure there is enough clearance between the ceiling and the floor.
Step 3: Mark and Install Mounting Brackets
🔧 Use a stud finder to locate ceiling beams for a secure mount.
🔧 Mark the placement with a pencil.
🔧 Drill pilot holes and attach the mounting brackets with screws.
Step 4: Secure the Rack and Test
✔️ Attach the SUP rack or straps securely.
✔️ Gently place your paddleboard in the rack to ensure a proper fit.
✔️ Test stability by slightly shaking the rack (it should remain firm).
Best Stand Up Paddle Board Ceiling Racks: Top Recommendations
Here are some of the top-rated SUP ceiling racks on the market:
1. StoreYourBoard Hi-Port 2 Ceiling Rack
✔️ Holds up to two paddleboards
✔️ Heavy-duty steel construction
✔️ Adjustable height for different board sizes
2. RAD Sportz SUP Hoist Pulley System
✔️ Great for high ceilings
✔️ Smooth pulley system for easy lifting
✔️ Supports up to 125 lbs
3. COR Surf Ceiling Rack
✔️ Affordable and easy to install
✔️ Soft padded arms prevent scratches
✔️ Minimalist design
4. Suspenz Ceiling Rack for Paddle Boards
✔️ High-quality padding protects your SUP
✔️ Can store one or two boards
✔️ Lightweight aluminum design
Each of these options provides a safe and efficient way to store your SUP while keeping your space organized.
Tips for Storing Your SUP Properly
To extend the life of your paddleboard, follow these storage tips:
✔️ Store it dry – Always dry your board completely before storing it to prevent mold or mildew.
✔️ Avoid direct sunlight – UV rays can damage the board’s material over time.
✔️ Check for damages – Inspect your board periodically to ensure there are no cracks or weak spots.
✔️ Use padding – If storing directly on metal racks, use foam padding to prevent scratches.
Frequently Asked Questions
1. Can I use a surfboard rack for my paddleboard?
Some surfboard racks may work for a paddleboard, but since SUPs are larger and heavier, it’s best to use a dedicated Stand Up Paddle Board Ceiling Rack for safety.
2. How much weight can a SUP ceiling rack hold?
Most racks can hold between 50 to 150 lbs, depending on the model. Always check the weight capacity before purchasing.
3. Will a pulley system be hard to install?
Not necessarily. Pulley systems usually come with detailed installation guides, and they only require basic tools like a drill and a stud finder.
4. Do I need special screws for installation?
Yes! Use heavy-duty screws that are designed for wood or drywall studs to ensure a secure mount.
Final Thoughts on Stand Up Paddle Board Ceiling Racks
A Stand Up Paddle Board Ceiling Rack is the perfect storage solution for any paddleboarding enthusiast. It saves space, protects your board, and keeps your gear organized. Whether you choose a fixed rack, pulley system, or padded straps, having a reliable ceiling storage solution will keep your SUP in great condition for years to come.
By following the installation tips and storage guidelines in this article, you’ll have a secure and accessible place for your paddleboard—ready for your next adventure on the water! 🌊🏄♂️