Types of Ceiling Cracks with Pictures: A Comprehensive Guide

Ceiling cracks can be a common occurrence in many homes and can result from various factors, including structural settling, temperature fluctuations, or moisture issues. Understanding the types of ceiling cracks is essential for effective repair and maintenance. In this article, we will explore the various types of ceiling cracks, complete with pictures to help you identify and address them.

Types Of Ceiling Cracks With Pictures

1. Hairline Cracks

Description: Hairline cracks are extremely thin cracks that may appear in a straight line or a spiderweb pattern. They are often barely visible and can result from minor settling or temperature changes.

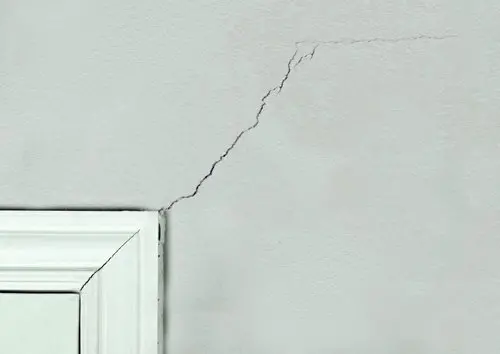
2. Settlement Cracks

Description: Settlement cracks are common in both old and new homes. They occur as the building settles, and they often follow the natural lines of construction materials. These cracks can be more noticeable than hairline cracks.

3. Expansion and Contraction Cracks

Description: These cracks occur due to the natural expansion and contraction of building materials in response to temperature and humidity changes. They are often more pronounced during extreme weather conditions.

4. Stair-Step Cracks

Description: Stair-step cracks form a pattern resembling a staircase. They are typical in masonry or brick ceilings and can indicate structural movement or settling issues.

5. Sagging Ceiling Cracks

Description: When a ceiling sags, it can develop cracks along the area of the sag. These cracks are often a sign of a more significant structural issue and should be addressed promptly.

6. Water Stain Cracks

Description: Water stain cracks occur when water infiltrates the ceiling, leaving behind a discolored mark along with the crack. Identifying the source of the water infiltration is crucial to prevent further damage.

7. Popcorn Ceiling Cracks

Description: Popcorn ceiling cracks appear in textured or popcorn ceilings. These cracks can be challenging to repair, as they require matching the texture of the surrounding area.

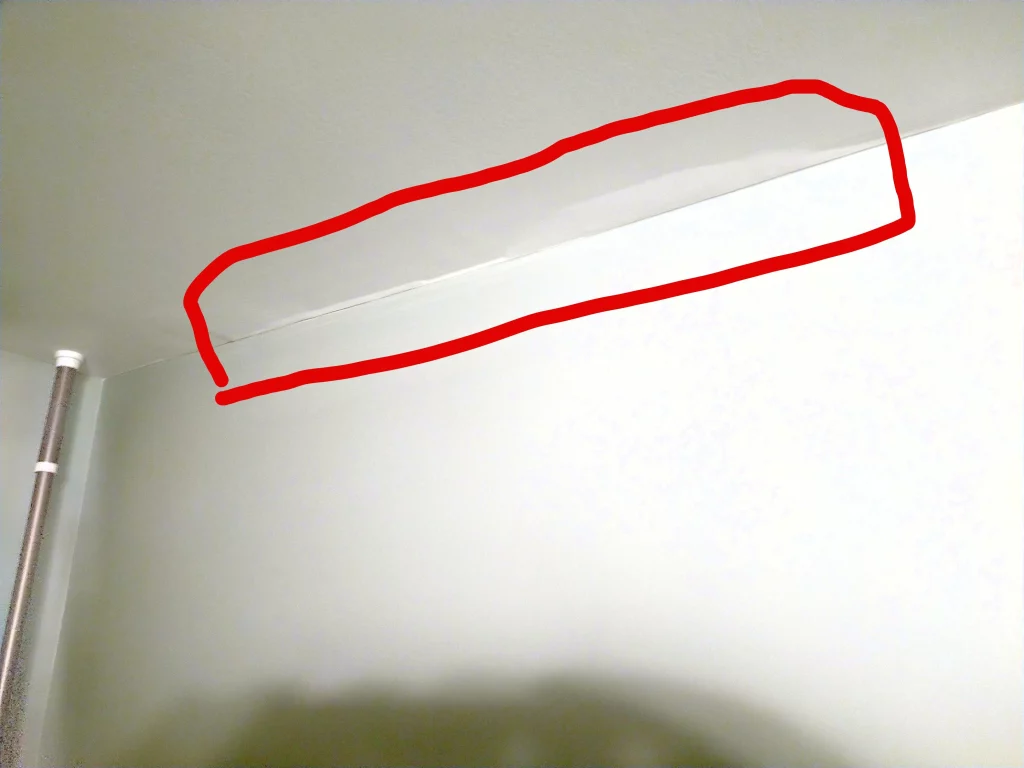
8. Drywall Joint Cracks

Description: Drywall joint cracks often occur at the seams of drywall sheets. They can result from poor installation, house settling, or temperature fluctuations. Proper taping and patching are essential for repairs.

How to Address Ceiling Cracks

Addressing ceiling cracks depends on the type and severity of the crack. Here are some general steps to consider:

  1. Assessment: Begin by identifying the type of crack and its cause. This will help determine the appropriate repair method.
  2. Surface Repair: For minor cracks, you can use a joint compound or patching material to fill the crack. Sand and paint the repaired area to match the ceiling.
  3. Structural Assessment: For significant cracks, especially those related to sagging or structural issues, consult a professional for a thorough assessment and repair.
  4. Moisture Control: If water stains are present, address the source of the water infiltration, whether it’s a roof leak, plumbing issue, or condensation problem.
  5. Texture Matching: When dealing with textured ceilings like popcorn ceilings, matching the texture can be challenging. Consider consulting a professional for these repairs.

Read too: Can Clogged Gutters Cause Ceiling Leaks

Conclusion

Ceiling cracks come in various types, each with its own causes and repair considerations. Identifying the type of crack and understanding its root cause is essential for effective repair and maintenance. Whether it’s a minor hairline crack or a more significant structural issue, addressing ceiling cracks promptly can help maintain the integrity and aesthetics of your home.

Unveiling the Costs: How Much To Skim Coat A Ceiling?

How Much To Skim Coat A Ceiling? A well-maintained ceiling adds elegance to any room, and one of the ways to achieve a smooth, flawless ceiling surface is through skim coating. If you’re considering this process, it’s important to understand the costs involved. In this article, we’ll explore the factors that influence the cost of skim coating a ceiling and provide you with valuable insights into budgeting for this home improvement project.

How Much To Skim Coat A Ceiling

Understanding the Skim Coating Process

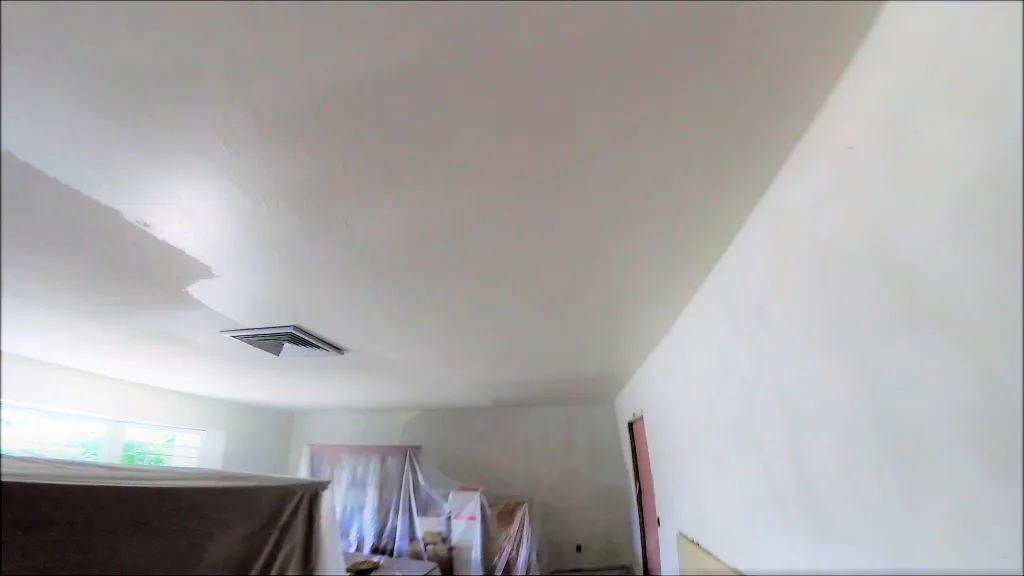
Skim coating is a technique used to create a smooth and even surface on a ceiling or wall. It involves applying a thin layer of joint compound or plaster to the existing surface, filling imperfections, and creating a blank canvas for painting or further finishing. Skim coating is typically required when the ceiling has imperfections such as cracks, texture, or unevenness, or when you want to achieve a modern, smooth finish.

Factors That Influence Skim Coating Costs

The cost of skim coating a ceiling can vary depending on several factors:

  1. Ceiling Size: The larger the ceiling, the more materials and labor will be required. Ceiling area is a significant factor in determining the cost.
  2. Ceiling Condition: The existing condition of the ceiling plays a crucial role. If the ceiling has significant damage or texture that needs removal, it will require more effort and material, increasing the cost.
  3. Labor Costs: Skim coating is a labor-intensive process. Labor costs can vary based on location and the complexity of the job.
  4. Materials: The type of joint compound or plaster used can affect costs. Higher-quality materials may cost more but can result in a smoother finish.
  5. Additional Repairs: If additional repairs are needed, such as fixing cracks, holes, or water damage, these will add to the overall cost.
  6. Ceiling Height: High ceilings can be more challenging to work on and may require specialized equipment, which can increase costs.

Read too: Why Is My Ceiling Fan Leaking Water

Estimating the Cost

To get an accurate estimate for skim coating your ceiling, consider the following steps:

  1. Measure the Ceiling: Measure the length and width of the ceiling to determine the square footage.
  2. Assess Ceiling Condition: Evaluate the condition of the ceiling. Take note of any imperfections that need to be addressed.
  3. Request Multiple Quotes: Contact several contractors or professionals for quotes. Be sure to provide them with accurate measurements and details about the ceiling’s condition.
  4. Ask for a Breakdown: Request a breakdown of the quote to understand how the costs are distributed, including labor, materials, and any additional repairs.

Average Cost Ranges

On average, the cost of skim coating a ceiling can range from $1 to $2 per square foot. For a 200-square-foot ceiling, this translates to a cost of $200 to $400. However, keep in mind that prices can vary significantly based on the factors mentioned earlier.

Additional Considerations

When budgeting for skim coating, consider the following:

  1. Painting Costs: Skim coating is typically done before painting, so budget for painting costs as well.
  2. Quality vs. Price: Don’t always choose the lowest price. The quality of work and materials can make a significant difference in the final result.
  3. DIY vs. Professional: While some homeowners attempt to skim coat ceilings themselves, it can be a challenging and time-consuming task. Hiring a professional can ensure a smoother finish.

Conclusion:

Skim coating your ceiling can transform the look of a room, but it’s important to budget for this project properly. Understanding the factors that influence the cost and getting multiple quotes from professionals will help you make an informed decision. With the right investment, you can enjoy a beautifully smooth and flawless ceiling that enhances your home’s aesthetics.

How To Fix Water Bubble In Ceiling – A DIY Guide

A water bubble in the ceiling can be an alarming sight. It not only compromises the aesthetics of your home but also indicates a potential water leak or damage that needs immediate attention. Fixing a water bubble in the ceiling can be a DIY project if the problem is caught early and the damage is not extensive. In this article, we’ll guide you through the steps to address this issue effectively, from identifying the root cause to repairing the damage. Let’s get started.

How To Fix Water Bubble In Ceiling

Identifying the Problem

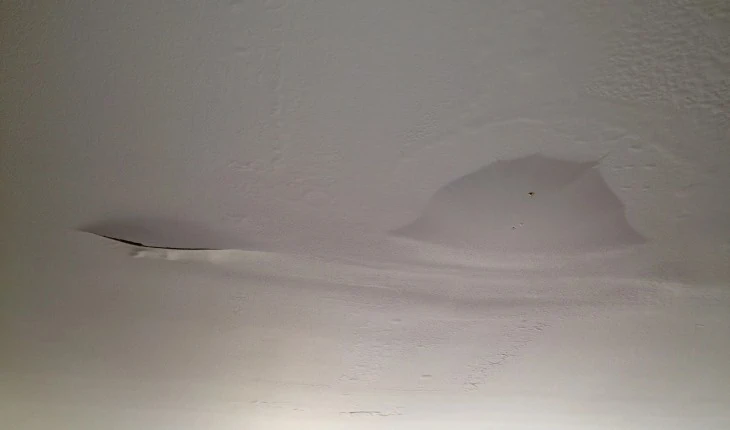
Before you can fix a water bubble in your ceiling, you need to identify the root cause. Water bubbles occur when water accumulates between the paint or drywall and the ceiling surface. This can happen due to various reasons, including:

  1. Leaky Roof: One of the most common reasons for water bubbles in the ceiling is a leaky roof. When your roof is compromised, rainwater can seep into the attic and then make its way down to the ceiling.
  2. Plumbing Issues: Faulty plumbing, such as a burst pipe or a leaky connection, can also lead to water bubbles in the ceiling. In this case, the water might come from above or adjacent to the ceiling.
  3. Condensation: In some cases, condensation can accumulate and create bubbles in the ceiling. This is more common in high-humidity environments or bathrooms without proper ventilation.

Locating the Source of the Leak

To effectively fix the water bubble in your ceiling, you need to find the source of the leak. Here’s how you can do it:

  1. Inspect the Attic: If you suspect a leaky roof, start by inspecting your attic. Look for wet spots or signs of water infiltration on the attic floor or the rafters. This can help you pinpoint the area where the water is entering.
  2. Check Plumbing: If you suspect a plumbing issue, turn off the water supply to your home and check for any dampness or leaks near the plumbing fixtures. This can help you identify the source of the problem.
  3. Look for Stains: Water stains on your ceiling can also provide clues about the source of the leak. The stain will typically be located close to the water bubble.

Repairing the Water Bubble

Once you’ve identified the source of the leak, it’s time to fix the water bubble in your ceiling. Here’s a step-by-step guide to repairing the damage:

  1. Gather Your Supplies: You’ll need a utility knife, a bucket, a plastic drop cloth, a putty knife, sandpaper, primer, paint, and a paint roller. Make sure to wear safety goggles and gloves during the process.
  2. Protect the Area: Lay the plastic drop cloth on the floor beneath the water bubble. This will catch any falling debris and water, making cleanup easier.
  3. Drain the Water: Use the utility knife to puncture the water bubble gently. Allow the water to drain into the bucket. If the bubble is large, be prepared for a significant amount of water.
  4. Let it Dry: After draining the water, allow the area to dry completely. This might take a few hours or even a day, depending on the extent of the damage.
  5. Scrape and Sand: Once the area is dry, use the putty knife to scrape away any loose or damaged drywall or paint. Then, sand the area to create a smooth surface for repairs.
  6. Apply Primer: Apply a layer of primer to the damaged area. This will help seal the surface and prepare it for painting.
  7. Paint the Ceiling: After the primer has dried, use a paint roller to apply a matching paint color to the ceiling. Make sure to blend the new paint with the surrounding area to create a seamless finish.
  8. Inspect for Additional Leaks: After the repair is complete, closely monitor the area for signs of additional leaks. If the problem persists, it’s crucial to address the underlying issue.

Preventing Future Water Bubbles

To prevent future water bubbles in your ceiling, consider these preventative measures:

  1. Regular Roof Inspections: Schedule regular inspections of your roof to catch and fix any issues early.
  2. Maintain Plumbing: Check and maintain your plumbing regularly to prevent leaks.
  3. Improve Ventilation: If condensation is a recurring issue, consider improving ventilation in the affected area.

Read too: What Does Water Damage Look Like On Ceiling

Conclusion

Fixing a water bubble in your ceiling is a manageable DIY project if you act promptly and address the underlying issue. Identifying the source of the leak, repairing the damage, and taking preventative measures can help maintain the integrity and appearance of your ceiling. By following the steps outlined in this article, you can resolve the issue and ensure a dry and beautiful home.