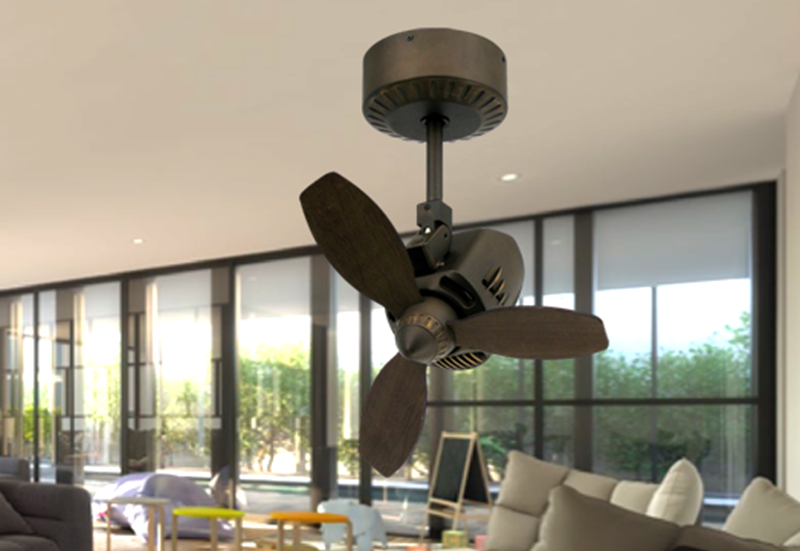
Mini Split System Ceiling Mount: The Ultimate Guide for Efficient Home Climate Control

When it comes to controlling the temperature in your home or office, a Mini Split System Ceiling Mount is a highly effective solution. Unlike traditional HVAC systems, mini splits offer more flexibility, energy efficiency, and easy installation. In this article, we’ll explore everything you need to know about the Mini Split System Ceiling Mount, including how it works, its benefits, installation tips, and how it compares to other HVAC solutions.

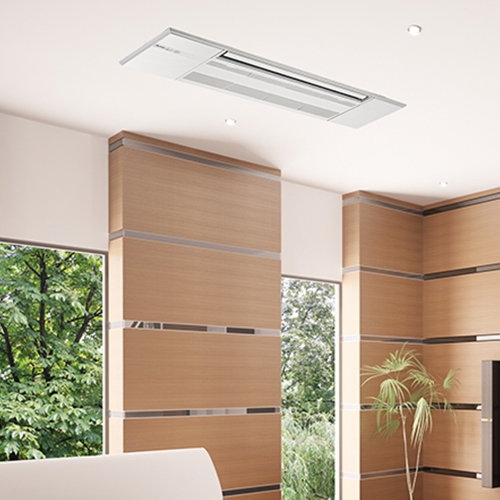
Mini Split System Ceiling Mount

What is a Mini Split System Ceiling Mount?

Mini Split System Ceiling Mount is a type of ductless air conditioning system that is installed directly on the ceiling. It consists of an indoor air-handling unit and an outdoor compressor, which work together to heat or cool your home. The system is popular because it doesn’t require ductwork, making installation quicker and less invasive compared to traditional systems.

The ceiling-mounted mini split is ideal for spaces with high ceilings or areas where wall-mounted units may not be feasible. This design is often chosen for homes with limited space, offices, or larger rooms that need uniform air distribution.


Why Choose a Mini Split System Ceiling Mount?

1. Space Efficiency

One of the main advantages of a Mini Split System Ceiling Mount is that it saves valuable wall space. If you have a smaller room or an interior design that doesn’t accommodate bulky wall units, ceiling-mounted mini splits are a great alternative. They can be mounted discreetly out of sight, making them perfect for aesthetic-conscious spaces.

Read too: Shiplap Ceiling in Kitchen: A Timeless Trend for a Stylish and Cozy Space

2. Energy Efficiency

Mini splits are known for their energy efficiency. Unlike central air systems, which lose energy through ducts, mini splits deliver cool or warm air directly into the room. The absence of ductwork means that no energy is wasted, resulting in lower energy bills. Additionally, these systems often come with inverter technology, which adjusts the compressor’s speed according to the cooling or heating demand, further increasing energy savings.

3. Zoning Capabilities

Mini Split System Ceiling Mount offers zoning capabilities, meaning that you can set different temperatures for different rooms or zones. This is a great feature if you have spaces with varying heating or cooling needs. For instance, the bedroom may require cooler air, while the living room could benefit from warmer temperatures. Zoning also means you won’t be cooling or heating rooms that are unoccupied, further saving on energy costs.

4. Quiet Operation

Mini split systems, including ceiling-mounted models, are much quieter than traditional HVAC units. The indoor unit operates at a much lower decibel level, and because it’s mounted on the ceiling, you’ll hear even less noise. This is ideal for bedrooms, home offices, or any space where noise reduction is a priority.

5. Easy Installation

A ceiling-mounted mini split system is easier to install than a traditional HVAC system because it doesn’t require extensive ductwork. Instead, small refrigerant lines are run between the indoor unit and the outdoor compressor. This makes the installation process faster and less disruptive, especially for retrofitting existing buildings or homes.


How Does a Mini Split System Ceiling Mount Work?

Mini Split System Ceiling Mount works by transferring refrigerant between the indoor and outdoor units. Here’s a breakdown of the process:

  1. Indoor Unit (Ceiling Mount): The ceiling-mounted indoor unit draws in warm air from the room, cools or heats it using refrigerant, and then redistributes the air back into the room. It also filters the air, providing better indoor air quality.
  2. Outdoor Unit: The outdoor compressor is responsible for compressing and circulating the refrigerant. It works in tandem with the indoor unit to heat or cool the air inside. It’s typically located outside the house or building, on the ground or mounted on a wall.
  3. Refrigerant Lines: The refrigerant lines connect the indoor and outdoor units. These lines allow the refrigerant to flow back and forth, absorbing heat from the air inside the room and releasing it outside. The system uses an evaporator coil and a condenser coil to facilitate this process.
  4. Remote Control: The Mini Split System Ceiling Mount typically comes with a remote control, allowing users to adjust the temperature, fan speed, and mode of the system from anywhere in the room.

Benefits of a Mini Split System Ceiling Mount

1. Improved Comfort

One of the primary reasons homeowners choose a ceiling-mounted mini split system is for the enhanced comfort it provides. Unlike traditional units that may cool or heat unevenly, mini splits distribute air evenly throughout the room. This ensures that no area is too cold or too hot, leading to more consistent temperatures and increased comfort.

2. Aesthetics

Since the unit is installed on the ceiling, a Mini Split System Ceiling Mount is less visible and blends in with the room’s decor. This allows you to maintain the aesthetic integrity of your space without compromising on functionality.

3. Customizable Control

With a mini split system, you have complete control over your comfort. You can adjust the temperature, fan speed, and even set a schedule for the system to turn on and off. This level of customization ensures that you get the precise temperature you need, when you need it.

4. Ideal for Retrofit Projects

For homes or buildings without existing ductwork, installing a Mini Split System Ceiling Mount is a cost-effective way to achieve efficient heating and cooling. It’s a great option for older homes, new additions, or spaces where adding ducts would be impractical or costly.


How to Install a Mini Split System Ceiling Mount

While the installation process for a Mini Split System Ceiling Mount is generally simpler than traditional systems, it still requires professional expertise to ensure proper setup. Here are the steps involved:

  1. Choose the Location: The first step is selecting the right spot for the ceiling-mounted unit. It should be positioned in the center of the room or space for optimal air circulation. Additionally, the location should be easily accessible for maintenance.
  2. Install the Indoor Unit: The indoor unit is mounted securely on the ceiling. The installation typically involves attaching brackets and ensuring the unit is level.
  3. Connect the Refrigerant Lines: Small refrigerant lines are run from the indoor unit to the outdoor unit. These lines are typically drilled through the wall and carefully sealed to prevent air or moisture leakage.
  4. Mount the Outdoor Unit: The outdoor unit, which houses the compressor, is installed outside the building. It should be positioned in a shaded area to reduce heat buildup, and it needs to be placed on a sturdy, level surface.
  5. Powering and Testing: Once everything is connected, the system is powered on, and the technician will test the operation of the system to ensure it works efficiently. They will also check for leaks or other potential issues.

Maintenance Tips for Mini Split System Ceiling Mount

To keep your Mini Split System Ceiling Mount running efficiently, regular maintenance is key. Here are a few tips:

  1. Clean the Filters: Clean the air filters every few months to ensure optimal airflow. Dirty filters can reduce the system’s efficiency and lead to poor air quality.
  2. Inspect the Refrigerant Lines: Periodically check the refrigerant lines for any leaks or damage. Leaks can lead to a decrease in system performance.
  3. Clean the Coils: The evaporator and condenser coils should be cleaned regularly to prevent dirt buildup, which can hinder performance.
  4. Schedule Professional Servicing: Have your system inspected by a professional at least once a year. A technician can ensure the refrigerant levels are adequate, clean the internal components, and check for any issues that could affect performance.

Conclusion

Mini Split System Ceiling Mount offers an excellent way to control the temperature in your home or office, providing energy-efficient heating and cooling without the need for bulky ductwork. With the flexibility to heat or cool individual rooms, these systems deliver customized comfort while saving space and energy. Whether you’re upgrading an existing system or installing a new one, a ceiling-mounted mini split offers long-term reliability and improved indoor air quality.
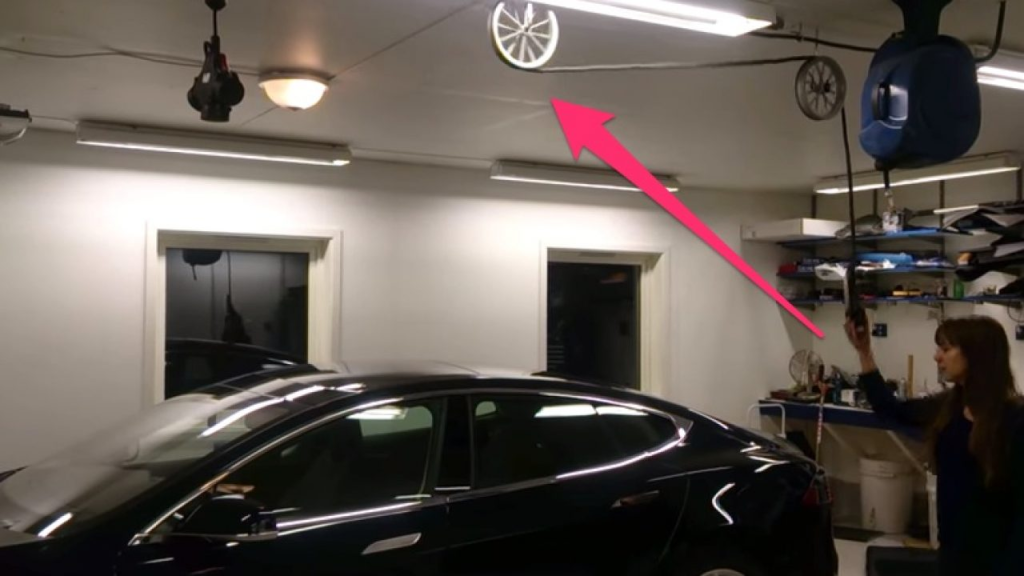

Tesla Charger Ceiling Mount: Efficient Solutions for Electric Vehicle Charging

As electric vehicles (EVs) continue to gain popularity, ensuring that your Tesla is always charged and ready to go becomes increasingly important. One effective solution for optimizing your charging setup is using a Tesla charger ceiling mount. This innovative approach not only maximizes space but also provides a sleek and efficient way to keep your EV charged. In this guide, we’ll explore the benefits, installation process, and considerations for choosing the perfect Tesla charger ceiling mount for your needs.

Tesla Charger Ceiling Mount

What is a Tesla Charger Ceiling Mount?

A Tesla charger ceiling mount is a mounting solution designed to attach your Tesla Wall Connector or other EV charging stations to the ceiling rather than the wall. This setup is particularly beneficial for garages or charging spaces where wall-mounted options are impractical or where maximizing floor space is essential.

Types of Tesla Charger Ceiling Mounts

  1. Fixed Ceiling Mounts: These mounts are securely attached to the ceiling and hold the charger in a fixed position. They are ideal for locations where the charging cable length is sufficient and where the charging position does not need frequent adjustments.
  2. Adjustable Ceiling Mounts: This type allows for height and angle adjustments, providing flexibility in positioning the charger. Adjustable mounts are useful in spaces with varying ceiling heights or where the charging position needs to be altered frequently.
  3. Retractable Ceiling Mounts: Retractable mounts feature a mechanism that allows the charger to be pulled down from the ceiling when in use and retracted when not needed. This option is perfect for maintaining a clean and unobstructed space.

Benefits of a Tesla Charger Ceiling Mount

Opting for a Tesla charger ceiling mount provides several advantages, making it a popular choice for Tesla owners:

1. Space Optimization

A ceiling mount helps save valuable wall and floor space. By keeping the charger mounted on the ceiling, you can utilize wall space for storage or other purposes and maintain a cleaner, more organized environment.

Read too: Bathroom Flooded Through the Ceiling: A Comprehensive Guide

2. Improved Aesthetics

Ceiling-mounted chargers offer a sleek and modern appearance, enhancing the overall look of your garage or charging area. The charger and cables are less obtrusive and can be more seamlessly integrated into the room’s design.

3. Enhanced Safety

Ceiling mounts reduce the risk of tripping hazards associated with floor-mounted cables. By keeping cables off the floor, you minimize the chance of accidental damage and ensure a safer environment for both your vehicle and the occupants.

4. Flexibility and Convenience

An adjustable or retractable ceiling mount provides flexibility in positioning the charger. This is especially useful if you have multiple vehicles or if the charging needs to be moved around frequently.

5. Protection from Environmental Factors

Ceiling mounts can offer better protection from environmental factors such as water and dirt, which can accumulate on the floor. This helps extend the lifespan of your charger and maintains its functionality.

Choosing the Right Tesla Charger Ceiling Mount

Selecting the right Tesla charger ceiling mount involves several factors to ensure compatibility and optimal performance. Here’s what you need to consider:

1. Charger Compatibility

Ensure that the mount is compatible with your specific Tesla Wall Connector or other charging station. Check the manufacturer’s specifications to confirm that the mount supports the model you have.

2. Ceiling Height

Consider the height of your ceiling when choosing a mount. For very high ceilings, an adjustable or retractable mount may be necessary to ensure that the charger is positioned at an accessible height for easy use.

3. Installation Requirements

Check the installation requirements for the ceiling mount. Some mounts may require professional installation or additional hardware, so make sure you understand the installation process before purchasing.

4. Cable Management

Choose a mount that offers effective cable management. Look for features such as cable clips or retractable systems that help keep the charging cable organized and prevent it from becoming tangled or damaged.

5. Aesthetic Considerations

Select a mount that complements the design of your space. Consider the finish and style of the mount to ensure it blends seamlessly with your garage or charging area.

Installing a Tesla Charger Ceiling Mount

Installing a Tesla charger ceiling mount involves several key steps to ensure proper setup and functionality. Here’s a step-by-step guide to help you through the installation process:

1. Plan the Mount Location

Determine the optimal location for the mount on the ceiling. Consider factors such as the distance from your vehicle, ceiling height, and accessibility. Mark the location where the mount will be installed.

2. Install the Mounting Bracket

Follow the manufacturer’s instructions to install the mounting bracket onto the ceiling. This may involve drilling holes and securing the bracket with screws or anchors. Ensure that the bracket is installed securely and is level.

3. Attach the Charger

Once the bracket is in place, attach the Tesla Wall Connector or charging station to the mount. Follow the manufacturer’s instructions for attaching the charger and ensure that it is securely fastened.

4. Connect the Wiring

Connect the wiring for the charger according to the manufacturer’s instructions. Ensure that all electrical connections are secure and that the wiring is properly routed to avoid damage.

5. Test the Setup

After installation, test the charger to ensure that it is functioning correctly. Verify that the charger is properly positioned and that the cable is accessible and well-managed. Make any necessary adjustments to optimize the setup.

6. Professional Installation

If you’re not comfortable with electrical work or if the installation requires complex modifications, consider hiring a professional electrician to complete the installation. This ensures that the setup is safe and meets all electrical codes and standards.

Maintenance and Care

Maintaining your Tesla charger ceiling mount is essential for ensuring long-term performance and reliability:

1. Regular Inspections

Periodically inspect the mount and charger for any signs of wear or damage. Check the mounting hardware and connections to ensure that everything is secure and functioning properly.

2. Clean the Charger

Keep the charger clean by wiping it down with a soft cloth. Avoid using harsh chemicals or abrasive materials that could damage the surface.

3. Check Cable Condition

Inspect the charging cable for any signs of damage or wear. Ensure that the cable is properly managed and that it is not subject to excessive bending or strain.

4. Address Issues Promptly

If you notice any issues with the mount or charger, address them promptly to prevent further damage or safety hazards. Contact a professional if necessary for repairs or maintenance.

Conclusion

A Tesla charger ceiling mount is a practical and stylish solution for optimizing your EV charging setup. By choosing the right mount, considering key factors such as compatibility and installation requirements, and maintaining the system properly, you can ensure that your Tesla is always ready to go. This guide provides the information you need to make an informed decision and enjoy the benefits of a ceiling-mounted charging solution.

Sonos One SL Ceiling Mount: Enhancing Your Audio Experience

Mounting your Sonos One SL speaker on the ceiling can significantly enhance your audio experience, providing better sound distribution and a sleek, clutter-free look. This guide will walk you through everything you need to know about the Sonos One SL Ceiling Mount, from its benefits to installation tips and the best products available.

Sonos One Sl Ceiling Mount

The Benefits of a Sonos One SL Ceiling Mount

Optimal Sound Distribution

Mounting your Sonos One SL on the ceiling allows for optimal sound distribution throughout the room. Ceiling mounts help in eliminating sound obstructions, creating a more immersive audio experience. This setup is particularly beneficial in large rooms or open floor plans where wall-mounted speakers may not provide adequate coverage.

Read too: Kitchen Lighting For A Vaulted Ceiling: Illuminating Your Space with Style and Functionality

Space-Saving Solution

Using a ceiling mount for your Sonos One SL frees up valuable floor and wall space, making it ideal for minimalist home designs or rooms with limited space. This setup reduces clutter and keeps your speaker safe from accidental damage.

Enhanced Aesthetic Appeal

Ceiling-mounted speakers offer a clean and modern look that can enhance the overall aesthetic of your room. By integrating your Sonos One SL into the ceiling, you maintain a sleek appearance without compromising on sound quality.

Security and Safety

Mounting your Sonos One SL on the ceiling keeps it out of reach of children and pets, reducing the risk of damage or injury. This setup also ensures that the speaker remains securely in place, even in high-traffic areas.

Choosing the Right Sonos One SL Ceiling Mount

Compatibility

When selecting a ceiling mount, ensure that it is specifically designed for the Sonos One SL. This ensures a secure fit and optimal performance. Universal mounts may not provide the same level of stability and security as mounts designed for the Sonos One SL.

Adjustable Angles

Choose a ceiling mount that allows for adjustable angles. This feature lets you direct the sound precisely where you want it, enhancing the audio experience in your room. Adjustable mounts provide flexibility, enabling you to achieve the best possible sound distribution.

Build Quality

Look for mounts made from high-quality materials such as steel or aluminum. These materials offer better durability and can support the weight of the Sonos One SL more effectively than plastic mounts. A robust mount ensures that your speaker remains securely in place for years to come.

Aesthetic Match

Consider the design and color of the mount to ensure it matches your room’s decor. Some mounts are available in various finishes, allowing you to choose one that complements your interior design. A well-matched mount can blend seamlessly with your ceiling, maintaining a cohesive look.

Ease of Installation

Select a mount that comes with clear instructions and all necessary hardware for easy installation. Some mounts offer features like quick-release mechanisms, making it easier to install or remove the speaker as needed. User-friendly mounts can save time and effort during installation.

How to Install a Sonos One SL Ceiling Mount

Tools and Materials Needed

Before starting the installation, gather the necessary tools and materials:

  • Sonos One SL Ceiling Mount
  • Drill
  • Screws and anchors
  • Screwdriver
  • Level
  • Measuring tape
  • Pencil

Step-by-Step Installation Guide

Step 1: Choose the Location

Select the ideal location for your Sonos One SL on the ceiling. Consider factors such as power source accessibility, sound distribution, and aesthetic appeal. Ensure the chosen spot provides optimal coverage for your room.

Step 2: Mark the Mounting Points

Use a level and measuring tape to mark the exact points where the mount will be installed. Double-check the alignment to ensure the speaker will be straight and level. Mark the drilling points with a pencil.

Step 3: Drill the Holes

Drill pilot holes at the marked points to prepare for the screws and anchors. Make sure to use the appropriate drill bit size for the screws and anchors included with your mount. Pilot holes prevent the ceiling from cracking and make it easier to insert the screws.

Step 4: Insert the Anchors

Insert the wall anchors into the pilot holes. These anchors provide additional support and ensure that the mount is securely attached to the ceiling. Use a hammer to gently tap the anchors into place if necessary.

Step 5: Attach the Mount

Align the ceiling mount with the pilot holes and use a screwdriver to secure it in place with the provided screws. Ensure that the mount is firmly attached and can support the weight of the Sonos One SL. Tighten the screws securely to prevent any movement.

Step 6: Mount the Sonos One SL

Attach your Sonos One SL to the ceiling mount according to the manufacturer’s instructions. Ensure that the speaker is securely fastened and cannot be easily dislodged. Some mounts may require you to slide the speaker into place, while others use screws or clamps.

Step 7: Adjust the Angle

If your mount allows for adjustable angles, set the speaker to your desired position. Test the sound to ensure it is directed optimally for your room. Make any necessary adjustments to achieve the best sound distribution.

Enhancing Your Audio Setup with Sonos One SL Ceiling Mount

Integrating with Other Sonos Products

The Sonos One SL ceiling mount can be part of a broader Sonos system. Consider integrating it with other Sonos speakers for a multi-room audio setup. This allows you to control and synchronize music across different rooms, enhancing your home entertainment experience.

Utilizing Voice Control

Pair your Sonos One SL with a compatible voice assistant for added convenience. With voice control, you can easily adjust the volume, change tracks, and manage your audio settings hands-free. Voice control adds a layer of functionality to your ceiling-mounted speaker.

Optimizing Sound Quality

Experiment with the placement and angle of your ceiling-mounted Sonos One SL to find the optimal sound distribution for your room. Use the Sonos app to fine-tune audio settings and create the perfect listening environment. The app provides various tools to customize your audio experience.

Aesthetically Pleasing Integration

Consider painting the ceiling mount to match your ceiling color for a seamless look. This can help the mount blend in, making your setup more visually appealing. An integrated look enhances the overall aesthetic of your room.

Popular Sonos One SL Ceiling Mounts

Vogel’s SOUND 4201 Ceiling Mount

The Vogel’s SOUND 4201 is a robust and versatile ceiling mount designed specifically for the Sonos One SL. It offers 360-degree rotation and a sleek design that complements any room decor. The adjustable angle feature allows for precise sound direction.

Sanus Adjustable Ceiling Mount

Sanus offers an adjustable ceiling mount for the Sonos One SL that provides excellent durability and ease of installation. It features a simple yet effective design that ensures your speaker remains securely in place. The quick-release mechanism makes it easy to install and remove the speaker.

Flexson Ceiling Mount for Sonos One SL

Flexson’s ceiling mount is known for its sturdy build and elegant design. It offers a neat and secure solution for ceiling mounting, with easy-to-follow installation instructions. The mount is designed to match the aesthetic of the Sonos One SL, providing a cohesive look.

Mount-It! Sonos One SL Ceiling Mount

Mount-It! provides a budget-friendly option without compromising on quality. This mount is easy to install and offers reliable support for your Sonos One SL. The adjustable tilt feature allows for customized sound direction, enhancing your audio experience.

Conclusion

Mounting your Sonos One SL on the ceiling is an excellent way to optimize your audio setup while maintaining a clean and modern look. With the right ceiling mount, you can enjoy enhanced sound distribution, save space, and add a touch of sophistication to your room. By following the tips and steps outlined in this guide, you can confidently install and enjoy your Sonos One SL Ceiling Mount.

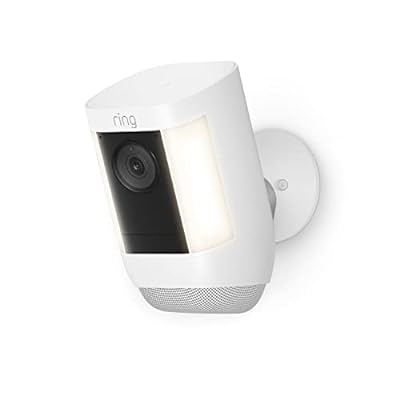
Ceiling Mount for Spotlight Cam Wired: Installation, Benefits, and More

With the increasing need for home security, many homeowners are opting for advanced surveillance solutions. One such solution that has gained popularity is the Ceiling Mount for Spotlight Cam Wired. This installation not only provides a wider field of view but also offers a more discreet placement for your security camera. In this article, we will delve into the details of why you should consider a ceiling mount, the installation process, benefits, and other essential information to help you make an informed decision.

Ceiling Mount For Spotlight Cam Wired

Why Choose a Ceiling Mount for Your Spotlight Cam Wired?

A ceiling mount offers several advantages over traditional wall mounts, making it an ideal choice for many homeowners. Here are some compelling reasons to opt for a Ceiling Mount for Spotlight Cam Wired:

  1. Enhanced Field of View: Mounting your spotlight cam on the ceiling provides a broader perspective, allowing you to monitor larger areas effectively. This is particularly useful for covering wide open spaces such as living rooms, garages, and large outdoor areas.
  2. Increased Security: A ceiling mount position makes it more challenging for intruders to tamper with or disable the camera. This added security can be crucial in protecting your home and ensuring continuous surveillance.
  3. Aesthetically Pleasing: Ceiling-mounted cameras are less conspicuous and blend better with the surroundings. This can be particularly important for those who are concerned about the visual impact of security cameras on their home’s décor.
  4. Optimal Coverage: Placing your spotlight cam on the ceiling ensures that it covers blind spots that wall-mounted cameras might miss. This can significantly enhance the overall security coverage of your property.

Installation Process for Ceiling Mount Spotlight Cam Wired

Installing a ceiling mount for your spotlight cam wired is a straightforward process, but it requires careful planning and execution to ensure optimal performance. Here’s a step-by-step guide to help you through the installation:

Step 1: Gather Necessary Tools and Materials

Before you begin the installation, make sure you have all the necessary tools and materials. This typically includes:

  • Spotlight Cam Wired
  • Ceiling Mount Bracket
  • Drill and Drill Bits
  • Screws and Anchors
  • Screwdriver
  • Measuring Tape
  • Pencil
  • Ladder

Step 2: Choose the Ideal Location

Selecting the right location is crucial for maximizing the effectiveness of your ceiling-mounted spotlight cam. Consider the following factors when choosing a location:

  • Field of View: Ensure that the camera covers the desired area without any obstructions.
  • Power Source: The location should be close to a power source or have the possibility of running power cables discreetly.
  • Wi-Fi Signal: Make sure the spot has a strong Wi-Fi signal to ensure uninterrupted connectivity.

Step 3: Mark the Mounting Points

Use a measuring tape and pencil to mark the exact points where you will drill holes for the mounting bracket. Ensure that the marks are level to avoid tilting the camera.

Step 4: Drill Holes and Install Anchors

Carefully drill holes at the marked points and insert the anchors. This will provide a secure base for the screws and ensure that the mount stays firmly in place.

Step 5: Attach the Mounting Bracket

Screw the mounting bracket into the anchors, making sure it is firmly attached to the ceiling. Double-check that it is level and secure before proceeding.

Step 6: Mount the Spotlight Cam

Attach the spotlight cam to the mounting bracket as per the manufacturer’s instructions. Ensure all connections are secure and the camera is positioned correctly.

Step 7: Connect to Power and Configure

Once the camera is mounted, connect it to the power source and follow the manufacturer’s instructions to configure the device. This usually involves connecting the camera to your Wi-Fi network and setting up the necessary settings through the app.

Benefits of Using a Ceiling Mount for Spotlight Cam Wired

Using a Ceiling Mount for Spotlight Cam Wired offers numerous benefits that can enhance the security and functionality of your surveillance system. Here are some of the key advantages:

1. Superior Surveillance Coverage

One of the most significant benefits of ceiling mounting your spotlight cam is the superior surveillance coverage it provides. The elevated position allows the camera to capture a wider area, reducing blind spots and ensuring comprehensive monitoring of your property.

2. Improved Safety and Security

Ceiling-mounted cameras are less accessible, making it more difficult for intruders to tamper with or disable the device. This added layer of security can be crucial in deterring potential intruders and ensuring continuous monitoring.

3. Aesthetic Integration

For homeowners concerned about the aesthetic impact of security cameras, ceiling mounts offer a more discreet and visually appealing solution. The camera blends seamlessly with the ceiling, minimizing its presence and maintaining the overall look of your interior or exterior space.

4. Versatility in Placement

Ceiling mounts offer greater versatility in placement compared to wall mounts. This allows you to position the camera in the optimal location for maximum coverage and effectiveness. Whether you need to monitor an indoor space or an outdoor area, a ceiling mount can provide the flexibility you need.

Tips for Maintaining Your Ceiling Mounted Spotlight Cam Wired

To ensure your ceiling-mounted spotlight cam wired continues to function optimally, regular maintenance is essential. Here are some tips to keep your camera in top condition:

Regular Cleaning

Dust and debris can accumulate on the camera lens, affecting image quality. Regularly clean the lens with a soft cloth to ensure clear and sharp footage.

Check Connections

Periodically check the power and network connections to ensure they are secure and functioning correctly. Loose connections can lead to interruptions in surveillance.

Firmware Updates

Keep your camera’s firmware up to date to benefit from the latest features and security enhancements. Regular updates can improve performance and protect against vulnerabilities.

Test Functionality

Regularly test the camera to ensure it is capturing footage correctly and that all features are working as expected. This includes checking the motion detection and night vision capabilities.

Read too: Exploring the Benefits and How-Tos of DIY Ceiling Cassette Mini Split Installation: Revolutionizing Comfort

Conclusion

Investing in a Ceiling Mount for Spotlight Cam Wired is a smart decision for enhancing your home security. The benefits of improved field of view, increased security, and aesthetic integration make it an attractive option for homeowners. By following the installation and maintenance tips provided in this guide, you can ensure that your ceiling-mounted spotlight cam operates effectively and provides the security coverage you need.

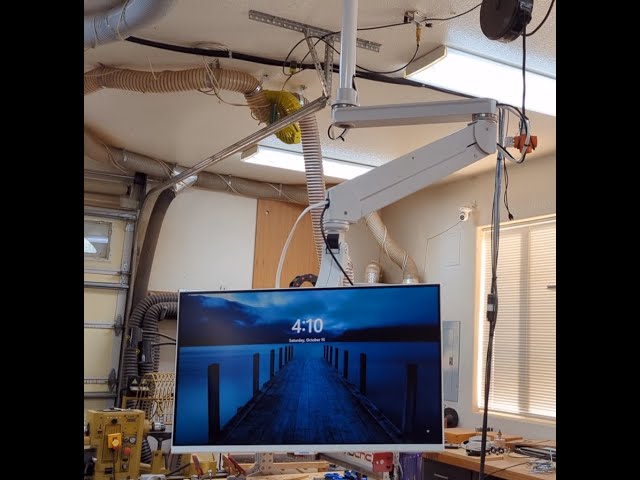
Ceiling Mount for Computer Monitor Setup: Enhance Your Workspace with a Convenient

In today’s modern workspace, maximizing efficiency and comfort is key. One way to achieve this is by utilizing a Ceiling Mount for Computer Monitor. Discover how this innovative solution can transform your workstation and elevate your productivity.

Ceiling Mount For Computer Monitor

Why Choose a Ceiling Mount for Your Computer Monitor?

When it comes to optimizing your workspace, the placement of your computer monitor plays a crucial role. While traditional desk mounts offer some flexibility, they can still take up valuable desk space and limit your viewing options. A ceiling mount, on the other hand, frees up desk space and provides greater flexibility in positioning your monitor for optimal viewing angles.

Benefits of Using a Ceiling Mount

  1. Space-Saving Design: By mounting your monitor to the ceiling, you can free up valuable desk space for other essentials, such as keyboards, mice, and paperwork.
  2. Improved Ergonomics: A ceiling mount allows you to adjust the height and angle of your monitor to reduce strain on your neck and eyes, promoting better ergonomics and comfort.
  3. Enhanced Flexibility: With a ceiling mount, you can easily adjust the position of your monitor to accommodate different tasks or preferences, whether you’re standing, sitting, or collaborating with colleagues.
  4. Clean Aesthetic: Eliminate clutter and achieve a sleek, minimalist look in your workspace by removing bulky monitor stands from your desk.

Choosing the Right Ceiling Mount

When selecting a ceiling mount for your computer monitor, there are several factors to consider:

  1. Compatibility: Ensure that the ceiling mount is compatible with your monitor’s size and weight specifications.
  2. Adjustability: Look for a mount that offers a wide range of tilt, swivel, and height adjustment options to customize your viewing experience.
  3. Installation: Consider the ease of installation and whether you’ll need additional tools or assistance to mount your monitor securely.
  4. Durability: Invest in a high-quality ceiling mount that is built to last and can support your monitor safely for years to come.

Installation Tips

While installing a ceiling mount for your computer monitor may seem daunting, it can be relatively straightforward with the right tools and instructions. Here are some tips to help you get started:

  1. Locate Studs: Use a stud finder to locate ceiling studs or joists for secure mounting. Avoid mounting the mount directly to drywall or plaster, as it may not provide sufficient support.
  2. Follow Instructions: Carefully read and follow the manufacturer’s installation instructions to ensure proper securing of all hardware.
  3. Use a Level: Use a level to ensure that the mount is installed evenly and your monitor will be level once mounted.
  4. Test Stability: Once installed, test the stability of the mount by gently adjusting the position of the monitor and ensuring that it remains securely in place.

Read too: Striped Schoolhouse Ceiling Light Fixtures: Unveiling the Timeless Charm

Conclusion

A Ceiling Mount for Computer Monitor offers a convenient and space-saving solution for optimizing your workspace and enhancing your productivity. With its adjustable design and ergonomic benefits, it’s a worthwhile investment for any modern workstation.

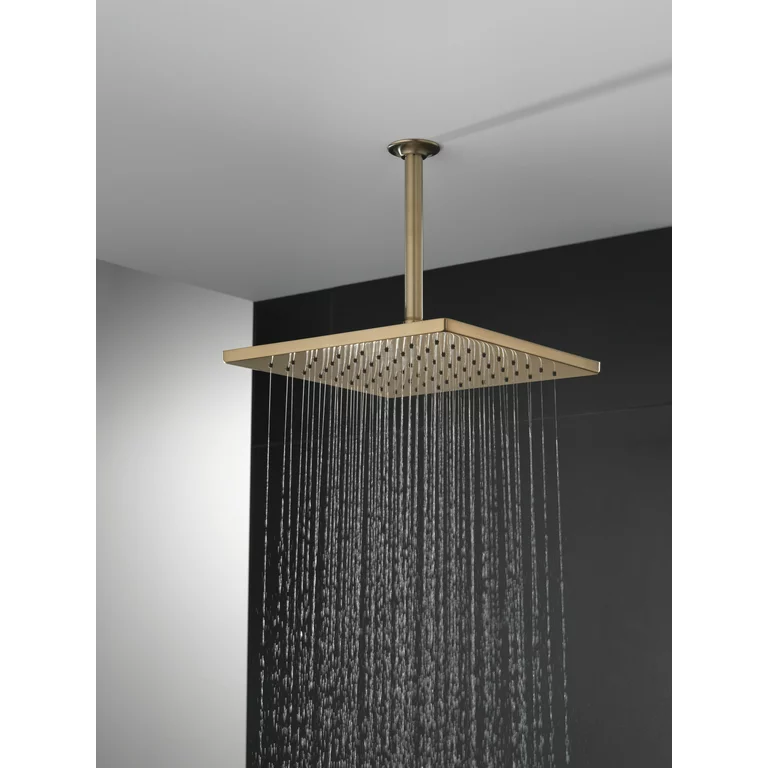
Delta Ceiling Mount Shower Head: Unveiling the Beauty

Are you ready to elevate your shower experience to new heights? Discover the luxurious and innovative Delta Ceiling Mount Shower Head. In this comprehensive guide, we’ll delve into everything you need to know about this exquisite bathroom fixture, from its cutting-edge features to installation tips and more.

Delta Ceiling Mount Shower Head

Introducing the Delta Ceiling Mount Shower Head

What is a Delta Ceiling Mount Shower Head?

A Delta Ceiling Mount Shower Head is a premium-quality shower fixture designed to be mounted directly onto the ceiling of your shower enclosure. This unique installation method creates a sleek and modern aesthetic while providing an immersive shower experience from above.

Read too: Discovering the Charm of Nautical Outdoor Ceiling Fans for Your Coastal Retreat: Sail into Style

Features and Benefits

  1. 360-Degree Rotation: Enjoy full flexibility and control over your shower experience with a Delta Ceiling Mount Shower Head’s 360-degree rotation feature. Easily adjust the angle and direction of the water flow to suit your preferences.
  2. Wide Coverage: Experience luxurious full-body coverage with the wide spray pattern of a Delta Ceiling Mount Shower Head. The strategically designed nozzles ensure even distribution of water for a refreshing and invigorating shower experience.
  3. Multiple Spray Settings: Customize your shower experience with multiple spray settings, including rain shower, massage, and mist. Whether you prefer a gentle rainfall or a powerful massage, there’s a setting to suit every mood and preference.
  4. Easy-to-Clean Design: Designed with convenience in mind, Delta Ceiling Mount Shower Heads feature easy-to-clean surfaces and anti-clog nozzles, ensuring hassle-free maintenance and long-lasting performance.
  5. Sleek and Modern Design: Add a touch of elegance to your bathroom decor with the sleek and modern design of a Delta Ceiling Mount Shower Head. Available in a variety of finishes and styles, you can choose the perfect option to complement your bathroom aesthetic.

Installation Tips

Pre-Installation Preparation

Before installing your Delta Ceilings Mount Shower Head, consider the following:

  • Ensure that your shower ceiling is structurally sound and capable of supporting the weight of the fixture.
  • Measure the dimensions of your shower enclosure to determine the optimal placement of the shower head.
  • Consult the manufacturer’s instructions and recommendations for installation guidelines and best practices.

Installation Process

  1. Prepare the Mounting Surface: Clean the ceiling surface thoroughly and ensure it is free from any debris or moisture.
  2. Mark the Installation Location: Use a pencil to mark the desired location for the shower head on the ceiling, taking into account factors such as shower size and user height preferences.
  3. Drill Pilot Holes: Use a drill to create pilot holes at the marked installation location to facilitate the installation process.
  4. Install Mounting Bracket: Secure the mounting bracket to the ceiling using the provided hardware, ensuring it is level and securely attached.
  5. Attach Shower Head: Connect the Delta Ceilings Mount Shower Head to the mounting bracket according to the manufacturer’s instructions, ensuring a secure and watertight seal.

Conclusion

Transform your daily shower routine into a luxurious and rejuvenating experience with a Delta Ceilings Mount Shower Head. With its innovative design, advanced features, and customizable settings, it’s the perfect addition to any modern bathroom. Elevate your space and indulge in the ultimate shower experience with Delta.

Unlocking Comfort: Mitsubishi Ceiling Mount Mini Split Systems

In the realm of home climate control, Mitsubishi Electric emerges as a beacon of innovation with its cutting-edge Ceiling Mount Mini Split systems. As homeowners increasingly prioritize comfort, energy efficiency, and versatile solutions, Mitsubishi’s offerings stand out as a testament to technological prowess and consumer-centric design.

Mitsubishi Ceiling Mount Mini Split

Exploring Mitsubishi Ceiling Mount Mini Split Systems

Mitsubishi’s Ceiling Mount Mini Split systems represent a paradigm shift in home climate management. Designed to blend seamlessly with any interior while delivering powerful performance, these systems offer a myriad of benefits that elevate the living experience.

Unparalleled Comfort

With Mitsubishi Ceiling Mount Mini Split systems, comfort knows no bounds. Whether it’s scorching summers or chilly winters, these units ensure precise temperature control, creating an oasis of comfort within your home. Equipped with advanced features such as multi-stage filtration and whisper-quiet operation, Mitsubishi systems guarantee a serene indoor environment year-round.

Space-Saving Elegance

Say goodbye to bulky HVAC units and hello to sleek sophistication. Mitsubishi’s Ceiling Mount Mini Split systems boast a low-profile design that maximizes floor space without compromising on performance. Perfect for rooms with limited space or aesthetic preferences, these units blend seamlessly into any décor, adding a touch of modernity to your living space.

Energy Efficiency Redefined

In an era of environmental consciousness, Mitsubishi leads the charge towards sustainable living. Their Ceiling Mount Mini Split systems are engineered with energy efficiency in mind, utilizing state-of-the-art technology to minimize energy consumption without sacrificing comfort. By optimizing airflow and leveraging innovative cooling mechanisms, Mitsubishi systems deliver substantial energy savings, helping homeowners reduce their carbon footprint while lowering utility bills.

Read too: Understanding and Dealing with Ants in the Ceiling Spaces: Navigating the Intrusion

Customized Climate Control

No two homes are alike, which is why Mitsubishi offers unparalleled customization options with their Ceiling Mount Mini Split systems. Whether you need to cool a single room or multiple zones, Mitsubishi’s modular approach allows for precise temperature regulation in every corner of your home. With intuitive controls and programmable settings, you’re in command of your indoor environment like never before.

Installation Versatility

From residential dwellings to commercial spaces, Mitsubishi Ceiling Mount Mini Split systems adapt to any environment with ease. Whether it’s a retrofit project or new construction, these units offer flexible installation options, ensuring a seamless integration into any building structure. With minimal disruption and quick setup, Mitsubishi systems provide instant comfort without the hassle.

Conclusion

In conclusion, Mitsubishi Ceilings Mount Mini Split systems represent the pinnacle of home climate control technology. With their unmatched comfort, space-saving design, energy efficiency, and customizable features, these units redefine the way we experience indoor living. Whether you’re looking to upgrade your home’s HVAC system or enhance comfort in your commercial space, Mitsubishi offers a solution that’s as versatile as it is reliable.

5 Reasons Why You Should Use a Ceiling Mount Monitor Arm

Ergonomics

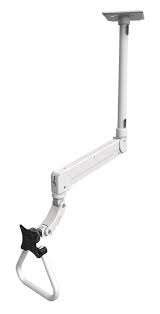
One of the biggest benefits of using a ceiling mount monitor arm is that it can help to improve your ergonomics. When you’re sitting at a desk all day, it’s important to have your monitor at the correct height and angle to avoid neck and shoulder pain. A ceiling mount monitor arm can help you to do this by allowing you to position your monitor exactly where you need it.

Ceiling Mount Monitor Arm

Flexibility

Another benefit of using a ceiling mount monitor arm is that it can give you more flexibility. With a traditional monitor stand, you’re limited to positioning your monitor on your desk. But with a ceiling mount monitor arm, you can move your monitor anywhere you want. This can be helpful if you want to share your monitor with someone else, or if you need to move your monitor out of the way for something else.

Space saving

If you’re short on space, a ceiling mount monitor arms can be a great way to save some room. Traditional monitor stands can take up a lot of desk space, but a ceiling mount monitor arms doesn’t take up any space at all. This can be especially helpful if you have a small desk or if you want to free up some space on your desk for other things.

Aesthetics

Ceiling mount monitor arms can also improve the aesthetics of your workspace. A traditional monitor stand can look bulky and cluttered, but a ceiling mount monitor arms can give your workspace a more clean and modern look.

Health

Ceiling monitor arms can also help to improve your health. When you’re sitting at a desk all day, it’s important to get up and move around every 20-30 minutes. A ceiling monitor arm can help you to do this by making it easy to move your monitor out of the way so you can stand up and stretch.

Conclusion

If you’re looking for a way to improve your ergonomics, flexibility, space saving, aesthetics, and health, then a ceiling mount monitor arms is a great option. Ceiling monitor arms are easy to install and use, and they can make a big difference in the way you work.

Read too: Exploring the Benefits and How-Tos of DIY Ceiling Cassette Mini Split Installation: Revolutionizing Comfort

Exploring the Versatility of Outdoor Ceiling Mount Oscillating Fans for Ultimate Al Fresco Enjoyment: Breeze into Comfort

Transform your outdoor spaces into havens of comfort with the soothing breeze of Outdoor Ceiling Mount Oscillating Fans. Dive into the world of al fresco living as we unveil the features, benefits, and diverse applications of these innovative fans. Discover how Outdoor Ceiling Mount Oscillating Fans can elevate your outdoor experience, providing not only relief from the heat but also a touch of sophistication to your favorite outdoor retreats.

Outdoor Ceiling Mount Oscillating Fans

Outdoor Ceiling Mount Oscillating Fans: A Breath of Fresh Air

Embracing Comfort in Outdoor Living

As outdoor living spaces become extensions of our homes, the demand for effective cooling solutions has grown. Outdoor Ceiling Mount Oscillating Fans emerge as versatile and stylish additions, seamlessly blending functionality with aesthetics to create an environment where comfort reigns supreme.

How They Work

Oscillating Movement for Enhanced Air Circulation

At the heart of Outdoor Ceiling Mount Oscillating Fans lies the unique oscillating movement. Unlike traditional fans, these ceiling-mounted counterparts pivot horizontally, distributing air in a sweeping motion. This oscillating feature ensures a wider coverage area, making them ideal for large outdoor spaces.

Ceiling Mounting for Space Efficiency

The decision to mount fans on the ceiling not only maximizes floor space but also enhances the overall aesthetics of the outdoor area. Ceiling-mounted fans offer a clean and unobtrusive look, making them suitable for a variety of outdoor settings, from patios and porches to gazebos and pergolas.

Outdoor Ceiling Mount Oscillating Fan: Versatility in Design

Diverse Styles to Complement Outdoor Decor

Outdoor Ceiling Mount Oscillating Fans come in a myriad of styles to suit different outdoor decor themes. Whether you prefer a contemporary sleek design or a more traditional look with ornate details, there’s a fan that seamlessly integrates into your outdoor aesthetic, adding a touch of sophistication to the space.

Weather-Resistant Materials for Durability

Recognizing the exposure to the elements, manufacturers design Outdoor Ceiling Mount Oscillating Fan with weather-resistant materials. From rust-resistant finishes to UV-resistant blades, these fans are built to withstand the challenges of outdoor environments, ensuring longevity and performance.

The Benefits of Outdoor Ceiling Mount Oscillating Fan

Efficient Cooling for Al Fresco Enjoyment

The primary benefit of Outdoor Ceiling Mount Oscillating Fan is, undoubtedly, efficient cooling. The oscillating motion ensures that the cool breeze reaches every corner of your outdoor space, providing relief from the heat even on the warmest days. This makes outdoor entertaining, dining, or simply relaxing more enjoyable.

Insect Repellent Functionality

Some Outdoor Ceiling Mount Oscillating Fan come equipped with insect repellent features. These fans help deter flying insects, creating a more pleasant and bug-free environment for outdoor gatherings. Say goodbye to bothersome mosquitoes and flies as you bask in the comfort of your outdoor oasis.

Outdoor Ceiling Mount Oscillating Fan: Ideal Applications

Elevating Patio Dining Experiences

Picture a serene patio dinner under the stars, accompanied by a gentle breeze from an Outdoor Ceiling Mount Oscillating Fan. These fans enhance the ambiance of outdoor dining spaces, ensuring that your meals are enjoyed in a comfortable and refreshing atmosphere.

Creating a Relaxing Lounge Area

Transform your outdoor lounge area into a cozy retreat with the addition of an Outdoor Ceiling Mount Oscillating Fan. Whether you’re reading a book, sipping a drink, or simply unwinding, the oscillating breeze adds a layer of tranquility to your relaxation space.

Choosing the Right Outdoor Ceiling Mount Oscillating Fan

Assessing Size and Coverage Area

Selecting the right size of Outdoor Ceiling Mount Oscillating Fan depends on the size of your outdoor space. Assess the coverage area each fan offers to ensure that the breeze reaches all desired corners, providing comprehensive cooling.

Considering Speed Settings for Customized Comfort

Many Outdoor Ceiling Mount Oscillating Fan come with multiple speed settings. Consider the climate of your location and your personal preferences when choosing a fan with adjustable speeds. This feature allows you to customize the cooling experience to suit different weather conditions.

Installation and Maintenance Tips

Professional Installation for Safety

To ensure the safe and effective installation of Outdoor Ceiling Mount Oscillating Fan, it’s advisable to enlist the help of a professional electrician. Proper installation guarantees secure mounting and electrical connections, promoting the longevity of the fan.

Regular Cleaning for Optimal Performance

Routine cleaning is essential to maintain the optimal performance of Outdoor Ceiling Mount Oscillating Fan. Dust and debris can accumulate on the blades and affect the fan’s efficiency. Use a soft brush or cloth to gently clean the blades and housing, keeping the fan in top condition.

Where to Find Quality Outdoor Ceiling Mount Oscillating Fan

Exploring Home Improvement Stores

Home improvement stores often carry a selection of Outdoor Ceiling Mount Oscillating Fan. Visit these stores to explore different brands, styles, and features in person. Seeking advice from knowledgeable store staff can also aid in making an informed decision.

Online Retailers for a Wide Selection

For a broader range of options and the convenience of online shopping, explore reputable online retailers. Read customer reviews, check product specifications, and inquire about warranty information before making a purchase. Look for retailers that specialize in outdoor cooling solutions for the best selection.

Read too: Exploring Craftsman Style Ceiling Fans for Your Home: Embracing Timeless Elegance

Conclusion

In conclusion, Outdoor Ceiling Mount Oscillating Fan offer a refreshing solution for enhancing your outdoor living spaces. From efficient cooling to versatile designs, these fans are not only functional but also contribute to the overall enjoyment of al fresco living. Elevate your outdoor experience with the soothing breeze and stylish allure of Ceiling Mount Oscillating Fan.