R 30 Ceiling Insulation: Why It’s Essential for Your Home’s Comfort and Efficiency

When it comes to maintaining a comfortable and energy-efficient home, one of the most important elements to consider is insulation. Proper insulation helps keep your home warm in the winter and cool in the summer, leading to a more stable indoor temperature and lower energy costs. One of the most common insulation ratings used for ceilings is R 30 ceiling insulation. This article explores what R 30 ceiling insulation is, why it is important, and how you can install it to optimize your home’s comfort and energy efficiency.

R 30 Ceiling Insulation

What is R 30 Ceiling Insulation?

R 30 ceiling insulation refers to the insulation material that has an R-value of 30. The R-value is a measure of an insulation material’s ability to resist heat flow, with higher values indicating greater insulating power. Essentially, R 30 insulation provides a level of resistance to heat transfer that is ideal for ceilings in climates with moderate to cold temperatures.

The R 30 rating is commonly used in areas like attics, ceilings, and roofs, where maintaining a consistent indoor temperature is essential. This level of insulation is ideal for homes located in regions that experience cold winters or areas where homeowners want to reduce their heating and cooling costs significantly. The insulation’s primary function is to prevent heat from escaping in the winter and to block heat from entering during the hot summer months.

Read too: Shiplap Ceiling in Kitchen: A Timeless Trend for a Stylish and Cozy Space


Why Choose R 30 Ceiling Insulation for Your Home?

R 30 ceiling insulation offers numerous benefits, particularly for homeowners looking to improve energy efficiency and comfort. Below are some reasons why you might want to consider adding this insulation to your home.

1. Energy Efficiency

The primary benefit of R 30 ceiling insulation is its energy efficiency. Insulation works by trapping air in pockets, which reduces the amount of heat that can pass through. This helps keep your home warm in winter and cool in summer, reducing the need for heating and air conditioning. With R 30 ceiling insulation, you’ll notice a decrease in your energy bills as your HVAC system works less to maintain a comfortable indoor temperature.

In fact, studies show that up to 40% of a home’s energy loss occurs through the attic. By properly insulating your ceiling with an R 30-rated material, you can significantly reduce this heat loss and improve the overall energy efficiency of your home.

2. Enhanced Comfort

Proper ceiling insulation helps to maintain a more stable indoor temperature throughout your home. With R 30 ceiling insulation, you will experience less fluctuation in temperature, keeping rooms warmer during winter and cooler in the summer. This increased comfort can make a significant difference in your living experience, especially in areas that see extreme temperature changes.

Additionally, insulation helps reduce drafts and cold spots in your home, particularly in rooms located directly under the roof or attic.

3. Soundproofing

In addition to temperature control, R 30 ceiling insulation can also serve as a sound barrier. Insulation materials like fiberglass, cellulose, or spray foam can help reduce sound transmission between rooms and floors. This can be particularly useful in homes with multiple levels or in apartments and townhouses where soundproofing is often a concern.

4. Increased Home Value

A well-insulated home is a valuable asset, as potential buyers will appreciate the energy savings and comfort that come with an effectively insulated home. By installing R 30 ceiling insulation, you’re not only improving your home’s energy efficiency but also increasing its market value.

In many regions, homes with higher R-value insulation are seen as more desirable due to the long-term savings they offer in terms of utility bills. If you’re planning to sell your home in the future, adding insulation can make it more attractive to buyers.


Different Types of R 30 Ceiling Insulation

There are several types of insulation materials available that provide an R 30 rating. The best material for your home depends on your budget, climate, and specific needs. Below are some of the most common types of insulation used for R 30 ceiling insulation:

1. Fiberglass Insulation

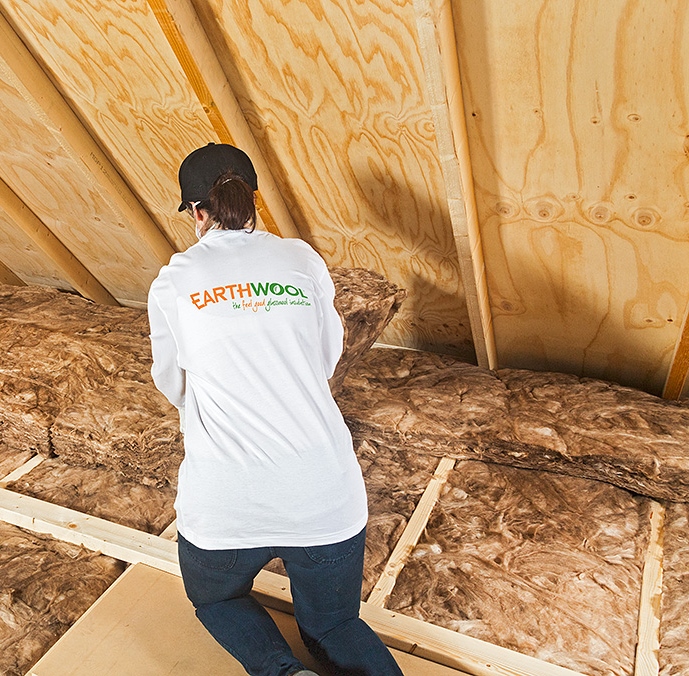
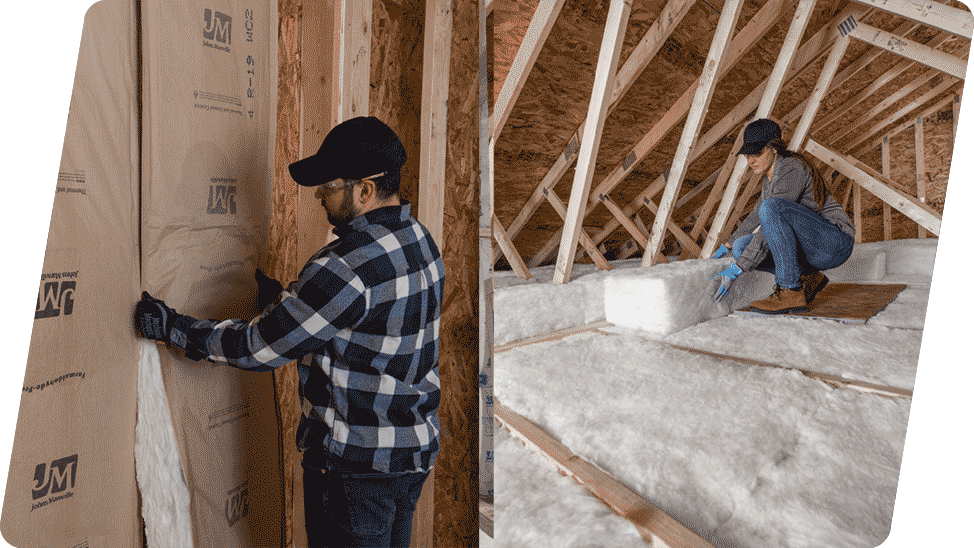
Fiberglass is one of the most widely used materials for ceiling insulation. It is cost-effective, readily available, and easy to install. Fiberglass insulation can come in batts (pre-cut rolls) or loose-fill form, and it is often the go-to choice for attics and ceilings.

Fiberglass batt insulation is typically used for standard ceiling sizes, and it provides an excellent balance of R-value and cost. It’s also non-combustible and resistant to moisture, making it ideal for areas with varying humidity levels.

2. Cellulose Insulation

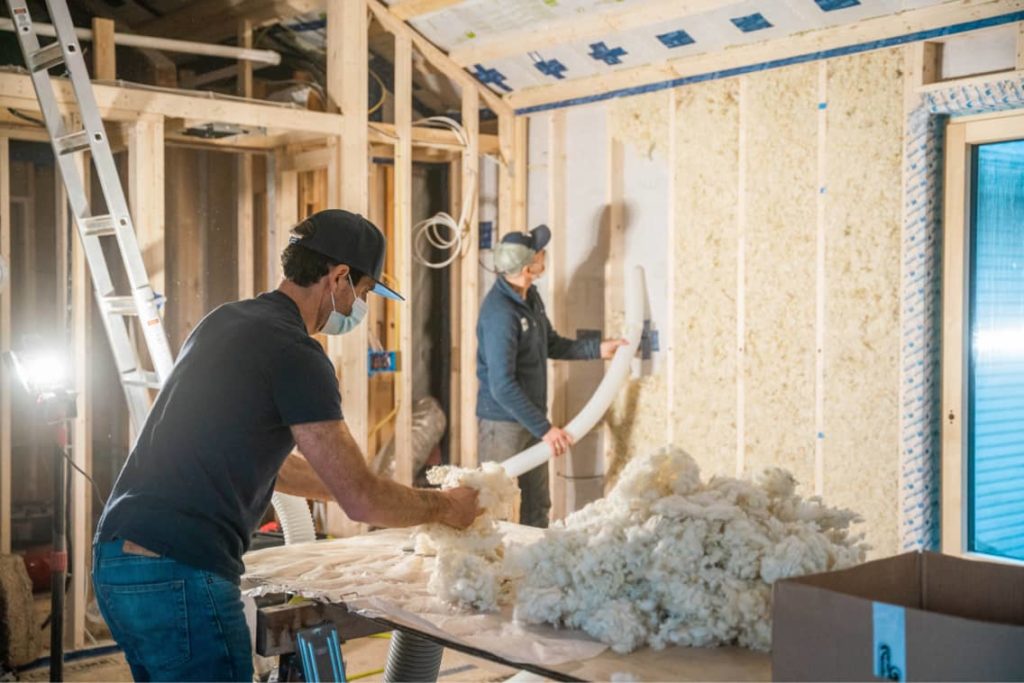
Cellulose insulation is made from recycled paper products and is often used in attics and ceilings. It is blown into place, which allows for a more complete fill, reducing gaps or voids in the insulation. Cellulose has a higher R-value per inch than fiberglass, so fewer layers are needed to achieve the desired R-value.

This type of insulation is also environmentally friendly, making it an excellent option for eco-conscious homeowners.

3. Spray Foam Insulation

Spray foam insulation is a high-performance option that provides an airtight seal. It is sprayed directly onto the ceiling surface and expands as it dries, filling all cracks and gaps. Spray foam insulation provides a higher R-value per inch compared to fiberglass and cellulose, making it a good option for areas where space is limited or where you need superior performance.

Spray foam is particularly effective at preventing air leaks, which can result in significant energy loss. However, it is generally more expensive than fiberglass or cellulose insulation.

4. Cotton or Denim Insulation

For those looking for a sustainable and non-toxic option, cotton or denim insulation is an alternative worth considering. Made from recycled cotton fabric or denim, this material is safe to handle and has a relatively high R-value. While it is not as commonly used as fiberglass or cellulose, it can provide good performance for ceiling insulation.


Installation Tips

Installing R 30 ceiling insulation is a straightforward process, but it can require some preparation and effort. While it’s always a good idea to hire a professional for insulation installation, many homeowners can complete the task themselves if they have the right tools and follow safety guidelines. Here’s a basic guide to installing ceiling insulation:

1. Measure the Space

Start by measuring the area of the ceiling that needs to be insulated. This will help you determine how much insulation material you’ll need to buy. Be sure to account for the full area of the attic or ceiling, including any nooks or corners.

2. Choose the Right Insulation Material

Choose the insulation material that best suits your needs. If you’re working with a tight budget, fiberglass batt insulation may be the most cost-effective choice. If you’re looking for superior performance and soundproofing, spray foam might be the best option.

3. Install the Insulation

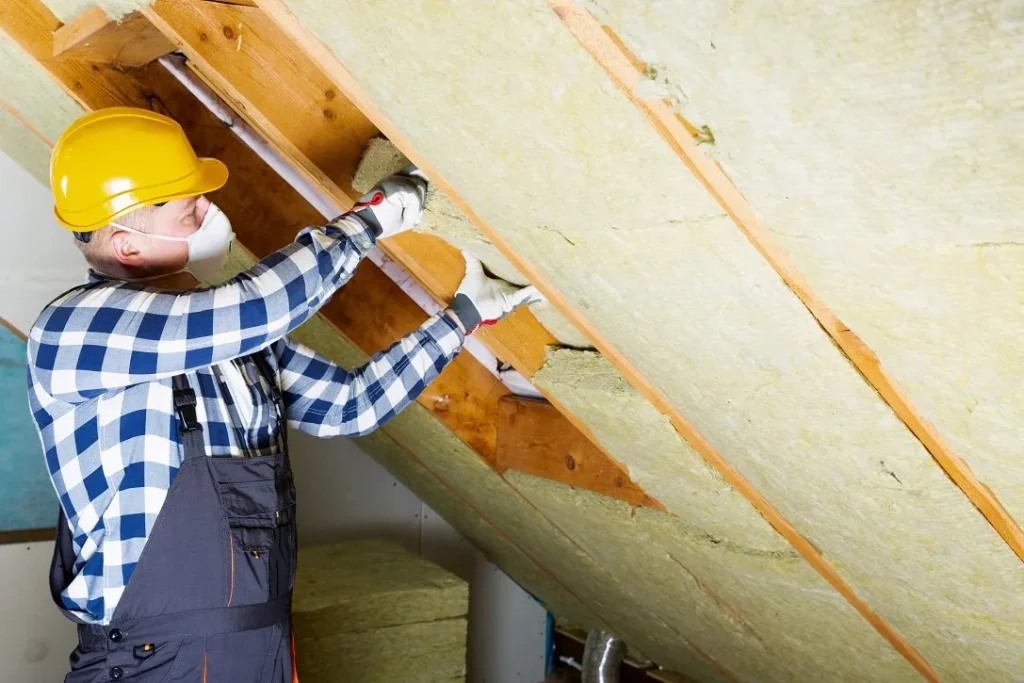
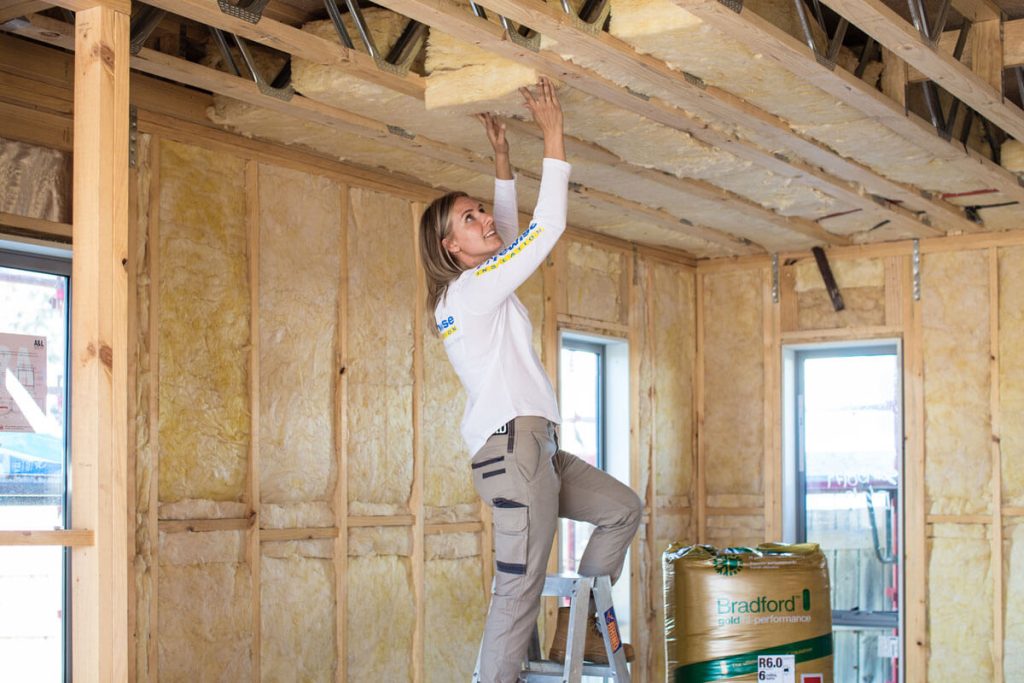
For batt insulation, lay the pieces between the ceiling joists, ensuring that they fit snugly. If using loose-fill insulation, you’ll need to use a blower to fill the area evenly. Spray foam insulation should be applied by a professional to ensure it’s done properly.

4. Seal Gaps and Joints

Ensure there are no gaps or spaces in the insulation material. Any gaps could lead to heat loss and reduced performance. Seal all joints and edges with tape or foam sealant to create an airtight barrier.


Conclusion

R 30 ceiling insulation is an excellent way to improve your home’s energy efficiency, comfort, and overall performance. By investing in high-quality insulation, you can reduce energy costs, maintain a comfortable indoor environment, and increase the value of your home. Whether you choose fiberglass, cellulose, spray foam, or another material, ensure that your insulation is properly installed for maximum effectiveness.
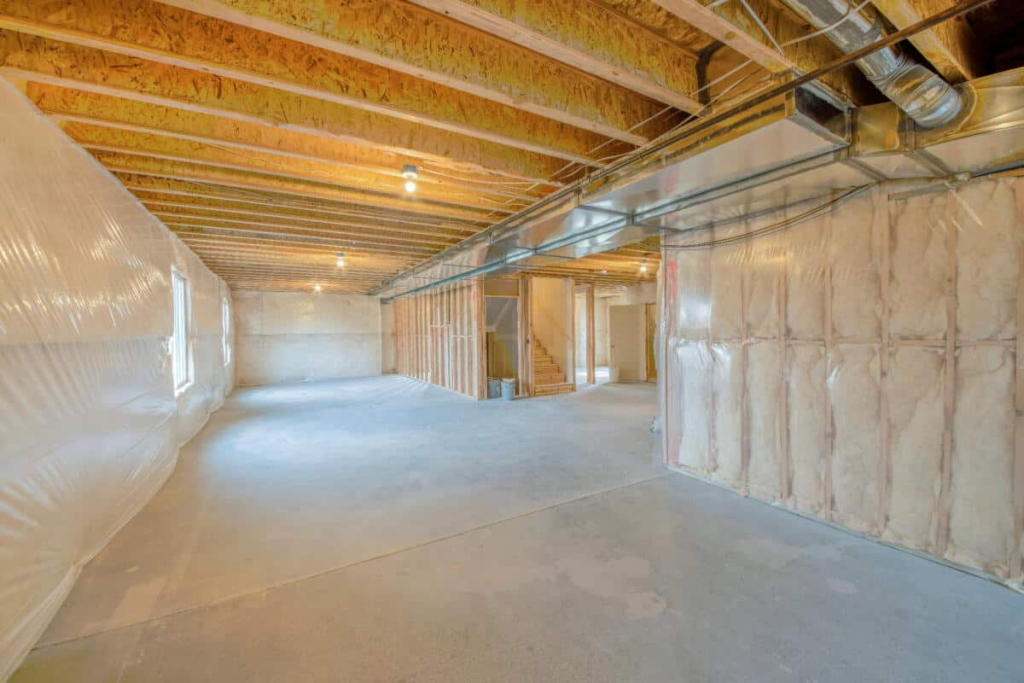
Basement Ceiling Insulation Code: Everything You Need to Know for Proper Insulation

Insulating your basement ceiling is essential for maintaining energy efficiency, improving comfort, and adhering to building regulations. However, it’s crucial to be aware of the basement ceiling insulation code requirements to ensure that your home stays compliant with local building standards. These codes are in place to ensure the safety, performance, and energy efficiency of your home’s insulation system, especially in colder climates where heat loss can be a significant issue.

Basement Ceiling Insulation Code

In this article, we’ll provide a comprehensive guide to the basement ceiling insulation code, including its importance, relevant standards, and factors to consider when insulating your basement ceiling. Whether you’re a homeowner, contractor, or DIY enthusiast, understanding these codes is critical for achieving the best results in terms of comfort, energy savings, and safety.

Read too: Exploring the Innovation and Efficiency of Ceiling Mounted Surgical Light Solutions: Illuminating Precision

Why Basement Ceiling Insulation Matters

Before diving into specific code requirements, it’s important to understand why basement ceiling insulation is essential. Basements often suffer from poor insulation, leading to several issues:

  1. Heat Loss: Without adequate insulation, basements can become cold during winter, causing the rooms above them to lose heat. This increases energy consumption as heating systems have to work harder.
  2. Moisture Control: Insulation also helps in controlling moisture, which is crucial in basements that are prone to dampness and condensation. Proper insulation prevents mold growth and protects the structural integrity of your home.
  3. Soundproofing: Insulating the basement ceiling can reduce noise transfer between floors, making the home more comfortable, particularly in houses with entertainment or utility rooms in the basement.
  4. Energy Efficiency: Proper insulation ensures energy efficiency, lowering heating and cooling costs throughout the year.

Given these benefits, many building codes outline strict insulation requirements to help homeowners protect their investment and ensure a safe living environment.

Understanding Basement Ceiling Insulation Code

The basement ceiling insulation code is a set of standards and regulations provided by local building authorities, as well as national codes like the International Residential Code (IRC) and the International Energy Conservation Code (IECC). These codes establish the minimum R-value (thermal resistance) needed for different parts of a home, including basements.

What Is an R-Value?

The R-value of insulation refers to its ability to resist heat flow. The higher the R-value, the better the insulation’s performance. Different areas of the home, such as walls, attics, and basements, have specific R-value requirements based on the local climate zone.

For basements, the R-value for ceiling insulation can vary, but it typically ranges between R-19 and R-30. This ensures that the basement stays insulated against temperature fluctuations, especially in colder regions.

The Basement Ceiling Insulation Code Requirements

In many regions, basement insulation requirements are detailed by both local and national building codes. Here’s a breakdown of what you need to know about basement ceiling insulation code standards:

1. International Residential Code (IRC)

The IRC is one of the most widely used building codes in the United States and provides guidance on insulation for various parts of a home, including basements. According to IRC, basement ceilings that are adjacent to conditioned spaces should have insulation that meets the minimum R-value specified for the climate zone.

  • Climate Zone 1-2: R-13 to R-15
  • Climate Zone 3-4: R-19
  • Climate Zone 5-8: R-30

These climate zones represent different geographical regions, where higher numbers indicate colder climates that require better insulation.

2. International Energy Conservation Code (IECC)

The IECC also sets insulation standards for energy efficiency, helping to reduce energy consumption in homes. Like the IRC, the IECC’s insulation requirements are broken down by climate zone. The specific R-value requirements for basement ceilings depend on whether the space above the basement is conditioned or unconditioned.

For instance:

  • If the basement is unconditioned and the ceiling separates it from a conditioned living space, the R-value needs to comply with the standard requirements for floor insulation based on the climate zone.
  • For conditioned basements, the walls should meet the code-specified R-value.

3. Local Building Codes

In addition to national codes, local municipalities may have their own specific insulation requirements. It is important to check with your local building authority before beginning any insulation project to ensure compliance with any additional regulations.

Some local codes may also specify whether a vapor barrier is required in basement insulation to prevent moisture issues. This can be particularly important in areas with high humidity or prone to water leaks.

4. Fire Safety Codes

In many regions, fire safety regulations play a role in how insulation is installed in basements. For example, building codes may require certain types of insulation, such as those with fire-resistant properties, or the installation of fire-blocking materials in specific areas.

Insulation in basement ceilings should comply with fire safety codes, especially if there are electrical wires or pipes running through the ceiling. Fiberglass and mineral wool are often recommended for their fire-retardant qualities.

Factors to Consider When Insulating a Basement Ceiling

To successfully meet the basement ceiling insulation code and achieve the best results, several key factors must be considered during the insulation process. These factors will help determine the right type of insulation and installation techniques for your home.

1. Climate Zone

As mentioned, your local climate zone will heavily influence the required R-value for basement ceiling insulation. Homes in colder climates will need insulation with a higher R-value to ensure the basement remains warm during winter months, while homes in warmer areas can use lower R-value insulation.

2. Unconditioned vs. Conditioned Basements

The type of basement you’re insulating also impacts your choice of insulation and how much you need. In an unconditioned basement (where the basement itself is not heated or cooled), it’s crucial to insulate the ceiling to maintain the energy efficiency of the home. For conditioned basements, the walls might require insulation more than the ceiling, depending on local codes.

3. Moisture Control

Since basements are prone to moisture issues, especially in regions with high humidity or heavy rainfall, moisture control is vital during insulation. If moisture builds up in the insulation, it can lead to mold growth, structural damage, and reduced insulation effectiveness.

Installing a vapor barrier can help prevent moisture from penetrating the insulation. This is especially important if you’re using materials like fiberglass, which can absorb water and lose effectiveness.

4. Soundproofing

In addition to thermal insulation, basement ceiling insulation can also be used to reduce noise transmission between floors. Insulation materials like cellulose or mineral wool can offer soundproofing benefits, making them a good choice if you’re using the basement as a living area, home office, or entertainment space.

5. Cost and Materials

The type of insulation material you choose will affect the cost and performance of the insulation. Common insulation materials for basement ceilings include:

  • Fiberglass Batts: A cost-effective option with good thermal performance. Fiberglass is easy to install and widely used in basement insulation projects.
  • Spray Foam Insulation: This option provides excellent thermal resistance and acts as both insulation and a vapor barrier. However, it can be more expensive than other materials.
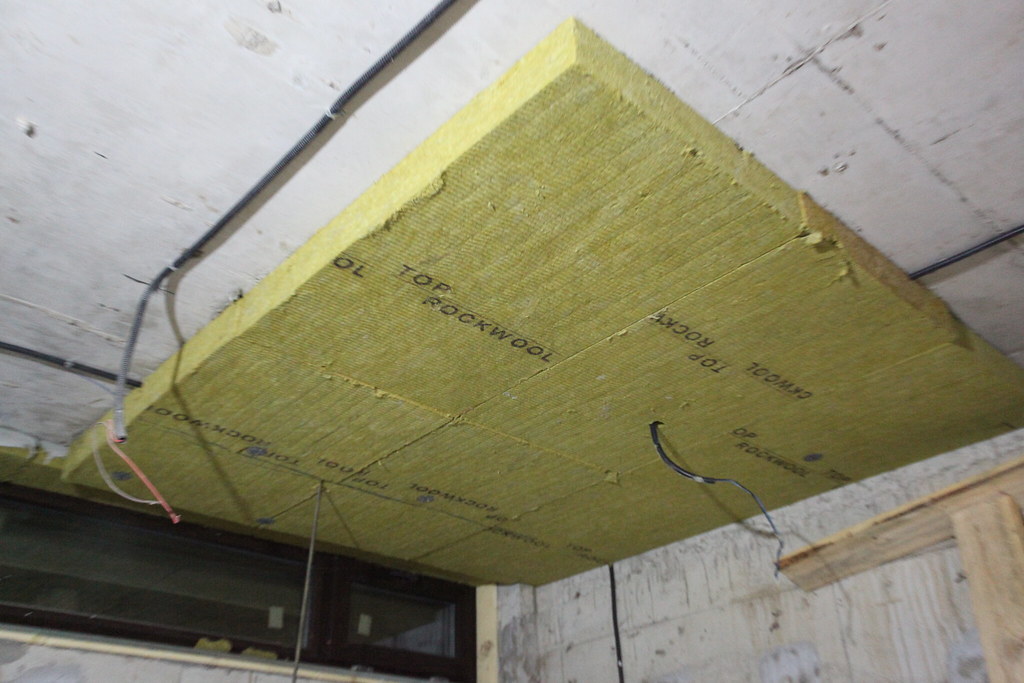
  • Mineral Wool: This material offers both thermal and soundproofing benefits, as well as fire resistance, making it an excellent choice for basements.

Installation Tips for Meeting Basement Ceiling Insulation Code

Once you’ve selected the right insulation material and determined the required R-value based on your climate zone and local code, it’s time to install the insulation. Here are some tips to ensure your installation meets code and provides the desired benefits:

1. Seal Gaps and Cracks

Before installing insulation, make sure to seal any gaps, cracks, or holes in the ceiling or walls. This will prevent air leakage and moisture infiltration, ensuring your insulation performs at its best.

2. Install Vapor Barriers

In basements with high humidity levels, a vapor barrier should be installed to prevent moisture from damaging the insulation. This is especially important when using materials like fiberglass, which can lose effectiveness when wet.

3. Use the Right Tools

Proper insulation installation requires specific tools, such as insulation knives, staplers, and protective gear. Make sure to follow the manufacturer’s instructions for both the insulation material and any vapor barrier.

4. Follow Local Code Guidelines

Always refer to your local building codes before starting your insulation project. Codes may differ depending on your location, and it’s essential to stay compliant with these regulations to avoid potential fines or complications during future home inspections.

Conclusion

Meeting the basement ceiling insulation code is crucial for maintaining energy efficiency, improving comfort, and protecting your home from potential moisture issues. By understanding the specific insulation requirements for your climate zone and local codes, you can make informed decisions about the type of insulation to use and how to install it properly.

When properly insulated, a basement can become a more comfortable and usable space, whether for storage, living, or entertainment. Investing in the right insulation materials and techniques will pay off in the form of lower energy bills, better soundproofing, and a more comfortable home.

Insulating Pole Barn Ceiling: Enhance Comfort and Energy Efficiency

When it comes to constructing or renovating a pole barn, many homeowners and builders overlook the importance of ceiling insulation. However, insulating the pole barn ceiling is a crucial step that can significantly improve the comfort of the space and enhance energy efficiency. In this comprehensive guide, we will explore the benefits of insulating a pole barn ceiling, the various insulation materials available, installation techniques, and maintenance tips. Whether you’re using your pole barn for storage, workshops, or livestock, proper insulation will make a world of difference.

Insulating Pole Barn Ceiling

What is a Pole Barn?

Understanding the Basics

A pole barn is a type of structure typically characterized by a framework of wooden posts (or poles) set in concrete. This construction method is often used for agricultural purposes but has gained popularity for residential, commercial, and recreational uses due to its cost-effectiveness and ease of construction. Pole barns can be customized in size and shape, making them suitable for a variety of functions.

Why Insulate a Pole Barn Ceiling?

Benefits of Insulating Pole Barn Ceilings

  1. Energy Efficiency: Insulating your pole barn ceiling can significantly reduce heating and cooling costs. A well-insulated space prevents heat from escaping in the winter and keeps it cooler during the summer, leading to lower energy bills.
  2. Comfort: Insulation helps maintain a consistent temperature within the pole barn, creating a more comfortable environment for both people and animals. This is particularly important in barns used for livestock or as workshops.
  3. Noise Reduction: Insulation materials can also help reduce noise transmission. This is beneficial if your pole barn is located near residential areas or if you’re using loud machinery inside.
  4. Condensation Control: Insulation helps prevent condensation build-up in the ceiling, which can lead to mold and mildew. Proper insulation maintains the temperature of the ceiling surface, minimizing the chances of moisture problems.
  5. Increased Property Value: An insulated pole barn is often more attractive to potential buyers, enhancing the overall value of your property.

Read too: Kitchen Lighting For A Vaulted Ceiling: Illuminating Your Space with Style and Functionality

Types of Insulation for Pole Barn Ceilings

Choosing the Right Insulation for Your Pole Barn Ceiling

When it comes to insulating your pole barn ceiling, several insulation materials are available, each with its unique properties and benefits. Below, we discuss some of the most common types of insulation:

1. Fiberglass Insulation

Fiberglass insulation is one of the most widely used types for ceilings and walls. It consists of fine glass fibers that trap air, providing excellent thermal insulation.

  • Pros:
    • Affordable and easy to install.
    • Non-combustible and resistant to moisture.
    • Available in batts or loose-fill options.
  • Cons:
    • Can irritate skin and lungs during installation.
    • Requires a vapor barrier to prevent moisture accumulation.

2. Spray Foam Insulation

Spray foam insulation is a versatile and highly effective insulation material. It is sprayed into place and expands to fill gaps, providing excellent air sealing and insulation.

  • Pros:
    • Superior thermal performance and air sealing capabilities.
    • Reduces noise transmission.
    • Acts as a vapor barrier, preventing moisture buildup.
  • Cons:
    • More expensive than fiberglass.
    • Requires professional installation for optimal results.

3. Cellulose Insulation

Cellulose insulation is made from recycled paper products treated with fire retardants. It is typically blown into place, filling gaps and voids effectively.

  • Pros:
    • Eco-friendly and made from recycled materials.
    • Good soundproofing qualities.
    • Effective at reducing air leaks.
  • Cons:
    • Can settle over time, reducing its effectiveness.
    • Requires proper installation to avoid moisture issues.

4. Mineral Wool (Rock Wool) Insulation

Mineral wool insulation is made from natural or recycled materials, providing excellent thermal and acoustic insulation.

  • Pros:
    • Fire-resistant and water-repellent.
    • Excellent soundproofing qualities.
    • Does not promote mold growth.
  • Cons:
    • More expensive than fiberglass.
    • Heavier and may require additional support during installation.

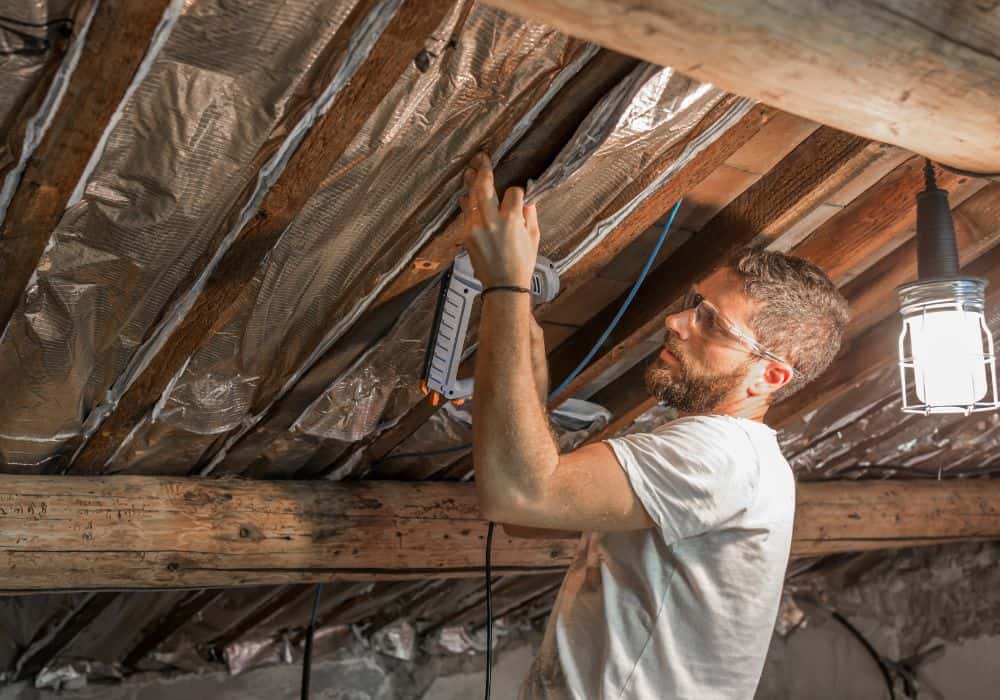
5. Reflective or Radiant Barrier Insulation

Reflective insulation consists of a reflective material (like aluminum foil) that reflects radiant heat away from the ceiling.

  • Pros:
    • Reduces heat gain in hot climates.
    • Lightweight and easy to install.
  • Cons:
    • Less effective in cold climates.
    • Typically used in conjunction with other insulation types for optimal performance.

Installation of Insulating Pole Barn Ceilings

A Step-by-Step Guide to Installing Insulation

Proper installation is key to maximizing the benefits of your chosen insulation material. Here’s a step-by-step guide to insulating your pole barn ceiling effectively:

1. Preparation

Before you begin, gather all necessary materials and tools, including:

  • Insulation material (fiberglass, spray foam, cellulose, etc.)
  • Vapor barrier (if required)
  • Measuring tape
  • Utility knife
  • Stapler or adhesive (for batts)
  • Protective gear (gloves, mask, goggles)

2. Measure and Cut

  • Measure the area of the ceiling to determine how much insulation you will need.
  • If using batts or rolls, cut them to fit the spaces between the ceiling joists.

3. Install Vapor Barrier (If Needed)

  • If your insulation requires a vapor barrier, install it on the warm side of the insulation (the side facing the living space). This barrier helps prevent moisture from penetrating the insulation.

4. Install Insulation

  • For Batts: Place the batts snugly between the ceiling joists. Avoid compressing the insulation, as this can reduce its effectiveness.
  • For Spray Foam: Hire a professional to apply the spray foam insulation. Ensure that it expands to fill all gaps.
  • For Cellulose: Use a blower to distribute cellulose evenly across the ceiling area.

5. Seal Any Gaps

  • After the insulation is installed, check for gaps and cracks. Use caulk or spray foam to seal any openings that could allow air leaks.

6. Finish the Ceiling

  • If desired, cover the insulation with a ceiling material such as plywood, drywall, or metal sheeting for a finished look. This also adds an extra layer of protection.

Maintenance Tips for Insulated Pole Barn Ceilings

Keeping Your Insulation in Top Condition

Maintaining your insulated pole barn ceiling is crucial for ensuring its longevity and effectiveness. Here are some tips to help you keep it in optimal condition:

  1. Regular Inspections: Periodically check your insulation for signs of moisture damage, mold, or pest infestations. Early detection can prevent larger issues down the line.
  2. Clean Gutters and Downspouts: Keep gutters and downspouts clear of debris to prevent water from pooling around your pole barn, which can lead to moisture problems in the ceiling.
  3. Maintain Ventilation: Proper ventilation is crucial for preventing moisture buildup. Ensure that your pole barn has adequate ventilation to allow for air circulation.
  4. Address Issues Promptly: If you notice leaks, condensation, or any signs of damage, address them immediately to prevent further damage to your insulation and structure.

Conclusion

In summary, insulating your pole barn ceiling is a vital step that enhances comfort, energy efficiency, and overall functionality. With various insulation options available, you can choose the material that best fits your needs and budget. Whether you opt for traditional fiberglass, advanced spray foam, or eco-friendly cellulose, proper installation and maintenance will ensure that your insulation performs effectively for years to come. Investing in an insulating pole barn ceiling is not just about comfort; it’s also a smart financial decision that can save you money on energy bills and increase the overall value of your property.

Exposed Insulation in Ceiling: Understanding the Pros and Cons

Exposed insulation in ceiling spaces is a topic that often comes up in discussions about modern construction and home renovation. While it can be a practical solution in some scenarios, it also comes with a unique set of considerations. In this comprehensive guide, we’ll explore what exposed insulation is, the benefits and drawbacks of this approach, and how to effectively manage and integrate it into your living space.

Exposed Insulation In Ceiling

What is Exposed Insulation in Ceiling?

Exposed insulation refers to insulation materials that are visible in the ceiling area of a building or room. Unlike traditional insulation methods that are hidden within walls or ceilings, exposed insulation is left uncovered, often as part of the architectural design. This can include materials like fiberglass batts, spray foam, or mineral wool.

Common Types of Exposed Insulation

  1. Fiberglass Insulation: Often seen in batt form, fiberglass is one of the most common types of insulation. When exposed, it can give a distinctive look and is usually covered with a vapor barrier to prevent moisture issues.
  2. Spray Foam Insulation: This type of insulation expands after application, creating an air-tight seal. It can be left exposed for aesthetic reasons or practicality, offering both insulation and air-sealing benefits.
  3. Mineral Wool: Known for its fire-resistant properties, mineral wool can also be used as exposed insulation. It provides excellent thermal and acoustic performance and can be left visible for its industrial appeal.

Read too: Enhance Your Space with Acoustic Ceiling Tiles Paint: A Comprehensive Guide

Pros of Exposed Insulation in Ceiling

1. Aesthetic Appeal

Exposed insulation in ceiling areas can lend a unique and industrial feel to a space. This style is often used in modern, loft-style, or minimalist interiors where the raw, unrefined look is part of the design concept.

  • Industrial Design: Complements industrial and modern aesthetics.
  • Unique Look: Adds a distinctive visual element to the space.

2. Cost-Effective

In some cases, leaving insulation exposed can reduce construction costs. By eliminating the need for additional materials like drywall or ceiling panels, you can save on both materials and labor.

  • Reduced Costs: Less need for additional finishing materials.
  • Simplicity: Simplifies the construction process.

3. Improved Accessibility

Exposed insulation allows for easy access to the insulation itself, which can be beneficial for repairs, maintenance, or upgrades. This can be particularly useful in commercial or industrial settings where changes may be frequent.

  • Maintenance: Easier to access and replace insulation if needed.
  • Flexibility: Allows for quick modifications and upgrades.

4. Enhanced Performance

Certain types of exposed insulation, such as spray foam, can offer superior insulation and air-sealing properties when left exposed. This can contribute to improved energy efficiency and indoor comfort.

  • Energy Efficiency: Can improve the overall insulation performance.
  • Comfort: Enhances thermal and acoustic comfort in the space.

Cons of Exposed Insulation in Ceiling

1. Aesthetic Challenges

While some may appreciate the raw look of exposed insulation, it can be off-putting to others. Not everyone finds this aesthetic appealing, and it might not suit more traditional or refined interior designs.

  • Design Limitations: May not fit all interior styles or preferences.
  • Visual Impact: Can be perceived as unfinished or unrefined.

2. Maintenance Issues

Exposed insulation can be more susceptible to dust, dirt, and other contaminants. Over time, this can affect the performance of the insulation and necessitate more frequent cleaning or replacement.

  • Cleaning: Requires regular dusting and maintenance.
  • Durability: Can be more prone to damage from environmental factors.

3. Potential Safety Concerns

Certain types of exposed insulation, such as fiberglass, can pose safety issues if not handled properly. Fiberglass particles can be irritating to the skin and lungs, so proper precautions should be taken.

  • Health Risks: Fiberglass particles can cause irritation.
  • Safety Measures: Requires careful handling and maintenance.

4. Building Codes and Regulations

In some areas, building codes and regulations may require that insulation be covered with a finished material to meet safety and fire resistance standards. Exposed insulation might not always comply with these regulations.

  • Regulatory Compliance: Must adhere to local building codes and standards.
  • Permits: May require additional permits or inspections.

How to Manage and Integrate Exposed Insulation

1. Choosing the Right Type of Insulation

Select insulation that fits your needs and aesthetic preferences. Consider factors such as R-value, durability, and maintenance requirements when choosing insulation for exposed applications.

  • Material Selection: Choose insulation based on performance and visual appeal.
  • Long-Term Considerations: Think about maintenance and durability.

2. Ensuring Proper Installation

Proper installation is crucial to maximize the benefits of exposed insulation. Ensure that the insulation is installed correctly, with attention to sealing gaps and ensuring proper coverage.

  • Installation Quality: Ensure professional and precise installation.
  • Sealing: Address any gaps or seams to improve performance.

3. Implementing Safety Measures

When dealing with exposed insulation, implement safety measures to protect against health risks. Use protective gear during installation and maintenance, and ensure proper ventilation in the space.

  • Protective Gear: Wear masks and gloves during handling.
  • Ventilation: Ensure good air circulation in the area.

4. Maintaining Cleanliness

Regular cleaning and maintenance can help keep exposed insulation in good condition. Develop a routine to check for dust, dirt, and any signs of wear or damage.

  • Routine Cleaning: Schedule regular cleaning and inspection.
  • Damage Control: Address any issues promptly to prevent further problems.

Conclusion

Exposed insulation in ceiling spaces can offer both aesthetic and practical benefits, but it’s essential to weigh the pros and cons before making a decision. By understanding the various types of insulation and their implications, you can make an informed choice that enhances your space while addressing any potential challenges. Whether you’re aiming for an industrial look or seeking practical solutions, proper planning and maintenance will ensure that your exposed insulation serves its purpose effectively.

Spray Foam Insulation For Ceilings: The Ultimate Guide to Energy Efficiency and Comfort

When it comes to creating a comfortable and energy-efficient home, insulation plays a critical role. One of the most effective forms of insulation today is spray foam insulation, particularly for ceilings. Proper insulation in the ceiling not only helps regulate the temperature in your home but also provides significant energy savings by reducing the workload on your HVAC system.

Spray Foam Insulation For Ceilings

In this article, we will dive deep into the benefits, types, and application process of spray foam insulation for ceilings, along with tips on how to choose the right product and contractor for your home. Whether you’re building a new home or retrofitting an older one, understanding how spray foam insulation works can help you make a more informed decision.


What is Spray Foam Insulation?

Spray foam insulation is a versatile and highly effective type of insulation that is created by mixing two chemicals, isocyanate and polyol resin, which react when combined to expand and form a rigid, foam-like substance. This foam is sprayed onto surfaces, where it quickly expands and hardens, creating a thick, airtight layer of insulation.

There are two main types of spray foam insulation: open-cell and closed-cell. Each has its unique properties and is used for different purposes, depending on your home’s needs.

  1. Open-cell Spray Foam: This type of spray foam is lighter and less dense than closed-cell foam. It is used primarily for interior applications, such as walls and ceilings, and provides excellent soundproofing qualities.
  2. Closed-cell Spray Foam: Closed-cell foam is denser and provides a higher R-value, which measures the material’s ability to resist heat flow. It is typically used for exterior walls, roofs, and areas where maximum thermal protection is needed.

Read too: Bathroom Flooded Through the Ceiling: A Comprehensive Guide


Benefits of Spray Foam Insulation For Ceilings

1. Superior Energy Efficiency

One of the primary reasons homeowners choose spray foam insulation for ceilings is the energy efficiency it offers. Spray foam creates an airtight seal, which reduces air leakage and heat transfer. This means that your heating and cooling systems won’t have to work as hard to maintain a consistent temperature, resulting in lower energy bills.

Ceilings are one of the largest areas of a home that can lose heat in the winter or gain heat in the summer. By using spray foam insulation, you can ensure that your home remains energy-efficient throughout the year.

2. Enhanced Comfort

Spray foam insulation helps maintain a consistent indoor temperature, preventing drafts and cold spots. By insulating the ceiling with spray foam, you create a barrier that blocks heat from escaping during the winter and keeps it out during the summer. This leads to a more comfortable living environment, regardless of the season.

Additionally, spray foam also provides noise reduction, making it an excellent option for soundproofing ceilings. The open-cell variety, in particular, is great for absorbing sound, helping to minimize noise from room to room.

3. Moisture and Mold Resistance

Ceilings, especially in basements or attics, are prone to moisture buildup, which can lead to mold growth over time. Spray foam insulation creates a moisture barrier, preventing water from seeping into the ceiling or attic space. This not only protects the structural integrity of your home but also reduces the risk of mold, which can cause health issues if left unchecked.

Because of its water resistance, closed-cell spray foam insulation is particularly effective in areas where moisture may be a concern.

4. Increased Structural Strength

In addition to its insulating properties, spray foam insulation can also add strength to your ceilings. The rigidity of closed-cell foam acts as an additional layer of support, which can help fortify the ceiling structure. This is especially beneficial in areas prone to high winds, heavy snowfall, or other weather-related stresses.

5. Long-Term Durability

Spray foam insulation is known for its long-lasting performance. Unlike traditional insulation materials, such as fiberglass or cellulose, spray foam does not degrade over time. Once installed, it retains its insulating properties for many years, ensuring your home remains energy-efficient without the need for frequent replacement.


Why Choose Spray Foam Insulation For Ceilings?

When it comes to insulating your home, ceilings are a critical area that often gets overlooked. However, because heat naturally rises, uninsulated or poorly insulated ceilings can lead to significant energy loss. By investing in spray foam insulation for ceilings, you can take advantage of the following benefits:

Airtight Seal

One of the standout features of spray foam insulation is its ability to expand and fill every nook and cranny of the ceiling. This creates a completely airtight seal, which prevents drafts and energy loss. Unlike traditional insulation materials that may leave gaps or become compressed over time, spray foam forms a tight bond with the surface, ensuring optimal insulation performance.

Higher R-Value

When insulating ceilings, it’s important to choose a material with a high R-value, which indicates its resistance to heat flow. Closed-cell spray foam insulation has one of the highest R-values of any insulation material, making it highly effective at blocking heat transfer. This is especially important for ceilings, where heat can escape more easily.

Versatility and Adaptability

Another advantage of spray foam insulation is its adaptability to various ceiling types. Whether you have a flat ceiling, vaulted ceiling, or an exposed beam ceiling, spray foam can be applied seamlessly. It’s also ideal for hard-to-reach areas or ceilings with unique architectural features.


Types of Spray Foam Insulation For Ceilings

Choosing the right type of spray foam insulation depends on several factors, including the specific needs of your home, the climate in your area, and your budget.

1. Open-Cell Spray Foam

As mentioned earlier, open-cell spray foam is a lighter, less dense option that is well-suited for interior ceiling insulation. Because it expands more than closed-cell foam, it is great for filling large areas or spaces with irregular shapes. Open-cell foam also provides excellent soundproofing, making it a good choice for ceilings between floors or in rooms where sound control is important.

Pros:

  • More affordable than closed-cell foam
  • Effective for soundproofing
  • Good for filling large spaces

Cons:

  • Lower R-value than closed-cell foam
  • Not as moisture resistant

2. Closed-Cell Spray Foam

Closed-cell spray foam is denser and more rigid than open-cell foam, making it a better choice for areas where high thermal resistance and structural strength are required. It has a higher R-value and provides an excellent moisture barrier, making it ideal for ceilings in basements or attics, where humidity levels may be higher.

Pros:

  • High R-value for better insulation
  • Provides moisture resistance
  • Adds structural strength to ceilings

Cons:

  • More expensive than open-cell foam
  • Less effective at soundproofing

Installing Spray Foam Insulation For Ceilings

The installation process for spray foam insulation is typically handled by professionals. The foam is applied using specialized equipment that mixes the two chemical components on-site. Once the foam is sprayed onto the ceiling, it expands quickly and fills in any gaps, cracks, or voids.

Here’s an overview of the installation process:

  1. Preparation: Before applying the spray foam, the installation team will prepare the area by covering any surfaces or fixtures that don’t need to be insulated. This ensures a clean, precise application.
  2. Application: Using a spray gun, the foam is applied to the ceiling in thin layers. The foam expands almost immediately upon contact, filling every corner and crevice.
  3. Curing: After application, the foam needs time to cure and harden. This typically takes a few hours, depending on the type of foam used and the size of the area being insulated.
  4. Finishing Touches: Once the foam has cured, any excess material is trimmed away, leaving a smooth, even surface.

Tips for Choosing a Contractor

When selecting a contractor for your spray foam insulation for ceilings project, it’s essential to choose someone with experience and expertise in spray foam applications. Here are a few tips for finding the right contractor:

  1. Check for Certifications: Make sure the contractor is certified to install spray foam insulation and has the necessary licenses and insurance.
  2. Ask for References: Request references from previous clients to ensure that the contractor has a proven track record of successful installations.
  3. Get Multiple Quotes: It’s always a good idea to get quotes from several contractors to compare pricing and services.
  4. Ask About Warranties: Find out if the contractor offers any warranties on the insulation materials or installation work.

Conclusion: Boost Your Home’s Efficiency with Spray Foam Insulation For Ceilings

Spray foam insulation for ceilings is an excellent investment that can provide long-term energy savings, enhanced comfort, and improved structural integrity for your home. Whether you’re looking to insulate an attic, basement, or living space, spray foam’s versatility and high performance make it an ideal choice for modern homeowners.

By choosing the right type of spray foam and working with a qualified contractor, you can ensure that your home remains energy-efficient and comfortable year-round.

Insulated Drop Ceiling Tiles: Enhancing Comfort and Efficiency in Your Space

Insulated drop ceiling tiles are not just about aesthetics—they offer practical benefits that can transform the comfort and energy efficiency of any room. Learn everything you need to know about Insulated Drop Ceiling Tiles and how they can be a smart investment for your home or commercial space.

Insulated Drop Ceiling Tiles

Understanding Insulated Drop Ceiling Tiles

Insulated Drop Ceiling Tiles are specially designed to provide thermal insulation and soundproofing in addition to their decorative function. They are typically made from materials like fiberglass, mineral wool, or foam, and are installed in suspended ceiling systems.

Benefits of Insulated Drop Ceiling Tiles

Explore the advantages these tiles bring to your space:

  • Thermal Insulation: Reduce heat loss in winter and heat gain in summer, improving energy efficiency.
  • Sound Absorption: Minimize noise transfer between rooms or floors, creating a quieter environment.
  • Aesthetic Appeal: Enhance the look of your space with a variety of styles, textures, and colors available.

Types of Insulated Drop Ceiling Tiles

Different materials offer varying levels of insulation and acoustic performance:

  • Fiberglass Tiles: Lightweight and cost-effective with good thermal and acoustic properties.
  • Mineral Wool Tiles: Excellent sound absorption capabilities and fire resistance.
  • Foam Tiles: Easy to install, offering moderate insulation and customization options.

Read too: Kitchen Lighting For A Vaulted Ceiling: Illuminating Your Space with Style and Functionality

Choosing the Right Insulated Drop Ceiling Tiles

Consider these factors when selecting tiles for your space:

  • R-Value: Opt for tiles with a higher R-value for better insulation performance.
  • Acoustic Rating: Choose tiles with higher NRC (Noise Reduction Coefficient) ratings for improved soundproofing.
  • Design and Style: Match tiles to your existing decor or architectural style to enhance visual appeal.

Installation Process and Considerations

Ensure proper installation for maximum benefits:

  • Ceiling Height: Measure ceiling height accurately to determine tile dimensions and suspension requirements.
  • Grid System: Select compatible suspension grids that support the weight and size of your chosen tiles.
  • Professional Installation: Hire experienced installers for precise fitting and alignment of tiles.

Maintenance and Upkeep

Keep your ceiling tiles in optimal condition:

  • Regular Cleaning: Dust tiles regularly to maintain their appearance and prevent buildup of dirt or allergens.
  • Inspection: Check for signs of damage or sagging, and replace damaged tiles promptly.
  • Repairs: Address any issues with the ceiling grid or support system to prevent further damage to tiles.

Applications of Insulated Drop Ceiling Tile

Utilize these tiles in various settings:

  • Residential Spaces: Bedrooms, living rooms, and basements benefit from improved comfort and noise reduction.
  • Commercial Buildings: Offices, conference rooms, and retail spaces create a more pleasant environment for occupants.
  • Educational Facilities: Classrooms and libraries enhance learning environments with reduced noise distractions.

Cost Considerations and Return on Investment

Evaluate the cost-effectiveness of insulated drop ceiling tile:

  • Initial Investment: Compare prices based on material, size, and performance characteristics.
  • Energy Savings: Calculate potential savings on heating and cooling costs due to improved insulation.
  • Long-Term Benefits: Consider the durability and maintenance requirements of different tile materials.

Conclusion

Investing in Insulated Drop Ceiling Tile offers multiple benefits beyond aesthetics, including enhanced comfort, energy efficiency, and noise reduction. Whether you’re upgrading a residential or commercial space, these tiles provide a practical solution to improve the overall environment.

Batt Insulation for Ceilings: Enhance Your Home’s Energy Efficiency

Batt insulation for the ceilings is a crucial component of any home’s energy efficiency and comfort. Whether you’re building a new home or renovating an existing one, properly insulating your ceiling with batt insulation can help reduce energy costs, regulate indoor temperatures, and enhance overall comfort. In this comprehensive guide, we’ll explore everything you need to know about batt insulation for the ceiling, including its benefits, installation methods, materials, and tips for maximizing effectiveness.

Batt Insulation For Ceiling

Understanding Batt Insulation for Ceiling

Batt insulation for the ceiling is a type of insulation material that comes in pre-cut panels or rolls. Made from materials such as fiberglass, mineral wool, or natural fibers, batt insulation is designed to fit snugly between ceiling joists or rafters, providing thermal resistance and preventing heat transfer between the interior and exterior of your home.

Benefits of Batt Insulation for Ceiling

  1. Improved Energy Efficiency: Batt insulation helps prevent heat loss in the winter and heat gain in the summer, reducing the workload on your heating and cooling systems and lowering energy bills.
  2. Enhanced Comfort: By maintaining consistent indoor temperatures, batt insulation creates a more comfortable living environment year-round, eliminating hot and cold spots and minimizing drafts.
  3. Sound Absorption: In addition to thermal resistance, batt insulation also provides sound absorption properties, reducing noise transmission between floors and rooms for a quieter home environment.
  4. Moisture Control: Some types of batt insulation are treated with moisture-resistant materials, helping to prevent mold and mildew growth in the ceiling cavity and improving indoor air quality.

Types of Batt Insulation Materials

Batt insulation for the ceiling is available in various materials, each with its own unique properties and benefits:

  • Fiberglass: Made from spun glass fibers, fiberglass batt insulation is lightweight, non-combustible, and resistant to moisture, making it a popular choice for ceiling insulation.
  • Mineral Wool: Recycled slag and basalt rock make mineral wool batts, providing excellent fire resistance, sound absorption, and thermal performance.
  • Natural Fibers: Insulation materials such as cotton, wool, and cellulose are derived from renewable resources and offer environmentally friendly alternatives to traditional insulation materials.

Read too: How To Extend Kitchen Cabinets To The Ceiling: A Complete Guide for Maximizing Space and Style

Installation Methods

Installing batt insulation for the ceiling requires careful planning and attention to detail to ensure optimal performance:

  1. Measurements: Measure the distance between ceiling joists or rafters to determine the width and thickness of batt insulation needed for your space.
  2. Cutting: Use a utility knife or insulation cutter to trim batt insulation panels to the appropriate size, taking care to avoid compressing the insulation, which can reduce its effectiveness.
  3. Placement: Place batt insulation between ceiling joists or rafters, ensuring a snug fit and full coverage without gaps or voids.
  4. Vapor Barrier: In regions with high humidity or moisture levels, consider installing a vapor barrier over the insulation to prevent condensation and moisture infiltration.

Tips for Maximizing Effectiveness

To maximize the effectiveness of batt insulation for the ceiling, consider the following tips:

  • Seal Air Leaks: Before installing batt insulation, seal any air leaks or gaps in the ceiling structure to prevent drafts and ensure a tight thermal envelope.
  • Proper Ventilation: Ensure adequate attic ventilation to prevent moisture buildup and maintain proper airflow, which can help extend the life of your insulation and prevent mold growth.
  • Professional Installation: If you’re unsure about installing batt insulation yourself, consider hiring a professional contractor with experience in ceiling insulation to ensure proper installation and optimal performance.

Conclusion

Batt insulation for the ceilings is a cost-effective and efficient way to improve your home’s energy efficiency, comfort, and indoor air quality. By understanding the benefits, materials, installation methods, and tips for maximizing effectiveness of batt insulation, you can make informed decisions about insulating your home and enjoy year-round comfort and savings on energy bills.

Maximize Your Home’s Efficiency with R-19 Ceiling Insulation: Benefits and Installation Tips

R-19 ceiling insulation is a crucial component of any home’s energy efficiency strategy. By effectively insulating your ceiling with R-19 insulation, you can minimize heat loss, reduce energy consumption, and enhance overall comfort levels in your living space. In this guide, we’ll explore everything you need to know about R-19 ceiling insulation, including its benefits, installation techniques, and tips for maximizing its effectiveness in your home.

R-19 Ceiling Insulation

Understanding R-19 Ceiling Insulation

R-19 refers to the thermal resistance value of the insulation material, indicating its ability to resist heat transfer. R-19 insulation is commonly used in ceilings, attics, and other areas of the home where heat loss and gain are significant factors. This type of insulation typically consists of fiberglass batts or rolls with a thickness of approximately 6.25 inches, providing superior thermal performance compared to lower R-value options.

The Benefits of R-19 Ceiling Insulation

Investing in R-19 ceiling insulation offers several benefits for homeowners:

  • Improved Energy Efficiency: R-19 insulation helps minimize heat transfer between the interior and exterior of your home, reducing the need for heating and cooling and lowering energy bills.
  • Enhanced Comfort: By maintaining more consistent indoor temperatures, R-19 insulation creates a more comfortable living environment year-round, with fewer temperature fluctuations and drafts.
  • Sound Dampening: In addition to thermal insulation, R-19 insulation can also help reduce noise transmission between floors, creating a quieter and more peaceful home environment.

Read too: Understanding and Dealing with Ants in the Ceiling Spaces: Navigating the Intrusion

Installation Techniques for R-19 Insulation

Proper installation is essential to maximize the effectiveness of R-19 ceiling insulation. Follow these tips for a successful installation process:

  1. Prepare the Space: Before installing R-19 insulation, ensure that the ceiling or attic space is clean, dry, and free of debris. Repair any leaks or damage to the roof or ceiling structure as needed.
  2. Measure and Cut: Measure the dimensions of the ceiling joists or rafters and cut the insulation batts to fit snugly between them. Leave a small gap around electrical fixtures and other obstructions to prevent compression of the insulation.
  3. Install Vapor Barrier: In regions with high humidity or moisture levels, it’s essential to install a vapor barrier between the insulation and the living space to prevent condensation and moisture buildup. Use a polyethylene vapor barrier and seal all seams and edges with tape.
  4. Secure in Place: Once the insulation is cut to size and positioned between the joists or rafters, use staples or insulation supports to hold it in place and prevent sagging over time.

Maximizing Effectiveness and Efficiency

To ensure optimal performance and efficiency of R-19 ceilings insulation, consider the following additional tips:

  • Seal Air Leaks: Inspect the ceiling and attic for air leaks, gaps, and cracks, and seal them with caulk, weatherstripping, or spray foam insulation to prevent heat loss and infiltration of outdoor air.
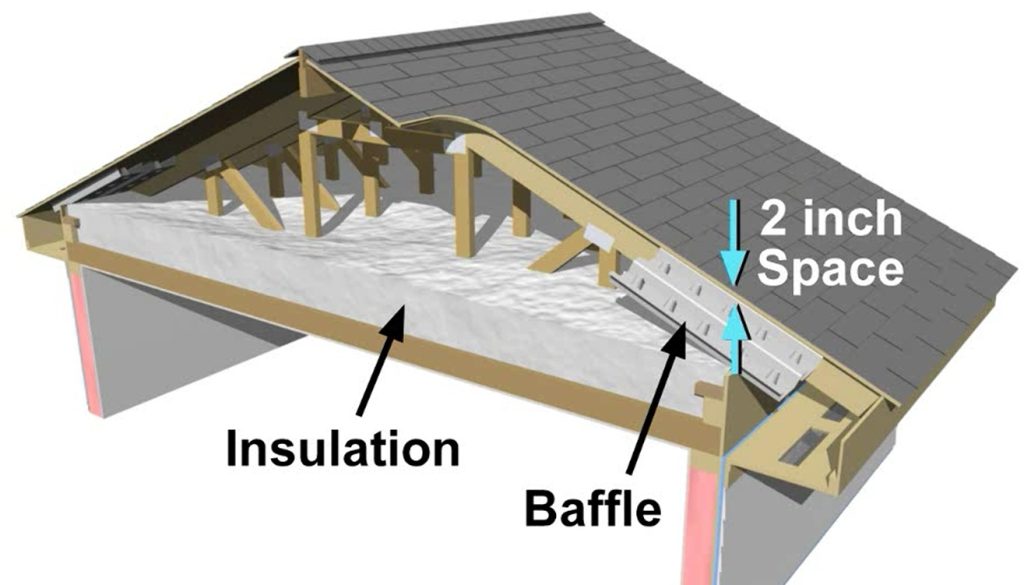
  • Maintain Adequate Ventilation: Proper attic ventilation is essential to prevent moisture buildup and ensure the longevity of the insulation. Install ridge vents, soffit vents, or attic fans to promote air circulation and prevent condensation.
  • Monitor Insulation Depth: Regularly check the depth and condition of the insulation in your ceiling or attic to ensure that it meets or exceeds the recommended R-value for your climate zone.

Conclusion

R-19 ceilings insulation is a cost-effective and efficient solution for improving the energy efficiency and comfort of your home. By understanding the benefits, installation techniques, and tips for maximizing effectiveness, you can upgrade your home’s insulation and enjoy year-round comfort while reducing energy consumption and utility costs.

Whether you’re tackling a DIY insulation project or hiring a professional contractor, R-19 ceiling insulation is a smart investment that pays dividends in terms of energy savings, comfort, and overall home performance.

A Comprehensive Guide to Install Rockwool In Ceiling Spaces: Elevate Comfort and Acoustics

Embarking on a journey to enhance your living space? Learn how to “Install Rockwool In Ceiling” for improved acoustics, thermal insulation, and a more comfortable atmosphere.

Install Rockwool In Ceiling

Introduction

Creating a space that offers both comfort and functionality involves careful consideration of various elements, and the ceiling is no exception. Rockwool, known for its exceptional insulating properties, can be a game-changer when properly installed in ceilings. In this guide, we’ll explore the step-by-step process to “Install Rockwool In Ceiling,” offering insights into its benefits and the transformative impact it can have on your environment.

Understanding: Install Rockwool In Ceiling

What is Rockwool?

Rockwool, also known as mineral wool, is a versatile insulation material made from basalt rock and recycled slag. It is renowned for its fire resistance, sound absorption capabilities, and thermal insulation properties.

Benefits of Installing Rockwool In Ceiling

  1. Enhanced Acoustic Performance: Rockwool acts as an excellent sound absorber, reducing echoes and minimizing noise transfer between rooms.
  2. Improved Thermal Insulation: By adding a layer of Rockwool in the ceiling, you create a barrier that helps regulate indoor temperatures, leading to energy efficiency.
  3. Fire Resistance: Rockwool is non-combustible, providing an added layer of safety to your home or commercial space.

Step-by-Step Guide to Install Rockwool In Ceiling

1. Gather Materials and Tools:

  • Rockwool Insulation Batts or Rolls
  • Protective Gear (gloves, goggles, mask)
  • Utility Knife
  • Measuring Tape
  • Staple Gun or Adhesive

2. Measure and Cut:

  • Measure the distance between ceiling joists and the length required for the insulation batts or rolls.
  • Use a utility knife to cut the Rockwool to the appropriate size, ensuring a snug fit.

3. Wear Protective Gear:

  • Before handling Rockwool, wear gloves, goggles, and a mask to protect yourself from fibers.

4. Install Rockwool Between Ceiling Joists:

  • Place the cut Rockwool between the ceiling joists, ensuring a tight fit to avoid gaps.
  • Use a staple gun or apply adhesive to secure the insulation in place.

5. Seal Gaps and Joints:

  • Inspect the installed Rockwool and seal any gaps or joints with additional material.

6. Cover with Ceiling Material:

  • Once the Rockwool is securely in place, cover it with the chosen ceiling material, whether it be drywall, panels, or another finish.

Additional Tips for a Successful Installation

  1. Consider Professional Assistance: If you’re unsure about the installation process, or if your ceiling has complex structures, consider hiring a professional installer.
  2. Ensure Adequate Ventilation: Proper ventilation is essential to prevent moisture buildup. Install vents or take necessary measures to maintain a well-ventilated space.

Read too: Understanding and Addressing a Leaky Ceiling in Your Apartment: Navigating the Drips

Conclusion

Installing Rockwool in the ceiling is a proactive step towards creating a more comfortable and energy-efficient living or working environment. By following the detailed guide outlined above, you can harness the benefits of Rockwool insulation and enjoy improved acoustics, thermal regulation, and enhanced fire safety. Whether you’re a homeowner or a commercial space manager, the decision to “Install Rockwool In Ceiling” can make a significant difference in the overall quality and sustainability of your space.

Understanding the Cost to Insulate a Ceiling for Your Home Comfort: Unveiling the Numbers

If you’re considering enhancing the energy efficiency and comfort of your home, understanding the “Cost To Insulate A Ceiling” is a crucial step. Learn about the factors influencing expenses and make informed decisions to optimize your living space.

Cost To Insulate A Ceiling

Introduction

Insulating your ceiling is a strategic investment that pays dividends in energy savings, comfort, and sustainability. Whether you’re motivated by reducing utility bills or creating a more temperate indoor environment, knowing the “Cost To Insulate A Ceiling” empowers you to make sound decisions for your home. In this comprehensive guide, we’ll explore the factors influencing insulation costs, types of insulation materials, and the potential long-term benefits of this investment.

Deciphering Expenses: Factors Affecting the Cost To Insulate A Ceiling

Understanding the various elements that contribute to the overall cost of insulating a ceiling is essential. Each home is unique, and several factors influence the expenses associated with this improvement.

  1. Ceiling Size and Layout: The size and layout of your ceiling directly impact the amount of insulation material required. Larger ceilings or intricate architectural designs may increase the overall cost.
  2. Insulation Material Choice: The type of insulation material you choose significantly affects costs. Common options include fiberglass, cellulose, foam board, and spray foam, each with its own price point.
  3. Labor Costs: Professional installation ensures optimal performance. Labor costs can vary based on the complexity of the job and local labor rates.
  4. Accessibility of the Ceiling: Easy access to the ceiling facilitates installation, potentially reducing labor costs. In contrast, hard-to-reach or obstructed areas may require more effort, impacting overall expenses.
  5. Local Climate Considerations: The climate in your region influences the recommended insulation levels. Colder climates may necessitate thicker insulation, affecting costs.

Unveiling the Numbers: Average Cost To Insulate A Ceiling

While the cost to insulate a ceiling can vary widely based on individual circumstances, providing a general overview can offer valuable insights. The following estimates are intended to provide a rough idea of potential expenses:

  1. Fiberglass Insulation: On average, fiberglass insulation costs between $1.00 and $1.50 per square foot, including materials and labor. This cost-effective option is popular for its thermal resistance and fire resistance.
  2. Cellulose Insulation: Cellulose insulation typically falls in the range of $1.00 to $1.50 per square foot. Made from recycled paper, cellulose is an eco-friendly choice known for its effective insulation properties.
  3. Foam Board Insulation: Foam board insulation can range from $1.50 to $3.00 per square foot. While more expensive, it offers high R-values and is suitable for various applications.
  4. Spray Foam Insulation: Spray foam insulation tends to be pricier, averaging between $1.50 and $3.50 per square foot. However, it provides superior air sealing and thermal resistance.

Maximizing Returns: Long-Term Benefits of Ceiling Insulation

Investing in ceiling insulation goes beyond upfront costs, offering long-term benefits that contribute to the overall value of your home.

  1. Energy Savings: Properly insulated ceilings reduce heat transfer, resulting in lower energy consumption for heating and cooling. This translates to ongoing savings on utility bills.
  2. Enhanced Comfort: Insulation creates a more stable indoor temperature, reducing drafts and temperature fluctuations. This contributes to a more comfortable living environment year-round.
  3. Environmental Impact: Energy-efficient homes contribute to environmental sustainability by reducing greenhouse gas emissions. Choosing eco-friendly insulation materials further enhances the positive impact.
  4. Increased Home Value: Well-insulated homes are attractive to potential buyers. The added energy efficiency and comfort provided by ceiling insulation can increase the resale value of your property.

Making Informed Decisions: Tips for Cost-Effective Ceiling Insulation

To maximize cost-effectiveness when insulating your ceiling, consider the following tips:

  1. Energy Audits: Conduct an energy audit to identify specific areas for improvement, guiding your insulation decisions and potentially reducing unnecessary expenses.
  2. DIY Considerations: While professional installation is recommended, homeowners with experience may explore certain DIY insulation projects, such as installing batts in accessible areas.
  3. Material Comparison: Research and compare insulation materials based on their R-values, durability, and long-term benefits. Choosing the right material for your needs ensures a wise investment.
  4. Government Incentives: Investigate available government incentives or tax credits for energy-efficient home improvements. These can help offset the initial cost of ceiling insulation.

Read too: Discover the Allure of Hunter Douglas Wood Ceiling Designs: Enhancing Spaces with Elegance

Conclusion

Investing in ceiling insulation is a strategic decision that pays off in increased comfort, energy savings, and environmental sustainability. By understanding the factors influencing the “Cost To Insulate A Ceiling,” you empower yourself to make informed choices for your home. Whether you prioritize cost-effectiveness, eco-friendliness, or long-term benefits, ceiling insulation is a valuable investment in the overall well-being of your living space.

A Step-by-Step Guide to Installing Rockwool Insulation in Your Ceiling: Unlock Energy Efficiency

When it comes to optimizing your home’s energy efficiency, one often overlooked yet crucial aspect is proper insulation. Among the various insulation materials available, Rockwool stands out for its exceptional thermal and acoustic properties. In this comprehensive guide, we will walk you through the process of Installing Rockwool Insulation in your ceiling. Discover the benefits, step-by-step instructions, and why this could be the key to a more comfortable and energy-efficient home.

Installing Rockwool Insulation In Ceiling

Why Rockwool Insulation?

Before delving into the installation process, let’s understand why Rockwool insulation is an excellent choice for your ceiling. Rockwool, also known as mineral wool, is made from volcanic rock and steel slag. This composition results in a material with remarkable fire resistance, sound absorption capabilities, and thermal insulation properties. Installing Rockwool insulation in your ceiling can significantly enhance your home’s energy efficiency, providing a more sustainable and comfortable living environment.

Benefits of Installing Rockwool Insulation in Ceiling

  1. Thermal Insulation: Rockwool’s dense and fibrous structure makes it an exceptional thermal insulator. By Installing Rockwool Insulation in your ceiling, you create a barrier that reduces heat transfer, keeping your home cooler in the summer and warmer in the winter.
  2. Sound Absorption: Beyond thermal benefits, Rockwool is renowned for its sound absorption qualities. If you’re looking to minimize noise from outside or between rooms, Installing Rockwool Insulation can create a quieter and more peaceful indoor environment.
  3. Fire Resistance: Safety is paramount, and Rockwool insulation excels in this aspect. It has a high melting point, making it highly resistant to fire. Installing Rockwool Insulation in your ceiling adds an extra layer of protection, enhancing the overall safety of your home.
  4. Moisture Resistance: Rockwool is hydrophobic, meaning it repels water. This quality prevents the insulation from absorbing moisture, reducing the risk of mold and mildew. Installing Rockwool Insulation in your ceiling safeguards your home against potential moisture-related issues.

Read too: Understanding the Causes and Solutions for a Crack Between Ceiling and Wall: Navigating Home Woes

Step-by-Step Guide to Installing Rockwool Insulation in Ceiling

Now, let’s dive into the practical aspect of Installing Rockwool Insulation. Follow these step-by-step instructions for a seamless installation process:

  1. Safety First: Before you begin, ensure you have the necessary safety gear, including gloves, safety glasses, and a dust mask. Safety should always be the top priority during any home improvement project.
  2. Assess the Space: Evaluate your ceiling space to determine the amount of Rockwool insulation needed. Measure the dimensions of the area and consider the desired thickness of the insulation for optimal performance.
  3. Prepare the Area: Clear the ceiling space of any obstructions or debris. Ensure that the area is clean and ready for the insulation installation.
  4. Cut the Insulation: Using a sharp utility knife, cut the Rockwool insulation batts to fit the dimensions of your ceiling space. Be precise in your measurements to achieve a snug and effective fit.
  5. Install the Insulation: Place the cut Rockwool insulation between the ceiling joists, ensuring a tight fit. The friction fit of Rockwool makes installation relatively straightforward. Avoid compressing the insulation, as this can reduce its effectiveness.
  6. Seal Gaps and Joints: Inspect the installed insulation for any gaps or joints. Seal these areas using appropriate materials to prevent air leakage, ensuring maximum energy efficiency.
  7. Observe Safety Precautions: Throughout the installation process, adhere to safety guidelines. Be cautious of any electrical wiring or fixtures in the ceiling, and take necessary precautions to avoid potential hazards.

Conclusion: A Cozier, More Energy-Efficient Home

Installing Rockwool Insulation in your ceiling is a practical and effective way to enhance your home’s energy efficiency. Beyond the environmental benefits, you’ll enjoy improved thermal comfort, reduced energy bills, and a quieter living space. Follow the step-by-step guide outlined in this article, and take the first step towards creating a cozier, more sustainable home. Don’t let the opportunity to boost your home’s insulation and energy efficiency pass you by—get started on Installing Rockwool Insulation in your ceiling today!

Choosing the Right Insulation: Faced or Unfaced Insulation in Ceiling

When it comes to insulating your home, one important decision to make is whether to use faced or unfaced insulation in the ceiling. Your choice can significantly impact your home’s energy efficiency and overall comfort. In this article, we will delve into the key factors to consider when deciding between faced or unfaced insulation for your ceiling and guide you through the benefits and drawbacks of each option.

Faced Or Unfaced Insulation In Ceiling

The Basics of Faced or Unfaced Insulation

Before we dive into the details, let’s clarify what faced and unfaced insulation are:

  • Faced Insulation: Faced insulation comes with a vapor barrier on one side. This vapor barrier is typically made of paper or foil and serves to prevent moisture from entering your home through the insulation.
  • Unfaced Insulation: Unfaced insulation, on the other hand, does not have a vapor barrier. It’s essentially just the insulation material without any additional layers.

Why Choose Faced Insulation?

Heading: Advantages of Faced Insulation in Ceilings

Faced insulation can be a suitable choice for your ceiling for several reasons:

  1. Moisture Control: The vapor barrier in faced insulation helps to control moisture and prevent it from entering your home. This can be particularly important in areas with high humidity or in climates prone to condensation issues.
  2. Thermal Efficiency: Faced insulation with a vapor barrier can provide excellent thermal efficiency by creating a sealed barrier. This helps keep your home cooler in the summer and warmer in the winter.
  3. Easier Installation: The paper or foil facing on this type of insulation makes it easier to handle and install without the need for additional materials like plastic sheeting.

When to Choose Unfaced Insulation?

Heading: Benefits of Unfaced Insulation in Ceilings

Unfaced insulation also has its advantages and can be the right choice for specific situations:

  1. Versatility: Unfaced insulation is highly versatile and can be used in various areas of your home, not just in ceilings. It’s an excellent choice if you have excess insulation that you’d like to repurpose.
  2. Customized Vapor Barrier: If you already have a vapor barrier in place or need to customize the vapor control layer, unfaced insulation gives you more control over this aspect of your insulation.
  3. Better Ventilation: Unfaced insulation can be a good option in attic spaces where proper ventilation is critical. It allows moisture to escape, reducing the risk of mold and mildew.

Factors to Consider When Choosing

Heading: Making the Right Decision

The decision between faced and unfaced insulation in your ceiling should be based on the following factors:

  1. Climate: Consider the climate of your location. Faced insulation is often a better choice in areas with high humidity or significant temperature fluctuations, while unfaced insulation can be more suitable in dry climates.
  2. Ventilation: Evaluate the ventilation in your attic or ceiling space. If proper ventilation is lacking, unfaced insulation can help maintain airflow, preventing moisture buildup.
  3. Existing Vapor Barriers: Check if there are existing vapor barriers in your home. If so, you may opt for unfaced insulation to avoid a double vapor barrier that can trap moisture.
  4. Installation Skill: Assess your DIY skills and comfort level with insulation installation. Faced insulation may be easier to work with for beginners, while experienced installers might prefer unfaced insulation for more customized solutions.

Read too: Is Installing A Ceiling Fan Hard

Conclusion

In the end, the choice between faced and unfaced insulation in your ceiling comes down to the unique characteristics of your home, your climate, and your specific needs. Both options have their advantages, and understanding these factors will help you make an informed decision. Whether you choose faced insulation for its moisture control and thermal efficiency or unfaced insulation for its versatility and ventilation benefits, insulating your ceiling is a crucial step toward a more energy-efficient and comfortable home. Make your choice wisely, and you’ll enjoy the benefits for years to come.

Understanding the Air Gap Between Ceiling and Insulation

When it comes to your home’s insulation, the space between your ceiling and insulation is often overlooked. However, this air gap can significantly impact your home’s energy efficiency, comfort, and even your utility bills. In this article, we will delve into the concept of the air gap between your ceiling and insulation, explaining what it is, why it matters, and how to address it effectively.

Air Gap Between Ceiling And Insulation

What Is the Air Gap Between Ceiling and Insulation?

The air gap between your ceiling and insulation refers to the space or void that exists between the uppermost layer of insulation and the material covering it, which is typically the ceiling. This gap can vary in size, and its presence can result from several factors, such as improper insulation installation or gaps left during construction.

Why Does the Air Gap Matter?

The air gap between your ceiling and insulation matters for several reasons:

1. Reduced Energy Efficiency

If your home has a significant air gap between the ceiling and insulation, it can result in reduced energy efficiency. Warm or cool air can escape through this gap, leading to higher energy bills as your HVAC system works harder to maintain the desired temperature.

2. Temperature Variations

An air gap can cause temperature variations within your home. Rooms with a wider air gap may feel drafty or have inconsistent temperatures, making your living spaces less comfortable.

3. Condensation and Moisture Issues

In humid climates, the presence of an air gap can lead to condensation problems. Moisture may accumulate within the gap, potentially causing mold, mildew, and even structural damage over time.

Addressing the Air Gap

Now that we understand why the air gap between the ceiling and insulation is important, let’s explore how to address it:

1. Insulation Retrofit

One effective solution is to retrofit additional insulation. You can add more insulation material to fill the gap and improve the energy efficiency of your home. This is typically done by installing insulation over the existing layer to eliminate the air gap.

2. Spray Foam Insulation

Spray foam insulation is an excellent option for sealing air gaps. It can be sprayed directly into the gap, effectively sealing it and providing a moisture barrier. This method not only enhances energy efficiency but also helps prevent moisture-related issues.

3. Air Sealing

Properly sealing any gaps or cracks in the ceiling can minimize the air gap’s size. Use caulk or weatherstripping to seal any openings around light fixtures, ceiling fans, or other penetrations in the ceiling.

4. Professional Assessment

If you’re unsure about the extent of the air gap and how to address it, consider hiring a professional insulation contractor. They can assess your home’s insulation needs and recommend the most appropriate solutions.

Read too: How Much Ceiling Height For Treadmill

Conclusion

The air gap between your ceiling and insulation is a critical factor in your home’s energy efficiency, comfort, and overall well-being. By addressing this gap through insulation retrofits, spray foam insulation, air sealing, or professional assessment, you can improve your home’s insulation and enjoy a more comfortable, energy-efficient living environment. Don’t overlook this important aspect of your home’s insulation; it can make a significant difference in your comfort and energy bills.

Unveiling the Truth: Is R13 Insulation Good for Ceilings?

When it comes to insulating your home, choosing the right type and thickness of insulation is crucial to maintaining a comfortable and energy-efficient living environment. Insulating your ceilings is particularly important, as heat rises, and a properly insulated ceiling can significantly reduce energy bills and keep your home at a comfortable temperature. R13 insulation is a popular choice, but is it good for ceilings? In this article, we’ll explore the pros and cons of using R13 insulation for ceilings to help you make an informed decision.

Is R13 Insulation Good For Ceilings

Understanding R13 Insulation

Before we delve into whether R13 insulation is suitable for ceilings, let’s understand what R13 insulation is. R13 is a type of fiberglass insulation that is commonly used in homes to improve thermal efficiency. The “R” in R13 stands for resistance, and it measures the insulation’s ability to resist heat transfer. The higher the R-value, the better the insulation’s performance.

The Pros of Using R13 Insulation for Ceilings

  1. Cost-Effective: R13 insulation is relatively affordable, making it an attractive option for homeowners on a budget. It provides a good balance between cost and performance.
  2. Effective Thermal Resistance: R13 insulation has an R-value of approximately 3.5 per inch of thickness. While it may not be the highest R-value available, it still offers reasonable thermal resistance for most ceiling applications.
  3. Easy Installation: Installing R13 insulation is a straightforward process, making it a viable option for do-it-yourselfers. It can be easily cut to fit between ceiling joists, and it doesn’t require special tools or equipment.
  4. Sound Dampening: In addition to thermal insulation, R13 insulation can help reduce sound transmission between floors, which can be particularly beneficial in multi-story homes or apartments.

The Cons of Using R13 Insulation for Ceilings

  1. Lower R-Value: While R13 insulation provides some thermal resistance, it may not be sufficient for ceilings in extremely cold or hot climates. Higher R-values, such as R30 or R38, are often recommended for better energy efficiency.
  2. Limited Moisture Resistance: Fiberglass insulation can absorb moisture, which can reduce its effectiveness over time. In areas with high humidity or potential for moisture intrusion, alternative insulation materials may be a better choice.
  3. Possible Health Concerns: The fine fibers in fiberglass insulation can be irritating to the skin, eyes, and respiratory system. Proper protective gear, such as gloves and a mask, is recommended when handling and installing R13 insulation.

When Is R13 Insulation Good for Ceilings?

R13 insulation can be a suitable choice for ceiling insulation in certain situations:

  1. Moderate Climates: In regions with moderate temperature variations, R13 insulation can provide adequate thermal resistance to keep your home comfortable year-round.
  2. Tight Budget: If you are working with a limited budget and need to insulate your ceilings, R13 insulation offers a cost-effective solution.
  3. Soundproofing: When sound reduction is a primary concern, R13 insulation can help dampen noise transmission between floors.

Read too: How Do Rats Get In The Ceiling

When Is R13 Insulation Not Ideal for Ceilings?

There are instances when R13 insulation may not be the best choice for ceiling insulation:

  1. Extreme Climates: In areas with harsh winters or scorching summers, higher R-values are recommended to optimize energy efficiency and comfort.
  2. Moisture-Prone Areas: Ceilings in spaces prone to moisture, such as bathrooms or kitchens, may benefit from insulation materials with better moisture resistance.
  3. Health Sensitivities: If you or your household members have sensitivities to fiberglass or concerns about indoor air quality, you might want to explore alternative insulation options.

Conclusion: Is R13 Insulation Right for Your Ceilings?

The suitability of R13 insulation for your ceilings depends on your needs, budget, and local climate. While affordable and easy to install, it may not offer sufficient thermal resistance for extreme climates. Consider location, budget, and health, and consult a professional for an informed decision on your home’s comfort and energy efficiency.