When it comes to home design, the details can make a significant difference in comfort and aesthetics. One such detail that often gets overlooked is the Ceiling Fan in Hallway. While most homeowners consider ceiling fans for living rooms or bedrooms, installing one in the hallway can offer numerous benefits. This guide will discuss the advantages, considerations, and installation process for ceiling fans in hallways, helping you create a comfortable and stylish home environment.
Why Consider a Ceiling Fan in Hallway?
Improved Air Circulation
One of the primary benefits of installing a ceiling fan in the hallway is improved air circulation. Hallways are often narrow and can become stuffy, especially if they are not well-ventilated. A ceiling fan helps to keep the air moving, creating a more comfortable environment throughout your home.
Energy Efficiency
Using a ceiling fan in the hallway can contribute to energy savings. By improving airflow, a ceiling fan can help regulate indoor temperatures, reducing the need for air conditioning in warmer months and heating in cooler months. When strategically placed, ceiling fans can make your heating and cooling systems more efficient, leading to lower energy bills.
Enhancing Aesthetic Appeal
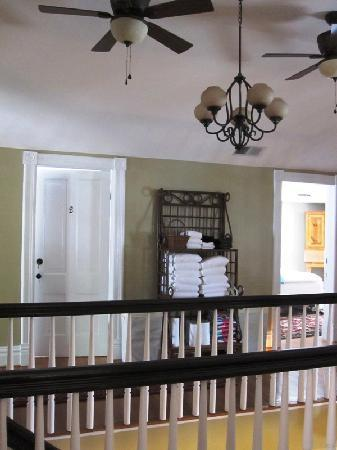
A ceiling fan can also serve as a stylish addition to your hallway decor. Available in various designs, finishes, and sizes, a ceiling fan can complement your home’s interior and add a focal point to an otherwise overlooked space. Whether you prefer a modern, sleek look or a more traditional design, there is a ceiling fan that can enhance your hallway’s aesthetics.
Versatility and Functionality
Ceiling fans are not just functional; they also offer versatility. Many modern ceiling fans come with light fixtures, providing additional lighting in the hallway. This is especially beneficial for long hallways that may need more illumination. The combination of light and airflow can make your hallway feel brighter and more inviting.
Read too: Shiplap Ceiling in Kitchen: A Timeless Trend for a Stylish and Cozy Space
Considerations Before Installing a Ceiling Fan in Hallway
While the benefits of a Ceiling Fan in Hallway are evident, there are several considerations to keep in mind before installation:
Ceiling Height
The height of your ceiling is a crucial factor when choosing a ceiling fan. Ideally, the fan blades should be at least 7 to 9 feet above the floor to ensure safety and optimal airflow. If your hallway has low ceilings, consider a flush-mount ceiling fan, which sits closer to the ceiling and is designed for spaces with limited vertical clearance.
Fan Size
Choosing the right size fan is essential for ensuring effective air circulation. The size of the ceiling fan should be proportionate to the size of the hallway. A small hallway might only require a fan with a blade span of 36 inches, while a larger hallway might benefit from a fan with a 52-inch blade span. Always refer to the manufacturer’s guidelines for recommendations based on room size.
Style and Design
The design of the ceiling fan should align with your home’s overall aesthetic. Consider factors like color, materials, and style (modern, traditional, rustic, etc.) when selecting a fan for your hallway. The right fan can elevate the look of your space and contribute to a cohesive design throughout your home.
Lighting Needs
If your hallway lacks natural light, consider installing a ceiling fan with integrated lighting. This can provide the necessary illumination while still offering the benefits of airflow. Additionally, consider the type of bulbs you use—LED bulbs are energy-efficient and long-lasting, making them a great choice for ceiling fan lighting.
Installation and Wiring
Installing a ceiling fan in the hallway may require electrical work, especially if there isn’t an existing ceiling fixture. It’s essential to ensure that your electrical system can handle the fan’s wattage and that it’s properly wired. If you are unsure about the installation process or wiring requirements, it is best to consult with a licensed electrician.
Installation Process for Ceiling Fans in Hallways
Once you’ve decided to install a ceiling fan in your hallway, follow these steps for a successful installation:
Step 1: Gather Your Materials
Before starting the installation, gather all necessary materials, including:
- Ceiling fan kit
- Mounting bracket
- Screwdrivers (flat-head and Phillips)
- Wire stripper
- Voltage tester
- Ladder
- Electrical tape
- Safety goggles
Step 2: Turn Off Power
Safety should always come first. Before you begin any electrical work, turn off the power to the circuit that will be used for the ceiling fan at the main electrical panel. Use a voltage tester to confirm that the power is off.
Step 3: Remove Existing Fixture
If you’re replacing an existing light fixture, carefully remove it by unscrewing the mounting screws and disconnecting the wires. Take note of how the fixture is wired for reference during the installation of the new fan.
Step 4: Install the Mounting Bracket
Most ceiling fans come with a mounting bracket that needs to be installed to the ceiling. Use the screws provided to secure the bracket to the ceiling joist, ensuring it is tightly fastened.
Step 5: Connect the Wires
Following the manufacturer’s instructions, connect the fan wires to the house wiring. Typically, you will connect:
- Black (fan motor) to black (power)
- White (fan motor) to white (neutral)
- Green or bare copper (ground) to the grounding wire or bracket
Use electrical tape to secure the wire connections and prevent any exposed wires.
Step 6: Hang the Ceiling Fan
Once the wiring is secure, carefully hang the ceiling fan on the mounting bracket according to the manufacturer’s instructions. Make sure it is aligned and stable before proceeding.
Step 7: Install Fan Blades
Attach the fan blades according to the instructions. Ensure they are securely fastened to avoid any wobbling during operation.
Step 8: Turn Power On and Test
After completing the installation, turn the power back on at the circuit breaker. Test the fan to ensure it operates correctly. Check for proper airflow and any unusual noises.
Maintenance Tips for Your Ceiling Fan in Hallway
To keep your ceiling fan in good working condition and maintain its appearance, consider the following maintenance tips:
Regular Cleaning
Dust can accumulate on fan blades, impacting performance and airflow. Clean your ceiling fan regularly using a microfiber cloth or a fan duster. For deeper cleaning, turn off the fan and wipe down the blades with a damp cloth.
Check for Wobbling
If your fan starts to wobble, it may need adjustments. Ensure that all screws and blade attachments are tight. If the problem persists, check to see if the fan is level; adjusting the mounting bracket may solve the issue.
Seasonal Adjustments
Many ceiling fans have a reversible motor, allowing you to change the direction of the blades. In summer, run the fan counterclockwise to create a cooling breeze; in winter, run it clockwise to circulate warm air. This can help maximize your home’s energy efficiency year-round.
Inspect Wiring and Connections
Periodically check the wiring and connections to ensure everything remains secure and intact. If you notice any frayed wires or signs of wear, consult with an electrician for repairs.
Conclusion
Installing a Ceiling Fan in Hallway is a smart investment that can enhance comfort, energy efficiency, and aesthetics in your home. By understanding the benefits, considerations, and installation process, you can create a more inviting and stylish space. With proper maintenance, your ceiling fan can provide comfort and appeal for years to come.