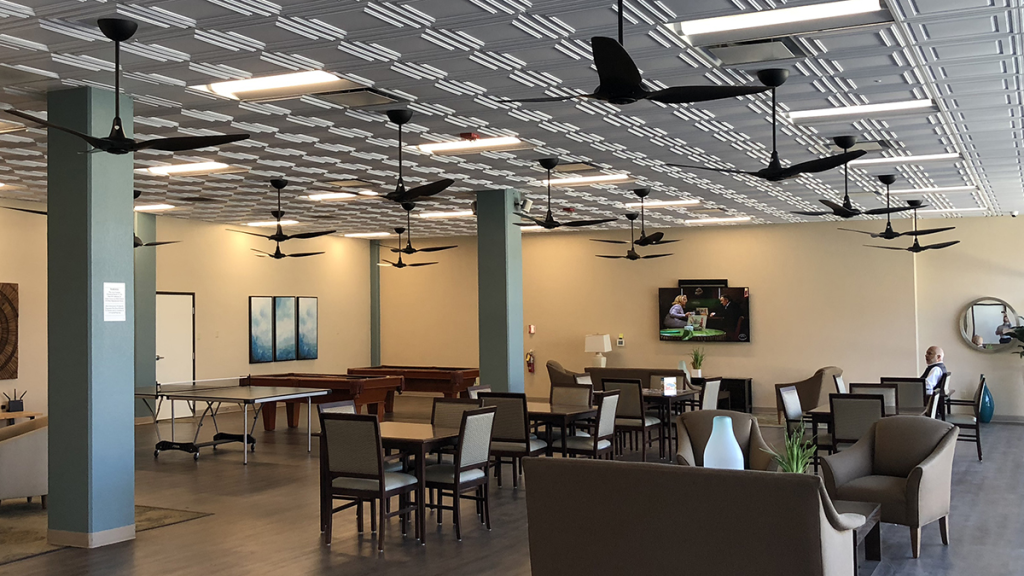
2X4 Fiberglass Ceiling Tiles: Elevate Your Space with Stylish and Functional

When it comes to transforming the look and feel of a room, few elements have as significant an impact as the ceiling. Often overlooked, the ceiling plays a crucial role in defining the ambiance and style of a space. 2X4 fiberglass ceiling tiles offer a versatile and practical solution for upgrading your ceiling with ease. In this comprehensive guide, we’ll explore everything you need to know about 2X4 fiberglass ceiling tiles, from their installation process to the benefits they bring to your home or office environment.

2X4 Fiberglass Ceiling Tiles

Understanding the Versatility of 2X4 Fiberglass Ceiling Tiles

Stylish Design Options

2X4 fiberglass ceiling tiles come in a wide range of styles, patterns, and finishes to suit any aesthetic preference. Whether you prefer a classic look with smooth, white tiles or a more contemporary vibe with textured designs, there’s a fiberglass tile to complement every decor style.

Exploring the Features of 2X4 Fiberglass Ceiling Tiles

Durable and Lightweight Construction

Fiberglass ceiling tiles are known for their durability and lightweight construction, making them easy to handle and install. Unlike traditional ceiling materials like plaster or wood, fiberglass tiles are resistant to moisture, mold, and mildew, making them ideal for use in high-humidity environments such as bathrooms or basements.

Read too: How To Extend Kitchen Cabinets To The Ceiling: A Complete Guide for Maximizing Space and Style

Installation Tips

Simple and Straightforward Installation

Installing 2X4 fiberglass ceiling tiles is a straightforward process that can be completed in just a few simple steps:

  1. Prepare the Surface: Ensure that the ceiling surface is clean, smooth, and free of any debris or imperfections before beginning the installation process.
  2. Measure and Cut Tiles: Measure the dimensions of the ceiling and cut the fiberglass tiles to fit using a utility knife or a specialized tile cutter.
  3. Apply Adhesive: Apply a suitable adhesive to the back of each tile and press it firmly onto the ceiling surface, ensuring proper alignment and spacing between tiles.
  4. Secure Edges and Corners: Use molding or trim pieces to secure the edges and corners of the ceiling tiles, providing a finished and polished look to the installation.

Benefits of 2X4 Fiberglass Ceiling Tiles

Enhanced Acoustic Properties

In addition to their visual appeal, fiberglass ceiling tiles offer excellent sound-absorbing properties, helping to reduce echo and noise levels in a room. This makes them an ideal choice for spaces where acoustic comfort is a priority, such as offices, classrooms, or recording studios.

Expert Recommendations

Consideration for Lighting and Fixtures

When selecting fiberglass ceiling tiles for your space, consider factors such as lighting and fixture placement to ensure optimal performance and aesthetics. Choose tiles with built-in light reflectivity or compatibility with recessed lighting fixtures to enhance brightness and visibility in the room.

Conclusion

Upgrade your ceiling space with the stylish and functional versatility of 2X4 fiberglass ceiling tile. Whether you’re renovating your home, office, or commercial space, these durable and easy-to-install tiles offer a cost-effective solution for enhancing the aesthetic appeal and acoustic comfort of any room. Follow the installation tips and expert recommendations outlined in this guide to transform your ceiling into a focal point of beauty and functionality.

Short Throw Projector Ceiling Mount Solution: Enhance Your Viewing Experience

In the realm of home entertainment, a high-quality projector can transform any room into a captivating theater experience. However, to fully maximize the potential of your projector, choosing the right mounting solution is essential. Short throw projector ceiling mounts offer a convenient and space-saving option for achieving optimal projection quality and viewing angles. In this comprehensive guide, we’ll delve into everything you need to know about short throw projector ceiling mounts, from their benefits to installation tips and more.

Short Throw Projector Ceiling Mount

Understanding the Importance of Short Throw Projector Ceiling Mount

Space-Saving Solution

Short throw projector ceiling mounts are designed to position the projector closer to the screen, allowing for larger image sizes and minimizing the risk of shadows or obstructions. By mounting the projector on the ceiling, you can free up valuable floor space and create a cleaner, more streamlined home theater setup.

Read too: How To Extend Kitchen Cabinets To The Ceiling: A Complete Guide for Maximizing Space and Style

Exploring the Features of Short Throw Projector Ceiling Mount

Flexibility and Adjustability

Short throw projector ceiling mounts offer a range of features to accommodate different projector models and installation preferences. These may include adjustable arms, swivel capabilities, and quick-release mechanisms for easy installation and maintenance.

Installation Tips

Proper Positioning

Follow these tips for a successful installation of your short throw projector ceiling mount:

  1. Locate the Ideal Position: Determine the optimal placement for the projector screen and mount, taking into account factors such as viewing angle, screen size, and distance from the seating area.
  2. Secure Mounting Surface: Ensure that the ceiling surface where the mount will be installed is sturdy and capable of supporting the weight of the projector and mount. Use appropriate hardware and anchors to secure the mount in place.

Benefits of Short Throw Projector Ceiling Mount

Enhanced Viewing Experience

Mounting your projector on the ceiling with a short throw mount offers several benefits, including:

  • Improved Image Quality: By minimizing the distance between the projector and the screen, short throw mounts help reduce image distortion and enhance clarity and sharpness.
  • Space Optimization: Ceiling-mounted projectors free up floor space, allowing for more flexible seating arrangements and a cleaner, clutter-free home theater environment.

Expert Recommendations

Choosing the Right Mount

When selecting a short throw projector ceilings mount, consider factors such as:

  • Compatibility: Ensure that the mount is compatible with your projector model and weight requirements.
  • Adjustability: Look for mounts with adjustable arms and tilt angles to achieve the perfect projection setup for your space.

Conclusion

Elevate your home theater experience to new heights with a short throw projector ceiling mount. Mounting your projector on the ceiling offers larger screen sizes, improved image quality, and a streamlined setup. Follow the installation tips and expert recommendations in this guide to select the perfect mount and create the ultimate viewing environment at home.

Ceiling Fans Downrod Length for Your Space: Optimizing Comfort

When it comes to keeping your home cool and comfortable, a ceiling fan is a must-have fixture. However, to ensure optimal airflow and performance, it’s essential to choose the right downrod length for your ceiling fan. In this comprehensive guide, we’ll delve into everything you need to know about ceiling fans downrod length, from understanding its importance to selecting the perfect size for your space.

Ceiling Fan Downrod Length

Understanding the Importance of Ceiling Fan Downrod Length

Enhancing Airflow Efficiency

The downrod length plays a crucial role in maximizing the airflow efficiency of your ceiling fan. By selecting the appropriate length, you can ensure that the fan operates at its optimal speed and effectively circulates air throughout the room.

Factors to Consider When Choosing Ceiling Fan Downrod Length

Ceiling Height

The height of your ceiling is the primary factor to consider when selecting the downrod length for your ceiling fan. Here’s a general guideline to help you determine the right length based on ceiling height:

  • Standard Ceiling (8-9 feet): For standard ceiling heights, a flush-mount installation without a downrod is typically sufficient to provide adequate clearance and airflow.
  • High Ceiling (10 feet or higher): In rooms with high ceilings, a longer downrod is necessary to bring the fan closer to the floor and ensure optimal airflow distribution.

Tips for Selecting the Right Ceiling Fan Downrod Length

Measuring and Calculating

Follow these steps to determine the appropriate downrod length for your ceiling fan:

  1. Measure Ceiling Height: Use a tape measure to determine the distance from the ceiling to the floor in the room where you plan to install the fan.
  2. Factor in Blade Clearance: Allow for at least 7 feet of clearance between the floor and the lowest point of the fan blades to prevent accidents and ensure safety.
  3. Calculate Downrod Length: Subtract the desired blade clearance (usually 7 feet) from the ceiling height to determine the ideal downrod length for your ceiling fan.

Read too: How To Extend Kitchen Cabinets To The Ceiling: A Complete Guide for Maximizing Space and Style

Benefits of Choosing the Right Ceiling Fan Downrod Length

Optimal Performance

Selecting the correct downrod length for your ceiling fan ensures that it operates at its full potential, providing efficient airflow and maximum comfort. With the right length, you can enjoy the benefits of a well-ventilated and comfortable living space year-round.

Conclusion

Choosing the right ceiling fans downrod length is essential for optimizing airflow and comfort in your home. By considering factors such as ceiling height and blade clearance, you can select the perfect length to ensure optimal performance and efficiency from your ceiling fan. Whether you’re installing a fan in a standard-height room or a soaring cathedral ceiling, following the guidelines outlined in this guide will help you achieve the perfect balance of form and function for your space.

Ceiling Mounted Rain Shower Heads: Elevate Your Shower Experience with a Luxurious

In the realm of bathroom luxury, few features evoke a sense of indulgence quite like a ceiling mounted rain shower head. Offering a spa-like experience right in the comfort of your own home, these shower heads provide a cascade of soothing water that envelops your body in relaxation. In this comprehensive guide, we’ll delve into everything you need to know about ceiling mounted rain shower heads, from installation tips to the benefits they bring to your daily routine.

Ceiling Mounted Rain Shower Head

Understanding the Appeal of Ceiling Mounted Rain Shower Head

A Touch of Luxury

Imagine stepping into your shower and being greeted by a gentle downpour of water from above, mimicking the sensation of standing beneath a warm summer rain. That’s the allure of a ceiling mounted rain shower head – it adds a touch of luxury and sophistication to any bathroom space.

Read too: How To Extend Kitchen Cabinets To The Ceiling: A Complete Guide for Maximizing Space and Style

Exploring the Features

Design and Functionality

Ceiling mounted rain shower heads come in a variety of styles, sizes, and finishes to suit any bathroom decor. From sleek and modern designs to more traditional options, there’s a rain shower head to complement every aesthetic preference.

Installation Tips

Ensuring Proper Installation

Installing a ceiling mounted rain shower head requires careful planning and precision to ensure optimal performance. Follow these tips for a successful installation:

  1. Choose the Right Location: Determine the ideal location for your shower head based on your shower layout and ceiling height. Ensure that there is sufficient space above the ceiling to accommodate the shower head and any necessary plumbing.
  2. Consider Water Pressure: Ceiling mounted rain shower heads typically require higher water pressure to deliver the desired rainfall effect. Make sure your plumbing system can provide adequate water flow to achieve optimal performance.

Benefits of Ceiling Mounted Rain Shower Head

Spa-like Experience

One of the primary benefits of a ceiling mounted rain shower head is the luxurious showering experience it provides. The gentle, evenly distributed flow of water mimics the sensation of standing beneath a natural rain shower, creating a soothing and immersive bathing experience.

Expert Recommendations for Ceiling Mounted Rain Shower Head

Choosing the Right Model

When selecting a ceiling mounted rain shower head for your bathroom, consider factors such as:

  • Size and Coverage: Choose a shower head with a size and shape that provides adequate coverage for your shower space.
  • Finish Options: Opt for a finish that complements your bathroom decor, whether it’s polished chrome, brushed nickel, or oil-rubbed bronze.

Conclusion

Elevate your daily shower routine to new heights of luxury and relaxation with a ceiling mounted rain shower heads. Whether you’re renovating your bathroom or simply looking to upgrade your shower experience, these stylish and functional fixtures offer a spa-like indulgence right in the comfort of your own home. Follow the tips and recommendations outlined in this guide to select, install, and enjoy the benefits of a ceiling mounted rain shower head in your bathroom sanctuary.

Expert Guide to Hassle-Free Ceiling Fan Installation in Charlotte: Everything You Need to Know

Are you considering upgrading your home with a new ceiling fan in Charlotte? Whether you’re looking to enhance comfort, improve air circulation, or add a stylish focal point to your space, proper installation is key to maximizing the benefits of your new fixture. In this guide, we’ll walk you through everything you need to know about ceiling fan installation in Charlotte, from planning and preparation to execution and troubleshooting.

Ceiling Fan Installation Charlotte

Understanding Ceiling Fan Installation in Charlotte

Installing a ceiling fan may seem like a daunting task, but with the right knowledge and preparation, it can be a straightforward DIY project or a job for a professional installer. In Charlotte, where hot summers and humid conditions are common, ceiling fans play a crucial role in maintaining comfort and energy efficiency year-round.

Planning Your Installation: Ceiling Fan Installation Charlotte

Before diving into the installation process, it’s essential to plan carefully to ensure a successful outcome. Start by selecting the right fan for your space based on factors such as size, style, and functionality. Consider the height of your ceiling, the location of electrical wiring, and any additional features you may want, such as remote control or lighting.

Read too: How To Extend Kitchen Cabinets To The Ceiling: A Complete Guide for Maximizing Space and Style

Preparing for Installation: Ceiling Fan Installation Charlotte

Gather all the necessary tools and materials, including a ladder, screwdriver, wire cutter, and electrical tape. Turn off the power to the existing ceiling fixture at the circuit breaker to prevent accidents. If you’re not comfortable working with electrical wiring, it’s best to hire a licensed electrician for safety and peace of mind.

Step-by-Step Installation Process

1. Remove the Old Fixture

Carefully remove the existing ceiling fixture, exposing the electrical wiring and mounting bracket. Disconnect the wires and remove the mounting bracket from the ceiling.

2. Install the Mounting Bracket

Follow the manufacturer’s instructions to install the mounting bracket for your new ceiling fan. Ensure that it is securely attached to the ceiling and can support the weight of the fan.

3. Assemble the Fan

Assemble the fan components according to the provided instructions, including attaching the blades, motor housing, and downrod. Double-check all connections to ensure they are tight and secure.

4. Wiring and Electrical Connections

Carefully connect the electrical wires from the fan to the corresponding wires in the ceiling, following proper color-coding and insulation techniques. Use wire nuts to secure the connections and electrical tape to cover exposed wires.

5. Mount the Fan

Lift the assembled fan into position and attach it to the mounting bracket on the ceiling. Ensure that the fan is balanced and level before tightening the screws.

6. Test and Adjust

Once the fan is securely mounted, restore power at the circuit breaker and test its operation. Make any necessary adjustments to the fan speed, direction, and lighting function as needed.

Troubleshooting Tips

If you encounter any issues during the installation process, such as wobbling or noisy operation, refer to the troubleshooting section of the manufacturer’s instructions or consult with a professional installer for assistance.

Conclusion

With the right tools, knowledge, and preparation, ceiling fan installation in Charlotte can be a rewarding and straightforward project. Whether you choose to tackle it yourself or enlist the help of a professional, a properly installed ceiling fan can enhance comfort, improve air circulation, and add value to your home for years to come.

Armstrong Yuma Ceiling Tiles Collection: Explore the Elegance and Durability

Are you looking to elevate the aesthetic appeal of your interior space while ensuring durability and easy maintenance? Look no further than the Armstrong Yuma Ceiling Tiles collection. Renowned for its timeless elegance and exceptional performance, Armstrong Yuma Ceiling Tile offers a versatile solution for residential, commercial, and industrial applications.

Armstrong Yuma Ceiling Tile

Understanding Armstrong Yuma Ceiling Tile: A Blend of Style and Functionality

Armstrong Yuma Ceiling Tile represents the pinnacle of ceiling design innovation, combining aesthetic appeal with practicality. Crafted with precision engineering and high-quality materials, these ceiling tiles are engineered to withstand the test of time while enhancing the visual appeal of any environment.

Why Choose Armstrong Yuma Ceiling Tile?

Superior Quality Materials

Armstrong Yuma Ceiling Tile is crafted using premium materials that ensure durability and longevity. Whether you opt for classic designs or contemporary styles, each tile is manufactured to meet the highest standards of quality and performance.

Read too: How To Extend Kitchen Cabinets To The Ceiling: A Complete Guide for Maximizing Space and Style

Versatility in Design Options

With a wide range of design options available, Armstrong Yuma Ceiling Tile allows you to unleash your creativity and bring your vision to life. From traditional patterns to modern textures, there’s a design to suit every aesthetic preference and architectural style.

Easy Installation and Maintenance

Designed for hassle-free installation, Armstrong Yuma Ceiling Tile simplifies the renovation process, saving you time and money. Additionally, these tiles are easy to clean and maintain, making them an ideal choice for busy environments where cleanliness is paramount.

Enhanced Acoustic Performance

In addition to their visual appeal, Armstrong Yuma Ceiling Tile also offers excellent acoustic performance, helping to reduce noise levels and create a more comfortable and productive environment. Whether it’s a bustling office space or a serene residential setting, these ceiling tiles contribute to a quieter and more peaceful atmosphere.

Explore the Armstrong Yuma Ceiling Tile Collection

Classic Elegance: Armstrong Yuma Classic White Ceiling Tile

Experience timeless sophistication with the Armstrong Yuma Classic White Ceiling Tile. Featuring a smooth, pristine surface, this tile adds a touch of understated elegance to any room, making it the perfect choice for traditional and contemporary interiors alike.

Modern Sophistication: Armstrong Yuma Textured Black Ceiling Tile

For those seeking a more contemporary aesthetic, the Armstrong Yuma Textured Black Ceiling Tile offers a sleek and stylish option. With its subtle texture and deep black finish, this tile exudes modern sophistication, making it a versatile choice for commercial spaces and upscale residential settings.

Industrial Charm: Armstrong Yuma MetalWorks Tin Ceiling Tile

Embrace the rustic charm of industrial design with the Armstrong Yuma MetalWorks Tin Ceiling Tile. Featuring authentic tin construction and intricate detailing, this tile adds character and personality to any space, making it a popular choice for cafes, restaurants, and loft-style apartments.

Conclusion

Elevate your space with the timeless elegance and superior quality of Armstrong Yuma Ceiling Tiles. Whether you’re renovating a residential property, designing a commercial space, or enhancing an industrial environment, these ceiling tiles offer unmatched versatility, durability, and style. Discover the perfect combination of form and function with Armstrong Yuma Ceiling Tile today.

Wooden Blade Ceiling Fan With Lights: Enhance Your Space with a Stylish

Are you looking to elevate the ambiance of your living space while keeping it cool and well-lit? Look no further than the versatile and elegant Wooden Blade Ceiling Fan With Lights. In this comprehensive guide, we’ll delve into the features, benefits, and considerations of incorporating this unique fixture into your home.

Wooden Blade Ceiling Fan With Light

Introduction

Ceiling fans have long been a staple in homes around the world, providing comfort and functionality. However, the Wooden Blade Ceiling Fan With Light takes it a step further by combining classic design with modern convenience. Let’s explore why this hybrid fixture is gaining popularity among homeowners.

Why Choose a Wooden Blade Ceiling Fan With Light?

Versatility: One of the key advantages of a Wooden Blade Ceiling Fan With Light is its versatility. The wooden blades add a touch of natural elegance to any room, complementing a variety of interior styles from rustic to contemporary.

Ambiance: Unlike traditional ceiling fans, which often prioritize function over form, a Wooden Blade Ceiling Fan With Light adds a decorative element to your space. Whether it’s in the living room, bedroom, or dining area, the soft glow of integrated lighting creates a warm and inviting atmosphere.

Energy Efficiency: Many Wooden Blade Ceiling Fans With Light are designed with energy efficiency in mind. By using LED bulbs and incorporating advanced motor technology, these fans consume less energy compared to conventional lighting fixtures and can help reduce your electricity bills.

Read too: How To Extend Kitchen Cabinets To The Ceiling: A Complete Guide for Maximizing Space and Style

Factors to Consider

Room Size: Before purchasing a Wooden Blade Ceiling Fan With Light, consider the size of the room where it will be installed. Choose a fan with an appropriate blade span to ensure optimal air circulation.

Ceiling Height: It’s essential to measure the distance between the ceiling and the floor to determine the appropriate mounting option for your fan. Some models come with adjustable downrods to accommodate varying ceiling heights.

Design Aesthetic: While functionality is crucial, don’t overlook the importance of aesthetics. Select a Wooden Blade Ceiling Fan With Light that complements the existing decor of your room, whether you prefer a sleek contemporary design or a more rustic look.

Installation and Maintenance

Installing a Wooden Blade Ceiling Fan With Light may seem daunting, but many manufacturers provide detailed instructions and support to simplify the process. However, if you’re not confident in your DIY skills, it’s best to hire a professional electrician for safe and proper installation.

Regular maintenance is also essential to ensure the longevity and efficiency of your ceiling fan. Dust the blades regularly, tighten any loose screws, and lubricate the motor as recommended by the manufacturer.

Enhance Your Home with a Wooden Blade Ceiling Fan With Light

Whether you’re looking to upgrade your current ceiling fan or add a stylish accent to a new space, a Wooden Blade Ceiling Fan With Light offers the perfect blend of form and function. With its timeless design and modern features, it’s sure to become a focal point in any room.

Conclusion

In conclusion, a Wooden Blade Ceiling Fan With Lights is a stylish and practical addition to any home. Its versatility, ambiance, and energy efficiency make it a standout choice for homeowners looking to elevate their living spaces. Consider investing in this unique fixture to enhance the comfort and aesthetic appeal of your home.

Where To Get Popcorn Ceiling Tested For Asbestos: Essential Guide and Tips

Popcorn ceilings, once a popular choice in home design, now raise concerns due to potential asbestos content. Homeowners seeking peace of mind may wonder, “Where to get popcorn ceiling tested for asbestos?” Understanding the risks and options available is crucial for a safe living environment.

Where To Get Popcorn Ceiling Tested For Asbestos

Introduction

Popcorn ceilings, also known as acoustic or textured ceilings, were prevalent in homes from the 1950s to the 1980s. While they served as a fashionable design choice in their time, concerns have arisen regarding the presence of asbestos in their composition. Asbestos, a naturally occurring mineral fiber, was commonly used in building materials for its heat resistance and durability. However, its adverse health effects, including lung cancer and mesothelioma, have led to its ban in construction materials. Consequently, homeowners are increasingly seeking ways to determine if their popcorn ceilings contain asbestos and how to address any potential risks.

Understanding the Risks of Asbestos in Popcorn Ceilings

Popcorn ceilings installed before the 1980s are more likely to contain asbestos. When these ceilings are disturbed, such as during renovations or repairs, asbestos fibers can become airborne and pose a health hazard when inhaled. Therefore, it’s essential for homeowners to assess the presence of asbestos before undertaking any activities that could disturb the ceiling.

Where To Get Popcorn Ceiling Tested For Asbestos

Finding a reputable service to test popcorn ceilings for asbestos is paramount for accurate results and peace of mind. Several options are available:

  1. Certified Asbestos Testing Laboratories: These specialized laboratories employ trained professionals and state-of-the-art equipment to accurately detect asbestos fibers in popcorn ceiling samples. Homeowners can collect samples themselves following proper safety protocols or hire professionals to do so.
  2. Environmental Testing Companies: Many environmental testing companies offer asbestos testing services for residential properties. These companies typically have experience in assessing various building materials for asbestos content and can provide detailed reports to homeowners.
  3. Local Health Departments: Some local health departments provide information and resources regarding asbestos testing. While they may not offer testing services directly, they can often recommend certified laboratories or testing companies in the area.

Factors to Consider When Choosing a Testing Service

When selecting a service to test popcorn ceilings for asbestos, homeowners should consider the following factors:

  • Accreditation and Certification: Ensure that the testing laboratory or company is accredited and employs certified asbestos inspectors. This ensures the accuracy and reliability of the test results.
  • Turnaround Time: Consider the time it takes for the testing service to provide results. While expedited options may be available at an additional cost, timely results are crucial, especially if renovation or repair plans are pending.
  • Cost: Obtain quotes from multiple testing services and compare their prices. However, prioritize quality and accuracy over cost alone, as the health risks associated with asbestos exposure are significant.
  • Customer Reviews and Reputation: Research the reputation of the testing service through customer reviews and testimonials. A trustworthy service will have positive feedback and a history of satisfied customers.

Read too: How To Extend Kitchen Cabinets To The Ceiling: A Complete Guide for Maximizing Space and Style

Taking Action Based on Test Results

Once the popcorn ceiling has been tested for asbestos, homeowners can determine the appropriate course of action based on the results:

  • If Asbestos is Detected: If asbestos is found in the popcorn ceiling, it’s essential to consult with asbestos remediation professionals to safely remove or encapsulate the material. DIY removal is strongly discouraged due to the health risks involved.
  • If No Asbestos is Detected: If the test results come back negative for asbestos, homeowners can proceed with renovations or repairs as planned, taking appropriate safety precautions to minimize any potential hazards.

Conclusion

Knowing where to get popcorn ceiling tested for asbestos is crucial for a safe home. Partnering with reputable testing services and acting on results mitigates asbestos exposure risks and ensures family well-being.

Mastering Vaulted Ceiling Fan Installation: A Comprehensive Guide

Vaulted ceilings add a sense of spaciousness and grandeur to any room, but installing a ceiling fan in such a space can pose some unique challenges. In this guide, we’ll take you through the process of vaulted ceiling fan installation, providing you with the knowledge and expertise needed to tackle this project with confidence.

Vaulted Ceiling Fan Installation

Understanding Vaulted Ceiling Fans

Vaulted ceiling fans are specially designed to accommodate the angled slope of a vaulted or sloped ceiling. Vaulted ceiling fans, unlike standard ones, come with adjustable mounting brackets and hardware, allowing installation on angled surfaces.

The Benefits of Vaulted Ceiling Fans

  1. Improved Air Circulation: Vaulted ceiling fans help promote better air circulation and ventilation in rooms with high or sloped ceilings, ensuring even airflow and temperature distribution.
  2. Enhanced Comfort: By circulating air throughout the room, vaulted ceiling fans can help maintain a comfortable indoor environment year-round, reducing the need for heating and cooling.
  3. Aesthetic Appeal: In addition to their practical benefits, vaulted ceiling fans add visual interest and style to a space, serving as a decorative focal point that complements the architectural features of a vaulted ceiling.

Vaulted Ceiling Fan Installation: Step-by-Step Guide

Follow these step-by-step instructions to install a ceiling fan in your vaulted ceiling space:

Step 1: Gather Your Materials

Before you begin, gather all the necessary materials and tools for the installation process, including the ceiling fan kit, ladder, screwdriver, wire stripper, and electrical tape.

Step 2: Turn Off Power

Shut off power to the existing ceiling electrical box at the circuit breaker to prevent the risk of electric shock while working on the installation.

Step 3: Remove Existing Fixture

If there is an existing light fixture or ceiling fan in place, remove it carefully, disconnecting the wires and removing any mounting hardware.

Step 4: Install Mounting Bracket

Attach the mounting bracket included with the ceiling fan kit to the ceiling electrical box, following the manufacturer’s instructions. Ensure that the bracket is securely fastened to the ceiling joist.

Step 5: Wire the Fan

Connect the wiring from the ceiling fan to the electrical wiring in the ceiling, matching the corresponding wires (typically black to black, white to white, and green to ground).

Step 6: Secure the Fan

Attach the fan motor to the mounting bracket, ensuring that it is securely fastened and balanced. Follow the manufacturer’s instructions for assembling and installing the fan blades.

Step 7: Test the Fan

Once the installation is complete, restore power at the circuit breaker and test the fan to ensure that it is functioning properly.

Tips for Vaulted Ceiling Fan Installation Success

  • Choose the Right Size: Choose a ceiling fan that suits your room size to ensure optimal airflow and performance.
  • Use a Support Brace: If necessary, install a support brace between ceiling joists to provide additional stability and support for the ceiling fan.
  • Consider Professional Installation: If you’re unsure about installing a vaulted ceiling fan yourself, consider hiring a licensed electrician or contractor to do the job safely and effectively.

Read too: How To Extend Kitchen Cabinets To The Ceiling: A Complete Guide for Maximizing Space and Style

Conclusion

Vaulted ceiling fan installation may seem daunting, but with the right tools, materials, and know-how, it can be a manageable DIY project. By following the steps outlined in this guide and exercising caution and attention to detail, you can enjoy the comfort and style that a ceiling fan brings to your vaulted ceiling space.

Tin Drop Ceiling Tile 2X4: Transform Your Space with Stylish

In the realm of interior design, every detail matters. From the flooring to the walls, each element contributes to the overall aesthetic and ambiance of a space. When it comes to ceilings, one option that stands out for its timeless elegance and versatility is tin drop ceiling tile 2X4. In this comprehensive guide, we’ll delve into the world of tin drop ceiling tiles, exploring their characteristics, installation process, and how they can transform any room.

Tin Drop Ceiling Tiles 2X4

Understanding Tin Drop Ceiling Tiles 2X4

Tin drop ceiling tiles 2X4 are a type of ceiling tile made from stamped tin, featuring a classic 2X4 foot size. These tiles are renowned for their intricate designs and durability, making them a popular choice for both residential and commercial spaces.

The Benefits of Tin Drop Ceiling Tiles 2X4

  1. Timeless Elegance: Tin drop ceiling tiles 2X4 boast a timeless elegance that adds character and charm to any space. Their intricate patterns and textures create a visually appealing focal point that enhances the overall aesthetic of a room.
  2. Durability: Constructed from high-quality tin, these ceiling tiles are exceptionally durable and long-lasting. They resist rust, corrosion, and moisture, suitable for kitchens, bathrooms, and basements.
  3. Versatility: Tin drop ceiling tiles 2X4 are available in a wide range of designs, finishes, and colors, allowing for endless customization options. Whether you prefer a classic vintage look or a more modern aesthetic, there’s a tin tile to suit every style.

Applications of Tin Drop Ceiling Tiles 2X4

  • Residential Spaces: Tin drop ceiling tiles 2X4 can add a touch of elegance to residential spaces such as living rooms, dining areas, and bedrooms. They are also commonly used in kitchens and bathrooms, where their durability and moisture resistance are highly advantageous.
  • Commercial Environments: In commercial settings, tin drop ceiling tiles 2X4 are often used to create a sophisticated and upscale ambiance. They are frequently found in restaurants, hotels, and retail stores, where they contribute to the overall design concept and atmosphere.

Installing Tin Drop Ceiling Tiles 2X4

Installing tin drop ceiling tiles 2X4 requires careful planning and attention to detail. Here are some key steps to ensure a successful installation:

  1. Prepare the Ceiling: Ensure that the ceiling surface is clean, dry, and free of any debris or contaminants.
  2. Measure and Cut Tiles: Measure the dimensions of the ceiling area and cut the tiles to fit using tin snips or a metal cutting saw.
  3. Install Tiles: Begin by installing the perimeter tiles, followed by the field tiles. Use adhesive or a grid system to secure the tiles in place, ensuring that they are properly aligned and spaced.
  4. Finish Edges: Once all tiles are installed, add trim pieces or molding to finish the edges and create a clean, polished look.

Maintenance of Tin Drop Ceiling Tiles 2X4

  • Regularly clean the tiles with a mild detergent and water solution to remove dust and dirt.
  • Avoid using abrasive cleaners or harsh chemicals, as they can damage the finish of the tiles.
  • Inspect the tiles periodically for signs of damage or wear, and replace any damaged tiles as needed.

Read too: How To Extend Kitchen Cabinets To The Ceiling: A Complete Guide for Maximizing Space and Style

Conclusion

Tin drop ceiling tile 2X4 offer a perfect combination of beauty, durability, and versatility. Consider adding tin tiles for timeless elegance, whether renovating a historic home or designing a modern commercial space.

Tegular Edge Ceiling Tile: Enhance Your Space with Stylish

In the realm of interior design, every detail matters. From the flooring to the walls, each element contributes to the overall aesthetic and ambiance of a space. When it comes to ceilings, one option that stands out for its versatility and style is tegular edge ceiling tiles. In this comprehensive guide, we’ll delve into the world of tegular edge ceiling tile, exploring their characteristics, installation process, and how they can transform any room.

Tegular Edge Ceiling Tiles

Understanding Tegular Edge Ceiling Tiles

Tegular edge ceiling tiles are a type of ceiling tile characterized by their unique edge design. Unlike traditional square or rectangular tiles, tegular edge tiles feature a recessed edge that creates a subtle reveal between each tile. This design adds depth and dimension to the ceiling, resulting in a more visually appealing and sophisticated look.

The Benefits of Tegular Edge Ceiling Tiles

  1. Enhanced Aesthetics: The recessed edge of tegular ceiling tiles creates a shadow line that adds visual interest to the ceiling. This subtle detail can elevate the overall aesthetic of any room, giving it a more polished and refined appearance.
  2. Improved Acoustic Performance: Tegular edge ceiling tiles are often available with acoustic properties, helping to reduce noise levels within a space. This makes them an ideal choice for offices, classrooms, and other environments where sound control is important.
  3. Easy Installation: Tegular edge ceiling tiles are designed for easy installation, allowing them to be quickly and efficiently installed in both new construction and renovation projects. They can be installed using a variety of methods, including adhesive, grid systems, or direct attachment to the ceiling substrate.

Read too: How To Extend Kitchen Cabinets To The Ceiling: A Complete Guide for Maximizing Space and Style

Applications of Tegular Edge Ceiling Tiles

  • Commercial Spaces: Tegular edge ceiling tiles are commonly used in commercial settings such as offices, retail stores, and restaurants. Their stylish design and acoustic properties make them well-suited for these environments.
  • Residential Settings: In residential applications, tegular edge ceiling tiles can add a touch of elegance to living rooms, dining areas, and bedrooms. They are available in a variety of styles and finishes to complement any decor.

Installing Tegular Edge Ceiling Tiles

Installing tegular edge ceiling tiles requires careful planning and attention to detail. Here are some key steps to ensure a successful installation:

  1. Prepare the Ceiling: Ensure that the ceiling surface is clean, dry, and free of any debris or contaminants.
  2. Measure and Cut Tiles: Measure the dimensions of the ceiling area and cut the tiles to fit using a utility knife or tile cutter.
  3. Install Tiles: Begin by installing the perimeter tiles, followed by the field tiles. Use adhesive or a grid system to secure the tiles in place, ensuring that they are properly aligned and spaced.
  4. Finish Edges: Once all tiles are installed, add trim pieces or molding to finish the edges and create a clean, polished look.

Maintenance of Tegular Edge Ceiling Tiles

  • Regularly clean the tiles with a mild detergent and water solution to remove dust and dirt.
  • Avoid using abrasive cleaners or harsh chemicals, as they can damage the finish of the tiles.
  • Inspect the tiles periodically for signs of damage or wear, and replace any damaged tiles as needed.

Conclusion

Tegular edge ceiling tile offer a perfect combination of style, functionality, and ease of installation. Whether you’re renovating a commercial space or updating your home decor, consider incorporating tegular edge tiles to add a touch of sophistication and elegance to your ceilings.

Stainless Steel Ceiling Panel: A Modern Touch for Your Space

In the realm of interior design, every detail counts. From the flooring to the walls, each element contributes to the overall ambiance and aesthetic of a space. When it comes to ceilings, one material that has been gaining popularity for its modern and sleek appearance is stainless steel. In this comprehensive guide, we’ll delve into the world of stainless steel ceiling panel, exploring their characteristics, benefits, and how they can elevate the look of any room.

Stainless Steel Ceiling Panels

Understanding Stainless Steel Ceiling Panels

Stainless steel ceiling panels are crafted from high-quality stainless steel, a durable and corrosion-resistant material known for its strength and longevity. These panels are available in various sizes, shapes, and finishes, making them suitable for a wide range of applications, from residential to commercial spaces.

The Benefits of Stainless Steel Ceiling Panels

  1. Durability: Stainless steel is renowned for its durability, making it an ideal choice for ceiling panels. It can withstand harsh environmental conditions and is resistant to rust, corrosion, and moisture damage.
  2. Versatility: Stainless steel ceiling panels come in a variety of designs and finishes, allowing for customization to suit any aesthetic preference. Whether you prefer a sleek brushed finish or a mirror-like polish, there’s a stainless steel panel to match your style.
  3. Easy Maintenance: Unlike traditional ceiling materials such as drywall or wood, stainless steel ceiling panels require minimal maintenance. You can easily clean them with soap and water, making them ideal for high-traffic areas or spaces prone to dirt and grime buildup.

Applications of Stainless Steel Ceiling Panels

  • Residential Spaces: Stainless steel ceiling panels add a modern and sophisticated touch to residential interiors, particularly in kitchens, bathrooms, and living areas.
  • Commercial Buildings: In commercial settings such as offices, restaurants, and retail stores, stainless steel ceiling panels create a contemporary and upscale atmosphere, enhancing the overall aesthetic appeal of the space.

Read too: How To Extend Kitchen Cabinets To The Ceiling: A Complete Guide for Maximizing Space and Style

Installing Stainless Steel Ceiling Panels

Installing stainless steel ceiling panels requires careful planning and precise execution. Ensuring proper securing and alignment of the panels is essential for achieving a seamless and polished look. Professional installation ensures optimal results and long-term durability.

Maintenance Tips for Stainless Steel Ceiling Panels

  • Regularly clean the panels with a mild detergent and water solution to remove dust, fingerprints, and other surface contaminants.
  • Avoid using abrasive cleaners or harsh chemicals, as they can damage the stainless steel finish.
  • Inspect the panels periodically for signs of corrosion or damage, and address any issues promptly to prevent further deterioration.

Conclusion

Stainless steel ceiling panel offer a perfect blend of style, durability, and functionality, making them a popular choice for modern interior design. Whether you’re renovating your home or updating a commercial space, consider incorporating stainless steel ceiling panels to add a touch of elegance and sophistication to your environment.

Silver Metal Ceiling Tile: Enhance Your Space with Stunning

Silver metal ceiling tile offer a sophisticated and modern aesthetic that can elevate any space. Whether you’re looking to add a touch of glamour to your home or create a sleek commercial environment, silver metal ceiling tiles are a versatile and stylish option. In this comprehensive guide, we’ll explore everything you need to know about silver metal ceiling tiles, including their benefits, installation techniques, design inspirations, and maintenance tips.

Silver Metal Ceiling Tiles

Understanding Silver Metal Ceiling Tiles

Silver metal ceiling tiles are crafted from high-quality aluminum or steel, providing durability and longevity. These tiles are available in a variety of finishes, including brushed silver, polished silver, and matte silver, allowing you to customize the look to suit your space. Whether you prefer a contemporary, industrial, or minimalist design aesthetic, silver metal ceiling tiles can complement a wide range of interior styles.

Benefits of Silver Metal Ceiling Tiles

There are several benefits to choosing silver metal ceiling tiles for your space:

  • Elegant Appearance: Silver metal ceiling tiles add a touch of sophistication and luxury to any room, making them ideal for both residential and commercial applications.
  • Durability: Metal ceiling tiles are highly durable and resistant to moisture, mold, and mildew, making them suitable for use in kitchens, bathrooms, and other high-humidity areas.
  • Easy Maintenance: Silver metal ceiling tiles are easy to clean and maintain, requiring only occasional dusting or wiping with a damp cloth to keep them looking pristine.

Read too: Understanding and Dealing with Ants in the Ceiling Spaces: Navigating the Intrusion

Installation Techniques

Installing silver metal ceiling tiles requires careful planning and attention to detail. Follow these steps for a successful installation:

  1. Prepare the Surface: Ensure that the ceiling surface is clean, dry, and free of any debris or imperfections. Repair any cracks, holes, or uneven areas before beginning the installation process.
  2. Measure and Mark: Measure the dimensions of the ceiling and mark the layout for the tiles, taking into account any obstacles such as light fixtures or vents. Use a chalk line or laser level to create straight guidelines for accurate placement.
  3. Cut Tiles to Size: Use tin snips or a metal cutting saw to cut the tiles to fit around the perimeter of the ceiling and accommodate any obstructions. Wear appropriate safety gear, such as gloves and goggles, when cutting metal tiles.
  4. Install Tiles: Starting from one corner of the room, begin attaching the tiles to the ceiling using adhesive, nails, or screws, depending on the type of tile and the manufacturer’s recommendations. Ensure that each tile is aligned properly and securely fastened to the ceiling.

Design Inspirations

Silver metal ceiling tiles offer endless design possibilities for enhancing your space:

  • Modern Elegance: Create a sleek and sophisticated ambiance with polished silver metal ceiling tiles in a minimalist interior.
  • Vintage Charm: Add a touch of nostalgia to your space with brushed silver metal ceiling tiles that evoke the glamour of the Art Deco era.
  • Industrial Chic: Embrace the industrial trend with matte silver metal ceiling tiles in a loft-style apartment or commercial space.

Maintenance Tips

To keep your silver metal ceiling tiles looking their best, follow these maintenance tips:

  • Regular Cleaning: Dust the tiles regularly with a soft cloth or vacuum attachment to remove any buildup of dirt or debris.
  • Avoid Harsh Chemicals: Use mild soap and water for cleaning, avoiding abrasive cleaners or solvents that could damage the finish of the tiles.
  • Inspect for Damage: Periodically inspect the tiles for signs of damage or wear, such as dents, scratches, or corrosion, and repair or replace any damaged tiles as needed.

Conclusion

Silver metal ceiling tile are a stylish and practical choice for enhancing the beauty and functionality of any space. Whether you’re renovating your home, updating a commercial property, or designing a new construction project, silver metal ceiling tiles offer versatility, durability, and aesthetic appeal that can’t be beaten.

By understanding the benefits, installation techniques, design inspirations, and maintenance tips outlined in this guide, you can confidently incorporate silver metal ceiling tiles into your interior design scheme and create a stunning and timeless space that reflects your unique style and personality.

Maximize Your Home’s Efficiency with R-19 Ceiling Insulation: Benefits and Installation Tips

R-19 ceiling insulation is a crucial component of any home’s energy efficiency strategy. By effectively insulating your ceiling with R-19 insulation, you can minimize heat loss, reduce energy consumption, and enhance overall comfort levels in your living space. In this guide, we’ll explore everything you need to know about R-19 ceiling insulation, including its benefits, installation techniques, and tips for maximizing its effectiveness in your home.

R-19 Ceiling Insulation

Understanding R-19 Ceiling Insulation

R-19 refers to the thermal resistance value of the insulation material, indicating its ability to resist heat transfer. R-19 insulation is commonly used in ceilings, attics, and other areas of the home where heat loss and gain are significant factors. This type of insulation typically consists of fiberglass batts or rolls with a thickness of approximately 6.25 inches, providing superior thermal performance compared to lower R-value options.

The Benefits of R-19 Ceiling Insulation

Investing in R-19 ceiling insulation offers several benefits for homeowners:

  • Improved Energy Efficiency: R-19 insulation helps minimize heat transfer between the interior and exterior of your home, reducing the need for heating and cooling and lowering energy bills.
  • Enhanced Comfort: By maintaining more consistent indoor temperatures, R-19 insulation creates a more comfortable living environment year-round, with fewer temperature fluctuations and drafts.
  • Sound Dampening: In addition to thermal insulation, R-19 insulation can also help reduce noise transmission between floors, creating a quieter and more peaceful home environment.

Read too: Understanding and Dealing with Ants in the Ceiling Spaces: Navigating the Intrusion

Installation Techniques for R-19 Insulation

Proper installation is essential to maximize the effectiveness of R-19 ceiling insulation. Follow these tips for a successful installation process:

  1. Prepare the Space: Before installing R-19 insulation, ensure that the ceiling or attic space is clean, dry, and free of debris. Repair any leaks or damage to the roof or ceiling structure as needed.
  2. Measure and Cut: Measure the dimensions of the ceiling joists or rafters and cut the insulation batts to fit snugly between them. Leave a small gap around electrical fixtures and other obstructions to prevent compression of the insulation.
  3. Install Vapor Barrier: In regions with high humidity or moisture levels, it’s essential to install a vapor barrier between the insulation and the living space to prevent condensation and moisture buildup. Use a polyethylene vapor barrier and seal all seams and edges with tape.
  4. Secure in Place: Once the insulation is cut to size and positioned between the joists or rafters, use staples or insulation supports to hold it in place and prevent sagging over time.

Maximizing Effectiveness and Efficiency

To ensure optimal performance and efficiency of R-19 ceilings insulation, consider the following additional tips:

  • Seal Air Leaks: Inspect the ceiling and attic for air leaks, gaps, and cracks, and seal them with caulk, weatherstripping, or spray foam insulation to prevent heat loss and infiltration of outdoor air.
  • Maintain Adequate Ventilation: Proper attic ventilation is essential to prevent moisture buildup and ensure the longevity of the insulation. Install ridge vents, soffit vents, or attic fans to promote air circulation and prevent condensation.
  • Monitor Insulation Depth: Regularly check the depth and condition of the insulation in your ceiling or attic to ensure that it meets or exceeds the recommended R-value for your climate zone.

Conclusion

R-19 ceilings insulation is a cost-effective and efficient solution for improving the energy efficiency and comfort of your home. By understanding the benefits, installation techniques, and tips for maximizing effectiveness, you can upgrade your home’s insulation and enjoy year-round comfort while reducing energy consumption and utility costs.

Whether you’re tackling a DIY insulation project or hiring a professional contractor, R-19 ceiling insulation is a smart investment that pays dividends in terms of energy savings, comfort, and overall home performance.

Exploring Pendant Lights for Tall Ceilings: Elevate Your Space

Tall ceilings can create a sense of spaciousness and grandeur in any room, but they also present unique challenges when it comes to lighting. Pendant lights offer an elegant and practical solution for illuminating tall spaces, adding both style and functionality to your interior design. In this guide, we’ll explore the world of pendant lights for tall ceilings, discussing different styles, installation considerations, and design inspirations to help you elevate your space with lighting.

Pendant Lights For Tall Ceilings

Understanding Pendant Lights for Tall Ceilings

Pendant lights are versatile fixtures that hang from the ceiling, typically suspended by a cord, chain, or rod. They come in a variety of shapes, sizes, and designs, making them suitable for various interior styles and ceiling heights. When it comes to tall ceilings, pendant lights offer the advantage of drawing the eye upward, accentuating the verticality of the space while providing focused illumination where it’s needed most.

Exploring Styles and Designs

When choosing pendant lights for tall ceilings, consider the following styles and designs:

  • Large-Scale Pendants: Opt for oversized pendant lights with substantial proportions to make a bold statement in rooms with tall ceilings. These larger fixtures can serve as focal points and add visual interest to the space.
  • Multi-Light Pendants: Multi-light pendants feature multiple bulbs or shades suspended from a single canopy, providing ample illumination for large areas. These fixtures are ideal for tall ceilings where a single pendant may appear disproportionate.
  • Linear Pendants: Linear pendant lights feature a row of lights arranged along a horizontal frame, making them well-suited for elongated spaces such as dining tables or kitchen islands in rooms with tall ceilings.
  • Statement Pendants: Choose pendant lights with unique shapes, materials, or finishes to add personality and style to your space. Statement pendants can become conversation pieces and contribute to the overall design scheme of the room.

Read too: Understanding and Dealing with Ants in the Ceiling Spaces: Navigating the Intrusion

Installation Considerations

Installing pendant lights in rooms with tall ceilings requires careful planning and consideration to ensure optimal performance and aesthetics. Here are some installation tips to keep in mind:

  • Adjustable Suspension: Opt for pendant lights with adjustable suspension systems or cord lengths to accommodate varying ceiling heights. This flexibility allows you to customize the placement of the fixtures and achieve the desired visual impact.
  • Proper Scale: Consider the scale of the pendant lights relative to the size of the room and the height of the ceiling. Oversized pendants may overpower small spaces, while undersized fixtures may get lost in rooms with tall ceilings.
  • Layered Lighting: Supplement pendant lights with additional lighting sources, such as recessed lights or wall sconces, to provide balanced illumination throughout the room. Layering lighting creates depth and visual interest while ensuring adequate brightness levels.

Design Inspirations

Draw inspiration from the following design ideas to incorporate pendant lights into rooms with tall ceilings:

  • Dramatic Entryways: Make a grand entrance by installing a cluster of pendant lights in the foyer or entryway to welcome guests and create a memorable first impression.
  • Dining Drama: Hang a row of statement pendants above the dining table to create a focal point and set the mood for intimate gatherings and festive meals.
  • Kitchen Elegance: Illuminate kitchen islands or breakfast bars with linear pendant lights to enhance functionality and style in high-ceilinged kitchens.
  • Living Room Ambiance: Add warmth and ambiance to living areas with oversized pendant lights suspended at varying heights to create visual interest and focal points.

Conclusion

Pendant lights offer a versatile and stylish lighting solution for tall ceilings, allowing you to enhance your space with both illumination and aesthetics. By choosing the right styles, considering installation factors, and drawing inspiration from design ideas, you can create a visually stunning and functional interior that showcases the beauty of your tall ceilings.

Whether you prefer large-scale statement pendants or sleek linear designs, there’s a pendant light option to suit your taste and complement your tall-ceilinged space perfectly. Elevate your interior design with pendant lights and transform your room into a well-lit and inviting haven.

Exploring Modern LED Chandeliers for High Ceilings: Illuminate Your Space

High ceilings offer a sense of grandeur and spaciousness to any room, but finding the right lighting fixtures to complement such spaces can be a challenge. Modern LED chandeliers for high ceilings provide the perfect solution, offering both style and functionality to illuminate large areas with ease. In this guide, we’ll delve into the world of modern LED chandeliers designed specifically for high ceilings, exploring various styles, installation considerations, and benefits for your space.

Modern Led Chandeliers For High Ceilings
Version 1.0.0

Understanding Modern LED Chandeliers for High Ceilings

Modern LED chandeliers are a popular choice for contemporary interiors, offering energy-efficient lighting solutions with sleek and stylish designs. When it comes to high ceilings, these chandeliers are particularly well-suited due to their ability to provide ample illumination across expansive areas while adding a touch of elegance and sophistication to the space.

Read too: Understanding and Dealing with Ants in the Ceiling Spaces: Navigating the Intrusion

Exploring Styles and Designs

Modern LED chandeliers come in a wide range of styles and designs to suit various aesthetic preferences and interior themes. Some popular options for high ceilings include:

  • Sleek and Minimalist: Minimalist chandeliers with clean lines and simple designs offer a modern and understated look that complements contemporary interiors with high ceilings.
  • Crystal and Glass: Crystal and glass chandeliers add a touch of glamour and luxury to high-ceilinged spaces, creating a dazzling focal point that enhances the overall ambiance.
  • Industrial and Urban: For a more urban and industrial aesthetic, consider chandeliers with metal accents, exposed bulbs, and geometric shapes, adding a touch of edgy sophistication to your space.

Installation Considerations

When installing modern LED chandeliers in rooms with high ceilings, there are several factors to consider to ensure optimal performance and aesthetics:

  • Height and Scale: Choose a chandelier size and height that complements the proportions of the room and the height of the ceiling. Opt for larger fixtures with multiple tiers for grand spaces, while smaller rooms may benefit from more streamlined designs.
  • Mounting Options: Depending on the height of your ceiling, you may need to consider different mounting options for your chandelier, such as flush mount, semi-flush mount, or adjustable suspension systems.
  • Dimming Capabilities: Select chandeliers with dimming capabilities to provide flexibility in lighting levels and create the desired ambiance for different occasions and activities.

Benefits of Modern LED Chandeliers for High Ceilings

Investing in modern LED chandeliers for high ceilings offers several benefits for homeowners and interior designers alike:

  • Energy Efficiency: LED technology provides energy-efficient lighting solutions that help reduce electricity consumption and lower utility costs over time.
  • Longevity: LED bulbs have a longer lifespan compared to traditional incandescent or fluorescent bulbs, reducing the frequency of bulb replacements and maintenance.
  • Customization: LED chandeliers offer customizable lighting options, allowing users to adjust brightness levels, color temperatures, and even control lighting remotely via smart devices.

Conclusion

Modern LED chandeliers for high ceilings offer a perfect blend of style, functionality, and energy efficiency, making them an ideal choice for illuminating expansive spaces with elegance and sophistication. Whether you prefer sleek and minimalist designs or glamorous crystal accents, there’s a modern LED chandelier to suit your high-ceilinged space perfectly.

By understanding the various styles, installation considerations, and benefits of modern LED chandeliers, you can make informed decisions to enhance the ambiance and visual appeal of your home or commercial space.

Drop Ceiling Tile: Elevate Your Kitchen with Stylish

Are you looking to revamp your kitchen’s appearance without breaking the bank? Look no further than Kitchen Drop Ceiling Tile. These versatile and stylish additions can completely transform the look and feel of your culinary space. In this comprehensive guide, we’ll explore everything you need to know about Kitchen Drop Ceiling Tiles, from their benefits to installation tips and design ideas.

Kitchen Drop Ceiling Tiles

Understanding Kitchen Drop Ceiling Tiles

Kitchen Drop Ceiling Tiles, also known as suspended ceiling tiles, are lightweight panels that are installed in a grid system suspended below the actual ceiling. They offer a myriad of benefits, ranging from aesthetics to practicality. Available in a variety of materials such as tin, PVC, and acoustic, these tiles come in numerous designs and finishes to suit any kitchen style.

Benefits of Kitchen Drop Ceiling Tiles

  • Enhanced Aesthetics: One of the primary reasons homeowners opt for Kitchen Drop Ceiling Tiles is their ability to enhance the overall aesthetic appeal of the kitchen. Whether you prefer a rustic, modern, or traditional look, there’s a drop ceiling tile design to complement your style.
  • Improved Acoustics: In a busy kitchen environment where noise levels can escalate quickly, drop ceiling tiles can help absorb sound, resulting in a quieter and more enjoyable cooking experience.
  • Concealed Wiring and Pipes: If your kitchen has exposed wiring or unsightly pipes, drop ceiling tiles provide an elegant solution to conceal them while maintaining easy access for repairs or maintenance.
  • Easy Installation: Unlike traditional ceiling renovation projects, installing Kitchen Drop Ceiling Tiles is relatively simple and can often be done as a DIY project, saving you time and money.

Choosing the Right Kitchen Drop Ceiling Tiles

When selecting drop ceiling tiles for your kitchen, consider factors such as material, design, and maintenance requirements. PVC tiles are moisture-resistant and easy to clean, making them ideal for kitchens prone to splashes and spills. Tin tiles, on the other hand, lend a vintage charm and are highly durable.

Read too: Exploring the Benefits and How-Tos of DIY Ceiling Cassette Mini Split Installation: Revolutionizing Comfort

Installation Tips

Installing Kitchen Drop Ceiling Tiles requires careful planning and precision. Begin by measuring the dimensions of your kitchen and determining the layout of the grid system. Ensure proper support for the grid, especially if you’re installing heavier materials like tin. Follow manufacturer instructions closely for a seamless installation process.

Design Ideas

From classic white tiles to intricate patterns and textured finishes, the design possibilities with Kitchen Drop Ceiling Tiles are endless. Consider incorporating recessed lighting for added ambiance or opt for decorative edge trim to elevate the visual appeal of your ceiling.

Maintenance and Care

To keep your Kitchen Drop Ceiling Tiles looking their best, regular maintenance is essential. Simply wipe them down with a mild detergent and water solution to remove dust and grease buildup. Avoid using abrasive cleaners or harsh chemicals, as they may damage the tiles’ finish.

Conclusion

Kitchen Drop Ceiling Tile offer a cost-effective and stylish solution for upgrading your kitchen’s appearance. Whether you’re aiming for a sleek modern aesthetic or a cozy farmhouse vibe, there’s a drop ceiling tile design to suit your taste. With easy installation, durability, and low maintenance requirements, these tiles are a practical choice for any kitchen renovation project.

So why wait? Transform your kitchen today with the timeless elegance of Kitchen Drop Ceiling Tiles.

Hunter Port Royale Ceiling Fans: Elevate Your Home’s Elegance

Transform your living space into a haven of luxury and comfort with the exquisite Hunter Port Royale Ceiling Fans. Explore the features and benefits of this sophisticated fan that combines timeless design with superior performance.

Hunter Port Royale Ceiling Fan

Introducing the Hunter Port Royale Ceiling Fan

The Hunter Port Royale Ceiling Fan is a statement piece that exudes elegance and sophistication. Crafted with meticulous attention to detail, this fan features a classic design with modern touches, making it the perfect addition to any upscale home décor.

Features and Benefits of the Hunter Port Royale Ceiling Fan

  1. Regal Design: Inspired by the grandeur of traditional European architecture, the Hunter Port Royale Ceiling Fan boasts intricate details and ornate accents that add a touch of luxury to any room. From its rich wood finishes to its decorative metalwork, every aspect of this fan reflects opulence and refinement.
  2. Exceptional Performance: Despite its ornamental appearance, the Hunter Port Royale Ceiling Fan delivers exceptional performance with its powerful motor and precision-engineered blades. Experience optimal airflow and cooling comfort, even in larger rooms, thanks to the fan’s high-quality construction and advanced technology.
  3. Customizable Options: The Hunter Port Royale Ceiling Fan offers customizable options to suit your unique preferences and décor style. Choose from a variety of finishes, including antique brass, brushed nickel, and oil-rubbed bronze, to complement your existing furnishings and color scheme.
  4. Quiet Operation: Equipped with WhisperWind® motor technology, the Hunter Port Royale Ceiling Fan operates quietly and efficiently, ensuring a peaceful and comfortable indoor environment. Enjoy the benefits of improved air circulation without the distraction of noisy fan blades.
  5. Remote Control Convenience: Control the fan speed, lighting, and direction of airflow with the included handheld remote control. Adjust settings from the comfort of your couch or bed, providing added convenience and ease of use.

Installation and Maintenance of the Hunter Port Royale Ceiling Fan

Installing the Hunter Port Royale Ceiling Fan is a straightforward process, thanks to the included step-by-step instructions and mounting hardware. However, it’s essential to follow safety guidelines and precautions during installation to ensure proper operation and longevity of the fan.

Regular maintenance is key to preserving the performance and appearance of your Hunter Port Royale Ceiling Fan. Clean the blades and housing regularly to remove dust and debris buildup, and lubricate the motor bearings as needed to keep the fan running smoothly.

Conclusion

The Hunter Port Royale Ceiling Fans combines timeless elegance with superior performance to create a luxurious cooling solution for any home. With its regal design, customizable options, and whisper-quiet operation, this fan is sure to elevate the ambiance of your living space while providing optimal comfort and style.

Hunter Cranbrook Ceiling Fans: Elevate Your Home Décor with the Stylish

Upgrade your home’s ambiance and cooling efficiency with the elegant and modern Hunter Cranbrook Ceiling Fans. Discover why this stylish fan is a must-have addition to any living space.

Hunter Cranbrook Ceiling Fan

Introducing the Hunter Cranbrook Ceiling Fan

The Hunter Cranbrook Ceiling Fan combines sleek design with powerful performance to create a perfect blend of form and function. With its striking geometric profile and vintage-inspired blade design, this fan adds a touch of sophistication to any room while providing optimal airflow and comfort.

Features and Benefits of the Hunter Cranbrook Ceiling Fan

  1. Unique Design: The Hunter Cranbrook Ceiling Fan features a distinctive caged design with exposed LED bulbs, creating a statement piece that enhances the aesthetics of any room. Available in various finishes, including mint, gloss black, and gloss white, this fan allows you to customize the look to suit your décor preferences.
  2. Powerful Performance: Despite its stylish appearance, the Hunter Cranbrook Ceiling Fan delivers exceptional performance with its reversible motor and 4-speed settings. Whether you need to cool down during the summer months or improve air circulation throughout the year, this fan provides reliable and efficient operation.
  3. Quiet Operation: Equipped with WhisperWind® motor technology, the Hunter Cranbrook Ceiling Fan operates quietly, ensuring minimal disruption to your indoor environment. Enjoy the benefits of improved air circulation without the distracting noise commonly associated with ceiling fans.
  4. Remote Control Convenience: Control the fan speed and lighting settings effortlessly with the included handheld remote control. Adjust the fan speed, dim the lights, or reverse the direction of the blades with the touch of a button, providing convenience and ease of use.
  5. Energy Efficiency: The Hunter Cranbrook Ceiling Fan is ENERGY STAR® certified, offering energy-efficient operation that helps reduce electricity consumption and lower utility bills. Enjoy the benefits of a stylish and functional ceiling fan while minimizing your environmental impact.

Hunter Cranbrook Ceiling Fan Installation and Maintenance

Installing the Hunter Cranbrook Ceiling Fan is a straightforward process, thanks to the included step-by-step instructions and mounting hardware. However, it’s essential to follow safety guidelines and precautions during installation to ensure proper operation and longevity of the fan.

Regular maintenance is key to preserving the performance and appearance of your Hunter Cranbrook Ceiling Fan. Clean the blades and housing regularly to remove dust and debris buildup, and lubricate the motor bearings as needed to keep the fan running smoothly.

Read too: Exploring the Benefits and How-Tos of DIY Ceiling Cassette Mini Split Installation: Revolutionizing Comfort

Conclusion

The Hunter Cranbrook Ceiling Fans combines style, performance, and convenience to create an exceptional cooling solution for any home. With its unique design, powerful airflow, and energy-efficient operation, this fan is sure to enhance your living space while providing comfort and functionality year-round.

How To Extend Kitchen Cabinets To The Ceiling: A Complete Guide for Maximizing Space and Style

In many kitchens, the space above the cabinets often goes unused, leaving a gap between the top of the cabinets and the ceiling. This unused space not only collects dust but also misses out on the opportunity to enhance the aesthetic appeal and storage capacity of the kitchen. Fortunately, extending kitchen cabinets to the ceiling is a practical solution that can transform your kitchen’s look while maximizing storage space. In this comprehensive guide, we’ll delve into the steps and considerations involved in extending kitchen cabinets to the ceiling, empowering you to make the most of your kitchen space efficiently.

How To Extend Kitchen Cabinets To The Ceiling

Why Extend Kitchen Cabinets To The Ceiling?

Extending kitchen cabinets to the ceiling offers several benefits beyond just aesthetics. It maximizes storage space, allowing you to utilize every inch of vertical space in your kitchen. By eliminating the gap between the cabinets and the ceiling, you prevent dust and grime buildup, making cleaning easier and reducing maintenance efforts. Additionally, extending cabinets to the ceiling creates a seamless and cohesive look, enhancing the overall design and visual appeal of your kitchen.

Planning Your Cabinet Extension

Before you embark on extending your kitchen cabinets to the ceiling, thorough planning is essential. Begin by assessing the current layout of your kitchen and identifying the cabinets that you wish to extend. Consider factors such as ceiling height, cabinet material, and existing design elements to ensure a cohesive look.

How To Extend Kitchen Cabinets To The Ceiling: Step-By-Step Guide

  1. Measurements and Preparation: Start by measuring the height and width of the cabinets you plan to extend. Take accurate measurements of the space between the cabinets and the ceiling to determine the size of filler strips or crown molding needed.
  2. Remove Existing Molding: If your cabinets have crown molding or trim at the top, carefully remove it using a pry bar or a similar tool. Be cautious to avoid damaging the cabinets or the surrounding wall.
  3. Install Filler Strips: Cut filler strips from the same material as your cabinets to fill the gap between the cabinets and the ceiling. Secure the filler strips in place using wood glue and nails or screws.
  4. Attach Crown Molding: To create a polished look, install crown molding along the top of the cabinets. Cut the molding to size and attach it securely using a nail gun or finishing nails. Ensure that the molding is level and aligned properly for a professional finish.
  5. Paint or Finish: Once the extension is complete, paint or finish the cabinets and molding to match the existing kitchen décor. Choose a color or finish that complements your kitchen style and enhances the overall aesthetic appeal.

Tips for Success

  • When selecting filler strips and crown molding, opt for materials that match your existing cabinets to maintain a cohesive look.
  • Use a stud finder to locate studs in the wall when securing filler strips and crown molding for added stability.
  • Consider adding LED strip lighting above the cabinets to illuminate the space and create ambiance.

Conclusion

Extending kitchen cabinets to the ceiling is a practical and stylish way to maximize space and enhance the aesthetics of your kitchen. By following the steps outlined in this guide and considering essential factors, you can transform your kitchen into a functional and visually appealing space. With careful planning and attention to detail, you can achieve a seamless integration that elevates the overall design of your kitchen.

Read too: Exploring the Benefits and How-Tos of DIY Ceiling Cassette Mini Split Installation: Revolutionizing Comfort