Waterproof ceiling tile 2X2 offer a versatile and practical solution for enhancing the appearance and functionality of any indoor space. Whether you’re renovating a bathroom, kitchen, or office, these tiles provide excellent protection against moisture while adding a touch of style to your ceiling. In this comprehensive guide, we’ll explore the features, benefits, and installation process of waterproof ceiling tiles 2X2, helping you create a beautiful and durable ceiling that withstands the test of time.
Introducing Waterproof Ceiling Tiles 2X2
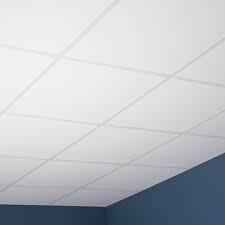
Waterproof ceiling tiles 2X2 are specially designed to resist moisture and humidity, making them ideal for use in areas prone to water exposure. They are typically made from durable materials such as PVC, vinyl, or fiberglass, which offer excellent durability and resistance to mold and mildew growth. These tiles come in a variety of styles, colors, and textures, allowing you to customize the look of your ceiling to suit your taste and decor preferences.
Benefits of Waterproof Ceiling Tiles 2X2
1. Moisture Resistance
The primary benefit of waterproof ceiling tiles 2X2 is their ability to withstand moisture and humidity without warping, sagging, or deteriorating. This makes them ideal for use in bathrooms, kitchens, laundry rooms, and other areas where moisture levels are high.
2. Durability
Waterproof ceiling tiles 2X2 are incredibly durable, providing long-lasting protection against water damage and wear and tear. Unlike traditional ceiling materials such as drywall or plaster, these tiles are resistant to cracks, stains, and discoloration, ensuring a pristine appearance for years to come.
Read too: Exploring the Efficiency of Radiant Ceiling Heater Electric: A Comprehensive Guide
3. Easy Installation
Most waterproof ceiling tiles 2X2 are designed for easy installation, allowing homeowners and contractors to quickly and efficiently transform their ceilings. These tiles can be installed using adhesive, staples, or a drop ceiling grid system, depending on the application and personal preference.
4. Aesthetic Appeal
In addition to their practical benefits, waterproof ceiling tiles 2X2 also offer aesthetic appeal. They come in a wide range of styles, including smooth, textured, and decorative patterns, allowing you to create a ceiling that complements your overall design scheme.
Installation Process
Installing waterproof ceiling tiles 2X2 is a straightforward process that can be completed in a few simple steps:
1. Prepare the Surface
Before installing the tiles, ensure that the ceiling surface is clean, smooth, and free of any debris or imperfections. Repair any cracks or holes in the ceiling and allow the surface to dry completely.
2. Measure and Cut Tiles
Measure the dimensions of the ceiling and cut the tiles to fit using a sharp utility knife or scissors. Be sure to leave a small gap around the edges to allow for expansion and contraction.
3. Apply Adhesive
Apply a suitable adhesive to the back of each tile and press it firmly onto the ceiling surface. Ensure that the tiles are aligned correctly and that there are no air bubbles or gaps between them.
4. Finish the Edges
Once all the tiles are installed, finish the edges with molding or trim pieces to create a clean and polished look. Caulk any gaps or seams to ensure a watertight seal.
Conclusion
Waterproof 2X2 ceiling tiles provide a practical and stylish solution for improving indoor spaces. With moisture resistance, durability, and easy installation, they’re ideal for bathrooms, kitchens, and other wet areas. Whether for home or office renovations, installing these tiles creates a beautiful, long-lasting ceiling that adds property value.