Understanding and Dealing with Toilet Overflow Water Damage to Ceiling Below

Experiencing toilet overflow water damage to the ceiling below can be a homeowner’s worst nightmare. In this comprehensive guide, we’ll delve into the causes behind this issue, explore preventive measures, and outline steps to effectively deal with the aftermath.
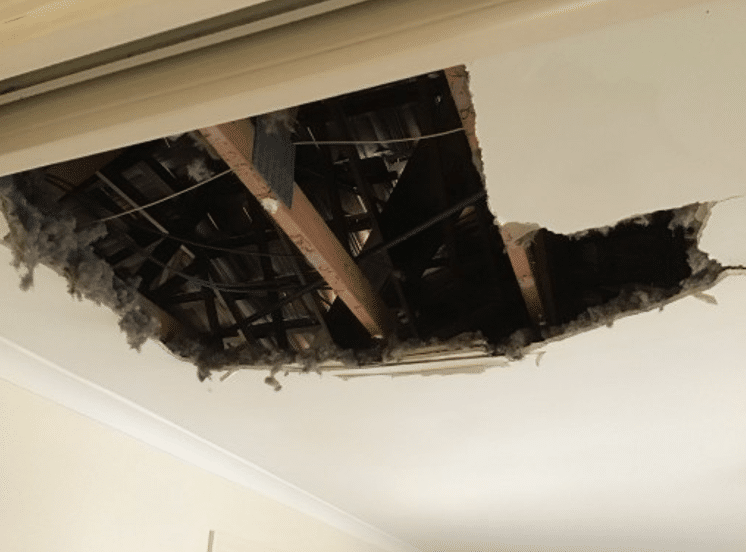
Toilet Overflow Water Damage To Ceiling Below

Understanding Toilet Overflow Water Damage to Ceiling Below

What Causes Toilet Overflow Water Damage?

Toilet overflow water damage to the ceiling below can occur due to various factors, including:

  • Clogged Drain: A blockage in the toilet’s plumbing system can cause water to back up and overflow, leading to damage to the ceiling below.
  • Faulty Toilet Components: Malfunctioning toilet components such as the fill valve, flapper, or float can result in continuous water flow, eventually causing an overflow.
  • Sewer Line Issues: Problems with the sewer line, such as blockages or backups, can cause water to flow back into the toilet and overflow.

Signs of Toilet Overflow Water Damage

Identifying signs of toilet overflow water damage to the ceiling below is crucial for prompt intervention. Look out for the following indicators:

  • Water stains or discoloration on the ceiling
  • Sagging or bulging ceiling tiles
  • Dampness or moisture in the affected area
  • Peeling paint or wallpaper

Read too: Exploring Craftsman Style Ceiling Fans for Your Home: Embracing Timeless Elegance

Preventive Measures to Avoid Toilet Overflow

Regular Maintenance

  • Schedule routine inspections of your toilet’s plumbing system to detect and address any leaks or issues promptly.
  • Avoid flushing non-biodegradable items such as wipes, paper towels, or hygiene products down the toilet to prevent clogs.

Upgrade Toilet Components

  • Install a toilet overflow prevention device, such as an automatic shut-off valve, to stop water flow in the event of an overflow.
  • Consider upgrading to a modern, water-efficient toilet with advanced flushing mechanisms to minimize the risk of overflow.

Dealing with Toilet Overflow Water Damage

Step 1: Stop the Water Source

  • Turn off the toilet’s water supply by locating the shut-off valve near the base of the toilet and turning it clockwise.

Step 2: Assess the Damage

  • Inspect the extent of the water damage to the ceiling below, including any structural issues or electrical hazards.

Step 3: Dry and Clean the Affected Area

  • Use towels, mops, or a wet/dry vacuum to remove excess water from the floor and ceiling.
  • Thoroughly clean and disinfect the affected area to prevent mold and mildew growth.

Step 4: Repair and Restoration

  • Repair any plumbing issues contributing to the overflow, such as clogs or faulty components.
  • Replace damaged ceiling tiles, drywall, or insulation as needed to restore the integrity of the ceiling below.

Conclusion

Dealing with toilet overflow water damage to the ceiling below requires swift action and thorough remediation to prevent further structural damage and mold growth. By understanding the causes, implementing preventive measures, and taking prompt steps to address the issue, you can effectively mitigate damage and restore your home’s safety and comfort.
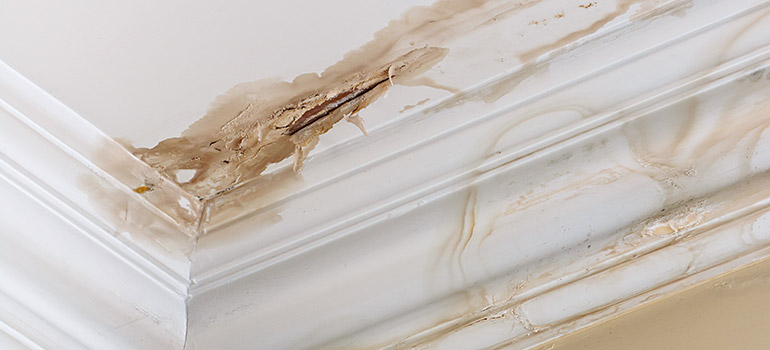
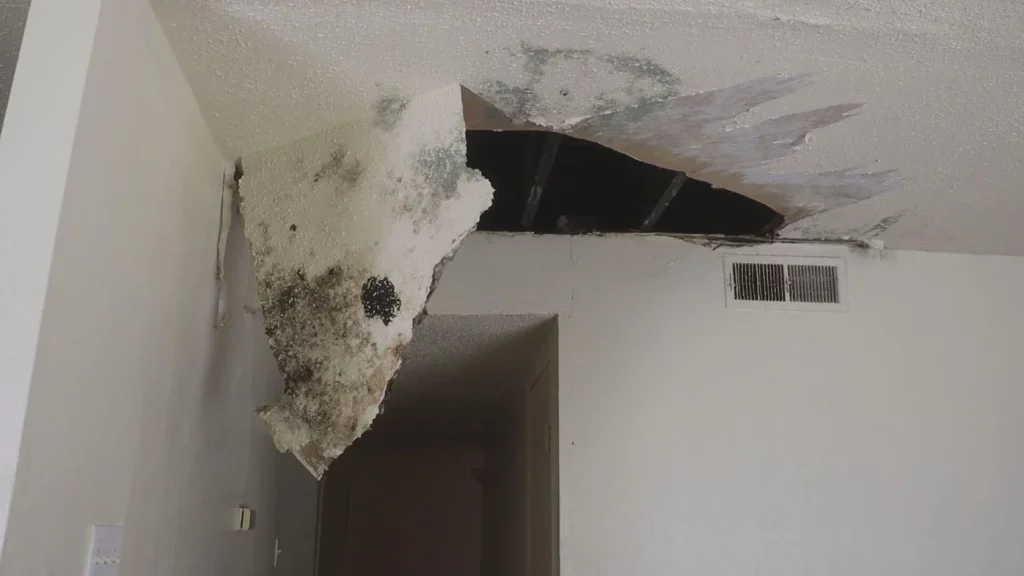
Dealing with the aftermath of Plaster Ceiling Water Damage: Salvaging Elegance

Embark on a journey of restoration as we explore the intricacies of “Plaster Ceiling Water Damage.” This comprehensive guide offers insights into identifying, addressing, and remedying the impact of water damage on your plaster ceiling, ensuring your living space remains a testament to elegance.

Plaster Ceiling Water Damage

Understanding the Impact: Plaster Ceiling Water Damage Demystified

Delve into the world of plaster ceiling water damage as we uncover the signs, causes, and effective solutions for a seamless restoration process.

1. Staining and Discoloration*

Water stains and discoloration on your plaster ceiling are telltale signs of water damage. These marks often appear as brown or yellowish patches, indicating a need for prompt attention.

2. Sagging or Bubbling*

Excess water can weaken the plaster, causing it to sag or bubble. If you notice irregularities in the ceiling surface, it may be a sign of water infiltration.

3. Peeling Paint or Wallpaper*

Water damage can compromise the adhesion of paint or wallpaper on your ceiling. Peeling or bubbling of these materials may signal underlying water issues.

4. Musty Odors*

The presence of water in your ceiling can lead to mold growth, resulting in musty odors. If you detect a persistent, unpleasant smell, it could be indicative of hidden water damage.

Read too: Understanding and Addressing a Leaky Ceiling in Your Apartment: Navigating the Drips

Addressing Plaster Ceiling Water Damage: Steps to Restoration

Navigate the restoration process with confidence by following these practical steps to address and repair this damage.

1. Identify and Fix the Source of Water Infiltration

Begin by identifying and addressing the source of water infiltration. Whether it’s a leaky roof, plumbing issue, or condensation problem, resolving the root cause is paramount to preventing future damage.

2. Assess the Extent of Damage

Thoroughly inspect the plaster ceiling to determine the extent of the damage. Identify areas that require repair or replacement and prioritize the restoration process accordingly.

3. Remove Damaged Plaster and Materials

Carefully remove any damaged plaster, as well as compromised paint or wallpaper. This step ensures a clean slate for the restoration process and prevents further deterioration.

4. Allow for Proper Drying

Before initiating repairs, allow the affected areas to dry completely. Adequate drying time prevents the growth of mold and ensures a solid foundation for restoration efforts.

5. Patch and Restore

Patch any holes or cracks in the plaster using a suitable repair compound. Once the patching is complete, restore the aesthetic appeal of your plaster ceiling with a fresh coat of paint or wallpaper.

Conclusion: Restoring Elegance, One Patch at a Time

By understanding the nuances of “Plaster Ceiling Water Damage” and implementing proactive restoration measures, you can preserve the elegance of your living space. Swift identification, targeted repairs, and a meticulous restoration process ensure that your plaster ceiling remains a symbol of sophistication and charm.

Embrace the journey of restoring elegance, and witness the transformation of your space as you bid farewell to the lingering effects of water damage.

Dealing with the aftermath: What to do when Your Ceiling Caved In Water Damage Strikes

Water damage is a homeowner’s nightmare, and when your ceiling caves in due to water damage, it can be a devastating experience. In this article, we’ll explore the causes, effects, and crucial steps to take when facing the aftermath of a ceiling caved in water damage.

Ceiling Caved In Water Damage

Introduction

Imagine coming home to find your ceiling collapsed, water pouring in from above, causing extensive damage to your belongings. The scenario is not only distressing but also poses immediate challenges that need urgent attention. Understanding the causes and knowing what steps to take can make a significant difference in mitigating the damage.

Causes of Ceiling Caved In Water Damage

Water damage leading to a collapsed ceiling can stem from various sources. It could be a burst pipe, roof leakage, plumbing issues, or even severe weather conditions like storms and heavy rainfall. Identifying the root cause is crucial in preventing future incidents.

Effects of Ceiling Caved In Water Damage

The consequences of a ceiling caved in due to water damage are extensive and can affect both the structural integrity of your home and the safety of its occupants. Immediate effects include ruined furniture, damaged electronics, and compromised living spaces. Long-term repercussions may include mold growth, which poses health risks and requires professional remediation.

Dealing with the Immediate Aftermath

1. Ensure Safety First

The first and foremost concern after a ceiling collapse is safety. Evacuate the affected area, especially if there are electrical appliances or if the structure seems unstable. Prioritize the safety of everyone in the household.

2. Turn Off Utilities

To prevent further damage and ensure safety, turn off water and electricity sources in the affected area. This will help minimize the risk of electrical shocks and additional water leakage.

3. Document the Damage

Before cleaning up or making any repairs, document the damage. Take photographs and videos of the affected areas, as these will be crucial for insurance claims and assessments.

4. Contact Professionals

Ceiling caved in water damage often requires professional assistance. Contact a reliable water damage restoration company to assess the extent of the damage and formulate an effective restoration plan.

Ceiling Caved In Water Damage Restoration Process

1. Water Extraction

The first step in the restoration process is water extraction. Specialized equipment is used to remove standing water and moisture from the affected areas.

2. Structural Drying

Once the water is removed, the next step is structural drying. This involves using dehumidifiers and air movers to eliminate any remaining moisture, preventing mold growth and further damage.

3. Repairs and Restoration

With the area dried, repairs can begin. This may include fixing the ceiling, replacing damaged drywall, and addressing any structural issues. Restoration professionals have the expertise to restore your home to its pre-damaged condition.

Read too: Unveiling the Secrets: Understanding and Optimizing R Value for Basement Ceiling Insulation

Preventing Future Incidents

To prevent ceiling caved in water damage in the future, consider the following measures:

1. Regular Inspections

Regularly inspect your roof, plumbing, and ceilings for signs of damage or wear. Identifying issues early can prevent them from escalating into major problems.

2. Adequate Insulation

Ensure your home is adequately insulated to prevent issues like ice dams and roof leaks. Proper insulation can also regulate indoor temperatures, reducing the risk of condensation.

3. Prompt Repairs

Address any leaks or plumbing issues promptly. Even small leaks can lead to significant water damage over time.

Conclusion

Experiencing a ceiling caved in due to water damage is undoubtedly stressful, but knowing how to respond can make a significant difference. By taking immediate action, seeking professional assistance, and implementing preventive measures, homeowners can navigate through the challenges of water damage and restore their homes to a safe and habitable condition. Remember, the key is to act swiftly and efficiently in the face of adversity.