Spray Foam Insulation For Ceilings: The Ultimate Guide to Energy Efficiency and Comfort

When it comes to creating a comfortable and energy-efficient home, insulation plays a critical role. One of the most effective forms of insulation today is spray foam insulation, particularly for ceilings. Proper insulation in the ceiling not only helps regulate the temperature in your home but also provides significant energy savings by reducing the workload on your HVAC system.

Spray Foam Insulation For Ceilings

In this article, we will dive deep into the benefits, types, and application process of spray foam insulation for ceilings, along with tips on how to choose the right product and contractor for your home. Whether you’re building a new home or retrofitting an older one, understanding how spray foam insulation works can help you make a more informed decision.


What is Spray Foam Insulation?

Spray foam insulation is a versatile and highly effective type of insulation that is created by mixing two chemicals, isocyanate and polyol resin, which react when combined to expand and form a rigid, foam-like substance. This foam is sprayed onto surfaces, where it quickly expands and hardens, creating a thick, airtight layer of insulation.

There are two main types of spray foam insulation: open-cell and closed-cell. Each has its unique properties and is used for different purposes, depending on your home’s needs.

  1. Open-cell Spray Foam: This type of spray foam is lighter and less dense than closed-cell foam. It is used primarily for interior applications, such as walls and ceilings, and provides excellent soundproofing qualities.
  2. Closed-cell Spray Foam: Closed-cell foam is denser and provides a higher R-value, which measures the material’s ability to resist heat flow. It is typically used for exterior walls, roofs, and areas where maximum thermal protection is needed.

Read too: Bathroom Flooded Through the Ceiling: A Comprehensive Guide


Benefits of Spray Foam Insulation For Ceilings

1. Superior Energy Efficiency

One of the primary reasons homeowners choose spray foam insulation for ceilings is the energy efficiency it offers. Spray foam creates an airtight seal, which reduces air leakage and heat transfer. This means that your heating and cooling systems won’t have to work as hard to maintain a consistent temperature, resulting in lower energy bills.

Ceilings are one of the largest areas of a home that can lose heat in the winter or gain heat in the summer. By using spray foam insulation, you can ensure that your home remains energy-efficient throughout the year.

2. Enhanced Comfort

Spray foam insulation helps maintain a consistent indoor temperature, preventing drafts and cold spots. By insulating the ceiling with spray foam, you create a barrier that blocks heat from escaping during the winter and keeps it out during the summer. This leads to a more comfortable living environment, regardless of the season.

Additionally, spray foam also provides noise reduction, making it an excellent option for soundproofing ceilings. The open-cell variety, in particular, is great for absorbing sound, helping to minimize noise from room to room.

3. Moisture and Mold Resistance

Ceilings, especially in basements or attics, are prone to moisture buildup, which can lead to mold growth over time. Spray foam insulation creates a moisture barrier, preventing water from seeping into the ceiling or attic space. This not only protects the structural integrity of your home but also reduces the risk of mold, which can cause health issues if left unchecked.

Because of its water resistance, closed-cell spray foam insulation is particularly effective in areas where moisture may be a concern.

4. Increased Structural Strength

In addition to its insulating properties, spray foam insulation can also add strength to your ceilings. The rigidity of closed-cell foam acts as an additional layer of support, which can help fortify the ceiling structure. This is especially beneficial in areas prone to high winds, heavy snowfall, or other weather-related stresses.

5. Long-Term Durability

Spray foam insulation is known for its long-lasting performance. Unlike traditional insulation materials, such as fiberglass or cellulose, spray foam does not degrade over time. Once installed, it retains its insulating properties for many years, ensuring your home remains energy-efficient without the need for frequent replacement.


Why Choose Spray Foam Insulation For Ceilings?

When it comes to insulating your home, ceilings are a critical area that often gets overlooked. However, because heat naturally rises, uninsulated or poorly insulated ceilings can lead to significant energy loss. By investing in spray foam insulation for ceilings, you can take advantage of the following benefits:

Airtight Seal

One of the standout features of spray foam insulation is its ability to expand and fill every nook and cranny of the ceiling. This creates a completely airtight seal, which prevents drafts and energy loss. Unlike traditional insulation materials that may leave gaps or become compressed over time, spray foam forms a tight bond with the surface, ensuring optimal insulation performance.

Higher R-Value

When insulating ceilings, it’s important to choose a material with a high R-value, which indicates its resistance to heat flow. Closed-cell spray foam insulation has one of the highest R-values of any insulation material, making it highly effective at blocking heat transfer. This is especially important for ceilings, where heat can escape more easily.

Versatility and Adaptability

Another advantage of spray foam insulation is its adaptability to various ceiling types. Whether you have a flat ceiling, vaulted ceiling, or an exposed beam ceiling, spray foam can be applied seamlessly. It’s also ideal for hard-to-reach areas or ceilings with unique architectural features.


Types of Spray Foam Insulation For Ceilings

Choosing the right type of spray foam insulation depends on several factors, including the specific needs of your home, the climate in your area, and your budget.

1. Open-Cell Spray Foam

As mentioned earlier, open-cell spray foam is a lighter, less dense option that is well-suited for interior ceiling insulation. Because it expands more than closed-cell foam, it is great for filling large areas or spaces with irregular shapes. Open-cell foam also provides excellent soundproofing, making it a good choice for ceilings between floors or in rooms where sound control is important.

Pros:

  • More affordable than closed-cell foam
  • Effective for soundproofing
  • Good for filling large spaces

Cons:

  • Lower R-value than closed-cell foam
  • Not as moisture resistant

2. Closed-Cell Spray Foam

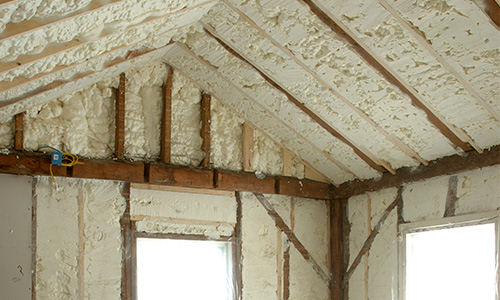
Closed-cell spray foam is denser and more rigid than open-cell foam, making it a better choice for areas where high thermal resistance and structural strength are required. It has a higher R-value and provides an excellent moisture barrier, making it ideal for ceilings in basements or attics, where humidity levels may be higher.

Pros:

  • High R-value for better insulation
  • Provides moisture resistance
  • Adds structural strength to ceilings

Cons:

  • More expensive than open-cell foam
  • Less effective at soundproofing

Installing Spray Foam Insulation For Ceilings

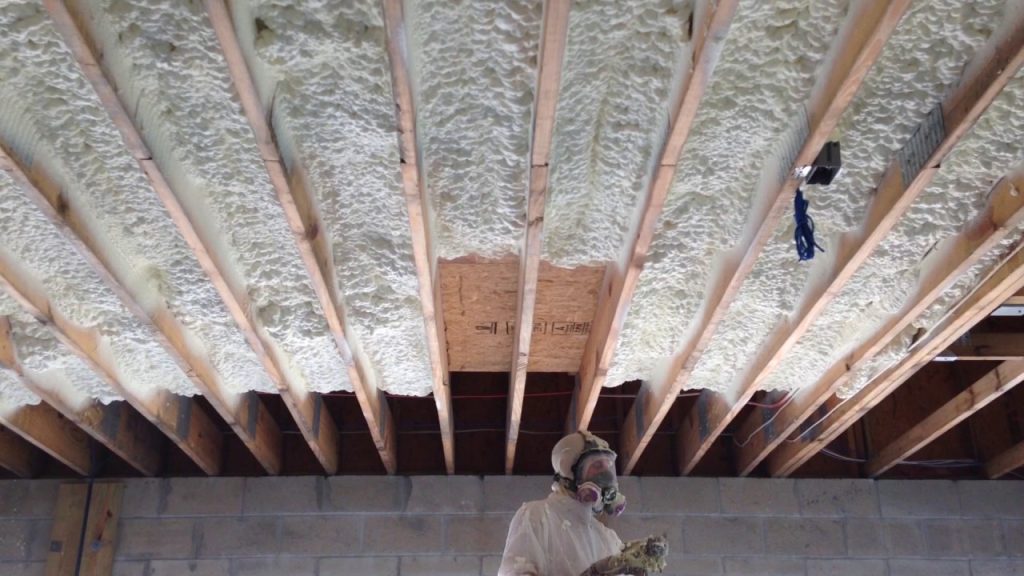
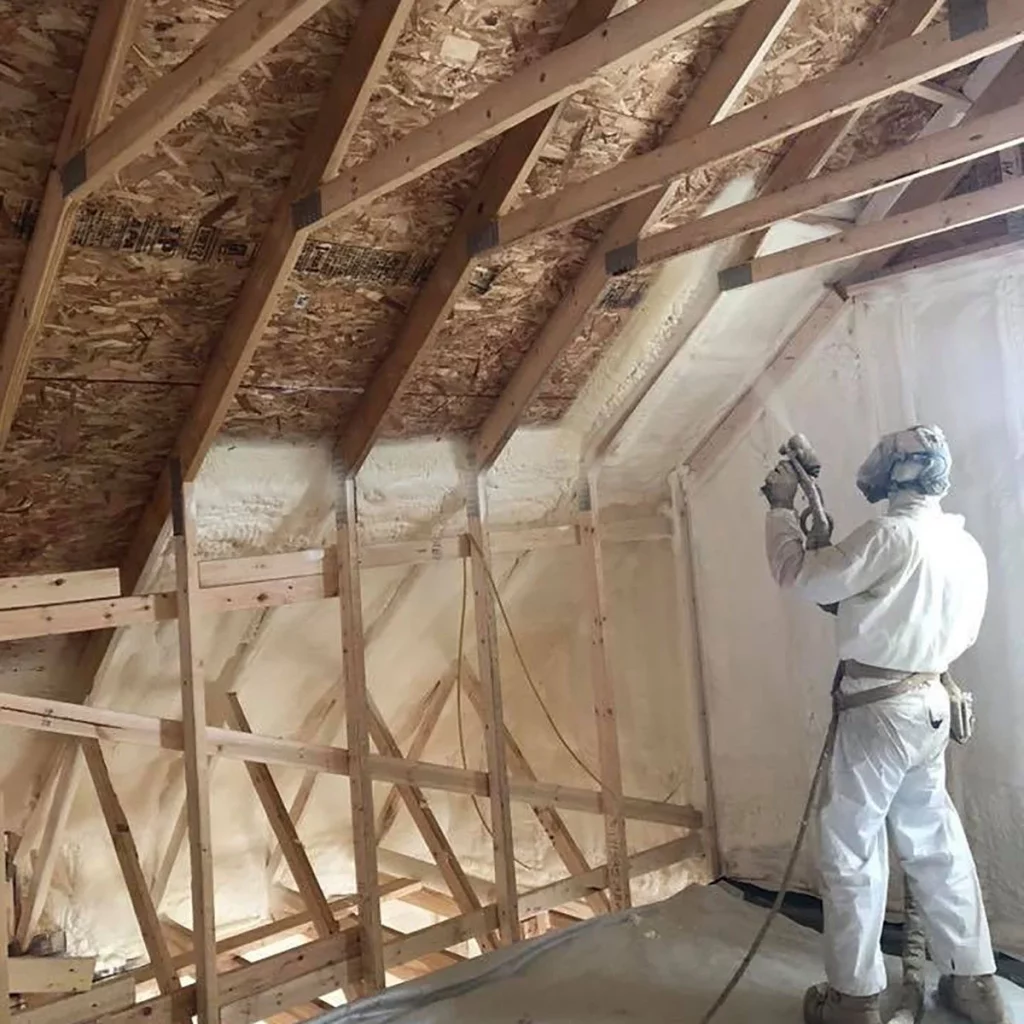
The installation process for spray foam insulation is typically handled by professionals. The foam is applied using specialized equipment that mixes the two chemical components on-site. Once the foam is sprayed onto the ceiling, it expands quickly and fills in any gaps, cracks, or voids.

Here’s an overview of the installation process:

  1. Preparation: Before applying the spray foam, the installation team will prepare the area by covering any surfaces or fixtures that don’t need to be insulated. This ensures a clean, precise application.
  2. Application: Using a spray gun, the foam is applied to the ceiling in thin layers. The foam expands almost immediately upon contact, filling every corner and crevice.
  3. Curing: After application, the foam needs time to cure and harden. This typically takes a few hours, depending on the type of foam used and the size of the area being insulated.
  4. Finishing Touches: Once the foam has cured, any excess material is trimmed away, leaving a smooth, even surface.

Tips for Choosing a Contractor

When selecting a contractor for your spray foam insulation for ceilings project, it’s essential to choose someone with experience and expertise in spray foam applications. Here are a few tips for finding the right contractor:

  1. Check for Certifications: Make sure the contractor is certified to install spray foam insulation and has the necessary licenses and insurance.
  2. Ask for References: Request references from previous clients to ensure that the contractor has a proven track record of successful installations.
  3. Get Multiple Quotes: It’s always a good idea to get quotes from several contractors to compare pricing and services.
  4. Ask About Warranties: Find out if the contractor offers any warranties on the insulation materials or installation work.

Conclusion: Boost Your Home’s Efficiency with Spray Foam Insulation For Ceilings

Spray foam insulation for ceilings is an excellent investment that can provide long-term energy savings, enhanced comfort, and improved structural integrity for your home. Whether you’re looking to insulate an attic, basement, or living space, spray foam’s versatility and high performance make it an ideal choice for modern homeowners.

By choosing the right type of spray foam and working with a qualified contractor, you can ensure that your home remains energy-efficient and comfortable year-round.

Spray Foam Insulation Basement Ceiling: Enhance Your Home’s Efficiency

When it comes to home insulation, the basement ceiling often gets overlooked. However, proper insulation in this area is crucial for improving energy efficiency, controlling moisture, and ensuring a comfortable living space. Spray foam insulation is one of the most effective solutions for insulating basement ceilings. This article will explore everything you need to know about Spray Foam Insulation for Basement Ceiling, including its benefits, installation process, and tips for maximizing your home’s energy efficiency.

Spray Foam Insulation Basement Ceiling

Understanding Spray Foam Insulation

What is Spray Foam Insulation?

Spray foam insulation is a versatile and efficient insulation material that expands upon application to fill gaps and create an airtight seal. It is made from a combination of isocyanate and polyol resin, which react to form a foam that hardens as it dries. There are two main types of spray foam insulation:

  1. Open-cell foam: This type is less dense, more flexible, and has a lower R-value per inch compared to closed-cell foam. It is ideal for areas where moisture control is less critical.
  2. Closed-cell foam: Denser and more rigid, closed-cell foam offers a higher R-value and is more effective at preventing moisture penetration, making it an excellent choice for basement ceilings.

Read too: Kitchen Lighting For A Vaulted Ceiling: Illuminating Your Space with Style and Functionality

Why Choose Spray Foam Insulation for Basement Ceilings?

Spray Foam Insulation for Basement Ceilings is particularly beneficial because it provides superior insulation compared to traditional materials like fiberglass or cellulose. Its ability to expand and fill even the smallest cracks ensures that your basement ceiling is well-sealed, reducing the risk of drafts, moisture infiltration, and heat loss.

Benefits of Spray Foam Insulation for Basement Ceilings

1. Enhanced Energy Efficiency

One of the most significant benefits of using Spray Foam Insulation for Basement Ceilings is its impact on energy efficiency. By creating an airtight seal, spray foam minimizes heat transfer between the basement and the rest of the house. This means your heating and cooling systems don’t have to work as hard, leading to lower energy bills and a more sustainable home.

2. Moisture Control

Basements are notorious for being damp and prone to mold growth. Spray foam insulation acts as a barrier to moisture, preventing water vapor from seeping through the ceiling and into your home. This not only protects your basement from mold and mildew but also preserves the structural integrity of your house.

3. Soundproofing

If you use your basement as a living space, home theater, or workshop, soundproofing can be essential. Spray foam insulation provides excellent sound-dampening properties, reducing noise transmission between the basement and upper levels of your home.

4. Improved Indoor Air Quality

By sealing off cracks and gaps, Spray Foam Insulation helps prevent dust, allergens, and pollutants from entering your home through the basement. This results in cleaner indoor air and a healthier living environment for you and your family.

5. Long-Term Durability

Spray foam insulation is highly durable and long-lasting. Once applied, it remains effective for decades without sagging or deteriorating, ensuring that your investment pays off over the long term.

Installation Process of Spray Foam Insulation for Basement Ceilings

Step 1: Preparation

Before applying spray foam insulation, it’s essential to prepare the basement ceiling. This includes cleaning the surface, removing any old insulation, and ensuring there are no leaks or structural issues that need addressing.

Step 2: Safety Precautions

Spray foam insulation requires proper safety precautions due to the chemicals involved in the process. Protective gear, such as masks, gloves, and eyewear, is necessary for anyone involved in the application. Additionally, the area should be well-ventilated to avoid inhaling fumes.

Step 3: Application of Spray Foam Insulation

The actual application of Spray Foam Insulation for Basement Ceilings involves using a spray foam kit or hiring professionals. The foam is sprayed directly onto the ceiling, where it expands to fill cavities and gaps. The key to effective insulation is ensuring an even and consistent application across the entire ceiling surface.

Step 4: Curing and Finishing

After application, the spray foam needs time to cure and harden. This process typically takes several hours, depending on the type of foam used. Once cured, you can trim any excess foam and cover it with drywall or another finish if desired.

Step 5: Post-Installation Inspection

A thorough inspection after installation is crucial to ensure that the insulation was applied correctly and that there are no missed spots or uneven areas. Any necessary touch-ups should be completed at this stage to guarantee optimal performance.

Common Challenges and Solutions

Dealing with Moisture and Mold

Even though Spray Foam Insulation is effective at controlling moisture, it’s essential to address any existing moisture problems before installation. Ensure that your basement is dry, and consider installing a vapor barrier if necessary to further protect against moisture.

Ensuring Proper Ventilation

While spray foam creates an airtight seal, proper ventilation is still necessary to maintain air quality and prevent condensation. Consider installing vents or exhaust fans to ensure adequate airflow in your basement.

Hiring Professionals vs. DIY

While DIY spray foam insulation kits are available, hiring a professional is often the best choice for basement ceilings. Professionals have the experience and equipment needed to ensure an even application, which is critical for achieving the full benefits of spray foam insulation.

Cost Considerations

Initial Investment

The cost of Spray Foam Insulation for Basement Ceilings can vary based on the size of your basement and the type of foam used. While the initial investment may be higher than traditional insulation materials, the long-term savings on energy bills and the added durability often make it a worthwhile investment.

Long-Term Savings

In addition to energy savings, Spray Foam Insulation can increase the resale value of your home due to its energy-efficient properties. Potential buyers may also appreciate the benefits of improved indoor air quality and soundproofing.

Financing Options

If the upfront cost is a concern, consider exploring financing options or rebates that may be available for energy-efficient home improvements. Many states and local governments offer incentives for homeowners who choose environmentally friendly insulation solutions.

Conclusion

Spray Foam Insulation for Basement Ceiling offers a range of benefits, from improved energy efficiency and moisture control to soundproofing and enhanced indoor air quality. While the installation process requires careful preparation and expertise, the long-term advantages make it a wise investment for homeowners looking to upgrade their insulation. Whether you choose to tackle the project yourself or hire a professional, spray foam insulation is an effective solution for creating a more comfortable and energy-efficient home.

Spray Foam Insulation for Basement Ceiling: The Comprehensive Guide

When it comes to optimizing the comfort and energy efficiency of your home, spray foam insulation for basement ceiling is a top choice. This innovative insulation method offers superior thermal resistance, noise reduction, and moisture control, making it ideal for basements. In this guide, we’ll delve into the benefits, installation process, and maintenance of spray foam insulation, helping you make an informed decision for your home.

Spray Foam Insulation For Basement Ceiling

What is Spray Foam Insulation?

Spray foam insulation is a type of insulation material that is applied as a liquid and then expands to form a solid, insulating layer. It is available in two primary types: open-cell and closed-cell spray foam. Each type has distinct properties and applications.

Types of Spray Foam Insulation

  1. Open-Cell Foam: This type of foam is less dense and has a softer, spongy texture. It is excellent for soundproofing and offers good thermal resistance. Open-cell foam is generally more affordable but has a lower R-value per inch compared to closed-cell foam.
  2. Closed-Cell Foam: Closed-cell foam is denser and more rigid. It provides a higher R-value per inch and is highly effective at preventing moisture infiltration. This type of foam is ideal for areas prone to high humidity or where a strong structural barrier is needed.

Read too: Bathroom Flooded Through the Ceiling: A Comprehensive Guide

Benefits of Spray Foam Insulation for Basement Ceiling

Choosing spray foam insulation for basement ceiling offers several advantages over traditional insulation materials. Here’s why it might be the right choice for your basement:

1. Superior Insulation Performance

Spray foam insulation provides excellent thermal resistance, which helps maintain a consistent temperature in your basement. It expands upon application, filling gaps and cracks that other insulation materials might miss, resulting in a more effective and energy-efficient insulation layer.

2. Moisture Barrier

Closed-cell spray foam insulation acts as a moisture barrier, preventing water vapor from penetrating the insulation and potentially causing mold or mildew. This is particularly beneficial in basements, where moisture can be a significant issue.

3. Soundproofing Properties

Open-cell spray foam insulation offers excellent soundproofing qualities. By reducing the transmission of sound between rooms, it creates a quieter, more peaceful environment. This is especially useful in homes with basements that are used as living spaces or home theaters.

4. Energy Efficiency

Spray foam insulation helps to reduce heating and cooling costs by creating a more airtight seal. This means your HVAC system will work more efficiently, leading to lower energy bills and a more comfortable living space.

5. Durability and Longevity

Spray foam insulation is durable and can last for many years without needing replacement. Unlike traditional fiberglass insulation, spray foam does not sag or settle over time, maintaining its insulating properties throughout its lifespan.

Installation Process for Spray Foam Insulation

Installing spray foam insulation for basement ceiling requires professional expertise due to the specialized equipment and techniques involved. Here’s an overview of the installation process:

1. Preparation

Before installation, the basement ceiling needs to be prepared. This includes cleaning the surface, removing any old insulation or debris, and ensuring that the area is dry and free of mold. Any necessary repairs should be made prior to insulation installation.

2. Measuring and Planning

The area to be insulated is measured to determine the amount of spray foam needed. The installation plan is created, including the type of spray foam to be used and the specific application techniques.

3. Application

During the application process, the spray foam is mixed and sprayed onto the ceiling. The foam expands upon contact, filling gaps and creating a seamless insulation layer. For best results, the application should be done in layers to ensure complete coverage and adequate thickness.

4. Curing

After application, the spray foam needs time to cure and expand fully. This typically takes a few hours, during which the area should be kept free of disturbance. Once cured, the foam will form a solid, insulating barrier.

5. Inspection and Cleanup

After the foam has cured, the installation is inspected to ensure proper coverage and adhesion. Any excess foam is trimmed, and the area is cleaned up. The finished product should provide a smooth, even insulation layer.

Maintenance of Spray Foam Insulation

Maintaining spray foam insulation for basement ceiling is relatively straightforward, but regular checks can help ensure it continues to perform effectively:

1. Inspect Regularly

Periodically inspect the insulation for any signs of damage or wear. Look for gaps, cracks, or areas where the foam may have shifted or settled. Address any issues promptly to maintain insulation performance.

2. Check for Moisture

Monitor the basement for any signs of moisture or leaks. While spray foam insulation provides a moisture barrier, it’s essential to ensure that no water is seeping into the basement. Address any sources of moisture to prevent damage to the insulation and underlying structures.

3. Clean as Needed

Keep the basement area clean and free of debris. Regular cleaning can help prevent any buildup of dust or dirt on the insulation surface, which could affect its performance.

4. Professional Inspections

Consider having a professional inspect the insulation periodically, especially if you notice any changes in your basement’s temperature or energy bills. A professional can assess the insulation’s condition and recommend any necessary repairs or upgrades.

Conclusion

Spray foam insulation for basement ceiling offers a range of benefits, from superior thermal performance and moisture control to enhanced soundproofing and energy efficiency. While the installation process requires professional expertise, the long-term advantages of spray foam insulation make it a valuable investment for improving the comfort and efficiency of your home.

By understanding the types of spray foam, the installation process, and maintenance tips, you can make an informed decision and enjoy the many benefits of this innovative insulation solution.

Spray Foam Garage Ceiling Solutions: Mastering Insulation

Transforming your garage into a functional and comfortable space goes beyond mere organization and storage solutions. Proper insulation plays a crucial role in maintaining a consistent temperature and energy efficiency. Among the various insulation options available, spray foam insulation for garage ceilings stands out as a versatile and effective solution. In this comprehensive guide, we’ll explore the benefits, installation process, and considerations for spray foam garage ceiling insulation, empowering you to create a more comfortable and energy-efficient garage space.

Spray Foam Garage Ceiling

Understanding Spray Foam Insulation

The Science Behind Spray Foam

Spray foam insulation is composed of two main components: polyurethane foam and a blowing agent. When these components are combined and sprayed onto a surface, they expand and create a seamless, airtight barrier that effectively seals gaps and cracks. This unique property makes spray foam insulation ideal for filling irregular spaces and achieving maximum insulation efficiency.

Types of Spray Foam Insulation

There are two primary types of spray foam insulation: open-cell and closed-cell. Open-cell spray foam is lighter and less dense, allowing for greater flexibility and sound absorption. Closed-cell spray foam, on the other hand, is denser and provides superior insulation properties, making it ideal for areas with high moisture levels or structural support requirements.

Read too: Understanding and Dealing with Ants in the Ceiling Spaces: Navigating the Intrusion

Benefits of Spray Foam Garage Ceiling Insulation

  1. Superior Insulation Performance: Spray foam insulation forms a seamless barrier that effectively seals gaps and cracks, preventing air leakage and heat transfer. This results in better temperature control and reduced energy consumption, leading to lower utility bills.
  2. Moisture Resistance: Closed-cell spray foam insulation is impermeable to moisture, making it resistant to mold, mildew, and moisture-related damage. This is particularly beneficial in garage environments where moisture infiltration is a common concern.
  3. Sound Dampening: Spray foam insulation provides excellent soundproofing properties, reducing noise transmission from outside sources and minimizing echoes within the garage. This is advantageous for homeowners who use their garage as a workshop, home gym, or entertainment area.
  4. Long-Term Durability: With proper installation and maintenance, spray foam insulation can last for decades without losing its effectiveness. This long-term durability ensures consistent insulation performance and peace of mind for homeowners.

Installation Process

Preparing the Garage Space

Before applying spray foam insulation to the garage ceiling, it’s essential to prepare the space properly. This includes clearing out any items or debris from the area and ensuring that the ceiling surface is clean and free of moisture.

Applying the Spray Foam Insulation

The application of spray foam insulation should be performed by trained professionals to ensure proper coverage and adhesion. The insulation is sprayed onto the ceiling surface in multiple layers, allowing it to expand and create a seamless barrier.

Curing and Drying

After the spray foam insulation is applied, it undergoes a curing and drying process to harden and form a solid barrier. Depending on the type of insulation used and environmental conditions, this process may take several hours to complete.

Finishing Touches

Once the spray foam insulation is fully cured, any excess foam can be trimmed and the ceiling surface can be finished according to the homeowner’s preference. This may include painting or sealing the ceiling to enhance its appearance and durability.

Conclusion

Spray foam garage ceiling insulation offers numerous benefits for homeowners looking to enhance comfort, energy efficiency, and durability. It seals gaps, blocks moisture, and provides excellent insulation. This transforms the garage into a more functional and inviting space, whether it’s used for work, storage, or living. Investing in spray foam insulation is a wise choice, delivering long-term comfort and savings.

Exploring the Wonders of Spray Foam on Ceiling for Ultimate Insulation: Unlocking the Benefits

Spray foam insulation has become a game-changer in the world of home improvement, and its application on ceilings is gaining widespread attention. In this detailed exploration, we will delve into the advantages, considerations, and process of using “Spray Foam On Ceiling” for enhanced insulation. If you’re curious about upgrading your home’s insulation, this guide is a must-read.

Spray Foam On Ceiling

Understanding the Power of Spray Foam on Ceiling:

Spray foam insulation involves the application of a specialized material that expands and hardens, creating a seamless and airtight barrier. When applied to ceilings, this method offers a range of benefits that go beyond traditional insulation methods.

Let’s dive into the specifics of using spray foam on ceilings, exploring its advantages, considerations, and the step-by-step process for a successful application.

Advantages of Spray Foam on Ceiling:

  1. Seamless Coverage:
    • Unlike traditional insulation materials, spray foam expands to fill gaps and crevices, providing a seamless and airtight barrier. This ensures that every inch of your ceiling is effectively insulated.
  2. High R-Value:
    • Spray foam insulation boasts a high R-value, indicating its exceptional thermal resistance. This means it effectively resists heat transfer, keeping your home comfortable and energy-efficient.
  3. Moisture Resistance:
    • Spray foam creates a moisture-resistant barrier, preventing issues like mold and mildew growth. This is particularly advantageous in areas prone to high humidity levels.
  4. Longevity and Durability:
    • Once applied, spray foam insulation is known for its longevity and durability. It doesn’t settle or compress over time, maintaining its effectiveness for years.

Considerations Before Application:

Before opting for spray foam on your ceiling, there are several considerations to keep in mind to ensure a successful application.

  1. Professional Installation:
    • While some homeowners may consider DIY insulation projects, professional installation is highly recommended for spray foam. Trained technicians ensure proper application and safety.
  2. Ventilation Requirements:
    • Adequate ventilation is crucial during and after the application process. Ensure proper airflow to allow the foam to cure and release any off-gassing.
  3. Budget Considerations:
    • Spray foam insulation tends to be more expensive than traditional options. However, the long-term benefits often outweigh the initial investment. Consider your budget and the potential energy savings.

The Application Process:

Now, let’s explore the step-by-step process of applying spray foam on your ceiling for optimal insulation.

  1. Preparation:
    • Clear the area of any obstacles and ensure proper ventilation. Cover surfaces that should not receive the foam, such as windows and doors.
  2. Safety Gear:
    • Wear appropriate safety gear, including protective clothing, goggles, and a respirator, as spray foam can be irritating to the skin and eyes.
  3. Application:
    • Using specialized equipment, apply the spray foam evenly across the ceiling. Ensure uniform coverage, especially in corners and edges.
  4. Curing Time:
    • Allow the foam to cure as per the manufacturer’s instructions. During this time, proper ventilation is essential to dissipate any fumes.
  5. Inspection:
    • After the foam has cured, inspect the application to ensure even coverage. Trim any excess foam if necessary.

Read too: How Gutters Causing Ceiling Leak Can Wreak Havoc in Your Home? Unveiling the Hidden Dangers

Conclusion:

In conclusion, considering “Spray Foam On Ceiling” for insulation is a wise decision for homeowners looking to enhance energy efficiency and comfort. By understanding the advantages, considerations, and application process, you can make informed choices when it comes to upgrading your home’s insulation. Always prioritize professional installation for optimal results and long-term benefits.

Exploring the Wonders of Spray Foam on Attic Ceiling for Energy Efficiency: Unveiling the Benefits

The use of spray foam on attic ceilings has become a game-changer in the realm of home insulation. Homeowners seeking energy-efficient solutions are turning to this innovative method to enhance insulation and reduce energy costs. In this comprehensive guide, we’ll delve into the world of “Spray Foam on Attic Ceiling,” exploring its benefits, installation process, and why it’s gaining popularity among savvy homeowners.

Spray Foam On Attic Ceiling

Understanding Spray Foam on Attic Ceiling

What is Spray Foam Insulation? Spray foam insulation is a cutting-edge material renowned for its exceptional thermal resistance properties. When applied to the attic ceiling, it creates a seamless barrier that prevents heat loss or gain, resulting in a more comfortable and energy-efficient home.

Advantages of Using Spray Foam on Attic Ceilings

1. Improved Energy Efficiency:

The primary advantage lies in its ability to seal every nook and cranny, leaving no room for air leaks. This tight seal significantly reduces the workload on your heating and cooling systems, leading to lower energy bills.

2. Enhanced Comfort:

Spray foam provides consistent insulation, ensuring a more comfortable living space year-round. Say goodbye to cold spots in winter and sweltering areas in summer – enjoy a balanced indoor temperature.

3. Moisture Control:

Unlike traditional insulation materials, spray foam is resistant to moisture. This prevents the growth of mold and mildew, safeguarding your home’s structural integrity.

4. Longevity and Durability:

Once applied, spray foam can last for several decades without losing its effectiveness. It adheres firmly to surfaces, providing a durable and long-lasting solution for your attic insulation needs.

The Installation Process: Spray Foam on Attic Ceiling

  1. Preparation: Before application, the attic space is thoroughly inspected for any existing issues. Repairs are made, and the area is prepped for the spray foam installation.
  2. Application: Professional installers use specialized equipment to apply the spray foam evenly across the attic ceiling. The foam expands to fill gaps and creates a seamless barrier.
  3. Curing: After application, the foam undergoes a curing process, during which it hardens and forms a protective layer. This process is relatively quick, allowing homeowners to enjoy the benefits promptly.

Read too: Is Bathroom Ceiling Mold Dangerous to Your Health and Home? Unveiling the Threat

Common Concerns and Solutions

1. Cost Considerations:

While the initial cost of spray foam insulation may be higher than traditional options, its long-term energy savings often outweigh the upfront investment.

2. DIY vs. Professional Installation:

While some may consider a DIY approach, professional installation is recommended for optimal results. Trained experts ensure proper application and adherence to safety standards.

Conclusion

In conclusion, the application of spray foam on attic ceilings is a wise investment for homeowners seeking to enhance energy efficiency and overall comfort. The benefits, including improved insulation, moisture control, and durability, make it a popular choice in the realm of home improvement. If you’re contemplating ways to upgrade your home’s insulation and reduce energy costs, considering spray foam on your attic ceiling is a step in the right direction. Embrace the future of insulation and transform your attic into a well-insulated space that contributes to a more sustainable and cost-effective home.

Can You Spray Foam Attic Ceiling?

If you’re looking for a way to improve the insulation in your attic, spray foam is a great option. Spray foam is a type of insulation that is applied as a liquid and expands to fill all the nooks and crannies in your attic. This can help to seal up air leaks and improve energy efficiency.

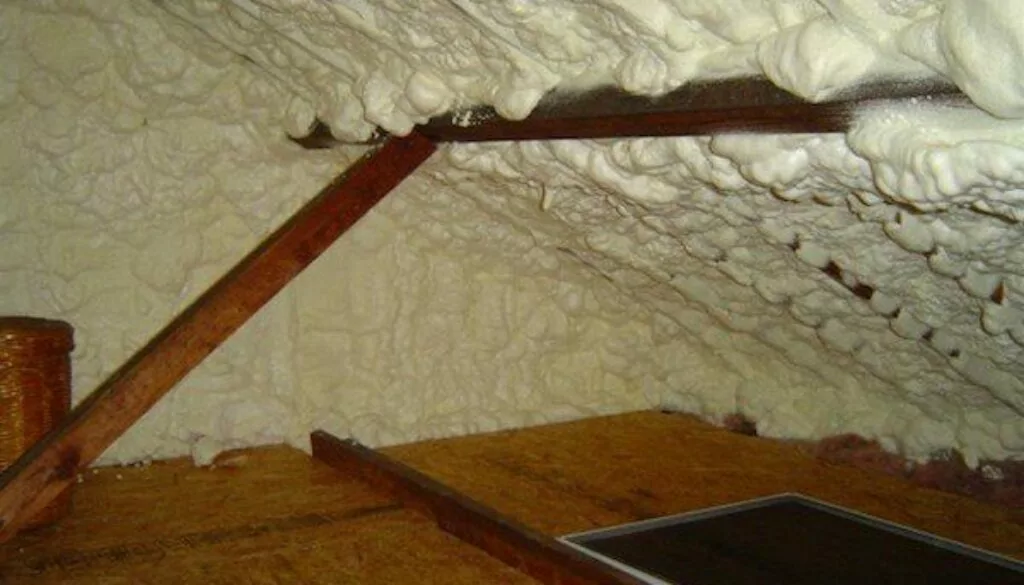
One of the most common questions about spray foam is whether it can be applied to attic ceilings. The answer is yes, spray foam can be applied to attic ceilings. In fact, it is one of the most effective ways to insulate an attic ceiling.

Can You Spray Foam Attic Ceiling

Can Spray Foam Be Applied to Attic Ceilings?

Yes, spray foam can be applied to attic ceilings. In fact, it is one of the most effective ways to insulate an attic ceiling. Spray foam is a versatile insulation that can be applied to a variety of surfaces, including ceilings, walls, and floors.

Benefits of Spray Foam Attic Ceilings

There are many benefits to using spray foam for attic ceilings. Some of the benefits include:

  • Improved energy efficiency: Spray foam can help to seal up air leaks and improve energy efficiency. This can save you money on your energy bills.
  • Reduced noise levels: Spray foam can help to reduce noise levels in your home. This can make your home more comfortable and peaceful.
  • Improved comfort: Spray foam can help to keep your home cooler in the summer and warmer in the winter. This can make your home more comfortable to live in.

How to Apply Spray Foam to Attic Ceilings

Applying spray foam to attic ceilings is a job that is best left to a professional. A professional will have the experience and expertise to apply the foam correctly.

The process of applying spray foam to attic ceilings typically involves the following steps:

  1. Preparing the attic: The attic will need to be cleaned and cleared of any debris.
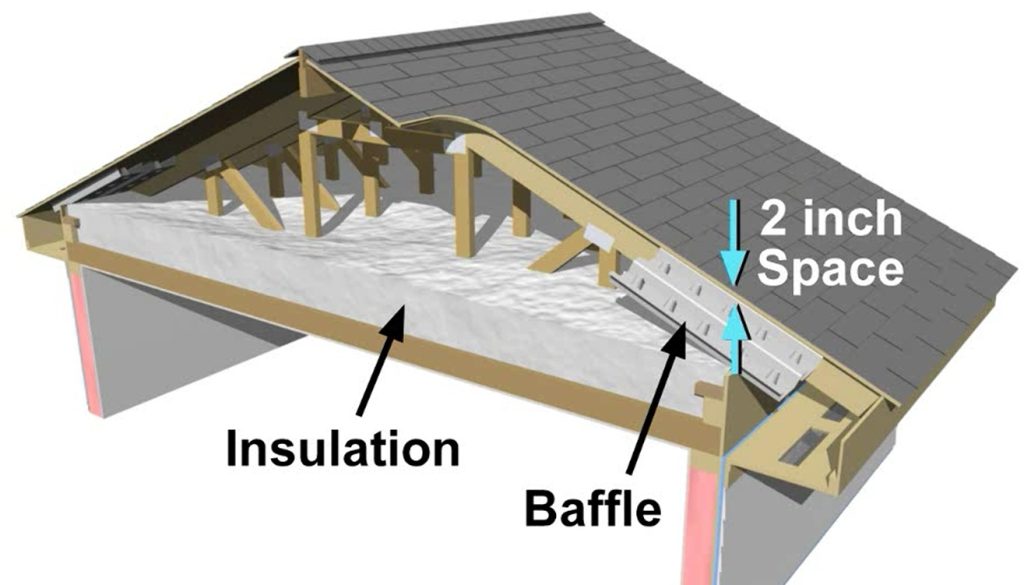
  2. Installing baffles: Baffles are installed to help prevent the foam from blocking the soffit vents.
  3. Applying the foam: The foam is applied using a special sprayer.
  4. Finishing the job: Once the foam has cured, the attic can be cleaned up.

Cost of Spray Foam Attic Ceilings

The cost of spray foam attic ceilings varies depending on the size of the attic and the type of foam that is used. In general, spray foam attic ceilings are more expensive than other types of insulation.

Conclusion

If you’re looking for a way to improve the insulation in your attic, spray foam is a great option. Spray foam can be applied to attic ceilings and offers a number of benefits, including improved energy efficiency, reduced noise levels, and improved comfort.

Additional Information

  • Spray foam is a type of insulation that is applied as a liquid and expands to fill all the nooks and crannies in your attic. This is important because it helps to seal up air leaks, which can account for up to 30% of heat loss in a home.
  • Spray foam can help to reduce noise levels by up to 50%. This is because it creates a solid barrier that blocks sound waves.
  • Spray foam can help to keep your home cooler in the summer and warmer in the winter. This is because it helps to trap heat and cold air inside your home.
  • Applying spray foam to attic ceilings is a job that is best left to a professional. This is because it requires specialized equipment and expertise.

Additional Examples

Here are some examples of how spray foam can be used to improve the insulation in an attic ceiling:

  • In a home with a vented attic, spray foam can be applied to the underside of the roof sheathing. This will help to seal up air leaks and improve energy efficiency.
  • In a home with an unvented attic, spray foam can be applied to the attic floor. This will help to create a solid barrier that blocks heat and cold air from escaping.
  • In a home with a cathedral ceiling, spray foam can be applied to the underside of the rafters. This will help to improve energy efficiency and reduce noise levels.

Read too: Should You Insulate Your Garage Ceiling

Conclusion

Spray foam is a versatile and effective insulation that can be used to improve the insulation in an attic ceiling. It offers a number of benefits, including improved energy efficiency, reduced noise levels, and improved comfort.tunesharemore_vert

Understanding the Air Gap Between Ceiling and Insulation

When it comes to your home’s insulation, the space between your ceiling and insulation is often overlooked. However, this air gap can significantly impact your home’s energy efficiency, comfort, and even your utility bills. In this article, we will delve into the concept of the air gap between your ceiling and insulation, explaining what it is, why it matters, and how to address it effectively.

Air Gap Between Ceiling And Insulation

What Is the Air Gap Between Ceiling and Insulation?

The air gap between your ceiling and insulation refers to the space or void that exists between the uppermost layer of insulation and the material covering it, which is typically the ceiling. This gap can vary in size, and its presence can result from several factors, such as improper insulation installation or gaps left during construction.

Why Does the Air Gap Matter?

The air gap between your ceiling and insulation matters for several reasons:

1. Reduced Energy Efficiency

If your home has a significant air gap between the ceiling and insulation, it can result in reduced energy efficiency. Warm or cool air can escape through this gap, leading to higher energy bills as your HVAC system works harder to maintain the desired temperature.

2. Temperature Variations

An air gap can cause temperature variations within your home. Rooms with a wider air gap may feel drafty or have inconsistent temperatures, making your living spaces less comfortable.

3. Condensation and Moisture Issues

In humid climates, the presence of an air gap can lead to condensation problems. Moisture may accumulate within the gap, potentially causing mold, mildew, and even structural damage over time.

Addressing the Air Gap

Now that we understand why the air gap between the ceiling and insulation is important, let’s explore how to address it:

1. Insulation Retrofit

One effective solution is to retrofit additional insulation. You can add more insulation material to fill the gap and improve the energy efficiency of your home. This is typically done by installing insulation over the existing layer to eliminate the air gap.

2. Spray Foam Insulation

Spray foam insulation is an excellent option for sealing air gaps. It can be sprayed directly into the gap, effectively sealing it and providing a moisture barrier. This method not only enhances energy efficiency but also helps prevent moisture-related issues.

3. Air Sealing

Properly sealing any gaps or cracks in the ceiling can minimize the air gap’s size. Use caulk or weatherstripping to seal any openings around light fixtures, ceiling fans, or other penetrations in the ceiling.

4. Professional Assessment

If you’re unsure about the extent of the air gap and how to address it, consider hiring a professional insulation contractor. They can assess your home’s insulation needs and recommend the most appropriate solutions.

Read too: How Much Ceiling Height For Treadmill

Conclusion

The air gap between your ceiling and insulation is a critical factor in your home’s energy efficiency, comfort, and overall well-being. By addressing this gap through insulation retrofits, spray foam insulation, air sealing, or professional assessment, you can improve your home’s insulation and enjoy a more comfortable, energy-efficient living environment. Don’t overlook this important aspect of your home’s insulation; it can make a significant difference in your comfort and energy bills.