Exploring What Causes Ceiling Cracks and How to Address Them: Unveiling the Mysteries

Ceiling cracks can be a worrisome sight. Dive into the depths of understanding “What Causes Ceiling Cracks” and discover effective solutions to maintain the structural integrity of your living space.
What Causes Ceiling Cracks

Introduction

The appearance of cracks on your ceiling can trigger concerns about the structural stability of your home. In this in-depth exploration, we will unravel the mysteries behind “What Causes Ceiling Cracks” and provide valuable insights into preventive measures and solutions for this common issue.

Understanding What Causes Ceiling Cracks

1. Natural Settlement:

  • Over time, buildings undergo natural settlement, causing materials to shift and potentially leading to minor cracks in ceilings.

2. Temperature Fluctuations:

  • Extreme temperature changes, especially in regions with harsh climates, can cause materials to expand and contract, resulting in cracks.

3. Humidity and Moisture:

Types of Ceiling Cracks

1. Hairline Cracks:

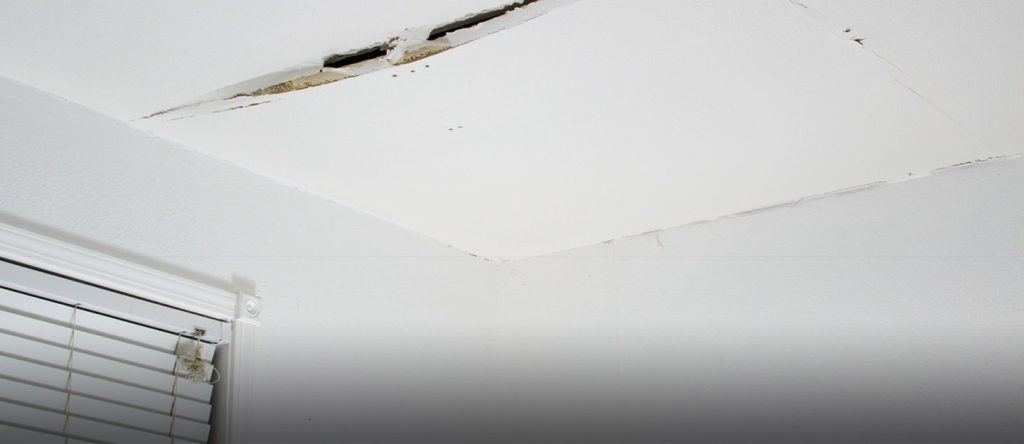
  • Thin, superficial cracks often caused by settling and generally not indicative of severe structural issues.

2. Vertical Cracks:

  • Commonly associated with settling or foundation movement, vertical cracks may require closer inspection.

3. Diagonal Cracks:

  • Diagonal cracks can signify more significant structural movement and may necessitate professional assessment.

What Causes Ceiling Cracks: Unraveling the Factors

Ceiling cracks can result from a combination of various factors. Understanding these elements is crucial in determining the appropriate course of action.

1. Structural Issues:

  • Foundation settlement or movement can exert stress on the structure, leading to cracks in the ceilings.

2. Poor Construction Practices:

  • Inadequate construction techniques or the use of subpar materials during the building process can contribute to ceiling cracks.

3. Inadequate Support:

  • Ceilings without proper support, such as insufficient joists or beams, are more susceptible to developing cracks.

Addressing and Preventing Ceiling Cracks

1. Fill and Seal Hairline Cracks:

  • For minor, hairline cracks, use a suitable filler and sealant to prevent further expansion.

2. Address Underlying Issues:

  • If cracks persist or worsen, consult with a structural engineer to identify and address underlying issues.

3. Maintain Consistent Humidity Levels:

  • Use dehumidifiers to control indoor humidity, preventing excessive expansion and contraction of materials.

Preventive Measures for Long-Term Stability

1. Regular Inspections:

  • Conduct routine inspections to identify potential issues before they escalate.

2. Proper Ventilation:

  • Ensure adequate ventilation to regulate temperature and humidity levels within the home.

3. Professional Consultation:

  • Seek professional advice during the construction or renovation process to ensure proper structural support.

Read too: Understanding and Addressing a Leaky Ceiling in Your Apartment: Navigating the Drips

Conclusion

Understanding “What Causes Ceiling Cracks” is essential for maintaining the structural integrity and aesthetic appeal of your home. By identifying the contributing factors, addressing issues promptly, and implementing preventive measures, you can ensure a stable and resilient ceiling structure. Whether you are dealing with hairline cracks or more significant issues, taking a proactive approach to ceiling maintenance will contribute to the long-term stability of your living space.
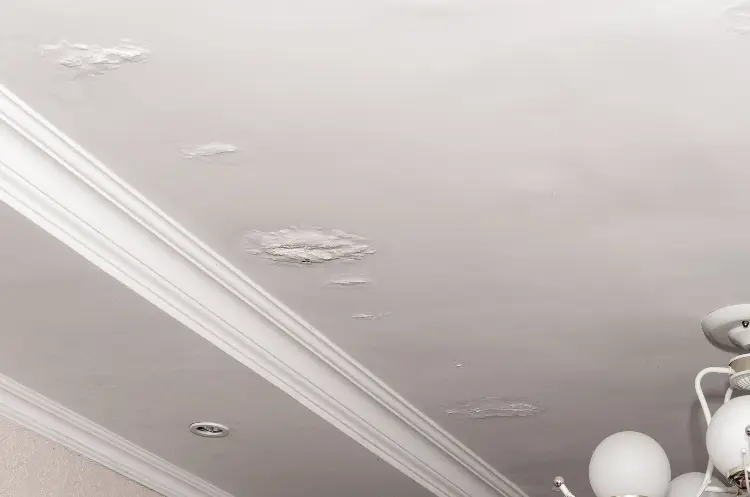
Understanding and Addressing Condensation on the Ceiling: Unraveling the Mystery

Condensation on the ceiling can be more than just a visual nuisance; it might indicate underlying issues. Delve into the intricacies of “Condensation on the Ceiling” to comprehend its causes, implications, and effective solutions for a healthier home environment.

Condensation On The Ceiling

Exploring the Causes: Condensation on the Ceiling

Understanding the Science of Condensation

In this section, we’ll unravel the science behind condensation on the ceiling. Explore how warm air meets a cold surface, leading to water vapor turning into liquid droplets. Understand the role of temperature differentials and humidity levels in creating the perfect conditions for condensation to occur.

Condensation on the Ceiling: Common Culprits

Poor Ventilation and Stagnant Air

Explore how poor ventilation contributes to condensation. Understand the importance of proper air circulation in preventing the buildup of moisture. Delve into the impact of stagnant air and how it can lead to condensation issues in various areas of your home.

Addressing the Issue: Condensation on the Ceiling Solutions

Improving Ventilation Systems

In this section, explore solutions to combat condensation by enhancing ventilation systems. Understand how installing exhaust fans, improving air circulation, and ensuring proper ventilation in key areas can mitigate condensation. Gain insights into the role of ventilation in maintaining a balanced and moisture-free environment.

Potential Risks and Damages

Mold and Mildew Concerns

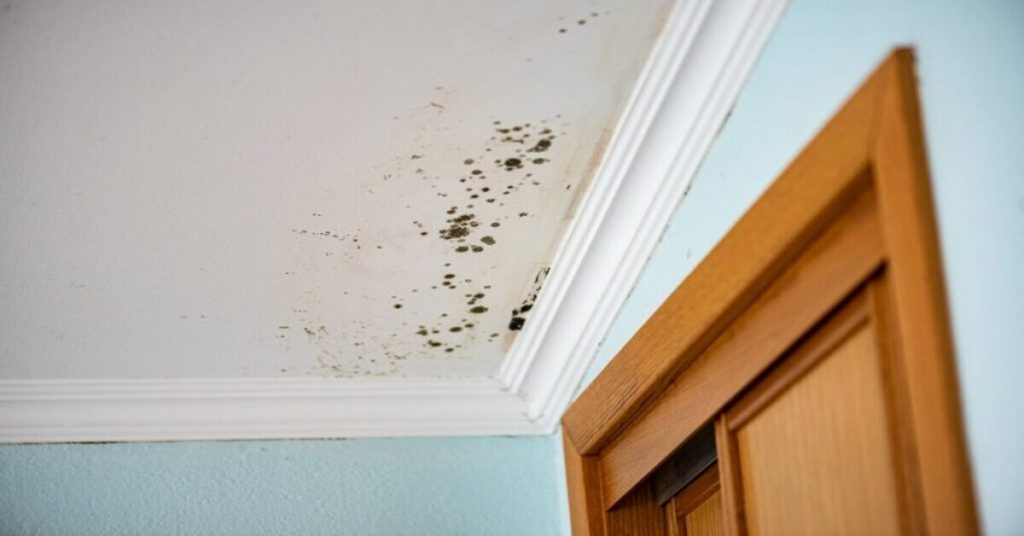
Delve into the potential risks associated with condensation, particularly the growth of mold and mildew. Understand how the excess moisture provides an ideal breeding ground for these harmful organisms. Explore the health implications and structural damages that can arise if condensation issues are left unaddressed.

Preventive Measures:

Controlling Indoor Humidity Levels

Explore preventive measures to avoid condensation by controlling indoor humidity levels. Understand the recommended humidity range for optimal comfort and how using dehumidifiers can help regulate moisture. Delve into the importance of maintaining a balance to prevent condensation-related problems.

Seasonal Considerations

Winter vs. Summer Challenges

In this section, explore how condensation varies with seasons. Understand the challenges posed by winter and the potential for condensation on colder surfaces. Delve into how summer brings its own set of issues, including humidity levels that can contribute to ceiling condensation. Gain insights into seasonal adjustments to mitigate these challenges.

Professional Intervention: Seeking Help for Condensation on the Ceiling

Consulting with Experts

Explore scenarios where professional intervention might be necessary to address condensation. Understand the role of experts in assessing the severity of the issue, identifying underlying problems, and recommending targeted solutions. Delve into the importance of timely and thorough assessments for a lasting resolution.

Read too: Transforming Your Home’s Elegance with a Smooth Ceiling After Popcorn Removal: Elevate Your Space

Conclusion: Navigating a Condensation-Free Living Space

In conclusion, the presence of condensation warrants attention and proactive measures. By understanding the causes, implementing preventive strategies, and seeking professional guidance when needed, homeowners can create a living space that is free from the issues associated with ceiling condensation.

This comprehensive guide aims to empower homeowners with knowledge on addressing and preventing condensation on the ceiling for a healthier and more comfortable living environment.

Understanding and Addressing Moisture Spots on Ceiling: A Comprehensive Guide

Moisture spots on the ceiling can be more than a cosmetic concern; they might signal underlying issues. Let’s delve into the intricacies of “Moisture Spots On Ceiling,” exploring their causes, implications, and effective solutions to ensure a healthy and well-maintained living space.

Moisture Spots On Ceiling

Unveiling the Culprit

Leaky Roofs and Plumbing Issues

In this section, we’ll uncover the common causes behind moisture spots. From leaky roofs to plumbing issues, understanding these culprits is crucial for addressing the root of the problem.

Signs and Symptoms

Discoloration, Stains, and Peeling Paint

Explore the signs and symptoms of moisture spots. Discoloration, stains, and peeling paint are indicators that shouldn’t be ignored. Recognizing these signs early can lead to prompt intervention.

Assessing the Damage: Moisture Spots On Ceiling Evaluation

Professional Inspections and DIY Checks

This section highlights the importance of assessing the damage caused by moisture spots. Whether through professional inspections or DIY checks, understanding the extent of the issue is crucial for effective remediation.

Immediate Remediation Steps

Temporary Fixes and Preventive Measures

Delve into immediate remediation steps to address moisture spots. From temporary fixes to preventive measures, explore actions you can take to halt further damage while planning for comprehensive repairs.

Long-Term Solutions: Battling Moisture Spots On Ceiling

Roof Repairs, Proper Ventilation, and Waterproofing

Explore long-term solutions to combat moisture spots. From roof repairs to ensuring proper ventilation and waterproofing, understanding these solutions is essential for maintaining a dry and healthy living environment.

Read too: Transforming Your Home’s Elegance with a Smooth Ceiling After Popcorn Removal: Elevate Your Space

The Role of Professional Assistance

Consulting Experts and Contractors

This section outlines the role of professional assistance in dealing with moisture spots. From consulting experts to engaging contractors, understanding when and how to seek professional help is vital for a successful resolution.

Preventive Measures: Safeguarding Against Moisture Spots On Ceiling

Regular Inspections and Humidity Control

Explore preventive measures to safeguard against moisture spots. Regular inspections and humidity control can play a significant role in preventing the recurrence of issues, ensuring the long-term integrity of your ceilings.

Conclusion: Maintaining a Moisture-Free Living Space

In conclusion, addressing “Moisture Spots On Ceiling” requires a comprehensive approach. By recognizing causes, understanding signs, and implementing both immediate and long-term solutions, homeowners can ensure a dry, safe, and well-maintained living space.

This comprehensive guide aims to empower homeowners with knowledge on identifying, addressing, and preventing issues related to moisture spots on the ceiling. Safeguard your home investment by taking proactive steps to secure the integrity of your ceilings and ensure a healthy living environment.

A Comprehensive Above Ceiling Inspection Checklist for Homeowners: Mastering Maintenance

Homeowners often overlook the space above their ceilings when it comes to routine inspections. In this comprehensive guide, we present the “Above Ceiling Inspection Checklist,” an essential tool for ensuring the health and longevity of your home. Explore the key components to inspect, potential issues, and preventive measures to keep your space in top-notch condition.

Above Ceiling Inspection Checklist

Unveiling the Above Ceiling Inspection Checklist: A Homeowner’s Guide

Let’s dive into the details of the Above Ceiling Inspection Checklist, covering crucial aspects to examine for a well-maintained home.

Key Components of Above Ceiling Inspection Checklist:

  1. Insulation Integrity:
    • Assess the condition of insulation materials above the ceiling. Look for signs of wear, damage, or areas where insulation may have shifted.
  2. Electrical Wiring:
    • Inspect electrical wiring for any visible issues such as exposed wires, fraying, or outdated components. Ensure that wiring is organized and adheres to safety standards.
  3. Plumbing Systems:
  4. HVAC Ductwork:
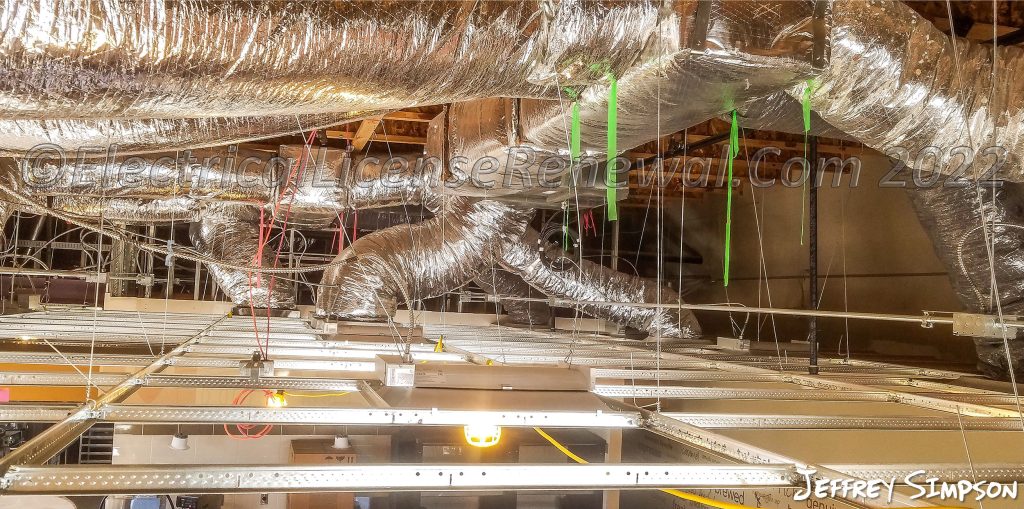
    • Examine the HVAC ductwork for leaks, damage, or signs of deterioration. Properly functioning ducts are crucial for maintaining indoor air quality.
  5. Structural Integrity:
    • Look for any signs of sagging, cracks, or other structural issues in the above-ceiling space. Addressing these concerns early can prevent more significant problems.

Read too: How Gutters Causing Ceiling Leak Can Wreak Havoc in Your Home? Unveiling the Hidden Dangers

Potential Issues to Look Out For:

Identifying Common Issues with Above Ceiling Inspection Checklist

Understanding the potential issues that may arise during an above-ceiling inspection is crucial for effective maintenance.

  1. Mold and Mildew:
    • Check for any signs of mold or mildew growth, especially in areas prone to moisture. Addressing these issues promptly is essential for indoor air quality.
  2. Pest Infestations:
    • Inspect for signs of pests or rodents that may have infiltrated the above-ceiling space. Addressing pest issues promptly prevents damage and health concerns.
  3. Inadequate Ventilation:
    • Ensure proper ventilation in the above-ceiling space to prevent moisture buildup, which can lead to mold growth and compromise the integrity of materials.
  4. Insulation Compaction:
    • Over time, insulation may compact or settle, reducing its effectiveness. Check for areas where insulation may need to be replenished or redistributed.

Preventive Measures:

Proactive Steps for a Healthy Above Ceiling Space

Implementing preventive measures is key to maintaining a healthy above-ceiling space and avoiding potential issues.

  1. Regular Inspections:
    • Schedule regular above-ceiling inspections to catch issues early and prevent extensive damage.
  2. Proper Ventilation:
    • Ensure adequate ventilation to prevent moisture buildup and maintain a healthy environment.
  3. Sealing Gaps:
    • Seal any gaps or openings that may allow pests or outside elements to enter the above-ceiling space.
  4. Insulation Maintenance:
    • Periodically check and maintain insulation to ensure it remains effective in regulating temperature and reducing energy costs.

Conclusion:

In conclusion, the “Above Ceiling Inspection Checklist” is a valuable tool for homeowners committed to maintaining a healthy and well-functioning home. By regularly inspecting key components, identifying potential issues, and implementing preventive measures, you can ensure that your above-ceiling space contributes to the overall comfort, safety, and longevity of your home.

Dealing with Drips: Water Leaking From AC Vent in Ceiling

The sound of water dripping in your home can be concerning, and when it’s coming from an AC vent in your ceiling, it’s a clear sign that something is amiss. This article will guide you through the common causes of water leaking from an AC vent in the ceiling, how to identify the issue, and steps to remedy it.

Water Leaking From Ac Vent In Ceiling

Understanding the Causes

Water leaking from an AC vent is not only annoying but also potentially damaging to your home. To address the issue, you first need to understand what might be causing it:

  1. Condensation Buildup: One of the primary causes of water dripping from AC vents is condensation. When warm, moist air meets the cold air inside your air conditioning system, condensation can form and lead to dripping.
  2. Clogged Drain Line: The AC unit has a drain line that removes excess condensation. If this drain line becomes clogged or damaged, it can lead to water backing up and dripping from the vent.
  3. Refrigerant Leak: A refrigerant leak can cause your AC unit to freeze over, resulting in excess water when it thaws. This water may find its way into the vent.

Identifying the Issue

If you notice water dripping from an AC vent in your ceiling, it’s crucial to identify the root cause. Here are some steps to help you pinpoint the problem:

  1. Inspect the Condensation: Check if the water dripping is clear and cold. If it is, the issue is likely condensation. This usually happens in hot and humid weather.
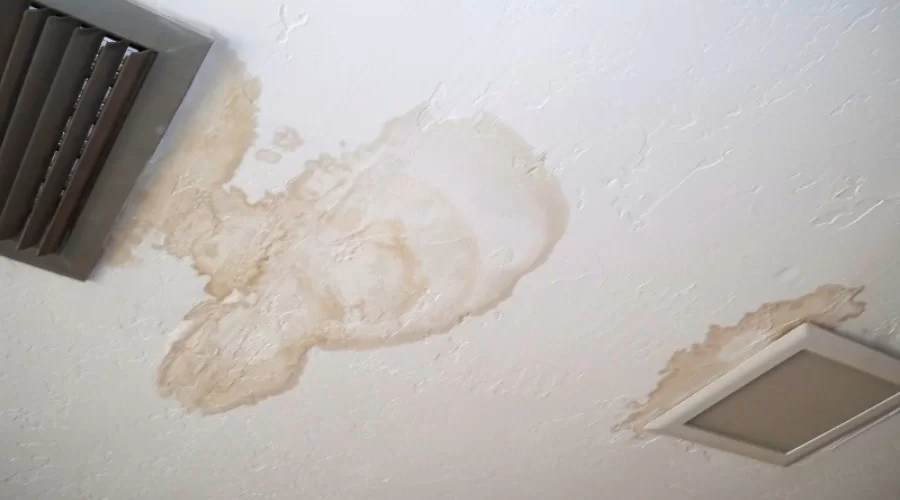
  2. Examine the Vent Grille: Look at the vent grille and its surroundings. If you see water stains, it can indicate a recurring issue.
  3. Check the AC Unit: Inspect the AC unit, specifically the drain line. Ensure it is not clogged, disconnected, or damaged.
  4. Schedule Professional Inspection: If you’re unable to determine the cause or it involves complex internal components, it’s best to call a professional HVAC technician to inspect your system.

Read too: What To Do About Mice In Ceiling

Remedying the Issue

Once you’ve identified the cause of the water leakage, you can take appropriate steps to remedy it:

  1. Condensation Buildup: If condensation is the problem, you can reduce it by lowering the thermostat temperature or installing a dehumidifier in your home. Proper insulation and sealing ductwork can also help.
  2. Clogged Drain Line: If the drain line is clogged, you can try flushing it with a mixture of water and vinegar or by using a wet/dry vacuum. However, it’s advisable to have a professional handle this to avoid further damage.
  3. Refrigerant Leak: If the issue is a refrigerant leak, you’ll need a professional HVAC technician to locate and repair the leak, then recharge the system with the appropriate refrigerant.

Preventing Future Leaks

To avoid water leaking from your AC vent in the ceiling in the future, consider these preventive measures:

  1. Regular Maintenance: Schedule regular maintenance for your AC system, which should include cleaning the drain line and ensuring proper insulation.
  2. Change Filters: Replace or clean your air filters regularly to ensure the air flows freely through the system, reducing the likelihood of condensation.
  3. Seal Ductwork: Properly seal and insulate ductwork to minimize temperature differences that can lead to condensation.
  4. Monitor the Thermostat: Be mindful of your thermostat settings and make sure they are appropriate for the weather conditions.

Conclusion

Water leaking from an AC vent in your ceiling can be a sign of various issues, from condensation to more severe problems like a refrigerant leak. Identifying the cause is the first step in addressing the issue effectively. While some problems can be resolved with simple maintenance, others may require professional assistance. By taking preventive measures, you can reduce the risk of future leaks and keep your home comfortable and dry.