Stylish 13 Inch Flush Mount Ceiling Light: Enhance Your Space

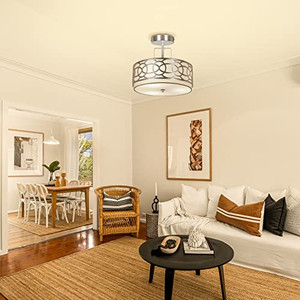
When it comes to upgrading your home lighting, a 13-inch flush mount ceiling light is a practical and stylish choice. This lighting option provides a sleek, low-profile design that seamlessly blends with various decor styles while offering optimal illumination. In this guide, we’ll delve into the features, benefits, and tips for choosing the perfect 13-inch flush mount ceiling light for your home.

13 Inch Flush Mount Ceiling Light

Why Choose a 13 Inch Flush Mount Ceiling Light?

A 13-inch flush mount ceiling lights is an ideal solution for rooms where space is at a premium or where a minimalist aesthetic is desired. Here are some reasons why this size and style are popular:

1. Space-Saving Design

Flush mount ceiling lights sit close to the ceiling, making them perfect for rooms with low ceilings or areas where a hanging fixture might be impractical, such as hallways or closets.

2. Versatility

This size fits well in various spaces, from bedrooms to kitchens, providing enough light without overpowering the room.

3. Style Options

Available in a range of materials, finishes, and designs, a 13-inch flush mount ceiling light can complement modern, traditional, or transitional interiors.

4. Energy Efficiency

Many models come with energy-efficient LED technology, reducing electricity consumption while offering bright, even light.

Read too: Bathroom Flooded Through the Ceiling: A Comprehensive Guide


Features to Look for in a 13 Inch Flush Mount Ceiling Light

When shopping for the perfect 13-inch flush mount ceiling light, consider these key features:

1. Lighting Type

  • LED Lights: Long-lasting and energy-efficient, LED flush mounts are a top choice.
  • Incandescent or CFL Options: While less energy-efficient, these can provide a warm, classic glow.

2. Material and Finish

  • Metal Finishes: Options like brushed nickel, bronze, or matte black can add a touch of elegance.
  • Glass Shades: Frosted or clear glass diffuses light beautifully and complements various decors.

3. Dimmable Features

For added versatility, look for models with dimmable settings. This allows you to adjust the brightness to suit the room’s mood and functionality.

4. Easy Installation

Ensure the light is easy to install with clear instructions and necessary hardware included.


Where to Use a 13 Inch Flush Mount Ceiling Light

A 13-inch flush mount ceiling lights is versatile enough to work in almost any room. Here are some popular applications:

1. Living Rooms

In living rooms, this light can serve as the primary source of illumination or as a secondary light to complement chandeliers or lamps.

2. Bedrooms

Flush mounts are perfect for bedrooms, providing soft, even light that enhances relaxation without taking up visual space.

3. Kitchens

Install this size in kitchens for ample task lighting. It works well in small or medium-sized spaces, especially above breakfast nooks or prep areas.

4. Hallways and Entryways

The low-profile design ensures smooth navigation in tight spaces, making it ideal for hallways and entryways.

5. Bathrooms

For bathrooms, ensure the light is rated for damp locations to avoid issues with humidity.


Benefits of Upgrading to a 13 Inch Flush Mount Ceiling Light

1. Enhanced Aesthetics

Modern flush mount ceiling lights can add a stylish flair to your space. With sleek designs and various finishes, they blend seamlessly with your decor.

2. Better Lighting Quality

These fixtures distribute light evenly, reducing shadows and creating a well-lit environment.

3. Energy Savings

Opting for an energy-efficient LED model reduces utility bills and minimizes your environmental footprint.

4. Low Maintenance

With LED options, you’ll enjoy a longer lifespan and less frequent bulb replacements.

5. Increased Home Value

Updated lighting fixtures are a cost-effective way to boost your home’s appeal and market value.


Tips for Installing Your 13 Inch Flush Mount Ceiling Light

1. Choose the Right Location

Ensure the fixture is centered in the room or placed strategically where the most light is needed.

2. Turn Off Power

Before starting installation, turn off the power at the breaker to avoid electrical hazards.

3. Follow Instructions

Most fixtures come with detailed instructions. Follow them carefully for a safe and secure installation.

4. Use Appropriate Tools

You’ll typically need a screwdriver, wire strippers, and a ladder for the installation process.

5. Test Before Finalizing

Once installed, test the light to ensure it’s working correctly before securing all screws and bolts.


Popular Styles of 13 Inch Flush Mount Ceiling Lights

1. Contemporary Designs

Modern flush mounts often feature clean lines, geometric shapes, and minimalist finishes like chrome or matte black.

2. Traditional Styles

For a more classic look, choose lights with ornate detailing, antique brass finishes, or frosted glass shades.

3. Transitional Options

Transitional styles blend traditional and modern elements, offering versatility that suits various decor themes.

4. Rustic or Industrial

Rustic designs may include wood accents or vintage-inspired details, while industrial options often feature exposed bulbs and metal finishes.


Maintenance Tips

To keep your fixture looking and performing its best:

  • Clean Regularly: Dust the light and wipe the shade with a damp cloth to maintain brightness.
  • Check Connections: Periodically ensure all screws and electrical connections are secure.
  • Replace Bulbs Promptly: If using non-LED bulbs, replace them as needed to avoid dim or flickering light.
  • Inspect for Damage: Look for cracks or wear, especially in the shade or mounting hardware.

Conclusion

A 13-inch flush mount ceiling lights is a practical, stylish, and versatile lighting solution for any home. Whether you’re upgrading a bedroom, brightening a kitchen, or adding elegance to a hallway, this fixture size strikes the perfect balance between form and function.

With options to suit every decor style and budget, you’re sure to find a 13-inch flush mount ceiling lights that enhances your home’s ambiance and usability. By considering features like lighting type, material, and installation ease, you can make a choice that meets your needs while adding a touch of sophistication to your space.

Black And Gold Ceiling Fan With Light: The Perfect Blend of Style and Functionality

Ceiling fans have long been a staple in home design, providing a functional solution for cooling and lighting while also enhancing the aesthetics of a space. Among the many options available, a Black and Gold Ceiling Fan with Light stands out as a luxurious and elegant choice. This design combines sleek black finishes with touches of gold to create a statement piece that fits seamlessly into various interior styles. Whether you’re renovating your home or designing a new space, this guide will help you understand the features, benefits, and versatility of black and gold ceiling fans with lights.

Black And Gold Ceiling Fan With Light

Why Choose a Black and Gold Ceiling Fan with Light?

Ceiling fans serve more than just a practical purpose; they contribute significantly to a room’s overall ambiance. Here’s why a Black and Gold Ceiling Fan with Light is worth considering:

1. Timeless Elegance

The black and gold color combination exudes sophistication, blending modernity with classic charm. The bold black provides a neutral base, while gold accents add a touch of luxury.

2. Dual Functionality

These fans combine cooling and lighting, reducing the need for separate installations. This dual-purpose design maximizes efficiency and saves space, making it perfect for both small and large rooms.

3. Versatile Design

Whether your decor leans towards contemporary, industrial, or traditional, a black and gold ceiling fan complements various styles. It’s an ideal choice for living rooms, bedrooms, or even outdoor spaces like covered patios.

4. Energy Efficiency

Modern ceiling fans, including black and gold designs, are energy-efficient. They help circulate air effectively, reducing reliance on air conditioning and lowering energy bills.

Read too: Discovering the Charm of Nautical Outdoor Ceiling Fans for Your Coastal Retreat: Sail into Style


Key Features of Black and Gold Ceiling Fans with Lights

1. Sleek Black Finish

The primary black finish serves as a sophisticated backdrop, making the fan suitable for both minimalist and bold interiors.

2. Gold Detailing

Gold accents on the blades, motor housing, or light fixtures create a striking contrast, elevating the overall look.

3. Integrated Lighting

Many designs come with LED lights, offering bright and energy-efficient illumination. Some models feature dimmable options for customized lighting.

4. Remote Control Functionality

Most black and gold ceiling fans are equipped with remote controls, allowing you to adjust speed, direction, and lighting with ease.

5. Silent Operation

Advanced motor technology ensures quiet performance, making these fans suitable for bedrooms and study areas.


How to Choose the Right Black and Gold Ceiling Fan with Light

When selecting a ceiling fan, consider the following factors to ensure it meets your needs:

1. Room Size

  • For smaller rooms (up to 75 sq. ft.), choose a fan with a blade span of 29–36 inches.
  • Medium rooms (76–144 sq. ft.) require blades spanning 36–42 inches.
  • Larger spaces (over 225 sq. ft.) need fans with blades measuring 50–54 inches or more.

2. Ceiling Height

  • Standard ceilings can accommodate most fans, but for high ceilings, opt for models with downrods.
  • Flush-mounted designs work best for low ceilings.

3. Lighting Requirements

Determine the type of lighting you need. Dimmable LEDs offer flexibility, while warm-toned lights create a cozy atmosphere.

4. Style Compatibility

Ensure the fan’s design aligns with your room’s decor. A black and gold fan adds a luxurious touch to both modern and traditional settings.


Black And Gold Ceiling Fan With Light: Enhancing Different Spaces

1. Living Rooms

In living areas, a black and gold ceiling fan serves as a central focal point. Pair it with neutral tones or bold color schemes to create a cohesive look.

2. Bedrooms

For bedrooms, choose a fan with a quiet motor and dimmable lighting to enhance comfort and relaxation.

3. Dining Areas

In dining rooms, a fan with warm-toned lighting adds ambiance, while the gold accents tie in with metallic elements like chandeliers or tableware.

4. Outdoor Spaces

Outdoor-rated black and gold ceiling fans are perfect for covered patios and porches. Ensure the model is resistant to moisture and harsh weather conditions.


Maintenance Tips

To keep your ceiling fan looking and functioning like new, follow these maintenance tips:

1. Regular Cleaning

Dust the blades and motor housing regularly using a soft cloth or vacuum attachment.

2. Check for Loose Parts

Inspect screws and mounting brackets periodically to ensure the fan remains secure.

3. Replace Bulbs as Needed

For fans with integrated lighting, replace bulbs promptly when they burn out. Opt for energy-efficient LEDs for longer-lasting performance.

4. Lubricate Moving Parts

If your fan begins to make noise, check the manufacturer’s guidelines for lubrication. Some models may require periodic oiling.


Popular Black and Gold Ceiling Fan with Light Models

Here are a few popular models to consider:

1. Westinghouse Lighting Xavier II

This fan features a sleek black finish with gold highlights and reversible blades. Its integrated LED light kit offers bright illumination.

2. Minka Aire Orb

The modern design of the Minka Aire Orb blends a matte black body with brushed gold accents, making it perfect for contemporary spaces.

3. Hunter Fan Company Hepburn

This fan boasts a vintage-inspired design with a matte black finish and antique gold accents. Its dimmable LED light provides a warm glow.


FAQs

1. Are black and gold ceiling fans suitable for small rooms?

Yes, they come in various sizes to fit small, medium, and large rooms. Look for compact models with smaller blade spans for limited spaces.

2. Can I install a black and gold ceiling fan outdoors?

Outdoor-rated models are designed to withstand moisture and weather conditions, making them suitable for covered patios and porches.

3. Are these fans energy-efficient?

Most modern ceiling fans, including black and gold designs, feature energy-efficient motors and LED lights.

4. How do I choose the right lighting color for my fan?

Warm tones (2700–3000K) create a cozy atmosphere, while cool tones (4000–5000K) are ideal for task lighting.


Conclusion

A Black and Gold Ceiling Fan with Light is more than just a functional appliance; it’s a statement piece that elevates the aesthetics of any room. Its timeless design, energy efficiency, and versatility make it an excellent choice for homeowners looking to combine practicality with style. Whether you’re revamping your living room, bedroom, or outdoor space, a black and gold ceiling fan is sure to make an impression.

Western Ceiling Fans With Lights: Enhance Your Space with Style and Functionality

When it comes to home décor, ceiling fans with lights offer both practical benefits and aesthetic appeal. Western ceiling fans with lights, in particular, bring a distinctive charm and functionality to various interior styles, from rustic to contemporary. In this comprehensive guide, we’ll explore the features, benefits, and considerations of Western ceiling fans with lights, helping you choose the perfect option to elevate your living space.

Western Ceiling Fans With Lights

Understanding Western Ceiling Fans With Lights

Western ceiling fans with lights blend functionality with design, making them a popular choice for many homeowners. These fans not only provide essential cooling and air circulation but also integrate lighting to enhance the ambiance of your room. Let’s delve into the key aspects of Western ceiling fans with lights:

What Are Western Ceiling Fans With Lights?

Western ceiling fans with lights are designed to reflect the aesthetics and themes associated with Western-style décor. They often feature rustic, vintage, or rugged elements that resonate with the charm of the American West. These fans come equipped with integrated lighting, providing both illumination and cooling benefits in one elegant fixture.

Key Features

  1. Design Elements: Western ceiling fans with lights often incorporate design elements such as wooden blades, wrought iron details, and weathered finishes. These features contribute to the rugged, charming look characteristic of Western décor.
  2. Integrated Lighting: These fans come with built-in light fixtures, which can vary from simple, functional bulbs to more elaborate chandeliers or sconces. The lighting aspect not only brightens the room but also adds to the overall aesthetic.
  3. Durability: Built to withstand the demands of everyday use, Western ceiling fans with lights are typically made from high-quality materials such as metal and wood. Their durable construction ensures long-lasting performance.
  4. Versatility: Available in various sizes and styles, these fans can be used in different rooms, including living rooms, bedrooms, and even outdoor spaces like patios or porches.

Benefits of Installing Western Ceiling Fans With Lights

Installing Western ceiling fans with lights in your home offers several advantages. Here are some key benefits:

1. Enhanced Lighting

The integrated lighting feature of Western ceiling fans provides effective illumination for your room. Whether you need bright light for tasks or a softer glow for ambiance, these fans offer versatile lighting options. Many models allow you to adjust the brightness and color temperature to suit different needs and moods.

Read too: Exploring the Innovation and Efficiency of Ceiling Mounted Surgical Light Solutions: Illuminating Precision

2. Improved Air Circulation

Western ceiling fans with lights are designed to improve air circulation in your space. By circulating air efficiently, these fans help maintain a comfortable temperature, reduce humidity, and enhance overall comfort. This can be especially beneficial in rooms where cooling is needed in addition to lighting.

3. Stylish Design

The Western aesthetic brings a unique and charming look to your home. The rugged and rustic design elements of these fans complement various interior styles, including farmhouse, country, and ranch-themed décor. By incorporating Western ceiling fans with lights, you can enhance the visual appeal of your space.

4. Energy Efficiency

Ceiling fans are known for their energy-saving benefits. By improving air circulation, they can help reduce the need for air conditioning, leading to lower energy bills. The addition of integrated lighting means you have an all-in-one solution for both cooling and illumination, which can be more energy-efficient than using separate fixtures.

Choosing the Right Western Ceiling Fans With Lights

Selecting the perfect Western ceiling fan with lights involves considering several factors to ensure it fits your needs and preferences. Here are some tips to help you make an informed decision:

1. Room Size and Ceiling Height

The size of your room and the height of your ceiling are crucial factors in choosing the right ceiling fan. Larger rooms may require bigger fans with wider blade spans, while smaller rooms can benefit from more compact models. Additionally, if you have high ceilings, consider fans with adjustable downrods to ensure proper airflow.

2. Design and Style

Western ceiling fans with lights come in various designs, from traditional wooden blades to more modern interpretations. Consider the existing décor of your room and choose a fan that complements your style. Look for fans with features like distressed finishes, metal accents, or ornate details to enhance the Western aesthetic.

3. Light Options

Different models offer various lighting options, including adjustable brightness, dimmable features, and different types of bulbs. Decide on the type of lighting that best suits your needs. If you want flexibility, opt for a fan with adjustable lighting settings to create the desired ambiance.

4. Installation and Maintenance

Consider the installation process and whether you need professional help. Some fans are easier to install than others, and professional installation might be required for more complex models. Additionally, check for maintenance requirements, such as cleaning and replacing bulbs, to ensure long-term performance.

5. Energy Efficiency and Features

Look for fans with energy-efficient lighting options, such as LED bulbs, which consume less power and have a longer lifespan. Some fans also come with remote controls or smart features, allowing you to adjust settings conveniently.

Popular Styles

Western ceiling fans with lights are available in various styles, each offering a unique look and functionality. Here are some popular styles to consider:

1. Rustic Lodge Style

This style features fans with wooden blades, metal accents, and a rugged appearance. The rustic lodge style often includes elements like antler motifs or vintage finishes, making it ideal for cabins or country homes.

2. Western Farmhouse Style

Fans in the Western farmhouse style typically feature a blend of wood and metal with a distressed finish. This style complements farmhouse décor and adds a touch of charm to any room.

3. Vintage Western Style

Vintage Western fans often include classic design elements such as ornate metalwork, antique finishes, and traditional blade shapes. These fans evoke a nostalgic feel and fit well in historic or period-themed homes.

4. Contemporary Western Style

Contemporary Western fans offer a modern twist on traditional Western design. These fans may feature sleek lines, minimalist designs, and a combination of materials such as wood and brushed metal.

Maintenance and Care for Western Ceiling Fans With Lights

Proper maintenance ensures that your Western ceiling fan with lights remains in good working condition. Here are some tips for keeping your fan in top shape:

1. Regular Cleaning

Dust and dirt can accumulate on the blades and light fixtures, affecting the performance and appearance of your fan. Clean the blades regularly with a soft cloth or duster, and wipe down the light fixtures as needed. Ensure the power is turned off before cleaning.

2. Check for Loose Parts

Periodically check for loose screws, bolts, or other components. Tighten any loose parts to prevent wobbling or rattling, which can affect the fan’s operation and longevity.

3. Replace Bulbs as Needed

If the lighting in your fan dims or goes out, replace the bulbs promptly. Consider using energy-efficient LED bulbs to reduce energy consumption and extend the life of the lighting.

4. Inspect the Motor and Blades

Regularly inspect the motor and blades for signs of wear or damage. If you notice any issues with the motor or unusual noises, contact a professional for repair or maintenance.

Conclusion

Western ceiling fans with lights offer a stylish and functional addition to your home décor. With their blend of rustic charm and modern convenience, these fans enhance both the aesthetic appeal and comfort of your living space. By understanding the benefits, choosing the right style, and maintaining your fan properly, you can enjoy the perfect combination of lighting and cooling for years to come.

Recessed Lighting Concrete Ceiling: Maximizing Style and Functionality

When it comes to creating a sleek and modern interior, recessed lighting is a popular choice that blends seamlessly with various architectural styles. However, when the ceiling is made of concrete, installing recessed lighting can seem daunting. This article will guide you through the benefits, challenges, and solutions for installing Recessed Lighting in Concrete Ceilings, ensuring your space is both functional and aesthetically pleasing.

Recessed Lighting Concrete Ceiling

The Benefits of Recessed Lighting in Concrete Ceilings

Sleek and Minimalistic Design

Recessed lighting is renowned for its ability to provide unobtrusive illumination, maintaining a clean ceiling line. When installed in a concrete ceiling, these lights enhance the modern and industrial vibe often associated with concrete surfaces, making them an excellent choice for contemporary spaces.

Space-Saving Solution

Unlike traditional hanging fixtures, recessed lighting doesn’t take up any headroom, making it perfect for rooms with lower ceilings. This is especially important in spaces where you want to avoid any obstruction or where the ceiling height is limited, such as basements or lofts with concrete ceilings.

Even Distribution of Light

Recessed lights can be strategically placed to ensure an even distribution of light throughout the room. This helps in eliminating shadows and brightening up every corner, which is particularly beneficial in rooms with concrete ceilings that can often feel heavy or oppressive without proper lighting.

Read too: Kitchen Lighting For A Vaulted Ceiling: Illuminating Your Space with Style and Functionality

Enhancing Architectural Features

Concrete ceilings often boast unique textures and finishes. Recessed lighting can be used to highlight these features, adding depth and character to the space. Whether you have a smooth polished surface or an exposed aggregate finish, the right lighting can make these elements stand out.

Challenges of Installing Recessed Lighting in Concrete Ceilings

Structural Constraints

Concrete ceilings are structurally different from drywall or wood ceilings, making them more challenging to work with when installing recessed lighting. The density and hardness of concrete mean that standard tools and techniques may not be sufficient.

Limited Access

Running electrical wiring through a concrete ceiling is not as straightforward as it is with other materials. Concrete does not allow easy access for wiring, and creating channels for cables can be labor-intensive and require specialized equipment.

Heat Dissipation

Concrete is an excellent conductor of heat, which can be both an advantage and a disadvantage. While it helps dissipate the heat generated by the lights, it can also make managing the heat buildup within the fixture more difficult. This is something that must be considered to avoid any potential safety issues.

Need for Professional Installation

Due to the complexity involved, installing recessed lighting in a concrete ceiling often requires professional assistance. This can increase the cost and time required for the project, but it’s necessary to ensure that the installation is safe and effective.

Solutions and Tips for Installing Recessed Lighting in Concrete Ceilings

Using Core Drilling Techniques

One of the most effective methods for installing recessed lighting in a concrete ceiling is core drilling. This process involves using a diamond-tipped core drill to create precise holes in the concrete. These holes allow for the installation of the light fixtures without compromising the structural integrity of the ceiling.

Choosing the Right Fixtures

When selecting fixtures for a concrete ceiling, it’s important to choose those specifically designed for such applications. These fixtures are typically more robust and capable of handling the challenges posed by concrete, such as heat dissipation and limited installation space.

Wiring Considerations

To address the challenge of running electrical wiring through concrete, consider surface-mounted conduit or cable trays that can be painted to match the ceiling. Alternatively, you can explore the possibility of embedding conduits within the concrete during the initial construction phase, although this is less practical for retrofitting.

Hiring a Professional Electrician

Given the complexities involved, hiring a professional electrician with experience in installing recessed lighting in concrete ceilings is highly recommended. They will have the necessary tools, expertise, and knowledge to ensure the job is done correctly, safely, and in compliance with building codes.

Planning Your Recessed Lighting Layout

Assessing the Room’s Functionality

Before installing recessed lighting, consider the primary function of the room. For instance, a kitchen might require more focused task lighting, whereas a living room might benefit from a combination of ambient and accent lighting. The room’s purpose will influence the number and placement of lights.

Spacing and Placement

The placement of recessed lights is crucial for achieving balanced illumination. A general rule of thumb is to space the lights approximately 4 to 6 feet apart for an 8-foot ceiling, adjusting accordingly for higher ceilings. For concrete ceilings, this might require more careful planning to avoid excessive drilling.

Layering Your Lighting

To enhance the ambiance of your room, consider layering your recessed lighting with other types of lighting. Incorporate dimmable recessed lights to allow for different moods and times of day. Combining recessed lighting with wall sconces, pendant lights, or floor lamps can create a dynamic and versatile lighting scheme.

Highlighting Architectural Features

If your concrete ceiling has unique architectural features, such as exposed beams or a coffered design, consider using recessed lighting to highlight these elements. Position the lights in a way that draws attention to these features, adding depth and interest to your room.

Maintenance and Longevity of Recessed Lighting in Concrete Ceilings

Choosing LED Lights for Longevity

LED lights are the preferred choice for recessed lighting due to their long lifespan and energy efficiency. Since accessing recessed fixtures in a concrete ceiling can be more challenging, using long-lasting LEDs reduces the frequency of bulb changes and maintenance.

Regular Cleaning and Inspection

Although recessed lights are relatively low maintenance, it’s still important to periodically clean the fixtures and inspect them for any signs of wear or damage. Dust and debris can accumulate over time, potentially affecting the light output and heat dissipation.

Ensuring Proper Ventilation

To prevent overheating, ensure that your recessed lighting fixtures are properly ventilated. This is especially important in concrete ceilings, where heat dissipation can be more challenging. Proper ventilation will help extend the life of your fixtures and maintain their performance.

Conclusion

Recessed Lighting in Concrete Ceilings offers a unique opportunity to blend modern design with functional lighting solutions. While the installation process can be more complex compared to other ceiling types, the end result is well worth the effort. By carefully planning your layout, choosing the right fixtures, and working with a professional, you can achieve a beautifully lit space that enhances the overall aesthetic and functionality of your home.

Whether you’re looking to create a minimalist living room, a bright and functional kitchen, or an inviting entryway, recessed lighting in your concrete ceiling can make a significant difference. Embrace the modern, sleek look that recessed lighting offers and transform your space into one that is both stylish and welcoming.

Mission Style Ceiling Fans With Lights: Combining Function and Elegance

When it comes to blending style with functionality in home decor, Mission style ceiling fans with lights stand out as a perfect choice. Known for their unique design elements and practical benefits, these fans not only keep your space cool but also enhance its aesthetic appeal. In this article, we’ll explore the features, benefits, and design options of Mission style ceiling fans with lights, and provide tips on how to choose the perfect one for your home.

Mission Style Ceiling Fans With Lights

What Are Mission Style Ceiling Fans With Lights?

Mission style ceiling fans with lights are ceiling fans designed in the Mission style, a design movement that originated in the late 19th century. Characterized by its emphasis on simplicity, craftsmanship, and natural materials, Mission style is a subset of the Arts and Crafts movement. When combined with modern ceiling fan technology and lighting, these fans offer both aesthetic charm and practical functionality.

Key Features of Mission Style Ceiling Fans With Lights

  • Design Aesthetics: Mission style ceiling fans often feature clean lines, geometric shapes, and natural materials such as wood or metal with rich finishes. The lighting elements typically incorporate stained glass or Tiffany-style shades that enhance the classic appeal.
  • Lighting Options: These fans usually come with integrated light fixtures, which may include one or multiple bulbs, and can be designed with various types of glass shades such as frosted or colored glass.
  • Material and Finish: Common materials include bronze, brass, and wood, often with a distressed or antique finish that complements the Mission style.
  • Blade Design: The blades of Mission style ceiling fans are generally wide and flat, designed to provide efficient air circulation while blending seamlessly with the fan’s overall aesthetic.

Benefits of Mission Style Ceiling Fans With Lights

1. Aesthetic Appeal

One of the primary benefits of Mission style ceiling fans with lights is their ability to enhance the visual appeal of any room. The Mission style’s emphasis on handcrafted, artisanal elements means these fans often serve as focal points, adding character and sophistication to your decor. The combination of the fan and light fixture in a single piece helps to streamline the design and reduce clutter.

2. Energy Efficiency

Modern ceiling fans, including Mission style models, are designed to be energy-efficient. By circulating air effectively, they help maintain a comfortable temperature and reduce the need for additional cooling or heating. This can lead to significant savings on your energy bills.

Read too: Discovering the Charm of Nautical Outdoor Ceiling Fans for Your Coastal Retreat: Sail into Style

3. Versatile Lighting

The integrated lighting options of these ceiling fans offer both ambient and task lighting. Depending on the design, you can have adjustable light levels, which is ideal for creating the right mood or providing focused illumination in specific areas of a room.

4. Improved Air Circulation

Mission style ceiling fans are engineered to enhance air circulation. This can be particularly beneficial in rooms with high ceilings or in larger spaces where maintaining even airflow can be challenging. The efficient blade design helps distribute air evenly, improving overall comfort.

5. Design Flexibility

Mission style ceiling fans with lights come in various sizes and finishes, making them suitable for different room sizes and decor styles. Whether you have a small cozy room or a large open space, there’s a Mission style fan that can fit your needs.

Choosing the Right Mission Style Ceiling Fans With Lights

1. Room Size and Ceiling Height

Consider the size of the room and the height of the ceiling when selecting a Mission style ceiling fan. Larger rooms and high ceilings may require a fan with a larger blade span or an extended downrod to ensure effective air circulation.

2. Design and Finish

Choose a fan design and finish that complements your existing decor. Mission style fans are available in various finishes such as antique bronze, oil-rubbed bronze, and natural wood. Ensure that the finish matches or contrasts harmoniously with other elements in your room.

3. Lighting Features

Determine the type and intensity of lighting you need. Some Mission style fans come with adjustable lighting, while others may have fixed settings. Consider whether you need dimmable lights, specific color temperatures, or additional light sources.

4. Fan Blades

The blade material and finish can affect both the performance and appearance of the fan. Wood blades offer a classic look and natural feel, while metal blades provide a more modern or industrial aesthetic. Ensure that the blade material complements the overall style of the fan.

5. Control Options

Modern ceiling fans offer various control options, including remote controls, wall switches, and smart home integration. Consider the convenience of these controls and how they fit into your lifestyle.

Installation Tips for Mission Style Ceiling Fans With Lights

1. Professional Installation

While some DIY enthusiasts may choose to install their ceiling fans, it is often best to hire a professional electrician for installation. This ensures that the fan is installed correctly and safely, especially when dealing with electrical wiring and ceiling support.

2. Proper Placement

Ensure that the fan is installed at the correct height for optimal air circulation. Typically, the fan should be installed so that the blades are at least 7-9 feet above the floor. The placement should also allow for sufficient clearance around the fan.

3. Regular Maintenance

To keep your Mission style ceiling fan in good working condition, perform regular maintenance. This includes dusting the blades, checking the light bulbs, and ensuring that all parts are securely fastened.

4. Balancing the Fan

If you notice any wobbling or noise from the fan, it may need to be balanced. Most ceiling fans come with balancing kits, or you can consult a professional to resolve any issues.

Design Ideas for Mission Style Ceiling Fans With Lights

1. Classic Living Room

In a classic living room with traditional furniture, a Mission style ceiling fan with a stained glass light fixture can serve as a stunning centerpiece. Opt for rich wood finishes and brass accents to complement classic decor.

2. Rustic Cabin

For a rustic cabin or mountain home, choose a Mission style ceiling fan with a rugged wood finish and metal accents. This can enhance the natural, earthy feel of the space while providing necessary air circulation and lighting.

3. Modern Loft

In a modern loft or contemporary setting, a Mission style ceiling fan with clean lines and a sleek metal finish can add a touch of elegance. Pair it with minimalist furniture and neutral tones for a sophisticated look.

4. Cozy Bedroom

In a cozy bedroom, a Mission style ceiling fan with soft lighting and a warm wood finish can create a comfortable and inviting atmosphere. Choose a fan with adjustable lighting to provide both ambient and task lighting.

Conclusion

Mission style ceiling fans with lights offer a perfect blend of functionality and elegance. Their unique design, combined with practical benefits such as improved air circulation and energy efficiency, makes them an excellent choice for various indoor spaces. By considering factors such as room size, design preferences, and lighting needs, you can select the ideal Mission style fan to enhance your home’s comfort and aesthetic appeal.

Biltmore Lighting Ceiling Fans: Style and Comfort Combined

When it comes to enhancing both the functionality and aesthetic appeal of your home, Biltmore Lighting Ceiling Fans offer a perfect blend of style and efficiency. This comprehensive guide will explore the various benefits, styles, and considerations for choosing Biltmore Lighting Ceiling Fans, ensuring you make an informed decision for your space.

Biltmore Lighting Ceiling Fans

Why Choose Biltmore Lighting Ceiling Fans?

Biltmore Lighting Ceiling Fans stand out in the market due to their superior quality, innovative design, and exceptional performance. Here are some compelling reasons to choose these ceiling fans:

  1. Elegant Design: Inspired by the grandeur of the Biltmore Estate, these fans feature intricate designs that add a touch of elegance to any room.
  2. Energy Efficiency: Biltmore Lighting Ceiling Fans are designed to provide optimal air circulation, reducing the need for air conditioning and helping you save on energy bills.
  3. Durability: Made from high-quality materials, these fans are built to last, offering reliable performance for years to come.
  4. Versatility: Available in various styles and finishes, Biltmore Lighting Ceiling Fans can complement any décor, from traditional to modern.
  5. Quiet Operation: Engineered for smooth and quiet operation, these fans ensure a peaceful environment without the distraction of noise.

Read too: Enhance Your Space with Acoustic Ceiling Tiles Paint: A Comprehensive Guide

The Range of Biltmore Lighting Ceiling Fans

Biltmore Lighting offers a diverse range of ceiling fans, each designed to cater to different tastes and functional requirements. Here are some popular styles:

  1. Classic Designs:
    • Biltmore Estate Collection: Inspired by the opulence of the Biltmore Estate, these fans feature intricate details and antique finishes, perfect for traditional and vintage-inspired interiors.
    • Victorian Series: With ornate patterns and rich finishes, the Victorian series adds a touch of old-world charm to your home.
  2. Modern and Contemporary:
    • Minimalist Designs: For those who prefer a sleek, modern look, Biltmore offers ceiling fans with clean lines and understated elegance.
    • Innovative Features: Some models include integrated LED lighting, remote controls, and reversible motors for year-round comfort.
  3. Outdoor Options:
    • Weather-Resistant Models: Designed for patios, porches, and outdoor living areas, these fans are built to withstand the elements while providing effective cooling and lighting.

Best Practices for Choosing Biltmore Lighting Ceiling Fans

Selecting the right Biltmore Lighting Ceiling Fans involves considering several factors to ensure you get the most suitable option for your space. Here are some tips to help you make the best choice:

  1. Room Size and Fan Size:
    • Small Rooms: For rooms up to 75 square feet, opt for a fan with a blade span of 29 to 36 inches.
    • Medium Rooms: For spaces between 76 to 144 square feet, choose a fan with a blade span of 36 to 42 inches.
    • Large Rooms: For areas between 144 to 225 square feet, a fan with a 44 to 50-inch blade span is ideal.
    • Extra-Large Rooms: For rooms over 225 square feet, consider a fan with a blade span of 50 to 72 inches.
  2. Ceiling Height:
    • Low Ceilings: Flush-mount or hugger fans are suitable for low ceilings, providing adequate clearance and ensuring safety.
    • Standard Ceilings: For standard 8 to 9-foot ceilings, a fan with a standard downrod will work well.
    • High Ceilings: For ceilings over 9 feet, use an extended downrod to ensure the fan is positioned at the optimal height for air circulation.
  3. Style and Finish:
    • Choose a fan style that complements your room’s décor. Biltmore Lighting offers a variety of finishes, including brushed nickel, bronze, matte black, and more, ensuring you can find the perfect match.
  4. Lighting Needs:
    • Many Biltmore Lighting Ceiling Fans come with integrated lighting. Consider your room’s lighting needs and opt for a fan with the appropriate light fixture. LED options are energy-efficient and provide long-lasting illumination.
  5. Control Options:
    • Choose from various control options, including pull chains, wall switches, and remote controls. For added convenience, some models offer smart home compatibility, allowing you to control your fan and lights via a mobile app or voice commands.

Installation and Maintenance Tips

Proper installation and regular maintenance are essential to ensure your Biltmore Lighting Ceiling Fans perform optimally and have a long lifespan. Here are some tips to help you:

  1. Professional Installation:
    • While some homeowners may choose to install ceiling fans themselves, hiring a professional electrician ensures the job is done safely and correctly, especially for complex installations.
  2. Regular Cleaning:
    • Dust the fan blades regularly to prevent buildup, which can affect performance and air quality. For thorough cleaning, use a mild detergent and a soft cloth.
  3. Blade Balance:
    • Check the balance of the fan blades periodically. An unbalanced fan can wobble and cause noise. Most Biltmore Lighting Ceiling Fans come with a balancing kit to address this issue.
  4. Motor Maintenance:
    • Ensure the motor and other moving parts are well-lubricated and free of dust. If you notice any unusual noises or performance issues, consult the user manual or contact customer support.

Enhancing Your Home with Biltmore Lighting Ceiling Fans

Biltmore Lighting Ceiling Fans are not just functional fixtures; they are also statement pieces that can enhance the overall aesthetic of your home. Here are some ways to incorporate these fans into your interior design:

  1. Focal Point in Living Rooms:
    • Install a grand Biltmore Estate Collection fan in your living room to serve as a focal point. The intricate design and elegant finish can elevate the space’s overall look.
  2. Adding Charm to Bedrooms:
    • Choose a Victorian series fan for the bedroom to create a cozy, charming atmosphere. The soft lighting and gentle breeze can contribute to a restful environment.
  3. Enhancing Dining Areas:
    • A minimalist fan with integrated LED lighting can be a perfect addition to the dining area, providing both illumination and ventilation during meals.
  4. Outdoor Ambiance:
    • For outdoor patios or porches, select a weather-resistant Biltmore Lighting Ceiling Fan to keep the area cool and comfortable while adding a touch of style.

Conclusion

Biltmore Lighting Ceiling Fan combine elegance, functionality, and durability, making them an excellent choice for any home. With a wide range of styles and features, these fans can complement any décor while providing efficient cooling and lighting solutions. By considering factors such as room size, ceiling height, and design preferences, you can find the perfect Biltmore Lighting Ceiling Fan to enhance your space. Invest in Biltmore Lighting Ceiling Fan to enjoy the perfect blend of style and comfort in your home.

Progress Lighting Airpro Ceiling Fan: Enhance Your Home

Choosing the right ceiling fan can significantly impact your home’s comfort, style, and energy efficiency. One standout option on the market is the Progress Lighting Airpro Ceiling Fan. This guide will delve into everything you need to know about the Progress Lighting Airpro Ceiling Fan, including its benefits, features, installation tips, and design ideas. Whether you’re updating your existing fans or installing new ones, this fan offers a blend of performance and aesthetics that can enhance any room in your home.

Progress Lighting Airpro Ceiling Fan

Why Choose the Progress Lighting Airpro Ceiling Fan?

The Progress Lighting Airpro Ceiling Fan is renowned for its combination of style, functionality, and efficiency. Here are several compelling reasons to consider this fan for your home:

Superior Airflow and Energy Efficiency

One of the primary benefits of the Progress Lighting Airpro Ceiling Fan is its superior airflow capabilities. Designed to circulate air efficiently, this fan helps maintain a comfortable temperature in your home, reducing the need for air conditioning and lowering your energy bills.

Stylish Design

The Airpro Ceiling Fan comes in various styles and finishes, making it easy to find a model that complements your home decor. Whether you prefer a modern, sleek look or a more traditional aesthetic, there’s an Airpro Ceiling Fan to match your taste.

Durable and Reliable

Built with high-quality materials, the Progress Lighting Airpro Ceiling Fan is designed to last. Its robust construction ensures that it will provide reliable performance for years to come, making it a worthwhile investment.

Versatile Options

The Airpro Ceiling Fan offers a range of features to suit different needs and preferences. With options like integrated lighting, multiple speed settings, and remote control functionality, you can customize your fan to fit your lifestyle.

Key Features of the Progress Lighting Airpro Ceiling Fan

To fully appreciate the value of the Progress Lighting Airpro Ceiling Fan, it’s essential to understand its key features. Here are some of the standout characteristics of this fan:

Efficient Motor

The Airpro Ceiling Fan is equipped with a powerful and efficient motor that ensures optimal air circulation. This motor is designed to operate quietly, making it perfect for bedrooms, living rooms, and other spaces where noise can be a concern.

Customizable Speeds

With multiple speed settings, the Airpro Ceiling Fan allows you to adjust the airflow to your liking. Whether you need a gentle breeze or more intense circulation, this fan can meet your needs.

Reversible Blades

The fan’s reversible blades provide year-round comfort by allowing you to change the direction of airflow. In the summer, set the blades to rotate counterclockwise for a cooling effect. In the winter, switch to a clockwise rotation to help distribute warm air throughout the room.

Integrated Lighting

Many models of the Progress Lighting Airpro Ceiling Fan come with integrated lighting options. These lights not only illuminate your space but also enhance the fan’s functionality. You can choose from various light fixtures, including LED and incandescent options, to match your lighting needs and preferences.

Remote Control

For added convenience, some Airpro Ceiling Fans come with remote control functionality. This feature allows you to adjust the fan’s speed and lighting settings from anywhere in the room, providing easy and effortless control.

Installing Your Progress Lighting Airpro Ceiling Fan

Proper installation is crucial to ensure that your ceiling fan operates safely and efficiently. Here’s a step-by-step guide to help you install your Progress Lighting Airpro Ceiling Fan:

Step 1: Gather Your Tools

Before you begin, make sure you have all the necessary tools and materials:

  • Screwdrivers (both flathead and Phillips)
  • Pliers
  • Wire strippers
  • Electrical tape
  • Ladder
  • Stud finder
  • Ceiling fan mounting kit (if not included)

Step 2: Turn Off the Power

For safety, turn off the power to the existing light fixture at the circuit breaker. Use a voltage tester to confirm that the power is off before proceeding.

Step 3: Remove the Existing Fixture

Carefully remove the existing light fixture or fan, if applicable. Follow the manufacturer’s instructions to disconnect the wiring and remove any mounting hardware.

Step 4: Install the Mounting Bracket

Attach the mounting bracket to the ceiling electrical box using the provided screws. Ensure that the bracket is securely fastened and can support the weight of the fan.

Step 5: Assemble the Fan

Follow the manufacturer’s instructions to assemble the fan’s motor housing, blades, and light kit (if included). This may involve attaching the blades to the motor and connecting any wiring for the light kit.

Step 6: Connect the Wiring

Connect the fan’s wiring to the electrical box, matching the wires by color (typically black to black, white to white, and green/bare to ground). Use wire nuts and electrical tape to secure the connections.

Step 7: Attach the Fan to the Mounting Bracket

Carefully lift the fan and attach it to the mounting bracket. This may require an extra set of hands to hold the fan in place while you secure it with the provided screws.

Step 8: Install the Light Bulbs and Test

If your fan includes a light kit, install the bulbs and any glass shades or covers. Once everything is in place, turn the power back on at the circuit breaker and test the fan and light to ensure they are functioning correctly.

Design Ideas with the Progress Lighting Airpro Ceiling Fan

The Progress Lighting Airpro Ceiling Fan can enhance the look and feel of any room. Here are some design ideas to inspire you:

Living Room

Install an Airpro Ceiling Fan in your living room to create a comfortable and inviting space. Choose a fan with a stylish finish that complements your furniture and decor. Pair the fan with other light sources, such as floor lamps and table lamps, to create a layered lighting effect.

Bedroom

Add an Airpro Ceiling Fan to your bedroom for a touch of elegance and improved air circulation. Opt for a fan with a quiet motor and dimmable lighting to create a relaxing ambiance. Consider coordinating the fan’s finish with your bedroom furniture for a cohesive look.

Kitchen

Enhance your kitchen with an Airpro Ceiling Fan to keep the space cool and well-ventilated. Choose a fan with a simple, clean design that blends seamlessly with your kitchen’s style. Ensure the fan’s lighting provides adequate illumination for cooking and food preparation.

Outdoor Spaces

Many models of the Progress Lighting Airpro Ceiling Fan are suitable for outdoor use. Install a fan on your patio, porch, or outdoor living area to create a comfortable environment for entertaining and relaxation. Choose a weather-resistant model to ensure durability and longevity.

Maintenance Tips for Your Progress Lighting Airpro Ceiling Fan

Regular maintenance is essential to keep your Progress Lighting Airpro Ceiling Fan running smoothly and looking its best. Here are some tips to help you maintain your fan:

Regular Cleaning

Dust and dirt can accumulate on the fan blades and motor housing over time. Clean the fan regularly using a soft cloth or duster. For more thorough cleaning, use a damp cloth with mild soap and water, and avoid harsh chemicals that could damage the finish.

Tighten Screws and Bolts

Periodically check and tighten any screws and bolts on the fan to ensure they remain secure. This helps prevent wobbling and ensures safe operation.

Balance the Blades

If your fan wobbles or makes noise, the blades may be out of balance. Use a balancing kit (often included with the fan) to adjust the blades and ensure smooth operation.

Lubricate the Motor

Some ceiling fans require periodic lubrication to keep the motor running smoothly. Check the manufacturer’s instructions to determine if your fan needs lubrication and follow the recommended procedures.

Check Electrical Connections

Regularly inspect the electrical connections to ensure they are secure and free from corrosion. If you notice any issues, turn off the power and make the necessary repairs.

Read too: Understanding and Dealing with Ants in the Ceiling Spaces: Navigating the Intrusion

Conclusion

The Progress Lighting Airpro Ceiling Fans is an excellent choice for enhancing the comfort, style, and energy efficiency of your home. With its superior airflow, stylish design, and versatile features, this fan offers a perfect blend of form and function. By following the installation and maintenance tips provided in this guide, you can enjoy the benefits of your Airpro Ceiling Fan for years to come. Whether you’re updating your living room, bedroom, kitchen, or outdoor space, the Progress Lighting Airpro Ceiling Fan is a reliable and attractive option that will elevate your home’s ambiance and comfort.