Drop Ceiling Tile Sizes: A Complete Guide to Choosing the Right Fit for Your Space

When planning a ceiling upgrade, drop ceilings, also known as suspended ceilings, are popular for their versatility, cost-effectiveness, and easy installation. A crucial factor in creating a visually appealing and functional drop ceiling is choosing the correct tile size. Drop ceiling tile sizes vary, and selecting the right size can impact the room’s aesthetics, acoustics, and even lighting. This article will walk you through the different drop ceiling tile sizes available, factors to consider when choosing, and the advantages of each size for different types of spaces.

Drop Ceiling Tile Sizes

What are Drop Ceiling Tiles?

Drop ceiling tiles are panels suspended below the actual ceiling using a grid framework. These tiles offer a range of benefits, including easy access to electrical wiring, HVAC systems, and other overhead fixtures, while also allowing for quick tile replacements if damaged. They come in a variety of sizes, patterns, and materials to suit aesthetic preferences and functional needs.

Drop ceilings are often used in commercial spaces, but they are also becoming popular in residential areas like basements, kitchens, and home offices. To create the right look and functionality, it’s essential to choose drop ceiling tile sizes that fit both the space and your practical needs.

Read too: Kitchen Lighting For A Vaulted Ceiling: Illuminating Your Space with Style and Functionality


Drop Ceiling Tile Sizes Overview

The most common drop ceiling tile sizes are:

  1. 24 x 24 inches (2 x 2 feet)
  2. 24 x 48 inches (2 x 4 feet)

These two sizes are widely used because they fit standard grid systems and offer flexibility in design. Other custom sizes are available, but the above dimensions are the most prevalent and easiest to source.

Each of these tile sizes has distinct benefits and is suitable for different spaces. Let’s explore each option in more detail.


Common Drop Ceiling Tile Sizes and Their Applications

Understanding the most popular drop ceiling tile sizes and how they perform in different environments is crucial for a successful installation.

1. 24 x 24 Inch Tiles

Tiles with dimensions of 24 x 24 inches are widely popular because they provide a balanced look in both small and large spaces. This size is ideal for offices, hallways, kitchens, and smaller rooms where a compact and symmetrical appearance is desired.

  • Benefits:
    • Versatility: Due to their smaller size, they can fit in almost any room without overwhelming the space.
    • Easy to Replace: The 24 x 24-inch tiles are generally easier to remove and replace than larger tiles, making maintenance convenient.
    • Improved Sound Absorption: Smaller tiles offer better sound-dampening properties, making them a good choice for offices or study rooms where reducing noise is essential.

2. 24 x 48 Inch Tiles

For larger spaces like auditoriums, conference rooms, and commercial spaces, 24 x 48-inch tiles are a popular choice. Their larger surface area means fewer tiles are needed, resulting in faster installation.

  • Benefits:
    • Enhanced Aesthetic Flow: These tiles create a continuous look and reduce the appearance of gridlines, which can be distracting in larger rooms.
    • Cost-Effective Installation: With fewer tiles to install, the labor cost is often lower, especially in expansive spaces.
    • Good for High Ceilings: In rooms with higher ceilings, 24 x 48-inch tiles provide a seamless look that’s hard to achieve with smaller tiles.

Factors to Consider When Choosing Drop Ceiling Tile Sizes

When choosing the right drop ceiling tile size, it’s important to consider factors such as room dimensions, function, aesthetic preferences, and acoustic needs. Here are some points to keep in mind:

Room Size and Shape

For smaller rooms, smaller tiles (like 24 x 24 inches) often work best, while larger tiles (24 x 48 inches) can be more effective in larger, open spaces. The tile size should complement the room’s layout without overwhelming it.

Aesthetic Preferences

The appearance of your drop ceiling can dramatically impact the feel of a space. Smaller tiles create a more intricate look, while larger tiles give a streamlined, modern feel. Decide whether you want the ceiling tiles to stand out as a design feature or to blend seamlessly with the room’s decor.

Acoustic Needs

If sound control is a priority, like in an office or study room, smaller tiles may offer better sound absorption. Many 24 x 24-inch tiles are made with noise-reducing materials, making them ideal for creating a quieter environment.

Lighting Requirements

Incorporating lighting into drop ceilings is another key factor. Smaller tiles allow for more grid options to place recessed lighting. For larger tiles, ensure that lighting placement aligns with your functional needs.

Maintenance and Accessibility

If you anticipate regular maintenance or access to overhead wiring, smaller tiles may be more convenient for easier removal and replacement. Larger tiles, however, reduce the number of access points, which can simplify the grid structure.


Materials and Styles for Drop Ceiling Tiles

Drop ceiling tiles are available in various materials, each offering different benefits in terms of appearance, sound control, and durability. Here are a few popular options:

Acoustic Tiles

Acoustic ceiling tiles are usually made from fiberglass or mineral fiber, both excellent for sound absorption. They’re ideal in settings where noise control is essential, like offices or classrooms.

Metal Tiles

Metal tiles are durable and give a modern, industrial aesthetic. Often available in both 24 x 24 and 24 x 48-inch sizes, metal tiles are more popular in commercial and industrial spaces due to their sleek look and durability.

Wood-Look Tiles

For a warmer, more natural feel, wood-look tiles are available. These tiles offer a rustic look suitable for cafes, residential basements, or home offices. They may not have the same acoustic properties but can enhance the ambiance.


Drop Ceiling Tile Sizes: Making the Right Choice

When choosing between 24 x 24-inch and 24 x 48-inch tiles, consider both practical and aesthetic factors:

  • For small rooms or spaces with frequent maintenance, 24 x 24-inch tiles are often better.
  • For large rooms where a continuous aesthetic is preferred, 24 x 48-inch tiles offer a more streamlined look.

Ultimately, the tile size should enhance the room’s function, acoustic needs, and design style.


Drop Ceiling Tile Installation Tips

Proper installation ensures that your ceiling is stable and visually appealing. Here are some basic tips for installing drop ceiling tiles:

  1. Measure the Room Accurately: Determine the total area and grid size needed for a precise fit.
  2. Choose the Right Grid System: Ensure the grid you choose is compatible with your tile size.
  3. Install Supports Properly: Use support wires to secure the grid and tiles in place.
  4. Cut Tiles Carefully: For edges or areas around fixtures, use a sharp utility knife for clean cuts.

Following these steps can ensure your drop ceiling looks professional and functions as intended.


Conclusion

Selecting the correct drop ceiling tile size is an essential part of creating a functional, aesthetically pleasing space. By understanding the benefits and applications of 24 x 24-inch and 24 x 48-inch tiles, you can make an informed choice that aligns with your needs. Consider factors like room size, aesthetics, acoustics, and accessibility to determine the best fit for your space.

Whether for a home office, commercial space, or a school classroom, the right drop ceiling tile size can elevate your interior while addressing practical considerations. With a bit of planning, you can achieve a drop ceiling that not only looks great but also enhances the room’s functionality and comfort.

LED Drop Ceiling Tiles: Maximizing Efficiency and Style

Lighting plays a crucial role in any interior space, whether it’s a home, office, or commercial environment. Among the modern lighting solutions gaining popularity, LED drop ceiling tiles stand out for their ability to enhance lighting efficiency while maintaining a sleek, professional appearance. These innovative tiles seamlessly combine form and function, offering both high-quality illumination and an aesthetically pleasing ceiling design.

Led Drop Ceiling Tiles

In this article, we will explore everything you need to know about LED drop ceiling tiles, including their benefits, installation process, and how they can transform your space. Whether you’re updating a residential room or enhancing a large commercial area, LED drop ceiling tiles are a practical solution worth considering.

What Are LED Drop Ceiling Tiles?

LED drop ceiling tiles are integrated lighting fixtures designed to fit into suspended or “drop” ceilings, often found in offices, commercial spaces, and modern homes. These tiles replace standard ceiling panels, with LED lights embedded within the tile itself. This design not only brightens the room but also maintains a clean and cohesive ceiling appearance.

Drop ceilings, also known as suspended ceilings, are commonly made up of a grid framework where ceiling panels (typically made of materials like mineral fiber or fiberglass) are placed. Instead of using traditional panels, LED drop ceiling tiles serve the dual purpose of filling the grid slot while also providing a light source, eliminating the need for separate light fixtures.

Why Choose LED Drop Ceiling Tiles?

In recent years, LED lighting has become the preferred choice over traditional incandescent or fluorescent bulbs due to its energy efficiency, long lifespan, and minimal maintenance requirements. LED drop ceiling tiles go a step further by offering an all-in-one solution that combines lighting with ceiling aesthetics. Here are a few reasons why they have become so popular:

  • Energy Efficiency: LED lights use significantly less energy than traditional lighting, helping you reduce energy costs while providing brighter illumination.
  • Long Lifespan: LEDs can last up to 50,000 hours, which means you won’t have to worry about frequent replacements. This is especially beneficial in commercial spaces where continuous operation is common.
  • Slim and Sleek Design: LED drop ceiling tiles are designed to blend seamlessly with your ceiling grid, providing a streamlined look without the need for bulky lighting fixtures.
  • Uniform Light Distribution: The tiles are engineered to provide even lighting across the space, eliminating shadows and dark spots.
  • Customizable Appearance: Many LED drop ceiling tiles are available in various sizes, shapes, and colors, making it easier to match your ceiling design and overall decor.

Read too: Shiplap Ceiling in Kitchen: A Timeless Trend for a Stylish and Cozy Space

Benefits of Using LED Drop Ceiling Tiles

Choosing LED drop ceiling tiles for your space comes with numerous advantages, ranging from their aesthetic appeal to their high functionality. Below are some of the top benefits of installing LED drop ceiling tiles:

1. Energy Savings and Efficiency

One of the most compelling reasons to opt for LED drop ceiling tiles is the energy savings. LED technology is known for its ability to produce bright light while consuming a fraction of the energy that traditional lighting uses. This can lead to substantial cost savings, especially in large commercial spaces where lights are used for extended periods.

Additionally, LED drop ceiling tiles often come with dimming features or motion sensors, further optimizing energy use by adjusting the lighting based on the room’s occupancy and needs.

2. Improved Aesthetic Appeal

Unlike bulky lighting fixtures, LED drop ceiling tiles integrate directly into the ceiling, offering a more streamlined and modern look. Whether you’re designing an office or updating a home, LED tiles can significantly enhance the appearance of the room. They are especially useful in professional settings where a clean, minimalist look is desired.

Moreover, many LED tiles can be customized to match or complement existing ceiling panels. Some even come with decorative patterns or textures that can add a unique touch to your interior design.

3. Easy Installation and Maintenance

The installation process for LED drop ceiling tiles is straightforward, especially if you already have a suspended ceiling system in place. The tiles are designed to fit seamlessly into the ceiling grid, and many models come with plug-and-play systems, making them easy to connect to existing wiring.

In terms of maintenance, LED lights are highly durable and long-lasting. Unlike traditional bulbs that need frequent replacement, LED drop ceiling tiles can last for many years with minimal upkeep. This makes them an ideal choice for both residential and commercial environments where reducing maintenance costs is a priority.

4. Enhanced Lighting Quality

LEDs provide superior lighting quality compared to older lighting technologies. LED drop ceiling tiles offer uniform light distribution, reducing glare and creating a more comfortable working or living environment. These tiles also have better color rendering, making colors appear more vibrant and true to life. Whether you’re working in an office or relaxing at home, LED tiles can significantly improve the overall atmosphere of a room.

5. Eco-Friendly Option

As sustainability becomes a more pressing concern, LED drop ceiling tiles are a great choice for those looking to reduce their carbon footprint. LEDs consume less energy and produce less heat than traditional lighting options, making them more environmentally friendly. Additionally, they contain no harmful materials like mercury, which is commonly found in fluorescent lighting, making them safer for the environment when they reach the end of their lifespan.

How to Choose the Right LED Drop Ceiling Tiles for Your Space

When selecting LED drop ceiling tiles, there are a few factors to keep in mind to ensure you make the right choice for your specific needs.

1. Tile Size and Compatibility

Ensure that the LED drop ceiling tiles you choose are compatible with your existing ceiling grid. Standard ceiling grids usually accommodate 2×2 or 2×4-foot tiles, but it’s important to measure your space accurately before making a purchase.

2. Brightness and Color Temperature

LED tiles come in various brightness levels, measured in lumens, as well as different color temperatures, ranging from warm white (2700K) to cool white (5000K) and daylight (above 5000K). Choose a brightness level and color temperature that fits your space’s function. For example, cool white or daylight is often ideal for offices and workspaces, while warmer tones are better for residential areas like living rooms and bedrooms.

3. Dimming and Control Options

Some LED drop ceiling tiles come with dimming features, allowing you to adjust the brightness as needed. This is a particularly useful feature in multi-purpose rooms or conference rooms where different lighting levels may be required. Consider whether you want dimmable lights and whether you prefer manual controls or integration with a smart lighting system.

4. Certifications and Warranty

Check for certifications like ENERGY STAR or UL listings, which indicate the product has met safety and energy efficiency standards. It’s also a good idea to check the warranty offered by the manufacturer, as this can give you peace of mind regarding the product’s durability.

Installation Process for LED Drop Ceiling Tiles

While it’s possible to install LED drop ceiling tiles on your own, it’s always recommended to consult with an electrician if you’re not familiar with electrical wiring. Here is a general overview of the installation process:

Tools and Materials Needed:

  • LED drop ceiling tiles
  • Wire connectors
  • Ladder or scaffold
  • Measuring tape
  • Screwdriver
  • Electrical wiring (if not already present)

Installation Steps:

  1. Turn Off the Power: Before starting, ensure that the power to the room is turned off to avoid electrical hazards.
  2. Measure and Prepare: Measure the ceiling grid and ensure that your LED tiles fit properly. Adjust the grid if necessary, and remove any existing panels where the LED tiles will be placed.
  3. Wiring: If you’re installing new wiring, run it along the ceiling grid. Connect the wiring from the power source to the LED tiles using wire connectors.
  4. Insert the Tiles: Gently insert the LED drop ceiling tiles into the grid, ensuring that they sit securely.
  5. Test the Lights: After installation, turn the power back on and test the lights to ensure they work correctly.

Conclusion: LED Drop Ceiling Tiles – The Smart Choice for Modern Spaces

LED drop ceiling tiles offer a versatile, energy-efficient, and aesthetically pleasing lighting solution for a variety of environments. Whether you’re upgrading an office, retail space, or residential room, these tiles can significantly improve both the lighting quality and the appearance of your ceiling. With easy installation, low maintenance, and a range of customization options, LED drop ceiling tiles are a smart choice for anyone looking to enhance their interior space.

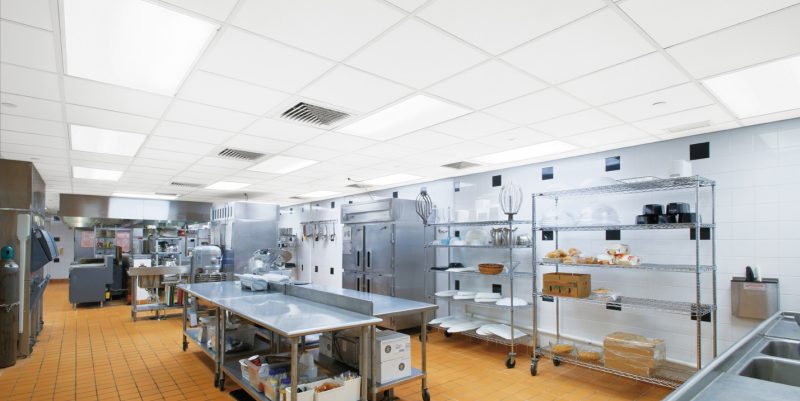
Commercial Kitchen Drop Ceiling Tiles: Benefits, Types, and Installation

When designing or renovating a commercial kitchen, every detail counts, from the layout to the equipment and finishes. One often overlooked but crucial component is the ceiling. Commercial Kitchen Drop Ceiling Tiles not only enhance the aesthetic appeal of your kitchen but also contribute to functionality, hygiene, and acoustics. In this article, we will explore the various aspects of commercial kitchen drop ceiling tiles, including their benefits, types, installation tips, and maintenance.

Commercial Kitchen Drop Ceiling Tiles

What Are Drop Ceiling Tiles?

Drop ceiling tiles, also known as suspended ceiling tiles, are a popular choice for commercial spaces, including kitchens. These tiles are installed below the structural ceiling, creating a space between the two. The drop ceiling framework consists of metal grids that support the tiles, allowing for easy access to plumbing, electrical wiring, and HVAC systems.

Read too: Shiplap Ceiling in Kitchen: A Timeless Trend for a Stylish and Cozy Space

Benefits of Using Drop Ceiling Tiles in Commercial Kitchens

  1. Hygiene and Cleanliness
    • Commercial kitchens are subject to strict hygiene regulations. Drop ceiling tiles can be made from materials that resist moisture, mold, and mildew, making them easier to clean and maintain. This is particularly important in a kitchen environment where spills and splatters are common.
  2. Sound Absorption
    • Noise can be a significant issue in busy kitchens. Drop ceiling tiles can help absorb sound, reducing noise levels and creating a more pleasant working environment. This can be particularly beneficial in open kitchen designs or restaurants where communication is essential.
  3. Accessibility
    • The space above drop ceiling tiles allows for easy access to plumbing, electrical systems, and HVAC units. This makes maintenance and repairs more straightforward, as tiles can be removed without disturbing the entire ceiling structure.
  4. Aesthetic Flexibility
    • Drop ceiling tiles come in various colors, designs, and finishes, providing flexibility in design. Whether you’re looking for a modern, sleek appearance or a more traditional look, there’s a drop ceiling tile option that can meet your needs.
  5. Energy Efficiency
    • Many drop ceiling tiles are designed to be energy-efficient, reflecting light and helping to reduce energy costs. Bright, reflective tiles can enhance the overall lighting in the kitchen, making it a more welcoming and functional space.

Types of Commercial Kitchen Drop Ceiling Tiles

When selecting drop ceiling tiles for your commercial kitchen, it’s essential to consider the various types available. Here are some popular options:

1. Acoustic Tiles

Acoustic tiles are designed to absorb sound and reduce noise levels. They are often used in commercial kitchens to create a quieter work environment. These tiles come in various thicknesses and densities, providing different levels of sound absorption.

2. Moisture-Resistant Tiles

Moisture-resistant tiles are specifically designed for areas where high humidity is common, such as kitchens. These tiles are treated to resist moisture, mold, and mildew, making them an excellent choice for commercial kitchens.

3. Metal Tiles

Metal drop ceiling tiles provide a sleek, modern look. They are durable, easy to clean, and resistant to damage from moisture and grease. Metal tiles are often used in high-end commercial kitchens and restaurants to create a stylish appearance.

4. Mineral Fiber Tiles

Mineral fiber tiles are made from natural and recycled materials, making them an environmentally friendly choice. These tiles offer good sound absorption and are often treated to resist moisture and mold.

5. Plastic Tiles

Plastic drop ceiling tiles are lightweight, easy to install, and highly resistant to moisture and stains. They can be a cost-effective option for commercial kitchens where durability and cleanliness are priorities.

How to Choose the Right Commercial Kitchen Drop Ceiling Tiles

Selecting the right drop ceiling tiles for your commercial kitchen involves several factors:

  1. Compliance with Regulations
    • Ensure that the tiles comply with local health and safety regulations. Some jurisdictions have specific requirements for materials used in commercial kitchens.
  2. Durability
    • Consider the durability of the tiles. Commercial kitchens experience high traffic and exposure to heat, moisture, and grease. Choose tiles that can withstand these conditions.
  3. Aesthetics
    • The appearance of the tiles should complement the overall design of your kitchen. Consider the color, finish, and style that will create a cohesive look.
  4. Installation and Maintenance
    • Consider how easy the tiles are to install and maintain. Some tiles require more maintenance than others, so factor this into your decision-making process.
  5. Cost
    • The cost of the tiles will play a role in your decision. While it’s essential to stay within budget, don’t compromise on quality. Investing in durable, high-quality tiles can save money in the long run.

Installation of Commercial Kitchen Drop Ceiling Tiles

Installing drop ceiling tiles in a commercial kitchen can be a straightforward process if done correctly. Here’s a step-by-step guide:

1: Gather Your Materials

Before you begin, make sure you have all the necessary materials, including:

  • Drop ceiling tiles
  • Metal grid system (rails and cross tees)
  • Suspension wires
  • A level
  • A measuring tape
  • A utility knife or tile cutter
  • Safety goggles and gloves

2: Measure the Space

Measure the dimensions of the kitchen to determine how many tiles and grid components you will need. Create a layout plan, taking into account any fixtures or obstacles, such as lights or vents.

3: Install the Grid System

  1. Mark the Installation Height: Use a chalk line to mark the height where the ceiling will be installed. Ensure it is level around the entire perimeter of the kitchen.
  2. Install Wall Angle: Attach wall angles along the marked line using screws or anchors.
  3. Suspend the Main Runners: Install the main runners (long metal rails) perpendicular to the desired direction of the tiles. Use suspension wires to secure the runners to the ceiling joists.
  4. Add Cross Tees: Insert cross tees into the main runners at the designated intervals according to the tile size. This will create a grid for the tiles to fit into.

4: Cut and Install the Tiles

  1. Measure and Cut: Measure and cut the tiles as necessary to fit around edges, fixtures, or vents. A utility knife or tile cutter can help achieve clean cuts.
  2. Place Tiles in the Grid: Gently place the tiles into the grid system, ensuring they fit snugly and are level with one another.

5: Finishing Touches

Once all the tiles are in place, check for any gaps or misalignments. Adjust as necessary, and then clean the tiles to remove any dust or debris from the installation process.

Maintenance of Commercial Kitchen Drop Ceiling Tiles

Regular maintenance is essential to keep your drop ceiling tiles looking their best and performing optimally:

  1. Regular Cleaning
    • Dust and grime can accumulate on drop ceiling tiles over time. Use a damp cloth or sponge to wipe down the tiles periodically. For tougher stains, a mild detergent can be used.
  2. Inspect for Damage
    • Regularly inspect the tiles for signs of damage, such as cracks, stains, or warping. Replace any damaged tiles promptly to maintain a clean and professional appearance.
  3. Monitor for Mold and Mildew
    • Given the high humidity levels in commercial kitchens, keep an eye out for mold or mildew. If you notice any growth, take immediate action to clean the area and prevent further issues.
  4. Check the Grid System
    • Periodically check the metal grid system for rust or damage. If necessary, tighten any loose components or replace damaged sections to ensure the tiles remain securely in place.

Conclusion

Commercial Kitchen Drop Ceiling Tiles are an essential component in creating a functional and visually appealing kitchen environment. With their numerous benefits, including hygiene, sound absorption, and aesthetic flexibility, these tiles can significantly enhance the overall quality of your commercial kitchen. By understanding the different types of tiles available and following proper installation and maintenance practices, you can create a space that not only meets health regulations but also provides a pleasant atmosphere for staff and customers alike.

Cheap Drop Ceiling Tiles 2X2: Affordable Solutions for Your Home

Drop ceilings, also known as suspended ceilings, are a popular choice for both residential and commercial spaces. They offer an easy and cost-effective way to cover up unsightly pipes, wiring, or damaged ceilings while adding a polished look to any room. When it comes to selecting materials for a drop ceiling, one of the most common choices is the 2×2 ceiling tile. If you’re on a budget, finding cheap drop ceiling tiles 2×2 that don’t compromise on quality or aesthetics is crucial. This article will guide you through everything you need to know about selecting affordable 2×2 drop ceiling tiles, including types, materials, benefits, and where to find the best deals.

Cheap Drop Ceiling Tiles 2X2

Understanding Cheap Drop Ceiling Tiles 2X2

What Are Drop Ceiling Tiles?

Drop ceiling tiles, often referred to as suspended ceiling tiles, are panels that are laid into a grid system. This grid is suspended from the structural ceiling, creating a gap between the ceiling tiles and the actual ceiling. This setup is particularly useful in basements, commercial buildings, and rooms where access to plumbing, electrical wiring, or ductwork is needed.

Why Choose 2X2 Tiles?

2×2 tiles refer to tiles that are 2 feet by 2 feet in size. This size is one of the most popular and commonly used for drop ceilings, as it strikes a good balance between coverage and ease of handling. These tiles are easy to install, replace, and maintain, making them a practical choice for both DIY enthusiasts and professional installers.

Advantages of Cheap Drop Ceiling Tiles 2X2

When selecting cheap drop ceiling tiles 2×2, it’s important to consider the advantages that come with choosing this specific size and style.

Read too: Kitchen Lighting For A Vaulted Ceiling: Illuminating Your Space with Style and Functionality

1. Cost-Effective Solution

One of the most significant advantages of 2×2 drop ceiling tiles is their affordability. These tiles are widely available, and their standard size often means they are produced in bulk, reducing the cost. For budget-conscious homeowners or business owners, choosing cheap drop ceiling tiles 2×2 allows for a cost-effective solution without sacrificing functionality or appearance.

2. Easy Installation

Another benefit of 2×2 ceiling tiles is their ease of installation. Their manageable size allows for quicker and less complicated installation, whether you’re doing it yourself or hiring a professional. This can lead to reduced labor costs, further enhancing the affordability of your project.

3. Variety of Styles

Despite being on the cheaper side, 2×2 ceiling tiles come in a wide range of styles, colors, and materials. Whether you’re looking for a simple, clean look or something more decorative, there’s likely a 2×2 tile that fits your aesthetic. This variety allows you to achieve the look you want at a price you can afford.

4. Sound Absorption

Many 2×2 ceiling tiles offer sound-absorbing qualities, which can be particularly beneficial in noisy environments. Whether it’s a busy office or a bustling home, these tiles can help dampen sound, creating a more peaceful and comfortable space.

5. Accessibility

Drop ceilings provide easy access to the space above, making them ideal for rooms where you might need to access wiring, plumbing, or ductwork. The 2×2 tiles are particularly convenient because they can be easily removed and replaced without disturbing the rest of the ceiling.

Materials Used in Cheap Drop Ceiling Tiles 2X2

When shopping for cheap drop ceiling tiles 2×2, it’s essential to understand the different materials available. Each material offers its own set of benefits and can affect the overall look, durability, and functionality of your ceiling.

1. Mineral Fiber

Mineral fiber is one of the most common materials used in drop ceiling tiles. These tiles are made from a combination of natural and synthetic fibers and are known for their acoustic properties. They are lightweight, affordable, and come in a variety of finishes, making them a popular choice for budget-friendly ceiling installations.

2. PVC (Polyvinyl Chloride)

PVC ceiling tiles are another cost-effective option. These tiles are lightweight, durable, and resistant to moisture and mold, making them an excellent choice for basements or bathrooms. PVC tiles can also be designed to mimic the look of tin or other more expensive materials, providing a high-end look at a fraction of the cost.

3. Gypsum

Gypsum ceiling tiles are made from a mineral-based material and are known for their fire-resistant properties. While they can be slightly more expensive than other options, they offer a solid, durable finish that can be painted or textured to match your décor. Gypsum tiles are an excellent choice for areas where safety is a concern.

4. Tin

Tin ceiling tiles offer a more decorative option for drop ceilings. Although tin tiles tend to be more expensive, there are cheaper faux-tin alternatives that provide the same aesthetic at a lower cost. These tiles add a vintage or industrial look to a room, making them a popular choice for homeowners looking to make a statement.

5. Styrofoam

Styrofoam ceiling tiles are an ultra-cheap option that can be easily installed and painted. While not as durable as other materials, they can be a good choice for temporary installations or for areas where aesthetics are more important than long-term durability.

Where to Find Cheap Drop Ceiling Tiles 2X2

Finding affordable drop ceiling tiles can be as simple as knowing where to look. Here are some tips for sourcing cheap drop ceiling tiles 2×2 without sacrificing quality.

1. Home Improvement Stores

Large home improvement stores often carry a wide selection of ceiling tiles in various styles and materials. These stores frequently offer sales and discounts, particularly on bulk purchases, making it easier to stay within budget.

2. Online Retailers

Shopping online can open up a wider range of options for cheap drop ceiling tiles 2×2. Websites like Amazon, eBay, and specialized retailers often offer competitive prices and a larger selection than brick-and-mortar stores. Additionally, online shopping allows you to easily compare prices and read reviews before making a purchase.

3. Discount Building Supply Stores

Discount building supply stores are another excellent source for affordable ceiling tiles. These stores often sell overstock, discontinued items, or returned goods at a fraction of the retail price. While the selection may be more limited, you can find significant deals if you’re flexible with your choices.

4. Wholesale Suppliers

If you’re working on a large project or multiple rooms, purchasing ceiling tiles from a wholesale supplier can save you money. Many wholesalers offer bulk pricing that can reduce the per-tile cost, making it more affordable to cover a larger area.

5. Local Classifieds and Reuse Centers

Don’t overlook local classifieds, such as Craigslist, or reuse centers when searching for cheap drop ceiling tiles 2×2. You may find used or surplus materials at a steep discount, particularly if someone is renovating and has leftover tiles they no longer need.

Installation Tips for Cheap Drop Ceiling Tiles 2X2

Installing drop ceiling tiles is a relatively straightforward process, but there are a few tips to ensure a smooth installation.

1. Prepare the Grid System

Before installing the tiles, ensure that your grid system is properly installed and level. Any misalignment can cause the tiles to fit improperly or look uneven.

2. Measure and Cut Tiles as Needed

While 2×2 tiles are designed to fit standard grid systems, you may need to cut tiles to fit around edges or obstacles. Use a sharp utility knife or a specialized ceiling tile cutter to achieve clean, precise cuts.

3. Install Tiles Carefully

When placing tiles into the grid, do so gently to avoid damaging them. If a tile doesn’t fit easily, double-check the grid alignment or trim the tile slightly rather than forcing it into place.

4. Consider Lighting and Fixtures

If your ceiling will include recessed lighting or other fixtures, ensure that your tiles are compatible or can be easily modified to accommodate these elements. Some tiles are pre-cut for standard fixtures, which can save time during installation.

Maintenance and Care for Cheap Drop Ceiling Tiles 2X2

Once your ceiling tiles are installed, proper maintenance will help them last longer and maintain their appearance.

1. Regular Cleaning

Dust and dirt can accumulate on ceiling tiles, particularly in high-traffic areas. Regularly dusting or lightly vacuuming your tiles can keep them looking fresh. For deeper cleaning, use a damp cloth and mild detergent, but be sure to check that the tiles are water-resistant before doing so.

2. Replace Damaged Tiles

If a tile becomes damaged, replacing it is usually simple. Keep a few extra tiles on hand for quick replacements, ensuring that your ceiling always looks its best.

3. Inspect for Moisture Damage

In areas prone to moisture, regularly inspect your tiles for signs of water damage, such as staining or warping. If you notice any issues, address the source of the moisture and replace the affected tiles to prevent further damage.

Conclusion

Cheap drop ceiling tiles 2×2 offer an affordable, versatile, and stylish solution for covering up old ceilings or finishing a room. Whether you’re renovating a basement, updating a commercial space, or simply looking for a quick and easy ceiling solution, 2×2 tiles provide the perfect combination of practicality and aesthetic appeal. By understanding the different materials, knowing where to find the best deals, and following proper installation and maintenance tips, you can achieve a professional-looking ceiling without exceeding your budget.

Drop Ceiling Tiles 24 X 48: Installation, Benefits, and Design Ideas

Drop ceiling tiles, also known as suspended ceiling tiles, are a popular choice for both residential and commercial spaces. Their versatility, ease of installation, and aesthetic appeal make them a go-to solution for many property owners. Among the various sizes available, Drop Ceiling Tiles 24 X 48 are particularly favored for their ability to cover large areas efficiently. This comprehensive guide will explore the benefits, installation process, and design ideas for Drop Ceiling Tiles 24 X 48, helping you transform any space effortlessly.

Drop Ceiling Tiles 24 X 48

What Are Drop Ceiling Tiles 24 X 48?

Drop ceiling tiles are panels designed to fit into a grid system suspended below the main structural ceiling. The 24 X 48 dimension refers to tiles that are 24 inches wide and 48 inches long, making them ideal for covering substantial areas with fewer seams and breaks.

Key Features:

  • Standard Size: The 24 X 48 dimension is a standard size in the industry, making it easy to find and replace tiles.
  • Material Variety: Available in various materials, including mineral fiber, fiberglass, metal, and PVC.
  • Aesthetic Versatility: Comes in different textures, patterns, and colors to suit diverse design preferences.

Benefits of Drop Ceiling Tiles 24 X 48

1. Easy Installation

One of the primary advantages of drop ceiling tiles is their straightforward installation process. The tiles are designed to fit into a grid system that can be installed quickly, even by DIY enthusiasts.

Installation Benefits:

  • Quick Setup: The grid system is easy to assemble, and the tiles simply drop into place.
  • Minimal Disruption: Installation can be done without significant disruptions to the existing space.
  • Accessibility: The tiles can be easily removed for access to electrical wiring, plumbing, and HVAC systems.

Read too: Kitchen Lighting For A Vaulted Ceiling: Illuminating Your Space with Style and Functionality

2. Aesthetic Appeal

Drop Ceiling Tiles 24 X 48 offer a wide range of design options, allowing you to create a polished and professional look in any room. Whether you prefer a classic, modern, or industrial style, there are tiles to match your vision.

Aesthetic Benefits:

  • Variety of Designs: Choose from smooth, textured, patterned, or metallic finishes.
  • Customizable: Paintable tiles offer further customization to match your interior decor.
  • Seamless Look: Larger tiles reduce the number of seams, creating a cleaner, more streamlined appearance.

3. Acoustic Performance

Many drop ceiling tiles are designed with sound-absorbing properties, making them an excellent choice for improving the acoustics of a room. This is particularly beneficial in offices, classrooms, and entertainment areas.

Acoustic Benefits:

  • Noise Reduction: Helps reduce noise levels and improve sound quality within a space.
  • Privacy: Enhances privacy by minimizing sound transmission between rooms.
  • Comfort: Creates a more comfortable and productive environment by reducing ambient noise.

4. Energy Efficiency

Drop ceiling tiles can also contribute to energy efficiency by providing an additional layer of insulation. This helps maintain a consistent temperature within a room, reducing heating and cooling costs.

Energy Benefits:

  • Thermal Insulation: Insulates the space, keeping it warmer in the winter and cooler in the summer.
  • Reflective Surfaces: Some tiles have reflective surfaces that enhance lighting efficiency, reducing the need for additional light sources.

5. Concealing Imperfections

Drop Ceiling Tiles 24 X 48 are perfect for concealing imperfections in the existing ceiling, such as cracks, stains, or unsightly wiring. They provide a quick and effective solution to improve the overall look of a room.

Concealment Benefits:

  • Hides Flaws: Covers up imperfections, giving the ceiling a smooth and clean appearance.
  • Improves Aesthetics: Enhances the overall aesthetic of the room without major renovations.
  • Functional: Allows easy access to hidden systems for maintenance and repairs.

Drop Ceiling Tiles 24 X 48: Installation Guide

Planning and Preparation

Proper planning and preparation are crucial for a successful drop ceiling installation. Here are the steps to get started:

  1. Measure the Space: Accurately measure the dimensions of the room to determine the number of tiles and grid components needed.
  2. Choose Materials: Select the type of tiles and grid system that best suits your design and functional requirements.
  3. Gather Tools: Ensure you have all the necessary tools, including a tape measure, level, drill, and cutting tools.

Installing the Grid System

The grid system forms the framework for the drop ceiling tiles. Follow these steps to install it:

  1. Mark the Perimeter: Use a level to mark the perimeter of the ceiling where the grid will be installed. Ensure the marks are even to maintain a level ceiling.
  2. Install Wall Angles: Attach wall angles along the perimeter marks. These will support the grid system.
  3. Install Main Runners: Install main runners across the room, securing them to the wall angles. Use a laser level to ensure they are perfectly straight.
  4. Install Cross Tees: Install cross tees perpendicular to the main runners to create a grid pattern. The intersections should form openings that match the size of your tiles.

Placing the Tiles

Once the grid system is in place, it’s time to install the tiles:

  1. Cut Tiles to Size: If necessary, cut the tiles to fit around fixtures or along the edges of the room.
  2. Place Tiles in Grid: Carefully lift each tile and place it into the grid opening. Ensure they are seated properly and lie flat.
  3. Adjust as Needed: Make any necessary adjustments to ensure the tiles fit snugly and the grid remains level.

Design Ideas for Drop Ceiling Tiles 24 X 48

1. Modern Minimalism

For a sleek, modern look, opt for smooth, white drop ceiling tiles. This design works well in contemporary spaces, providing a clean and uncluttered appearance.

Tips:

  • Pair with Recessed Lighting: Recessed lighting enhances the minimalist aesthetic and provides ample illumination.
  • Use Monochrome Color Scheme: Keep the color scheme simple and monochromatic for a cohesive look.

2. Industrial Chic

Metallic drop ceiling tiles can create an industrial chic vibe, perfect for lofts and urban spaces. Choose tiles with a metallic finish or exposed grid systems to achieve this look.

Tips:

  • Exposed Ductwork: Combine with exposed ductwork and brick walls for a true industrial feel.
  • Edison Bulb Lighting: Use Edison bulb lighting fixtures to add warmth and character to the space.

3. Classic Elegance

For a more traditional or elegant space, consider textured or patterned drop ceiling tiles. These tiles add depth and interest to the ceiling, enhancing the room’s overall decor.

Tips:

  • Crown Molding: Add crown molding around the edges for a refined touch.
  • Chandeliers: Install chandeliers or ornate light fixtures to complement the classic design.

4. Creative and Playful

In spaces like children’s rooms or creative studios, use colorful or patterned tiles to add a playful touch. Mix and match different designs to create a unique and lively environment.

Tips:

  • Bold Colors: Don’t be afraid to use bold, bright colors that make the space fun and inviting.
  • Interactive Elements: Consider incorporating interactive elements like magnetic or whiteboard tiles.

Maintaining Drop Ceiling Tiles 24 X 48

Maintaining drop ceiling tiles is relatively easy, ensuring they remain attractive and functional for years to come. Here are some maintenance tips:

Regular Cleaning

Dust and dirt can accumulate on ceiling tiles over time. Regular cleaning helps maintain their appearance and longevity.

Cleaning Tips:

  • Dust Regularly: Use a soft cloth or duster to remove dust from the surface of the tiles.
  • Spot Clean: For stubborn stains, use a mild detergent solution and a soft cloth to gently clean the affected area.
  • Avoid Excess Moisture: Be careful not to saturate the tiles with water, as excessive moisture can cause damage.

Inspection and Replacement

Regularly inspect the tiles and grid system for any signs of damage or wear.

Inspection Tips:

  • Check for Damage: Look for any cracked or sagging tiles and replace them promptly.
  • Inspect Grid System: Ensure the grid system remains securely fastened and in good condition.
  • Replace as Needed: Keep spare tiles on hand for quick replacements when necessary.

Conclusion

Drop Ceiling Tiles 24 X 48 are a versatile and practical solution for enhancing the aesthetics and functionality of any space. Whether you’re renovating an office, updating a retail store, or refreshing a room in your home, these tiles offer a range of benefits, including easy installation, aesthetic appeal, acoustic performance, energy efficiency, and the ability to conceal imperfections.

By following the installation guide and exploring various design ideas, you can create a ceiling that not only looks great but also meets your specific needs. Regular maintenance ensures your ceiling remains in top condition, providing lasting beauty and functionality.

Drop Ceiling Tiles for Restaurant Kitchen: The Ultimate Guide

Choosing the right drop ceiling tiles for restaurant kitchens is crucial for maintaining a clean, safe, and attractive environment. Drop ceiling tiles, also known as suspended ceilings, offer many benefits for commercial kitchens, including easy access to electrical and plumbing systems, improved acoustics, and enhanced fire resistance. In this comprehensive guide, we’ll explore everything you need to know about selecting the best drop ceiling tiles for your restaurant kitchen, from materials and styles to maintenance and installation tips.

Drop Ceiling Tiles For Restaurant Kitchen

Why Drop Ceiling Tiles are Ideal for Restaurant Kitchens

Drop ceiling tiles for restaurant kitchens are a popular choice for several reasons:

  1. Ease of Installation and Maintenance: Drop ceilings are relatively easy to install and maintain. They allow for easy access to wiring, plumbing, and HVAC systems, which is essential for any restaurant that needs to keep operations running smoothly with minimal disruption.
  2. Enhanced Hygiene: Restaurant kitchens must adhere to strict hygiene standards. Drop ceiling tiles are often made from materials that resist moisture and mold, making them easy to clean and maintain.
  3. Aesthetic Appeal: Beyond functionality, drop ceiling tiles can enhance the overall look of your kitchen. They come in various designs and finishes, allowing you to create a professional and attractive space.
  4. Sound Absorption: Kitchens can be noisy environments. Drop ceiling tiles with sound-absorbing properties help to reduce noise levels, creating a more pleasant working atmosphere for staff.

Choosing the Right Material for Drop Ceiling Tiles

When selecting drop ceiling tiles for restaurant kitchens, the material is one of the most important considerations. Here are some common materials and their benefits:

1. Mineral Fiber

Mineral fiber tiles are a popular choice for commercial kitchens due to their excellent sound absorption and fire resistance properties. They are lightweight, easy to install, and come in various textures and patterns.

2. Vinyl

Vinyl-covered tiles are ideal for environments where hygiene is a top priority. These tiles are resistant to moisture, mold, and mildew, making them easy to clean. They are also durable and can withstand the demands of a busy kitchen.

3. Metal

Metal tiles, such as aluminum or steel, are highly durable and resistant to moisture and fire. They are easy to clean and maintain, making them suitable for high-humidity environments like restaurant kitchens. Metal tiles also offer a sleek, modern look.

4. Gypsum

Gypsum tiles provide good sound insulation and fire resistance. They are available in various designs and finishes, allowing you to customize the look of your kitchen. However, they may not be as moisture-resistant as other materials, so they require regular maintenance.

Design and Style Considerations

When it comes to the design and style of drop ceiling tiles for restaurant kitchens, there are several factors to consider:

1. Tile Size and Shape

Drop ceiling tiles are available in various sizes and shapes. Standard sizes include 2×2 feet and 2×4 feet tiles. The size you choose will depend on the overall design of your kitchen and the look you want to achieve.

2. Color and Finish

Choose a color and finish that complements your kitchen’s décor. White is the most common color for ceiling tiles as it reflects light well and creates a clean, bright look. However, other colors and finishes can add a unique touch to your space.

3. Texture and Pattern

Textures and patterns can add visual interest to your ceiling. From smooth and plain tiles to more intricate designs, there are plenty of options to choose from. Consider the overall style of your restaurant and select tiles that enhance the aesthetic.

Installation Tips

Proper installation is key to ensuring the longevity and functionality of drop ceiling tiles for restaurant kitchens. Here are some tips to keep in mind:

1. Measure the Space

Accurate measurements are crucial for a successful installation. Measure the length and width of the room to determine how many tiles you will need. Don’t forget to account for any obstacles such as lights, vents, or sprinkler systems.

2. Prepare the Grid System

The grid system is the framework that holds the ceiling tiles in place. Ensure that the grid is level and properly secured to the ceiling. Use a laser level or chalk line to create straight lines for installation.

3. Cut Tiles to Fit

In some areas, you may need to cut tiles to fit around obstacles or at the edges of the room. Use a utility knife or tile cutter to make precise cuts. Always wear safety gear, such as gloves and goggles, when cutting tiles.

4. Install the Tiles

Begin installing the tiles by placing them into the grid system. Start from the center of the room and work your way outwards. Ensure that each tile fits snugly into the grid and lies flat.

5. Check for Alignment

Once all the tiles are in place, double-check for alignment and make any necessary adjustments. The tiles should be level and even to create a professional appearance.

Maintenance and Cleaning

Maintaining drop ceiling tiles for restaurant kitchen is essential for keeping them in good condition and ensuring they continue to meet health and safety standards. Here are some maintenance tips:

1. Regular Cleaning

Regular cleaning is essential to prevent the buildup of grease, dust, and other contaminants. Use a mild detergent and warm water to clean the tiles, and avoid abrasive cleaners that can damage the surface.

2. Inspect for Damage

Periodically inspect the tiles for signs of damage, such as cracks, stains, or sagging. Replace any damaged tiles promptly to maintain the integrity of the ceiling.

Read too: Striped Schoolhouse Ceiling Light Fixtures: Unveiling the Timeless Charm

3. Address Moisture Issues

Moisture can lead to mold and mildew growth, which is a significant concern in restaurant kitchens. Ensure that your kitchen has proper ventilation and address any leaks or moisture issues immediately.

Conclusion

Choosing the right drop ceiling tiles for restaurant kitchen involves careful consideration of material, design, and installation techniques. The right tiles not only enhance the appearance of your kitchen but also contribute to a safer and more efficient working environment. By following the guidelines outlined in this guide, you can ensure that your restaurant kitchen ceiling meets the highest standards of functionality and aesthetics.

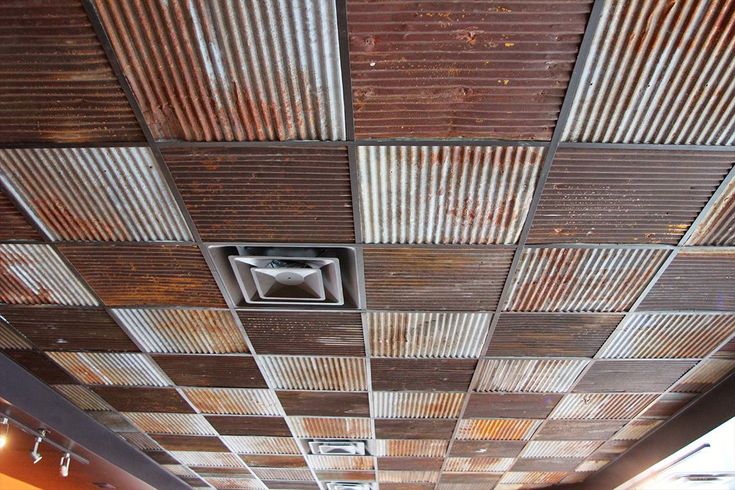
Rustic Drop Ceiling Tile: A Guide to Rustic Home Décor

Are you looking to infuse your home with the cozy charm of rustic décor? One way to achieve this aesthetic is by incorporating rustic drop ceiling tile into your interior design. In this guide, we’ll explore everything you need to know about rustic drop ceiling tiles, from their features and benefits to installation tips and design inspiration.

Rustic Drop Ceiling Tiles

Why Choose Rustic Drop Ceiling Tiles?

Rustic drop ceiling tiles offer a unique blend of functionality and style, making them an excellent choice for homeowners seeking to enhance the visual appeal of their living spaces. Here are some reasons to consider incorporating rustic drop ceiling tiles into your home décor:

  • Authentic Aesthetic: Rustic drop ceiling tiles are designed to mimic the look of natural materials such as wood, tin, or reclaimed metal, adding authenticity and character to any room.
  • Versatility: Whether you’re aiming for a farmhouse-inspired kitchen, a cozy cabin retreat, or a rustic industrial loft, there’s a wide range of rustic drop ceiling tile designs to suit your preferred style.
  • Durability: Made from high-quality materials, rustic drop ceiling tiles are durable and long-lasting, providing both aesthetic appeal and practical functionality.
  • Easy Installation: With their lightweight construction and simple installation process, rustic drop ceiling tiles are an accessible option for DIY enthusiasts and professional contractors alike.

Choosing the Right Rustic Drop Ceiling Tiles

When selecting rustic drop ceiling tiles for your home, consider factors such as material, color, and pattern to ensure they complement your existing décor and design preferences. Here are some popular options to explore:

  1. Wood-look Tiles: Embrace the warmth and texture of natural wood with rustic drop ceiling tiles that feature realistic wood grain patterns and finishes.
  2. Tin Tiles: Add a touch of vintage charm to your space with tin drop ceiling tiles, which evoke the look of traditional pressed tin ceilings found in historic homes and buildings.
  3. Metallic Tiles: For an industrial-inspired aesthetic, opt for rustic drop ceiling tiles with metallic finishes such as copper, bronze, or aged metal.

Read too: Discovering the Charm of Nautical Outdoor Ceiling Fans for Your Coastal Retreat: Sail into Style

Installation Tips

Installing rustic drop ceiling tiles is a straightforward process that can be completed in just a few simple steps. Here’s a basic overview of how to install these stylish tiles:

  1. Prepare the Ceiling: Ensure the ceiling surface is clean, dry, and free of any debris or obstructions before beginning the installation process.
  2. Measure and Cut Tiles: Measure the dimensions of the ceiling and use a utility knife or tin snips to cut the rustic drop ceiling tiles to fit accordingly.
  3. Apply Adhesive: Apply a suitable adhesive to the back of each tile and carefully press it into place on the ceiling, starting from one corner and working your way across.
  4. Secure Edges: Use nails or screws to secure the edges of the tiles to the ceiling, ensuring they are firmly in place and evenly spaced.
  5. Finishing Touches: Once all tiles are installed, add finishing touches such as trim pieces or molding to complete the look and enhance the overall aesthetic.

Design Inspiration for Rustic Drop Ceiling Tiles

Need some inspiration to kickstart your rustic ceiling tile project? Here are a few design ideas to spark your creativity:

  • Rustic Farmhouse Kitchen: Install weathered wood-look ceiling tiles in a farmhouse kitchen for a cozy and inviting ambiance.
  • Rustic Cabin Retreat: Create a rustic retreat in your home with tin ceiling tiles that evoke the charm of a mountain cabin or lakeside lodge.
  • Rustic Industrial Loft: Incorporate metallic drop ceiling tiles into an industrial loft space for an edgy and modern twist on rustic design.

Conclusion

Rustic drop ceiling tile are a versatile and stylish option for enhancing the aesthetic appeal of any room in your home. Whether you’re aiming for a cozy farmhouse vibe or an urban industrial look, these tiles offer endless design possibilities to suit your unique style and preferences.

Drop Ceiling Tile: Elevate Your Kitchen with Stylish

Are you looking to revamp your kitchen’s appearance without breaking the bank? Look no further than Kitchen Drop Ceiling Tile. These versatile and stylish additions can completely transform the look and feel of your culinary space. In this comprehensive guide, we’ll explore everything you need to know about Kitchen Drop Ceiling Tiles, from their benefits to installation tips and design ideas.

Kitchen Drop Ceiling Tiles

Understanding Kitchen Drop Ceiling Tiles

Kitchen Drop Ceiling Tiles, also known as suspended ceiling tiles, are lightweight panels that are installed in a grid system suspended below the actual ceiling. They offer a myriad of benefits, ranging from aesthetics to practicality. Available in a variety of materials such as tin, PVC, and acoustic, these tiles come in numerous designs and finishes to suit any kitchen style.

Benefits of Kitchen Drop Ceiling Tiles

  • Enhanced Aesthetics: One of the primary reasons homeowners opt for Kitchen Drop Ceiling Tiles is their ability to enhance the overall aesthetic appeal of the kitchen. Whether you prefer a rustic, modern, or traditional look, there’s a drop ceiling tile design to complement your style.
  • Improved Acoustics: In a busy kitchen environment where noise levels can escalate quickly, drop ceiling tiles can help absorb sound, resulting in a quieter and more enjoyable cooking experience.
  • Concealed Wiring and Pipes: If your kitchen has exposed wiring or unsightly pipes, drop ceiling tiles provide an elegant solution to conceal them while maintaining easy access for repairs or maintenance.
  • Easy Installation: Unlike traditional ceiling renovation projects, installing Kitchen Drop Ceiling Tiles is relatively simple and can often be done as a DIY project, saving you time and money.

Choosing the Right Kitchen Drop Ceiling Tiles

When selecting drop ceiling tiles for your kitchen, consider factors such as material, design, and maintenance requirements. PVC tiles are moisture-resistant and easy to clean, making them ideal for kitchens prone to splashes and spills. Tin tiles, on the other hand, lend a vintage charm and are highly durable.

Read too: Exploring the Benefits and How-Tos of DIY Ceiling Cassette Mini Split Installation: Revolutionizing Comfort

Installation Tips

Installing Kitchen Drop Ceiling Tiles requires careful planning and precision. Begin by measuring the dimensions of your kitchen and determining the layout of the grid system. Ensure proper support for the grid, especially if you’re installing heavier materials like tin. Follow manufacturer instructions closely for a seamless installation process.

Design Ideas

From classic white tiles to intricate patterns and textured finishes, the design possibilities with Kitchen Drop Ceiling Tiles are endless. Consider incorporating recessed lighting for added ambiance or opt for decorative edge trim to elevate the visual appeal of your ceiling.

Maintenance and Care

To keep your Kitchen Drop Ceiling Tiles looking their best, regular maintenance is essential. Simply wipe them down with a mild detergent and water solution to remove dust and grease buildup. Avoid using abrasive cleaners or harsh chemicals, as they may damage the tiles’ finish.

Conclusion

Kitchen Drop Ceiling Tile offer a cost-effective and stylish solution for upgrading your kitchen’s appearance. Whether you’re aiming for a sleek modern aesthetic or a cozy farmhouse vibe, there’s a drop ceiling tile design to suit your taste. With easy installation, durability, and low maintenance requirements, these tiles are a practical choice for any kitchen renovation project.

So why wait? Transform your kitchen today with the timeless elegance of Kitchen Drop Ceiling Tiles.

Enhance Your Space with Stunning Translucent Drop Ceiling Tiles: A Comprehensive Guide

Translucent drop ceiling tiles are the perfect solution for adding sophistication and style to any space. In this comprehensive guide, discover everything you need to know about these innovative tiles, from their unique features to installation tips and the benefits they offer.

Translucent Drop Ceiling Tiles

Understanding Translucent Drop Ceiling Tiles

Translucent drop ceiling tiles are designed to allow light to pass through, creating a soft, diffused glow that enhances the ambiance of any room. Made from durable materials such as acrylic or fiberglass, these tiles are lightweight, easy to install, and available in a variety of sizes and designs to suit different aesthetic preferences.

Features of Translucent Drop Ceiling Tiles

  1. Light Transmission: Translucent ceiling tiles are engineered to transmit light evenly across the surface, eliminating harsh shadows and creating a warm, inviting atmosphere.
  2. Durability: Made from high-quality materials, translucent tiles are resistant to moisture, mold, and mildew, making them ideal for use in humid environments such as kitchens and bathrooms.
  3. Versatility: These tiles are available in various styles, including smooth, textured, and patterned designs, allowing for endless customization options to complement any décor scheme.
  4. Easy Installation: Translucent drop ceiling tiles are designed for easy installation, requiring minimal tools and expertise. They can be installed directly onto existing ceiling grids or suspended using wires for a floating effect.

Read too: Exploring the Efficiency of Radiant Ceiling Heater Electric: A Comprehensive Guide

Benefits of Translucent Drop Ceiling Tiles

  1. Enhanced Lighting: By allowing natural or artificial light to pass through, translucent tiles help brighten dark spaces and reduce the need for additional lighting fixtures, saving energy and lowering utility costs.
  2. Visual Appeal: The soft, diffused light created by translucent ceiling tiles adds depth and dimension to a room, making it appear larger and more spacious.
  3. Privacy and Acoustics: Translucent tiles provide a degree of privacy while still allowing light to filter through, making them ideal for partition walls or dividing spaces. Additionally, they can help improve acoustics by absorbing sound and reducing echo.
  4. Easy Maintenance: Unlike traditional ceiling materials such as drywall or plaster, translucent tiles are easy to clean and maintain, requiring only periodic dusting or wiping with a mild detergent solution.

Installation Tips

1. Prepare the Ceiling Grid

  • Ensure that the existing ceiling grid is clean, level, and free of any debris or obstructions.
  • If necessary, make any repairs or adjustments to the grid before installing the translucent tiles.

2. Measure and Cut Tiles

  • Measure the dimensions of the ceiling grid and mark the translucent tiles accordingly for cutting.
  • Use a sharp utility knife or a specialized tile cutter to cut the tiles to size, ensuring a precise fit.

3. Install Tiles

  • Start by placing the first row of tiles along one edge of the ceiling grid, ensuring proper alignment of the tongue and groove edges.
  • Continue installing the tiles row by row, using ceiling tile adhesive or clips to secure them in place as needed.
  • Double-check the alignment and spacing of the tiles periodically to ensure a uniform and professional-looking installation.

4. Finishing Touches

  • After installing all the tiles, trim any excess material along the edges by using a utility knife or a fine-toothed saw.
  • Replace the ceiling grid covers or add decorative molding to conceal the edges and give the ceiling a polished finish.

Conclusion

In conclusion, translucent drop ceiling tiles offer a versatile and stylish solution for enhancing the ambiance of any space. With their unique features, easy installation, and numerous benefits, these tiles are an excellent choice for residential and commercial applications alike. Whether you’re looking to brighten a dim room, create visual interest, or improve acoustics, translucent ceiling tiles are sure to make a lasting impression.

Melt Away Drop Ceiling Tile for Ultimate Convenience: Revolutionizing Ceilings

Melt away drop ceiling tile represent a groundbreaking advancement in ceiling design, offering unparalleled convenience and functionality for both residential and commercial spaces. In this comprehensive guide, we’ll delve into the features, benefits, and applications of melt away drop ceiling tiles, showcasing how they can transform your space with ease.

Melt Away Drop Ceiling Tiles

Understanding Melt Away Drop Ceiling Tiles

What Are Melt Away Drop Ceiling Tiles?

Melt away drop ceiling tiles, also known as dissolvable ceiling tiles or water-soluble ceiling tiles, are innovative ceiling panels designed to simplify the process of ceiling maintenance and renovation. These tiles are made from water-soluble materials that dissolve upon contact with water, allowing them to be easily removed without the need for extensive manual labor or demolition.

Key Features and Functionality

Easy Removal

The primary feature of melt away drop ceiling tiles is their ease of removal. Unlike traditional ceiling tiles that require manual removal and disposal, melt away tiles can be dissolved with water, eliminating the need for labor-intensive removal processes. This makes them ideal for spaces where frequent access to the ceiling plenum is required, such as offices, retail stores, and healthcare facilities.

Quick Installation

In addition to easy removal, melt away drop ceiling tiles are also quick and easy to install. These tiles can be installed using standard drop ceiling grid systems, making them suitable for both new construction and renovation projects. With their simple installation process, melt away tiles offer a convenient solution for updating or renovating ceilings in a variety of settings.

Applications of Melt Away Drop Ceiling Tiles

Commercial Spaces

Melt away drop ceiling tiles are well-suited for use in commercial spaces where frequent access to the ceiling plenum is necessary. In settings such as office buildings, retail stores, and restaurants, these tiles provide a convenient solution for maintenance and renovation projects. Whether accessing HVAC systems, electrical wiring, or plumbing fixtures, melt away tiles simplify the process of ceiling maintenance and repair.

Healthcare Facilities

In healthcare facilities, where cleanliness and infection control are paramount, melt away drop ceiling tiles offer significant benefits. These tiles can be easily removed and replaced as needed, allowing for efficient cleaning and disinfection of ceiling surfaces. Additionally, melt away tiles eliminate the risk of contamination associated with traditional ceiling tiles, contributing to a safer and healthier environment for patients and staff.

Benefits of Melt Away Drop Ceiling Tiles

Time Savings

One of the primary benefits of melt away drop ceiling tiles is their ability to save time and labor during maintenance and renovation projects. With traditional ceiling tiles, removal and replacement can be a time-consuming and labor-intensive process. Melt away tiles streamline this process, allowing for quick and easy removal without the need for specialized tools or equipment.

Cost Efficiency

In addition to time savings, melt away drop ceiling tiles offer cost efficiency benefits. By reducing the time and labor required for ceiling maintenance and renovation, these tiles help minimize associated labor costs. Additionally, the convenience of melt away tiles may result in fewer disruptions to business operations, further reducing potential losses in productivity.

Versatility

Melt away drop ceiling tiles are available in a variety of sizes, styles, and finishes, making them suitable for a wide range of applications and design aesthetics. Whether you prefer a traditional look or a more modern design, there are melt away tiles available to suit your preferences. Additionally, these tiles can be easily customized to accommodate lighting fixtures, air vents, and other ceiling accessories.

Considerations for Installation and Use

Water Resistance

While melt away drop ceiling tiles are designed to dissolve upon contact with water, it’s essential to consider their water resistance properties during installation. Ensure that the ceiling plenum is adequately sealed to prevent water damage to surrounding structures or equipment. Additionally, take precautions to prevent accidental activation of the tiles during routine cleaning or maintenance activities.

Compatibility

When selecting melt away drop ceiling tiles, it’s important to ensure compatibility with existing ceiling grid systems and accessories. Verify that the tiles are compatible with standard drop ceiling grid systems and that they meet any specific requirements for your project. Additionally, consider the compatibility of the tiles with other ceiling components, such as lighting fixtures and air vents.

Conclusion

Melt away drop ceiling tile offer a revolutionary solution for simplifying ceiling maintenance and renovation projects in commercial and residential spaces. With their easy removal, quick installation, and versatile design options, these tiles provide unparalleled convenience and functionality for architects, contractors, and building owners alike. Whether used in offices, healthcare facilities, or retail stores, melt away tiles offer a convenient and cost-effective solution for updating and maintaining ceilings with ease.