How to Paint Drop Ceiling Tiles Like a Pro? Transform Your Space

Drop ceilings, also known as suspended ceilings, are a common feature in basements, offices, and commercial buildings. While they are practical for hiding plumbing and electrical systems, they can sometimes appear outdated or dull. If you want to give your space a fresh look without a complete renovation, painting drop ceiling tiles is a cost-effective and straightforward solution. In this guide, we will delve into how to paint drop ceiling tiles, covering everything from preparation to the final touches.

How To Paint Drop Ceiling Tiles

Why Paint Drop Ceiling Tiles?

Before diving into the process, it’s essential to understand why painting your drop ceiling tiles can be a beneficial choice. Here are a few compelling reasons:

1. Enhanced Aesthetic Appeal

One of the primary reasons homeowners and business owners choose to paint drop ceiling tiles is to enhance the aesthetic appeal of the room. A fresh coat of paint can completely transform the look of the ceiling, making it more visually appealing and modern.

Read too: Kitchen Lighting For A Vaulted Ceiling: Illuminating Your Space with Style and Functionality

2. Cost-Effectiveness

Replacing drop ceiling tiles can be costly and labor-intensive. Painting is a fraction of the price, allowing you to achieve a new look without breaking the bank.

3. Customization Options

Painting gives you the freedom to customize the color and finish of your ceiling tiles. Whether you want a bright white for a clean look or a bold color to make a statement, the options are endless.

4. Conceal Stains and Damage

Over time, drop ceiling tiles can accumulate stains, water damage, or discoloration. Painting can effectively conceal these imperfections, giving your ceiling a fresh, clean appearance.


How to Prepare for Painting Drop Ceiling Tiles

Step 1: Gather Your Supplies

Before you start, gather all the necessary supplies. Here’s what you’ll need:

  • Paint: Choose a high-quality ceiling paint or a paint designed specifically for drop ceilings.
  • Primer: A good primer will help the paint adhere better, especially if the tiles are porous.
  • Paint Roller: A roller with a long handle is best for reaching high ceilings.
  • Brush: Use a paintbrush for cutting in around edges and corners.
  • Drop Cloths: Protect your furniture and floor by laying down drop cloths.
  • Ladder: Ensure you have a sturdy ladder to reach the ceiling comfortably.
  • Masking Tape: Use this to tape off any areas you don’t want to paint.

Step 2: Prepare the Area

  • Remove Obstructions: Clear any furniture or items from the area below the drop ceiling. If possible, remove any tiles that are stained or damaged and replace them.
  • Cover Surfaces: Use drop cloths to cover the floor and any remaining furniture to protect them from paint splatters.

Step 3: Inspect and Clean the Tiles

Before painting, inspect the tiles for damage. If you notice any mold or mildew, clean the tiles with a mixture of water and mild detergent. For tough stains, you may need to use a specialized cleaner. Once cleaned, allow the tiles to dry completely before proceeding.


How to Paint Drop Ceiling Tiles

Now that you’re prepared, let’s walk through the steps on how to paint drop ceiling tiles effectively.

Step 4: Prime the Tiles

If you are using a primer, it’s essential to apply it first. Here’s how:

  1. Apply Primer: Using a roller, apply the primer evenly across the tiles. For corners and edges, use a brush for better precision.
  2. Drying Time: Allow the primer to dry completely according to the manufacturer’s instructions. This usually takes about an hour, but check the label for specifics.

Step 5: Choose the Right Paint

For painting drop ceiling tiles, select a high-quality paint that is specifically designed for ceilings or a semi-gloss finish. Semi-gloss paints are more durable and easier to clean.

Step 6: Painting Process

  1. Start with Edges: Use a brush to carefully paint the edges of the tiles first. This step ensures that you have clean lines along the perimeter.
  2. Roll the Main Areas: Once the edges are done, use a roller to paint the flat surfaces of the tiles. Work in small sections to maintain a wet edge, preventing roller marks.
  3. Apply Multiple Coats: Depending on the color and finish, you may need to apply multiple coats of paint. Allow the first coat to dry completely before applying the second coat.

Step 7: Final Touches

After the final coat is dry, inspect your work. Touch up any spots that may need additional paint or attention.

Step 8: Clean Up

Once you’re satisfied with the painting, remove any masking tape carefully while the paint is still slightly wet to ensure clean lines.


Maintenance Tips for Painted Drop Ceiling Tiles

Once your drop ceiling tiles are painted, proper maintenance can help keep them looking fresh and new.

1. Regular Cleaning

Dust and dirt can accumulate on your ceiling tiles, so make it a habit to dust them regularly. Use a microfiber cloth or a soft duster to gently wipe the tiles.

2. Avoid Harsh Chemicals

When cleaning, avoid using harsh chemicals that could damage the paint finish. A mixture of mild soap and water is usually sufficient.

3. Check for Damage

Periodically inspect your tiles for any signs of damage, such as cracks or discoloration. Address any issues promptly to maintain the overall appearance.


Conclusion: Revitalize Your Space with Painted Drop Ceiling Tiles

Painting your drop ceiling tiles can significantly enhance the overall look and feel of your space. Not only does it offer a cost-effective solution to outdated ceilings, but it also provides an opportunity for customization and creativity.

By following the steps outlined in this guide on how to paint drop ceiling tiles, you can transform your room into a more inviting and aesthetically pleasing environment. With a little effort and the right tools, you can enjoy a fresh and stylish ceiling that enhances your home or office.
The Ultimate Guide: How Much To Paint Basement Ceiling Like a Pro

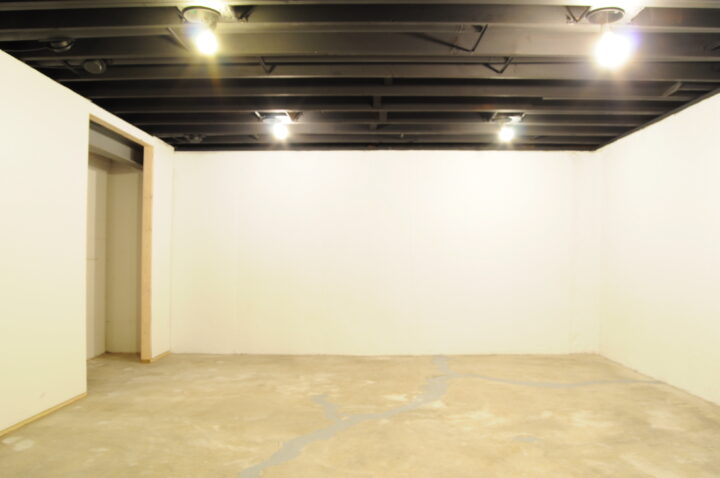
Painting your basement ceiling can be a transformative and cost-effective way to improve the overall look of your basement. However, before you dive into this DIY project, it’s essential to answer the question, “How much to paint basement ceiling?” In this comprehensive guide, we will walk you through the steps and considerations to help you determine the cost, materials, and techniques needed to achieve a professionally painted basement ceiling.

How Much To Paint Basement Ceiling

How Much To Paint Basement Ceiling: Factors to Consider

Estimating the Cost

The cost of painting your basement ceiling can vary widely based on several factors, including:

  1. Ceiling Size: The larger the area, the more paint you will need, and the longer the project will take. Measure the square footage of your ceiling to estimate the amount of paint required.
  2. Ceiling Height: Higher ceilings may require specialized equipment or additional labor, which can increase the cost.
  3. Ceiling Condition: If your basement ceiling has imperfections, such as water damage or cracks, it may require additional preparation and repair work, adding to the overall cost.
  4. Paint Type: The type of paint you choose, whether it’s a standard latex paint or a specialized basement ceiling paint, will affect the cost. Specialized paints may be more expensive but offer better coverage and durability.
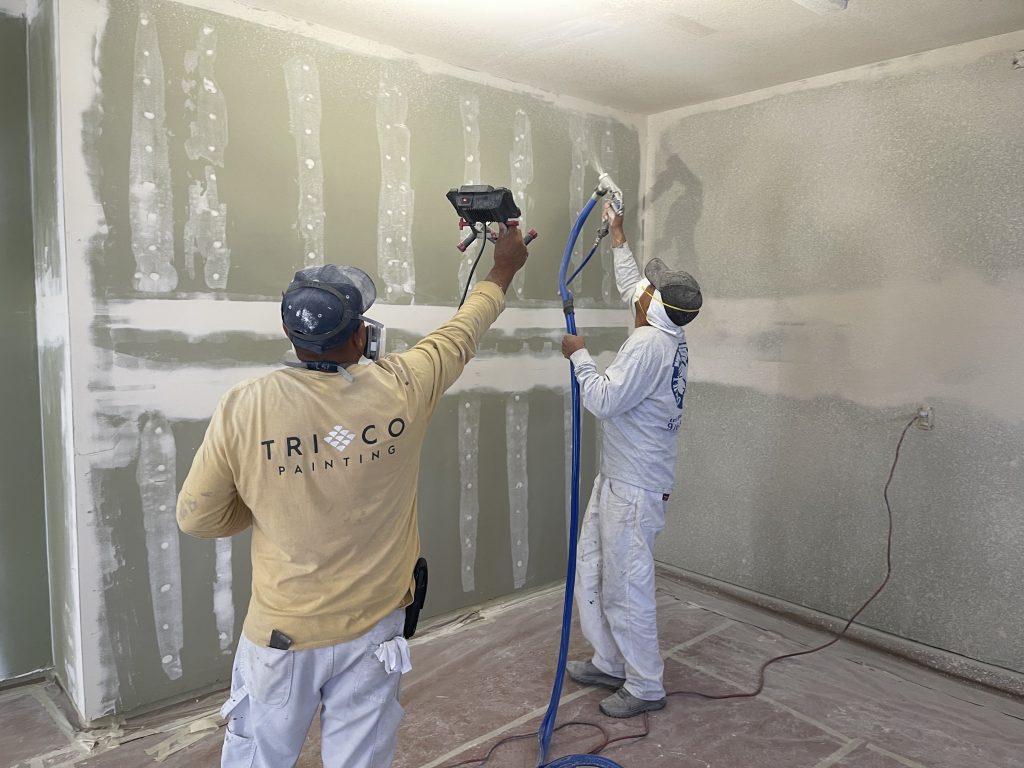
  5. Labor: If you decide to hire a professional painter, labor costs will be a significant part of your budget. DIY painting will save on labor but may require more time and effort.
  6. Equipment and Supplies: Consider the cost of painting tools, including brushes, rollers, painter’s tape, drop cloths, and a paint sprayer if you plan to use one.

Preparing the Surface

Proper preparation is essential for a successful basement ceiling paint job. The steps include:

  1. Cleaning: Clean the ceiling thoroughly to remove dust, dirt, and any potential contaminants. This will ensure that the paint adheres well.
  2. Repairing: Address any ceiling imperfections. Fill cracks, holes, and water damage, and sand the surface to create a smooth canvas for painting.
  3. Priming: Applying a primer can help the paint adhere better and provide a more even finish. Choose a primer specifically designed for basement ceilings.

Choosing the Right Paint

Selecting the right type of paint for your basement ceiling is crucial. Consider these factors:

  1. Ceiling Height: If your basement ceiling is low, a lighter color can make the space feel more open and airy. Darker colors can add coziness but may make the room feel smaller.
  2. Finish: The finish of the paint affects the overall appearance. Flat or matte finishes can help hide imperfections, while semi-gloss or gloss finishes reflect more light and are easier to clean.
  3. Moisture Resistance: If your basement is prone to moisture or humidity, choose a paint with moisture-resistant properties to prevent mold and mildew growth.

DIY vs. Hiring a Professional

Deciding whether to paint your basement ceiling yourself or hire a professional depends on your budget and skills. Here are some considerations:

  1. DIY: Painting your basement ceiling yourself can save on labor costs, but it may require more time and effort. Make sure you have the necessary tools, skills, and patience for the job.
  2. Professional: Hiring a professional painter can ensure a high-quality finish, especially if your ceiling is challenging to access. Obtain quotes from multiple contractors and check their references before making a decision.

Conclusion

Painting your basement ceiling is a fantastic way to improve the aesthetics of your basement. By carefully considering factors such as ceiling size, height, condition, and paint type, you can estimate the cost and plan your project accordingly. Whether you decide to take on the DIY challenge or hire a professional, a beautifully painted basement ceiling can transform your space and make it more inviting for various activities. Remember, preparation is key to a successful paint job, so invest the time and effort into getting your basement ceiling looking its best.

The Cost To Paint Garage Walls And Ceiling: A Home Improvement Worth the Investment

When it comes to home improvement projects, one area that often gets overlooked is the garage. While we may focus on renovating our living rooms, kitchens, or bedrooms, the garage is an essential part of our homes, and it deserves some attention too. One cost-effective way to revamp your garage’s appearance is by giving its walls and ceiling a fresh coat of paint. In this article, we will explore the cost of painting garage walls and ceilings, the benefits of doing so, and some helpful tips for a successful garage painting project.

Cost To Paint Garage Walls And Ceiling

Understanding the Costs

Before delving into the details of painting your garage walls and ceiling, it’s crucial to understand the costs involved. The overall cost of this project can vary depending on several factors, including the size of your garage, the condition of the existing paint, and the type of paint you choose.

  1. Garage Size Matters: The size of your garage plays a significant role in determining the cost. Larger garages will naturally require more paint, time, and labor. On average, a single-car garage is smaller than a double-car garage, so the cost will be relatively lower for the former.
  2. Current Paint Condition: If your garage walls and ceiling already have old paint that’s peeling or chipping, the project will likely require more preparation work. This might include scraping, sanding, and priming, which can increase the overall cost.
  3. Choice of Paint: The type of paint you choose will also impact the cost. High-quality, durable paints will be more expensive but are a better long-term investment as they will require less frequent repainting.
  4. DIY vs. Professional: You can save money by painting your garage yourself, but if you’re not experienced, it might be more cost-effective in the long run to hire a professional painter who can ensure a high-quality finish.

The Benefits of Painting Your Garage Walls and Ceiling

Now that you have a better understanding of the costs involved, let’s explore the numerous benefits of painting your garage.

  1. Improved Aesthetics: One of the most apparent advantages is the improved appearance of your garage. A fresh coat of paint can make the space look cleaner, brighter, and more welcoming. It can even help in increasing the resale value of your home.
  2. Protection: Painting your garage walls and ceiling provides a protective barrier against moisture, dust, and other environmental factors. This added protection can extend the life of your garage and its contents.
  3. Enhanced Lighting: A well-painted garage can appear more luminous, which is especially useful if your garage serves as a workspace or storage area. Brighter lighting can make tasks easier and improve safety.
  4. Customization: Painting your garage allows you to personalize the space. You can choose colors that match your home’s exterior or reflect your personal style.

Calculating the Cost

To give you a more concrete idea of the cost to paint garage walls and ceiling, let’s consider an example. For an average-sized double-car garage, the cost can range from $300 to $900 for a DIY project. This includes the cost of paint, primer, brushes, rollers, painter’s tape, and any necessary tools. If you decide to hire a professional, the cost can range from $600 to $2,000, depending on your location, the level of prep work required, and the type of paint used.

Keep in mind that these are general estimates, and the actual cost can vary based on the factors mentioned earlier. To get a more accurate cost assessment, it’s recommended to obtain quotes from local contractors or consult with paint supply stores.

Tips for a Successful Garage Painting Project

Now that you’re considering painting your garage, here are some essential tips to ensure a successful project:

  1. Proper Preparation: Ensure the walls and ceiling are clean and free from any loose paint or debris. Sand any rough spots and use primer to create a smooth surface.
  2. Choose the Right Paint: Select a high-quality paint that is designed for garage use. These paints are formulated to withstand temperature fluctuations and resist moisture.
  3. Safety First: Use appropriate safety gear, including eye protection, a mask, and gloves, when working with paint and chemicals.
  4. Ventilation: Proper ventilation is crucial to prevent inhaling fumes. Keep the garage door open or use fans to circulate air.
  5. Take Your Time: Don’t rush the project. Properly apply one or two coats of paint, allowing sufficient drying time between coats.
  6. Consider Professional Help: If you’re unsure about your painting skills or the project’s scope, it may be best to hire a professional painter to ensure a high-quality finish.

Read too: What Does Asbestos Popcorn Ceiling Look Like

Conclusion

The cost to paint garage walls and ceiling is an investment that can improve the appearance, functionality, and longevity of your garage. While the cost may vary depending on several factors, the benefits are well worth it. Whether you choose to tackle this project as a DIY enthusiast or hire a professional, a beautifully painted garage will enhance your home’s overall appeal and provide lasting protection for years to come. So, don’t neglect your garage; give it the makeover it deserves and enjoy the many advantages of a freshly painted space.

How Much Does It Cost To Paint A Kitchen Ceiling?

Your kitchen is the heart of your home, and a fresh coat of paint on the ceiling can breathe new life into this essential space. But how much does it cost to paint a kitchen ceiling? In this article, we’ll explore the various factors that influence the cost and provide you with an estimate for this common home improvement project.

how much does it cost to paint a kitchen ceiling

Why Paint Your Kitchen Ceiling

Before we delve into the cost considerations, let’s understand why painting your kitchen ceiling is a worthwhile investment:

  1. Enhanced Aesthetics: A freshly painted ceiling can make your kitchen look brighter and more inviting. It’s an excellent way to update the overall appearance of your kitchen.
  2. Improved Hygiene: Kitchens can accumulate grease and grime over time. Painting the ceiling helps maintain a clean and hygienic environment.
  3. Prevent Stains: Kitchens are prone to stains and water damage, especially in areas near sinks and stovetops. A new coat of paint can hide these imperfections.
  4. Value Addition: A well-maintained and aesthetically pleasing kitchen can add value to your home, making it more appealing to potential buyers.

Factors Affecting Kitchen Ceiling Painting Costs

Several factors can influence the cost of painting a kitchen ceiling. Here’s a breakdown of these cost considerations:

  1. Ceiling Size: The size of your kitchen ceiling, measured in square footage, directly affects the amount of paint and labor required. Larger ceilings naturally cost more to paint.
  2. Ceiling Condition: Ceilings in poor condition may require more prep work, including patching cracks, addressing water damage, or removing old paint. This can increase the overall cost.
  3. Paint Type: The type of paint you choose, such as standard latex paint or specialty kitchen paint with moisture and stain resistance, affects costs. Specialized paints may be more expensive.
  4. Labor Costs: Labor costs depend on your location and the complexity of the project. Hiring a professional painter can be more costly but ensures a high-quality finish.

Estimating Kitchen Ceiling Painting Costs

On average, the cost to paint a kitchen ceiling can range from $100 to $300, with most costs attributed to paint and labor. Here’s a general breakdown of estimated costs:

  • Material: A gallon of quality kitchen paint typically costs $30 to $50 and covers approximately 350 square feet.
  • Labor: Professional labor costs can range from $50 to $150 for a painter’s service per hour, depending on your location and the complexity of the project.
  • Equipment and Supplies: Budget an additional $20 to $50 for brushes, rollers, drop cloths, and other necessary tools.

For a smaller kitchen with a standard-sized ceiling, the cost may be closer to the lower end of the range. Larger kitchens or those with more extensive repairs may fall toward the higher end.

Conclusion: A Fresh and Inviting Kitchen Space

Painting your kitchen ceiling is an effective and budget-friendly way to enhance your kitchen’s appearance and maintain a clean, inviting space. By considering the size, condition, and paint type for your ceiling, you can better estimate the project’s expenses. Whether you decide to hire a professional or take on the task yourself, a freshly painted kitchen ceiling provides a fresh and appealing environment for your cooking and dining activities.

How Much Does It Cost To Paint A Basement Ceiling?

The basement is often an underutilized space in many homes. However, with some thoughtful renovations, it can become a valuable addition to your living area. One way to transform the look and feel of your basement is by painting the ceiling. But, how much does it cost to paint a basement ceiling? In this article, we’ll provide you with insights into the factors that influence the cost and help you estimate the expenses for this home improvement project.

how much does it cost to paint a basement ceiling

The Importance of Painting a Basement Ceiling

Before we dive into the cost considerations, it’s essential to understand the significance of painting a basement ceiling. Basements are notorious for having low ceilings and exposed pipes, ducts, and other utilities. Painting the ceiling not only enhances the aesthetics but also offers practical benefits:

  • Brightening the Space: A fresh coat of paint can make your basement look brighter and more inviting. Light colors can help reflect the limited natural light in the space.
  • Hiding Imperfections: Painting can cover up unsightly marks, stains, and imperfections on the ceiling, creating a smoother and more finished appearance.
  • Protecting Surfaces: Painting can help protect ceiling materials from moisture, reducing the risk of mold or mildew growth in damp basement environments.
  • Adding Value: A well-painted basement ceiling can add value to your home, making it more appealing to potential buyers.

Factors Affecting Basement Ceiling Painting Costs

Several factors can influence the cost of painting a basement ceiling. Here’s a breakdown of these cost considerations:

  1. Ceiling Size: The size of your basement ceiling, measured in square footage, directly affects the amount of paint and labor required. Larger ceilings will naturally cost more to paint.
  2. Ceiling Height: The height of your basement ceiling plays a role in the cost. Higher ceilings may require additional equipment, such as ladders or scaffolding, which can add to labor costs.
  3. Ceiling Condition: If the ceiling requires repairs or significant preparation work, such as removing old paint or addressing water damage, this will increase the overall cost.
  4. Paint Type: The type of paint you choose, such as standard latex paint or a specialty basement paint, can impact costs. Some basement paints are designed to resist moisture and mold, but they may be more expensive.
  5. Labor Costs: Labor costs vary depending on your location and the complexity of the project. Hiring a professional painter can be more costly but ensures a high-quality finish.

Estimating Basement Ceiling Painting Costs

On average, the cost to paint a basement ceiling can range from $300 to $600, with most costs attributed to paint and labor. Here’s a general breakdown of estimated costs:

  • Paint: $30 to $50 per gallon for a quality paint suitable for basement ceilings.
  • Primer: $20 to $30 per gallon if needed for preparation.
  • Labor: $200 to $400 or more for a professional painter’s service, depending on the scope of work.
  • Equipment and Supplies: $20 to $50 for brushes, rollers, drop cloths, and other painting supplies.

For a smaller basement with a standard ceiling, the cost may be closer to the lower end of the range. Larger basements, those requiring extensive repairs, or specialty paints may fall toward the higher end.

Conclusion: Enhancing Your Basement Space

Painting your basement ceiling is a cost-effective and transformative way to enhance your basement space. By considering the size, height, condition, and paint type for your ceiling, you can better estimate the project’s expenses. Whether you decide to hire a professional or take on the task yourself, a freshly painted basement ceiling can make a significant difference in the overall appearance and functionality of your basement, turning it into a more inviting and valuable part of your home.