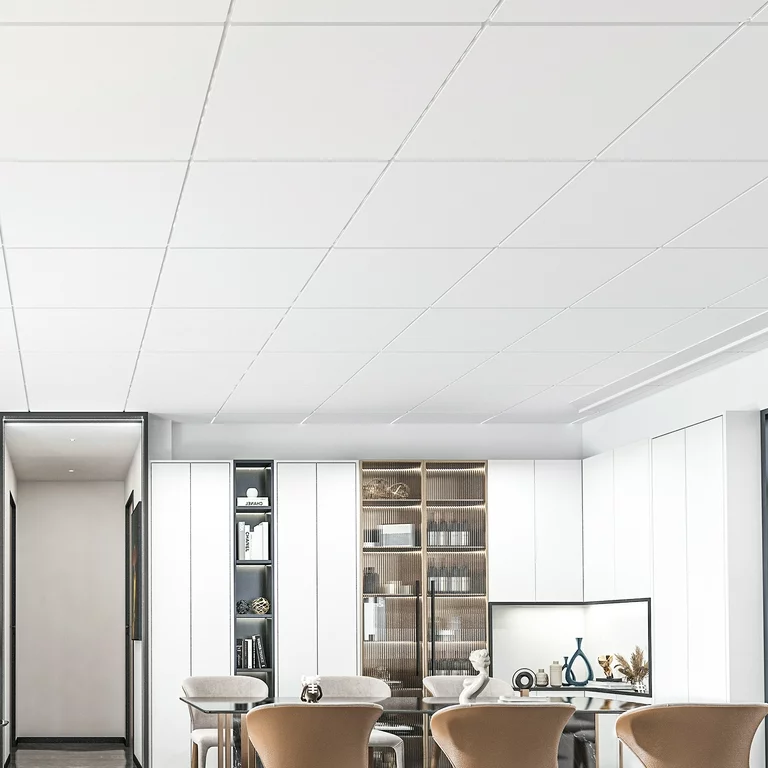
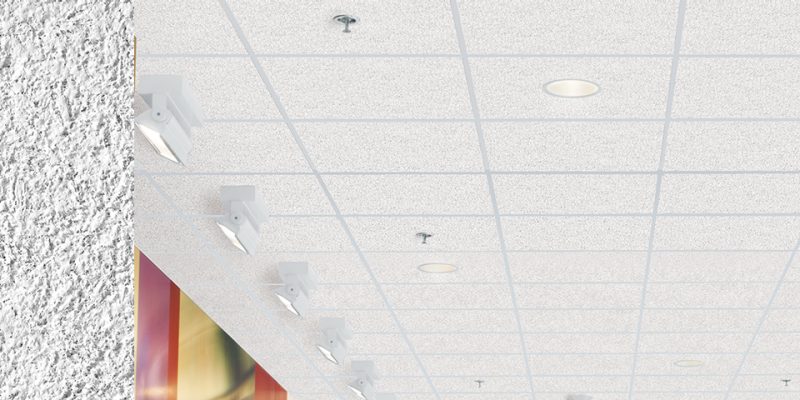
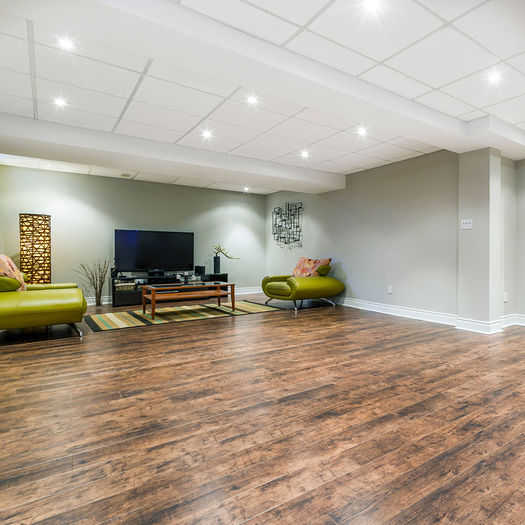
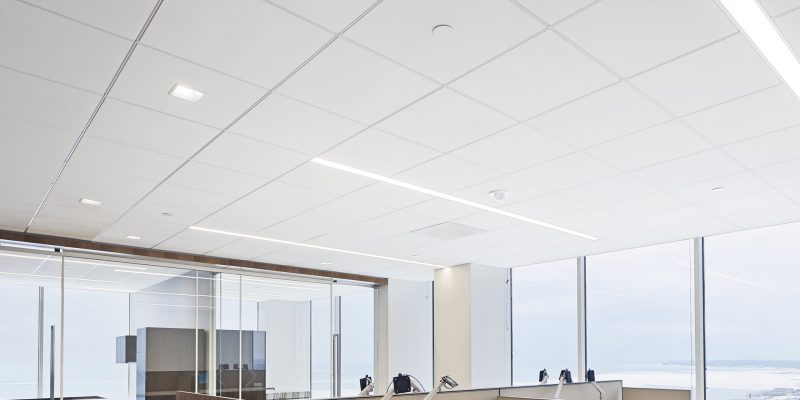
Fire Rated Ceiling Tiles for Commercial Kitchen Safety

When it comes to designing and constructing a commercial kitchen, safety is paramount. One of the most crucial aspects of ensuring safety in such environments is the use of fire rated ceiling tiles for commercial kitchen applications. These specialized tiles are not only integral to the aesthetics of a kitchen but also play a vital role in fire prevention and safety compliance. In this article, we will explore what fire rated ceiling tiles are, their benefits, installation considerations, and how they contribute to creating a safe working environment in commercial kitchens.

Fire Rated Ceiling Tiles For Commercial Kitchen

Understanding Fire Rated Ceiling Tiles

What Are Fire Rated Ceiling Tiles?

Fire rated ceiling tiles for commercial kitchen use are designed to resist the spread of fire and provide a certain level of protection during a fire incident. These tiles are constructed from materials that can withstand high temperatures and are often tested under specific standards to ensure their effectiveness.

Read too: Bathroom Flooded Through the Ceiling: A Comprehensive Guide

The fire rating of ceiling tiles is typically measured in terms of minutes, which indicates how long the tiles can withstand exposure to flames without compromising the ceiling’s structural integrity. Common fire ratings for ceiling tiles include 1-hour, 2-hour, and 4-hour ratings, with higher ratings providing better protection.

Why Are Fire Rated Ceiling Tiles Important in Commercial Kitchens?

In a commercial kitchen, the risk of fire is significantly higher due to the presence of cooking equipment, flammable materials, and high heat. Here are a few reasons why fire rated ceiling tiles are essential in these environments:

  1. Fire Safety Compliance: Many local building codes and regulations require commercial kitchens to use fire rated materials, including ceiling tiles. Compliance helps ensure that the kitchen meets safety standards and reduces liability.
  2. Protection Against Smoke and Flames: Fire rated ceiling tiles help contain flames and smoke, providing more time for occupants to evacuate safely in the event of a fire. This containment can also protect the rest of the building from fire damage.
  3. Insurance Benefits: Utilizing fire rated materials can potentially lower insurance premiums for commercial kitchen operators. Insurance companies often offer discounts for businesses that take proactive measures to enhance safety.
  4. Enhanced Aesthetics: Modern fire rated ceiling tiles come in various styles and finishes, allowing for a visually appealing kitchen design without compromising safety.

Features of Fire Rated Ceiling Tiles for Commercial Kitchen

When selecting fire rated ceiling tiles for commercial kitchen use, it’s essential to consider several features that will enhance safety, durability, and aesthetics:

1. Fire Resistance Ratings

As mentioned earlier, fire resistance ratings are crucial. Choose tiles with a fire rating that meets or exceeds local building codes. A rating of at least 1-hour is often recommended for commercial kitchens.

2. Material Composition

The materials used in fire rated ceiling tiles significantly influence their performance. Common materials include:

  • Mineral Fiber: Often treated to be fire resistant, mineral fiber tiles are popular for commercial kitchens due to their acoustic properties and ease of installation.
  • Gypsum Board: This material has inherent fire-resistant properties and is often used in ceiling systems that require additional support.
  • Metal: Metal ceiling tiles are not only fire resistant but also provide a modern look and excellent durability.

3. Aesthetic Options

Fire rated ceiling tiles are available in various styles, colors, and textures, enabling you to choose options that complement your kitchen’s overall design. Consider tiles that match the style of the kitchen while adhering to safety standards.

4. Sound Absorption

Commercial kitchens can be noisy environments, and choosing fire rated ceiling tiles with sound-absorbing properties can help reduce noise levels. Look for tiles with acoustic ratings to improve the overall work environment.

5. Ease of Maintenance

Choose fire rated ceiling tiles that are easy to clean and maintain, as commercial kitchens are subject to grease and stains. Tiles with a smooth finish are often easier to wipe down and keep looking clean.

Benefits of Using Fire Rated Ceiling Tiles in Commercial Kitchens

Incorporating fire rated ceiling tiles for commercial kitchen environments offers several benefits beyond mere compliance with safety regulations:

1. Enhanced Safety

The primary benefit of fire rated ceiling tiles is the increased safety they provide. In the event of a fire, these tiles can delay the spread of flames and smoke, giving kitchen staff precious minutes to evacuate and alert others.

2. Improved Fire Control

Fire rated tiles can help contain a fire, allowing fire suppression systems to operate effectively. This containment reduces the risk of a small kitchen fire spreading to other areas of the building.

3. Lower Insurance Costs

As mentioned previously, utilizing fire rated materials can potentially lead to lower insurance premiums. Insurance companies recognize the reduced risk associated with commercial kitchens that implement safety measures.

4. Versatile Design Options

With advancements in design, fire rated ceiling tiles are now available in a range of styles and finishes. This versatility allows kitchen operators to maintain a professional appearance while ensuring safety.

5. Compliance with Health Codes

In many jurisdictions, fire rated ceiling tiles are required to meet health and safety codes. Using these tiles ensures that your kitchen adheres to regulations, minimizing the risk of penalties or closures.

Installation Considerations for Fire Rated Ceiling Tiles

When installing fire rated ceiling tiles for commercial kitchen applications, certain factors must be considered to ensure proper performance and compliance:

1. Professional Installation

While some ceiling tiles may be suitable for DIY installation, it’s often best to hire professionals experienced in commercial kitchen installations. They can ensure that the tiles are installed correctly and meet local fire safety codes.

2. Proper Support Structure

Ensure that the ceiling’s structural framework can support the weight of fire rated tiles. Some heavier tiles may require additional support or specific installation methods.

3. Sealing and Gaps

All seams and gaps between tiles should be sealed appropriately to prevent the spread of smoke and flames. Use fire-rated caulking or other materials to fill any voids, ensuring a complete barrier.

4. Compatibility with Existing Systems

If you are retrofitting fire rated ceiling tiles into an existing kitchen, ensure they are compatible with other systems such as lighting and ventilation. Consult with a professional if you’re uncertain about compatibility.

5. Regular Inspection and Maintenance

Once installed, regular inspections are necessary to ensure that the tiles remain in good condition. Look for any signs of damage or wear and address issues promptly to maintain safety standards.

Top Brands of Fire Rated Ceiling Tiles for Commercial Kitchen

There are several reputable manufacturers that specialize in producing fire rated ceiling tiles for commercial kitchens. Here are a few of the most recognized brands:

1. Armstrong Ceilings

Armstrong is a well-known name in the ceiling tile industry, offering a wide range of fire rated ceiling tiles designed for commercial kitchens. Their products combine aesthetics with safety, making them a popular choice among kitchen designers.

2. USG Corporation

USG provides a variety of fire rated ceiling systems that are specifically engineered for commercial kitchen applications. Their tiles are known for their durability and performance, ensuring compliance with fire safety codes.

3. CertainTeed

CertainTeed offers fire rated ceiling tiles that combine functionality with design. Their products include various materials and finishes, catering to diverse aesthetic preferences while maintaining safety standards.

4. Ceilings Plus

Ceilings Plus specializes in custom ceiling solutions, including fire rated tiles suitable for commercial kitchens. They focus on innovation and quality, making them a reliable choice for unique kitchen designs.

Conclusion

In conclusion, selecting fire rated ceiling tiles for commercial kitchen use is an essential aspect of creating a safe and compliant cooking environment. These tiles not only enhance safety by containing potential fires but also provide aesthetic benefits and sound absorption properties. When choosing the right tiles for your commercial kitchen, consider factors such as fire ratings, materials, aesthetics, and ease of maintenance. By investing in high-quality fire rated ceiling tiles and ensuring proper installation, you can create a safer workplace that meets local regulations and enhances the overall design of your kitchen.

Beveled Edge Ceiling Tile: Everything You Need to Know

When it comes to designing the perfect ceiling, Beveled Edge Ceiling Tile are a popular choice for homeowners, interior designers, and contractors alike. These tiles are known for their aesthetic appeal, easy installation, and versatility in various settings, from residential homes to commercial spaces. Whether you’re renovating a room or designing a new building, beveled edge ceiling tiles offer a sleek, professional look that can complement any decor.

Beveled Edge Ceiling Tiles

In this comprehensive guide, we will delve into everything you need to know about beveled edge ceiling tiles, from their benefits and installation to design options and maintenance.

What Are Beveled Edge Ceiling Tiles?

Beveled edge ceiling tiles are ceiling panels that have slightly sloped or angled edges, giving them a distinct appearance compared to flat-edged tiles. The beveled edges create depth and dimension, making each tile stand out on its own while contributing to an overall cohesive look. This feature enhances the visual appeal of a ceiling by adding subtle shadows and texture, which can make a room feel more spacious and luxurious.

Read too: Shiplap Ceiling in Kitchen: A Timeless Trend for a Stylish and Cozy Space

These tiles can be made from various materials, such as:

  • Vinyl
  • PVC
  • Metal
  • Gypsum
  • Acoustic fiber

They are available in different styles, finishes, and colors, making them adaptable to both modern and traditional interior designs.

Benefits of Beveled Edge Ceiling Tiles

Choosing beveled edge ceiling tiles comes with several advantages. Let’s explore some of the key benefits of opting for these tiles in your ceiling design.

1. Enhanced Aesthetic Appeal

One of the main reasons people choose beveled edge ceiling tiles is their enhanced aesthetic appeal. The beveled edges give a three-dimensional look to the ceiling, creating an elegant and refined appearance. This design element helps to create a sense of depth and character, making the ceiling a focal point in any room.

2. Easy Installation

Beveled edge tiles are designed for easy installation, which is a major advantage for both DIY enthusiasts and professionals. Many beveled edge ceiling tiles are designed to be installed in a drop ceiling grid system, which makes them easy to place and remove. Their lightweight construction also makes handling and installation more manageable, reducing labor costs if you’re hiring professionals.

3. Conceals Imperfections

The unique design of beveled edges can help to hide imperfections in the ceiling. If your ceiling has slight variations in height or some small flaws, beveled edge tiles can effectively mask these issues by drawing attention away from them.

4. Acoustic Benefits

Many beveled edge ceiling tiles are made from materials like acoustic fiber or gypsum, which have sound-absorbing properties. This makes them an excellent choice for spaces where noise control is important, such as offices, schools, or home theaters. The beveled edges further enhance their acoustic benefits by helping to break up sound waves, reducing echo and reverberation.

5. Durability

Depending on the material used, beveled edge tiles can be highly durable and resistant to moisture, mold, and mildew. For example, PVC and vinyl tiles are often waterproof and can be used in areas with high humidity, such as bathrooms or kitchens. This durability makes them a practical and long-lasting choice for ceilings in various environments.

6. Versatility in Design

Beveled edge ceiling tiles are available in a wide range of styles, from sleek modern designs to intricate, decorative patterns. They can be painted or coated in different finishes to match your room’s design scheme. Whether you want a minimalist look or a more ornate ceiling, you can find beveled edge tiles that suit your vision.

Types of Beveled Edge Ceiling Tiles

When choosing beveled edge ceiling tiles, you have several options to consider based on your specific needs and preferences. Here are some of the most common types of beveled edge ceiling tiles.

1. Acoustic Beveled Edge Ceiling Tiles

Acoustic tiles are designed to reduce noise and improve sound quality in a room. They are commonly used in commercial settings like offices and conference rooms, but they can also be used in home theaters or music studios. These tiles not only look great but also provide functional benefits by absorbing sound and minimizing echo.

2. Metal Beveled Edge Ceiling Tiles

For a more industrial or modern look, metal beveled edge ceiling tiles are a fantastic option. These tiles are typically made from aluminum or tin and can be finished in various metallic hues, such as brushed nickel or copper. They add a sleek and polished look to any room and are often used in commercial spaces, restaurants, or loft-style homes.

3. PVC or Vinyl Beveled Edge Ceiling Tiles

PVC and vinyl beveled edge tiles are known for their durability and resistance to moisture. These tiles are often used in areas with high humidity, such as bathrooms, basements, or kitchens. They are lightweight, easy to clean, and available in various colors and finishes.

4. Gypsum Beveled Edge Ceiling Tiles

Gypsum tiles are a popular choice for those seeking a balance between aesthetics and functionality. These tiles are often used in both residential and commercial settings due to their fire-resistant properties and ability to absorb sound. Gypsum tiles with beveled edges can provide a smooth and professional look while offering practical benefits.

Installation Process for Beveled Edge Ceiling Tiles

Installing beveled edge ceiling tiles is typically straightforward, but it’s important to follow the correct steps to ensure a successful installation. Here’s a basic guide to the installation process:

1. Prepare the Ceiling Surface

Before installing the tiles, make sure the ceiling surface is clean and smooth. If you’re using a drop ceiling system, ensure the grid is securely in place and correctly measured.

2. Measure the Ceiling

Accurate measurements are crucial to ensure the tiles fit perfectly. Measure the dimensions of the ceiling and plan how many tiles you will need.

3. Cut the Tiles (if necessary)

In some cases, you may need to cut tiles to fit around edges or light fixtures. Use a sharp utility knife or a tile cutter to make precise cuts, ensuring the beveled edges remain intact.

4. Install the Tiles

Place the tiles into the ceiling grid or adhesive them directly to the ceiling, depending on the installation method. Make sure each tile is aligned properly, with the beveled edges facing outward for the best effect.

5. Finishing Touches

Once all the tiles are installed, check for any gaps or misalignments. You may also want to add ceiling molding or trim to enhance the overall look.

Maintenance Tips for Beveled Edge Ceiling Tiles

To keep your beveled edge ceiling tiles looking their best, regular maintenance is essential. Here are some tips to help you maintain your ceiling tiles:

1. Regular Cleaning

Most ceiling tiles can be cleaned with a soft cloth or duster to remove dust and dirt. For vinyl or PVC tiles, you can use a mild soap solution and a damp cloth to wipe them down.

2. Inspect for Damage

Regularly check your ceiling tiles for signs of damage, such as cracks, chips, or stains. If you notice any damaged tiles, replace them promptly to maintain the appearance and functionality of your ceiling.

3. Avoid Excessive Moisture

While many beveled edge ceiling tiles are moisture-resistant, excessive humidity can still cause damage over time. Ensure that the room is well-ventilated, especially in areas like bathrooms or kitchens, to prevent moisture buildup.

Where to Use Beveled Edge Ceiling Tiles

Beveled edge ceiling tiles are incredibly versatile and can be used in various settings, including:

  • Living rooms: Add elegance and dimension to your home’s interior design.
  • Kitchens: Use moisture-resistant tiles for a functional and stylish kitchen ceiling.
  • Bathrooms: Opt for vinyl or PVC tiles to prevent moisture damage.
  • Offices: Acoustic beveled edge tiles are perfect for reducing noise in workspaces.
  • Basements: Create a polished look while addressing soundproofing needs.

Conclusion

Choosing beveled edge ceiling tile is a great way to elevate the look of any space. Their aesthetic appeal, ease of installation, and practical benefits make them a popular choice for both residential and commercial settings. Whether you’re looking to enhance the acoustics of a room or simply want to add a touch of sophistication, beveled edge ceiling tiles offer a versatile solution that can meet a variety of needs.

Armstrong 1270 Ceiling Tile: A Comprehensive Guide to Performance, Installation, and Benefits

When it comes to designing or upgrading ceilings in commercial spaces, schools, or homes, one name that consistently stands out is Armstrong. Known for their range of high-quality ceiling tiles, the Armstrong 1270 Ceiling Tile is a top choice for those seeking durability, aesthetics, and functionality in one package. Whether you’re an architect, contractor, or a homeowner, this ceiling tile offers the perfect blend of design and performance to meet a wide range of needs.

Armstrong 1270 Ceiling Tile

In this article, we will explore everything you need to know about the Armstrong 1270 Ceiling Tile—from its unique features and benefits to how it’s installed and maintained. We will also discuss why this particular ceiling tile stands out in the market and why it might be the right choice for your next ceiling project.


What Is the Armstrong 1270 Ceiling Tile?

The Armstrong 1270 Ceiling Tile is part of Armstrong’s line of premium ceiling solutions, designed to cater to both commercial and residential settings. Its fine-textured surface and acoustic properties make it suitable for spaces where sound control is critical, such as offices, schools, retail environments, and even high-end residential projects. This tile is designed to be used in suspended or drop ceiling systems, which provide easy access to utilities such as wiring, plumbing, and HVAC systems.

Read too: Bathroom Flooded Through the Ceiling: A Comprehensive Guide


Key Features of Armstrong 1270 Ceiling Tile

1. Superior Acoustic Performance

One of the main reasons people opt for the Armstrong 1270 Ceiling Tile is its excellent acoustic performance. With a high Noise Reduction Coefficient (NRC) rating, this ceiling tile absorbs sound effectively, reducing noise levels in rooms that are prone to echo or excessive background noise. This makes it ideal for open-plan offices, classrooms, and other busy environments where noise can be distracting.

2. Fine Textured Finish

Aesthetics play a significant role in ceiling design, and the Armstrong 1270 Ceiling Tile doesn’t disappoint. Its fine-textured, non-directional finish provides a clean and smooth appearance, which complements both modern and traditional spaces. This type of finish is especially valuable in areas where you want the ceiling to blend seamlessly into the overall design, enhancing the space’s professional look.

3. Durability and Longevity

The Armstrong 1270 Ceiling Tile is built to last, with high resistance to sagging and wear over time. This makes it a low-maintenance option, especially in environments with fluctuating humidity and temperature levels, such as basements or commercial kitchens. Thanks to its durable materials, you can trust that your ceiling will maintain its aesthetic and functional qualities for years to come.

4. Easy Installation

Installing the Armstrong 1270 Ceiling Tile is straightforward, even for those with limited experience. The tiles are lightweight and easy to handle, allowing for quick installation in most suspended ceiling systems. The compatibility of these tiles with standard grids also means that retrofitting or upgrading an existing ceiling system is a breeze.

5. Environmental Friendliness

Armstrong is committed to sustainability, and the 1270 Ceiling Tile is made from materials that are both recycled and recyclable. Choosing this tile can help reduce your carbon footprint, contributing to a greener building project. Additionally, these tiles meet several environmental certifications, making them an excellent choice for eco-conscious buyers or those aiming to meet green building standards.


Why Choose Armstrong 1270 Ceiling Tile for Your Space?

If you’re considering a ceiling upgrade, the Armstrong 1270 Ceiling Tile offers several advantages that make it a standout choice in the market. Below are a few reasons why this ceiling tile is worth your investment.

1. Ideal for Noise Control

In today’s open-office environments or high-traffic areas like classrooms and waiting rooms, controlling noise is essential for productivity and comfort. The Armstrong 1270 Ceiling Tile excels in sound absorption, making it perfect for spaces where minimizing background noise is a priority. Its NRC rating ensures that noise reverberation is kept to a minimum, allowing conversations, meetings, and lectures to take place without distractions.

2. Seamless Aesthetic Appeal

The clean, fine-textured finish of the Armstrong 1270 Ceiling Tile allows it to fit into a wide variety of design schemes. Whether you’re aiming for a modern, minimalist look or something more traditional, this tile’s non-directional surface adds a subtle, elegant touch to any ceiling. Its neutral finish makes it a versatile choice for a wide range of interior design styles, helping to enhance the overall aesthetic of the room.

3. Cost-Effective Solution

While ceiling tiles can vary in price, the Armstrong 1270 Ceiling Tile offers excellent value for money. Its combination of durability, acoustic performance, and aesthetic appeal makes it a smart investment for long-term ceiling solutions. With minimal maintenance required and a long lifespan, this tile reduces the need for frequent replacements, helping to lower overall costs.

4. Sustainable Choice

In a world where sustainability is increasingly important, the Armstrong 1270 Ceiling Tile is a responsible choice. The tile is made from recycled materials, and at the end of its life, it can be recycled again. This not only reduces waste but also helps conserve natural resources. Moreover, Armstrong’s commitment to environmentally friendly manufacturing processes means that this tile aligns with modern green building practices.


How to Install Armstrong 1270 Ceiling Tile

Installing the Armstrong 1270 Ceiling Tile is a relatively simple process, especially if you’re familiar with drop ceiling systems. Here is a step-by-step guide to help you complete your ceiling project efficiently.

1. Preparation

Start by measuring the dimensions of your room to determine how many ceiling tiles you will need. Make sure you have all the necessary tools, including a ladder, tape measure, and a level. If you’re working with an existing ceiling grid, check that it’s in good condition and properly aligned.

2. Install the Grid System

If you don’t already have a ceiling grid system installed, you’ll need to set it up first. Use your measurements to install the grid at the correct height and ensure that it’s level. For larger rooms, consider marking where each tile will go to make installation easier.

3. Cut the Tiles to Fit

For rooms with irregular dimensions or obstacles like light fixtures or air vents, you may need to cut the ceiling tiles. Use a sharp utility knife or tile cutter to trim the tiles to size. Be sure to measure carefully to avoid gaps or uneven edges.

4. Place the Tiles

Once the grid is installed and the tiles are cut to size, simply place the Armstrong 1270 Ceiling Tiles into the grid. Start from one corner and work your way across the room, making sure each tile is aligned and level.

5. Inspect and Adjust

After the tiles are in place, take a moment to inspect the ceiling for any gaps, misaligned tiles, or other issues. Adjust as needed to ensure a professional, seamless finish.


Maintenance Tips for Armstrong 1270 Ceiling Tile

To keep your Armstrong 1270 Ceiling Tile looking its best, regular maintenance is key. Here are some tips for maintaining your ceiling tiles:

1. Dusting and Cleaning

Over time, ceiling tiles can collect dust and debris. Use a soft cloth or a vacuum cleaner with a brush attachment to gently clean the tiles. For stubborn spots or stains, a mild detergent and water solution can be used, but avoid harsh chemicals that could damage the tile’s finish.

2. Checking for Damage

Periodically inspect the tiles for signs of sagging, discoloration, or wear. If you notice any damaged tiles, it’s best to replace them as soon as possible to maintain the overall appearance of the ceiling.

3. Monitoring Moisture Levels

Although the Armstrong 1270 Ceiling Tile is durable, it’s important to keep an eye on moisture levels in areas like bathrooms or basements, where humidity could cause the tiles to warp or discolor. Use dehumidifiers or proper ventilation to control moisture and extend the life of your ceiling tiles.


Conclusion

The Armstrong 1270 Ceiling Tile is an excellent choice for anyone looking to improve both the aesthetics and functionality of their space. Its superior acoustic properties, fine-textured finish, and long-lasting durability make it a valuable investment for a wide variety of settings, from commercial offices to residential homes. With easy installation and minimal maintenance, these ceiling tiles offer a seamless and cost-effective solution to elevate any interior environment.

755B Armstrong Ceiling Tile: The Ideal Choice for Modern Ceiling Solutions

When it comes to creating a space that’s functional, aesthetically pleasing, and designed for longevity, ceiling tiles are often overlooked. However, they play a crucial role in the acoustics, aesthetics, and energy efficiency of a room. One of the leading products in the ceiling tile industry is the 755B Armstrong Ceiling Tile, known for its durability, acoustic performance, and sleek appearance. Whether you’re remodeling a commercial space or upgrading your home, this ceiling tile offers a versatile solution that meets a wide range of needs.

755B Armstrong Ceiling Tile

In this article, we will explore the features, benefits, and installation process of the 755B Armstrong Ceiling Tile. We will also offer some maintenance tips and discuss why it stands out in the crowded market of ceiling solutions. Whether you’re an architect, contractor, or homeowner, this guide will help you understand why the 755B tile could be the perfect fit for your project.


What Is the 755B Armstrong Ceiling Tile?

The 755B Armstrong Ceiling Tile is part of Armstrong’s renowned line of ceiling solutions, specifically designed to offer high performance in both residential and commercial spaces. Known for its fine-textured finish and clean, modern aesthetic, this tile is engineered to meet the acoustic and durability needs of various environments. Its primary application is in drop ceilings or suspended ceiling systems, which are commonly used in offices, retail spaces, and large commercial areas. However, it is also suitable for homeowners looking to improve the look and functionality of their ceilings.


Key Features of 755B Armstrong Ceiling Tile

1. Acoustic Performance

One of the standout features of the 755B Armstrong Ceiling Tile is its excellent sound absorption properties. This makes it ideal for environments where noise control is crucial, such as offices, schools, or conference rooms. With its Noise Reduction Coefficient (NRC) rating, it efficiently reduces sound reverberation, creating a quieter and more comfortable atmosphere. This feature is particularly important in open office layouts or busy environments where multiple conversations and background noise can become distracting.

2. Durability

The 755B Armstrong Ceiling Tile is known for its long-lasting durability. Made from high-quality materials, these tiles resist sagging and maintain their structural integrity over time. This is especially useful in environments with fluctuating temperatures or humidity levels, such as basements or kitchens. The tiles are also impact-resistant, making them a reliable option for areas with high foot traffic or potential ceiling disturbances.

Read too: Bathroom Flooded Through the Ceiling: A Comprehensive Guide

3. Fine Textured Finish

Aesthetics play a significant role in ceiling design, and the 755B Armstrong Ceiling Tile does not disappoint. Its fine-textured, non-directional surface provides a smooth and seamless look. This design allows the tiles to blend well with various architectural styles, from modern office spaces to more traditional interiors. Whether you’re creating a professional atmosphere or a cozy home setting, these tiles can enhance the visual appeal of any room.

4. Easy Installation

The 755B Armstrong Ceiling Tile is designed for easy installation, especially in drop ceilings or suspended ceiling systems. Their lightweight construction makes handling them manageable, even for those new to DIY home projects. Whether you’re a professional contractor or a homeowner, these tiles can be installed quickly with minimal tools and expertise. They are compatible with most standard suspension systems, making them a flexible solution for both new installations and retrofitting existing ceilings.

5. Energy Efficiency

Ceiling tiles, especially in commercial settings, contribute to energy efficiency by providing additional insulation. The 755B Armstrong Ceiling Tile helps to maintain consistent temperatures in a room by reducing the need for excessive heating or cooling. This not only lowers energy costs but also improves comfort for occupants, making it a smart investment for long-term savings.


Why Choose the 755B Armstrong Ceiling Tile?

If you’re still considering whether the 755B Armstrong Ceiling Tile is the right choice for your project, here are several compelling reasons why this tile is a top contender in the market.

1. Versatility for Multiple Applications

The 755B Armstrong Ceiling Tile is versatile enough to be used in a variety of settings. Whether it’s an office space, a retail environment, or a residential area, these tiles offer the right blend of performance and appearance. Their fine texture and non-directional pattern make them suitable for various design styles, while their acoustic performance is essential in noisy environments like classrooms or open-plan offices.

2. Cost-Effective Solution

While ceiling tiles can range in price, the 755B Armstrong Ceiling Tile strikes a balance between affordability and high performance. It offers great value, especially for large commercial projects where budgets can be tight. The durability and long lifespan of the tiles also contribute to their cost-effectiveness, as they won’t need to be replaced frequently.

3. Environmental Sustainability

Armstrong places a strong emphasis on sustainability, and the 755B Armstrong Ceiling Tile is no exception. These tiles are made from recycled materials and are fully recyclable at the end of their lifespan. This makes them an eco-friendly choice for those who are looking to minimize their environmental impact. Armstrong’s commitment to sustainability extends to their manufacturing processes as well, ensuring that their products meet industry standards for environmental responsibility.

4. Improved Indoor Air Quality

Another important factor to consider is the role of ceiling tiles in maintaining indoor air quality. The 755B Armstrong Ceiling Tile is designed to resist mold, mildew, and bacterial growth, making it a healthy choice for indoor environments. This is particularly beneficial in areas such as healthcare facilities, schools, and homes where air quality is of utmost importance. By choosing this tile, you’re not only enhancing the look of your ceiling but also contributing to a healthier indoor space.


Installation Guide for the 755B Armstrong Ceiling Tile

Installing the 755B Armstrong Ceiling Tile is a straightforward process, especially if you’re familiar with suspended ceiling systems. Here’s a step-by-step guide to help you install these tiles efficiently:

1. Preparation

Before you start the installation, make sure you have all the necessary tools and materials. This includes a tape measure, level, ladder, suspension system, and, of course, the ceiling tiles. If you’re installing the tiles in an existing ceiling grid, check that the system is in good condition and properly aligned.

2. Measure and Mark

Measure the dimensions of the room to ensure that your grid system is accurately aligned. Use a level to mark where the ceiling grid will be installed. For larger rooms, consider creating a layout plan to ensure that the tiles will fit evenly across the ceiling.

3. Install the Suspension System

Install the ceiling grid or suspension system according to the manufacturer’s instructions. Ensure that it is securely fastened to the ceiling joists or beams. This is a crucial step as the grid will support the weight of the tiles.

4. Cut Tiles to Fit

If your room has irregular dimensions, you may need to cut some of the tiles to fit around the edges. Use a utility knife or tile cutter for precise cuts, ensuring that the edges remain clean for a professional finish.

5. Install the Tiles

Once the grid is in place, carefully place the 755B Armstrong Ceiling Tiles into the grid. Start from one corner of the room and work your way across, making sure that each tile fits snugly into place. Double-check that the tiles are level and evenly spaced.


Maintenance Tips for 755B Armstrong Ceiling Tile

Maintaining your 755B Armstrong Ceiling Tile is essential for ensuring its long-lasting performance. Here are some tips to keep your ceiling looking its best:

1. Regular Dusting

Dust and debris can accumulate on the surface of ceiling tiles over time. Use a soft, dry cloth or a vacuum with a brush attachment to remove dust from the tiles. Regular cleaning will help maintain their appearance and prevent the buildup of allergens.

2. Spot Cleaning

For stains or smudges, gently wipe the tiles with a damp cloth. Avoid using harsh chemicals or abrasive cleaners, as they can damage the tile’s finish. If a tile becomes heavily soiled or stained, consider replacing it to maintain the overall appearance of the ceiling.

3. Check for Damage

Periodically inspect your ceiling tiles for any signs of damage, such as sagging or discoloration. If you notice any issues, it’s best to address them promptly to avoid further damage. Sagging tiles can indicate issues with the suspension system or moisture problems, both of which should be resolved as soon as possible.


Conclusion

The 755B Armstrong Ceiling Tile offers a comprehensive solution for both residential and commercial spaces, combining aesthetics with functionality. Its acoustic properties, durability, and fine-textured finish make it an excellent choice for those seeking to enhance the appearance and performance of their ceiling. Whether you’re looking to improve acoustics in a noisy office or add a touch of elegance to your home, the 755B Armstrong Ceiling Tile is a cost-effective, durable, and visually appealing option.

Nail Up Tin Ceiling Tiles: A Stylish and Practical Choice

In the world of interior design, few elements offer the combination of elegance and practicality quite like nail up tin ceiling tiles. These versatile tiles have been making a comeback, bringing a touch of vintage charm to modern spaces. Whether you’re renovating a historic home or looking to add a unique feature to a contemporary setting, nail up tin ceiling tiles offer a distinctive solution. This article will explore the benefits, installation process, and design ideas for incorporating these stylish tiles into your home.

Nail Up Tin Ceiling Tiles

Why Choose Nail Up Tin Ceiling Tiles?

Nail up tin ceiling tiles are a popular choice for many reasons. Their historical significance, combined with modern adaptability, makes them a compelling option for a variety of design styles. Here’s why you might consider them for your next project:

  1. Historical Charm: Tin ceiling tiles date back to the 19th century when they were used to mimic expensive plaster ceilings. Today, they offer a nostalgic appeal while remaining relevant in contemporary design.
  2. Durability: Made from metal, these tiles are highly durable and resistant to wear and tear. They can withstand the test of time, making them a long-lasting investment.
  3. Easy Installation: Unlike traditional plaster ceilings, nail up tin ceiling tiles are relatively easy to install. This makes them a popular choice for DIY enthusiasts.
  4. Versatility: Tin ceiling tiles come in various designs and finishes, allowing them to complement a wide range of interior styles, from rustic farmhouse to sleek modern.
  5. Low Maintenance: These tiles are easy to clean and maintain, requiring only occasional dusting to keep them looking their best.

Read too: Bathroom Flooded Through the Ceiling: A Comprehensive Guide

Design Ideas with Nail Up Tin Ceiling Tiles

When it comes to incorporating nail up tin ceiling tiles into your home, the possibilities are nearly endless. Here are a few design ideas to inspire your project:

  1. Vintage Elegance: For a classic look, choose ornate tin tiles with intricate patterns. Pair them with vintage-inspired furnishings and fixtures to create a cohesive, timeless space.
  2. Modern Minimalism: Opt for sleek, minimalist tin tiles with a smooth finish. This choice works well in contemporary settings where clean lines and simplicity are key.
  3. Industrial Chic: Embrace the raw beauty of tin by leaving tiles in their natural metal finish. This design is perfect for lofts or urban spaces that celebrate an industrial aesthetic.
  4. Bold Patterns: For a more dramatic effect, choose tiles with bold, geometric patterns. These can serve as a focal point in a room, adding visual interest and texture.
  5. Color and Finish: Tin ceiling tiles are available in a variety of finishes, from polished and shiny to matte and aged. Choose a finish that complements your existing decor or adds a pop of contrast.

How to Install Nail Up Tin Ceiling Tiles

Installing nail up tin ceiling tiles is a manageable DIY project if you have some basic tools and a bit of patience. Here’s a step-by-step guide to help you get started:

  1. Preparation: Begin by preparing your ceiling. Ensure it is clean, dry, and free of any old paint or debris. Measure the area to determine how many tiles you’ll need.
  2. Plan Your Layout: Decide on the layout of your tiles. It’s helpful to draw a grid on your ceiling to guide the installation process.
  3. Cutting Tiles: If necessary, cut tiles to fit the edges and corners of your ceiling. Use tin snips or a metal cutter for clean, precise cuts.
  4. Apply Adhesive: Apply a strong adhesive to the back of each tile. Be sure to follow the manufacturer’s instructions for best results.
  5. Nail Tiles: Position the tile on the ceiling and secure it with nails or screws. Make sure to place nails at regular intervals to ensure a secure hold.
  6. Fill Gaps and Finish: Once all tiles are installed, fill any gaps or seams with a suitable filler. Paint or seal the tiles if desired to achieve your preferred finish.

Maintaining Tips

Maintaining nail up tin ceiling tiles is relatively straightforward. Regular dusting with a soft cloth or duster will keep them looking clean. For more stubborn stains, a mild soap solution and a soft brush can be used. Avoid abrasive cleaners that could damage the finish.

Conclusion

Nail up tin ceiling tile are a fantastic way to add character and sophistication to any room. Their rich history, combined with their modern adaptability, makes them a valuable choice for both renovation projects and new constructions. With a variety of designs, finishes, and installation options, these tiles offer endless possibilities for creating a space that is uniquely yours. Whether you’re drawn to their vintage charm or their contemporary appeal, nail up tin ceiling tiles are sure to elevate the style and ambiance of your home.

Moisture Resistant Drop Ceiling Tiles: Everything You Need to Know

When it comes to selecting the right ceiling tiles for your home or business, Moisture Resistant Drop Ceiling Tiles stand out as a highly functional and versatile option. Designed to combat issues related to humidity and water damage, these tiles offer a range of benefits that make them suitable for various environments. In this comprehensive guide, we’ll delve into the advantages, installation, and maintenance of moisture-resistant drop ceiling tiles, helping you make an informed decision for your next project.

Moisture Resistant Drop Ceiling Tiles

What Are Moisture Resistant Drop Ceiling Tiles?

Moisture Resistant Drop Ceiling Tiles are specially designed tiles used in suspended ceiling systems that are engineered to withstand high humidity and resist water damage. These tiles are commonly used in areas prone to moisture such as bathrooms, kitchens, basements, and commercial spaces like restaurants and laundromats.

Key Features

  1. Water Resistance: As the name suggests, moisture-resistant tiles are designed to repel water and prevent damage from high humidity levels.
  2. Durability: These tiles are made from materials that are resistant to warping, sagging, or disintegration when exposed to moisture.
  3. Ease of Installation: Like standard drop ceiling tiles, moisture-resistant tiles are designed to be easily installed and removed, making them convenient for maintenance and upgrades.
  4. Variety of Styles: Available in various designs, colors, and textures, moisture-resistant tiles can complement a range of interior aesthetics while providing practical benefits.

Read too: Bathroom Flooded Through the Ceiling: A Comprehensive Guide

Benefits of Moisture Resistant Drop Ceiling Tiles

1. Enhanced Durability

One of the primary advantages of Moisture Resistant Drop Ceiling Tiles is their enhanced durability. Unlike standard ceiling tiles that may deteriorate or become discolored when exposed to moisture, moisture-resistant tiles are built to maintain their integrity and appearance even in challenging conditions. This durability reduces the need for frequent replacements and repairs, saving time and money in the long run.

2. Improved Indoor Air Quality

Many moisture-resistant tiles come with built-in antimicrobial properties that help to reduce the growth of mold and mildew. By preventing these harmful substances from proliferating, moisture-resistant tiles contribute to better indoor air quality, which is particularly important for maintaining a healthy living or working environment.

3. Cost-Effective Solution

Although moisture-resistant tiles may have a slightly higher upfront cost compared to standard tiles, their long-term benefits often outweigh the initial investment. By reducing the likelihood of damage and the need for replacements, these tiles can be a cost-effective solution in the long run.

4. Easy Maintenance

Maintaining Moisture Resistant Drop Ceiling Tiles is relatively simple. They are often washable and can be easily cleaned with mild detergents. Additionally, their resistance to staining and discoloration helps to keep your ceiling looking fresh and new with minimal effort.

5. Versatility

These tiles are available in a variety of designs, allowing you to choose a style that fits your space. Whether you’re looking for a modern, sleek appearance or a more traditional look, moisture-resistant tiles can be found in various textures and finishes to match your aesthetic preferences.

Applications of Moisture Resistant Drop Ceiling Tiles

1. Residential Use

In residential settings, Moisture Resistant Drop Ceiling Tiles are ideal for areas such as bathrooms, laundry rooms, and basements where moisture levels are typically higher. Their ability to withstand humidity helps to prevent issues like mold growth and ceiling damage.

2. Commercial Use

For commercial spaces like restaurants, kitchens, and public restrooms, moisture-resistant tiles provide a practical solution for managing high moisture levels. They help maintain a clean and professional appearance while ensuring durability and ease of maintenance.

3. Industrial Settings

In industrial environments, where exposure to moisture and chemicals can be common, moisture-resistant ceiling tiles offer a reliable option. They can withstand harsh conditions and contribute to a safer and more organized workspace.

Installation of Moisture Resistant Drop Ceiling Tiles

1. Preparation

Before installing moisture-resistant tiles, ensure that the ceiling grid system is properly installed and level. The grid system should be checked for any damage or misalignment to ensure a smooth and accurate tile installation.

2. Measuring and Cutting

Measure the tiles to fit the dimensions of the ceiling grid. If necessary, cut the tiles to fit around fixtures and other obstructions. Use a utility knife or tile cutter for clean and precise cuts.

3. Placing the Tiles

Place the moisture-resistant tiles into the ceiling grid, starting from one corner and working your way across the ceiling. Ensure that each tile is properly aligned and sits flush with the surrounding tiles. Press the tiles gently into place to secure them.

4. Finishing Touches

After installing the tiles, check for any gaps or inconsistencies. Adjust or replace any tiles as needed to ensure a uniform and professional appearance. Clean the tiles to remove any dust or debris from the installation process.

Maintenance Tips for Moisture Resistant Drop Ceiling Tile

1. Regular Cleaning

Clean the tiles regularly using a damp cloth and mild detergent. Avoid using abrasive cleaners or excessive water, as this can damage the tiles. For stubborn stains, use a specialized cleaner recommended by the tile manufacturer.

2. Inspect for Damage

Periodically inspect the tiles for any signs of damage or wear. Replace any tiles that are cracked, warped, or showing signs of mold growth to maintain the integrity of the ceiling system.

3. Monitor Humidity Levels

Keep an eye on the humidity levels in areas where moisture-resistant tiles are installed. While these tiles are designed to resist moisture, excessive humidity or leaks can still pose a risk. Address any sources of moisture promptly to prevent potential damage.

4. Address Leaks Promptly

If you notice any leaks or water damage, address them immediately. Repair any sources of leaks and replace any damaged tiles to prevent further issues.

Conclusion

Moisture Resistant Drop Ceiling Tiles offer a practical and stylish solution for managing moisture and maintaining a clean, durable ceiling. Their benefits include enhanced durability, improved indoor air quality, cost-effectiveness, easy maintenance, and versatility. By understanding their advantages and following proper installation and maintenance practices, you can ensure that your ceiling system remains functional and attractive for years to come.

Armstrong 922A Ceiling Tile: The Perfect Choice for Acoustic and Aesthetic Solutions

When it comes to creating a comfortable and aesthetically pleasing environment in commercial and residential spaces, ceiling tiles play a crucial role. Among the various options available on the market, the Armstrong 922A Ceiling Tile stands out as a popular choice for its excellent acoustic properties, durability, and attractive design. Whether you’re renovating an office space, a school, or a retail store, the Armstrong 922A ceiling tile offers a blend of functionality and visual appeal that can enhance any space. In this article, we’ll explore everything you need to know about the Armstrong 922A ceiling tile, including its features, benefits, and installation process.

Armstrong 922A Ceiling Tile

What is the Armstrong 922A Ceiling Tile?

The Armstrong 922A Ceiling Tile is a high-quality acoustic ceiling tile designed to provide superior sound absorption, making it ideal for environments where noise control is essential. These tiles are part of Armstrong’s extensive range of ceiling solutions, known for their durability, ease of installation, and aesthetic versatility. The 922A model is particularly favored for its fine-textured surface, which contributes to a clean, modern look while enhancing the acoustics of the space.

Key Features of Armstrong 922A Ceiling Tile

  • Acoustic Performance: The Armstrong 922A ceiling tile is engineered to offer excellent sound absorption, with a Noise Reduction Coefficient (NRC) of up to 0.55. This makes it an ideal choice for offices, classrooms, and other spaces where reducing ambient noise is important.
  • Durability: Made from high-quality mineral fiber, the 922A tile is designed to withstand wear and tear over time, making it a long-lasting solution for commercial and residential installations.
  • Aesthetic Appeal: The fine-textured surface of the Armstrong 922A ceiling tile provides a smooth, elegant finish that can complement a wide range of interior designs. Its clean, white color ensures it blends seamlessly into any ceiling grid, enhancing the overall look of the space.
  • Ease of Installation: The tiles are lightweight and easy to handle, making the installation process straightforward. They fit into standard 15/16-inch ceiling grids, which are commonly used in most commercial and residential buildings.
  • Sustainability: Armstrong ceiling tiles are made with sustainability in mind. The 922A tiles contain a high percentage of recycled content, contributing to LEED credits for environmentally responsible building practices.

Read too: Kitchen Lighting For A Vaulted Ceiling: Illuminating Your Space with Style and Functionality

Advantages of Using Armstrong 922A Ceiling Tile

Choosing the Armstrong 922A ceiling tile comes with numerous benefits, making it a preferred option for many architects, builders, and facility managers. Here are some of the key advantages:

1. Superior Acoustic Control

One of the primary reasons for selecting the Armstrong 922A ceiling tile is its ability to control sound within a room. The tile’s acoustic properties help to absorb sound, reducing echo and minimizing noise levels. This makes it particularly beneficial in environments where clear communication is essential, such as offices, educational institutions, and healthcare facilities.

2. Enhanced Aesthetics

The Armstrong 922A ceiling tile offers a fine-textured, non-directional surface that provides a uniform and modern look. This design versatility allows it to be used in a variety of settings, from corporate offices to retail spaces. The clean, white finish of the tiles contributes to a bright and open atmosphere, which can enhance the perception of space and improve the overall ambiance of the room.

3. Durability and Low Maintenance

Durability is another significant advantage of the Armstrong 922A ceiling tile. Made from robust mineral fiber, these tiles are resistant to sagging and warping, even in high-humidity environments. Their durability reduces the need for frequent replacements, making them a cost-effective option in the long run. Additionally, the tiles are easy to clean, requiring only periodic dusting or vacuuming to maintain their appearance.

4. Sustainability and Environmental Responsibility

With growing concerns about environmental impact, the Armstrong 922A ceiling tile offers a sustainable choice for building projects. These tiles contain recycled materials and are fully recyclable at the end of their lifecycle, reducing their environmental footprint. Using Armstrong tiles can contribute to LEED certification, supporting green building initiatives and helping to achieve sustainability goals.

5. Ease of Installation and Replacement

The Armstrong 922A ceiling tile is designed for easy installation, fitting seamlessly into standard ceiling grids. This ease of installation not only saves time during the initial setup but also simplifies future maintenance tasks. If a tile becomes damaged or needs to be replaced, it can be easily removed and swapped out without disrupting the entire ceiling system.

Installation Guide for Armstrong 922A Ceiling Tile

Installing Armstrong 922A ceiling tiles is a relatively straightforward process that can be completed by professionals or experienced DIYers. Below is a step-by-step guide to help you through the installation process:

1. Preparation

Before starting the installation, ensure that you have all the necessary tools and materials, including the ceiling tiles, a ladder, a tape measure, a utility knife, and the ceiling grid system. Make sure the area is clean and free of debris, and that the ceiling grid is securely installed and level.

2. Measure and Cut the Tiles

Measure the dimensions of the ceiling grid and the room to determine the number of tiles needed. If necessary, cut the tiles to fit around edges, corners, or light fixtures. Use a utility knife to make precise cuts, ensuring that the tiles fit snugly within the grid.

3. Install the Tiles

Starting from one corner of the room, begin placing the Armstrong 922A ceiling tiles into the grid. Lift each tile into place and gently lower it into the grid framework. Make sure each tile is properly aligned and sits flush within the grid. Continue this process until all tiles are installed.

4. Finishing Touches

Once all the tiles are in place, step back and inspect the ceiling to ensure that all tiles are level and properly aligned. Make any necessary adjustments, and ensure that all tiles are securely fitted within the grid system.

5. Post-Installation Care

After installation, clean the tiles to remove any dust or debris that may have accumulated during the process. Regular maintenance includes dusting or vacuuming the tiles to keep them looking clean and fresh.

Applications and Use Cases for Armstrong 922A Ceiling Tile

The Armstrong 922A ceiling tile is a versatile solution suitable for a wide range of applications. Here are some common use cases where these tiles excel:

1. Commercial Offices

In office environments, controlling noise levels is crucial to maintaining productivity and a pleasant working atmosphere. The Armstrong 922A ceiling tile provides the acoustic control needed in open-plan offices, conference rooms, and private offices, while also contributing to a professional and polished appearance.

2. Educational Facilities

Classrooms, lecture halls, and libraries can benefit greatly from the sound-absorbing properties of the Armstrong 922A ceiling tiles. By reducing ambient noise, these tiles help create a more conducive learning environment, where students and teachers can focus on their tasks without distractions.

3. Healthcare Settings

Hospitals and clinics require environments that are both quiet and hygienic. The Armstrong 922A ceiling tile meets these needs by offering excellent sound absorption and easy-to-clean surfaces. This helps maintain a calm and sterile environment, essential for patient care and recovery.

4. Retail Spaces

In retail settings, the right ceiling solution can enhance the shopping experience by improving acoustics and contributing to the store’s overall aesthetic. The Armstrong 922A ceiling tiles provides a clean, bright appearance that can make retail spaces feel more welcoming and spacious, while also minimizing noise from bustling crowds.

5. Residential Areas

While primarily used in commercial settings, the Armstrong 922A ceiling tiles can also be an excellent choice for residential spaces, particularly in basements or home offices. These tiles offer the same benefits of noise reduction and aesthetic appeal, making them a great option for creating a comfortable and functional living space.

Conclusion

The Armstrong 922A ceiling tiles is a versatile, durable, and aesthetically pleasing option for both commercial and residential spaces. Its superior acoustic properties, ease of installation, and sustainability make it a top choice for anyone looking to improve the functionality and appearance of their ceiling. Whether you’re designing a new office, renovating a school, or updating a retail space, the Armstrong 922A ceiling tiles provides the performance and visual appeal needed to create a comfortable, efficient environment.

Insulated Ceiling Tiles 2X4: The Ultimate Guide to Enhanced Comfort and Efficiency

When it comes to enhancing the comfort and efficiency of your indoor spaces, insulated ceiling tiles 2×4 offer a remarkable solution. These tiles not only provide superior insulation but also contribute to the aesthetic and functional aspects of a room. This guide will explore the benefits, installation tips, design ideas, and maintenance of insulated ceiling tiles in the 2×4 size format, helping you make an informed decision for your next project.

Insulated Ceiling Tiles 2X4

What Are Insulated Ceiling Tiles 2X4?

Insulated ceiling tiles 2×4 are ceiling tiles measuring 2 feet by 4 feet, designed to provide both insulation and acoustic benefits. Typically made from materials like mineral fiber, fiberglass, or foam, these tiles are installed in suspended ceiling grids and serve multiple purposes:

  • Thermal Insulation: They help regulate indoor temperatures by minimizing heat loss or gain, which can contribute to lower energy bills.
  • Acoustic Control: These tiles absorb sound, reducing noise levels and improving room acoustics.
  • Fire Resistance: Many insulated ceiling tiles are fire-resistant, adding an extra layer of safety to your space.
  • Aesthetic Appeal: Available in various designs and finishes, they can enhance the visual appeal of your ceiling.

Benefits of Using Insulated Ceiling Tiles 2X4

1. Improved Energy Efficiency

One of the primary benefits of insulated ceiling tiles 2×4 is their contribution to energy efficiency. By providing effective thermal insulation, these tiles help maintain a stable indoor temperature, reducing the workload on heating and cooling systems. This not only leads to lower energy consumption but also helps in reducing utility bills.

2. Enhanced Acoustic Comfort

Noise reduction is a crucial aspect of creating a comfortable indoor environment. Insulated ceiling tiles with acoustic properties can absorb sound waves, reducing echo and noise levels. This is particularly beneficial in spaces such as offices, conference rooms, and educational institutions where clear communication and a quiet environment are essential.

Read too: Discovering the Charm of Nautical Outdoor Ceiling Fans for Your Coastal Retreat: Sail into Style

3. Fire Safety

Safety is a major concern in any building, and insulated ceiling tiles 2×4 can play a role in enhancing fire protection. Many of these tiles are manufactured with fire-resistant materials, which can help in containing and slowing the spread of flames in case of a fire. This added safety feature provides peace of mind and complies with building codes and regulations.

4. Aesthetic Flexibility

Insulated ceiling tiles come in a variety of styles, colors, and finishes. This allows you to choose tiles that match or complement your interior design. Whether you prefer a classic look or a modern touch, there’s an option to suit every aesthetic preference.

5. Easy Maintenance

Maintaining insulated ceiling tiles 2×4 is relatively simple. Many tiles are designed to be easy to clean and replace, ensuring that your ceiling remains in good condition with minimal effort. Regular dusting and occasional spot cleaning are typically sufficient to keep them looking their best.

Choosing the Right Insulated Ceiling Tiles 2X4

Selecting the right insulated ceiling tiles 2×4 involves considering several factors to ensure that the tiles meet your specific needs. Here are some key considerations:

1. Material

  • Mineral Fiber: Offers excellent acoustic and thermal insulation and is commonly used in commercial and residential spaces.
  • Fiberglass: Lightweight and highly effective in both thermal and acoustic insulation. It is also resistant to moisture.
  • Foam: Provides good thermal insulation and is often used in residential applications due to its ease of installation.

2. Fire Rating

Check the fire rating of the tiles to ensure they meet safety standards. Tiles with a higher fire resistance rating offer better protection and can be a requirement in certain building codes.

3. Design and Finish

Choose a design and finish that complements your space. Options include textured, smooth, and patterned finishes. Consider how the tiles will fit with your overall interior design.

4. Installation Requirements

Ensure that the tiles are compatible with your existing ceiling grid system or be prepared to make necessary adjustments. Some tiles may require professional installation, especially if they are part of a complex design or if additional insulation is needed.

Installation Tips for Insulated Ceiling Tiles 2X4

Proper installation is crucial for maximizing the benefits of your insulated ceiling tiles 2×4. Follow these tips to ensure a successful installation:

1. Preparation

Before starting the installation, measure the ceiling area to determine how many tiles you will need. Remove any existing tiles or debris from the ceiling grid to ensure a clean and even surface.

2. Cutting and Fitting

If necessary, cut the tiles to fit your ceiling grid. Use a utility knife or saw designed for the material of your tiles. Ensure that the tiles fit snugly into the grid to prevent gaps and ensure proper insulation.

3. Securing the Tiles

Place the tiles into the ceiling grid carefully, ensuring that they are level and properly aligned. Press them into place gently to avoid damaging the tiles or the grid.

4. Checking for Gaps

After installation, check for any gaps between tiles or between the tiles and the ceiling grid. Fill any gaps with appropriate sealant if necessary to maintain insulation effectiveness.

Design Ideas for Using Insulated Ceiling Tiles 2X4

Here are some creative ways to incorporate insulated ceiling tiles 2×4 into your interior design:

1. Modern Office Space

Incorporate sleek, white insulated ceiling tiles with a smooth finish to create a clean, professional look. This design is ideal for office environments where a bright and airy atmosphere is desired.

2. Home Theater

Opt for textured or patterned tiles to enhance the acoustics and create a visually appealing ceiling in your home theater. Darker colors or patterns can add a dramatic effect and improve sound quality.

3. Educational Facilities

In classrooms and lecture halls, use acoustic tiles to minimize noise and improve sound clarity. Bright, colorful tiles can also add a touch of fun and create a stimulating learning environment.

4. Residential Spaces

For living rooms or bedrooms, choose tiles with a soft texture and warm colors to add a cozy and inviting feel. Tiles with decorative patterns can also be used to make a statement in your home.

Maintenance and Care

To keep your insulated ceiling tiles 2×4 looking their best, follow these maintenance tips:

1. Regular Dusting

Dust the tiles regularly using a soft cloth or a vacuum cleaner with a brush attachment. This will help prevent the buildup of dust and maintain a clean appearance.

2. Spot Cleaning

For stains or spills, clean the affected area with a mild detergent and water. Avoid using harsh chemicals or abrasive cleaning tools that could damage the tiles.

3. Periodic Inspection

Inspect the tiles periodically for signs of damage or wear. Replace any damaged tiles promptly to ensure continued insulation and acoustic performance.

Conclusion

Insulated ceiling tiles 2×4 offer a practical and stylish solution for enhancing the comfort and efficiency of various indoor spaces. With their benefits in thermal insulation, acoustic control, and aesthetic flexibility, these tiles are a valuable addition to any home or commercial environment. By choosing the right tiles and following proper installation and maintenance practices, you can enjoy the long-lasting advantages they provide.

Discount Ceiling Tiles 2X2: Transform Your Space

Ceiling tiles are an often overlooked aspect of interior design, yet they play a crucial role in the aesthetic and acoustic quality of a room. For those looking to upgrade their ceilings without breaking the bank, discount ceiling tiles 2X2 are an excellent option. These tiles provide a cost-effective solution to revamping any space, from homes to offices. This article delves into the benefits, types, installation processes, and tips for choosing the right discount ceiling tiles 2X2 for your needs.

Discount Ceiling Tiles 2X2

Why Choose Discount Ceiling Tiles 2X2?

Ceiling tiles sized 2×2 feet are popular due to their versatility and ease of handling. Here are several reasons why you should consider these tiles for your next renovation project:

1. Cost-Effective

One of the primary advantages of discount ceiling tiles 2X2 is their affordability. They provide an economical way to improve the look and function of a ceiling without a significant financial investment.

2. Easy Installation

These tiles are designed for easy installation, making them suitable for DIY projects. They can be mounted directly onto existing ceilings or used with a grid system for drop ceilings.

3. Variety of Designs

Discount ceiling tiles 2X2 come in a wide range of designs, from classic to modern styles. Whether you want a sleek, minimalistic look or something more ornate, there’s a tile design to suit your taste.

4. Improved Acoustics

Ceiling tiles can help reduce noise levels in a room, creating a more comfortable and quieter environment. This is particularly beneficial in offices, schools, and commercial spaces.

5. Enhanced Aesthetics

Replacing old, stained, or damaged ceiling tiles with new ones can dramatically enhance the appearance of a room. They can cover up unsightly imperfections and give the space a fresh, clean look.

Types of Discount Ceiling Tiles 2X2

When selecting ceiling tiles, it’s essential to consider the material and design that best fits your needs. Here are some common types of discount ceiling tiles 2X2:

1. Acoustic Tiles

These tiles are designed to absorb sound, making them ideal for spaces where noise reduction is important. They are often used in offices, conference rooms, and classrooms.

2. Metal Tiles

Metal ceiling tiles offer a sleek, modern appearance and are highly durable. They are perfect for adding a touch of industrial chic to any space.

3. PVC Tiles

PVC tiles are lightweight, waterproof, and easy to clean, making them suitable for kitchens and bathrooms. They come in various patterns and colors to match any decor.

4. Styrofoam Tiles

These tiles are inexpensive, lightweight, and easy to install. They can be painted to match any color scheme and are great for DIY projects.

5. Tin Tiles

Tin ceiling tiles are known for their decorative, embossed designs and are often used to create a vintage or Victorian look. They are durable and resistant to moisture.

Read too: Striped Schoolhouse Ceiling Light Fixtures: Unveiling the Timeless Charm

How to Install Discount Ceiling Tiles 2X2

Installing ceiling tiles can be a straightforward process, especially with 2×2 tiles. Here are some basic steps to guide you through the installation:

1. Preparation

  • Measure the Area: Measure the dimensions of your ceiling to determine how many tiles you’ll need.
  • Choose Your Tiles: Select the type and design of tiles that best fit your aesthetic and functional needs.
  • Gather Tools: You’ll need a measuring tape, utility knife, straight edge, adhesive, and possibly a ladder.

2. Installation Methods

There are two primary methods for installing ceiling tiles: direct mount and drop ceiling (suspended grid system).

  • Direct Mount: This method involves attaching the tiles directly to the ceiling using adhesive. It’s ideal for flat ceilings without significant imperfections.
    • Apply adhesive to the back of each tile.
    • Press the tile firmly onto the ceiling, starting from one corner and working your way out.
    • Use a utility knife to cut tiles to fit around edges and fixtures.
  • Drop Ceiling: This involves suspending a grid system from the existing ceiling and laying the tiles into the grid. It’s perfect for covering up imperfections or accessing the space above the ceiling.
    • Install the grid system according to the manufacturer’s instructions.
    • Place the tiles into the grid, starting from the center and working outwards.
    • Cut tiles to fit into the perimeter and around any obstacles.

Tips for Choosing the Right Discount Ceiling Tiles 2X2

Selecting the right tiles can make a significant difference in the final look and functionality of your space. Here are some tips to help you make the best choice:

1. Consider the Room’s Function

Different rooms have different needs. For example, acoustic tiles are great for offices and media rooms, while moisture-resistant PVC tiles are better for bathrooms and kitchens.

2. Match Your Decor

Choose tiles that complement your existing decor. For a cohesive look, match the tile color and design with your furniture, walls, and flooring.

3. Check Durability

Consider the durability of the tile material, especially in high-traffic or moisture-prone areas. Metal and PVC tiles tend to be more durable than styrofoam or some acoustic tiles.

4. Look for Easy Maintenance

Opt for tiles that are easy to clean and maintain, especially in areas like kitchens where grease and grime can accumulate.

5. Budget Wisely

While discount tiles are more affordable, it’s still important to balance cost with quality. Look for tiles that offer the best value for your money.

Maintaining Your Ceiling Tiles

To keep your ceiling tiles looking their best, regular maintenance is essential. Here are some maintenance tips:

1. Regular Cleaning

Dust and clean your tiles regularly using a soft cloth or vacuum cleaner attachment. For tougher stains, use a mild detergent and water solution.

2. Inspect for Damage

Periodically check your ceiling tiles for any signs of damage, such as cracks, stains, or sagging. Replace any damaged tiles promptly to maintain the overall appearance.

3. Repaint as Needed

Some tiles, like styrofoam or metal, can be repainted to refresh their appearance. Use appropriate paint for the tile material and follow the manufacturer’s instructions.

Enhancing Your Space with Additional Decor

In addition to installing discount ceiling tiles 2X2, consider these additional decor tips to enhance your space:

1. Lighting

Good lighting can make a significant difference in any room. Consider adding stylish light fixtures or LED strips to complement your new ceiling tiles.

2. Wall Art

Decorate your walls with art that complements the style and color of your ceiling tiles. This can create a cohesive and visually appealing look.

3. Furniture Arrangement

Rearrange your furniture to make the most of your new ceiling design. Ensure that the layout allows for good airflow and lighting.

Conclusion

Discount ceiling tiles 2X2 offer an affordable and stylish way to transform your space. Whether you’re renovating a home, office, or commercial area, these tiles provide a versatile solution that can enhance both the aesthetics and functionality of your ceiling. By choosing the right type of tile, following proper installation techniques, and maintaining them well, you can enjoy a beautiful and functional ceiling for years to come.

1912A Armstrong Ceiling Tiles: Discover the Best Uses and Features

1912A Armstrong Ceiling Tiles are renowned for their versatility and durability in various architectural settings. This article explores the key features, benefits, and creative applications of these high-quality ceiling tiles.

1912A Armstrong Ceiling Tiles

Understanding 1912A Armstrong Ceiling Tile

Armstrong’s 1912A ceiling tiles are crafted to deliver exceptional acoustic performance while enhancing the aesthetic appeal of any space. They are ideal for both residential and commercial environments, offering a seamless blend of functionality and style.

Key Features of 1912A Armstrong Ceiling Tile

These tiles are engineered with advanced materials to ensure superior sound absorption and noise reduction capabilities. Their easy installation process makes them a favorite among contractors and DIY enthusiasts alike.

Applications of 1912A Armstrong Ceiling Tiles

From office buildings to educational institutions and healthcare facilities, 1912A Armstrong Ceiling Tiles provide practical solutions for improving indoor acoustics and visual appeal. Their ability to integrate with various lighting systems and HVAC configurations further enhances their utility.

Benefits of Choosing 1912A Armstrong Ceiling Tiles

  • Acoustic Excellence: Reduce noise levels effectively with Armstrong’s superior acoustic design.
  • Durability: Engineered to withstand long-term wear and maintain aesthetic integrity.
  • Design Versatility: Available in a range of textures and finishes to complement any interior style.
  • Sustainability: Made from environmentally friendly materials, contributing to LEED certification goals.

Read too: Discovering the Charm of Nautical Outdoor Ceiling Fans for Your Coastal Retreat: Sail into Style

Installing 1912A Armstrong Ceiling Tile

Whether for new construction or renovation projects, proper installation ensures optimal performance. Follow manufacturer guidelines and consider professional assistance for large-scale installations.

Conclusion

1912A Armstrong Ceiling Tile stand out as a premium choice for architects, designers, and property owners seeking reliable ceiling solutions that combine functionality with aesthetic appeal. Explore the diverse applications and benefits of these innovative ceiling tiles to enhance your next project.

White Suspended Ceiling Tiles: Enhance Your Space

Discover the versatility and benefits of using white suspended ceiling tiles in various settings. Learn about installation tips, design ideas, maintenance advice, and more to transform your ceilings effortlessly.

White Suspended Ceiling Tiles

Understanding White Suspended Ceiling Tiles

White suspended ceiling tiles are versatile components used to enhance the aesthetic appeal and functionality of interior spaces. These tiles are popular for their ability to create a clean, modern look while offering practical benefits.

Read too: Striped Schoolhouse Ceiling Light Fixtures: Unveiling the Timeless Charm

Benefits of White Suspended Ceiling Tiles

Explore the advantages of choosing white suspended ceiling tiles for your next renovation or construction project:

  • Light Reflection: White tiles reflect light, making spaces appear brighter and more spacious.
  • Aesthetic Versatility: Complements a wide range of interior design styles, from modern to traditional.
  • Acoustic Control: Some tiles offer acoustic properties, reducing noise levels in busy environments.
  • Ease of Installation: Quick and straightforward installation compared to traditional drywall ceilings.
  • Maintenance: Easy to clean and maintain, with options for stain-resistant finishes.

Types of White Suspended Ceiling Tiles

Dive into the different types of white suspended ceiling tiles available:

  • Mineral Fiber Tiles: Affordable and effective for controlling sound and enhancing insulation.
  • Vinyl-faced Gypsum Tiles: Durable and moisture-resistant, suitable for high-humidity areas like kitchens and bathrooms.
  • Metal Tiles: Provide a sleek, industrial look with options for enhanced durability and fire resistance.
  • Acoustic Tiles: Designed to absorb sound waves, improving acoustics in offices, classrooms, and studios.

Installation Tips for White Suspended Ceiling Tile

Ensure a successful installation with these practical tips:

  • Measurement and Planning: Measure the ceiling area accurately and plan the layout of tiles, ensuring symmetry and balance.
  • Choosing the Right Tiles: Select tiles based on ceiling height, room function, and desired aesthetic.
  • Tools and Materials: Gather necessary tools such as a level, tape measure, utility knife, and safety equipment.
  • Installation Technique: Follow manufacturer guidelines for tile installation, ensuring secure attachment and alignment.

Design Ideas

Discover creative ways to incorporate white suspended ceiling tile into your space:

  • Modern Office Spaces: Create a sleek, professional environment with clean lines and bright ceilings.
  • Retail Environments: Highlight merchandise with well-lit, visually appealing ceilings.
  • Residential Settings: Enhance living areas with an airy feel and improved light distribution.
  • Educational Facilities: Improve learning environments with acoustically optimized ceilings that reduce distractions.

Maintenance and Care Tips

Keep your white suspended ceiling tile looking their best with these maintenance tips:

  • Regular Cleaning: Dust tiles periodically to maintain their brightness and cleanliness.
  • Avoid Harsh Chemicals: Use mild cleaners and avoid abrasive materials that could damage the tile surface.
  • Inspect for Damage: Regularly inspect tiles for cracks, stains, or signs of water damage and replace as needed.
  • Professional Inspection: Consider scheduling professional inspections to assess the condition of your ceiling tiles.

Conclusion

White suspended ceiling tile offer a versatile and practical solution for enhancing interior spaces. Whether for improving aesthetics, controlling acoustics, or increasing light reflection, these tiles provide numerous benefits for various applications.

Armstrong 584B Ceiling Tile: Elevate Your Space with Superior Acoustic and Aesthetic Solutions

When it comes to enhancing both the visual appeal and acoustic performance of your interiors, ceiling tiles play a crucial role. Among the numerous options available, the Armstrong 584B Ceiling Tile stands out for its exceptional quality, aesthetic design, and acoustic properties. This article will explore the features, benefits, and applications of the Armstrong 584B Ceiling Tile, providing you with a comprehensive guide to making an informed choice for your next renovation or construction project.

Armstrong 584B Ceiling Tile

Understanding Armstrong 584B Ceiling Tile

What is the Armstrong 584B Ceiling Tile?

The Armstrong 584B Ceiling Tile is a high-performance ceiling solution designed to meet the needs of both residential and commercial spaces. Known for its excellent acoustic properties and clean, professional look, this ceiling tile is a popular choice for those seeking to improve sound absorption and enhance the overall aesthetics of their interiors.

Key Features of Armstrong 584B Ceiling Tile

  • Superior Acoustic Performance: One of the standout features of the Armstrong 584B is its ability to absorb sound effectively, reducing noise levels and enhancing speech intelligibility in any room.
  • Aesthetic Appeal: With a sleek and clean finish, these ceiling tiles provide a polished look that complements a wide range of interior design styles.
  • Durability: Made from high-quality materials, Armstrong 584B tiles are built to last, offering resistance to sagging and other forms of wear and tear.
  • Ease of Installation: These tiles are designed for easy installation, fitting seamlessly into standard ceiling grids without the need for special tools or expertise.

Benefits of Using Armstrong 584B Ceiling Tile

Acoustic Benefits

In environments where noise reduction is crucial—such as offices, classrooms, and healthcare facilities—the Armstrong 584B Ceiling Tile excels. Its high Noise Reduction Coefficient (NRC) helps to absorb ambient sound, creating a quieter and more comfortable space. This is particularly beneficial in open-plan offices where controlling noise can significantly improve productivity and concentration.

Aesthetic Benefits

The Armstrong 584B Ceiling Tile enhances the visual appeal of any room with its uniform, smooth surface. It is an excellent choice for modern interiors, providing a clean and professional appearance that is both subtle and sophisticated. The tiles can also be easily painted or customized to match specific design themes or color schemes.

Health and Safety Benefits

Manufacturers design these ceiling tiles to meet stringent safety standards, ensuring they are free from harmful chemicals and allergens. This makes them suitable for use in sensitive environments such as hospitals and schools. Additionally, the tiles offer fire resistance, adding an extra layer of safety to your building.

Applications of Armstrong 584B Ceiling Tile

Commercial Spaces

In commercial settings, such as offices, conference rooms, and retail stores, the Armstrong 584B Ceiling Tile is an ideal choice. Its acoustic properties help to create a more pleasant and productive working environment, while its clean aesthetic adds to the professional look of the space.

Educational Institutions

Schools and universities can greatly benefit from the noise-reducing qualities of these ceiling tiles. By minimizing background noise and enhancing speech clarity, Armstrong 584B tiles contribute to a better learning environment, helping students and teachers communicate more effectively.

Healthcare Facilities

Hospitals and clinics require materials that not only meet high hygiene standards but also contribute to a calm and quiet atmosphere. Armstrong 584B Ceiling Tiles meet these needs, providing excellent acoustic performance and a clean, sterile appearance.

Installation and Maintenance

Installation Tips for Armstrong 584B Ceiling Tile

You can install Armstrong 584B Ceiling Tiles with basic tools and equipment in a straightforward process. Here are some steps to guide you through the installation:

  1. Preparation: Measure the ceiling grid and ensure you have the correct number of tiles.
  2. Cutting and Fitting: Use a utility knife to cut the tiles to the desired size if necessary.
  3. Placement: Place the tiles into the ceiling grid, ensuring they fit snugly and securely.
  4. Final Adjustments: Make any final adjustments to ensure all tiles are level and aligned.

Maintenance Guidelines

Maintaining Armstrong 584B Ceiling Tiles is simple and requires minimal effort. Regular dusting and occasional wiping with a damp cloth will keep the tiles looking clean and new. For any stains or marks, a mild detergent can be used. The tiles are also designed to resist sagging, so they will maintain their shape and appearance over time.

Conclusion

The Armstrong 584B Ceiling Tiles is an excellent choice for anyone looking to improve the acoustics and aesthetics of their interior spaces. Whether you’re outfitting a commercial office, a school, or a healthcare facility, these tiles provide a blend of performance, durability, and visual appeal that is hard to beat. By choosing Armstrong 584B Ceiling Tiles, you invest in a solution that enhances both the functionality and beauty of your environment.

Read too: Striped Schoolhouse Ceiling Light Fixtures: Unveiling the Timeless Charm

From superior sound absorption to easy installation and maintenance, the benefits of Armstrong 584B Ceiling Tiles are clear. Explore the range of designs and options available to find the perfect fit for your project and enjoy the transformative impact of high-quality ceiling solutions.

Fiberglass Ceiling Tiles 2X4: Enhance Your Space with Durable and Stylish

When it comes to upgrading the aesthetics and functionality of your space, choosing the right ceiling tiles is essential. Fiberglass ceiling tiles 2X4 offer a perfect combination of durability, style, and ease of installation, making them an ideal choice for both residential and commercial applications. In this comprehensive guide, we’ll delve into everything you need to know about fiberglass ceiling tiles 2X4, from their features and benefits to installation tips and design ideas.

Fiberglass Ceiling Tiles 2X4

Understanding Fiberglass Ceiling Tiles 2X4

Fiberglass ceiling tiles 2X4 are rectangular panels typically measuring 2 feet by 4 feet, making them suitable for standard ceiling grid systems. These tiles are constructed from high-quality fiberglass material, which offers several advantages over traditional ceiling tile materials such as mineral fiber or gypsum.

Features and Benefits

  1. Durability: Fiberglass ceiling tiles are highly durable and resistant to moisture, mold, mildew, and sagging. This makes them suitable for use in high-humidity environments such as bathrooms, kitchens, and basements.
  2. Aesthetics: These tiles are available in a wide range of finishes, textures, and colors, allowing you to achieve the desired look and feel for your space. Whether you prefer a sleek and modern design or a more traditional aesthetic, there’s a fiberglass ceiling tile to suit your needs.
  3. Acoustic Properties: Fiberglass ceiling tiles offer excellent sound absorption properties, helping to reduce noise levels and improve acoustics in any room. This makes them ideal for use in offices, conference rooms, classrooms, and other areas where noise control is important.
  4. Fire Resistance: Many fiberglass ceiling tiles are manufactured with fire-resistant properties, providing an added layer of safety and protection in the event of a fire.

Installation Tips

Installing fiberglass ceiling tiles 2X4 is a straightforward process that can be completed by DIY enthusiasts or professional contractors. Here are some tips to ensure a successful installation:

  1. Prepare the Surface: Before installing the tiles, ensure that the ceiling surface is clean, dry, and free of any debris or contaminants.
  2. Measure and Cut: Measure the dimensions of the ceiling grid and carefully cut the fiberglass tiles to fit using a sharp utility knife or scissors.
  3. Install the Tiles: Place the tiles into the ceiling grid, ensuring a snug fit and proper alignment. Press down firmly to secure the tiles in place.
  4. Finishing Touches: After installing all the tiles, add any required trim pieces or accessories to finish the ceiling’s appearance.

Design Ideas for Fiberglass Ceiling Tiles 2X4

Fiberglass ceiling tiles 2X4 offer endless design possibilities for residential and commercial spaces. Here are some ideas to inspire your next project:

  1. Modern Minimalism: Achieve a sleek and contemporary look with smooth, white fiberglass ceiling tiles paired with recessed lighting for a minimalist aesthetic.
  2. Industrial Chic: Embrace the industrial trend with textured fiberglass tiles in metallic finishes such as silver or bronze, complemented by exposed ductwork and piping.
  3. Vintage Charm: Add a touch of vintage charm to your space with patterned or embossed fiberglass ceiling tiles reminiscent of classic tin ceilings.
  4. Natural Elegance: Create a serene and inviting atmosphere with fiberglass tiles featuring woodgrain or stone finishes, paired with warm, earthy tones and natural materials.

Conclusion

Fiberglass ceiling tiles 2X4 offer a versatile and practical solution for enhancing the appearance and functionality of any space. With their durability, style, and ease of installation, these tiles are an excellent choice for residential and commercial applications alike.

Read too: Understanding and Dealing with Ants in the Ceiling Spaces: Navigating the Intrusion

Clip-In Ceiling Tile: Easy, Elegant, and Efficient

Upgrade your space with clip-in ceiling tile! Learn all about the benefits, installation process, and design options of these versatile and stylish ceiling solutions.

Clip In Ceiling Tiles

Introduction

Clip-in ceiling tiles provide a convenient and aesthetically pleasing solution to enhance any interior space. With easy installation and a wide range of design options, they’re popular for both residential and commercial projects. In this guide, we’ll cover everything from their benefits to the installation process.

Understanding Clip-In Ceiling Tiles

Clip-in ceiling tiles, also called drop-in or lay-in tiles, are panels installed into a grid system. Clip-in tiles feature a special edge for easy insertion into the grid, securely held without additional hardware, unlike traditional tiles.

Benefits of Clip-In Ceiling Tiles

There are several benefits to choosing clip-in ceiling tiles for your next project, including:

  1. Easy Installation: Clip-in tiles are designed for effortless installation, making them suitable for DIY enthusiasts and professional contractors alike. With no need for adhesives or screws, you can quickly and easily transform your space with minimal mess and downtime.
  2. Versatile Design Options: Clip-in ceiling tiles offer diverse styles, colors, and finishes for any aesthetic preference, spanning from classic to modern. Find the perfect design to match your vision, whether it’s traditional or bold.
  3. Accessibility: Removable clip-in ceiling tiles provide convenient access for maintenance in commercial buildings, healthcare facilities, and other environments requiring regular upkeep.
  4. Acoustic Performance: Clip-in ceiling tiles often enhance acoustic performance by absorbing and reducing noise levels in a space. This can help create a more comfortable and productive environment, particularly in open-plan offices or multi-purpose rooms.

Installation Process for Clip-In Ceiling Tiles

Installing clip-in ceiling tiles is a straightforward process that can be completed in just a few simple steps:

  1. Prepare the Ceiling Grid: Ensure that the ceiling grid is clean, level, and free of any debris or obstructions before beginning the installation process.
  2. Measure and Cut Tiles: Measure the dimensions of the ceiling grid and use a utility knife or scissors to trim the clip-in tiles to fit as needed.
  3. Insert Tiles into Grid: Starting at one edge of the room, gently insert the clip-in tiles into the grid, making sure that the edge detail engages securely with the grid.
  4. Continue Installation: Continue inserting tiles into the grid, working your way across the room in a systematic manner until the entire ceiling is covered.
  5. Finishing Touches: Once all tiles are installed, double-check for any gaps or misalignments and make any necessary adjustments. Install any trim pieces or accessories as needed to complete the look.

Maintenance and Care

Clip-in ceiling tiles are relatively low-maintenance, requiring only periodic cleaning to remove dust and debris. To clean clip-in tiles, simply use a soft brush or vacuum attachment to gently remove any loose dirt or dust. For stubborn stains or spills, use a mild detergent solution and a soft cloth to spot clean the affected areas. Avoid using harsh chemicals or abrasive cleaners, as these can damage the finish of the tiles.

Conclusion

Clip-in ceiling tiles offer a versatile, easy-to-install, and visually appealing solution for enhancing the look and functionality of any interior space. Whether you’re renovating a residential home, commercial office, or retail space, clip-in tiles provide a cost-effective and stylish ceiling option that will stand the test of time.

Read too: Exploring the Efficiency of Radiant Ceiling Heater Electric: A Comprehensive Guide

Enhance Your Space with Armstrong 1912A Ceiling Tiles: A Comprehensive Guide

Are you considering upgrading your ceiling with a timeless and elegant look? Look no further than the Armstrong 1912A Ceiling Tiles. In this guide, we’ll delve into everything you need to know about this premium ceiling tile option, from its features and benefits to installation tips and design ideas.

Armstrong 1912A Ceiling Tile

Discovering Armstrong 1912A Ceiling Tile: An Overview

Armstrong 1912A Ceiling Tile: Elevating Spaces with Style and Sophistication

Armstrong 1912A Ceiling Tile is a classic choice for residential and commercial spaces alike. With its distinctive design and superior quality, it adds a touch of sophistication to any room. Let’s explore its key features:

  1. Timeless Design: The Armstrong 1912A Ceiling Tile features a timeless design characterized by its finely textured surface and beveled edges, creating a subtle yet refined aesthetic.
  2. Durable Construction: Crafted from high-quality materials, this ceiling tile offers durability and longevity, making it suitable for various environments, including offices, retail spaces, and healthcare facilities.
  3. Acoustic Performance: In addition to its visual appeal, Armstrong 1912A Ceiling Tile provides excellent acoustic performance, helping to reduce noise levels and create a more comfortable and productive environment.
  4. Easy Installation: Designed for hassle-free installation, this ceiling tile can be easily installed using standard ceiling grid systems, allowing for quick and efficient upgrades to your space.

Exploring the Versatility of Armstrong 1912A Ceiling Tile

Transform Your Space with Armstrong 1912A Ceiling Tile

Whether you’re renovating a residential kitchen or updating a commercial lobby, Armstrong 1912A Ceiling Tile offers endless possibilities for enhancing your space. Here are some creative ways to incorporate this versatile ceiling tile into your design:

  1. Office Spaces: Create a professional and inviting atmosphere in your office with Armstrong 1912A Ceiling Tile. Its clean lines and understated elegance complement a wide range of office decor styles.
  2. Retail Environments: Make a lasting impression on customers with a visually striking ceiling design. Armstrong 1912A Ceiling Tile adds visual interest and sophistication to retail spaces, helping to elevate the overall shopping experience.
  3. Healthcare Facilities: Enhance patient comfort and well-being in healthcare facilities with Armstrong 1912A Ceiling Tile. Its acoustic properties contribute to a quieter and more peaceful environment, promoting healing and relaxation.

Installation Tips and Maintenance Guidelines

Achieving Optimal Results with Armstrong 1912A Ceiling Tile

When installing Armstrong 1912A Ceiling Tile, follow these tips to ensure a seamless and professional-looking finish:

  1. Prepare the Surface: Ensure that the ceiling surface is clean, smooth, and free from any dust or debris before installation.
  2. Use Proper Tools: Use appropriate tools and equipment for cutting and handling the ceiling tiles to prevent damage and ensure accurate installation.
  3. Follow Manufacturer Instructions: Refer to the manufacturer’s installation guidelines and recommendations for best results.
  4. Regular Maintenance: Maintain the beauty and functionality of your Armstrong 1912A Ceiling Tile by regularly cleaning it with a mild detergent and water solution.

Conclusion

Armstrong 1912A Ceiling Tiles offers a perfect blend of style, durability, and performance, making it an ideal choice for a wide range of applications. Whether you’re updating a residential space or renovating a commercial property, this versatile ceiling tile is sure to enhance the look and feel of any room.

Read too: Exploring the Efficiency of Radiant Ceiling Heater Electric: A Comprehensive Guide