How To Soundproof A Ceiling From Noisy Neighbours? Living in an apartment or shared building can often lead to dealing with noise from neighbors above. Whether it’s footsteps, loud music, or even conversations, noise seeping through the ceiling can disrupt your peace and quiet. Fortunately, soundproofing your ceiling is an effective solution to minimize these disturbances. In this comprehensive guide, we’ll explore how to soundproof a ceiling from noisy neighbors, covering various methods, materials, and tips to help you regain your calm environment.
Why Soundproofing A Ceiling Is Important
Noise pollution is one of the most common issues in shared living spaces, especially in apartment buildings. Ceiling noise can range from light impact sounds like footsteps to airborne sounds such as loud music or TV. Without proper soundproofing, these sounds can travel directly through your ceiling and into your living space, causing a lack of privacy, stress, and sleepless nights.
Read too: Exploring the Efficiency of Radiant Ceiling Heater Electric: A Comprehensive Guide
Soundproofing a ceiling provides several benefits:
- Increased Privacy: Reduce unwanted noise and enhance personal privacy within your space.
- Better Sleep: A quieter environment is essential for restful sleep, especially in urban or multi-family buildings.
- Increased Property Value: A well-soundproofed home or apartment can appeal to buyers and renters who prioritize peace and quiet.
Now, let’s dive into how to soundproof a ceiling from noisy neighbors with detailed strategies and tips.
Understanding How To Soundproof A Ceiling From Noisy Neighbours
Soundproofing a ceiling involves blocking or absorbing sound waves that travel through it. There are two primary types of sounds you’ll need to address:
- Airborne Noise: This includes sounds such as voices, music, or TV noise. Airborne noise travels through the air and enters your living space via openings, cracks, and the ceiling structure.
- Impact Noise: Impact noise results from physical interactions with the ceiling, like footsteps, dropping objects, or moving furniture. This noise travels through the building’s structure and can be harder to block.
To effectively soundproof your ceiling, you’ll need to focus on solutions that tackle both airborne and impact noise. Here are several effective strategies.
1. Decouple the Ceiling
One of the most effective ways to reduce noise transmission is by decoupling the ceiling from the structure above. Decoupling involves creating a gap or separation between the ceiling and the floor above, which reduces the transfer of vibrations and sound waves.
Methods for Decoupling:
- Resilient Channels: Resilient channels are thin metal strips that are installed between the ceiling joists and the drywall. They work by creating a small gap that absorbs sound vibrations before they can pass through the ceiling. This method is particularly effective for impact noise.
- Sound Isolation Clips: These clips function similarly to resilient channels, but they provide more separation between the ceiling and the structure. They are highly effective for both impact and airborne noise.
How It Works:
When resilient channels or sound isolation clips are used, sound waves encounter the gap between the ceiling and the structure, preventing the waves from easily traveling through. This helps to significantly reduce the amount of noise that makes its way into your home.
2. Add Mass to the Ceiling
Sound travels easily through light and thin materials, so increasing the mass of your ceiling can help block sound waves from passing through. The more dense and heavy a material is, the better it will absorb and block sound.
Methods for Adding Mass:
- Mass-Loaded Vinyl (MLV): MLV is a flexible and dense material that is highly effective at blocking sound. You can install MLV sheets directly onto your ceiling joists before adding drywall. MLV is relatively thin, so it won’t add much bulk, but it offers excellent soundproofing properties.
- Double Layer of Drywall: Installing a second layer of drywall can also increase the mass of your ceiling, making it harder for sound to penetrate. For even better results, use Green Glue (a soundproofing compound) between the two drywall layers to dampen sound vibrations.
- Soundproof Drywall: This type of drywall is denser and thicker than standard drywall and is specifically designed to reduce sound transmission. It is more expensive but can be highly effective when combined with other soundproofing methods.
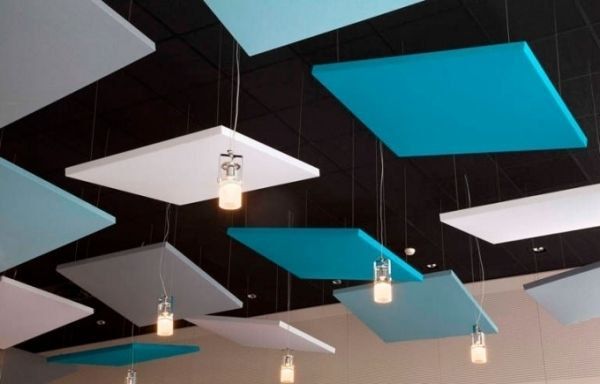
3. Use Acoustic Panels or Tiles
Acoustic panels or ceiling tiles are designed to absorb sound, reducing echoes and preventing noise from bouncing around a room. While they are often used for wall soundproofing, they can also be effective when applied to ceilings.
Types of Acoustic Panels:
- Foam Panels: These are lightweight and affordable soundproofing options that can be installed on the ceiling. They work best for absorbing mid- to high-frequency noise, such as voices or music.
- Fiberglass Panels: Fiberglass panels are thicker and denser than foam panels, making them more effective at absorbing low-frequency sounds like footsteps or bass-heavy music.
- Acoustic Ceiling Tiles: These tiles are often used in commercial buildings, but they can be installed in residential settings as well. They not only absorb sound but can also improve the aesthetic appearance of your ceiling.
4. Seal Gaps and Cracks
Even small gaps or cracks in your ceiling can allow sound to enter. Airborne noise in particular can easily pass through these small openings. Sealing any gaps or cracks is an inexpensive yet highly effective way to improve your ceiling’s soundproofing performance.
How to Seal Gaps:
- Acoustic Caulk: This flexible and soundproofing caulk is perfect for sealing gaps around the edges of the ceiling or in any cracks that may be present. Unlike regular caulk, acoustic caulk won’t harden over time, allowing it to remain effective as the building naturally shifts.
- Foam Insulation: Spray foam insulation can be used to fill any larger gaps or holes in the ceiling, providing an added barrier to sound. Foam insulation also offers the added benefit of thermal insulation, improving your home’s energy efficiency.
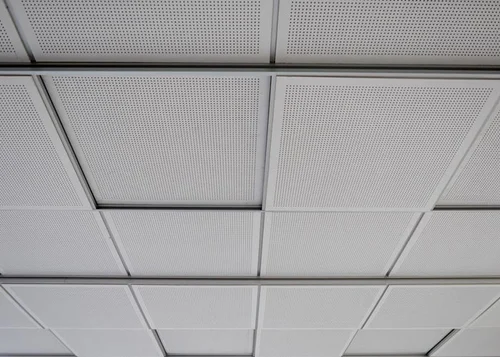
5. Install a Drop Ceiling
A drop ceiling, also known as a suspended ceiling, consists of a metal grid and ceiling tiles that are installed below the original ceiling. This method is particularly effective at reducing noise because it adds an additional layer of material between you and the noise source.
Benefits of a Drop Ceiling for Soundproofing:
- Added Air Gap: The drop ceiling creates an air gap between the original ceiling and the suspended tiles. This gap helps absorb sound vibrations, reducing noise transmission.
- Acoustic Ceiling Tiles: You can choose specialized acoustic tiles that are designed to absorb sound, further enhancing the noise reduction properties of a drop ceiling.
Installation Considerations:
- Ensure the drop ceiling is installed with soundproofing in mind. Use acoustic ceiling tiles or panels that are specifically rated for soundproofing. You may also want to add insulation above the tiles for even more noise reduction.
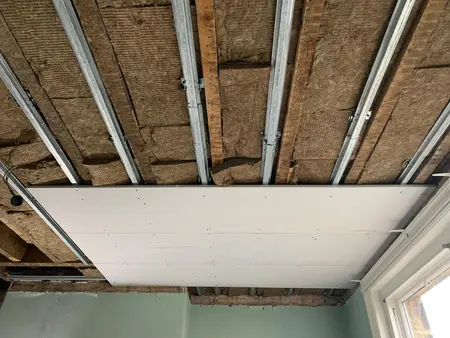
6. Install Soundproof Insulation
Insulation plays a critical role in reducing sound transmission between floors. By filling the cavities between the ceiling joists with soundproof insulation, you can effectively dampen sound waves before they reach your living space.
Types of Insulation for Soundproofing:
- Fiberglass Insulation: Fiberglass is a popular and affordable insulation option that can help reduce sound. It works by absorbing sound waves and preventing them from traveling through the ceiling.
- Mineral Wool Insulation: Mineral wool, or rock wool, is denser than fiberglass and offers better soundproofing performance. It’s particularly effective at blocking both airborne and impact noise.
- Blown-in Insulation: This type of insulation is ideal for filling hard-to-reach areas and gaps in your ceiling. It works similarly to fiberglass or mineral wool, absorbing sound and reducing noise transmission.
7. Use Soundproofing Curtains or Drapes
While not as effective as some of the other methods mentioned, heavy soundproofing curtains or drapes can help reduce noise in your space. These thick, dense materials can be hung around the edges of the ceiling or over windows to absorb airborne noise.
Although soundproof curtains won’t block impact noise, they can be helpful in reducing reverberation and softening echoes within the room.
Conclusion: Finding the Right Approach to Soundproofing Your Ceiling
Dealing with noise from neighbors can be incredibly frustrating, but by implementing the right soundproofing techniques, you can significantly reduce or eliminate the disturbances. Whether you’re decoupling the ceiling, adding mass, using acoustic panels, or installing a drop ceiling, there are numerous methods to suit your needs and budget.
When deciding how to soundproof a ceiling from noisy neighbors, it’s essential to evaluate the type of noise you’re dealing with and choose the appropriate method for your situation. With the right approach, you can create a peaceful, quiet environment and enjoy your living space without constant disruptions.