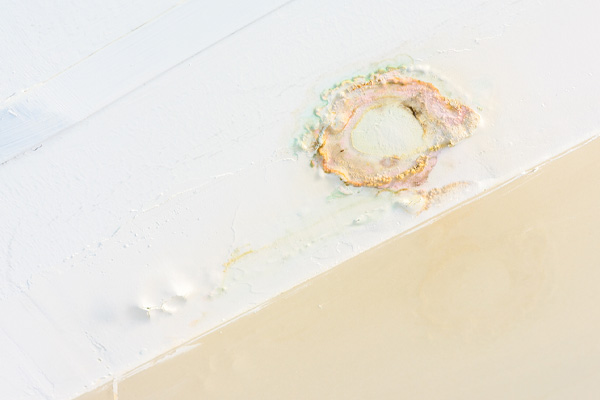
Water Stain on Ceiling Below Bathroom: A Comprehensive Guide

Water stains on the ceiling below a bathroom can be alarming for homeowners. These unsightly marks can indicate underlying problems that, if left unaddressed, may lead to significant damage and costly repairs. Understanding the causes, identifying the signs, and knowing how to effectively deal with a water stain on the ceiling below your bathroom are crucial for maintaining the integrity of your home. In this guide, we will delve deep into the topic, covering everything from identification to prevention.

Water Stain On Ceiling Below Bathroom

What Causes Water Stains on the Ceiling Below the Bathroom?

Before addressing the issue, it is essential to understand what typically causes water stains. Here are some common culprits:

1. Leaky Plumbing Fixtures

One of the primary causes of water stains in ceilings below bathrooms is leaks from plumbing fixtures. Toilets, sinks, and bathtubs are often connected to complex plumbing systems that can develop leaks over time. Common signs of leaking plumbing include:

  • Dripping sounds
  • Increased water bills
  • Wet spots around fixtures

2. Shower and Tub Leaks

Showers and bathtubs can also be sources of water damage. Improper sealing or caulking around these fixtures can allow water to seep through and accumulate in the ceiling below. This type of leak may not be immediately noticeable but can lead to significant staining over time.

Read too: Shiplap Ceiling in Kitchen: A Timeless Trend for a Stylish and Cozy Space

3. Roof Leaks

In some cases, water stains can be attributed to issues with the roof rather than plumbing. If your bathroom is located near an exterior wall, rainwater may be seeping in through the roof or siding and causing stains on the ceiling below.

4. Condensation Issues

Bathrooms are typically humid environments due to showering and bathing. If your bathroom lacks adequate ventilation, condensation can form on pipes and ceilings, leading to water stains.

5. Faulty Ventilation

Without proper ventilation, warm, moist air can collect in the bathroom, leading to increased humidity and condensation. This moisture can accumulate on ceilings and eventually lead to water stains.

6. Faulty Appliances

Appliances such as washing machines and dishwashers that are located near the bathroom can also contribute to water stains. If a hose bursts or a connection leaks, the resulting water can seep into the ceiling below.

Signs of Water Damage to Look For

Identifying a water stain on the ceiling below the bathroom is the first step in addressing the issue. Here are some signs that you may have a water problem:

1. Discoloration

Water stains often appear as brown or yellow spots on the ceiling. These stains can grow larger over time, indicating an ongoing leak.

2. Peeling or Bubbling Paint

If the paint on your ceiling is peeling, bubbling, or flaking, it could be a sign of moisture accumulation. This is often seen in conjunction with visible water stains.

3. Mold Growth

Excess moisture can lead to mold growth, which is not only unsightly but also poses health risks. If you see black or green patches on your ceiling, it is essential to address the moisture problem immediately.

4. Soft Spots or Sagging

If you notice any soft spots or sagging areas on your ceiling, it may indicate that water has saturated the drywall or plaster. This situation is more serious and requires immediate attention.

Steps to Take When You Notice a Water Stain on the Ceiling Below Bathroom

1. Investigate the Source

The first step in addressing a water stain is to investigate its source. Look for visible signs of leaks from plumbing fixtures, including:

  • Inspecting under sinks and around toilets for moisture.
  • Checking shower and bathtub seals for any gaps.
  • Examining the roof and walls for leaks or damage.

2. Turn Off the Water Supply

If you suspect that the water stain is due to a plumbing issue, turn off the water supply to the affected area to prevent further damage. This will help mitigate the risk of additional water leaking into your ceiling.

3. Fix the Underlying Issue

Once you have identified the source of the leak, it’s crucial to repair it promptly. Depending on the cause, this may involve:

  • Replacing damaged pipes or fittings.
  • Resealing shower or tub fixtures.
  • Repairing any roofing issues.
  • Improving bathroom ventilation to reduce condensation.

4. Dry the Affected Area

After repairing the source of the leak, it is essential to dry the affected area thoroughly. Use fans, dehumidifiers, and good ventilation to help remove moisture. This step is crucial to prevent mold growth and further damage to your ceiling.

5. Repair the Ceiling

Once the area is dry, you can address the visible water stain. Here are some repair steps:

  • Clean the Area: Remove any mold or mildew with a mixture of water and bleach or a specialized cleaner.
  • Patch Holes or Cracks: If there are any cracks or holes in the ceiling, patch them with a suitable filler.
  • Repaint: After the patching compound has dried, repaint the affected area with a moisture-resistant ceiling paint to ensure a uniform appearance and prevent future stains.

6. Monitor for Recurrence

After addressing the issue, it’s essential to monitor the area for any signs of recurring water stains. Regularly check plumbing fixtures and inspect the ceiling for any new discoloration.

Preventing Water Stains on Ceiling Below Bathroom

Once you’ve addressed the existing water stains, consider implementing preventative measures to avoid future issues:

1. Regular Inspections

Conduct regular inspections of your plumbing fixtures and appliances to catch potential leaks early. Look for any signs of moisture around pipes and connections.

2. Maintain Proper Ventilation

Ensure your bathroom has proper ventilation to reduce humidity levels. This can be achieved through:

  • Installing exhaust fans that vent outside.
  • Opening windows to allow fresh air to circulate.
  • Using dehumidifiers in particularly humid climates.

3. Use Moisture-Resistant Materials

When remodeling or renovating, consider using moisture-resistant materials, such as:

  • Mold-resistant drywall for ceilings.
  • Waterproof paint for high-moisture areas.

4. Seal Gaps and Cracks

Regularly check for and seal any gaps or cracks in your bathroom’s plumbing and fixtures. This will help prevent moisture from escaping into the ceiling.

5. Proper Appliance Maintenance

Ensure that appliances such as washing machines are properly maintained and that hoses are checked for leaks regularly.

Conclusion

Dealing with a water stain on the ceiling below the bathroom can be a daunting task, but with the right approach, you can effectively address and prevent these issues. By identifying the source of the leak, fixing it, and taking preventive measures, you can ensure that your home remains a safe and comfortable environment. Regular maintenance and inspections will go a long way in avoiding future water stains, protecting both your ceiling and your peace of mind.

If you find yourself overwhelmed or unable to locate the source of the leak, don’t hesitate to reach out to a professional plumber or contractor. Addressing these issues early will save you time and money in the long run, ensuring the longevity of your home.

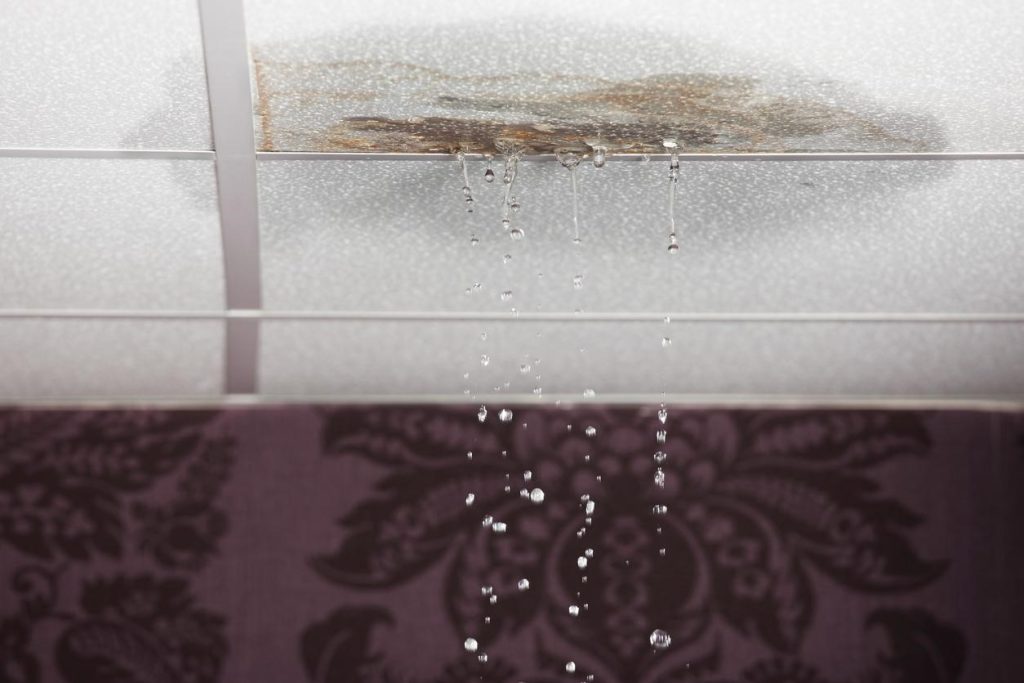
Water Mark on Ceiling Below Bathroom: Causes, Solutions, and Prevention

Noticing a water mark on your ceiling, especially in the area directly below your bathroom, can be a cause for concern. This discoloration often indicates a water leak or moisture problem originating from the bathroom above. Addressing this issue promptly is essential to prevent further damage and ensure the safety of your home. This article explores the common causes of water marks on ceilings, how to address them, and ways to prevent future issues.

Water Mark On Ceiling Below Bathroom

What is a Water Mark on Ceiling Below Bathroom?

A water mark on the ceiling below a bathroom is a visible sign of water damage. It usually appears as a stain or discoloration and can vary in size and color depending on the extent of the water leak. Water marks often indicate that moisture has seeped through the ceiling from the bathroom above, which can lead to more significant problems if not addressed.

Common Causes of Water Marks on Ceiling Below Bathroom

Several factors can contribute to the development of water marks on your ceiling:

1. Leaking Pipes

One of the most common causes of water marks on the ceiling is leaking pipes. Pipes in the bathroom can become damaged or corroded over time, leading to leaks. These leaks can allow water to escape and travel through the ceiling, resulting in visible stains.

2. Faulty Fixtures

Bathroom fixtures such as sinks, toilets, and showers can develop leaks if they are not properly installed or maintained. Faulty seals, connections, or fixtures can allow water to escape, causing damage to the ceiling below.

3. Clogged Drains

Clogged drains in the bathroom can cause water to back up and overflow. If the clog is severe, it can lead to water seeping into the ceiling below, creating water marks and potential damage.

4. Poor Ventilation

Bathrooms with inadequate ventilation can experience high humidity levels. Over time, this excess moisture can accumulate and eventually seep through the ceiling, causing water marks and potential mold growth.

Read too: Discovering the Charm of Nautical Outdoor Ceiling Fans for Your Coastal Retreat: Sail into Style

5. Roof Leaks

In some cases, water marks on the ceiling below a bathroom may be due to roof leaks. If the roof above the bathroom is damaged or compromised, rainwater can penetrate and affect the ceiling below.

6. Faulty Waterproofing

Bathrooms should be properly waterproofed to prevent moisture from seeping through. If the waterproofing measures are insufficient or have failed, water can leak through the bathroom floor and ceiling, leading to water marks.

How to Address Water Marks on Ceiling Below Bathroom

If you discover a water mark on your ceiling, follow these steps to address the issue:

1. Turn Off Water Supply

If you suspect a plumbing issue, start by turning off the water supply to the bathroom. This will help prevent further water damage while you investigate the source of the problem.

2. Inspect the Bathroom

Carefully inspect the bathroom for visible signs of leaks or damage. Check pipes, fixtures, and drains for any signs of leakage or malfunction. Look for wet spots, corrosion, or damaged parts.

3. Check for Roof Leaks

If you suspect a roof leak, inspect the roof for damage, such as missing shingles or damaged flashing. Look for signs of water infiltration and address any issues promptly.

4. Repair Leaks and Faulty Fixtures

Once you’ve identified the source of the leak, make the necessary repairs. This may involve replacing damaged pipes, fixing faulty fixtures, or unclogging drains. For significant plumbing issues, consider hiring a professional plumber.

5. Improve Ventilation

If poor ventilation is a contributing factor, improve the ventilation in the bathroom. Install or upgrade exhaust fans to reduce humidity and prevent moisture buildup.

6. Replace Damaged Ceiling Materials

If the ceiling has been significantly damaged, it may need to be repaired or replaced. Remove any damaged materials, allow the area to dry completely, and then patch or replace the ceiling as needed.

7. Monitor for Mold Growth

After addressing the leak and repairing the ceiling, monitor the area for signs of mold growth. Mold can develop in damp environments and may require professional remediation if it becomes extensive.

Preventing Future Water Marks on Ceiling Below Bathroom

To avoid future issues with water marks and ceiling damage, consider the following preventive measures:

1. Regular Plumbing Inspections

Schedule regular inspections of your plumbing system to identify and address potential issues before they become major problems. Look for signs of wear and tear, leaks, or corrosion.

2. Maintain Fixtures

Keep bathroom fixtures well-maintained and ensure that they are properly installed. Regularly check for leaks, and tighten or replace any faulty components.

3. Clean Drains Regularly

Prevent clogs by regularly cleaning bathroom drains. Use drain covers to catch debris and avoid putting large or non-dissolvable items down the drain.

4. Upgrade Ventilation

Ensure that your bathroom has adequate ventilation to manage humidity levels. Consider installing a high-quality exhaust fan or upgrading existing ventilation systems.

5. Ensure Proper Waterproofing

Verify that your bathroom is properly waterproofed. Check for any signs of failure in waterproofing measures and address any issues promptly.

6. Address Roof Maintenance

Regularly inspect and maintain your roof to prevent leaks and water damage. Address any signs of wear and tear, and ensure that the roof is properly sealed and protected.

Conclusion

A water mark on the ceiling below a bathroom is a clear sign of water damage that needs prompt attention. By understanding the common causes, addressing the problem effectively, and implementing preventive measures, you can protect your home from further damage and ensure the longevity of your ceiling and plumbing systems. If you’re unsure about handling the issue or require professional assistance, don’t hesitate to contact experts for help.

What to Do When Your Bathroom Ceiling is Dripping Water? Troubleshooting Woes

Embark on a journey of understanding and resolving the perplexing issue of a “Bathroom Ceiling Dripping Water.” Uncover the reasons behind this concern and explore effective solutions for a dry and secure bathroom space.

Bathroom Ceiling Dripping Water

Bathroom Ceiling Dripping Water: A Dilemma Explored

Bathroom Ceiling Dripping Water: Unveiling the Mystery

Discover the unsettling sight of water dripping from your bathroom ceiling and its potential causes. Delve into the complexities of identifying and addressing this issue to ensure a safe and dry environment.

Decoding the Signs: Recognizing Bathroom Ceiling Water Drips

Learn to recognize the signs of water dripping from your bathroom ceiling. From visible water stains to the sound of dripping water, understand the indicators that signal potential leaks and the need for immediate attention.

Understanding the Causes of Bathroom Ceiling Water Drips

1. Plumbing Issues: Leaks and Bursts

Explore the role of plumbing issues in causing water drips from the bathroom ceiling. Understand how leaks, burst pipes, or faulty plumbing connections can lead to water infiltration and subsequent ceiling damage.

2. Roof Leaks and Seepage

Delve into the consequences of roof leaks and seepage affecting your bathroom ceiling. Learn about the potential sources of water intrusion from the roof and how it can manifest as dripping water in your bathroom.

3. Condensation and Humidity

Understand the impact of condensation and high humidity levels on your bathroom ceiling. Explore how these environmental factors can contribute to water accumulation and dripping, leading to potential structural damage.

Read too: Exploring Hunter Douglas Architectural Ceilings for Modern Design: Elevate Your Space with Elegance

The Consequences of Neglected Bathroom Ceiling Water Drips

1. Structural Compromises

Uncover the potential structural compromises resulting from prolonged water drips. Learn how untreated issues can weaken the integrity of your bathroom ceiling and the overall structure of your home.

2. Mold and Mildew Growth

Explore the risk of mold and mildew growth associated with persistent water drips. Understand the health hazards and the importance of addressing water leaks promptly to prevent these issues.

3. Aesthetic Deterioration

Beyond structural concerns, water drips affect the aesthetics of your bathroom. Learn about the impact on the appearance of your ceiling, including discoloration, peeling paint, and potential damage to decorative elements.

Dealing with Bathroom Ceiling Water Drips: Effective Solutions

1. Immediate Action: Emergency Measures

In the event of water drips, take immediate action to contain the issue. Explore emergency measures, including identifying and addressing the source of water infiltration, drying the affected area, and preventing further damage.

2. Professional Assessment: Seeking Expert Advice

Consult with professionals for a thorough assessment of the damage. Learn about the importance of seeking expert advice to identify the extent of the water drips and determine the most effective resolution methods.

3. Repair Techniques: Preserving Your Bathroom Space

Explore repair techniques to preserve the integrity of your bathroom ceiling. From fixing plumbing issues to repairing roof leaks, discover the steps involved in restoring a bathroom with water drips.

Preventive Measures: Safeguarding Your Bathroom

1. Regular Maintenance and Inspections

Implement regular maintenance and inspections to prevent water drips. Explore the significance of inspecting plumbing, checking the roof for leaks, and ensuring proper ventilation to protect your bathroom from potential issues.

2. Waterproofing Solutions

Consider waterproofing solutions for vulnerable areas prone to water infiltration. Explore options such as sealants, coatings, and other preventive measures to create a protective barrier against water drips.

3. Prompt Repairs

Address any signs of potential issues promptly. Learn about the importance of prompt repairs to plumbing problems, roof leaks, or other sources of water infiltration to prevent water drips in your bathroom.

Conclusion: Ensuring a Dry and Secure Bathroom Environment

In conclusion, dealing with “Bathroom Ceiling Dripping Water” requires a combination of vigilance, immediate action, and professional expertise. By understanding the causes, consequences, and effective resolution methods, you can safeguard your bathroom from the challenges of water drips. Remember, early intervention is key to minimizing damage and ensuring the longevity and safety of your bathroom space.

Troubleshooting Water Through Ceiling From Bathroom: Causes, Fixes, and Prevention Tips

Water damage is a homeowner’s nightmare, and one of the most distressing scenarios is discovering water seeping through the ceiling from the bathroom. This unexpected issue not only poses immediate concerns but also demands swift action to prevent further damage. In this article, we will delve into the causes behind “Water Through Ceiling From Bathroom,” offering insights into troubleshooting, fixing the issue, and providing prevention tips to safeguard your home.

Water Through Ceiling From Bathroom

Understanding the Causes of Water Through Ceiling From Bathroom

One of the primary steps in addressing this problem is identifying the root causes. Leaks, poor waterproofing, and plumbing issues are often culprits. A leaking pipe or a faulty seal around the shower can allow water to infiltrate the ceiling, leading to visible stains and structural damage over time.

Dealing with Plumbing Leaks: Water Through Ceiling From Bathroom

Plumbing leaks are a common source of water-related problems in households. Inspecting the pipes in and around your bathroom can reveal issues such as corrosion, rust, or visible leaks. If left unattended, these can result in water seeping through the ceiling. Regular maintenance and timely repairs can help mitigate this risk.

Shower and Bath Seal Inspection

Faulty seals around showers and baths are notorious for causing water damage. Over time, seals can deteriorate, leading to water escaping and causing damage to the surrounding areas. Checking and replacing these seals as part of routine maintenance can prevent water infiltration and subsequent ceiling issues.

Identifying and Repairing Roof Leaks

Sometimes, the source of the problem may not be within the bathroom itself but rather a roof leak that manifests as water through the ceiling. Conducting a thorough inspection of your roof, especially after heavy rains or storms, is crucial. Repairing any damaged or missing shingles and addressing other roof issues promptly can prevent water from entering your home.

Fixing Water Damage and Stains on Ceilings

Addressing the aftermath of water damage is as important as preventing it. If you notice water stains on your ceiling, it’s essential to take prompt action. Begin by locating the source of the leak and fixing it. Once the issue is resolved, you can focus on repairing the damaged ceiling. This may involve removing affected drywall, applying a stain-blocking primer, and repainting the area.

Prevention Tips for Water Through Ceiling From Bathroom

Prevention is undoubtedly the best approach when it comes to water damage. Implementing the following tips can help safeguard your home from “Water Through Ceiling From Bathroom”:

  1. Regular Inspections: Conduct routine inspections of your bathroom plumbing, including pipes and seals, to catch potential issues before they escalate.
  2. Proactive Maintenance: Address any leaks or plumbing issues promptly. Don’t delay repairs, as even minor leaks can lead to significant water damage over time.
  3. Waterproofing: Ensure proper waterproofing in areas prone to water exposure, such as around showers and baths. This can involve reapplying sealant and checking for gaps regularly.
  4. Roof Maintenance: Keep your roof in good condition by addressing any damage promptly. Regularly clean gutters to prevent water from pooling and causing leaks.
  5. Proper Ventilation: Ensure your bathroom has adequate ventilation to prevent moisture buildup, which can contribute to mold growth and damage over time.

Read too: Understanding the Labor Cost to Texture Ceiling and Enhance Your Home: Unveiling the Secrets

Conclusion

Discovering water through the ceiling from the bathroom can be a stressful situation, but understanding the causes and implementing preventative measures can save you from extensive damage. Regular inspections, proactive maintenance, and timely repairs are key to keeping your home dry and secure. By following these guidelines, you can maintain a watertight home and enjoy peace of mind, knowing that you’re taking steps to prevent “Water Through Ceiling From Bathroom” issues.