Are you tired of tripping over your paddle board every time you step into your garage or storage area? Say goodbye to clutter and hello to organization with a paddle board ceiling rack. In this guide, we’ll explore the benefits of installing a paddle board ceiling rack, how to do it yourself, and why it’s a game-changer for paddle board enthusiasts.
Discovering the Paddle Board Ceiling Rack
The Need for Organization
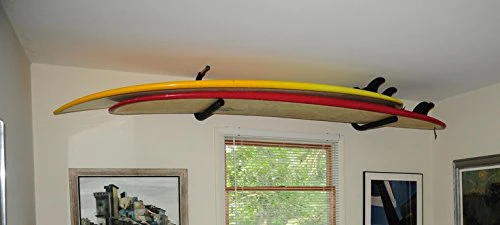
Paddle boards are large, bulky items that can take up valuable floor space if not properly stored. A paddle board ceiling rack provides a solution by allowing you to safely and securely store your board overhead, freeing up floor space for other items or activities.
Benefits of a Paddle Board Ceiling Rack
- Space Optimization: By utilizing the ceiling space in your garage or storage area, a ceiling rack allows you to maximize floor space and keep your paddle board out of the way when not in use.
- Protection: Storing your paddle board on a ceilings rack helps protect it from damage caused by being leaned against walls or stacked with other items. It also prevents scratches and dents that can occur when boards are stored haphazardly.
- Easy Access: Despite being overhead, a paddle board ceilings rack provides convenient access to your board whenever you’re ready to hit the water. No more struggling to maneuver around obstacles or dig through clutter to find your board.
Installing a Paddle Board Ceiling Rack
Step-by-Step Guide
- Locate Ceiling Joists: Use a stud finder to locate the ceiling joists where you plan to install the rack. Ceiling joists provide the necessary support to hold the weight of your paddle board.
- Mark Mounting Points: Once you’ve located the joists, mark the mounting points for the ceiling rack brackets. Ensure you space the brackets appropriately to support the length of your paddle board.
- Install Brackets: Secure the brackets to the ceiling joists using heavy-duty screws or bolts. Make sure the brackets are level and securely anchored to the joists to prevent accidents or damage.
- Attach Rack Arms: Once the brackets are in place, attach the rack arms to the brackets according to the manufacturer’s instructions. Test the rack for stability and adjust as needed.
Maintenance and Safety Tips
Regular Inspections
Periodically inspect the ceiling rack and mounting hardware for signs of wear or damage. Tighten any loose bolts or screws, and replace any worn components to ensure the safety and security of your paddle board.
Weight Capacity
Be mindful of the weight capacity of your paddle board ceilings rack and avoid exceeding it. Overloading the rack can lead to structural damage or failure, risking damage to your paddle board and other property.
Read too: Discovering the Charm of Nautical Outdoor Ceiling Fans for Your Coastal Retreat: Sail into Style
Conclusion
A paddle board ceilings rack is a practical and space-saving solution for storing your paddle board safely and securely. By following the installation and maintenance tips outlined in this guide, you can enjoy the convenience of easy access to your paddle board while keeping your space organized and clutter-free.