Upgrade your space with clip-in ceiling tile! Learn all about the benefits, installation process, and design options of these versatile and stylish ceiling solutions.
Introduction
Clip-in ceiling tiles provide a convenient and aesthetically pleasing solution to enhance any interior space. With easy installation and a wide range of design options, they’re popular for both residential and commercial projects. In this guide, we’ll cover everything from their benefits to the installation process.
Understanding Clip-In Ceiling Tiles
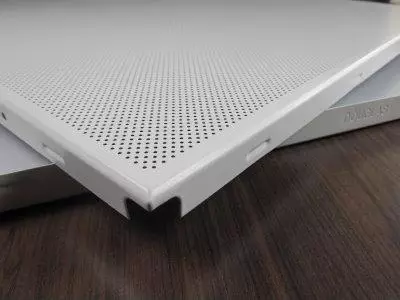
Clip-in ceiling tiles, also called drop-in or lay-in tiles, are panels installed into a grid system. Clip-in tiles feature a special edge for easy insertion into the grid, securely held without additional hardware, unlike traditional tiles.
Benefits of Clip-In Ceiling Tiles
There are several benefits to choosing clip-in ceiling tiles for your next project, including:
- Easy Installation: Clip-in tiles are designed for effortless installation, making them suitable for DIY enthusiasts and professional contractors alike. With no need for adhesives or screws, you can quickly and easily transform your space with minimal mess and downtime.
- Versatile Design Options: Clip-in ceiling tiles offer diverse styles, colors, and finishes for any aesthetic preference, spanning from classic to modern. Find the perfect design to match your vision, whether it’s traditional or bold.
- Accessibility: Removable clip-in ceiling tiles provide convenient access for maintenance in commercial buildings, healthcare facilities, and other environments requiring regular upkeep.
- Acoustic Performance: Clip-in ceiling tiles often enhance acoustic performance by absorbing and reducing noise levels in a space. This can help create a more comfortable and productive environment, particularly in open-plan offices or multi-purpose rooms.
Installation Process for Clip-In Ceiling Tiles
Installing clip-in ceiling tiles is a straightforward process that can be completed in just a few simple steps:
- Prepare the Ceiling Grid: Ensure that the ceiling grid is clean, level, and free of any debris or obstructions before beginning the installation process.
- Measure and Cut Tiles: Measure the dimensions of the ceiling grid and use a utility knife or scissors to trim the clip-in tiles to fit as needed.
- Insert Tiles into Grid: Starting at one edge of the room, gently insert the clip-in tiles into the grid, making sure that the edge detail engages securely with the grid.
- Continue Installation: Continue inserting tiles into the grid, working your way across the room in a systematic manner until the entire ceiling is covered.
- Finishing Touches: Once all tiles are installed, double-check for any gaps or misalignments and make any necessary adjustments. Install any trim pieces or accessories as needed to complete the look.
Maintenance and Care
Clip-in ceiling tiles are relatively low-maintenance, requiring only periodic cleaning to remove dust and debris. To clean clip-in tiles, simply use a soft brush or vacuum attachment to gently remove any loose dirt or dust. For stubborn stains or spills, use a mild detergent solution and a soft cloth to spot clean the affected areas. Avoid using harsh chemicals or abrasive cleaners, as these can damage the finish of the tiles.
Conclusion
Clip-in ceiling tiles offer a versatile, easy-to-install, and visually appealing solution for enhancing the look and functionality of any interior space. Whether you’re renovating a residential home, commercial office, or retail space, clip-in tiles provide a cost-effective and stylish ceiling option that will stand the test of time.
Read too: Exploring the Efficiency of Radiant Ceiling Heater Electric: A Comprehensive Guide