Looking to revamp your interior decor? Consider the versatile and visually appealing option of Vinyl Covered Gypsum Ceiling Tile. In this detailed guide, we’ll delve into everything you need to know about these innovative ceiling tiles, from their features and installation process to their benefits and design possibilities.
Understanding
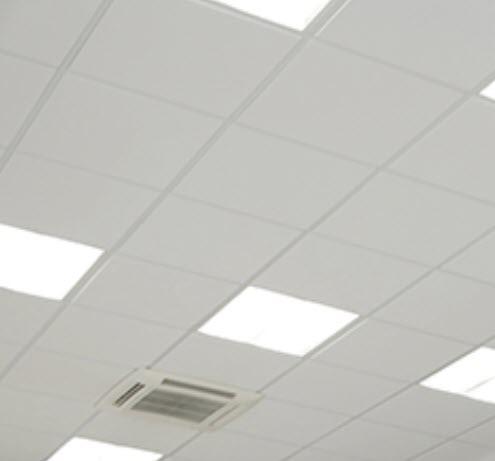
Vinyl Covered Gypsum Ceiling Tiles offer a practical and aesthetic solution for transforming any space. These tiles combine the durability and versatility of gypsum with the stylish appearance and easy maintenance of vinyl, making them an ideal choice for both residential and commercial applications.
Key Features of Vinyl Covered Gypsum Ceiling Tiles
- Durable Construction: Constructed from high-quality gypsum core material and covered with a vinyl surface, these ceiling tiles are built to withstand daily wear and tear while maintaining their appearance for years to come.
- Easy Installation: Vinyl Covered Gypsum Ceiling Tiles are designed for easy installation, with options for direct mounting to the ceiling grid or using adhesive for a seamless finish. Their lightweight construction also makes them easy to handle and maneuver during installation.
- Versatile Design Options: Available in a wide range of sizes, shapes, colors, and patterns, Vinyl Covered Gypsum Ceiling Tiles offer endless design possibilities to suit any aesthetic preference or interior style. Whether you prefer a classic white finish or a bold, contemporary design, there’s a tile to match your vision.
- Excellent Acoustic Properties: Gypsum is known for its excellent acoustic properties, and Vinyl Covered Gypsum Ceiling Tiles are no exception. These tiles help to reduce noise levels within a space, creating a more comfortable and peaceful environment for occupants.
Installing Vinyl Covered Gypsum Ceiling Tiles
Installing Vinyl Covered Gypsum Ceiling Tiles is a straightforward process that can be completed with basic tools and DIY skills. Here’s a step-by-step guide to help you get started:
- Preparation: Begin by preparing the ceiling surface, ensuring that it is clean, dry, and free from any debris or obstructions. If necessary, install a suitable ceiling grid system to support the tiles.
- Measurement: Measure the dimensions of the ceiling area and calculate the number of tiles needed for complete coverage. Allow for any necessary adjustments around light fixtures, vents, or other obstacles.
- Cutting Tiles: Use a sharp utility knife or tile cutter to cut the Vinyl Covered Gypsum Ceiling Tiles to the appropriate size and shape, taking care to make accurate cuts for a precise fit.
- Installation: Starting from one corner of the room, begin installing the tiles by either placing them directly into the ceiling grid or applying adhesive to the back of each tile and pressing it firmly into place. Continue this process until the entire ceiling area is covered.
- Finishing Touches: Once all the tiles are installed, double-check for any gaps or uneven edges and make any necessary adjustments. Install trim pieces or moldings along the perimeter of the ceiling to create a finished look.
Enhancing Your Space with Vinyl Covered Gypsum Ceiling Tiles
Vinyl Covered Gypsum Ceiling Tiles offer numerous benefits beyond their aesthetic appeal. From improving acoustics to enhancing durability and ease of maintenance, these tiles are a practical and stylish choice for any interior space.
Conclusion
In conclusion, Vinyl Covered Gypsum Ceiling Tile provide a versatile, durable, and visually appealing solution for upgrading your interior decor. Whether renovating a home, office, or hospitality venue, these tiles offer endless possibilities for creating functional, beautiful spaces.
Read too: Enhance Your Space with Acoustic Ceiling Tiles Paint: A Comprehensive Guide