Suspended Ceiling Exhaust Fan: Benefits, Installation, and Maintenance

When it comes to maintaining air quality and ensuring proper ventilation in commercial or residential spaces, a suspended ceiling exhaust fan is a crucial component. This type of exhaust fan is specifically designed to fit into suspended or drop ceilings, offering a practical solution for efficient air circulation. In this guide, we will explore the benefits, installation process, and maintenance of suspended ceiling exhaust fans, helping you make an informed decision for your ventilation needs.

Suspended Ceiling Exhaust Fan

What is a Suspended Ceiling Exhaust Fan?

A suspended ceiling exhaust fan is a ventilation device designed to be installed within a suspended ceiling system. These fans are typically used in commercial spaces, offices, and large residential areas to expel stale air, odors, and moisture from the room. Unlike traditional ceiling fans, which circulate air within the room, exhaust fans are designed to remove air from the space, improving indoor air quality and reducing humidity levels.

Benefits of Using a Suspended Ceiling Exhaust Fan

1. Improved Air Quality

One of the primary benefits of a suspended ceiling exhaust fan is its ability to enhance indoor air quality. By expelling stale air, pollutants, and odors, the fan helps maintain a cleaner and healthier environment. This is particularly important in areas where high levels of contaminants or moisture can accumulate.

Read too: A Comprehensive Mr Cool Ceiling Cassette Review: Unveiling Excellence

2. Effective Moisture Control

In spaces prone to high humidity, such as kitchens or bathrooms, a suspended ceiling exhaust fan helps control moisture levels. Excess moisture can lead to mold growth, damage to building materials, and an uncomfortable indoor environment. By removing humid air, the fan helps prevent these issues.

3. Energy Efficiency

Suspended ceiling exhaust fans are designed to operate efficiently, often using less energy compared to other ventilation systems. Their installation within a suspended ceiling can also contribute to better insulation and energy savings.

4. Discreet Installation

These fans are installed within the ceiling grid, making them less obtrusive and more aesthetically pleasing compared to wall-mounted or freestanding units. This is particularly beneficial in spaces where maintaining a clean and modern appearance is important.

How to Choose the Right Suspended Ceiling Exhaust Fan

Selecting the right suspended ceiling exhaust fan involves considering several factors to ensure optimal performance:

1. Airflow Capacity

The airflow capacity of the fan is measured in cubic feet per minute (CFM). The size of the space and the level of ventilation required will determine the appropriate CFM rating. For example, a kitchen may require a fan with a higher CFM rating compared to an office space.

2. Size and Dimensions

Ensure the fan fits within the dimensions of your suspended ceiling grid. Measure the space available and choose a fan that matches these dimensions to ensure a proper fit.

3. Noise Level

Consider the noise level of the fan, which is usually measured in sones. A quieter fan is preferable for spaces where noise can be disruptive, such as offices or bedrooms.

4. Energy Efficiency

Look for fans that are ENERGY STAR® rated or have energy-efficient features. These models consume less power and can contribute to lower utility bills.

5. Installation and Maintenance

Choose a fan that is easy to install and maintain. Some models come with features that simplify installation and offer easy access for cleaning and servicing.

Installation of a Suspended Ceiling Exhaust Fan

Installing a suspended ceiling exhaust fan requires careful planning and adherence to safety guidelines. Here’s a step-by-step guide to help you through the process:

1. Turn Off Power

Before starting the installation, ensure that the power to the circuit you’ll be working on is turned off at the breaker box. This step is crucial for safety.

2. Remove Ceiling Tiles

Carefully remove the ceiling tiles where the fan will be installed. This will provide access to the ceiling grid and the area where the fan will be mounted.

3. Prepare the Mounting Space

Measure and mark the location for the fan. Ensure that the chosen spot is centrally located and meets the clearance requirements specified by the manufacturer.

4. Install the Mounting Bracket

Secure the mounting bracket to the ceiling grid or structural support. The bracket should be firmly attached to ensure that the fan remains stable and secure.

5. Connect the Ductwork

If the fan requires ductwork, connect the ducting to the fan according to the manufacturer’s instructions. Ensure all connections are sealed properly to prevent air leaks.

6. Install the Fan

Place the fan into the mounting bracket and secure it in place. Follow the manufacturer’s instructions for attaching the fan to the bracket and connecting it to the power source.

7. Reinstall Ceiling Tiles

Replace the ceiling tiles around the installed fan. Ensure that the tiles fit properly and do not obstruct the fan’s operation.

8. Turn On Power and Test

Restore power at the breaker box and test the fan to ensure it operates correctly. Check for any unusual noises or vibrations and address any issues as needed.

Maintenance Tips for Suspended Ceiling Exhaust Fans

Proper maintenance is essential for ensuring the longevity and efficiency of your suspended ceiling exhaust fan:

1. Regular Cleaning

Dust and clean the fan blades and grille regularly to prevent dust buildup and maintain optimal performance. Use a soft cloth or vacuum with a brush attachment to remove dust and debris.

2. Check for Obstructions

Periodically inspect the fan for any obstructions or debris that could affect its operation. Ensure that the ductwork is clear and free of blockages.

3. Inspect and Replace Filters

If your fan includes filters, check them regularly and replace them as needed. Clogged filters can reduce airflow and efficiency.

4. Monitor Performance

Pay attention to the fan’s performance, including its noise level and airflow. Address any issues promptly to prevent further problems and maintain efficient operation.

Common Issues and Troubleshooting

1. Fan Not Operating

If the fan does not turn on, check the power supply and ensure that the circuit breaker is not tripped. Verify that the fan is properly connected to the power source.

2. Excessive Noise

Excessive noise can be caused by loose parts, obstructions, or imbalanced blades. Inspect the fan and tighten any loose components. Ensure that the blades are clean and free of debris.

3. Inadequate Airflow

If the fan is not providing sufficient airflow, check for blockages in the ductwork or obstructions around the fan. Ensure that the fan’s CFM rating is appropriate for the size of the space.

Conclusion

A suspended ceiling exhaust fan is an effective and discreet solution for improving ventilation and air quality in various settings. By understanding its benefits, installation process, and maintenance requirements, you can make an informed choice and ensure the efficient operation of your fan. Whether in a commercial space or a large residential area, a suspended ceiling exhaust fan can provide the ventilation needed for a healthier and more comfortable environment.
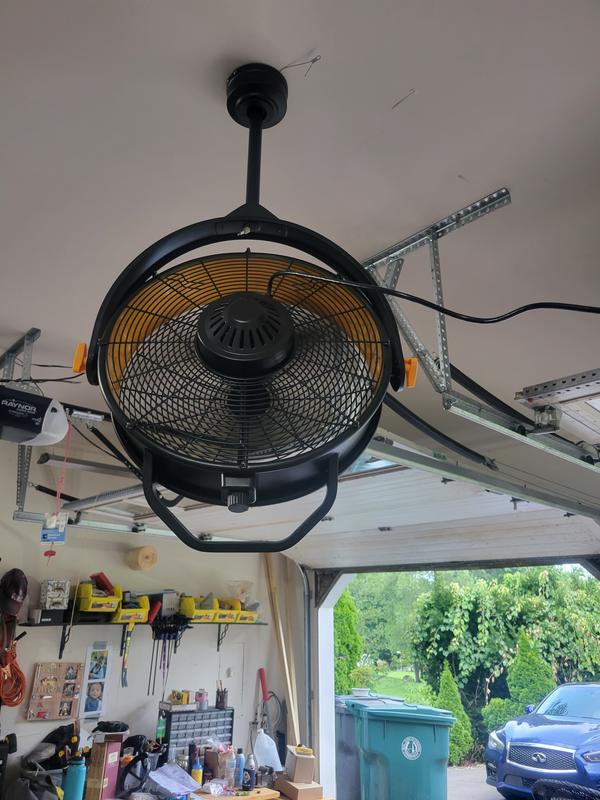
Ceiling Fan in Your Garage: Maximizing Comfort and Functionality

Garages are often overlooked when it comes to climate control and comfort. However, by installing a ceiling fan in the garage, you can transform this space into a more enjoyable and functional area. Here’s everything you need to know about the benefits and installation process of a ceiling fan in the garage.

Ceiling Fan In Garage

Introduction

The garage is more than just a space to park your car or store belongings; it can serve as a workshop, recreational area, or even a makeshift gym. However, without proper ventilation and temperature control, it can become uncomfortable, especially during hot summer months or intense DIY projects. This is where installing a ceiling fan in the garage can make a significant difference.

Why Install a Ceiling Fan in the Garage?

Enhanced Air Circulation

One of the primary reasons to install a ceiling fan in the garage is to improve air circulation. Unlike standing fans or air conditioning units, ceiling fans are strategically positioned to distribute air evenly throughout the space. This helps alleviate stuffiness and prevents pockets of hot air from forming in certain areas of the garage.

Temperature Regulation

During the summer, garages can become unbearably hot, making it unpleasant to spend time working on projects or engaging in hobbies. A ceiling fan in the garage can help regulate the temperature by creating a gentle breeze that cools the space. This can make it more comfortable to work in and prevent heat-related fatigue.

Moisture Control

Garages are susceptible to moisture buildup, especially in humid climates or during rainy seasons. Excess moisture can lead to mold growth, rust on tools and equipment, and damage to stored items. By installing a ceiling fan in the garage, you can help circulate air and reduce humidity levels, minimizing the risk of moisture-related issues.

Choosing the Right Ceiling Fan

When selecting a ceiling fan for your garage, there are several factors to consider:

  1. Size: Ensure the fan is appropriately sized for the space. Larger garages may require multiple fans or larger blade spans to effectively circulate air.
  2. Durability: Opt for a fan specifically designed for garage use, as it will be built to withstand dust, moisture, and temperature fluctuations.
  3. Airflow: Look for fans with adjustable speed settings to customize airflow based on your comfort needs.
  4. Energy Efficiency: Choose an energy-efficient model to minimize electricity consumption and reduce utility costs over time.

Installation Process

Installing a ceiling fan in the garage is a relatively straightforward process, but it may require basic electrical knowledge and tools. Here’s a general overview of the installation steps:

  1. Prepare the Area: Clear the space where the fan will be installed and ensure there is proper electrical wiring available.
  2. Mounting Bracket Installation: Securely anchor the mounting bracket to the ceiling following the manufacturer’s instructions.
  3. Assemble the Fan: Follow the included instructions to assemble the fan components, including the blades, motor housing, and light fixture (if applicable).
  4. Wiring: Connect the fan’s wiring to the electrical wiring in the ceiling, ensuring all connections are secure and insulated.
  5. Mount the Fan: Lift the fan assembly onto the mounting bracket and secure it in place using the provided hardware.
  6. Test Operation: Turn on the power and test the fan to ensure it is operating correctly, including adjusting the speed settings as needed.

Maintenance Tips

To keep your ceiling fan in the garage running smoothly and efficiently, consider the following maintenance tips:

  • Regularly dust the fan blades and motor housing to prevent dust buildup.
  • Check and tighten any loose screws or connections to ensure stability.
  • Lubricate moving parts, such as the motor bearings, according to the manufacturer’s recommendations.
  • Inspect the fan for any signs of damage or wear, such as warped blades or excessive wobbling, and address any issues promptly.

Read too: Striped Schoolhouse Ceiling Light Fixtures: Unveiling the Timeless Charm

Conclusion

Installing a ceiling fan in the garage can enhance comfort, improve air circulation, and prolong the life of your tools and equipment. Whether you use your garage for woodworking, automotive projects, or simply as a recreational space, a ceiling fan can make it a more enjoyable and functional environment. With the right fan selection and proper installation, you can maximize the potential of your garage and create a space that you’ll love spending time in.

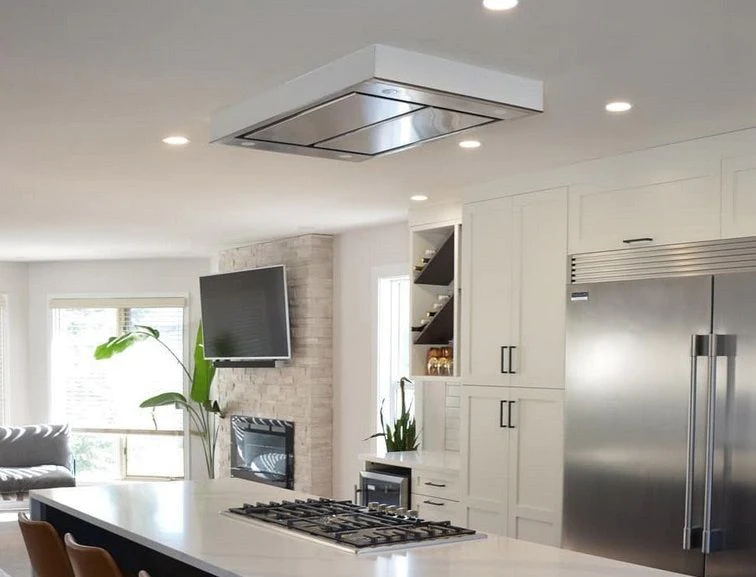
Exploring the Benefits of a Ceiling Flush Range Hood: Elevate Your Kitchen Style with Innovation

Discover the perfect blend of functionality and modern design with a sophisticated touch – the “Ceiling Flush Range Hood.” Learn why this innovative kitchen appliance is becoming a popular choice for homeowners seeking both efficiency and elegance in their culinary spaces.

Ceiling Flush Range Hood

Unveiling Excellence: Ceiling Flush Range Hood

Delve into the world of advanced kitchen ventilation with the Ceiling Flush Range Hood. From its sleek design to powerful performance, this range hood redefines the kitchen landscape, providing an efficient and aesthetically pleasing solution for removing cooking odors and maintaining air quality.

Why Opt for a Ceiling Flush Range Hood?

1. Space-Saving Elegance: Unlike traditional range hoods that occupy wall or under-cabinet space, a Ceiling Flush Range Hood is designed to seamlessly integrate into your kitchen’s ceiling. This space-saving design adds a touch of elegance while ensuring optimal functionality.

2. Enhanced Airflow: The ceiling placement of the range hood allows for more efficient capture of cooking fumes and odors. With a flush-mounted design, it ensures that the entire cooking area receives optimal ventilation, enhancing indoor air quality.

3. Stylish Minimalism: Embrace a modern and minimalist kitchen aesthetic with a Ceiling Flush Range Hoods. The sleek and unobtrusive design complements contemporary kitchen styles, making it a focal point without dominating the visual space.

Ceiling Flush Range Hood: A Closer Look

Let’s explore the features and components that make the Ceiling Flush Range Hoods a standout choice for discerning homeowners.

1. Flush-Mounted Design

The most prominent feature of a Ceiling Flush Range Hoods is its flush-mounted design. This means that the hood is installed directly into the ceiling, creating a seamless and integrated look. This design is particularly beneficial for kitchens with open layouts or island cooktops.

2. Efficient Ventilation System

Despite its unobtrusive design, the Ceiling Flush Range Hoods boasts a powerful ventilation system. The fan, filters, and ductwork work together to effectively remove grease, smoke, and odors from the cooking area, ensuring a clean and fresh kitchen environment.

3. LED Lighting Integration

Many Ceiling Flush Range Hoods come equipped with integrated LED lighting. This not only illuminates the cooking area but also adds a touch of sophistication to the kitchen. The lighting is often adjustable, allowing you to set the ambiance according to your preferences.

Advantages of Installing a Ceiling Flush Range Hood

Explore the practical benefits and advantages that a Ceiling Flush Range Hoods brings to your kitchen space.

1. Optimal Space Utilization

For kitchens with limited wall or cabinet space, a Ceiling Flush Range Hoods maximizes the use of available space. It ensures that the cooking area remains uncluttered, providing a clean and open environment.

2. Improved Visibility

The integrated LED lighting not only enhances the aesthetic appeal but also improves visibility while cooking. Enjoy a well-lit workspace without the need for additional under-cabinet lighting.

3. Quieter Operation

Ceiling Flush Range Hoods are designed for quiet operation, ensuring that the kitchen remains a peaceful and enjoyable space even during cooking. The noise level is minimal, allowing for conversations and activities to continue without disruption.

Read too: Unveiling the Essentials of Vaulted Ceiling Insulation Requirements: Elevate Your Space