Valspar Color Changing Ceiling Paint: Transform Your Space

When it comes to home improvement, one of the simplest yet most effective ways to refresh a space is through painting. Among the various options available in the market, Valspar Color Changing Ceiling Paint stands out for its unique ability to transform the atmosphere of a room. This innovative product not only enhances aesthetics but also adds functionality. In this article, we’ll explore what Valspar Color Changing Ceiling Paint is, its benefits, application techniques, and tips for achieving the best results.

Valspar Color Changing Ceiling Paint

What is Valspar Color Changing Ceiling Paint?

Valspar Color Changing Ceiling Paint is a specialized paint designed specifically for ceilings. It features a unique technology that allows it to change color as it dries, providing a visual cue to homeowners and professionals alike about where they have painted. This innovative feature makes the painting process more straightforward, helping users avoid missed spots and ensuring an even coat.

The paint initially goes on in a blue color, which fades to white as it dries. This two-tone system not only helps in achieving a perfect finish but also adds a level of fun to the painting experience.

Benefits of Valspar Color Changing Ceiling Paint

Using Valspar Color Changing Ceiling Paint offers several advantages:

1. Ease of Use

The color-changing feature makes it easy for both novice and experienced painters to see where they have applied the paint. This minimizes the chance of missed spots or uneven application, making the painting process smoother and more efficient.

Read too: Kitchen Lighting For A Vaulted Ceiling: Illuminating Your Space with Style and Functionality

2. High-Quality Finish

Valspar is known for its commitment to quality, and this paint is no exception. It dries to a smooth, white finish that complements any room’s decor. Whether your style is modern, traditional, or somewhere in between, this paint can enhance your ceiling without detracting from other design elements.

3. Quick Drying Time

This ceiling paint dries relatively quickly, allowing you to complete your painting project in a shorter amount of time. The quick drying time is particularly advantageous when working on large spaces or when you need to complete a project within a tight timeframe.

4. Low VOC Formula

Valspar Color Changing Ceiling Paint has a low volatile organic compound (VOC) formula, which means it emits fewer harmful chemicals into the air. This makes it a safer choice for indoor painting, especially in homes with children or pets.

5. Versatile Application

While specifically designed for ceilings, this paint can also be used on other surfaces if you’re looking for a unique finish. Its adaptability allows for creative design possibilities throughout your home.

How to Apply Valspar Color Changing Ceiling Paint

Applying Valspar Color Changing Ceiling Paint is a straightforward process, but following some tips and techniques will help you achieve the best results. Here’s a step-by-step guide to get you started:

1. Prepare the Room

Before you begin painting, it’s essential to prepare the room properly:

  • Clear the Area: Remove any furniture or items that might obstruct your painting. If that’s not possible, cover them with drop cloths to protect against splatters.
  • Clean the Ceiling: Dust and dirt can affect paint adhesion. Wipe down the ceiling with a damp cloth to remove any debris.
  • Repair Imperfections: Inspect the ceiling for cracks or holes. Fill in any gaps with spackle or joint compound, then sand the area smooth once it’s dry.

2. Gather Your Supplies

You’ll need the following supplies:

  • Valspar Color Changing Ceiling Paint
  • A paint roller with an extension handle
  • A paint tray
  • A brush for edges and corners
  • Painter’s tape for clean lines
  • Drop cloths or plastic sheeting
  • A ladder or step stool

3. Apply Painter’s Tape

For a clean finish, apply painter’s tape along the edges where the ceiling meets the walls. This will help prevent any paint from getting on the walls and ensure a sharp line.

4. Start Painting

  • Cut In: Use a brush to paint around the edges and corners of the ceiling first. This is known as “cutting in” and helps ensure that you have a clean line where the ceiling meets the walls.
  • Roll On the Paint: Once you have cut in the edges, use a roller to apply the paint to the larger areas of the ceiling. Start at one corner and work your way across the ceiling in sections.
  • Watch for Color Change: As you apply the paint, keep an eye on the color-changing feature. Initially, the paint will be blue, and as it dries, it will transition to white.

5. Second Coat (if needed)

Once the first coat has dried, check if you need a second coat. If the blue color is still visible in some areas, apply a second coat following the same process.

6. Remove Painter’s Tape

After the final coat has dried, carefully remove the painter’s tape while the paint is still slightly wet to ensure clean edges.

7. Clean Up

Finally, clean your brushes and rollers with soap and water. Make sure to seal any leftover paint in its original container for future touch-ups.

Tips for Achieving the Best Results with Valspar Color Changing Ceiling Paint

To ensure your project goes smoothly and yields the best possible outcome, consider the following tips:

1. Choose the Right Time to Paint

It’s best to paint when the weather is dry and mild. High humidity or extreme temperatures can affect the drying process and the final appearance of the paint.

2. Use Proper Lighting

Ensure the room is well-lit while painting. This will help you see the color change more clearly and identify any missed spots.

3. Avoid Overworking the Paint

When using a roller, avoid going back and forth too much on the same area. This can cause the paint to lift and result in an uneven finish. Instead, roll in one direction and blend as you go.

4. Ventilation

Ensure proper ventilation while painting to dissipate any fumes. Open windows and doors, or use fans to keep the air circulating.

5. Be Patient

Allow sufficient drying time between coats. Rushing the process can lead to uneven application and a less-than-desirable finish.

Maintenance of Valspar Color Changing Ceiling Paint

After your painting project is complete, it’s essential to maintain the ceiling to keep it looking fresh:

  1. Regular Cleaning: Dust the ceiling periodically with a microfiber cloth or a vacuum with a brush attachment to prevent buildup.
  2. Spot Cleaning: For any stains or marks, use a damp cloth and a mild detergent to clean the affected area. Avoid harsh chemicals that could damage the paint.
  3. Touch-Ups: Keep leftover paint for touch-ups. If you notice any imperfections over time, apply a small amount of the Valspar paint to maintain the ceiling’s appearance.

Conclusion

Valspar Color Changing Ceiling Paint offers a unique blend of functionality and aesthetic appeal. Its innovative color-changing technology simplifies the painting process, ensuring a professional finish for homeowners and contractors alike. By following the steps and tips outlined in this article, you can transform your space and enjoy the benefits of a beautifully painted ceiling.
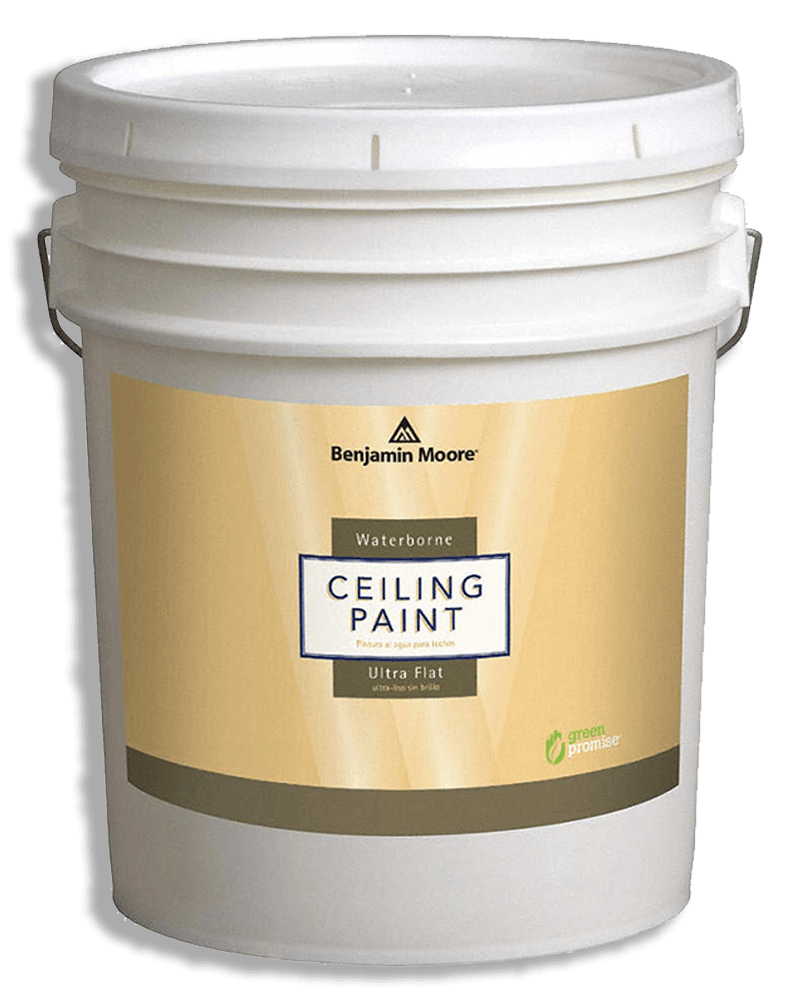

Unlock the Magic of Benjamin Moore Ceiling Paint 5 Gallon: A Comprehensive Guide to Effortless Painting Projects

When it comes to transforming the look and feel of your home, few things make a bigger impact than a fresh coat of paint on the ceiling. And if you’re embarking on a painting project, opting for Benjamin Moore ceiling paint in a 5-gallon container can save you time and effort. In this guide, we’ll delve into the world of Benjamin Moore ceiling paint in 5-gallon containers, exploring its features, benefits, and tips for a flawless painting experience.

Benjamin Moore Ceiling Paint 5 Gallon

Understanding Benjamin Moore Ceiling Paint 5 Gallon

Benjamin Moore is renowned for its high-quality paints, and their ceiling paint in a 5-gallon size is no exception. Designed specifically for ceilings, this paint offers superior coverage, durability, and ease of application. The 5-gallon container size is ideal for larger painting projects, ensuring you have ample paint to complete the job without the need for frequent trips to the store.

Features and Benefits

  1. Excellent Coverage: Benjamin Moore ceilings paint in a 5-gallon container provides exceptional coverage, allowing you to achieve a smooth and uniform finish with fewer coats. This saves you time and effort, especially when painting large or high-ceilinged rooms.
  2. Low Spatter Formula: One of the key advantages of Benjamin Moore ceiling paint is its low spatter formula, which minimizes mess and cleanup time. This feature is particularly beneficial when painting overhead surfaces, where drips and splatters can be challenging to manage.
  3. High Hide Formula: Ceilings are often subject to stains, discoloration, and imperfections, making coverage a top priority. Benjamin Moore ceilings paint in a 5-gallon container features a high hide formula that effectively conceals surface flaws, ensuring a flawless finish.
  4. Mildew Resistance: In areas prone to high humidity, such as bathrooms and kitchens, mold and mildew growth can be a concern. Benjamin Moore ceiling paint is formulated with mildew-resistant additives, helping to prevent the growth of mold and mildew on painted surfaces.

Tips for Painting with Benjamin Moore Ceiling Paint 5 Gallon

Achieving professional-looking results with Benjamin Moore ceilings paint in a 5-gallon container is easier than you might think. Here are some tips to ensure a successful painting project:

  1. Prepare the Surface: Before painting, ensure that the ceiling surface is clean, dry, and free of any dust, dirt, or debris. Use a mild detergent solution to remove any grease or stains, and allow the surface to dry completely before applying paint.
  2. Use the Right Tools: Invest in high-quality painting tools, including a roller with an extension pole for reaching high ceilings, as well as a brush for cutting in along edges and corners. Opt for a roller cover with a nap appropriate for the texture of your ceiling.
  3. Apply Primer if Necessary: If the ceiling surface has significant stains or discoloration, consider applying a primer before painting with Benjamin Moore ceiling paint. This will help to ensure uniform coverage and adhesion of the paint.
  4. Apply Paint in Thin, Even Coats: Avoid overloading the roller with paint, as this can result in drips and uneven coverage. Instead, apply paint in thin, even coats, working in small sections and overlapping each stroke slightly for a seamless finish.

Conclusion

In conclusion, Benjamin Moore ceilings paint in a 5-gallon container is a reliable and convenient option for painting projects of any size. With its superior coverage, low spatter formula, and mildew-resistant properties, this paint makes it easy to achieve professional-looking results on ceilings throughout your home. Whether you’re refreshing a single room or tackling a whole-house makeover, Benjamin Moore ceilings paint in 5-gallon containers is sure to exceed your expectations.

Read too: Discovering the Charm of Nautical Outdoor Ceiling Fans for Your Coastal Retreat: Sail into Style

Unveiling the Secrets: How To Paint A Basement Ceiling

How to paint a basement ceiling? Your basement is a hidden gem in your home, offering valuable additional living space. However, many homeowners overlook the ceiling when it comes to renovation and design. A painted basement ceiling can add character and charm to the space, making it feel like an integral part of your home. In this article, we will guide you through the process of painting a basement ceiling, from preparation to execution, and reveal the magic of this transformation.

How To Paint A Basement Ceiling

The Importance of a Well-Designed Ceiling

Elevating the Aesthetics of Your Basement

The ceiling of your basement plays a crucial role in the overall aesthetics of the space. A well-designed ceiling can:

1. Enhance the Ambiance:

  • A carefully chosen color and design can make your basement feel warm and inviting.

2. Hide Imperfections:

  • A painted ceiling can conceal imperfections, pipes, wires, and ducts that are often present in basements.

3. Define Zones:

  • By using different colors or finishes, you can create distinct zones within your basement for various purposes.

Preparing for the Paint Job

Setting the Stage for Success

Before you dive into painting your basement ceiling, it’s essential to prepare adequately. Here are the steps to get you started:

1. Clean the Ceiling:

  • Dust and clean the ceiling to ensure that the paint adheres properly. Use a vacuum cleaner with a brush attachment or a duster to remove loose particles.

2. Repair Damage:

  • Inspect the ceiling for any damage, such as cracks or holes. Repair these issues using a suitable filler or patching compound.

3. Protect the Area:

  • Cover the floor and any items in your basement with drop cloths or plastic sheets to prevent paint splatters.

4. Choose the Right Paint:

  • Select a paint that is suitable for your ceiling’s material and your desired finish. Latex or water-based paints are typically recommended for basement ceilings.

Painting the Basement Ceiling

Turning Your Vision into Reality

Now that your basement ceiling is prepped and you’ve gathered the necessary materials, it’s time to start painting.

1. Start with a Primer:

  • Apply a coat of primer to the ceiling to create an even base for the paint. Primer helps the paint adhere better and provides a smoother finish.

2. Use a Roller:

  • A paint roller is an effective tool for applying paint to the ceiling. Use an extension pole to reach high or hard-to-access areas.

3. Work in Sections:

  • Divide the ceiling into manageable sections and work on one section at a time. This approach ensures even coverage and prevents the paint from drying too quickly.

4. Apply Multiple Coats:

  • Depending on the desired finish and the color you’re using, you may need to apply two or more coats of paint. Allow each coat to dry before applying the next.

5. Be Mindful of Drips:

  • Watch out for drips and streaks, especially when applying paint to an overhead surface. Correct any imperfections immediately.

Read too: How Much Ceiling Height For Treadmill

Finishing Touches and Ideas

Bringing Your Vision to Life

As you near the end of your basement ceiling painting project, consider these finishing touches and creative ideas:

1. Accent Colors:

2. Stencils or Patterns:

  • Add flair to your ceiling by using stencils or creating patterns that complement the overall design of your basement.

3. Incorporate Lighting:

  • Well-placed lighting fixtures can highlight your newly painted ceiling, creating a dynamic and appealing look.

Conclusion:

How to paint a basement ceiling? A painted basement ceiling can transform a neglected space into a captivating and functional part of your home. By following the steps outlined in this guide and considering creative ideas for your ceiling, you can achieve a unique and visually appealing basement that suits your style and needs. Don’t let your basement’s potential go to waste; start your ceiling painting project and unlock the beauty of this often-overlooked area.