Clean Room Ceiling Tile: Maintenance, Installation, and Benefits

Are you looking to create a pristine environment in your clean room facility? Clean room ceiling tile play a crucial role in maintaining cleanliness and controlling contaminants. In this comprehensive guide, we’ll delve into the world of clean room ceiling tiles, covering their maintenance, installation, and the benefits they provide.
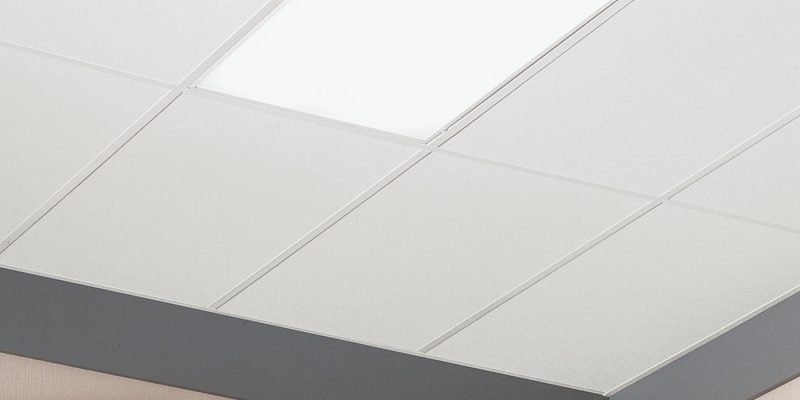
Clean Room Ceiling Tile

Understanding Clean Room Ceiling Tiles

Clean room ceiling tiles are specially designed to meet the stringent requirements of controlled environments, such as pharmaceutical facilities, laboratories, and manufacturing plants. These tiles are engineered to minimize particulate contamination, resist microbial growth, and maintain a sterile environment.

Maintenance of Clean Room Ceiling Tiles

Regular Cleaning

Routine cleaning is essential to prevent the accumulation of dust, debris, and other contaminants on the surface of clean room ceiling tiles. Use a mild detergent solution and a non-abrasive cloth to gently wipe down the tiles, taking care not to scratch or damage them.

Inspection and Replacement

Regular inspection of clean room ceiling tiles is necessary to identify any signs of damage, discoloration, or degradation. Promptly replace damaged tiles to maintain the integrity of the clean room environment and prevent the spread of contaminants.

Installation Guidelines

Proper Sealing

Ensure that clean room ceiling tiles are properly sealed to prevent air leakage and minimize the infiltration of contaminants from the plenum space above. Use appropriate sealants and gaskets to create an airtight seal around the perimeter of each tile.

Read too: Discovering the Charm of Nautical Outdoor Ceiling Fans for Your Coastal Retreat: Sail into Style

Grid Alignment

Proper alignment of the ceiling grid is crucial for the installation of clean room ceiling tiles. Use a laser level or string line to ensure that the grid is perfectly square and level, minimizing gaps and inconsistencies between tiles.

Benefits of Clean Room Ceiling Tiles

Contamination Control

Clean room ceiling tiles help to minimize the presence of airborne particles and contaminants, creating a controlled environment suitable for sensitive manufacturing processes and research activities.

Sterility Maintenance

Clean room ceiling tiles’ non-porous surface prevents moisture and microbial growth, crucial for sterile environments in pharmaceutical and biotech production.

Ease of Maintenance

Designed for easy cleaning and maintenance, clean room ceiling tiles reduce downtime and labor costs associated with facility upkeep.

Conclusion

Clean room ceiling tile are an integral component of controlled environments, providing contamination control, sterility maintenance, and ease of maintenance. Follow maintenance and installation guidelines to keep your clean room facility compliant with regulations and running efficiently.

Essential Guide to Scaffolding for High Ceilings: Safety, Types, and Usage Tips

Are you planning to work on projects in spaces with lofty ceilings? Whether it’s painting, maintenance, or construction, accessing high ceilings safely and efficiently requires the right equipment. In this comprehensive guide, we’ll explore everything you need to know about scaffolding for high ceilings, including safety considerations, types of scaffolding, and practical usage tips.

Scaffolding For High Ceilings

Understanding Scaffolding for High Ceilings

What Is Scaffolding?

Scaffolding is a temporary structure used to support workers and materials during construction, maintenance, or repair tasks. It provides a stable platform for working at heights, ensuring safety and productivity.

Scaffolding for High Ceilings

When working in spaces with high ceilings, standard scaffolding may not suffice. Specialized scaffolding designed for high ceilings offers additional height and stability to accommodate the unique requirements of such environments.

Safety Considerations

1. Stability

  • Ensure that the scaffolding structure is stable and securely anchored to the ground or floor.
  • Regularly inspect the scaffolding components for signs of damage or wear and tear.

2. Fall Protection

  • Install guardrails, toe boards, and safety nets to prevent falls from elevated platforms.
  • Provide workers with personal protective equipment, including harnesses and lanyards.

3. Weight Capacity

  • Adhere to the manufacturer’s weight capacity specifications for the scaffolding system.
  • Avoid overloading the scaffolding with excessive materials or equipment.

Types of Scaffolding for High Ceilings

1. Suspended Scaffolding

  • Suspended scaffolding hangs from the ceiling using ropes or chains, providing access to elevated areas with minimal obstruction.
  • It is ideal for tasks such as painting, maintenance, or window cleaning in high-ceilinged spaces.

2. Mobile Scaffolding Towers

  • Mobile scaffolding towers feature wheels or casters, allowing for easy movement and positioning within a workspace.
  • They offer flexibility and accessibility for various tasks, including installation, repairs, or renovations in high-ceilinged areas.

3. Cantilever Scaffolding

  • Cantilever scaffolding extends horizontally from a supporting structure, providing access to areas beyond obstacles or obstructions.
  • It is commonly used in industrial settings with high ceilings, such as warehouses or manufacturing facilities.

Practical Usage Tips for Scaffolding in High Ceilings

1. Proper Assembly

  • Follow the manufacturer’s instructions carefully when assembling the scaffolding system.
  • Ensure that all components are securely connected and in good condition before use.

2. Regular Inspections

  • Conduct routine inspections of the scaffolding for any signs of damage, instability, or malfunction.
  • Address any issues promptly and refrain from using damaged scaffolding.

Read too: Discovering the Charm of Nautical Outdoor Ceiling Fans for Your Coastal Retreat: Sail into Style

3. Training and Supervision

  • Provide workers with comprehensive training on scaffold usage, safety procedures, and fall prevention measures.
  • Assign a competent person to supervise scaffold erection, usage, and dismantling processes.

Conclusion

Scaffolding for high ceilings plays a crucial role in enabling safe and efficient work at elevated heights. By understanding the safety considerations, types, and practical usage tips outlined in this guide, you can ensure the successful completion of projects in spaces with lofty ceilings while prioritizing worker safety.

Understanding and Addressing Yellow Spots on Your Bathroom Ceiling

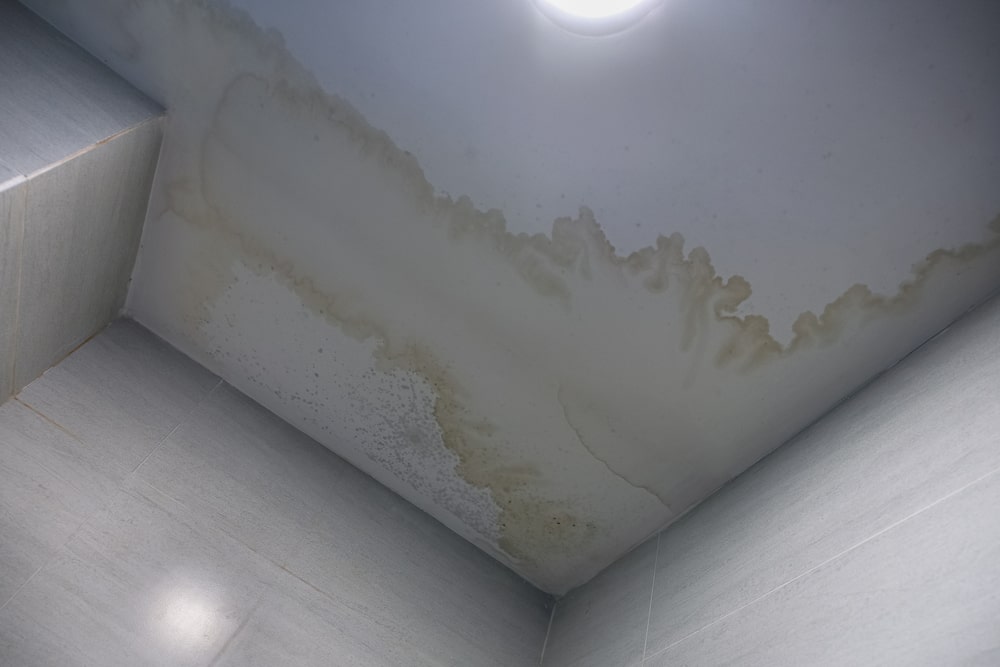
The bathroom is a space where you begin and end your day, and the condition of its ceiling can greatly impact your experience. Yellow spots on the bathroom ceiling are not just unsightly; they can also be indicative of underlying issues. In this informative article, we will delve into the causes of “Yellow Spots on Bathroom Ceiling” and explore effective solutions to address this common problem.

Yellow Spots On Bathroom Ceiling

Identifying Yellow Spots on Bathroom Ceiling

Yellow spots on the bathroom ceiling can be alarming, but before taking any action, it’s essential to understand what they are and what may be causing them. These spots are often signs of water damage or staining and may be linked to several common factors.

Common Causes of Yellow Spots on Bathroom Ceiling

  1. Water Leaks: The most frequent cause of yellow spots is water leaks from plumbing or roofing issues. These leaks can penetrate the ceiling, leading to discoloration.
  2. Mold and Mildew: Humidity and poor ventilation in bathrooms can create ideal conditions for mold and mildew growth, resulting in yellowish stains on the ceiling.
  3. Leaking Roof: Roof leaks, especially in homes with bathrooms directly beneath the roof, can cause water to seep through, leading to ceiling staining.
  4. Condensation: The accumulation of moisture on the bathroom ceiling due to steam from hot showers or baths can result in yellowing over time.

Dealing with Yellow Spots on Bathroom Ceiling

Once you’ve identified the cause of the yellow spots, you can take appropriate steps to address the issue:

  1. Repair Water Leaks: If water leaks are the culprits, it’s essential to fix the source of the leaks promptly. This may involve plumbing repairs, roof fixes, or sealing gaps.
  2. Mold and Mildew Removal: For mold and mildew, clean the affected areas with a mildew remover or a solution of water and vinegar. Ensure the bathroom is well-ventilated to prevent future growth.
  3. Proper Ventilation: Improve bathroom ventilation by using exhaust fans, opening windows, or adding a dehumidifier to reduce moisture buildup.
  4. Ceiling Repainting: If the stains are stubborn and don’t respond to cleaning, consider repainting the bathroom ceiling with a stain-blocking primer and mold-resistant paint.
  5. Regular Maintenance: Implement regular bathroom maintenance practices to prevent future issues. Check for leaks, keep the bathroom well-ventilated, and promptly address any signs of water damage.

Preventing Future Yellow Spots

To prevent the recurrence of yellow spots on your ceiling, consider the following preventive measures:

  1. Regular Inspection: Periodically inspect your bathroom ceiling for any signs of staining or discoloration.
  2. Prompt Repairs: Address any water leaks, plumbing issues, or roof problems immediately to prevent extensive damage.
  3. Improved Ventilation: Ensure proper bathroom ventilation to reduce humidity levels.
  4. Use Mold-Resistant Paint: Consider using mold-resistant paint for your bathroom ceiling during renovations or repaints.

Conclusion

Yellow spots on the bathroom ceiling can be both unsightly and indicative of underlying issues, primarily related to water damage or mold growth. You can maintain a clean and healthy bathroom environment by identifying causes and taking appropriate repair and prevention measures. Regular maintenance and vigilance are key to preserving the condition and aesthetics of your bathroom ceiling.